Are you ready to indulge in a dessert that brings pure joy? Chocolate Lava Cake is the ultimate treat, bursting with rich chocolate goodness and a gooey center. I’ll show you how to make this irresistible delight, from selecting the best chocolate to perfecting that molten texture. Whether you want a classic version or a fun twist, this recipe has it all. Let’s dive into the world of chocolate dreams!
Ingredients
List of Ingredients
To make chocolate lava cake, gather these items:
– 1/2 cup (115g) unsalted butter
– 1 cup (170g) high-quality dark chocolate, finely chopped
– 2 large eggs
– 2 large egg yolks
– 1/4 cup (50g) granulated sugar
– 2 tablespoons all-purpose flour
– Pinch of sea salt
– Powdered sugar for dusting
– Ice cream or whipped cream, for serving (optional)
When choosing chocolate, pick a dark chocolate with at least 60% cocoa. Higher cocoa content gives a richer flavor. Look for brands that are smooth and have a nice sheen. Avoid chocolate labeled as “baking chocolate” unless it is high quality.
Optional Additions
You can add flavors to the batter. Consider a teaspoon of vanilla extract or a bit of espresso powder. These add warmth and depth to the chocolate.
For toppings, think about serving your lava cake with:
– Vanilla ice cream
– Whipped cream
– Fresh berries
– A drizzle of caramel or chocolate sauce
These options enhance the dessert’s taste and make it even more special. Enjoy experimenting with flavors and textures!
Step-by-Step Instructions
Preparation Steps
Preheat your oven to 425°F (220°C). Grease four ramekins with unsalted butter. Make sure to coat the insides well. Lightly dust the ramekins with flour. This helps the cake slide out easily after baking.
Next, melt the chocolate and butter. In a microwave-safe bowl, combine the finely chopped dark chocolate and unsalted butter. Heat in the microwave in 30-second bursts. Stir well between each interval. This should take about 1-2 minutes. You want a smooth, melted mixture.
Mixing and Baking
Now let’s mix the ingredients. In a separate bowl, whisk the whole eggs, egg yolks, and granulated sugar together. Keep whisking until the mixture is pale and thick, about 2 minutes.
Slowly pour the melted chocolate and butter into the egg mixture. Stir continuously until the two mixtures blend well. Then, sift in the all-purpose flour and a pinch of sea salt. Gently fold the mixture with a spatula until just combined. Be careful not to over-mix; this can change the cake’s texture.
Baking Time and Techniques
Divide the batter among the prepared ramekins, filling each about three-quarters full. Place them on a baking sheet for easy handling. Bake in the oven for 12-14 minutes. The edges should be firm, but the center must remain soft and slightly jiggly. This contrast gives you that perfect lava texture.
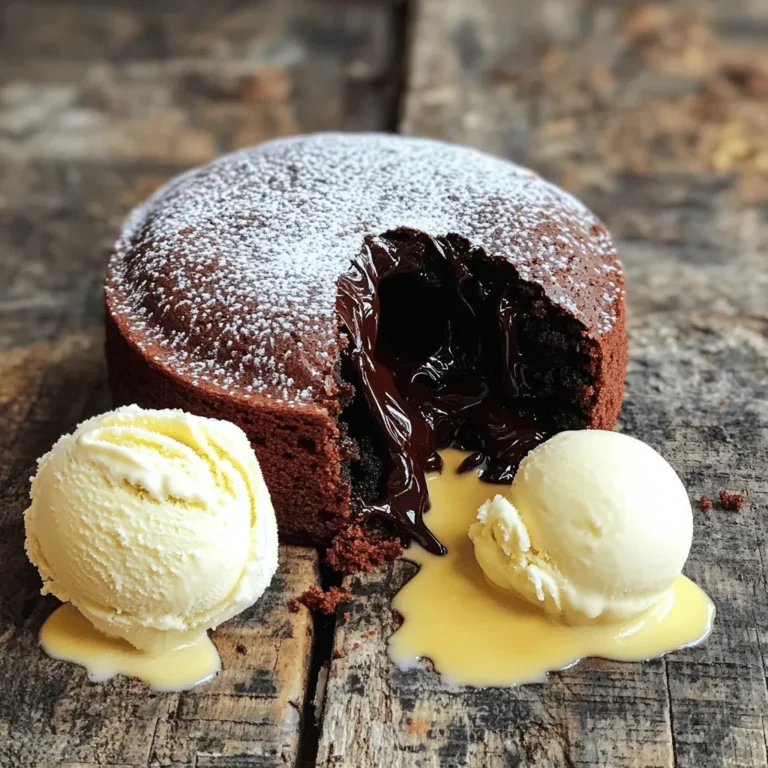
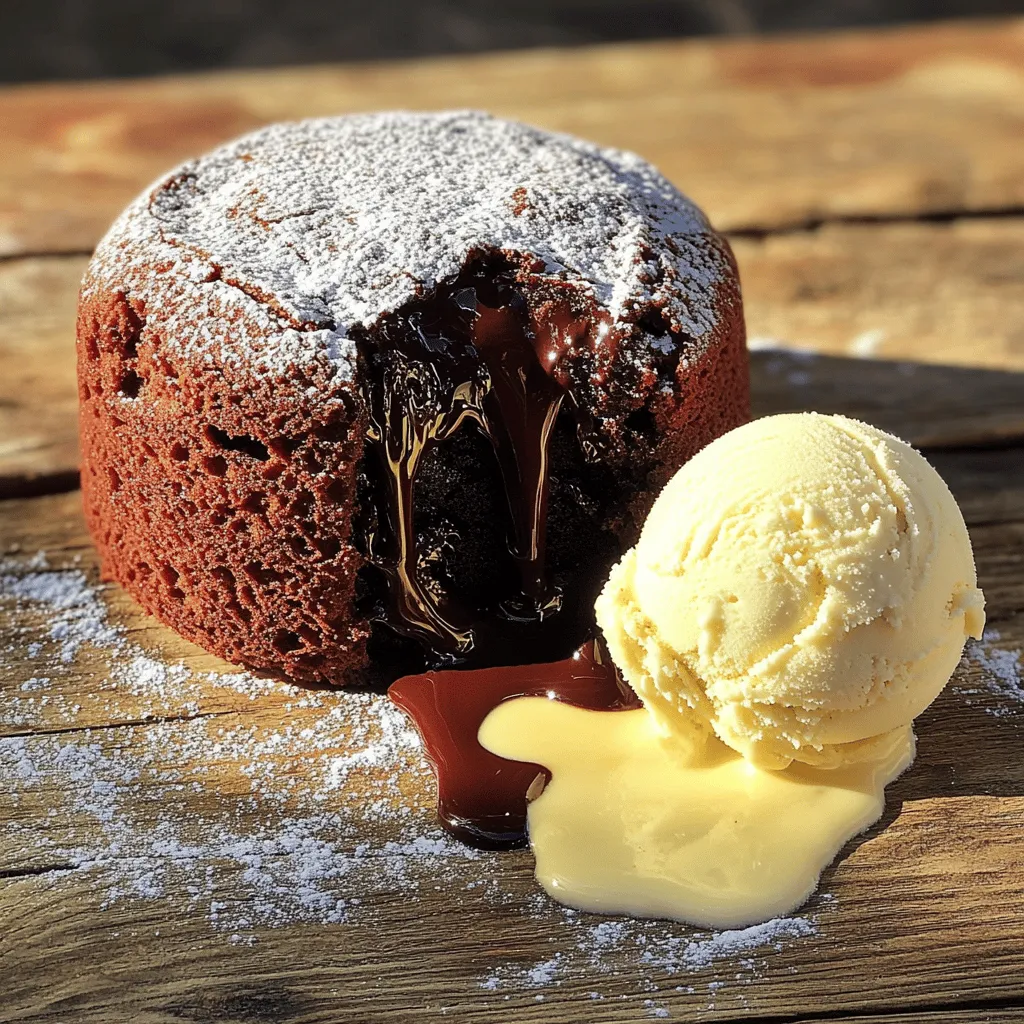
After baking, carefully remove the ramekins from the oven. Let them sit for one minute. Run a small knife around the edges to help release the cakes. Invert each ramekin onto a plate, lifting them off gently. You should see the beautiful lava cakes on your plate. Dust the tops with powdered sugar for a nice finish. Enjoy with ice cream or whipped cream if you like.
Tips & Tricks
Achieving the Perfect Lava Effect
To get that gooey center, timing is key. Bake your cakes at 425°F (220°C) for 12 to 14 minutes. Keep an eye on them. The edges should set while the middle stays soft.
A common mistake is overbaking. If you bake too long, the center won’t be lava-like. If unsure, check at 12 minutes. If the center jiggles gently, it’s ready.
Presentation Tips
Presentation makes your dessert shine. After inverting the cakes, dust them with powdered sugar for a lovely touch. This adds a sweet contrast to the rich chocolate.
For serving, pair your lava cake with a scoop of vanilla ice cream. The cold creaminess balances the warm, molten chocolate. You can also add fresh berries for a pop of color and flavor. Enjoy your delicious creation with these simple yet effective tips!
Variations
Flavor Variations
You can change the flavor of your chocolate lava cake easily. Use different types of chocolate for fun tastes. Try milk chocolate for a sweeter cake. Use white chocolate for a creamy twist. For more excitement, add flavored chocolate, like mint or orange.
Creative additions make this dessert even better. A bit of espresso brings out the chocolate’s rich taste. If you like citrus, add orange zest for a bright note. You can even mix in a splash of vanilla or a pinch of cinnamon for warmth.
Health-Conscious Options
If you want a gluten-free version, use gluten-free flour instead of regular flour. This swap keeps the cake light and fluffy while making it safe for those with gluten allergies. You can also find gluten-free baking mixes that work well.
For a healthier cake, substitute sugar with honey or maple syrup. This change adds natural sweetness. You can replace butter with coconut oil or applesauce. Both keep the cake moist and tasty. These options help you enjoy this dessert while being mindful of health.
Storage Info
How to Store Leftovers
To store leftover chocolate lava cake, use airtight containers. Place the cooled cakes in the containers. This helps prevent them from drying out. If you have ramekins, you can cover them tightly with plastic wrap. Keep the cakes in the fridge for up to three days. Remember, the fresher they are, the better the taste.
For best results, avoid stacking the cakes. This keeps the tops nice and smooth. If you want to get fancy, place a piece of parchment paper between layers. This adds a little cushion and keeps the cakes intact.
Reheating Instructions
When you’re ready to enjoy your cake again, you can reheat it easily. The best way is to use the oven. Preheat it to 350°F (175°C). Place the cake on a baking sheet. Heat for about 10 minutes. This warms it up without making it dry.
If you want to keep that gooey center, you can also use the microwave. Heat the cake for 20-30 seconds. Check it after 20 seconds to see if it’s warm enough. Be careful not to overheat it. This can ruin the lava effect you love so much.
To restore the ‘lava’ effect, consider adding a scoop of ice cream on top. The warm cake and cold ice cream create a delightful combination. Enjoy your decadent dessert!
FAQs
Common Questions
What do I do if my cakes don’t have a gooey center?
If your cakes lack a gooey center, they likely baked too long. The key is to check them at 12 minutes. The edges should be set, while the center remains soft. If you notice the center is firm, try reducing the baking time next time. Each oven can vary, so keep an eye on them!
Can I make the batter in advance?
Yes, you can make the batter ahead of time. Prepare it and fill your ramekins, then cover them with plastic wrap. Store the filled ramekins in the fridge for up to 24 hours. When you’re ready to bake, just take them out and pop them in the oven straight from the fridge. You may need to add an extra minute or two to the baking time.
Related Queries
Best restaurants for Chocolate Lava Cake near me?
For the best chocolate lava cake, check local bistros or high-end restaurants. They often have this dessert on their menu. Look for places with good reviews and a focus on desserts. You can also ask friends for their favorites.
How to serve Chocolate Lava Cake for a dinner party?
At a dinner party, serve chocolate lava cake warm. Plate it carefully, and dust it with powdered sugar for a nice touch. A scoop of vanilla ice cream or a dollop of whipped cream pairs perfectly. You can also add fresh berries for color and flavor. This will impress your guests!
Making the perfect chocolate lava cake involves careful ingredient selection, detailed steps, and handy tips. You now know how to choose the best chocolate and add your favorite flavors. Mixing and baking correctly brings out the cake’s gooey center. Remember to store leftovers well and reheat them properly.
Enjoy the rich taste and impress your friends at your next gathering with this easy treat!

