Who can resist the creamy, zesty goodness of a classic Key Lime Pie? This simple and refreshing recipe brings the taste of Florida right to your kitchen. With a perfect graham cracker crust and a smooth key lime filling, it’s an absolute delight. In this post, I’ll walk you through every step, share helpful tips, and reveal yummy variations. Let’s dive into this fruity dessert that you can easily whip up at home!
Ingredients
Key Ingredients List
To make a classic key lime pie, you need these key ingredients:
– 1 ½ cups graham cracker crumbs
– ½ cup unsweetened coconut flakes
– ½ cup granulated sugar
– ½ cup unsalted butter, melted
– 4 large egg yolks
– 1 can (14 oz) sweetened condensed milk
– ½ cup fresh key lime juice (or substitute with regular lime juice)
– Zest from 2 key limes
– 1 cup heavy whipping cream
– 2 tablespoons powdered sugar
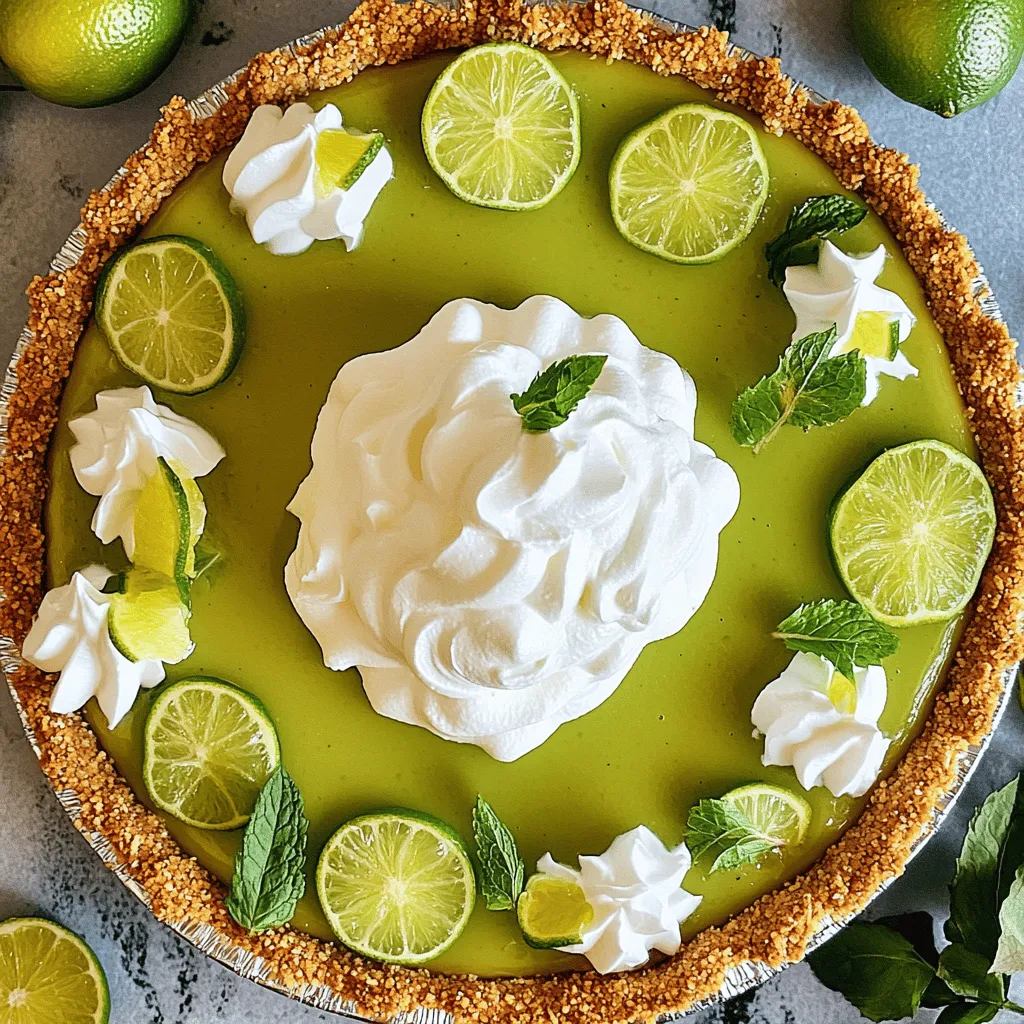
– Lime slices and fresh mint leaves for garnish
Ingredient Substitutions
You can make some easy swaps if you don’t have certain ingredients. Here are a few:
– Graham cracker crumbs: Use crushed digestive biscuits or vanilla wafers.
– Unsweetened coconut flakes: Swap with crushed nuts for a different texture.
– Granulated sugar: Coconut sugar or honey can work as a sweetener.
– Egg yolks: You may use a vegan egg substitute if needed.
– Sweetened condensed milk: Try using coconut cream for a dairy-free option.
Notes on Fresh vs. Bottled Key Lime Juice
Fresh key lime juice gives the best flavor. It’s bright and zesty. Bottled juice can taste dull and less vibrant. If you use bottled juice, choose a high-quality brand. Fresh key limes are small and have a unique tartness. You can find them in stores or local markets. The zest from the limes adds even more flavor, so don’t skip it!
Step-by-Step Instructions
Preparing the Graham Cracker Crust
To start, preheat your oven to 350°F (175°C). In a medium bowl, mix together the graham cracker crumbs, unsweetened coconut flakes, and granulated sugar. Next, pour in the melted butter. Stir until the crumbs look like wet sand. This means they are ready.
Now, take a 9-inch pie dish. Firmly press the crumb mixture into the bottom and sides. Make sure it is even. Place the pie dish in the oven for 8 to 10 minutes. Look for a light golden color. Once baked, take it out and let it cool completely.
Making the Key Lime Filling
In another bowl, whisk the egg yolks until they are smooth and pale. Slowly add the sweetened condensed milk while you whisk. Next, pour in the fresh key lime juice and add the lime zest. Mix until everything is well combined and thickens a bit.
Baking and Cooling the Pie
Carefully pour the lime filling into your cooled crust. Smooth the top if needed. Bake the pie in the oven for 10 to 12 minutes. The filling should set but still jiggle slightly in the center. After baking, take it out and let it cool completely at room temperature.
Tips & Tricks
How to Achieve the Perfect Whipped Cream
To make the best whipped cream, start with cold cream. Use heavy whipping cream for rich flavor. Pour it into a clean bowl. Add powdered sugar for sweetness. Beat with an electric mixer on medium speed. Watch for soft peaks to form. This takes about 2-3 minutes. Do not overbeat; it can turn grainy. You want it fluffy and smooth for your pie.
Common Mistakes to Avoid
Many people skip chilling the pie before serving. Chilling helps flavors blend. It also makes slicing easier. Avoid overbaking the filling. It should jiggle slightly in the center. If it sets too firm, the pie may taste dry. Lastly, don’t forget to zest the limes. The zest adds a fresh, bright flavor.
Serving Suggestions for Classic Key Lime Pie
Serve slices on chilled plates. This keeps the pie cool and refreshing. For a fun touch, drizzle extra key lime juice on top. Add lime slices and mint leaves for color. Pair your pie with fresh fruit or a scoop of vanilla ice cream. These add sweetness and balance the tartness.
Variations
Gluten-Free Options
You can easily make a gluten-free key lime pie. Use gluten-free graham crackers or ground nuts for the crust. Almond flour works well and gives a nice flavor. Combine it with melted butter like you would with regular crumbs. Bake as usual, and you’ll have a gluten-free treat that everyone can enjoy.
Vegan Versions
Making a vegan key lime pie is simple and fun. Replace the egg yolks with silken tofu or coconut cream. This keeps the filling creamy and smooth. Use a plant-based condensed milk or make your own using coconut milk and sugar. The key lime juice still gives it that zesty kick. You can whip coconut cream as a topping, too.
Creative Twists on Classic Key Lime Pie
Get creative with flavors! Try adding fresh fruit like strawberries or raspberries to the filling. This gives a fruity twist that complements the lime. You can also add a hint of ginger for a spicy kick. For a tropical flavor, mix in some crushed pineapple. Each twist offers a new taste that makes key lime pie exciting.It’s full of flavor and sure to impress!
Storage Info
How to Store Leftover Key Lime Pie
To keep your leftover key lime pie fresh, cover it well. Use plastic wrap or foil. This will prevent the pie from absorbing other smells in the fridge. Store it in the refrigerator for up to four days. The pie’s flavor will stay strong, and you can enjoy it again.
Freezing the Pie for Later
You can freeze key lime pie if you have leftovers. First, let it cool completely. Then, slice it into pieces. Wrap each slice tightly in plastic wrap. Place the wrapped slices in a freezer-safe bag. This way, you can keep them for up to three months. When you want to eat it, thaw the pie in the fridge overnight.
Best Practices for Keeping the Crust Crispy
To keep your crust crispy, avoid storing it in a closed container. Moisture can make it soggy. Instead, place the pie in the fridge uncovered for a day or two. If you freeze it, the crust might soften a bit. When you thaw it, you can crisp it up by baking it for a few minutes. This will help restore its crunch.
FAQs
What makes Key Lime Pie different from regular lime pie?
Key Lime Pie uses key limes, which are smaller and tarter than regular limes. Key limes give the pie a unique flavor. They also have a distinct fragrance that adds to the pie’s appeal. The pie’s filling is creamy, made with sweetened condensed milk, egg yolks, and key lime juice. This combination creates a smooth, tangy dessert that stands out from regular lime pie. You will find that the taste is richer and more vibrant.
Can I use regular limes instead of key limes?
Yes, you can use regular limes in a pinch. However, the flavor will change. Regular limes are less tart and more bitter than key limes. If you substitute, you might want to adjust the sugar to balance the taste. Many people still enjoy the pie made with regular limes. It just won’t have that classic key lime flavor you expect.
How long can I keep Key Lime Pie in the fridge?
You can keep Key Lime Pie in the fridge for about 3 to 5 days. Make sure to cover it well to prevent it from drying out. If you want it to last longer, consider freezing it. Just remember that the crust might become a bit soft after thawing. For the best taste, I recommend eating it fresh. Enjoy the zesty flavors right after making it for the best experience.
To make a great Key Lime Pie, use fresh ingredients and follow clear steps. We covered how to prepare the crust, make the filling, and cool the pie. I offered tips for whipped cream and common mistakes to avoid. Plus, you can explore variations like gluten-free or vegan options. Store leftovers properly for the best taste. Now, you have the tools to create your perfect pie. Enjoy each bite of your delicious Key Lime Pie creation!