
Craving a simple, no-bake treat? These No-Bake Peanut Butter Bars are your answer! Packed with rich flavor and easy to make, they’re perfect for satisfying your sweet tooth without turning on the oven. You’ll spend only a few minutes preparing these tasty bars, and they require just a handful of ingredients. Let’s dive into the step-by-step process to create these delicious goodies together!
Ingredients
Required Ingredients for No-Bake Peanut Butter Bars
To make these delicious bars, you need these main ingredients:
– 1 cup creamy peanut butter
– 1 cup rolled oats
– 1/2 cup honey or pure maple syrup
– 1/4 cup coconut flour
– 1/2 cup dark chocolate chips (dairy-free if desired)
– 1/4 teaspoon vanilla extract
– A pinch of salt
For some customization, you can add:
– Chopped nuts for crunch
– Cocoa powder for a chocolatey twist
– Dried fruits for sweetness
Allergen Information
These bars contain common allergens such as peanuts and possibly gluten from oats. If you need allergen-friendly options:
– Use almond butter or sunflower seed butter instead of peanut butter.
– Choose gluten-free oats to avoid gluten.
– For sweeteners, use agave syrup if avoiding honey.
Always check labels to be safe!
Step-by-Step Instructions
Preparing the Peanut Butter Mixture
Start by taking 1 cup of creamy peanut butter. Add in 1/2 cup of honey or pure maple syrup. Mix them together in a large bowl. I like using a spatula for this step. Make sure the mixture is smooth and well blended. A smooth mix is key. It makes the bars taste great and helps hold them together.
Mixing in Dry Ingredients
Next, take 1 cup of rolled oats and 1/4 cup of coconut flour. Add these dry ingredients into your peanut butter mix. Use a wooden spoon to stir them in. Make sure everything is mixed well. You don’t want any dry spots left. This helps each bite have the same yummy taste.
Setting the Mixture
Now, it’s time to pack the mixture into a baking dish. I use an 8×8-inch dish lined with parchment paper. This makes it easy to lift the bars out later. Press the mixture firmly into the dish. Use your hands or a spatula to make it even. Chill the dish in the refrigerator for 1 to 2 hours. This helps the bars set up nicely. When they are firm, lift them out using the parchment paper. Cut them into bars or squares as you like.
Tips & Tricks
Best Practices for Consistency
To get the best texture for your No-Bake Peanut Butter Bars, you need the right balance of ingredients. Make sure to use creamy peanut butter. This keeps the bars smooth and not too crumbly. When mixing, stir slowly to blend all ingredients well. If you see dry spots, keep mixing.
Common mistakes include not packing the mixture tightly enough in the dish. If it’s loose, the bars may fall apart when you cut them. Press the mixture firmly into the baking dish to avoid this. Also, make sure to chill the bars long enough, about 1-2 hours. This sets them perfectly.
Presentation Tips for Serving
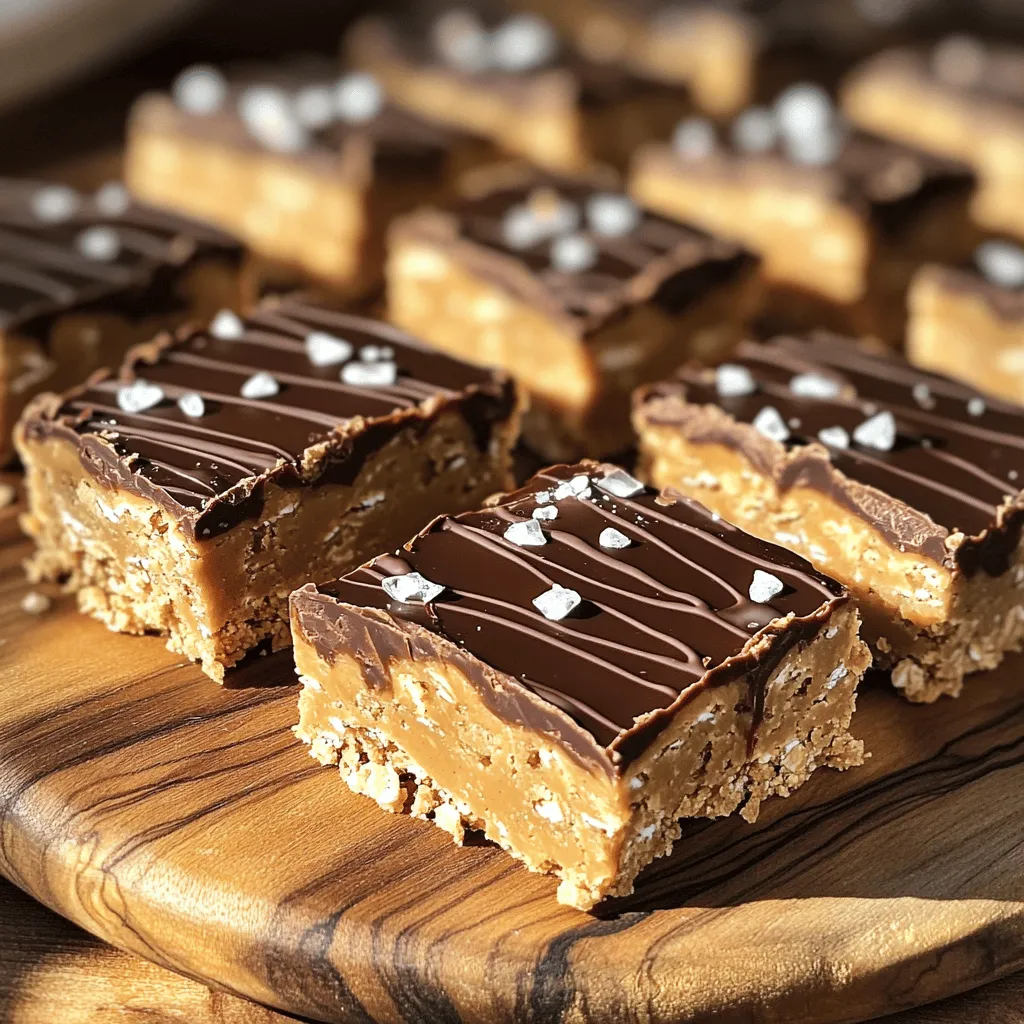
Serving your No-Bake Peanut Butter Bars can be fun and creative. Arrange the bars neatly on a nice plate. For a special touch, drizzle some melted chocolate on top. You can also sprinkle chopped nuts or a pinch of sea salt for extra flavor and texture. This makes them look pretty and taste even better!
Making Ahead and Freezing
If you want to make these bars ahead of time, they freeze well. Wrap the bars tightly in plastic wrap or place them in an airtight container. They can last up to three months in the freezer. When you’re ready to enjoy them, take the bars out and let them thaw in the fridge for a few hours. This keeps them firm and tasty. Enjoy your delicious treat!
Variations
Flavor Variations
You can easily change the flavor of your no-bake peanut butter bars. One option is to add cocoa powder. This gives a rich, chocolatey taste. Just mix in 1/4 cup of cocoa powder with the dry ingredients. If you’re after a protein boost, try adding protein powder instead. A scoop of your favorite protein powder blends well and keeps the bars nutritious.
You can also swap peanut butter for other nut butters. Almond or cashew butter works great. Each nut butter brings a unique taste. So, feel free to experiment with what you like best.
Mix-ins and Toppings
Adding mix-ins can make your bars even better. Try seeds like chia or flax for extra crunch and nutrients. Dried fruits like cranberries or raisins can add a sweet touch. Just make sure to chop them small, so they mix in well.
For toppings, consider drizzling melted dark chocolate over the bars. This adds a nice finish and makes them look fancy. You can also sprinkle chopped nuts or coconut flakes on top. These toppings give extra flavor and texture. Enjoy creating your own perfect no-bake peanut butter bars!
Storage Info
Proper Storage Guidelines
To keep your no-bake peanut butter bars fresh, follow these tips:
– Cool completely: Always let the bars cool in the fridge for at least 1-2 hours.
– Use airtight containers: Store them in a clean, airtight container. This helps keep moisture out.
– Layer with parchment: If stacking, place parchment paper between layers to prevent sticking.
– Refrigerate: Store in the fridge to maintain texture and taste.
Shelf Life
No-bake peanut butter bars can last a while! Here’s how long you can keep them:
– Refrigerated: Up to one week.
– Frozen: They last up to three months in the freezer.
Check for signs of spoilage like an off smell or a change in texture. If they feel too soft or sticky, it’s best to toss them. Enjoy your tasty treat while it’s fresh!
FAQs
What is the total prep and cook time for No-Bake Peanut Butter Bars?
The total prep and cook time is about 2 hours and 15 minutes. You need only 15 minutes to mix everything together. The rest is chilling time in the fridge. This makes it easy to fit into your day.
Can I use a different sweetener?
Yes, you can swap honey or maple syrup for other sweeteners. Agave syrup or brown rice syrup work well too. If you prefer something sugar-free, try stevia or erythritol. Just make sure to adjust the amount since some sweeteners are much sweeter than others.
How do I know if the bars are set properly?
To check if the bars are set, gently press on the top with your finger. If it feels firm and doesn’t leave an imprint, they are ready. You can also look for a glossy finish on the top. If they still feel soft, give them more time in the fridge.
To recap, you learned how to make no-bake peanut butter bars. We discussed the required ingredients and possible allergens. I shared step-by-step instructions to help you create the perfect mixture. You also found tips for storing and serving the bars, along with unique variations.
These bars are easy to customize and a healthy treat. You can enjoy them guilt-free, knowing exactly what’s inside. Now, it’s time to grab those ingredients and start making your delicious bars!

