Looking for a dessert that combines silky cheesecake and Oreo cookies? You’re in the right place! My No Bake Oreo Cheesecake Bars are a fun and easy treat. With just a few simple ingredients and minimal effort, you’ll have a delicious dessert that everyone will love. Get ready to impress your friends and family with these tasty bars that require no baking at all! Let’s dive into the recipe and make something great together.
Ingredients
To make No Bake Oreo Cheesecake Bars, gather these simple ingredients:
– 24 Oreo cookies, finely crushed
– 1/4 cup unsalted butter, melted
– 16 oz cream cheese, softened
– 1 cup powdered sugar, sifted
– 1 teaspoon pure vanilla extract
– 2 cups whipped cream or stabilized whipped topping
– 8 Oreo cookies, coarsely chopped for topping
– Optional: chocolate shavings for garnish
These ingredients create a creamy, rich, and delicious dessert. The crushed Oreos form a tasty crust, while the cream cheese and whipped cream give the filling its smooth texture. Using sifted powdered sugar adds just the right sweetness. You can top the bars with more Oreo pieces for crunch and chocolate shavings for a touch of elegance. This recipe is all about balance and indulgence, making it a favorite for gatherings or a sweet treat at home.
Step-by-Step Instructions
Preparing the Oreo Crust
– First, combine 24 finely crushed Oreo cookies and 1/4 cup melted unsalted butter in a bowl.
– Next, press the mixture firmly into a 9×9 inch baking dish. Use your fingers or the back of a measuring cup to make it even.
– Chill the crust for 10-15 minutes in the fridge. This helps it firm up before adding the filling.
Making the Cheesecake Filling
– In a large mixing bowl, beat 16 oz of softened cream cheese until it is smooth.
– Gradually mix in 1 cup of sifted powdered sugar and 1 teaspoon of pure vanilla extract. Keep blending until everything is well combined.
– Gently fold in 2 cups of whipped cream or stabilized whipped topping. Use a spatula for this step to keep the filling light and airy.
Assembling the Bars
– Now, fold in 8 coarsely chopped Oreo cookies to add extra texture.
– Pour the cheesecake filling over the chilled Oreo crust. Use a spatula to spread it evenly.
– Finally, cover the dish and refrigerate until set, which will take at least 4 hours. This step is key to getting the right texture for your bars.
Tips & Tricks
Achieving the Perfect Texture
To make your No Bake Oreo Cheesecake Bars great, start with softened cream cheese. If the cream cheese is cold, it will stay lumpy. Soft cream cheese mixes well and helps create a smooth filling. Take it out of the fridge at least 30 minutes before you start. This will help it warm up.
When you fold in the whipped cream, be gentle. Use a spatula and lift the cream from the bottom. This keeps the mixture light and fluffy. If you mix too hard, you might lose that airy texture we want.
Presentation Ideas
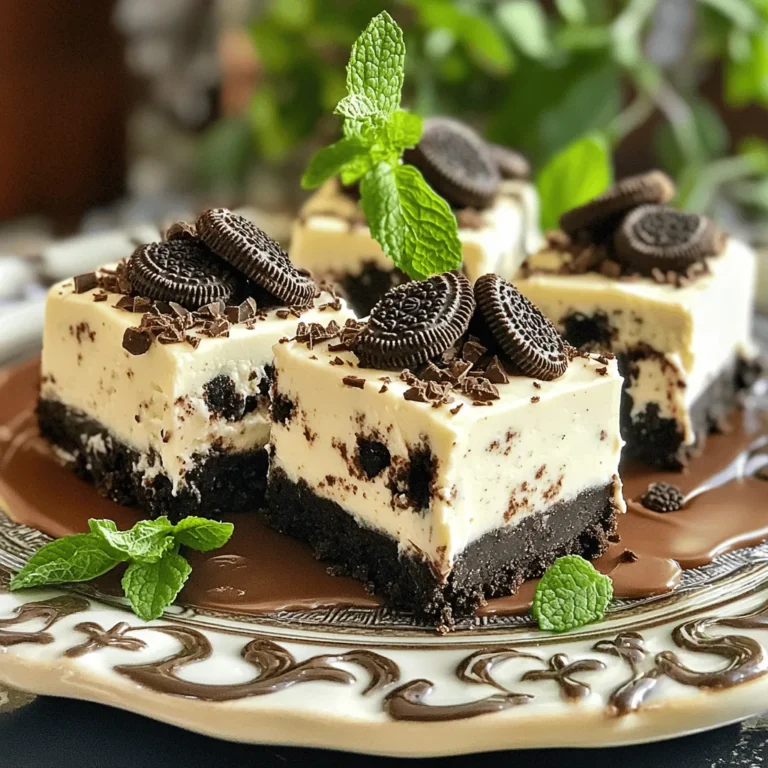
For serving, a decorative platter makes a big difference. Place the bars neatly and drizzle some chocolate sauce on top. This adds a nice touch and makes them look fancy. You can also sprinkle a fresh mint leaf for color.
For a fun twist, try adding chocolate shavings on top. They give a rich look and taste. You can even put extra chopped Oreos on top. This adds a fun crunch and makes each bar even more delicious.

Variations
Flavor Variations
You can change up the flavor of your No Bake Oreo Cheesecake Bars in fun ways. One great option is to add peanut butter. Just mix in half a cup of creamy peanut butter into the cheesecake filling. This adds a rich, nutty taste. If you prefer mint, add a few drops of mint extract. It makes the bars fresh and cool!
For toppings, think beyond Oreos. Try adding chopped nuts for crunch. Walnuts or pecans work well. You can also use fresh fruit, like strawberries or raspberries. They add a nice color and burst of flavor. Drizzling caramel or chocolate sauce on top will make your bars even more special.
Gluten-Free Option
If you need a gluten-free treat, it’s easy! Just swap regular Oreos for gluten-free Oreos. They taste just as good and let everyone enjoy these bars. This small change keeps all the flavors you love while making it safe for those with gluten allergies.
Storage Info
How to Store Leftover Bars
To keep your No Bake Oreo Cheesecake Bars fresh, use an airtight container. Place the bars in the container and cover them well. This method keeps them moist and tasty. Store the container in the fridge. Your bars will last for about 4 to 5 days. After that, they may lose their flavor and texture.
Freezing Instructions
Freezing is great for longer storage. To freeze the cheesecake bars, first cut them into squares. Wrap each square in plastic wrap. Then, place the wrapped bars in a freezer bag. Seal the bag tightly to prevent freezer burn. When you want to enjoy a bar, take one out and let it thaw in the fridge for a few hours. It will taste just as good as fresh!
FAQs
Can I use a different type of cookie for the crust?
Yes, you can! Many cookies work well for the crust. If you want a twist, try using chocolate or vanilla wafer cookies. Graham crackers also make a great base for a lighter flavor. Each cookie will change the taste a bit, so feel free to experiment. Just remember, the key is to crush them finely and mix with melted butter.
How do I know when the cheesecake is set?
The cheesecake is set when it feels firm to the touch. You can gently press the top with your finger to check. It should bounce back slightly. If it feels too soft, let it chill longer. After about four hours in the fridge, it should be ready to cut. Look for a smooth top without any wobble.
Can I prepare this recipe in advance?
Yes! You can make this cheesecake a day ahead. Just keep it covered in the fridge. This allows the flavors to blend nicely. Make sure to add toppings right before serving for the best look and taste. Enjoy the ease of prep and the delight of serving a tasty dessert!
These no-bake Oreo cheesecake bars are easy and fun to make. We covered the key ingredients, step-by-step instructions, and helpful tips to ensure a creamy texture. You learned about variations, storage tips, and got answers to common questions.
Enjoy experimenting with flavors and toppings. You’ll impress friends and family every time you serve these delicious bars!

