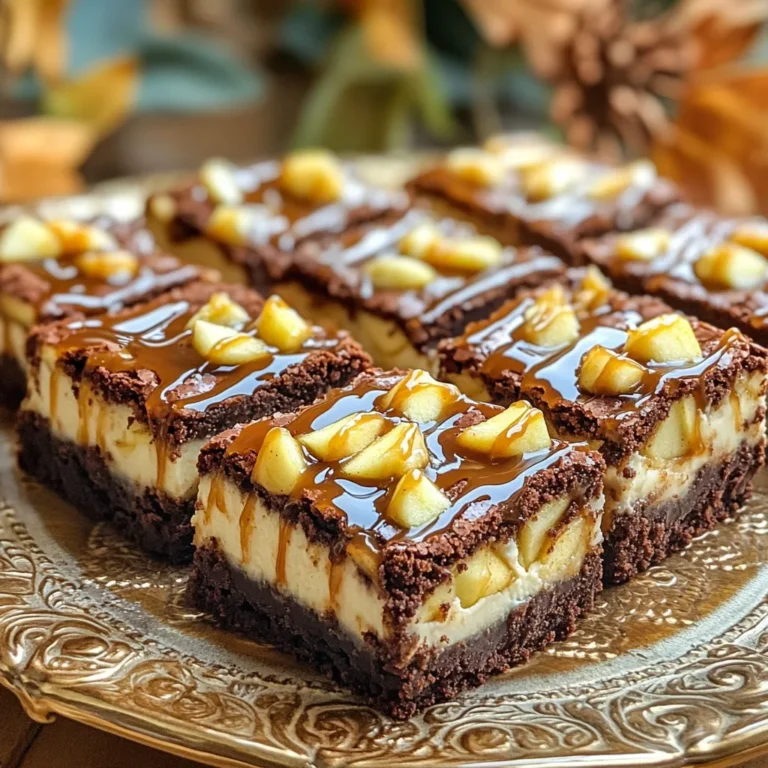
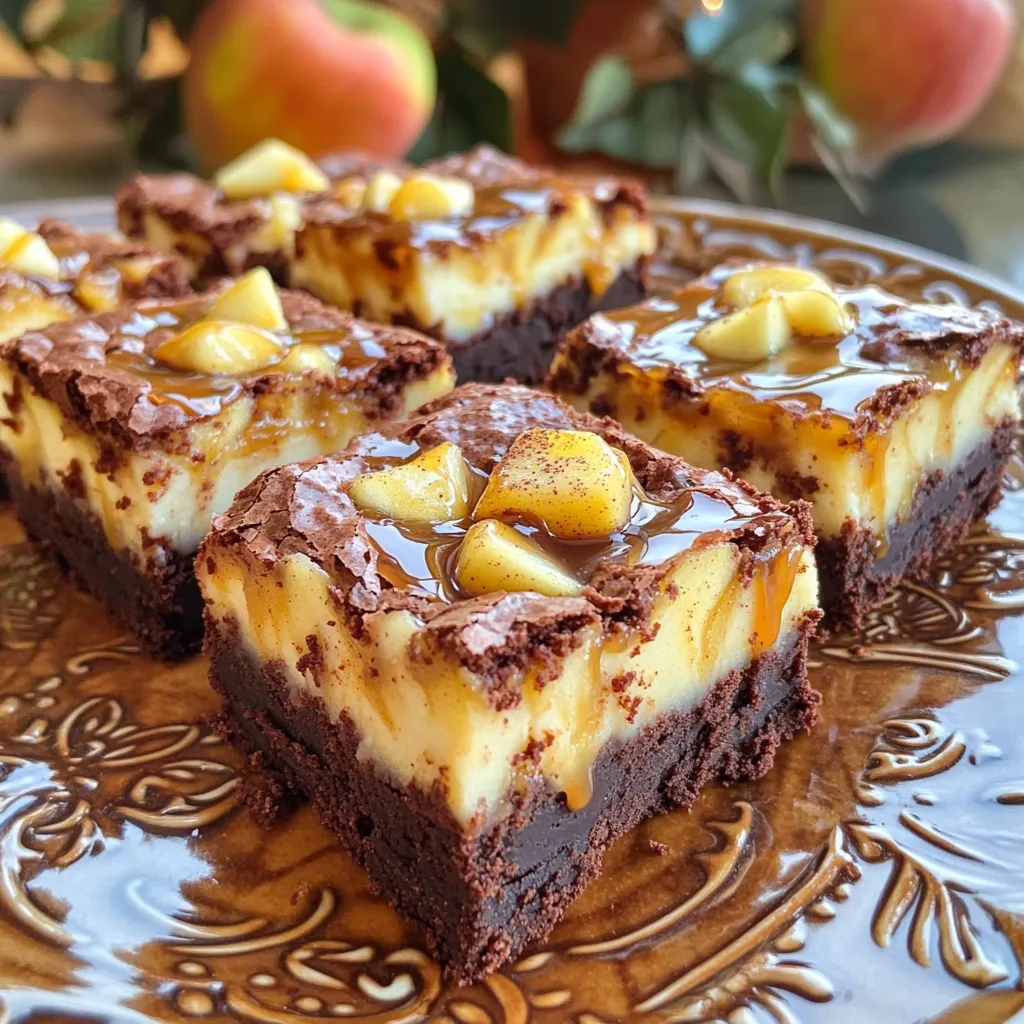
Get ready to indulge in a dessert that combines the best of all worlds: Caramel Apple Cheesecake Brownies! These rich, fudgy brownies meet creamy cheesecake swirled with sweet caramel and bits of juicy apples. I’ll guide you through each simple step, making it easy for you to create this mouthwatering treat. Perfect for any occasion, these brownies are sure to amaze your family and friends. Let’s dive in!
Ingredients
Main Ingredients for Caramel Apple Cheesecake Brownies
You need these main items for the brownies:
– 1/2 cup unsalted butter
– 1 cup granulated sugar
– 2 large eggs
– 1 teaspoon vanilla extract
– 1 cup all-purpose flour
– 1/4 cup unsweetened cocoa powder
– 1/2 teaspoon baking powder
– 1/4 teaspoon salt
– 2 medium apples, peeled, cored, and diced
– 1 teaspoon ground cinnamon
– 8 oz cream cheese, softened
– 1/4 cup powdered sugar
– 1 large egg
– 1/2 teaspoon vanilla extract
– 1/2 cup caramel sauce (plus more for drizzling)
Optional Garnishes and Toppings
To make your brownies even more delightful, consider these toppings:
– Extra caramel sauce for drizzling
– Thin apple slices for garnish
– A sprinkle of cinnamon for added flavor
Equipment Needed for Preparation
Gather these tools before you start cooking:
– Medium saucepan for melting butter
– Mixing bowls for batter and cream cheese
– Whisk for mixing ingredients
– Spatula for spreading batter
– 9×9-inch baking pan, greased or lined
– Toothpick or knife for swirling the cream cheese mixture
These ingredients and tools will help you create a fantastic dessert filled with rich flavors. Enjoy making this sweet treat!
Step-by-Step Instructions
Prepping the Oven and Baking Pan
First, heat your oven to 350°F (175°C). This step is key for baking. Next, take a 9×9-inch baking pan. Grease it lightly or line it with parchment paper. This makes it easy to remove the brownies later.
Making the Brownie Batter
In a medium saucepan, melt 1/2 cup of unsalted butter over low heat. Once it’s melted, take it off the heat. Whisk in 1 cup of granulated sugar until smooth. Then, add 2 large eggs, one at a time. Mix well after each egg. Stir in 1 teaspoon of vanilla extract.
In a separate bowl, mix 1 cup of all-purpose flour, 1/4 cup of cocoa powder, 1/2 teaspoon of baking powder, and 1/4 teaspoon of salt. Slowly fold this dry mix into the wet mix. Be gentle to avoid overmixing. Finally, fold in 2 medium apples, peeled and diced, along with 1 teaspoon of ground cinnamon.
Preparing the Cream Cheese Mixture
In another mixing bowl, take 8 oz of softened cream cheese. Add 1/4 cup of powdered sugar, 1 large egg, and 1/2 teaspoon of vanilla extract. Beat this mixture until it is smooth and creamy. Make sure there are no lumps left in the cream cheese.
Assembling and Swirling the Layers
Pour the brownie batter into your prepared pan. Use a spatula to spread it evenly. Next, dollop spoonfuls of the cream cheese mixture over the brownie batter. Use a knife or toothpick to swirl the cream cheese into the batter. This creates a lovely marbled look. Drizzle 1/2 cup of caramel sauce on top, swirling it for extra flavor.
Baking and Cooling Process
Place the pan in your preheated oven. Bake for 30-35 minutes. Check if a toothpick comes out clean or with a few moist crumbs. Once done, remove the brownies from the oven. Let them cool in the pan for 15 minutes. Carefully lift them out using the parchment paper. Transfer to a wire rack to cool completely. After cooling, drizzle more caramel sauce on top. Cut into squares and serve.
Tips & Tricks
How to Achieve the Perfect Brownie Texture
To get the best brownie texture, start with the right butter. Use unsalted butter and melt it slowly. This step helps the sugar mix in well. Mix the wet and dry ingredients just until combined. Overmixing can lead to tough brownies. Aim for a shiny surface before baking. When you cool the brownies, let them sit in the pan. This helps set the structure.
Best Practices for Swirling Cream Cheese
Swirling cream cheese can be tricky, but it’s fun! First, make sure your cream cheese is soft. This way, it mixes easily. When you dollop the cream cheese on the brownie batter, use a spoon. Spread it randomly for a good look. Grab a knife or toothpick next. Start in the center and swirl gently. Don’t mix too much; a few swirls create a pretty pattern.
Suggestions for Caramel Drizzling
Caramel adds a sweet touch! When drizzling, use warm caramel sauce. Warm sauce flows better and looks great. Drizzle half of it before baking. This lets the flavor soak in. After baking, add more caramel on top. For a fun effect, use a spoon to swirl it in. You can also sprinkle a pinch of cinnamon with the caramel. This adds a nice touch to the look and taste.
Variations
Adding Different Fruits or Nuts
You can change the flavor of these brownies by adding other fruits or nuts. Try using pears, peaches, or berries. Each fruit brings its own taste and texture. If you want to add nuts, walnuts or pecans work great. Chop them up and mix them into the batter. This adds crunch and flavor to each bite.
Making it Gluten-Free
To make these brownies gluten-free, swap out the all-purpose flour for a gluten-free blend. Look for a mix that works well in baking. Check the label to ensure it contains xantham gum, which helps with texture. This simple switch lets everyone enjoy the treat without worry.
Chocolate or Peanut Butter Swirls
For a rich twist, add chocolate or peanut butter swirls. Melt some chocolate or peanut butter and drizzle it over the cream cheese layer. Use a knife to swirl it in. This adds a delicious depth to the flavors. It makes the brownies even more fun and tasty.
Storage Info
How to Store Leftover Brownies
To keep your caramel apple cheesecake brownies fresh, store them properly. Place the brownies in an airtight container. This helps keep the moisture in. You can also use plastic wrap if you don’t have a container. Keep them at room temperature for up to three days. If you want them to last longer, put them in the fridge. They will stay good there for about a week.
Freezing Instructions for Long-Term Storage
If you have extra brownies, freezing is a great option. First, let the brownies cool completely. Then, cut them into squares for easy serving. Wrap each square in plastic wrap. After that, place all wrapped squares in a freezer-safe bag. Be sure to remove as much air as you can. These brownies can stay frozen for up to three months. When you’re ready to enjoy them, just thaw them at room temperature.
Best Practices for Reheating
Reheating brownies can bring back their soft texture. For the best results, use the oven. Preheat your oven to 350°F (175°C). Place the brownies on a baking sheet. Heat for about 10 minutes or until warm. You can also use a microwave, but be careful. Heat them in short bursts of 10 seconds to avoid drying them out. Once warm, drizzle with extra caramel sauce for a treat you’ll love!
FAQs
Can I Use Different Types of Apples?
Yes, you can use different types of apples. I like to use Granny Smith for their tartness. Honeycrisp apples add a nice sweetness. You can mix apples for more flavor too. Just make sure they are firm and not mushy. This keeps the brownies from getting soggy.
How Long Do These Brownies Last?
These brownies can last up to a week when stored properly. Keep them in an airtight container to keep them fresh. If you want them to last longer, you can freeze them. Just wrap each piece well and place them in a freezer bag.
Is It Possible to Make This Recipe Dairy-Free?
Yes, you can make this recipe dairy-free. Use a dairy-free butter substitute and a dairy-free cream cheese. There are many great brands available now. Make sure to check the labels to find the best options. This way, everyone can enjoy these tasty brownies!
In this blog post, we explored how to make delicious caramel apple cheesecake brownies. We covered the key ingredients, step-by-step instructions, and tips for perfect results. You learned about optional garnishes and different variations to suit your taste. Remember to store leftovers properly to keep them fresh. With these guidelines, you can enjoy this tasty treat anytime. Get creative and have fun with your baking! Enjoy your homemade brownies and share them with friends and family.

