No-Churn Mint Chocolate Chip Ice Cream Delight
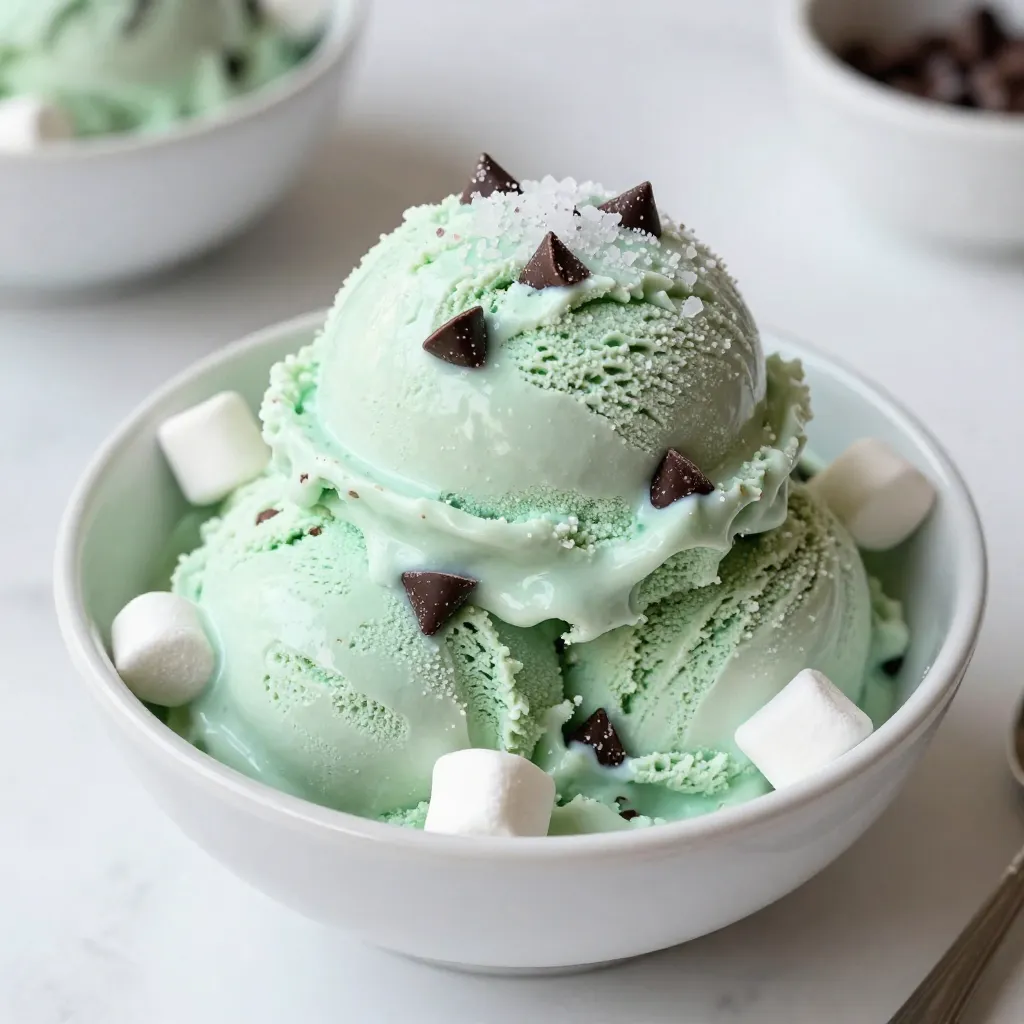
Who doesn’t love the cool crunch of mint chocolate chip ice cream? With my no-churn recipe, making this delightful treat
Who doesn’t love the cool crunch of mint chocolate chip ice cream? With my no-churn recipe, making this delightful treat
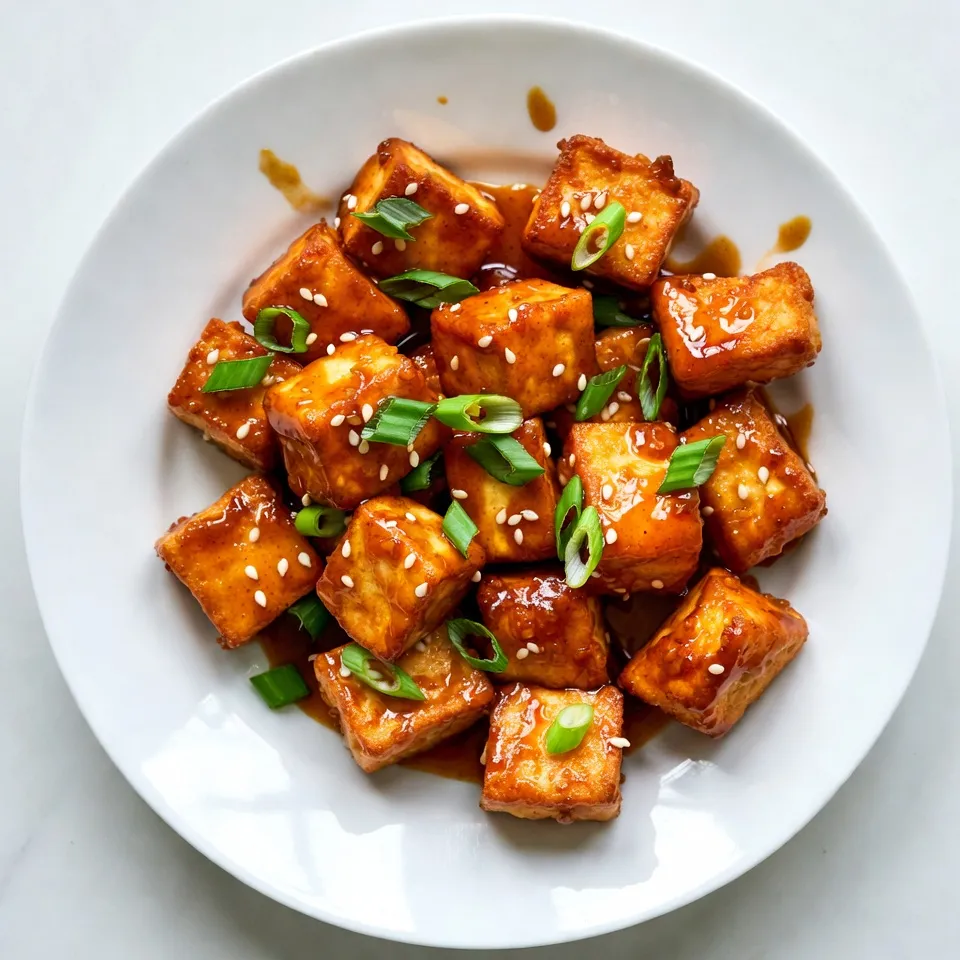
Looking for a tasty vegan treat? Try my Spicy Honey Garlic Tofu Bites! These bites are packed with flavor, combining
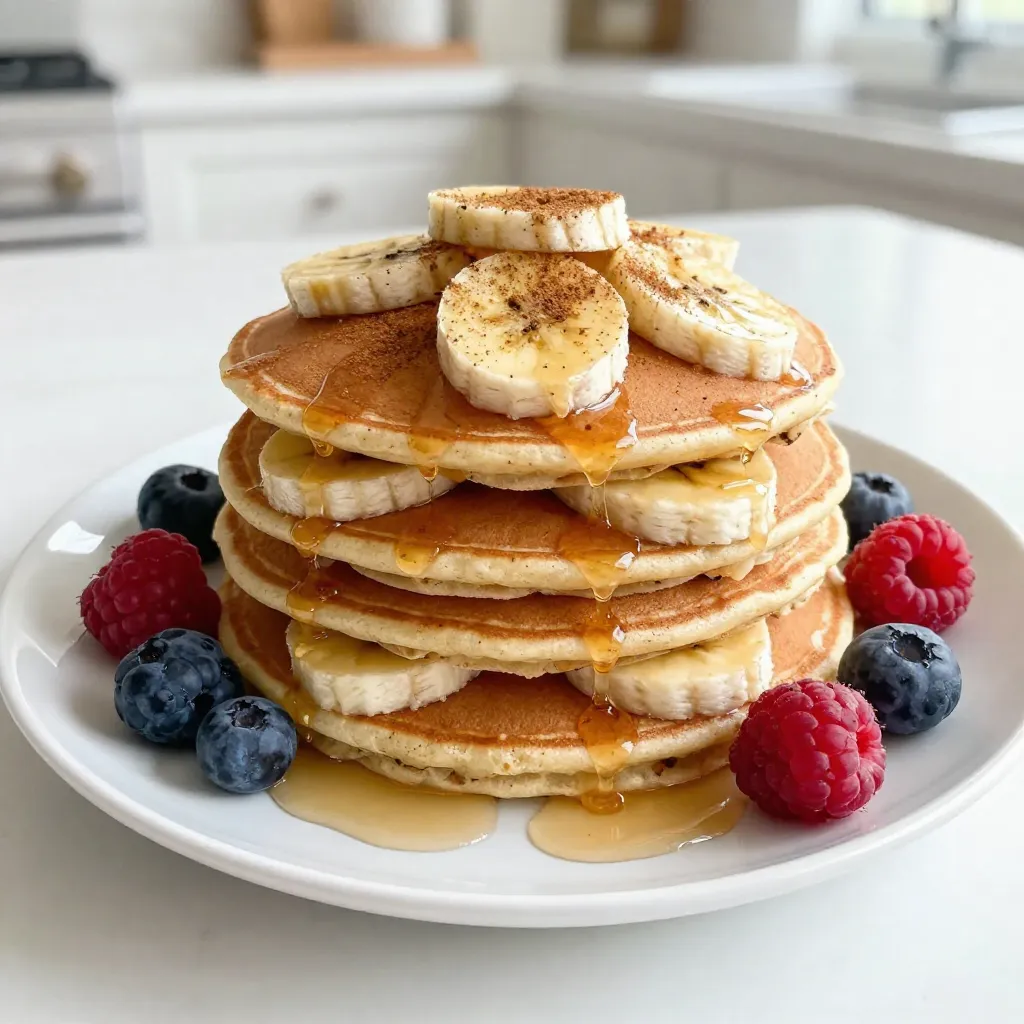
Are you ready to flip your breakfast routine upside down? These Gluten-Free Banana Oat Pancakes are easy to make and
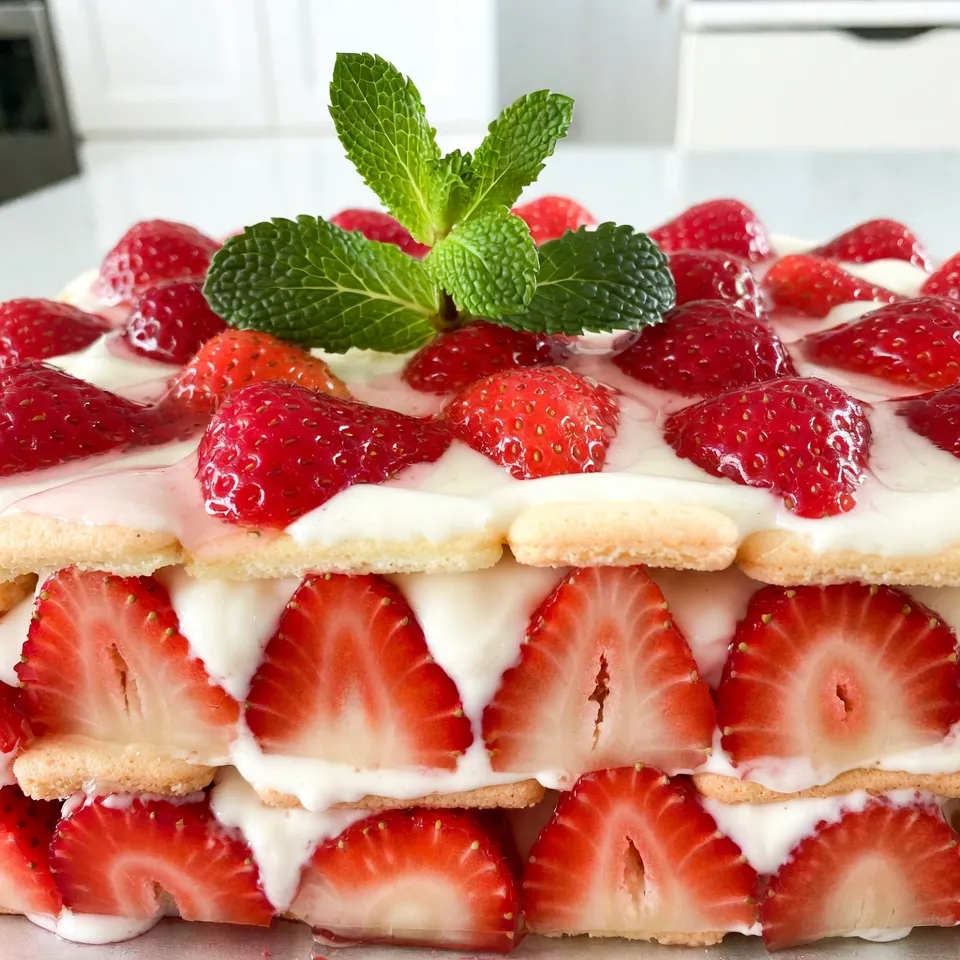
Looking for a cool, easy dessert to impress friends and family? Look no further! The Strawberry Shortcake Icebox Cake is
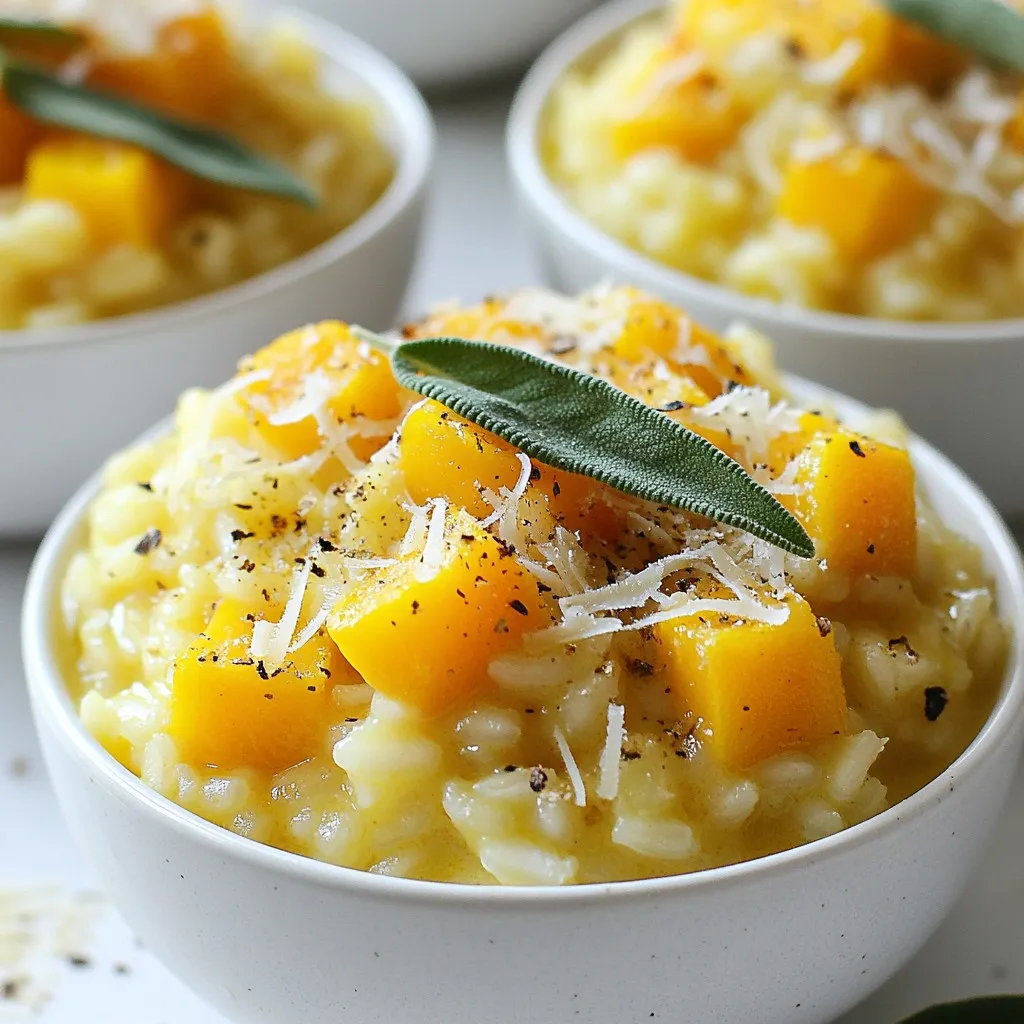
Welcome to my kitchen! Today, I’ll show you how to make a rich and creamy butternut squash risotto. This dish
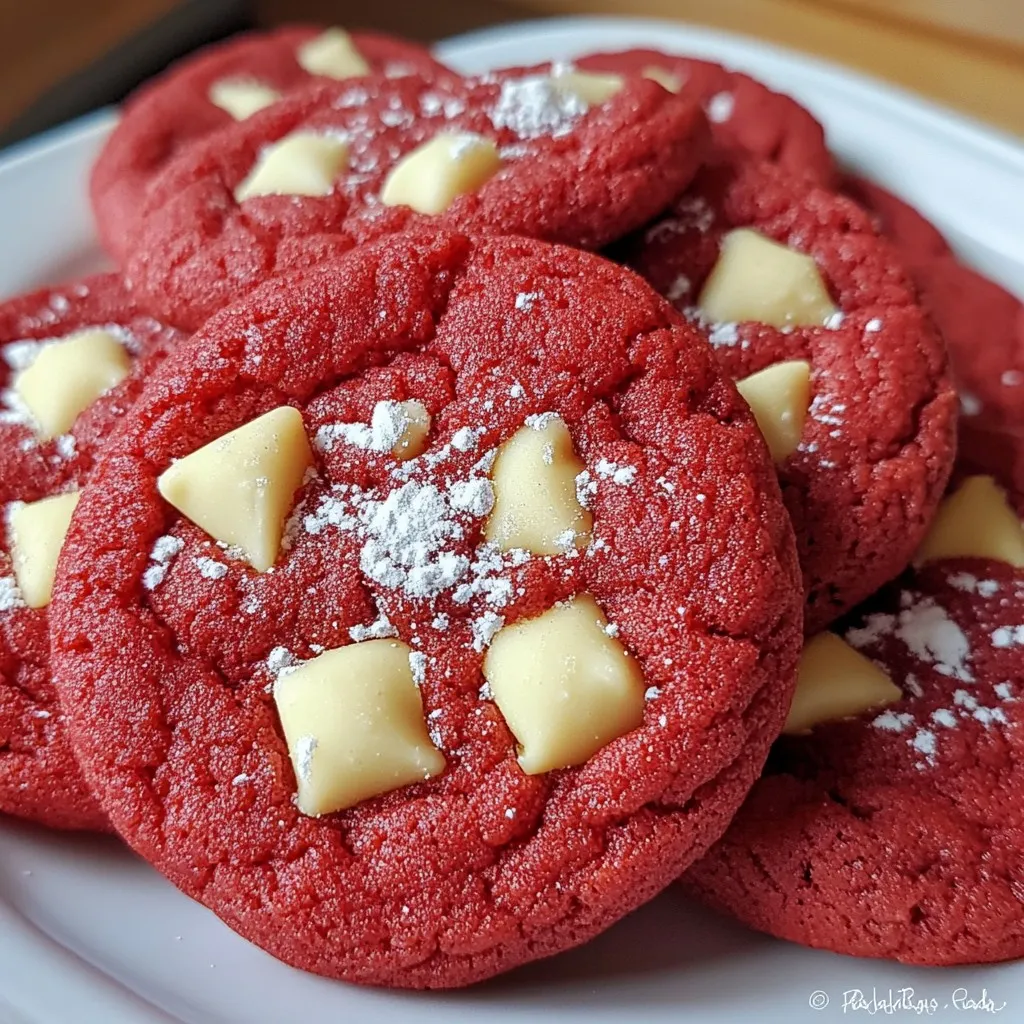
If you’re looking for a simple and tasty treat, you’ve found it! Red Velvet Cake Mix Cookies are fun to
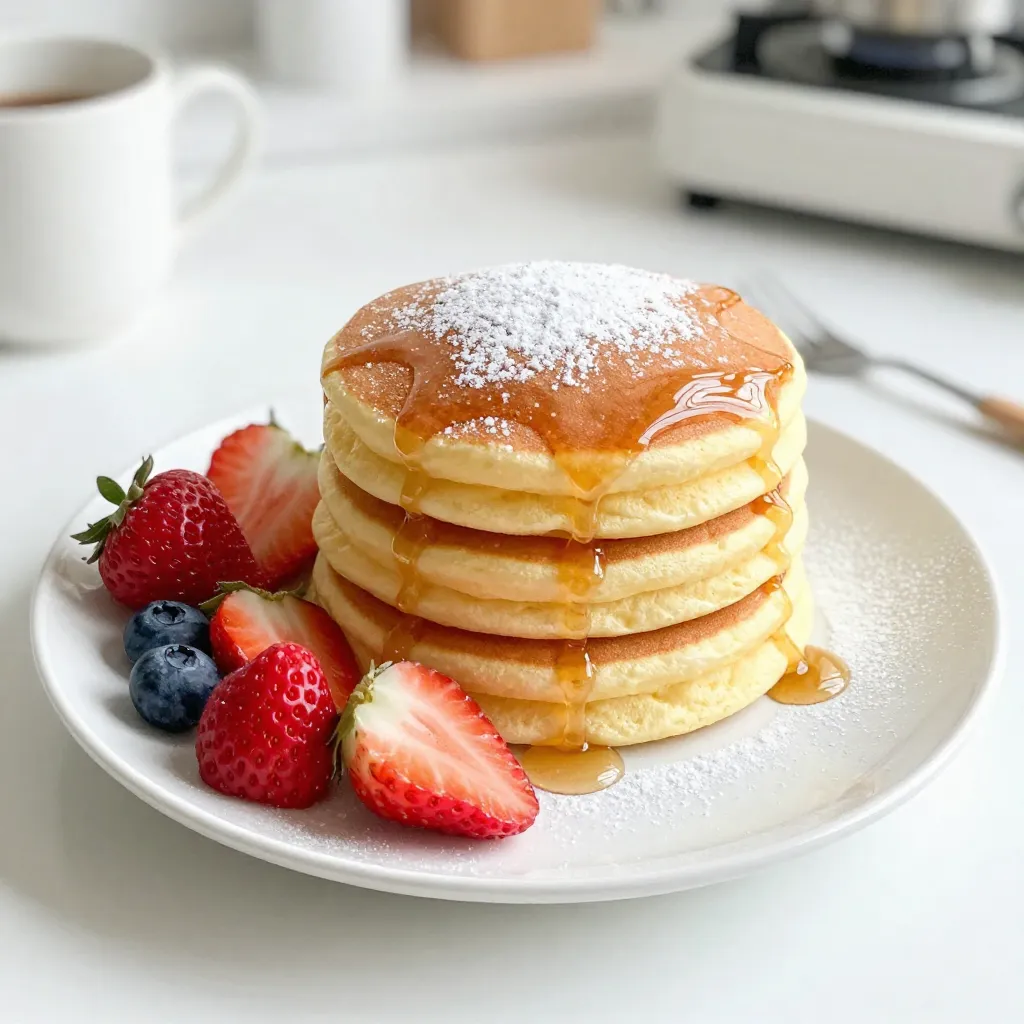
If you crave a breakfast that feels like a warm hug, fluffy Japanese pancakes are your answer. These delightful treats

Get ready to add some festive fun to your holiday baking with Peppermint Snowball Cookies! These delightful treats are easy
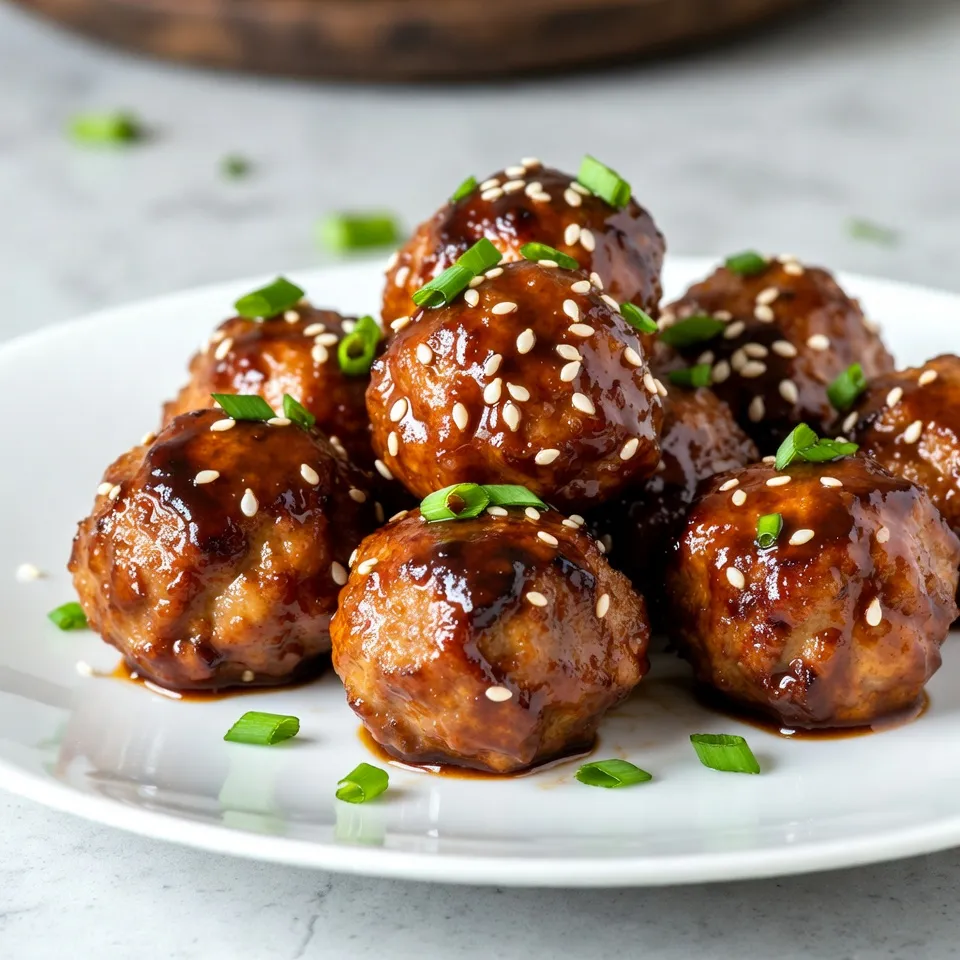
Looking for a simple and tasty dinner option? Slow Cooker Honey Garlic Meatballs are your answer. These meatballs are packed
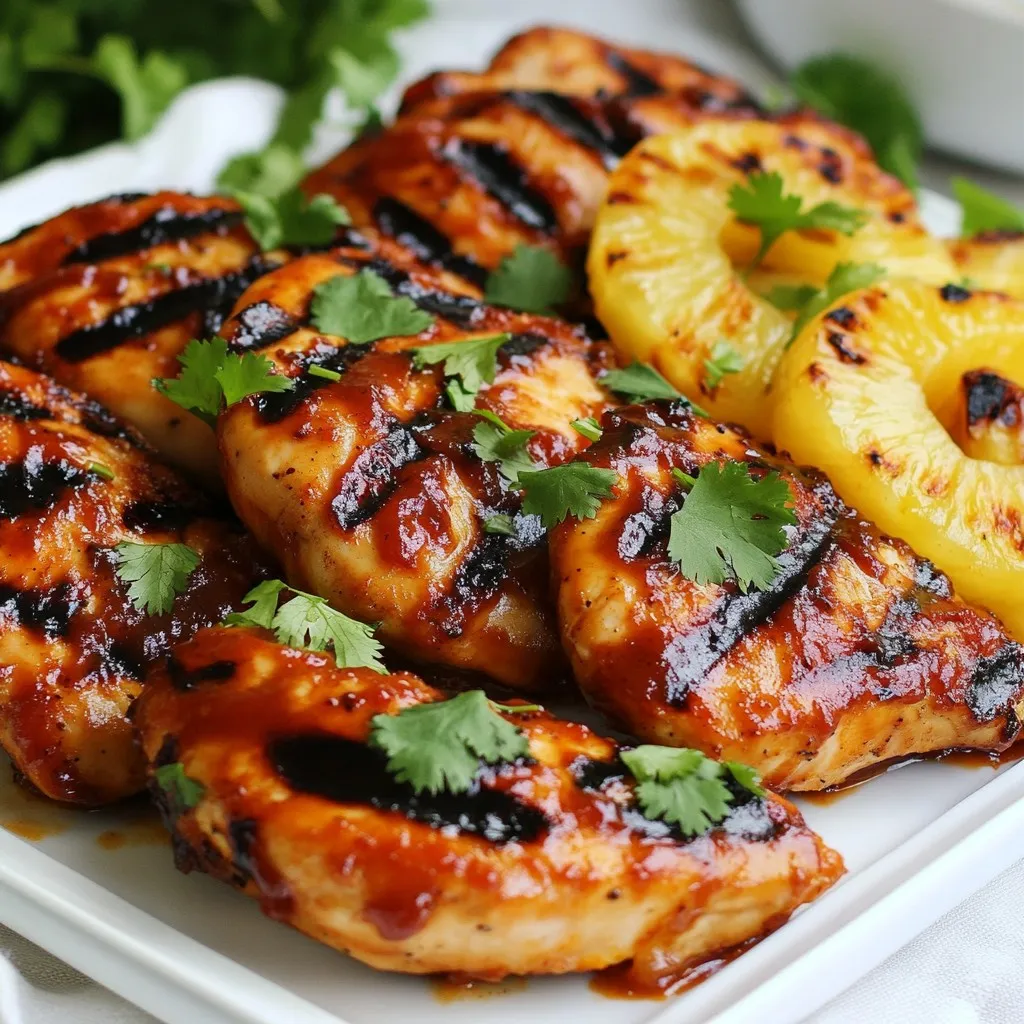
Get ready to savor the tastes of the islands with my Hawaiian BBQ Chicken recipe! This dish combines juicy chicken
