
Mushroom Stir-Fry Flavorful and Simple Meal Guide
Are you ready to whip up a quick and tasty meal? In this Mushroom Stir-Fry Flavorful and Simple Meal Guide,
Are you ready to whip up a quick and tasty meal? In this Mushroom Stir-Fry Flavorful and Simple Meal Guide,

Craving a tasty yet simple dinner? Look no further than my Sheet Pan Teriyaki Chicken and Veggies Delight! This one-pan

Wake up to a morning feast with my Loaded Breakfast Hash. This dish combines crispy potatoes, fresh veggies, and savory
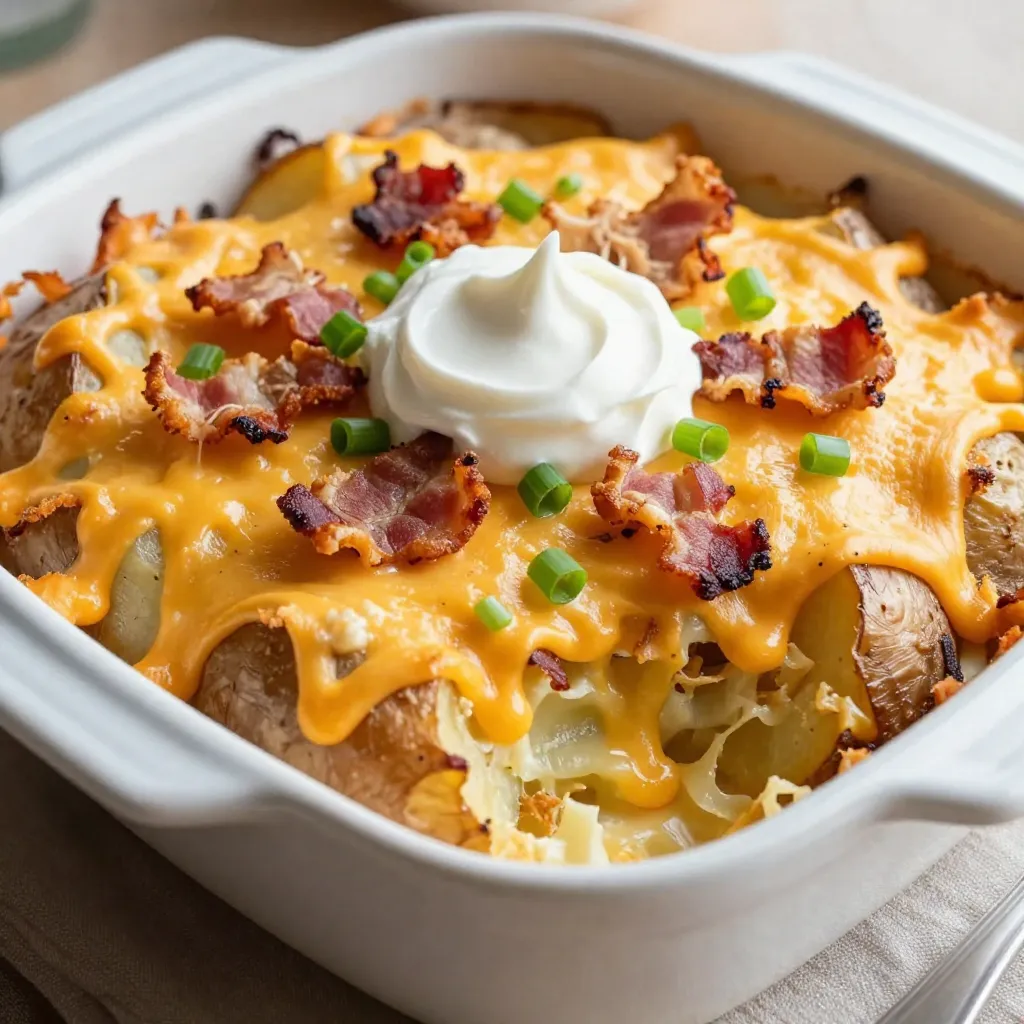
Are you ready for a dish that delivers comfort and flavor? Loaded Baked Potato Casserole combines creamy goodness with hearty
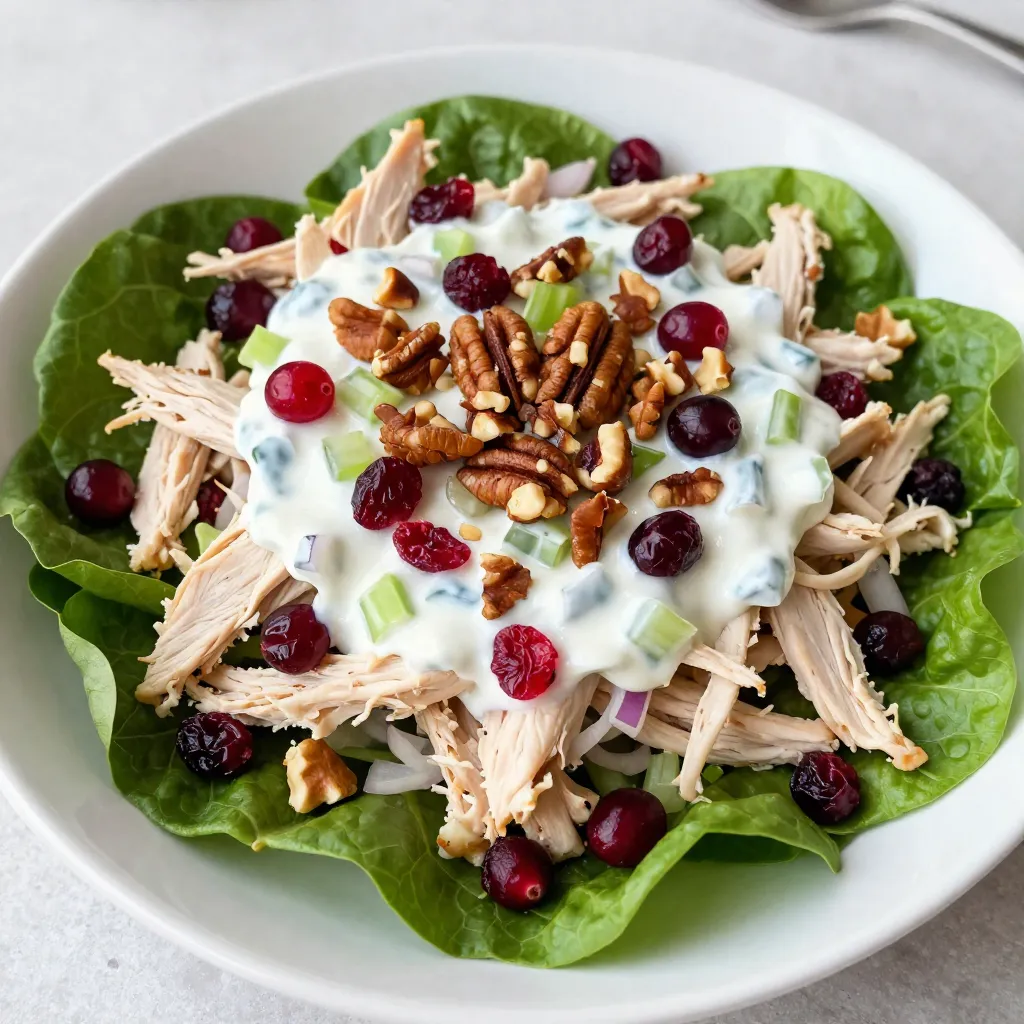
Looking for a fresh and flavorful twist on chicken salad? You’ve landed in the right place! My Cranberry Pecan Chicken
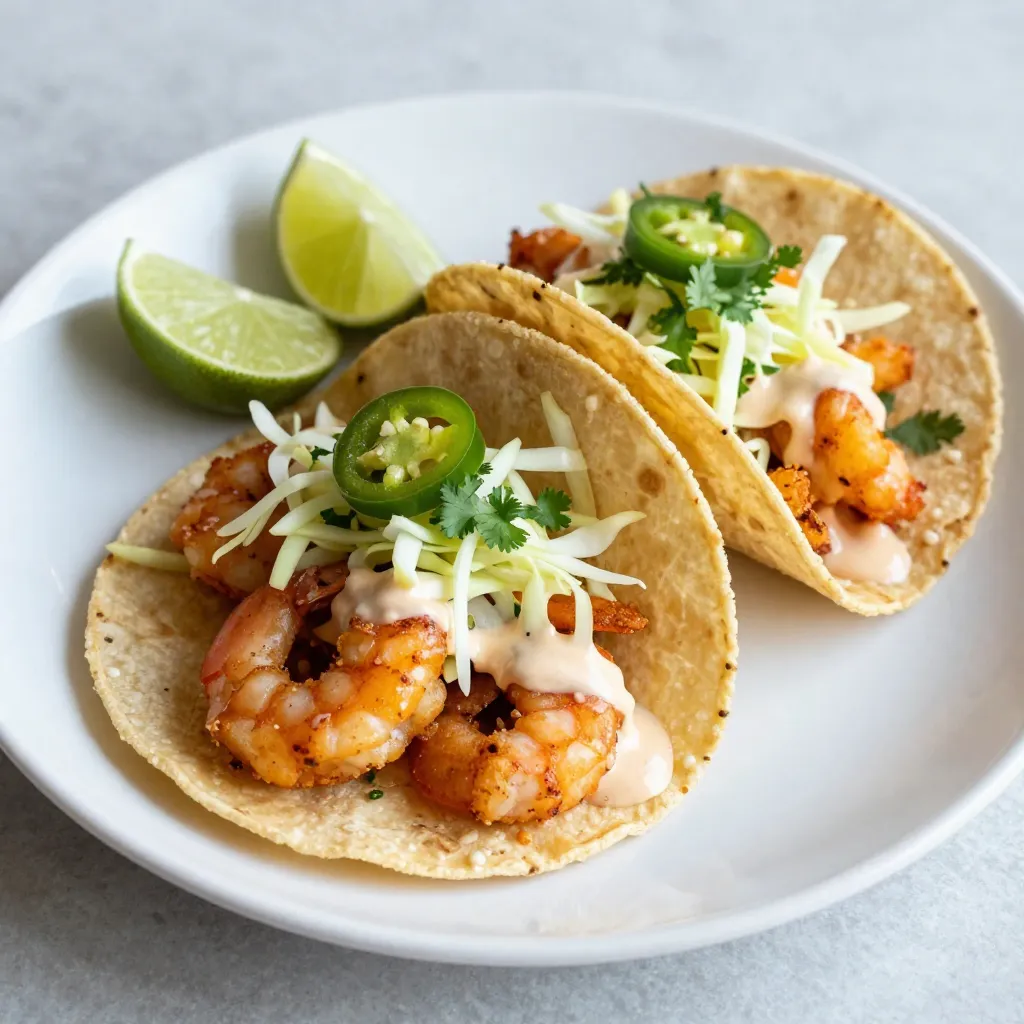
Ready to spice up your dinner routine? Bang Bang Shrimp Tacos deliver bold flavors and are a breeze to make!
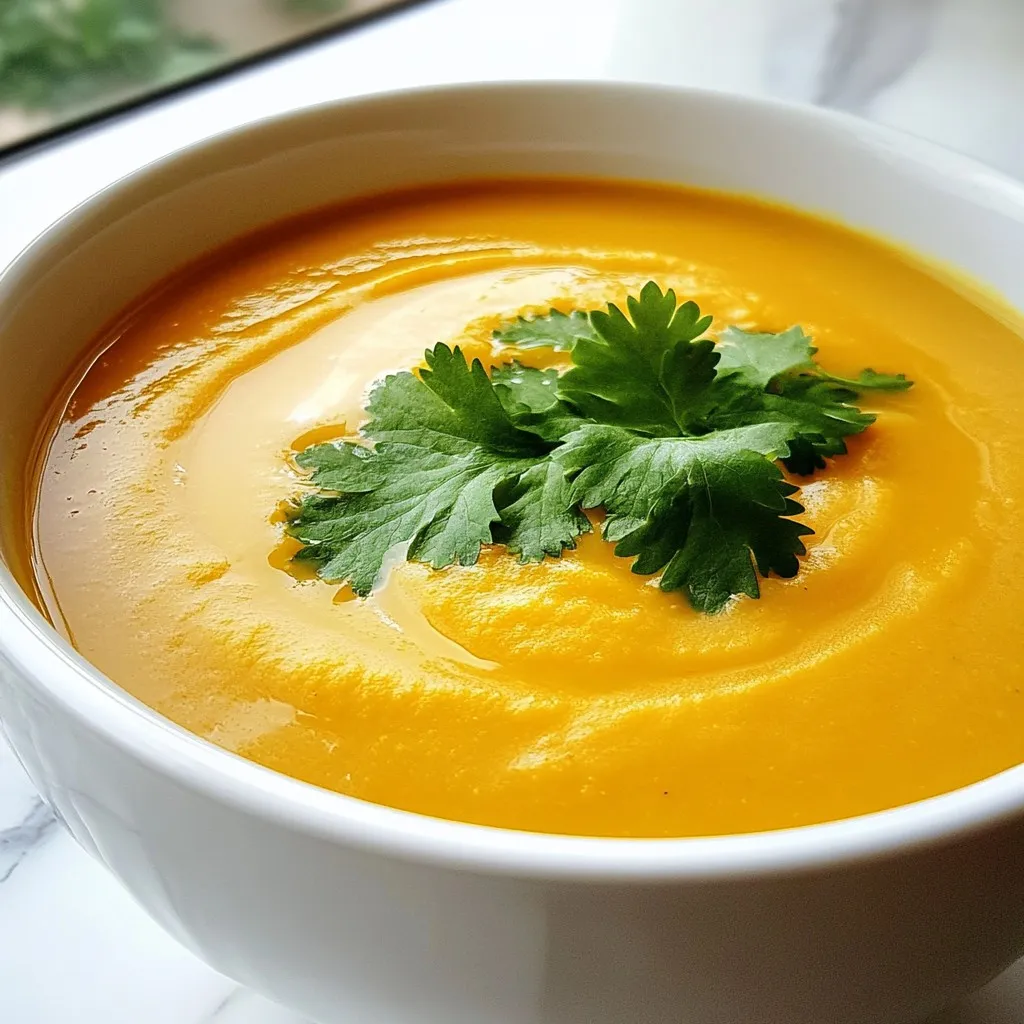
Are you looking for a warm, comforting dish that’s simple and delicious? This Silky Carrot Soup is a quick and
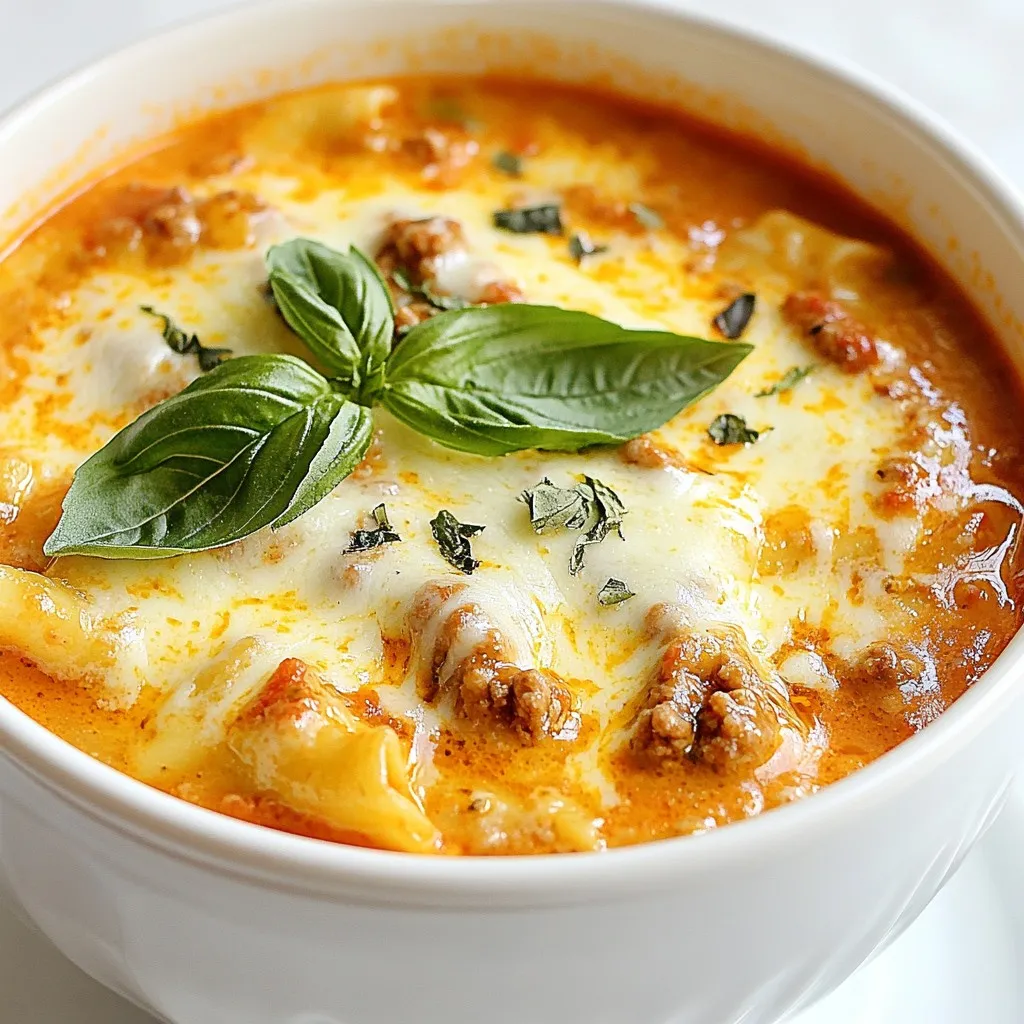
Craving a warm and hearty dish? Cozy Creamy Lasagna Soup is your perfect answer! This comforting soup blends all the

Get ready to impress your guests with my Cheesy Pull-Apart Christmas Tree Bread! This fun and festive dish is perfect
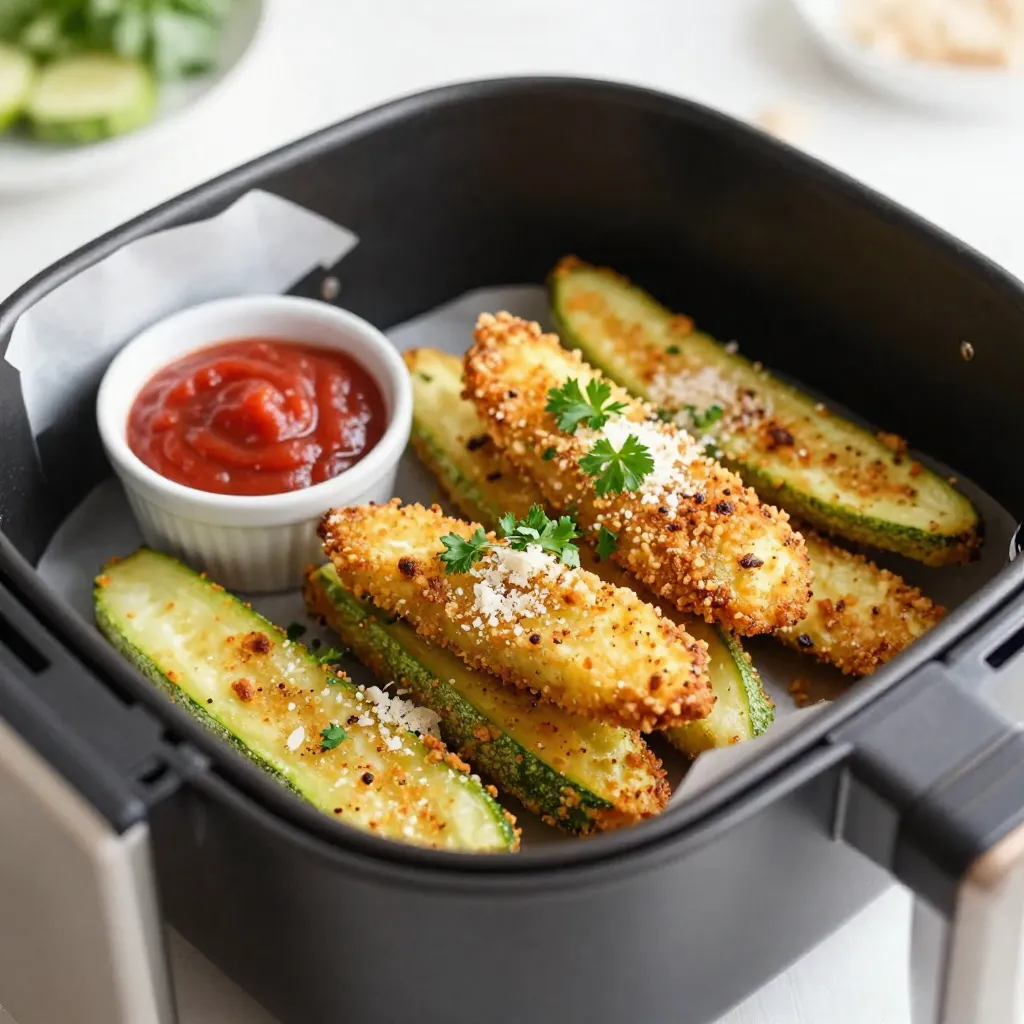
Looking for a tasty snack that’s both crispy and healthy? Let’s talk about Air Fryer Parmesan Zucchini Fries! These crunchy
