
No-Bake Peppermint Oreo Pie Easy Holiday Delight
Get ready to impress your friends and family with an easy No-Bake Peppermint Oreo Pie! This festive treat combines creamy
Get ready to impress your friends and family with an easy No-Bake Peppermint Oreo Pie! This festive treat combines creamy

Are you ready to fill your kitchen with the warm, spicy aroma of classic gingerbread cake? This delightful recipe is

Looking for a cozy dish to satisfy your cravings? This Cheesy Broccoli Rice Casserole packs flavor and comfort in every
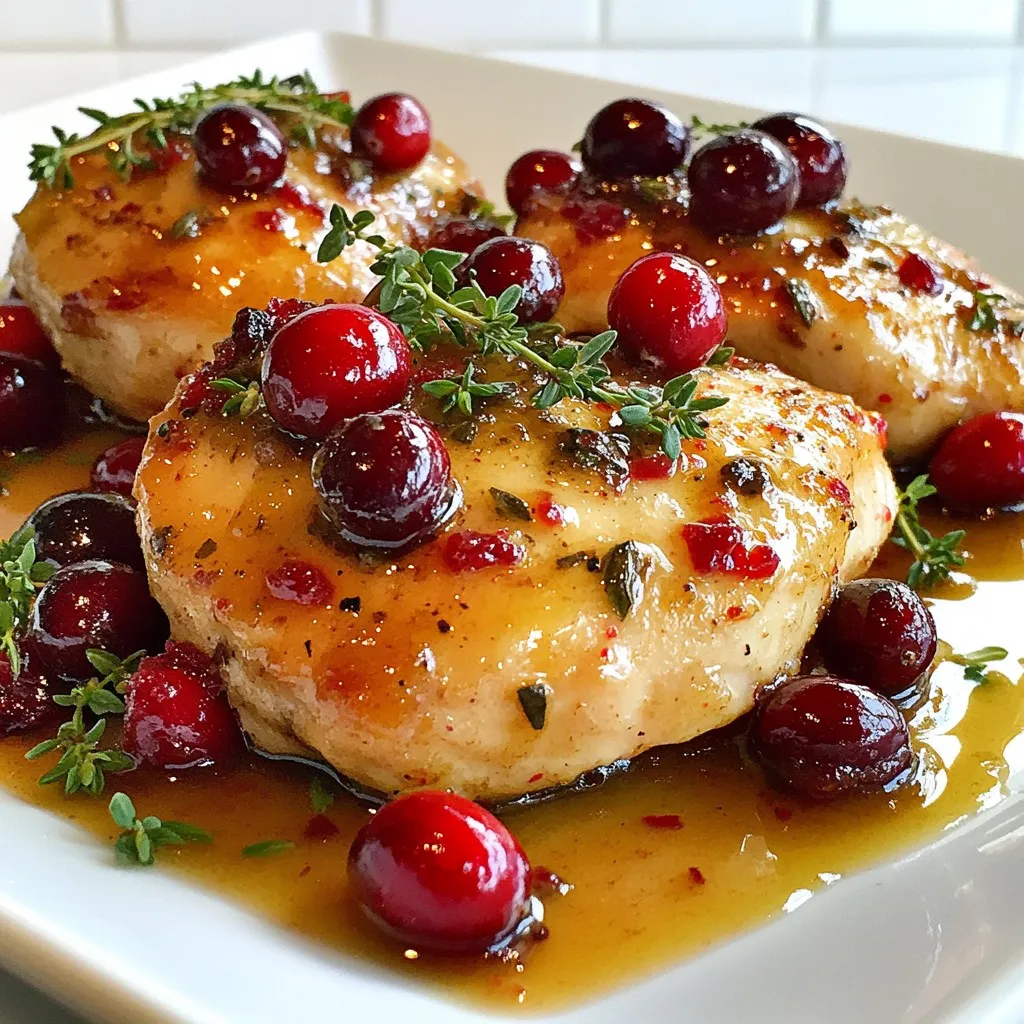
Looking for a dinner that’s both flavorful and easy to make? You’re in the right place! Savory Cranberry Glazed Chicken

Are you ready to create a deliciously easy treat? This Chocolate Chip Banana Bread recipe is perfect for both beginners

Ready to spice up your meal routine? These Vegan Buffalo Chickpea Wraps pack a punch with flavor and crunch. Picture

Looking for a simple, tasty treat that brightens up your table? You’ll love this Easy Cranberry Fluff Salad! With just

Craving a hearty meal that cooks itself? My Savory Slow Cooker Chicken Taco Soup recipe is your answer! With tender

Are you ready to dive into a delicious and hearty vegan dish? This Best Vegan Red Lentil Curry is not

Looking for a quick and tasty dinner idea? This Sheet Pan Teriyaki Chicken recipe is packed with flavor and super
