Skip to content
DisclaimerTerms Of UseGDPR PolicyCookie Policy

yumymoments

  • Home
  • Drinks
  • Appetizers
  • Dinner
  • Dessert
  • About
  • Contact
  • Privacy Policy
DisclaimerTerms Of UseGDPR PolicyCookie Policy

Samantha

- 4 medium zucchinis - 1 cup quinoa - 2 cups vegetable broth - 1 cup cherry tomatoes, halved - 1/2 cup black olives, sliced - 1/2 cup feta cheese, crumbled - 1/4 cup fresh basil, chopped - 1 teaspoon dried oregano - Salt and pepper to taste - 1/2 cup mozzarella cheese, shredded When I make stuffed zucchini boats, I always start with fresh zucchinis. They are the star of the dish. I recommend choosing medium-sized zucchinis. They are easier to scoop and fill. Next, I use quinoa for a healthy base. It has a nice texture and is full of protein. For flavor, I add cherry tomatoes and black olives. The tomatoes add sweetness, while olives give a salty burst. Feta cheese adds a creamy and tangy touch. I love crumbling it into the filling. To enhance the taste, I use fresh basil and dried oregano. These herbs bring a bright, fresh flavor. I season with salt and pepper to make everything pop. Finally, I top each boat with shredded mozzarella cheese. It melts beautifully and adds a rich finish to the dish. You can find the full recipe above to see all the steps. - Preheat oven to 375°F (190°C). - Prepare a baking dish with parchment paper. - Slice each zucchini in half lengthwise and scoop out the flesh. - Boil vegetable broth in a medium saucepan. - Add the rinsed quinoa and let it simmer. - Set the cooked quinoa aside to cool. - Sauté the reserved zucchini flesh, cherry tomatoes, and olives in a skillet. - Mix the cooked quinoa with the sautéed vegetables, feta, and basil. - Fill each zucchini half with the quinoa mixture, pressing gently. - Sprinkle mozzarella cheese on top of the stuffed zucchinis. - Bake for 25-30 minutes until golden and bubbly. - Allow the zucchini boats to cool before serving. For the full recipe, check the detailed instructions above. Enjoy this easy and tasty dish! - Pick firm and fresh zucchinis. - Smaller zucchinis are often sweeter. Choosing the right zucchini is key to a great dish. Look for zucchinis that feel firm and heavy for their size. Avoid ones that feel soft or have blemishes. Smaller zucchinis tend to have a sweeter flavor and tender texture. I love using them for my stuffed zucchini boats because they cook evenly and hold their shape well. - Substitute quinoa with rice or couscous. - Add ground meat for a heartier meal. You can easily change up the filling. If you want a different grain, use rice or couscous instead of quinoa. Both options work great and add a nice texture. For a heartier meal, consider adding cooked ground meat like turkey or beef to the mix. This adds protein and makes the dish more filling, perfect for hungry families! - Experiment with spices like chili flakes. - Try different cheese combinations. To boost flavor, try adding spices like chili flakes for some heat. You can also mix in fresh herbs like parsley or dill for extra zest. Cheese is another area to play with. Swap feta with goat cheese or cheddar for a different taste. Each cheese brings its own character, so don't be afraid to experiment! If you want the full recipe, check out the complete details above. Enjoy cooking! {{image_4}} For a fun twist, you can easily make your zucchini boats vegetarian. Start by adding bell peppers or mushrooms to the filling. Both add great flavor and texture to your dish. If you're looking for a dairy-free option, try using vegan cheese alternatives. These can melt well and still give you that cheesy goodness. Want to travel the world with your taste buds? Try a Mediterranean style. Add sun-dried tomatoes for a rich, tangy flavor. If you prefer something more Southwestern, mix in black beans and corn. This adds a hearty touch and gives your zucchini boats a delicious kick. Make the most of what's fresh! Incorporate seasonal vegetables like spinach in spring or squash in fall. This not only boosts flavor but also keeps your meals exciting. Adapt your ingredients based on what’s in season. This way, you can enjoy different tastes throughout the year. For the full recipe, check out the Cheesy Mediterranean Stuffed Zucchini Boats. Store your leftover stuffed zucchini boats in an airtight container. This keeps them fresh. You should eat them within 3-4 days for the best taste. The flavors will stay great if stored properly. You can freeze uncooked zucchini boats for later meals. Just prepare them as per the Full Recipe, then place them in a freezer bag. When you want to eat them, thaw them overnight in the fridge before baking. This helps them cook evenly and taste delicious. For the best texture, reheat your stuffed zucchini boats in an oven. Set it to 350°F (175°C) and bake for about 15 minutes. You can also use a microwave for quick meals, but the oven gives a better result. Enjoy your tasty dishes warm! Follow the outlined recipe steps for best results. Start by preparing the zucchini. Preheat your oven to 375°F (190°C). Slice the zucchini in half and scoop out the flesh. Cook the quinoa in vegetable broth until tender. Sauté the zucchini flesh with tomatoes and olives. Mix everything together and fill the zucchini halves. Top with mozzarella cheese, then bake until golden. Yes, rice or farro work well as substitutes. Both grains provide a nice texture and taste. You can use leftover rice or even couscous if you have it on hand. Just adjust the cooking time based on what you choose. Cheese, fresh herbs, and breadcrumbs add flavor. You can use mozzarella, parmesan, or even goat cheese. Fresh herbs like basil or parsley brighten the dish. For a crunchy topping, sprinkle breadcrumbs mixed with olive oil before baking. Yes, they are low in calories and packed with nutrients. Zucchini is full of vitamins and fiber. The quinoa and veggies provide protein and antioxidants. Enjoying these boats can help you feel full and satisfied without extra calories. Stuffed zucchini boats are a tasty, healthy dish. We covered key ingredients like zucchini, quinoa, and flavorful toppings. You saw how to prepare, cook, and bake them step by step. Remember, you can mix and match ingredients to fit your taste or what you have on hand. Store extras right to enjoy later. Zucchini boats make a great meal choice. Try different flavors, and you'll find your favorite! Your kitchen will smell great, and you’ll love the results. Enjoy cooking!

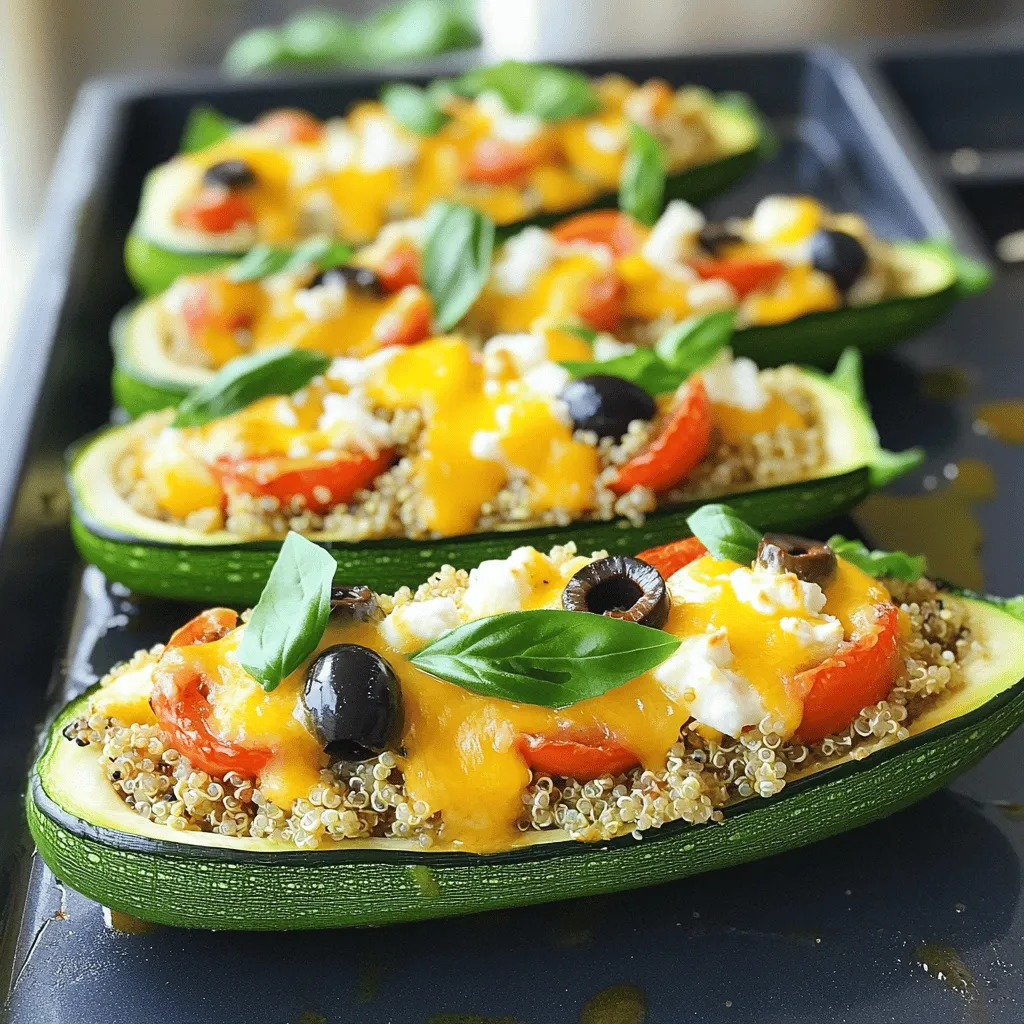
Stuffed Zucchini Boats Flavorful and Easy Recipe

Looking for a quick and tasty dinner idea? Stuffed zucchini boats are your answer! They are simple to make and

- 2 ripe bananas, frozen - 2 tablespoons natural peanut butter - 1 cup unsweetened almond milk (or preferred milk) - Optional sweeteners and additional ingredients The main ingredients in this smoothie are simple yet powerful. The ripe bananas bring natural sweetness and creaminess. When frozen, they give a thick texture. Peanut butter adds rich flavor and healthy fats. Almond milk keeps it light and smooth. You can also add honey or maple syrup for extra sweetness. A dash of vanilla or cinnamon can elevate the taste. - Health benefits of bananas: Bananas are full of potassium. This mineral helps your heart and muscles. They also have fiber, which aids digestion. Plus, they can boost your mood with their natural sugars. - Advantages of peanut butter: Peanut butter is a good source of protein. It keeps you full longer and provides healthy fats. It also contains vitamins and minerals like magnesium and vitamin E. - Nutritional value of almond milk: Almond milk is low in calories. It is often enriched with vitamins like D and E. This makes it a great choice for those watching their weight or lactose-intolerant. - Converting tablespoons to grams: One tablespoon of peanut butter weighs about 16 grams. This is useful for precise measurements. - Adjusting for serving sizes: If you want to make more smoothies, simply multiply the ingredients. For example, double the recipe for four servings. Start by peeling the frozen bananas. Break them into smaller chunks. This helps the blender mix them well. Gather your tools, like a blender and measuring cups. Make sure you have everything ready before you start. Put the banana chunks in the blender first. Then, add the natural peanut butter and almond milk. If you like it sweeter, add honey or maple syrup next. Pour in the vanilla extract, ground cinnamon, and chia seeds if you want extra nutrition. Blend all the ingredients on high speed until smooth. If it’s too thick, add a splash of almond milk to thin it out. Blend again until creamy. Pour your smoothie into tall glasses. For the best taste, serve it cold. You can garnish with a sprinkle of ground cinnamon or a drizzle of peanut butter on top. For a fun touch, add sliced bananas or crushed nuts as decoration. Enjoy your Peanut Butter Banana Smoothie! For a detailed list of ingredients and precise steps, check the Full Recipe. To get your smoothie just right, you may want to adjust the thickness. If it’s too thick, add a splash of milk. Almond milk works great, but feel free to use what you have. You can also toss in some ice cubes for a thicker drink. Blend until smooth and creamy. A powerful blender makes this easier. If you have a regular blender, blend for a bit longer to make it silky. Not everyone likes the same level of sweetness. I suggest starting with one tablespoon of honey or maple syrup. Taste it! If you want it sweeter, add more. You can also use natural sweeteners like agave syrup or dates if you prefer. Each adds a unique flavor to your smoothie. Want more nutrition? Chia seeds are a great choice. Just one tablespoon adds fiber and omega-3s. You can also try adding protein powder for a boost. This can help keep you full longer. Try different nut butters if you want to mix it up. They all bring their own flavor and health benefits. For the full recipe and more tips, check out the [Full Recipe]. {{image_4}} You can easily make this smoothie vegan. First, replace honey with agave syrup. Agave syrup adds sweetness without animal products. Next, choose any plant-based milk. Almond, oat, or soy milk all work well. Each option brings its own flavor and nutrients. If you follow a keto diet, there are great tweaks. Use sugar-free sweeteners like stevia or erythritol. These keep the sweetness without extra carbs. Opt for high-fat dairy options too. Full-fat coconut milk or heavy cream can replace almond milk. This adds creaminess and keeps carbs low. Want to mix up the taste? Try adding cocoa powder for a chocolate twist. It pairs well with bananas and peanut butter. You can also swap peanut butter for almond or cashew butter. Each nut butter offers a unique flavor and texture. It’s fun to experiment with different options! For the full recipe, you can check the above section. Enjoy trying out these variations! To keep your peanut butter banana smoothie fresh, store it in the fridge. Use an airtight container to prevent air from spoiling it. If you have more than one serving, you can pour it into smaller jars. This makes it easy to grab and go. If you want to save it for later, freezing is a great option. Pour the smoothie into ice cube trays. Once frozen, you can blend the cubes later for a quick treat. In the fridge, your smoothie will last about one to two days. After that, its taste and texture may change. Look for signs of spoilage. If the smoothie smells sour or changes color, it’s best to toss it out. Always trust your senses to know if it’s still good. Want to save time in the morning? You can prep your smoothie in advance. Measure out your ingredients the night before and store them in the fridge. You can also blend a big batch and pour it into jars. Just shake or stir before drinking. This way, you’ll always have a nutritious option ready. Portioning your smoothie makes it easy to grab on busy days. For easy access, use clear jars to see how much you have left! For the full recipe, check out the Creamy Dreamy Peanut Butter Banana Smoothie 🥜. To make your smoothie thicker, adjust the ratios of your ingredients. Use less almond milk. You can also add ice cubes. For a creamier texture, use more frozen bananas. Adding chia seeds can help thicken it, too. They absorb liquid and create a nice, smooth blend. So, feel free to experiment until you find your favorite thickness! Yes! You can use many milk types. Almond milk is great, but soy milk works well too. Coconut milk adds a rich flavor. If you prefer dairy, whole milk or yogurt can be nice choices. Each option changes the taste and texture a bit. So, try different kinds to see what you like best! This smoothie is quite nutritious! It has about 300 calories per serving. Bananas provide potassium and fiber, while peanut butter adds protein and healthy fats. Almond milk keeps it light and dairy-free. Chia seeds boost nutrition even more. Overall, this drink offers a good balance of carbs, protein, and fats. You can make this smoothie without a blender! Start by mashing the bananas with a fork. Then, mix in the peanut butter and other ingredients using a whisk. If you have a hand mixer, that works too. This method may take longer, but you can still enjoy a tasty drink! To boost protein, consider adding protein powder. Whey or plant-based powders work well. Greek yogurt is another great choice. It adds creaminess and extra protein. You can also use silken tofu for a smooth texture. These options will help you reach your protein goals while keeping the smoothie delicious! This article covered how to make a delicious peanut butter banana smoothie. You learned about the key ingredients, their health benefits, and how to prepare them. I shared tips for achieving the perfect texture and ways to customize your smoothie. You also found guidance on storage options and meal prep. In conclusion, enjoy your smoothie as a quick snack or breakfast. It's tasty and full of good nutrients. With a few tweaks, you can make it fit your diet needs. Grab your blender and start blending for a tasty treat!

Peanut Butter Banana Smoothie Healthy and Tasty Drink

Are you ready to blend up a deliciously healthy treat? A Peanut Butter Banana Smoothie is a perfect mix of

- Fresh Strawberries: You need about 1 pound of fresh strawberries, which is around 20-25 berries. When selecting strawberries, look for shiny, red ones. Avoid any with bruises or soft spots. Choose berries that are firm and have bright green leaves. - Dark Chocolate: For the best flavor, use dark chocolate with at least 70% cocoa. This richness balances well with the tartness of the strawberries. You can also try chocolate with higher cocoa percentages for a more intense taste. - Coconut Oil: Adding 2 tablespoons of coconut oil is optional, but it helps the chocolate become smoother. This makes it easier to dip the strawberries. Coconut oil also gives a lovely sheen to the chocolate. Plus, it can help the chocolate set quickly. Make sure to gather all these ingredients before you start. This will help keep your process smooth and fun! You can find the full recipe for detailed steps and tips. Start by rinsing the strawberries gently under cool water. This removes dirt and helps keep them fresh. After rinsing, use a paper towel to pat them dry carefully. It's really important that the strawberries are dry. If they have moisture, the chocolate won’t stick well. To melt the chocolate, I recommend using a microwave. Put the dark chocolate and coconut oil in a microwave-safe bowl. Heat it in the microwave for 30 seconds. After each interval, stir the chocolate. Keep doing this until it melts and becomes smooth. This usually takes about 1 to 2 minutes. Watch closely to avoid burning it. You can also use a double boiler if you prefer. Just fill a pot with water and place another bowl on top. Heat it slowly until the chocolate melts. Now, let’s dip the strawberries. Hold each strawberry by its green stem. Immerse it into the melted chocolate. Allow the extra chocolate to drip off. Gently swirl the strawberry as you lift it out for a nice finish. Place the dipped strawberries on a parchment-lined baking sheet. You can add a sprinkle of sea salt or crushed dry rose petals on top for extra flavor. This will make them look special too. Let the chocolate set by chilling the strawberries in the fridge for about 30 minutes. After that, they’ll be ready to enjoy! *Preventing chocolate from overheating:* Keep an eye on your chocolate while melting. If it gets too hot, it may seize up. Use a microwave on low power. Heat for short bursts, about 30 seconds at a time. Stir well after each burst. This way, your chocolate melts smoothly without burning. *Ensuring even coverage on strawberries:* Make sure your strawberries are completely dry. Any water will cause the chocolate to slide off. When dipping, swirl the strawberry gently in the chocolate. This helps coat it evenly. Let any extra chocolate drip off before placing it on the baking sheet. *Adding flavors like vanilla or espresso powder:* You can make your chocolate more exciting. Add a drop of vanilla extract or a sprinkle of espresso powder to the melted chocolate. Both options give a rich taste. You can also try adding a pinch of sea salt for a nice contrast. *Using different types of chocolate (milk, white):* Feel free to mix it up with chocolate types. Milk chocolate is sweeter and creamier. White chocolate is rich and buttery. Each type offers a unique flavor. Experiment to see which you like best! *Best practices for maintaining texture:* When you chill the strawberries, do not leave them too long. If they sit too long in the fridge, the chocolate can become too hard. Aim for about 30 minutes. This will allow the chocolate to set perfectly without losing its shine. *Arranging for presentation:* For a beautiful display, use a nice platter. You can place the strawberries in cupcake liners for added charm. Arrange them in a circular pattern or any fun shape. A bed of mint leaves can add a fresh touch. Enjoy your stunning and tasty creation! {{image_4}} For a sweet twist, try white chocolate dipped strawberries. The steps are similar. Here’s what you need: - 1 pound fresh strawberries - 8 ounces white chocolate - Sprinkles or crushed nuts (optional) 1. Melt the White Chocolate: Use the same method as dark chocolate. Heat white chocolate in a microwave-safe bowl in 30-second bursts. Stir often until it’s smooth. 2. Dip and Decorate: Dip each strawberry into the melted white chocolate. Add sprinkles or crushed nuts while the chocolate is wet for added flair. White chocolate adds a creamy flavor. You can also mix in some vanilla to boost the sweetness. Get creative with toppings! You can use: - Chopped nuts (e.g., almonds or pistachios) - Crushed cookies (like Oreos or graham crackers) - Drizzles of dark or white chocolate For seasonal flavors, think about adding peppermint during winter or zest from citrus fruits in spring. These ideas make each batch unique and fun. Enjoy the process! Each variation brings a new twist to your delightful chocolate dipped strawberries. Check out the Full Recipe for more tips and ideas. To keep your chocolate dipped strawberries fresh, refrigeration is key. Place them in a single layer on a plate or container. Cover them gently with plastic wrap or a lid. This helps prevent air exposure. The strawberries will stay fresh for about 1 to 2 days. If you need them to last longer, avoid washing them until you are ready to eat. To maximize flavor and texture, always store them in the fridge. The cool air helps the chocolate stay firm. Just remember, they taste best when fresh! If you want to save chocolate dipped strawberries for later, freezing is a great option. First, let them cool and set completely. Next, place them on a baking sheet lined with parchment paper. Make sure they are not touching. Freeze them for about 1 to 2 hours until they are solid. Once frozen, transfer them to an airtight container or freezer bag. Be sure to label the bag with the date. They will taste good for about 2 to 3 months. When you are ready to eat, move them to the fridge to defrost for a few hours. This way, they will keep their shape and flavor. Enjoy your delicious treat anytime! To keep chocolate from cracking, ensure it is melted properly. Use a microwave for short bursts, stirring often. You can add coconut oil to the chocolate. This helps make it smooth and less likely to crack. - Make sure your strawberries are dry. Any water can cause the chocolate to crack. - Work in a cool area. Heat can affect the chocolate's texture. - Once dipped, let them chill in the fridge. This helps the chocolate set evenly. Yes, you can use milk chocolate instead of dark. Milk chocolate is sweeter and creamier. This can change the taste of your strawberries. Some people love the sweet mix of milk chocolate with fresh strawberries. - If you love rich flavors, dark chocolate is the way to go. - For a sweeter bite, milk chocolate is a great choice. - You can also mix dark and milk chocolate for a fun blend. You can find pre-made chocolate dipped strawberries at local bakeries or grocery stores. Many shops offer fresh options, especially around holidays. - Check online for delivery from local bakeries. - Some gourmet stores have them ready to go. - You can also order from popular online shops. They often deliver them fresh to your door. For a full recipe, check out the delicious steps to make your own chocolate dipped strawberries at home! Making chocolate dipped strawberries is simple and fun. We covered key ingredients like fresh strawberries, dark chocolate, and coconut oil. I shared step-by-step instructions, from preparing strawberries to melting chocolate and dipping techniques. Tips helped avoid common mistakes and enhance flavor. We explored variations, including white chocolate and toppings. Storage advice ensures your treats stay delicious longer. With these insights, you can create tasty treats that impress and delight. Enjoy your sweet creations!

Chocolate Dipped Strawberries Delightful Dessert Recipe

Chocolate-dipped strawberries are a sweet treat that’s both easy and impressive. If you’re looking to wow your friends or indulge

To make these tasty bites, you need a few simple ingredients. Here’s what you will need: - 1 large head of cauliflower, cut into bite-sized florets - 1 cup all-purpose flour (or gluten-free flour for a gluten-free option) - 1 cup cold water - 1 teaspoon garlic powder - 1 teaspoon onion powder - 1 teaspoon smoked paprika - 1/2 teaspoon salt - 1/2 teaspoon freshly cracked black pepper - 1 cup Buffalo sauce (store-bought or homemade) - 2 tablespoons melted butter (optional, adds richness) - Fresh parsley, finely chopped (for garnish) These ingredients come together to create a crunchy and spicy snack that everyone will love. If you want to make this dish gluten-free, swap the all-purpose flour for gluten-free flour. This change keeps the texture light and crispy. You can find gluten-free flour blends at most grocery stores. Look for one that works well for baking. This ensures a great taste without gluten. Garnish your Buffalo Cauliflower Bites with fresh parsley for a pop of color. This touch makes them look fancy. You can also serve them with dipping sauces. Ranch or blue cheese dressing works best. These creamy dips balance the heat from the Buffalo sauce. You can also try other sauces like yogurt or hummus for a twist. Enjoy experimenting with different flavors! First, you need a large head of cauliflower. Cut it into bite-sized florets. This size helps them cook evenly. Rinse the florets in cold water to remove any dirt. Pat them dry with a clean towel. Dry florets hold the batter better, so this step is key. In a large bowl, mix 1 cup of all-purpose flour with 1 cup of cold water. Add 1 teaspoon of garlic powder, 1 teaspoon of onion powder, 1 teaspoon of smoked paprika, 1/2 teaspoon of salt, and 1/2 teaspoon of black pepper. Whisk until the batter is smooth and thick. It should coat the florets well. If you want gluten-free bites, swap regular flour for gluten-free flour. Preheat your oven to 450°F (230°C). Line a baking sheet with parchment paper. Dip each cauliflower floret into the batter. Make sure each piece is well coated. Let any extra batter drip off. Space the florets out on the baking sheet. This helps them get crispy. Bake them for 20 to 25 minutes. They should turn golden brown and crispy. While the florets bake, mix 1 cup of Buffalo sauce with 2 tablespoons of melted butter in a bowl. Stir until smooth. When the cauliflower is done, carefully move them into the bowl with the sauce. Toss them gently to coat each piece. Put the sauced cauliflower back onto the baking sheet. Bake for another 10 minutes. This step crisps the sauce and adds flavor. Afterward, let them cool for about 5 minutes. Enjoy your Buffalo cauliflower bites with ranch or blue cheese dressing for dipping. For the full recipe, check above. To get your Buffalo Cauliflower Bites extra crispy, follow these steps: - Use cold water in your batter. This helps create a light and airy coating. - Spread the florets apart on the baking sheet. Overcrowding can result in steaming, not crisping. - Bake on a preheated baking sheet. This jumpstarts the crisping process. - Flip the florets halfway through baking. This ensures even crispiness on all sides. If you prefer different cooking methods, try these options: - Air Frying: Preheat your air fryer to 400°F (200°C). Basket-style fryers work best. Cook in batches for about 15-20 minutes. Shake the basket halfway through for even cooking. - Frying: Heat oil in a deep pan to 350°F (175°C). Carefully add the battered florets. Fry in small batches for about 3-4 minutes until golden. Drain on paper towels to remove excess oil. Coating your cauliflower well is key to great flavor and texture: - Make sure the batter is thick enough. It should stick well to the florets. - Dip each floret completely in the batter. Ensure it’s fully covered for best results. - Tap off excess batter. Too much will lead to soggy bites. - Let the coated florets rest for a few minutes before baking. This helps the batter adhere better. For the full recipe, check out the complete guide. {{image_4}} You can make the batter for Buffalo Cauliflower Bites even tastier. Here are some great ideas: - Add spices: Try cumin, chili powder, or cayenne for extra heat. - Herbs: Mix in dried oregano or thyme for a fresh taste. - Cheesy twist: Add nutritional yeast for a cheesy flavor without dairy. These options let you customize your bites to your liking! Buffalo sauce is classic, but don't stop there! - BBQ sauce: Use your favorite BBQ sauce for a sweet and tangy flavor. - Asian-inspired: Try soy sauce, sesame oil, and sriracha for a unique twist. Each sauce brings its own flair, making your bites exciting. Buffalo Cauliflower Bites can fit any diet. - Vegan option: Use plant-based butter or skip the butter altogether. - Non-vegan twist: Add cheese to the batter for a richer taste. These adaptations ensure that everyone at your table can enjoy this snack. Don't forget to check the Full Recipe for all the details! To store leftover Buffalo Cauliflower Bites, let them cool completely. Place them in an airtight container. This keeps the bites fresh for up to three days in the fridge. If you want them to last longer, consider freezing them. For the best texture when reheating, use an oven or an air fryer. Preheat your oven to 350°F (175°C). Spread the bites on a baking sheet. Heat for about 10-15 minutes until they are crispy again. In an air fryer, set it to 350°F (175°C) and cook for about 5-7 minutes. This way, they stay crunchy and delicious. If you want to freeze your Buffalo Cauliflower Bites, the best time to do it is right after cooking. Let them cool, then place them in a single layer on a baking sheet. Freeze until solid, then transfer to a freezer-safe bag. They will last for up to three months in the freezer. When you are ready to eat, bake them from frozen for about 20-25 minutes at 450°F (230°C) for a tasty snack. Yes, Buffalo Cauliflower Bites are vegan. You can use flour and water for the batter. The Buffalo sauce is also usually vegan. Just check the label to be sure. To make Buffalo Cauliflower Bites gluten-free, swap out the all-purpose flour for gluten-free flour. This simple change keeps the recipe tasty and safe for gluten-free diets. Buffalo Cauliflower Bites pair well with many sides. Here are some ideas: - Fresh veggie sticks (carrots, celery, cucumber) - Creamy dips like ranch or blue cheese dressing - A light salad with a tangy vinaigrette - Crispy potato wedges or sweet potato fries You can adjust the heat level of your Buffalo Cauliflower Bites. For a spicy kick, use extra Buffalo sauce or a hotter variety. If you prefer milder bites, reduce the amount of sauce or choose a milder sauce. You can also add honey or maple syrup for sweetness, balancing the heat. Buffalo cauliflower bites are tasty and easy to make. We covered the key ingredients, including tasty sauces and gluten-free swaps. You learned simple steps, from prepping the cauliflower to baking it for crunch. I shared tips on achieving crispiness and cooking methods like air frying. You now have ideas for flavor variations and how to store leftovers. Remember, these bites can fit any meal. Enjoy experimenting with flavors and making this dish your own.

Buffalo Cauliflower Bites Flavorful and Easy Snack

Looking for a fun, tasty snack? You’ll love these Buffalo Cauliflower Bites! They pack a punch of flavor and are

- 1 large head of cauliflower - 4 tablespoons extra virgin olive oil - 4 cloves garlic - 1 teaspoon sea salt - ½ teaspoon black pepper - 1 teaspoon smoked paprika - ¾ cup Parmesan cheese - 2 tablespoons fresh parsley - Lemon wedges for serving The quality of Parmesan matters a lot. Freshly grated cheese gives the best flavor. If you have pre-grated cheese, it will still work, but the taste won’t be as rich. You can swap the olive oil for other oils like avocado or canola. These oils also add a nice touch. Using fresh herbs is always better than dried ones. Fresh parsley brightens the dish, while dried herbs may not have the same punch. If you only have dried parsley, use half the amount. I recommend sticking to these key ingredients for the best Garlic Parmesan Roasted Cauliflower experience. For the complete recipe, check out the [Full Recipe]. 1. Preheating the oven: Start by preheating your oven to 425°F (220°C). A hot oven helps the cauliflower roast well. 2. Preparing the cauliflower florets: Take one large head of cauliflower. Cut it into bite-sized florets. Make sure the pieces are even for uniform cooking. 1. Tossing and seasoning the cauliflower: In a large bowl, add the cauliflower florets. Pour in 4 tablespoons of extra virgin olive oil. Then, add 4 minced garlic cloves, 1 teaspoon of sea salt, ½ teaspoon of black pepper, and 1 teaspoon of smoked paprika. Use your hands or a spatula to mix everything well. Each floret should be coated nicely. 2. Spreading on the baking sheet: Line a large baking sheet with parchment paper. Spread the seasoned cauliflower in a single layer. Leave space between each floret to help them roast evenly. 3. Roasting time and technique: Place the baking sheet in the preheated oven. Roast the cauliflower for about 25 minutes. Stir the florets halfway through to ensure even browning. They should turn golden brown and become tender. 1. Adding Parmesan cheese: After 25 minutes, take the baking sheet out of the oven. Sprinkle ¾ cup of freshly grated Parmesan cheese over the hot florets. 2. Garnishing with parsley: Put the baking sheet back in the oven for another 5 to 7 minutes. This helps the cheese melt and become bubbly. Once done, take it out and add 2 tablespoons of finely chopped fresh parsley on top. 3. Serving suggestions: Serve your Garlic Parmesan Roasted Cauliflower right away. Include lemon wedges on the side. A squeeze of lemon juice adds brightness to the dish. You can find the Full Recipe to get all the details. To get the best texture, preheat your oven to 425°F (220°C). A hot oven helps the cauliflower crisp up nicely. Spread the florets in a single layer on your baking sheet. If they are too close together, they will steam instead of roast. This spacing allows hot air to circulate, making them golden and tender. To boost the flavor, try adding different spices. You can mix in some chili flakes for heat or a pinch of oregano for a fresh taste. Fresh lemon juice is a game changer too. Squeezing lemon over the roasted cauliflower brightens every bite and adds a zesty finish. Garlic Parmesan roasted cauliflower pairs well with many main dishes. It makes a great side for chicken, steak, or fish. If you want more sides, try serving it with a salad or some crusty bread. This adds variety and makes your meal feel complete. For a special touch, place lemon wedges on the plate for squeezing. For the complete recipe, check the Full Recipe section. {{image_4}} You can easily adapt this Garlic Parmesan Roasted Cauliflower to fit your needs. For those needing gluten-free options, great news! This recipe is naturally gluten-free. You can enjoy it without worry. If you follow a vegan diet, you can still savor this dish. Instead of Parmesan cheese, use a plant-based cheese that melts well. Nutritional yeast also works for a cheesy flavor without dairy. Want to spice things up? Add chili flakes to the seasoning mix. This gives the cauliflower a nice kick. You can also mix in smoked paprika for a deeper flavor profile. For a fresh touch, try an herb-infused version. Use fresh herbs like thyme or rosemary. Chop them finely and toss them with the cauliflower for a fragrant twist. This dish works with many seasonal vegetables. Try adding Brussels sprouts or carrots to the mix. The roasting brings out their sweetness, pairing well with the cauliflower. For holidays, get creative! You can top your roasted cauliflower with pomegranate seeds for a festive look. Or, sprinkle some crushed nuts for added crunch during gatherings. To keep your Garlic Parmesan Roasted Cauliflower fresh, follow these simple steps: - How to store leftovers: Let the cauliflower cool before storing. Place it in an airtight container. This helps to lock in flavor and moisture. - Best container types for storage: Use glass or BPA-free plastic containers. They are great for keeping food fresh longer. When it comes to reheating, you have two main options. - Reheating in the oven vs. microwave: The oven is best for keeping the crunch. Preheat it to 350°F (175°C) and spread the cauliflower on a baking sheet. Heat for about 10 minutes. The microwave is faster but can make it soggy. If you choose this method, heat in short bursts to avoid overcooking. - Tips for maintaining texture: Cover the cauliflower loosely with a paper towel in the microwave. This helps to absorb excess moisture and keeps it crispy. You can freeze Garlic Parmesan Roasted Cauliflower, but it requires some care. - Can you freeze Garlic Parmesan Roasted Cauliflower?: Yes, you can freeze it. Just make sure it’s completely cooled first. - Best practices for freezing and thawing: Place it in freezer bags or airtight containers. Squeeze out as much air as possible. When ready to eat, thaw in the fridge overnight before reheating. This keeps the flavor and texture better. Cutting cauliflower is simple. Start with a large head of cauliflower. Remove the leaves and stem. Then, slice it into quarters. From there, cut each quarter into bite-sized florets. Aim for uniform pieces. This helps them cook evenly. If some pieces are too big, cut them down further. Smaller pieces roast faster and are easier to eat. Yes, you can prep this dish in advance. Cut the cauliflower and toss it with oil and spices. Store it in the fridge in a sealed container. You can do this a day before. When ready, just spread it on a baking sheet and roast. This saves time and makes cooking easier. This dish pairs well with many main courses. You can serve it alongside grilled chicken or fish. It also goes great with steak or roasted pork. For a vegetarian option, try it with quinoa or a hearty salad. The flavors complement a variety of meals. To add heat, sprinkle chili flakes on the cauliflower before roasting. You can also mix in a bit of hot sauce with the oil. Another option is to use spicy paprika instead of smoked paprika. Adjust the heat to your taste. This gives the dish a nice kick. Yes, this dish is healthy and packed with nutrients. Cauliflower is low in calories but high in fiber. It provides vitamins C and K. Using olive oil adds healthy fats. Parmesan cheese gives protein and calcium, too. Overall, it's a tasty, nutritious side. You can enjoy it guilt-free! We explored how to make Garlic Parmesan Roasted Cauliflower, covering all key steps. You learned about fresh ingredients, cooking techniques, and flavorful variations. Remember, the right Parmesan and olive oil make a big difference. Whether you want to enjoy this dish simply or add a spicy kick, the options are endless. Keep experimenting with sides and seasonings to match your taste. Enjoy this easy and healthy dish, perfect for any meal.

Garlic Parmesan Roasted Cauliflower Simple Side Dish

Looking for a side dish that steals the show? Garlic Parmesan Roasted Cauliflower is your answer! This simple recipe is

To create a tasty Spicy Tuna Poke Bowl, gather the following: - 1 cup sushi rice - 1 ½ cups water - 1 lb sushi-grade tuna, diced into bite-sized cubes - 2 tablespoons soy sauce - 1 tablespoon sesame oil - 1 tablespoon sriracha (adjust to taste for desired spiciness) - 1 ripe avocado, sliced - ½ cucumber, thinly sliced into rounds - 1 radish, thinly sliced - 2 green onions, finely chopped - 1 tablespoon sesame seeds (white or black, for contrast) - Seaweed salad (for garnish) - Pickled ginger (for garnish) - Microgreens (for garnish, optional) If you can't find sushi-grade tuna, use sashimi-grade salmon or cooked shrimp. For a vegetarian option, try diced tofu or marinated tempeh. Want to add more flavor? Try garnishing with spicy mayo or a sprinkle of chili flakes. You can also include fresh herbs like cilantro or mint for extra zest. To start, rinse the sushi rice. Use a fine-mesh strainer and cold water. Rinse until the water runs clear. This step removes excess starch. Removing starch helps the rice stay fluffy, not sticky. In a medium saucepan, add the washed rice and 1 ½ cups of water. Place the saucepan over medium-high heat. Bring the water to a boil. Once it starts boiling, reduce the heat to low. Cover the saucepan and let it simmer for 15 minutes. After 15 minutes, turn off the heat. Keep the lid on for another 10 minutes. This steaming step makes the rice perfect. To achieve the best rice texture, remember these tips: - Use the right ratio of water to rice. - Do not lift the lid while it steams. - Fluff the rice with a fork after cooking. Now, let’s mix the marinade for the tuna. In a medium bowl, combine diced sushi-grade tuna, soy sauce, sesame oil, and sriracha. Use a gentle folding motion to coat the tuna. If you love spice, add more sriracha. If not, start with less. Dicing sushi-grade tuna properly is key. First, use a sharp knife. Cut the tuna into bite-sized cubes. Aim for uniform pieces for better marination. Time to assemble your poke bowl! Start with a generous scoop of sushi rice as the base. Place it in a large, deep bowl. Next, spoon the marinated spicy tuna over the rice. Arrange avocado slices in a fan shape on top. Then, add thinly sliced cucumber and radish around the tuna. This creates a vibrant look. For a balanced flavor, here are some tips: - Add equal amounts of each topping. - Layer ingredients with a variety of colors. - Use fresh ingredients for the best taste. Finally, sprinkle sesame seeds on top. This adds a nice crunch. Garnish with seaweed salad and pickled ginger. For an elegant touch, add microgreens if you like. For the full recipe, check the details above. Enjoy your flavorful and fresh spicy tuna poke bowl! To avoid mushy rice, rinse it well. Wash sushi rice until the water is clear. This removes excess starch. When cooking, use the right water ratio. For one cup of sushi rice, use one and a half cups of water. Let it simmer and steam with the lid on. This makes the rice fluffy. For the tuna, do not marinate it too long. Just coat it in the sauce before serving. This keeps the fish fresh and firm. Always use sushi-grade tuna for the best taste and safety. Check for bright color and a fresh smell. Common mistakes include overcooking the rice or using stale ingredients. Fresh ingredients are key for flavor. Use ripe avocados and crisp cucumbers. Check your soy sauce and sesame oil for freshness. To cater to dietary needs, swap tuna for tofu or cooked shrimp. This makes a great vegan or gluten-free option. You can also use brown rice for added fiber. For extra flavor, try different toppings. Add sliced radishes, edamame, or pickled vegetables. You can mix in some citrus zest for brightness. Sriracha is great, but you can also use chili flakes. Experiment with herbs like cilantro or mint for a fresh twist. Each mix-in adds a new layer of taste. Enjoy creating your perfect poke bowl! For the complete recipe, check out the Full Recipe. {{image_4}} You can switch up the protein in your poke bowl. Try salmon, tofu, or shrimp. Each choice brings its own taste and texture. Salmon offers a rich, buttery flavor. Tofu gives a nice, firm bite, perfect for plant-based diets. Cooked shrimp adds a sweet, juicy element. Choosing different proteins has health perks, too. Salmon is packed with omega-3 fatty acids. Tofu is a great source of plant protein. Shrimp is low in calories but high in protein. Each option keeps the dish nutritious and satisfying. Different seafood options create unique flavor profiles. Salmon pairs well with a citrusy sauce. Tofu absorbs flavors nicely, making it versatile. Shrimp has a mild taste that works with many spices. These variations keep your poke bowl exciting and fresh! For your poke bowl base, you can use brown rice or quinoa. Brown rice adds a nutty flavor and extra fiber. Quinoa is gluten-free and high in protein. Both grains provide a solid foundation for your dish. If you want a lighter option, consider a salad bowl. Use greens like spinach or arugula as the base. This adds freshness and crunch to your meal. Get creative with how you serve your poke bowl. You can layer ingredients in jars for a fun, portable meal. Or, try serving it in a lettuce wrap for a unique twist. Each serving choice adds a personal touch to your dish. For the Full Recipe, check out the detailed instructions above! To keep your spicy tuna poke bowl fresh, store it in the fridge. Use an airtight container to prevent moisture loss. You can separate the rice and tuna if you prefer. This helps maintain the rice's texture and the tuna's flavor. Enjoy your leftovers within two days for the best taste. When reheating sushi rice, do it gently. Use a microwave on low power or steam it briefly. Avoid high heat, which can make the rice tough. Tuna should not be reheated, as it can lose its fresh taste and texture. Instead, enjoy the tuna cold. To serve leftovers, layer fresh toppings like avocado or cucumber. This adds a nice crunch and keeps the dish lively. If you want to serve it warm, only reheat the rice. The Full Recipe will guide you through making a delicious poke bowl from scratch. What type of tuna is best for poke? The best tuna for poke is sushi-grade tuna. This type is fresh and safe to eat raw. Look for yellowfin or ahi tuna. It has great flavor and texture. You can ask your fishmonger for sushi-grade options. Is it safe to eat raw fish at home? Yes, it is safe if you use sushi-grade fish. This fish is handled and stored properly. Always check for freshness and quality. Keep it cold until you are ready to use it. If you are unsure, you can cook the fish instead. Can I make the poke bowl ahead of time? You can prepare some elements in advance. Cook the rice and store it in the fridge. Marinate the tuna right before serving. Keep veggies fresh until serving time. This way, your poke bowl stays fresh and tasty. What to do if I can’t find sushi-grade tuna? If you can't find sushi-grade tuna, use cooked seafood or tofu. Cooked shrimp or crab works well. You can also use canned tuna in water for a quick option. Ensure it is high quality for the best flavor. Can I omit the sriracha if I don’t like spicy food? Yes, you can skip the sriracha. Use a mild sauce instead, like soy sauce or teriyaki. You can also add a touch of sesame oil for flavor without heat. Your poke bowl will still be delicious. What vegetables can I add or substitute? You can add many vegetables to your poke bowl. Try carrots, bell peppers, or radishes for crunch. Avocado adds creaminess. You can also mix in edamame or seaweed for extra nutrition. Choose what you enjoy most! In this blog post, we explored how to make a Spicy Tuna Poke Bowl. We covered the key ingredients, step-by-step instructions, and useful tips for success. You can adjust spice levels and swap ingredients to match your taste. Remember to store leftovers properly and consider other protein options for variety. With these steps, you can enjoy a tasty and healthy meal at home. Dive into the world of poke bowls and make this dish your own!

Spicy Tuna Poke Bowl Flavorful and Fresh Delight

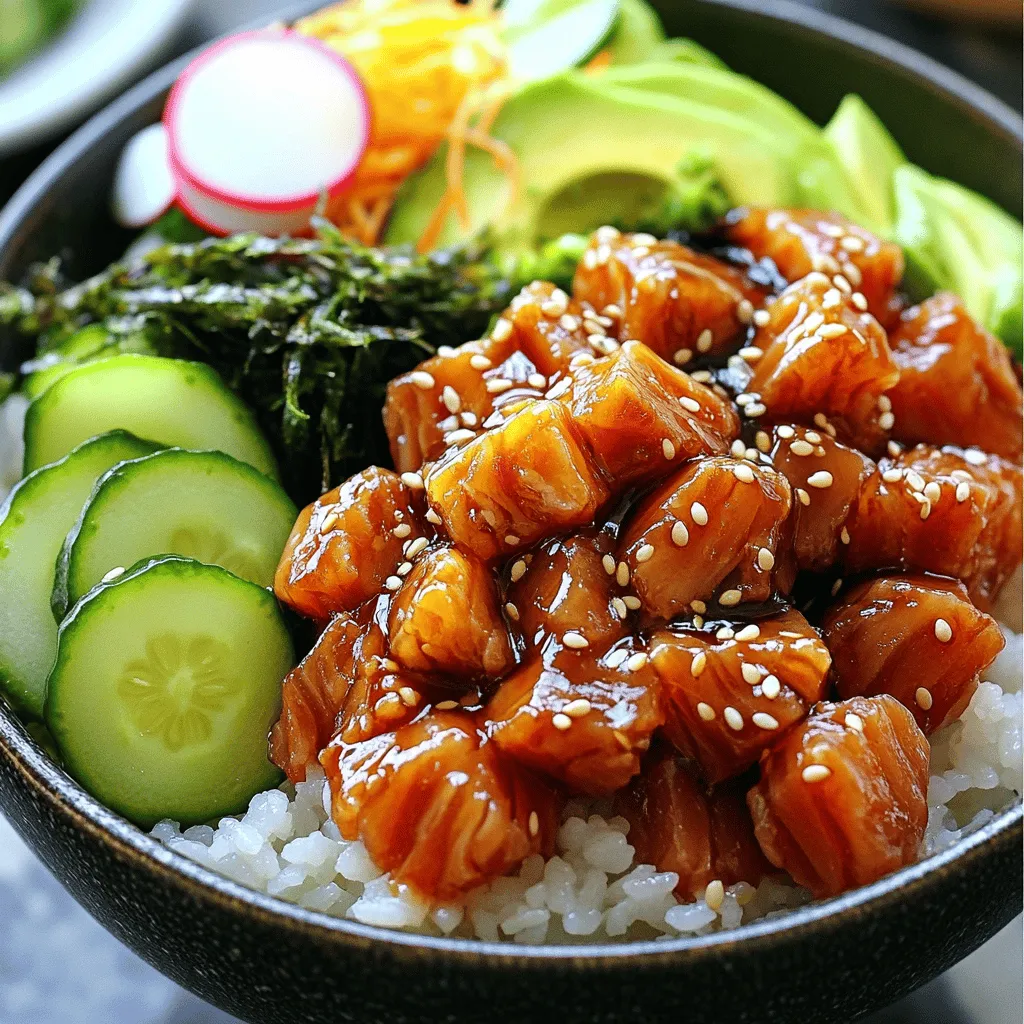
If you’re craving a vibrant dish that bursts with flavor, then a Spicy Tuna Poke Bowl is your answer! This

To make creamy avocado pasta, you need simple, fresh ingredients. Here’s what you will need: - 2 ripe avocados - 3 cloves garlic, minced - 1 tablespoon fresh lemon juice - 1/4 cup fresh basil leaves (plus extra for garnish) - 3 tablespoons extra virgin olive oil - 1/2 teaspoon red pepper flakes (adjust to taste) - Salt and freshly ground black pepper to taste - 12 oz spaghetti or pasta of your choice - 1/4 cup grated Parmesan cheese (optional) - Cherry tomatoes, halved (for serving) These ingredients come together to create a light yet satisfying dish. The ripe avocados provide creaminess, while the garlic adds a punch of flavor. Fresh lemon juice brightens the dish, and basil gives it a nice aroma. For a touch of heat, the red pepper flakes work wonders. Feel free to adjust this to your taste! The optional Parmesan cheese can add a savory note, but it's great without it too. The cherry tomatoes add color and a burst of sweetness when you bite into them. This dish is quick to prepare and perfect for a weeknight dinner. You can find the full recipe and instructions to create this delightful meal. - Bring salted water to a rolling boil. - Add your pasta and cook until al dente, about 8 to 10 minutes. - Reserve 1 cup of the starchy water before draining the pasta. - In a blender, combine ripe avocados, minced garlic, lemon juice, basil, olive oil, and red pepper flakes. - Blend until smooth and creamy. - If the sauce is thick, add the reserved pasta water slowly until it reaches your desired creaminess. - In a large mixing bowl, add the drained pasta. - Pour the creamy avocado sauce over the pasta. - Toss gently until the pasta is well-coated. - If needed, add more pasta water to adjust the sauce's consistency. - Plate the creamy avocado pasta into individual bowls. - Top with halved cherry tomatoes and grated Parmesan, if using. - Serve immediately to enjoy the best flavor and texture. - Look for ripe avocados that yield slightly to gentle pressure. - Choose avocados with dark green skin, as they are often ripe. - Cut the avocado carefully with a knife. - Twist to remove the pit, using a spoon to scoop it out. - Add salt and pepper to boost the taste of your sauce. - Try garlic powder for extra garlic flavor. - Fresh herbs like parsley or cilantro can add a fresh twist. - For a vegan option, use nutritional yeast instead of cheese. - Spaghetti works well, but you can use any pasta type. - Fusilli or penne can hold the sauce nicely. - For gluten-free options, choose pasta made from rice or corn. - Zucchini noodles are a great low-carb alternative. These tips will help you create a delicious creamy avocado pasta. You can find the full recipe for more details and instructions. {{image_4}} You can make this dish vegan easily. Just swap the Parmesan cheese for nutritional yeast. Nutritional yeast gives a cheesy flavor without dairy. You can also use other dairy-free options, like cashew cream or coconut cream. These keep the dish rich and creamy. Want to bulk up your pasta? Add grilled chicken or shrimp for protein. They pair well with the creamy sauce. You can also toss in veggies. Cherry tomatoes, spinach, or peas add color and nutrients. These options make your meal more filling and fun. If you like heat, try a spicy version! Just add more red pepper flakes for a kick. You can also mix in jalapeños or drizzle some chili oil on top. This adds a nice zing and makes the dish exciting. To keep your creamy avocado pasta fresh, use airtight containers. Glass or plastic containers work well. Make sure the lid seals tight. Store your leftovers in the fridge. They will stay good for about three days. To maintain freshness, cover the pasta with plastic wrap. This helps keep air out. If you notice browning on the avocado, you can sprinkle a bit of lemon juice on top. When reheating, avoid the microwave if you can. The microwave can make the sauce grainy. Instead, use a pot on low heat. Add a splash of pasta water to help maintain creaminess. Stir gently until warm. If you need to use the microwave, heat in short bursts. Check every 30 seconds to avoid overheating. Store any leftovers in the fridge for up to three days. Enjoy your creamy avocado pasta fresh for the best taste! Yes, you can prepare steps ahead of time. You can make the avocado sauce a few hours before serving. Just store it in an airtight container. To keep it fresh, press plastic wrap directly onto the surface of the sauce. This helps prevent browning. You can also cook the pasta in advance. Just toss it with a bit of olive oil to keep it from sticking. When you are ready to serve, combine the pasta and sauce. If you want low-carb options, try zucchini noodles or spaghetti squash. Both are healthy and tasty. Zucchini noodles can be made with a spiralizer. Just slice zucchini into thin strands. For spaghetti squash, roast it in the oven until tender, then scoop out the flesh. These options are light and still pair well with the creamy avocado sauce. The avocado sauce lasts about 1 to 2 days in the fridge. To keep it fresh, store it in a sealed container. If you notice browning, just stir it well before serving. You can also add a splash of lemon juice to help keep the color bright. Avoid freezing the sauce, as it may change texture and flavor. For the best taste, enjoy it fresh! This blog covered making creamy avocado pasta, from ingredient details to storage tips. It showed how to mix ripe avocados, garlic, and fresh herbs for a tasty sauce. You can customize it with veggies or proteins, too. Enjoy your dish with fresh cherry tomatoes and optional cheese. This recipe is fun and easy. It’s perfect for a quick meal that tastes great. I hope you try this dish and share your thoughts!

Creamy Avocado Pasta Easy and Delicious Recipe

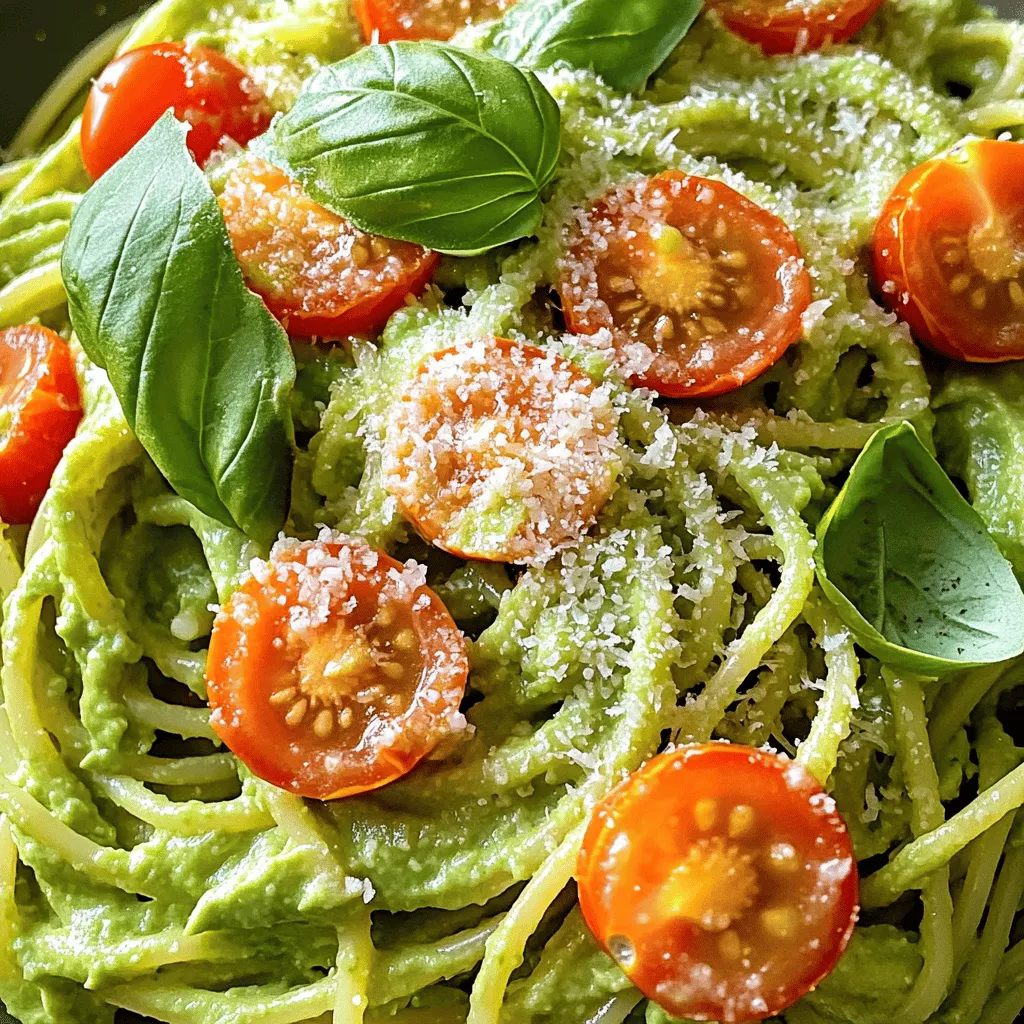
Are you ready to create a tasty dish that combines health and flavor? My creamy avocado pasta is simple, fast,

To make the marinade, start by mixing together the juice and zest of the limes in a bowl. Add two tablespoons of olive oil, two minced garlic cloves, one tablespoon of honey, one teaspoon of chili powder, and one teaspoon of smoked paprika. Don't forget to sprinkle in some salt and pepper to taste. Use a whisk to blend everything until it is smooth and well mixed. This marinade will give your shrimp a bright and zesty flavor. Tips for achieving the perfect consistency: - Make sure your ingredients are at room temperature for easier mixing. - If it feels too thick, add a little more olive oil or lime juice to loosen it up. Once your marinade is ready, add one pound of peeled and deveined shrimp to the bowl. Gently toss the shrimp until they are fully coated in the marinade. Cover the bowl tightly with plastic wrap or a lid. Place it in the fridge to marinate. Recommended marinating time: - Aim for at least 30 minutes, but two hours gives the best flavor. Importance of covering and refrigerating: - Covering the bowl keeps the shrimp fresh and prevents any cross-contamination. It also helps the flavors seep into the shrimp. While your shrimp are marinating, preheat your grill to medium-high heat. If you’re using wooden skewers, soak them in water for about 30 minutes. This step helps to keep them from burning on the grill. After marinating, carefully thread about four to five shrimp onto each skewer. Make sure to leave some space between each shrimp for even cooking. Cooking time and signs of doneness: - Grill the skewers for about 2-3 minutes on each side. You will know they are done when the shrimp turn a vibrant pink and have slight char marks. Be careful not to overcook them. Overcooked shrimp can become rubbery and tough. Once cooked, take the skewers off the grill and let them rest for one minute. This helps keep the shrimp juicy. Enjoy with fresh cilantro and lime wedges for an extra kick! For the full recipe, check out the detailed steps provided. To avoid overcooking shrimp, keep a close eye on them. Cook shrimp for just 2-3 minutes on each side. They should turn a bright pink color. If they curl tightly, they are likely overdone. Perfectly cooked shrimp feel firm but spring back when you press them. When using wooden skewers, soak them in water for 30 minutes. This step keeps them from burning on the grill. Thread 4 to 5 shrimp on each skewer. Make sure to space them evenly. This helps them cook uniformly and prevents sticking. For a beautiful dish, arrange the skewers on a large platter. Drizzle some leftover marinade over them for added flavor. Add lime wedges on the side. This way, guests can squeeze lime juice over the shrimp. Great side dishes include rice, fresh salads, or grilled veggies. These pair well with the zesty lime flavor. {{image_4}} You can play with flavors in your zesty lime grilled shrimp. If you like spice, try adding cayenne pepper or paprika. These spices give your shrimp a nice kick. You can also switch up the marinade. For a tropical twist, use coconut milk or a ginger-based marinade. Both add unique flavors and keep the shrimp juicy. Not everyone has a grill, and that's okay! You can bake or sauté the shrimp instead. To bake, preheat your oven to 400°F. Place the shrimp on a baking sheet and cook for 8-10 minutes. If you want shrimp that are crispy, use an air fryer. Set it to 400°F and cook for about 6-8 minutes. Check them often to avoid overcooking. When it comes to sides, you have many options. Fresh salads, rice, or grilled vegetables work well. They balance the flavors of the shrimp nicely. For drinks, consider pairing with a light white wine or a refreshing cocktail. A mojito or a citrus-based drink highlights the zesty lime flavor. Enjoy your meal with these tasty pairings! To keep your grilled shrimp fresh, use air-tight containers. This helps prevent moisture loss. Place the shrimp in the fridge within two hours of cooking. Grilled shrimp can stay safe in the fridge for up to three days. Ensure the shrimp are cooled before sealing the container. When reheating grilled shrimp, avoid the microwave if you want to keep flavor. Instead, try a skillet on low heat. Add a touch of olive oil to keep them moist. Stir gently until warm. You can also chop leftover shrimp for tacos or salads. They add great flavor and protein to any dish. To freeze grilled shrimp, let them cool completely. Then, place them in a single layer on a baking sheet. Freeze until solid, about one hour. After that, transfer the shrimp to a freezer bag. Squeeze out as much air as possible. You can use frozen shrimp in stir-fries or pasta dishes after thawing. Just remember to use them within three months for the best taste. Enjoy the full recipe for more delicious ideas! To season grilled shrimp, I like to use salt and pepper. These basics enhance the shrimp's natural taste. You can add spices like chili powder or smoked paprika for more flavor. These spices bring out the zesty lime taste in this dish. Just mix them into your marinade for a perfect balance. For the best flavor, marinate shrimp for at least 30 minutes. If you can, aim for up to 2 hours. This time allows the shrimp to soak up all those tasty lime and spice flavors. Remember, longer marinating times make a richer flavor but don’t go overboard. Too long can turn the shrimp mushy. Yes, you can use frozen shrimp! Just make sure to thaw them first. The best way is to leave them in the fridge overnight or run them under cold water. After thawing, pat them dry with paper towels. This helps the marinade stick better. Use them in your recipe just like fresh shrimp. Common mistakes include not preheating the grill and overcooking the shrimp. Always preheat your grill to medium-high heat. This gives you those nice grill marks. For cooking time, keep an eye on the shrimp. They only need about 2-3 minutes per side. Overcooked shrimp become rubbery, so watch closely. To get the best grill marks, make sure the grill is hot. Use oil on the grill grates or the shrimp to prevent sticking. Place the shrimp on the grill and don’t move them right away. Let them cook for a few minutes. This helps them sear nicely and creates those beautiful grill marks. Zesty Lime Grilled Shrimp is a delightful dish packed with flavor. We explored the ingredients, step-by-step instructions, and tips for perfect grilling. You can add unique twists, store leftovers, and reheat them easily. By mastering these techniques, your shrimp will impress everyone. Enjoy the tangy zing and the warm smoky taste in every bite. Now it's time to fire up the grill and savor this tasty dish!

Zesty Lime Grilled Shrimp Delicious and Easy Recipe

If you’re craving a quick and tasty meal, I have just the thing for you: Zesty Lime Grilled Shrimp. This

- 2 cups rolled oats - 1 cup pecans, roughly chopped - 1/2 cup almond butter - 1/3 cup pure maple syrup - 1/2 cup honey (or agave syrup as a vegan option) - 1/4 teaspoon salt - 1/2 teaspoon vanilla extract - 1/2 cup dried cranberries (or raisins) - 1/2 teaspoon cinnamon I love using simple ingredients to make my granola bars. Each item plays an important role. The rolled oats are the base. They add fiber and keep you full. Pecans give a nice crunch and healthy fats. Almond butter binds everything together. It also adds a nutty flavor that I adore. Maple syrup brings natural sweetness. Honey can replace it for a different taste. The salt enhances all the flavors. Vanilla extract adds a warm aroma. Dried cranberries (or raisins) offer a sweet, chewy bite. Lastly, cinnamon adds a warm spice that rounds out the taste. - Calories per serving: About 180 calories - Macronutrient breakdown: - Carbohydrates: 25g - Protein: 5g - Fat: 7g These bars are a great snack. They are perfect for breakfast or an afternoon pick-me-up. You get energy from the carbs and protein from the nuts and almond butter. The healthy fats keep you satisfied. Each bite is not just tasty but also nutritious. For the full recipe, check out the details above. Start by preheating your oven to 350°F (175°C). This helps the bars bake evenly. Next, prepare an 8x8-inch baking dish. Line it with parchment paper, leaving some paper hanging over the sides. This makes it easy to lift the bars out later. In a large mixing bowl, mix the dry ingredients. Combine 2 cups rolled oats, 1 cup chopped pecans, 1/4 teaspoon salt, and 1/2 teaspoon cinnamon. Stir well to blend everything. In a small saucepan over low heat, add 1/2 cup almond butter, 1/3 cup pure maple syrup, 1/2 cup honey (or agave syrup), and 1/2 teaspoon vanilla extract. Stir until it's smooth. Avoid boiling the mixture. Once your almond butter mixture is warm, pour it over the dry ingredients. Mix until everything is coated well. Gently fold in 1/2 cup dried cranberries. Transfer this mix to your prepared baking dish. Use a spatula to press it down firmly into an even layer. Place the dish in the oven. Bake for 20 to 25 minutes, until the edges turn golden brown. After baking, let it cool completely in the pan. Lift it out using the parchment paper and cut it into squares. Store your delicious granola bars in an airtight container at room temperature for up to one week. For more details, check the Full Recipe. Getting the right texture and flavor in your maple pecan granola bars is key. First, measure your ingredients accurately. This will ensure a balanced mix. Too many oats can make the bars dry. Too few can make them too sticky. Use a kitchen scale if you have one. This helps with precise measurements. Next, let’s talk about sweetness. Maple syrup adds a great taste, but balance is important. Too much syrup can make the bars overly sweet. You want just enough to enhance the flavor without overpowering it. Aim for a nice blend that keeps the bars tasty and healthy. When it comes to serving, presentation matters. You can drizzle the bars with extra maple syrup for a sweet touch. This adds both flavor and visual appeal. You might also sprinkle some chopped pecans on top for crunch. Cutting the bars into uniform pieces helps with serving. Use a sharp knife and cut straight down. This makes the bars easy to grab for snacks or lunch boxes. You can also wrap them individually for a fun and easy grab-and-go option. One mistake to avoid is overbaking your granola bars. If you bake them too long, they become hard and dry. Keep an eye on them in the oven, and look for a golden brown edge. Another common error is not pressing the mixture down firmly enough. If it’s too loose, the bars won’t hold together. Use a spatula or your hands to press down hard. This helps the bars stick together during baking. Following these tips can make your maple pecan granola bars a hit! For the full recipe, check out the details above. {{image_4}} To make these granola bars gluten-free, choose certified gluten-free oats. Regular oats may contain gluten from cross-contamination. By using gluten-free oats, you can enjoy these tasty bars without worry. For a vegan twist, substitute almond butter with any nut or seed butter you like. Sunflower seed butter works well and adds a unique flavor. Swap honey with agave syrup or maple syrup for sweetness. This keeps the bars plant-based and still delicious. You can customize these granola bars with different fruits. Try adding dried apricots or dark chocolate chips for extra flavor. For a spicy kick, sprinkle in nutmeg or ginger. These additions make each bite exciting and unique. For the full recipe, check out the Maple Pecan Granola Bars. To keep your maple pecan granola bars fresh, store them in an airtight container. I like to use a glass jar or a plastic bin with a secure lid. Make sure the bars are cool before sealing them. This helps prevent moisture buildup. Store them at room temperature, away from direct sunlight. They stay fresh for up to one week. Want to save some for later? Freezing granola bars is a great option! Cut the bars into squares first. Then, wrap each piece in plastic wrap. Place the wrapped bars in a freezer-safe bag or container. This will protect them from freezer burn. For the best taste, eat them within three months. To enjoy frozen bars, thaw them in the fridge overnight. You can also leave them out at room temperature for about an hour. This way, they’ll taste fresh and delicious, just like when you made them. These granola bars last about one week at room temperature. Store them in an airtight container to keep them fresh. If you want to extend their life, you can refrigerate them. In the fridge, they can last up to two weeks. This helps maintain their texture and flavor. Yes, you can use peanut butter instead of almond butter. Peanut butter adds a rich, nutty taste. However, it has a stronger flavor than almond butter. This may change the overall taste of the bars. The texture will also be creamier with peanut butter. Yes, these granola bars are healthy and nutritious. They are packed with whole grains from oats. Pecans provide healthy fats and protein. Almond butter adds more protein and fiber. Honey and maple syrup offer natural sweetness. Plus, dried cranberries boost your vitamin intake. Each bar is a balanced snack that keeps you full and satisfied. You can find the full recipe to make these bars at home. This blog post covered the essential ingredients for making delicious maple pecan granola bars. I shared step-by-step instructions and valuable tips to help you avoid common mistakes. You can customize these bars to fit gluten-free or vegan diets. Plus, I explained how to store and freeze them for later use. In conclusion, these granola bars are healthy, tasty, and easy to make. Enjoy experimenting with flavors and variations. You’ll love how simple they are to prepare.

Maple Pecan Granola Bars Tasty and Nutritious Snack

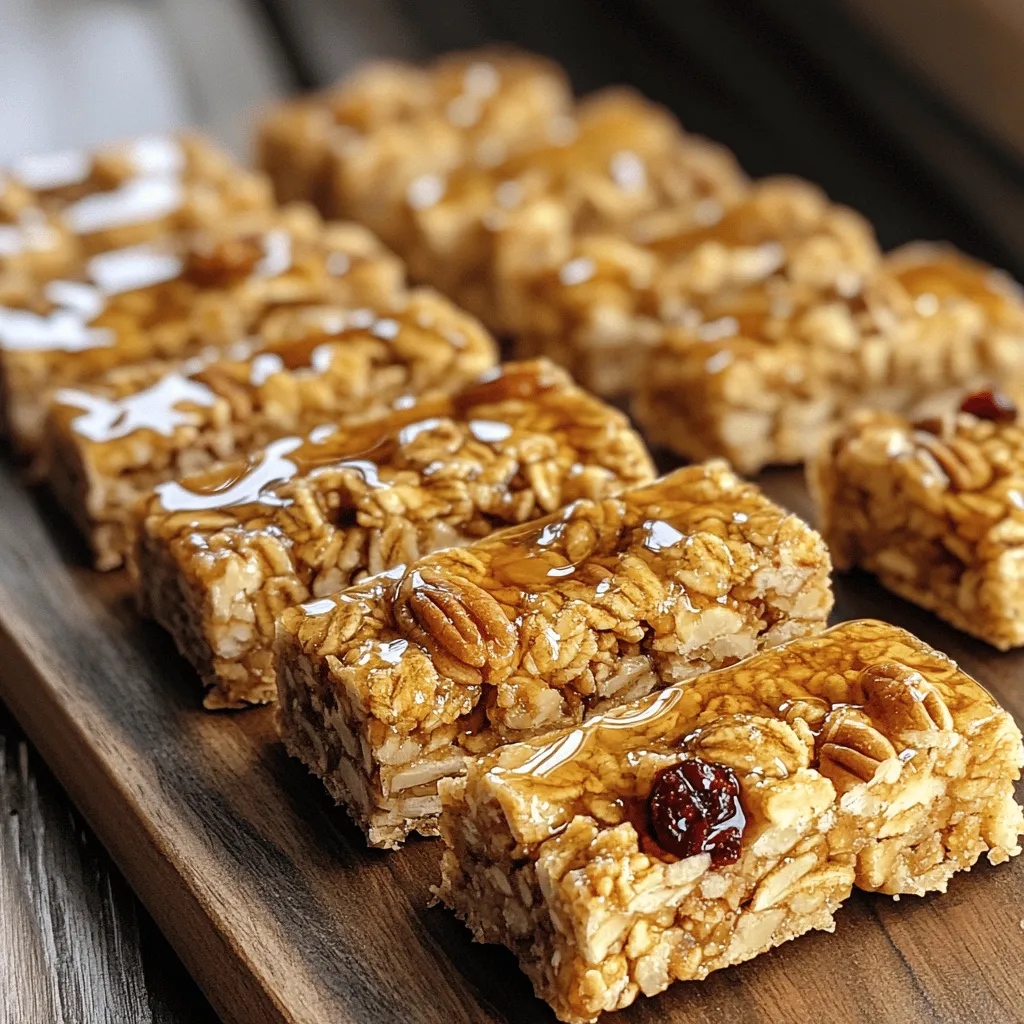
Looking for a simple, tasty snack? These Maple Pecan Granola Bars are perfect! Packed with wholesome ingredients like oats, nuts,

- 6 large eggs - 1/2 cup milk (dairy or plant-based) - 1 cup fresh spinach, chopped - 1/2 cup bell pepper, diced - 1/2 cup cherry tomatoes, halved - 1/4 cup red onion, finely chopped - 1/2 cup shredded cheese (cheddar or feta recommended) - Additional Seasoning: Salt and pepper to taste - Cooking Oil: 1 teaspoon olive oil Egg muffins with veggies are easy and quick to make. You can use fresh or frozen veggies. I love using spinach, bell peppers, and cherry tomatoes. They add nice color and flavor. You can mix and match based on what you have at home. Cheese makes these muffins creamy. I suggest cheddar or feta, but you can use what you like. Don't forget to add salt and pepper for taste. A little olive oil helps prevent sticking. You can find the full recipe above. Enjoy making these tasty muffins! First, preheat your oven to 350°F (175°C). This step ensures even cooking. Next, grease a muffin tin with olive oil. You can also use silicone liners. They help with easy removal later. In a large bowl, whisk together 6 large eggs and 1/2 cup of milk. Make sure the mixture is smooth. Season with salt and pepper to taste. Then, add 1 cup of chopped spinach, 1/2 cup of diced bell pepper, 1/2 cup of halved cherry tomatoes, and 1/4 cup of finely chopped red onion. Mix in 1/2 cup of shredded cheese. Stir until all ingredients blend well. Carefully pour the egg mixture into the muffin tin. Fill each cup about three-quarters full. This allows room for rising. Place the muffin tin in the oven and bake for 18 to 20 minutes. They are ready when puffed up and a toothpick comes out clean. For more details, check the Full Recipe. To make your egg muffins fluffy, start by whisking the eggs well. Whisk until frothy; this adds air and lightness. If you have a hand mixer, use it for even better results. Cooking time can vary by oven. If your muffins brown too quickly, lower the temperature slightly. On the other hand, if they take longer, check your oven’s accuracy. Every oven runs a bit differently. Serving your muffins on a bright platter can make a big difference. Use fresh herbs as a garnish. This adds a pop of color and a burst of flavor. You can also pair them with avocado or salsa for extra flair. Make your egg muffins visually appealing. A mix of colors from the veggies looks great. Arrange them neatly on a plate to impress your guests. Adding veggies to your muffins boosts their nutrition. Spinach, bell peppers, and tomatoes all provide vitamins. They help keep your meals healthy and tasty. If you want to swap milk for a plant-based option, try almond or oat milk. These alternatives can add unique flavors and keep your muffins light. They also make the recipe suitable for those with dietary restrictions. For more details on how to make these delicious treats, check out the Full Recipe. {{image_4}} You can change the veggies based on what you have. Try zucchini or broccoli instead of spinach. If you want a different cheese, use goat cheese or even nutritional yeast for a vegan option. This way, you can keep the recipe fresh and tasty. Add herbs like thyme or rosemary for extra flavor. You can also mix in cooked bacon or sausage for a heartier meal. Spice lovers can toss in red pepper flakes or smoked paprika to give the muffins a kick. To make this recipe gluten-free, just ensure any added ingredients are gluten-free. You can also make a low-carb version by skipping the cheese or using fewer veggies. Try adding avocado for a creamy texture without carbs. Each variation keeps the dish healthy and fun. Check out the Full Recipe for more ideas! To keep your egg muffins fresh, let them cool down completely. Place them in an airtight container. This will help maintain their taste and texture. You can store them in the fridge for up to one week. Make sure to check for any signs of spoilage before eating. If you want to save some for later, freezing is a great option. To freeze egg muffins, first, let them cool completely. Then, wrap each muffin in plastic wrap. Place the wrapped muffins in a freezer bag or container. When you're ready to eat, you can reheat them straight from the freezer. To reheat, just pop them in the microwave for about 1-2 minutes or until heated through. This makes it easy to enjoy a quick meal anytime! For the full recipe, check out the previous sections. Yes, you can make egg muffins ahead. I often prepare a batch on Sundays. This saves time on busy mornings. To meal prep, bake the muffins and let them cool. Once cool, place them in an airtight container. Store them in the fridge for up to a week. You can reheat them in the microwave or oven. This way, you have a healthy breakfast ready to go! If you want an egg-free option, try these substitutes: - Flaxseed meal: Mix 1 tablespoon of flaxseed meal with 3 tablespoons of water. Let it sit for 5 minutes. - Chia seeds: Similar to flaxseed, mix 1 tablespoon of chia seeds with 3 tablespoons of water. - Silken tofu: Blend 1/4 cup of silken tofu until smooth. This works well in savory muffins. These options will create a similar texture, but flavors may vary. Egg muffins can last about one week in the fridge. To keep them fresh, store them in an airtight container. If you notice any moisture, place a paper towel inside to absorb it. Always check for signs of spoilage before eating. If they look or smell odd, it’s best to toss them. Enjoy them warm for breakfast or a snack! For the complete recipe, check out the Full Recipe section. This blog post covered tasty egg muffins. You learned about the main ingredients, mixing, baking, and tips to perfect them. I shared ideas to make these muffins visually appealing and healthy. Variations let you customize based on what you like. Remember to store leftovers properly for later enjoyment. Experimenting with these recipes can lead to great meals. You can create quick dishes that fit your taste. Enjoy cooking and make these muffins your own!

Egg Muffins with Veggies Quick and Healthy Recipe

Looking for a quick and healthy breakfast? Try these delicious egg muffins with veggies! They are easy to make and

Older posts
Newer posts
← Previous Page1 … Page70 Page71 Page72 … Page75 Next →

dsad

© 2025 yumymoments • Built with GeneratePress

Our Policies

  • Copyright Policy
  • Cookie Policy
  • GDPR Policy
  • Privacy Policy
  • Disclaimer
  • Terms Of Use

More Information

  • Home
  • About
  • Contact
  • Appetizers
  • Dessert
  • Dinner
  • Drinks
©2025, yumymoments About Back To Top