Skip to content
DisclaimerTerms Of UseGDPR PolicyCookie Policy

yumymoments

  • Home
  • Drinks
  • Appetizers
  • Dinner
  • Dessert
  • About
  • Contact
  • Privacy Policy
DisclaimerTerms Of UseGDPR PolicyCookie Policy

Samantha

- 1 can (15 oz) chickpeas, rinsed and drained - 4 cups mixed greens (arugula, baby spinach, and romaine) - 1 cup cherry tomatoes, halved - ½ cucumber, diced into bite-sized pieces - ½ red bell pepper, diced - ¼ red onion, thinly sliced - ¼ cup feta cheese, crumbled (optional) Crispy chickpea salad shines with fresh ingredients. The chickpeas offer protein and crunch. Mixed greens give the salad a fresh base. You can use any greens you like. I love adding cherry tomatoes for sweetness. Cucumbers bring a cool, refreshing crunch. Red bell pepper adds color and flavor. A sprinkle of feta cheese is optional but tasty. It adds creaminess that pairs well with crispy chickpeas. - 2 tablespoons extra virgin olive oil - 1 teaspoon smoked paprika - 1 teaspoon garlic powder - Sea salt and freshly cracked black pepper, to taste - 2 tablespoons balsamic vinegar The right oils and spices elevate your salad. Extra virgin olive oil adds richness. Smoked paprika gives it a warm, smoky flavor. Garlic powder enhances the taste without being overpowering. A pinch of sea salt and freshly cracked pepper bring out all the flavors. Balsamic vinegar adds a sweet tang that ties everything together. These ingredients create a balance in taste that makes each bite special. For the full recipe, follow the steps to prepare this delightful dish! First, preheat your oven to 400°F (200°C). This step is key for crispy chickpeas. Next, take a can of chickpeas and rinse them well. Drain them completely to remove excess water. Spread the chickpeas on a baking sheet lined with parchment paper. This helps them cook evenly. Drizzle 2 tablespoons of olive oil over the chickpeas. Then, add 1 teaspoon of smoked paprika and 1 teaspoon of garlic powder. Season with sea salt and black pepper to taste. Use your hands to mix everything well. Make sure all the chickpeas are coated in the oil and spices. Place the baking sheet in the oven and bake for 25 to 30 minutes. Shake the baking sheet halfway through for even roasting. When they are golden brown, take them out and let them cool a bit. In a large salad bowl, combine 4 cups of mixed greens like arugula, baby spinach, and romaine. Add 1 cup of halved cherry tomatoes, ½ diced cucumber, ½ diced red bell pepper, and ¼ thinly sliced red onion. Toss these ingredients gently. This mix adds color and crunch to your salad. After your chickpeas cool, add them on top of the salad. The warm chickpeas will create a nice crunch. If you want, sprinkle ¼ cup of crumbled feta cheese on top for extra flavor. Finish your salad by drizzling 2 tablespoons of balsamic vinegar over it. Toss everything gently to combine well. This adds a tangy taste that balances the salad. Serve your salad right away for the best crunch. For a fresh look, use a large bowl or individual plates. Top with some extra crispy chickpeas. Garnish with fresh herbs like parsley or cilantro for a pop of color. Enjoy every bite of this crispy chickpea salad! For the full recipe, refer to the detailed instructions above. To make your chickpeas crisp, the oven temperature matters. Preheat your oven to 400°F (200°C). This hot air helps the chickpeas turn golden and crunchy. Timing is key too; bake them for 25 to 30 minutes. Halfway through, shake the baking sheet. This ensures even roasting and prevents sogginess. Spread the chickpeas in a single layer on the baking sheet for best results. Spices can take your chickpeas from good to great. I love using smoked paprika and garlic powder. They add a nice depth of flavor. Consider trying cumin or chili powder for a kick. For the salad, balance textures. The crunch of the chickpeas pairs well with soft greens and juicy tomatoes. You can also sprinkle nuts or seeds for extra crunch. Serving your salad well makes a big difference. Use a large, shallow bowl for a beautiful display. Scatter the crispy chickpeas on top to highlight their texture. For a pop of color, add fresh herbs like parsley or cilantro. A drizzle of balsamic vinegar not only adds taste but also enhances the look. Your salad will be a feast for the eyes and the palate. For the full recipe, check out the Crispy Chickpea Salad section. {{image_4}} You can change up the greens in your salad. Instead of mixed greens, try kale or romaine. You can also use spinach for a softer touch. Seasonal veggies add great flavor. In spring, use asparagus or snap peas. In fall, add roasted squash or Brussels sprouts. These changes keep your salad fresh and exciting. Want to boost your protein? Add grilled chicken or shrimp. Tofu is another great choice if you want a vegan option. You can also swap chickpeas for black beans or lentils. Each option gives you a unique taste and texture. Creating homemade dressings is easy and fun. Mix olive oil with lemon juice for a zesty twist. You can also add mustard or honey for sweetness. Balsamic vinegar is a classic choice, but try flavored ones too. Raspberry or fig balsamic adds a fruity note. These options let you customize your salad to fit your mood. For the full recipe, see the main guide above. To keep your leftover salad fresh, refrigerate it right away. Place the salad in an airtight container. This helps to keep moisture out and flavors in. If you have crispy chickpeas, store them separately. This way, they stay crunchy longer. To reheat crispy chickpeas, use the oven. Preheat it to 350°F (175°C). Spread the chickpeas on a baking sheet. Heat for about 10 minutes or until warm. This keeps them crispy and tasty. Canned chickpeas can last up to three years if unopened. Once opened, use them within three days. Fresh veggies like cucumbers and bell peppers last about a week in the fridge. Always check for signs of spoilage before use. To make your chickpeas extra crispy, follow these steps: - Start with dry chickpeas. If using canned, rinse and drain them well. - Pat them dry with a towel. Removing moisture helps them crisp up. - Use enough oil to coat them evenly. This helps with browning. - Spread them out on the baking sheet. Crowding will steam them. - Bake them at 400°F (200°C) for about 25 to 30 minutes. Shake halfway through for even cooking. You can prep the salad in advance, but keep some parts separate. - Store the crispy chickpeas in an airtight container. They stay crunchy this way. - Mix the greens and veggies together in another container. - Dress the salad right before serving. This keeps everything fresh and crisp. Many dressings pair well with this crispy chickpea salad. Some tasty options include: - Lemon vinaigrette for a bright flavor. - Tahini dressing for a nutty taste. - Yogurt-based dressings for creaminess. - A simple olive oil and vinegar mix works great too. Yes, this salad is perfect for meal prep! - Prepare the ingredients in bulk. Store them in separate containers. - Assemble the salad just before eating. This keeps it fresh. - Enjoy it for lunches or quick dinners throughout the week. Yes, you can use dried chickpeas! - Soak them overnight in water. This helps them cook evenly. - Cook them in boiling water until tender before roasting. - Follow the same steps for seasoning and baking as with canned. This will ensure you get that perfect crispy texture. Check the [Full Recipe] for more details on making this delicious salad! The key to a tasty crispy chickpea salad lies in the right mix of ingredients. Here’s what you will need: - 1 can (15 oz) chickpeas, rinsed and drained - 2 tablespoons extra virgin olive oil - 1 teaspoon smoked paprika - 1 teaspoon garlic powder - Sea salt and freshly cracked black pepper, to taste - 4 cups mixed greens (arugula, baby spinach, and romaine) - 1 cup cherry tomatoes, halved - ½ cucumber, diced into bite-sized pieces - ½ red bell pepper, diced - ¼ red onion, thinly sliced - ¼ cup feta cheese, crumbled (optional) - 2 tablespoons balsamic vinegar I love the way these ingredients work together. The chickpeas add protein and crunch. The mixed greens give fresh flavor and texture. Cherry tomatoes and cucumber add sweetness and a refreshing bite. When you sprinkle feta cheese, it adds a creamy touch that pairs well with the crispiness of the chickpeas. Let’s talk about the olive oil and spices. They make the chickpeas flavorful and help them get crispy in the oven. Smoked paprika and garlic powder give a warm, savory kick. Don’t forget the sea salt and black pepper; they enhance all the flavors in the salad. For a full guide, check out the Full Recipe. This blog post covered making a crispy chickpea salad from start to finish. You learned the key ingredients, such as chickpeas, greens, and seasonings. I shared step-by-step instructions and tips to achieve crispy chickpeas. We explored different variations and how to store leftovers properly. In conclusion, this salad is easy, tasty, and healthy. Enjoy making it your own with your favorite ingredients. Share it with friends to try together. Happy cooking!

Crispy Chickpea Salad Tasty and Healthy Delight

Looking to spice up your meals with a crunchy, healthy twist? This Crispy Chickpea Salad is your answer! Packed with

- 1 pound flank steak, thinly sliced against the grain - 2 cups broccoli florets - 1 tablespoon vegetable oil - 1/4 cup low-sodium soy sauce - 2 tablespoons oyster sauce - 1 tablespoon cornstarch - 2 cloves garlic, minced - 1 teaspoon fresh ginger, grated - 2 green onions, sliced (for garnish) - Sesame seeds (for garnish) For this easy beef and broccoli dish, we focus on fresh and flavorful components. The flank steak is key. Slice it thinly against the grain. This helps make the beef tender and easy to chew. Broccoli florets add a nice crunch and a bright color. The marinade brings the dish together. Low-sodium soy sauce and oyster sauce create a savory base. Cornstarch helps thicken the sauce while keeping the beef juicy. Don't forget the aromatics! Garlic and ginger add depth to the flavor. They bring warmth and a touch of spice. Finally, garnish with green onions and sesame seeds. This makes the dish look pretty and adds a nice finish. For the full recipe, check out the details above! - In a bowl, whisk together soy sauce, oyster sauce, cornstarch, garlic, and ginger. - Once mixed, add the flank steak. Make sure every piece is covered. - Let the beef marinate for 15-20 minutes. This helps build flavor. - Bring a pot of salted water to a boil. - Add the broccoli florets and blanch for 2-3 minutes. - Once bright green, quickly transfer the broccoli to a bowl of ice water. This stops the cooking process. - Heat vegetable oil in a large skillet over medium-high heat. - Once hot, add the marinated beef in a single layer. - Let it sear for 2-3 minutes without stirring. This creates a nice crust. - Stir-fry the beef for another 2-3 minutes until browned and cooked through. - Remove the beef from the skillet and set it aside. Now, you’re ready to create a delicious meal with the full recipe! To get that perfect sear, use a hot pan. A hot surface makes the beef cook fast and brown nicely. If the pan is too cool, the meat will steam, not sear. Always avoid overcrowding the pan. This way, each piece gets enough heat, leading to even cooking. If you have a lot of beef, cook it in batches. Taste your dish as you cook. If you want more flavor, add a splash of soy sauce or a pinch of salt. This simple step makes a big difference. For those who like spice, consider adding a touch of chili. It adds warmth without overpowering the dish. First, garnish your dish. Green onions and sesame seeds make it pop. They add color and crunch to the meal. Serve your beef and broccoli with fluffy white rice or noodles. This combination creates a full meal that looks good on the plate. For a complete recipe, you can check the full recipe for Easy Beef and Broccoli. {{image_4}} You can switch up the protein in this dish. Try chicken, shrimp, or tofu instead of flank steak. Each option brings a unique taste. Just remember to adjust the cooking time. Chicken takes a bit longer, while shrimp cooks quickly. Tofu needs a little more time to crisp up for the best texture. Adding more veggies can make this dish even better. Bell peppers add sweetness, while carrots bring crunch. Snap peas offer a fresh pop, and mushrooms provide an earthy flavor. Feel free to mix and match based on what you like or have on hand. It’s a great way to use leftover veggies, too. You can change the sauce for a new twist. Try using teriyaki sauce for a sweet and savory flavor. If you need a gluten-free option, use tamari instead of soy sauce. Both choices will still keep your dish tasty and satisfying. Experimenting with sauces can open up a whole new world of flavors. For more details on how to prepare this dish, check the Full Recipe. Refrigerate your Easy Beef and Broccoli in an airtight container for up to 3 days. Make sure to let the dish cool completely before storing. This helps keep the flavors fresh and prevents sogginess. For the best texture, reheat your beef and broccoli in a skillet over medium heat. This method brings back the crispness of the broccoli. If you choose to microwave it, be aware that the broccoli may soften more than you'd like. If you want to freeze this dish, I suggest freezing it without the broccoli. This keeps the texture nice after thawing. Use freezer-safe containers and enjoy it within 2-3 months for the best flavor and quality. Yes, you can marinate the beef and pre-blanch the broccoli in advance. This makes your cooking faster on the night you plan to serve it. Simply place the marinated beef in the fridge for a few hours or overnight. You can also blanch the broccoli and store it in an airtight container. It will stay fresh until you're ready to cook. Fluffy white rice, noodles, or steamed vegetables complement this dish well. I personally love serving it over jasmine rice. The rice soaks up the savory sauce and balances the flavors perfectly. If you're feeling adventurous, try adding some garlic noodles or even a side of crispy spring rolls. Absolutely! It stores well and reheats nicely, making it perfect for meal prepping. You can divide the beef and broccoli into meal containers. This way, you have an easy lunch or dinner ready to go. Just reheat it in the microwave or a skillet until hot. The flavors hold up well, and you'll enjoy it just as much as when it was first made. In this blog post, we explored how to make Easy Beef and Broccoli. We covered the key ingredients, from flank steak and broccoli to a tasty marinade. You learned step-by-step cooking instructions and helpful tips on achieving great flavor and presentation. I shared ways to adjust the recipe and how to store leftovers. Overall, this dish is simple, flavorful, and great for meal prep. Enjoy experimenting with different proteins and vegetables, too! With proper storage, your leftovers will last and taste amazing. Happy cooking!

Easy Beef and Broccoli Savory Weeknight Recipe

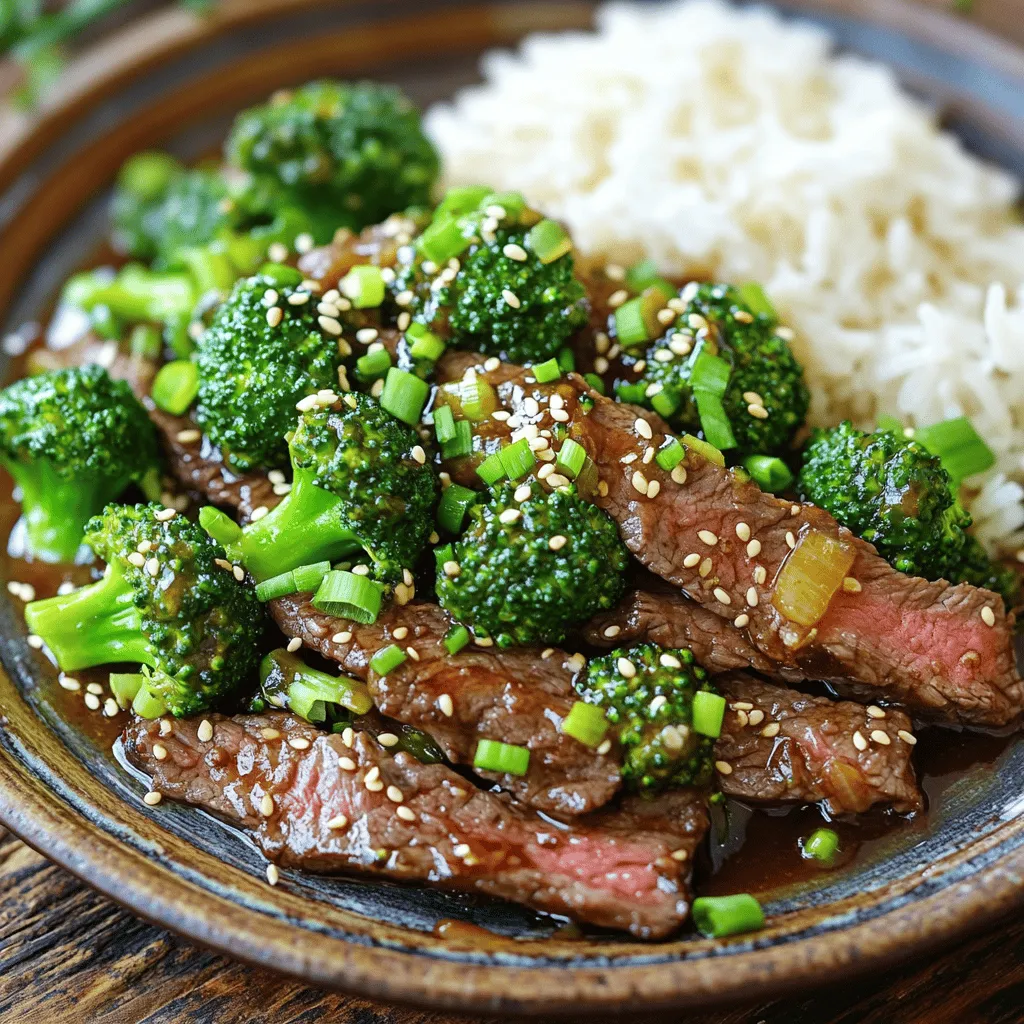
Looking for a quick, tasty meal that impresses? Try my Easy Beef and Broccoli Savory Weeknight Recipe! With just a

- 3 cups cooked rotini pasta - 2 cups cooked chicken breast, diced - 2 cups broccoli florets (fresh or frozen) - 1 cup Alfredo sauce (store-bought or homemade) - 1 cup shredded mozzarella cheese - 1 cup grated Parmesan cheese - 1 teaspoon garlic powder - 1 teaspoon Italian seasoning - Salt and pepper to taste - 2 tablespoons olive oil - Fresh parsley, chopped (for garnish) I love how these ingredients come together to make a dish that feels special yet simple. Each bite offers creamy goodness, and the chicken adds protein to keep you satisfied. The broccoli gives a nice crunch and color too. To make this dish stand out, I often use fresh ingredients whenever I can. Fresh chicken and broccoli make a big difference in flavor. You can even make your Alfredo sauce from scratch if you have the time. It’s fun to experiment with flavors and textures. The seasoning is key. Garlic powder and Italian seasoning bring warmth and depth. I always taste and adjust salt and pepper to fit my preference. Remember, you can customize this dish. Swap out the rotini pasta for any pasta shape you love. You can also mix in other veggies or try different cheeses. This makes it fun to create your version of Creamy Chicken Alfredo Bake. Check out the Full Recipe for all the steps. Enjoy cooking and making it your own! - Preheat the oven to 375°F (190°C). - In a large mixing bowl, combine the cooked rotini pasta, diced chicken, and broccoli florets. This mix forms the heart of your bake. - In another bowl, whisk together the Alfredo sauce, garlic powder, Italian seasoning, and salt and pepper. This sauce brings rich flavor to the dish. - Pour the sauce over the pasta, chicken, and broccoli. Toss gently until everything is coated. - Grease a 9x13 inch baking dish. Transfer the pasta mixture to the dish, spreading it evenly. - Sprinkle the shredded mozzarella and grated Parmesan cheese over the top. This adds a tasty cheesy layer. - Drizzle olive oil over the cheese to boost flavor and help it brown. - Cover the dish with aluminum foil. Bake for 25 minutes. - After 25 minutes, remove the foil. Continue baking for 10-15 more minutes. The cheese should bubble and turn golden brown. - Once baked, take it out and let it cool for a few minutes. Garnish with freshly chopped parsley for a splash of color. To ensure even cooking of the pasta, always boil it until it is al dente. This helps keep the pasta firm during baking. If you cook it too soft, it will become mushy later. Stir the pasta often while it cooks to keep it from sticking. To prevent the dish from drying out, cover it with aluminum foil while baking. This traps steam and keeps the creamy sauce rich and moist. Remove the foil for the last part of baking to let the cheese brown nicely. For extra flavor, try adding spices like paprika or crushed red pepper. Fresh herbs such as basil or thyme can also brighten the dish. You can even mix in some sautéed mushrooms or spinach for depth. If you want to vary cheese types, consider mixing in gouda or cheddar. These cheeses melt well and add unique flavors. You can also use a blend of cheeses for a richer taste. Serve the creamy bake straight from the dish for a cozy feel. Top with extra grated Parmesan for a nice touch. Fresh parsley adds a pop of color and freshness. Pair the bake with garlic bread or a simple green salad. These sides balance the richness and add a nice crunch. Enjoy your meal with family or friends for a comforting dinner! {{image_4}} You can switch out pasta types in this dish. Use penne, fusilli, or even whole wheat pasta. Each type brings its own twist. Feel free to try gluten-free pasta if needed. It cooks well and tastes great too. You can also change the protein. Instead of chicken, add shrimp or even tofu. Shrimp cooks fast and adds a sweet flavor. Tofu is perfect for a vegan option. It soaks up the sauce's taste and adds protein. If you want a gluten-free version, use gluten-free pasta and check your sauce. Many brands offer gluten-free Alfredo sauce. This makes the dish safe for those with gluten issues. For a low-fat option, use low-fat cheese and a lighter Alfredo sauce. You can also skip the cheese on top. This keeps the taste while reducing calories. Seasonal veggies can brighten your dish. In spring, add asparagus or peas. In fall, use squash or spinach. These veggies add color and taste. For holiday themes, consider adding cranberries or pecans for a festive twist. This makes the dish special for celebrations. You can even change the cheese to something more seasonal, like goat cheese. Explore these variations to make Creamy Chicken Alfredo Bake your own. You can find the full recipe above to get started! To store your Creamy Chicken Alfredo Bake, let it cool first. Place leftovers in an airtight container. This keeps the dish fresh and tasty. You can store it in the fridge for about 3 to 4 days. Make sure to label the container with the date. This helps you remember when you made it. If you want to freeze the dish, follow these steps. First, let the bake cool completely. Then, wrap it tightly in plastic wrap or aluminum foil. Place it in a freezer-safe container. You can freeze it for up to 3 months. To reheat, thaw it in the fridge overnight. Then, bake at 350°F (175°C) until hot, about 25-30 minutes. In the fridge, the Creamy Chicken Alfredo Bake lasts about 3 to 4 days. In the freezer, it can last up to 3 months. To check for spoilage, look for signs like bad smells or visible mold. If it looks or smells off, it's best to throw it away. Keeping track of storage time helps you enjoy this dish at its best! You can serve many tasty side dishes with Creamy Chicken Alfredo Bake. Here are a few ideas: - Garlic bread: It's soft and buttery, perfect for dipping. - Caesar salad: The crisp greens and creamy dressing balance the rich bake. - Steamed vegetables: Broccoli or green beans add color and nutrition. - Roasted potatoes: They offer a crunchy texture and pair well with the creamy dish. These sides make your meal more enjoyable and add variety to your plate. Yes, you can make Creamy Chicken Alfredo Bake ahead. Here’s how: - Prep the bake: Follow the recipe steps until you cover the dish with foil. - Refrigerate: You can store it in the fridge for up to 24 hours. - Baking: When ready, bake it straight from the fridge but add 10-15 minutes to the time. - Reheating: If you have leftovers, reheat in the oven at 350°F (175°C) until warm. This method saves time and makes dinner easy. Absolutely! Creamy Chicken Alfredo Bake is a hit with kids. To make it even more appealing: - Cut chicken into fun shapes: Use cookie cutters for stars or hearts. - Add favorite veggies: If your kids like carrots or peas, mix them in. - Serve with a side: Kids love to dip! Pair with ranch or marinara sauce. These tweaks can make the dish more fun for picky eaters. If you want some heat in your Creamy Chicken Alfredo Bake, try these tips: - Add red pepper flakes: Just a pinch can add a nice kick. - Mix in hot sauce: Include a tablespoon of your favorite hot sauce in the Alfredo. - Use spicy sausage: Swap the chicken for spicy Italian sausage for extra flavor. These options will make your dish exciting for those who love spice! You now have a complete guide to making a Creamy Chicken Alfredo Bake. From understanding the key ingredients to mastering step-by-step instructions, you've seen how simple it can be. I shared tips to enhance flavor, variations for dietary needs, and storage methods to keep leftovers fresh. This dish is not just easy; it’s also versatile and can please many tastes. Enjoy the cooking process and make it your own!

Creamy Chicken Alfredo Bake Savory Family Favorite

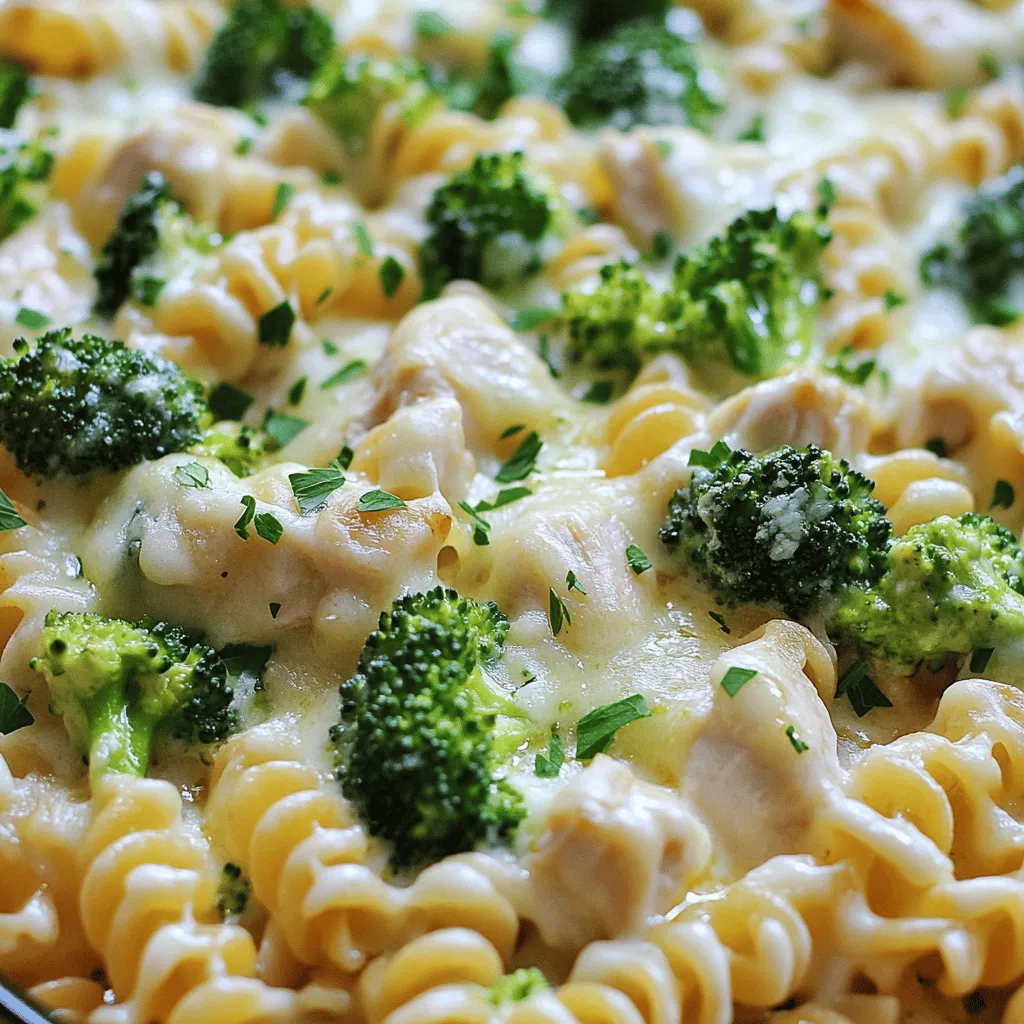
Are you ready to impress your family with a dish they’ll love? My Creamy Chicken Alfredo Bake combines tender chicken,

For coconut curry chicken, you need fresh and flavorful items. Here’s a list of what you’ll use: - 1 lb (450g) boneless, skinless chicken thighs, cut into bite-sized pieces - 1 tablespoon coconut oil - 1 medium onion, finely chopped - 3 cloves garlic, minced - 1 tablespoon fresh ginger, grated - 2 tablespoons red curry paste - 1 can (13.5 oz) coconut milk - 1 cup chicken broth - 1 tablespoon fish sauce (or soy sauce for a vegetarian option) - 1 tablespoon brown sugar - 1 red bell pepper, sliced into thin strips - 1 cup snap peas or green beans, trimmed - 2 cups fresh baby spinach - Fresh cilantro, roughly chopped, for garnish - Cooked rice (jasmine or basmati), for serving These ingredients combine to create a rich, creamy, and aromatic dish. The chicken thighs provide a tender bite. Coconut milk brings creaminess, while the red curry paste adds heat and depth. You might want to scale the recipe. Here are some quick conversions: - 1 lb = 450g - 1 tablespoon = 15ml - 1 cup = 240ml If you need to adjust, remember that these conversions keep your dish balanced. Use these measurements to ensure your flavors and textures stay just right. You can easily swap ingredients based on what you have. Here are some common alternatives: - Chicken thighs can be replaced with chicken breast for a leaner option. - Use vegetable broth instead of chicken broth for a vegetarian dish. - If you don’t have red curry paste, try green curry paste for a different flavor. - For a nut-free option, skip the coconut milk and use almond or oat milk instead. These substitutions allow you to customize the recipe. Adjust according to your taste or dietary needs. Enjoy the process of making this dish your own! You can find the full recipe [here]. 1. Gather all your ingredients. This makes cooking smooth and fun. 2. Cut the chicken into bite-sized pieces. This helps it cook evenly. 3. Finely chop the onion. A sharp knife makes this easier. 4. Mince the garlic and grate the ginger. Fresh flavors are key here. 5. Slice the red bell pepper into thin strips. Keep them uniform for even cooking. 6. Trim the snap peas or green beans. This adds a nice crunch to your dish. 1. Heat coconut oil in a large skillet over medium heat. Wait until it melts. 2. Add the chopped onion. Sauté for about 5 minutes until soft. 3. Stir in garlic and ginger. Cook for 1 minute until fragrant. 4. Add chicken pieces. Spread them out and cook for 5-7 minutes. Flip occasionally until browned. 5. Mix in red curry paste. Ensure all chicken pieces are coated. Sauté for an extra 2 minutes. 6. Slowly pour in coconut milk and chicken broth. Add fish sauce and brown sugar. Stir well. 7. Increase heat to bring it to a gentle simmer. Once bubbling, add bell pepper and snap peas. 8. Simmer for 10 minutes. This helps the veggies stay tender-crisp and the chicken cook through. 9. Just before serving, fold in baby spinach. Stir gently until it wilts, about 1 minute. 10. Taste the curry. Adjust seasoning with more fish sauce or brown sugar if needed. 11. Serve the curry over cooked rice. Ensure everyone gets enough delicious sauce. 12. Garnish with freshly chopped cilantro for a bright finish. - Use deep bowls for serving. This highlights the dish's vibrant colors. - Consider adding extra cilantro on top. It gives a fresh aroma. - Enjoy the dish warm. It brings out all the flavors. For the complete recipe details, check the Full Recipe. To make the best coconut curry chicken, follow these simple tips: - Choose quality chicken: Fresh, boneless, skinless thighs work best. They stay juicy. - Use fresh spices: Fresh ginger and garlic give strong flavors. - Don't rush the sauté: Cook onions until soft. This builds a great base. - Bloom the spices: Stir red curry paste for a few minutes. This enhances its taste. - Adjust the heat: Simmer gently. High heat can make the sauce too thin. - Taste as you go: Add more fish sauce or sugar if needed. This personalizes the flavor. Storing your coconut curry chicken is easy. Here are some tips: - Cool before storing: Let it cool down to room temperature first. - Use airtight containers: This keeps the flavors fresh and prevents spills. - Refrigerate promptly: Consume leftovers within three days for best taste. - Freezing: You can freeze it! It lasts up to three months. Just thaw before reheating. - Reheat gently: Use low heat on the stove or microwave. Stir often for even warmth. Having the right tools makes cooking easier. Here’s what you need: - Sharp knife: For chopping chicken and veggies with ease. - Cutting board: A clean surface to prep your ingredients. - Large skillet or pot: Essential for cooking everything together. - Wooden spoon: Perfect for stirring without scratching your pan. - Measuring cups and spoons: Accurate measurements help with flavors. - Ladle: Use this to serve your delicious curry. For a complete guide, check out the Full Recipe. {{image_4}} You can easily make coconut curry chicken vegetarian or vegan. Simply swap out the chicken for cubed tofu or chickpeas. Tofu soaks up great flavors. Use soy sauce instead of fish sauce. For a vegan twist, pick vegetable broth. This keeps the dish rich and creamy while still being plant-based. You have many protein options besides chicken. Try shrimp for a lighter meal. Fish, like salmon, works well too. For a heartier dish, use beef or lamb. Just adjust cooking times as needed. Each protein offers a unique taste that pairs wonderfully with the coconut curry. Want more heat? Add fresh chili peppers or more red curry paste. You can also include a pinch of cayenne for an extra kick. If you prefer mild flavors, reduce the curry paste. Taste as you go. This way, you can create a dish that fits your spice level perfectly. For the complete recipe, check out the Full Recipe. To make your meal complete, pair the coconut curry chicken with tasty sides. Here are some great options: - Jasmine or basmati rice: The soft grains soak up the curry sauce well. - Naan or flatbread: Great for scooping up the curry and adds a nice texture. - Steamed vegetables: Broccoli, carrots, or cauliflower add color and nutrition. - Cucumber salad: A cool salad can balance the heat from the curry. Make your dish look as good as it tastes. Here are some presentation tips: - Use deep bowls: This highlights the vibrant colors of the curry. - Layer the rice: Put rice at the bottom and curry on top for a nice effect. - Add color: Serve with colorful vegetables to make the dish pop. - Keep it clean: Wipe the edges of the bowl for a polished look. Garnishing adds flavor and makes your dish inviting. Consider these options: - Fresh cilantro: It adds a bright taste and looks great. - Lime wedges: A squeeze of lime gives a fresh zing. - Chili flakes: For those who like it spicier, sprinkle some on top. - Toasted coconut: This adds crunch and a sweet note. For the full recipe, check out the Tropical Coconut Curry Chicken details. Coconut curry chicken lasts about 3 to 4 days in the fridge. Make sure to store it in an airtight container. This keeps it fresh and tasty for your next meal. Yes, you can freeze coconut curry chicken. Allow it to cool first, then place it in a freezer-safe container. It will stay good for up to 3 months. When ready to eat, thaw it in the fridge overnight and reheat. Red curry paste uses red chilies, giving it a bolder flavor. Green curry paste uses green chilies, which makes it fresher and spicier. Both have unique ingredients. You can choose based on your taste preference. To make your coconut curry chicken spicier, add more red curry paste. You can also include fresh chilies or chili flakes. Adjusting the amount is key to achieving the heat you want. I love serving coconut curry chicken with jasmine rice or basmati rice. You can also pair it with naan bread or a fresh salad. These sides enhance the meal and make it even more enjoyable. For the full recipe, check out Tropical Coconut Curry Chicken. This blog post covered the key ingredients, step-by-step cooking, and helpful tips for making coconut curry chicken. We looked at ingredient alternatives, cooking methods, and serving ideas. You now have the tools to create a tasty dish for any occasion. Remember, the choice of spices and sides can make your curry even better. Embrace your creativity and enjoy cooking!

Coconut Curry Chicken Flavorful and Hearty Recipe

Are you ready to spice up your dinner routine? This Coconut Curry Chicken is a game changer. It’s rich, flavorful,

- 2 ripe peaches, sliced into wedges - 8 oz fresh mozzarella, sliced into rounds - 1 cup fresh basil leaves, whole - 2 tablespoons balsamic glaze, for drizzling - 1 tablespoon extra virgin olive oil, for drizzling - Sea salt and freshly cracked black pepper, to taste The ingredients for Peach Caprese Salad are simple yet full of flavor. Ripe peaches bring sweetness and juiciness. Fresh mozzarella adds creaminess. Basil leaves give it a fragrant touch. Balsamic glaze adds a rich depth. Extra virgin olive oil rounds out the taste. Sea salt and black pepper boost all the flavors. This salad is easy to make, yet it tastes gourmet. - Calories per serving: About 200 calories - Macronutrient breakdown: - Fats: 12g - Carbohydrates: 18g - Proteins: 7g Peach Caprese Salad is not just tasty; it’s also healthy. Peaches are rich in vitamins A and C. They help boost your immune system and keep your skin healthy. Fresh mozzarella provides calcium and protein. Basil is packed with antioxidants, too. Enjoy this salad as a light meal or a side dish. For the full recipe, you can refer to the steps above. - Rinse and slice the peaches. - Slice mozzarella into rounds. - Arrange salad components on a platter. To start, rinse your peaches under cold water. This removes any dirt. Use a sharp knife to slice the peaches into even wedges. This step reveals their juicy, vibrant inside. Next, take the fresh mozzarella and slice it into rounds. Aim for a thickness that matches the peach wedges. This helps balance your salad. Now, grab a large serving platter. Arrange your peach and mozzarella slices in a circular pattern. Alternate each piece for a pretty look. This way, every bite offers both flavors. - Create a circular arrangement of peach and mozzarella. - Tuck in basil leaves. - Drizzle olive oil and balsamic glaze. Next, carefully tuck whole basil leaves between the slices of peach and mozzarella. This adds a fragrant freshness. Then, drizzle extra virgin olive oil evenly over the salad. This enhances the flavors. Follow with a gentle drizzle of balsamic glaze. This adds a beautiful contrast and depth. Finally, season your salad. Use a sprinkle of sea salt and freshly cracked black pepper. This elevates the sweetness of the peaches and creaminess of the mozzarella. - Best ways to serve immediately. - Recommendations for side dishes or pairings. For the best taste, serve the salad right away. This way, you enjoy its full freshness. If you want, you can refrigerate it for about 10 minutes. This allows the flavors to blend slightly before serving. Pair this salad with grilled chicken or a light pasta dish. It also goes well with crusty bread or a light white wine. Enjoy this refreshing Peach Caprese salad as a starter for any summer meal. For more details, check the Full Recipe. Choosing ripe peaches is key. Look for peaches that feel soft but not mushy. Their skin should have a vibrant color. This shows they are sweet and juicy. For the mozzarella, fresh is best. Choose mozzarella packed in water for creaminess. It should have a smooth texture and mild taste. Fresh basil leaves should be bright green and fragrant. Avoid any yellow or browning leaves, as they can spoil the flavor. To make your salad stand out, think about garnishing. Adding extra basil leaves on top adds color. A light drizzle of balsamic glaze right before serving can enhance the look. For serving, use a large, shallow platter. This allows the colors of the salad to pop. A white plate can highlight the vibrant yellow and green of the salad. You can take the flavor even further. Try adding a sprinkle of crushed red pepper for heat. You might also consider using a different dressing. A honey vinaigrette can add sweetness. For extra texture, consider adding nuts. Sliced almonds or pine nuts can give a nice crunch. You can find more ideas in the Full Recipe. {{image_4}} You can change fruits in your salad. If you want a twist, try strawberries or nectarines. Both fruits add unique flavors. They also bring a nice pop of color. You can also switch cheeses. Burrata offers a creamy texture. Feta has a salty kick that works well. Each choice gives the salad a different taste. For a vegan option, skip the cheese. You can add avocado slices instead. The creamy avocado pairs well with peaches. It adds a rich mouthfeel without dairy. For gluten-free variations, you are already safe. This salad is naturally gluten-free. Just ensure your balsamic glaze has no gluten ingredients. Using seasonal produce makes your salad fresher. In summer, peaches shine, while in fall, you can use apples. Each season brings different flavors. Adjusting herbs can also change the taste. In spring, try adding mint for a refreshing twist. In winter, consider a dash of cinnamon for warmth. Each season offers new ways to enjoy this dish. To keep your Peach Caprese Salad fresh, store it in the fridge. Use an airtight container for leftovers to avoid moisture loss. If you have leftover peaches or mozzarella, keep them separate. This way, they stay fresh longer. Wrap each ingredient in plastic wrap to keep them safe from air. The salad can stay good for about one day in the fridge. After that, the peaches may turn mushy, and the cheese might lose its charm. Watch for any change in color or smell. If the peaches smell sour or the cheese feels slimy, it is time to toss it out. You can add leftover salad to a sandwich for a tasty twist. Try mixing it into a grain bowl with quinoa or rice. Use extra basil in pesto for a fresh sauce. You can also blend leftover salad into a smoothie for a unique flavor. The options are endless! A Peach Caprese Salad is a fresh dish that mixes sweet peaches with creamy mozzarella. This salad comes from the classic Italian Caprese Salad, which uses tomatoes instead of peaches. The colorful mix of fruit, cheese, and herbs makes it a great summer treat. Yes, you can prepare some parts ahead. Slice the peaches and mozzarella a few hours before serving. Keep them in the fridge to stay fresh. Just wait to add the basil, olive oil, and balsamic glaze until right before serving. This keeps the salad looking nice. This salad pairs well with grilled meats like chicken or steak. It also goes great with crusty bread or a light pasta. You can serve it as a side dish or a light main course. A crisp white wine adds a nice touch too. To make the salad more filling, add proteins like grilled chicken or shrimp. You can also mix in grains like quinoa or farro. These additions will give you more energy and make the dish heartier without losing its fresh taste. Peach Caprese Salad is packed with vitamins and minerals. Peaches provide vitamin C and fiber. Mozzarella adds calcium and protein, while basil offers antioxidants. This salad is not just tasty but also a healthy choice for any meal. For the complete Peach Caprese Salad recipe, check out the Full Recipe. In this blog post, we explored a delicious Peach Caprese Salad. We covered ingredients, preparation steps, and ways to make it stand out. You learned about nutrition and how to store leftovers. This salad is refreshing, simple, and versatile. You can use different fruits, cheeses, and even adjust it for dietary needs. Enjoy experimenting with flavors and making this dish your own. Your next meal can be both fun and tasty with a Peach Caprese Salad on the table.

Peach Caprese Salad Fresh and Flavorful Delight

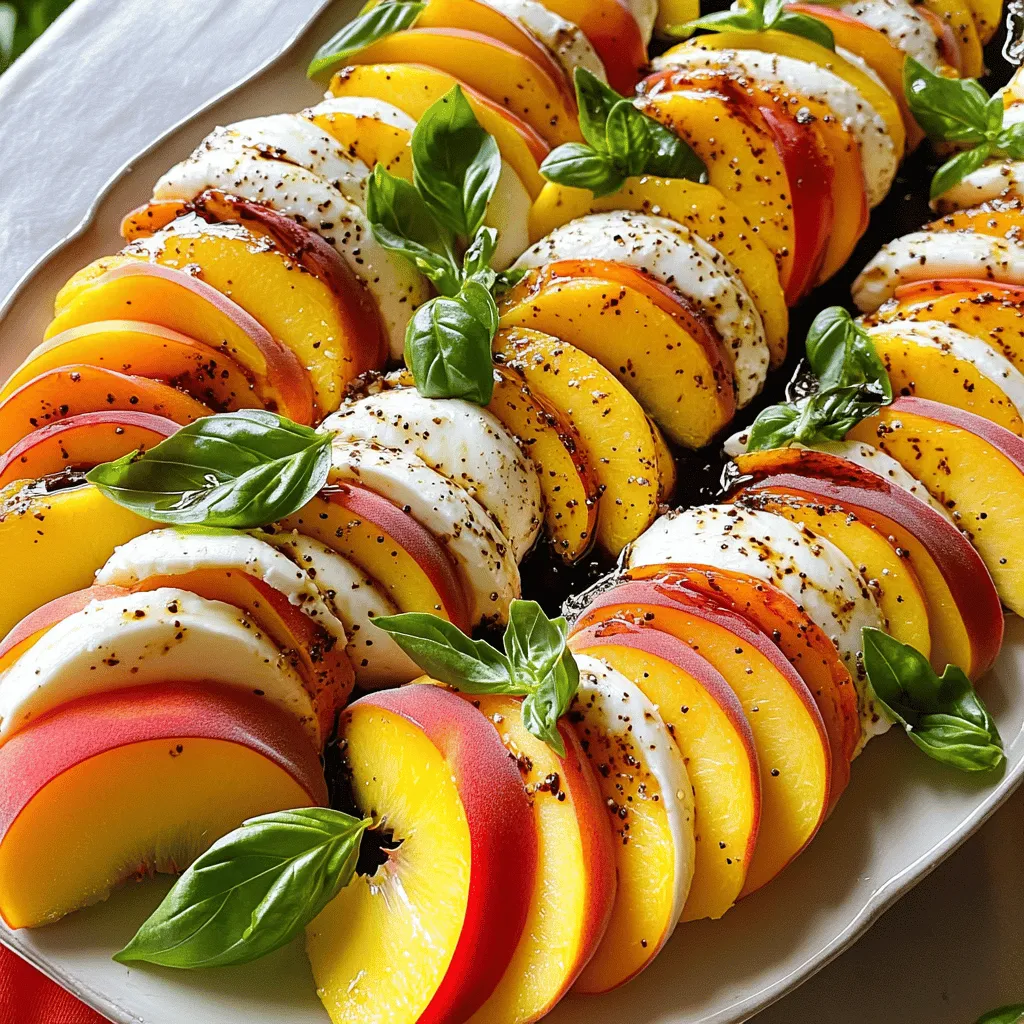
Looking for a delightful dish that bursts with flavor and freshness? Let me introduce you to Peach Caprese Salad! This

To make Lemon Herb Grilled Salmon, you need a few fresh and simple items. Here’s a list of what you'll need: - 4 salmon fillets (approximately 6 oz each) - 2 tablespoons olive oil - Zest and juice of 1 fresh lemon - 3 cloves garlic, finely minced - 1 teaspoon fresh dill, chopped - 1 teaspoon fresh parsley, chopped - 1 teaspoon fresh thyme, chopped - Salt and freshly ground black pepper to taste - Lemon wedges and additional fresh herbs for garnish Each ingredient adds flavor and makes the dish bright and tasty. The fresh herbs bring life to the salmon. The lemon juice adds a nice tang. This combination makes a perfect meal for any day of the week. You can find the full recipe in the main article. Now, get ready to enjoy a delicious dish that is easy to make! First, grab a small mixing bowl. In it, whisk together the olive oil, lemon zest, lemon juice, minced garlic, and chopped herbs. This step is key for great flavor. Make sure all ingredients mix well. This way, each bite of salmon will burst with taste. Next, take your salmon fillets and arrange them in a shallow dish. Pour the marinade over the salmon. Use a spoon to coat each piece well. Cover the dish with plastic wrap. Place it in the fridge for 30 minutes to 2 hours. This time allows the flavors to sink into the fish. When it's time to cook, preheat your grill to medium-high heat. To keep the salmon from sticking, oil the grill grates with a paper towel dipped in oil. After that, remove the salmon from the marinade. Let any extra marinade drip off. Discard the leftover marinade. Now, lay the salmon skin-side down on the grill. Grill the salmon for 6-8 minutes. Flip it halfway through for even cooking. The fish should turn opaque and flake easily with a fork. This method ensures a delicious meal every time. Enjoy your Lemon Herb Grilled Salmon! For the complete steps, check the Full Recipe. Grilling salmon is simple if you follow a few key tips. The grilling time depends on the thickness of the fillet. For a 1-inch thick fillet, grill for about 6-8 minutes. Thinner fillets may need only 4-6 minutes. Always check for doneness; the salmon should look opaque and flake easily with a fork. After grilling, let the salmon rest for 3-5 minutes. This step helps keep the fish moist and flavorful. To boost the flavor of your salmon, consider adding more herbs or spices. You might try fresh basil or a sprinkle of smoked paprika. Both options add a unique twist. Marinade the salmon for at least 30 minutes. If you have more time, letting it sit for 2 hours makes the flavors even better. Just ensure it stays in the fridge while marinading. A beautiful plate makes the meal more enjoyable. Serve your grilled salmon on a white plate. This helps the colors pop. Add lemon wedges around the fillets. A sprinkle of fresh herbs on top adds nice color and flavor. For side dishes, try a light salad or roasted veggies. They pair well with the salmon and enhance the meal's appeal. For a full recipe, check out the details above. {{image_4}} You can cook salmon in various ways. Broiling and grilling are two popular options. - Broiling: This method uses high heat from above. To broil, place the salmon on a baking sheet. Set your oven to broil and cook for about 6-8 minutes. Keep an eye on it, as broiling can cook quickly. - Grilling: This method adds a smoky flavor. Preheat your grill to medium-high heat. Cook the salmon skin-side down for about 6-8 minutes, flipping halfway. Use a spatula to turn it gently. If you prefer a healthier option, try baking the salmon. Preheat your oven to 375°F. Place the salmon on a baking dish and cover it with foil. Bake for 15-20 minutes. This keeps the fish moist and tender. You can switch up the flavors with different citrus fruits. Instead of lemon, try lime or orange. Each fruit gives a unique twist to the taste. For some heat, add red pepper flakes to the marinade. This adds a spicy kick. You can also use mustard for a tangy flavor. Mixing it with the marinade brings new life to the dish. If you need gluten-free options, this recipe is naturally gluten-free. Just check your ingredients to ensure they are safe. For dairy-free needs, this recipe fits perfectly too. Want to switch the fish? You can use trout or tilapia instead of salmon. Each fish has its flavor and texture, which can change the dish's outcome. Enjoy experimenting with different types of fish to find your favorite! To store leftover grilled salmon, place it in an airtight container. This keeps it fresh and prevents odors from mixing. Make sure to cool the salmon to room temperature before sealing. You can keep it in the fridge for up to three days. Enjoy it in salads or sandwiches for quick meals. If you want to save grilled salmon for later, freezing is a great option. Wrap the salmon tightly in plastic wrap and then place it in a freezer bag. This helps keep the flavor intact. For best quality, eat it within three months. When you're ready to cook, thaw it in the fridge overnight or use the cold water method. Just seal it in a bag and place it in cold water until it’s thawed. To reheat salmon, I suggest using the oven or stovetop. For the oven, preheat it to 275°F. Place the salmon on a baking sheet and cover it with foil. Heat for about 15 minutes. This keeps the salmon moist and tasty. If using the stovetop, warm it gently in a skillet over low heat. Avoid high heat, as it can dry out the fish. Remember, seafood can easily become tough if overheated. So, take your time! For the best taste, marinate the salmon for at least 30 minutes. This time allows the flavors to soak in. If you have more time, go for up to 2 hours. A longer marination gives a richer, deeper flavor. Just remember to keep it in the fridge while it marinates to stay safe. Yes, you can use frozen salmon! First, thaw it safely. Place the frozen fillets in the fridge overnight. If you're short on time, submerge them in cold water for about an hour. Once thawed, pat them dry and follow the recipe as usual. The marinade will still work wonders, giving you tasty salmon. Salmon is packed with nutrients. It is a great source of protein, which helps build and repair your body. Salmon also contains omega-3 fatty acids. These healthy fats are good for your heart. Eating salmon may lower the risk of heart disease and improve brain function. Plus, it has vitamins like B12, which helps keep your energy up. Enjoying salmon can be a tasty way to stay healthy! Grilling salmon is easy with the right ingredients and steps. You need fresh salmon, herbs, and a zesty marinade. The instructions guide you through marinating, grilling, and serving. Remember to experiment with flavors and techniques, like broiling or baking. Store leftovers properly for later enjoyment. Salmon is not only tasty but also packed with nutrients. Enjoy making this dish and sharing it with others!

Lemon Herb Grilled Salmon Tasty and Simple Recipe

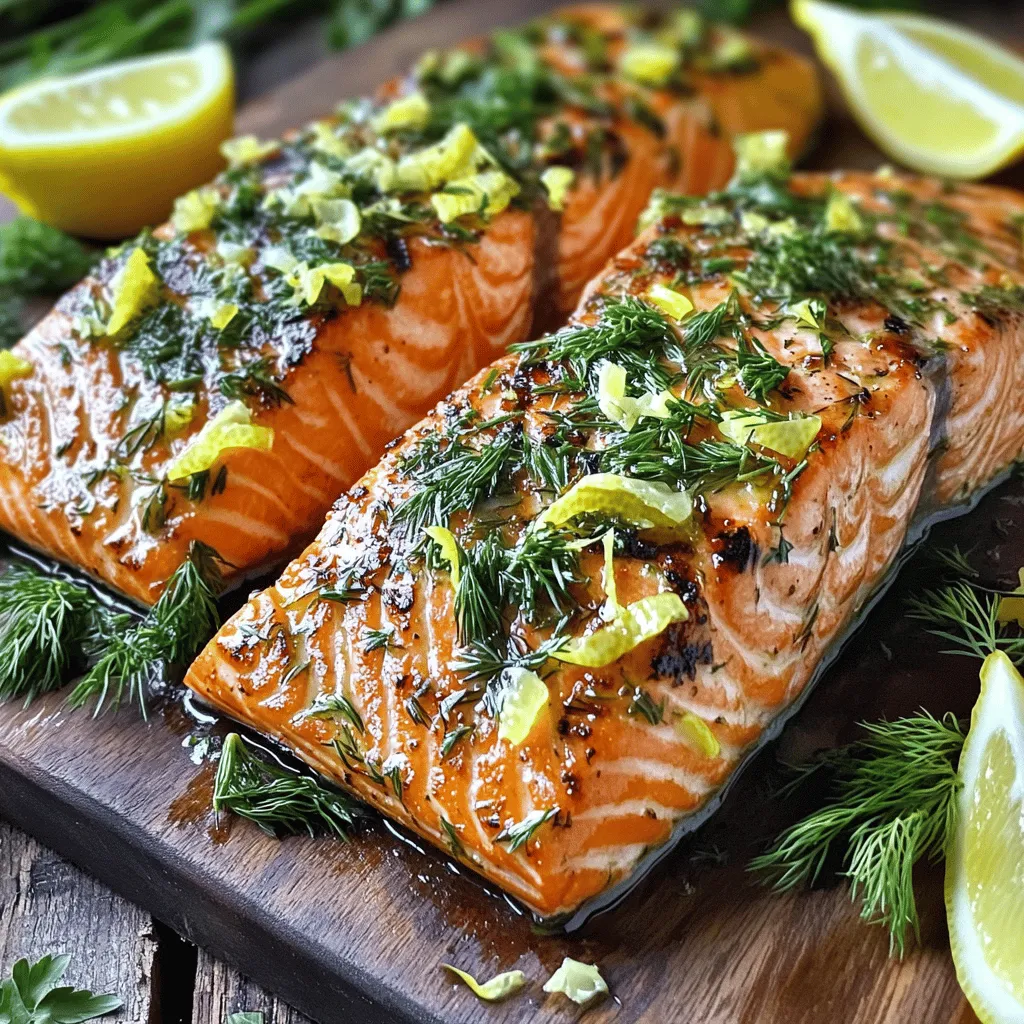
Looking for a quick and tasty way to impress your family? My Lemon Herb Grilled Salmon recipe is perfect for

- 4 medium zucchinis - 1 cup quinoa - 2 cups vegetable broth - 1 cup cherry tomatoes, halved - 1/2 cup black olives, sliced - 1/2 cup feta cheese, crumbled - 1/4 cup fresh basil, chopped - 1 teaspoon dried oregano - Salt and pepper to taste - 1/2 cup mozzarella cheese, shredded When I make stuffed zucchini boats, I always start with fresh zucchinis. They are the star of the dish. I recommend choosing medium-sized zucchinis. They are easier to scoop and fill. Next, I use quinoa for a healthy base. It has a nice texture and is full of protein. For flavor, I add cherry tomatoes and black olives. The tomatoes add sweetness, while olives give a salty burst. Feta cheese adds a creamy and tangy touch. I love crumbling it into the filling. To enhance the taste, I use fresh basil and dried oregano. These herbs bring a bright, fresh flavor. I season with salt and pepper to make everything pop. Finally, I top each boat with shredded mozzarella cheese. It melts beautifully and adds a rich finish to the dish. You can find the full recipe above to see all the steps. - Preheat oven to 375°F (190°C). - Prepare a baking dish with parchment paper. - Slice each zucchini in half lengthwise and scoop out the flesh. - Boil vegetable broth in a medium saucepan. - Add the rinsed quinoa and let it simmer. - Set the cooked quinoa aside to cool. - Sauté the reserved zucchini flesh, cherry tomatoes, and olives in a skillet. - Mix the cooked quinoa with the sautéed vegetables, feta, and basil. - Fill each zucchini half with the quinoa mixture, pressing gently. - Sprinkle mozzarella cheese on top of the stuffed zucchinis. - Bake for 25-30 minutes until golden and bubbly. - Allow the zucchini boats to cool before serving. For the full recipe, check the detailed instructions above. Enjoy this easy and tasty dish! - Pick firm and fresh zucchinis. - Smaller zucchinis are often sweeter. Choosing the right zucchini is key to a great dish. Look for zucchinis that feel firm and heavy for their size. Avoid ones that feel soft or have blemishes. Smaller zucchinis tend to have a sweeter flavor and tender texture. I love using them for my stuffed zucchini boats because they cook evenly and hold their shape well. - Substitute quinoa with rice or couscous. - Add ground meat for a heartier meal. You can easily change up the filling. If you want a different grain, use rice or couscous instead of quinoa. Both options work great and add a nice texture. For a heartier meal, consider adding cooked ground meat like turkey or beef to the mix. This adds protein and makes the dish more filling, perfect for hungry families! - Experiment with spices like chili flakes. - Try different cheese combinations. To boost flavor, try adding spices like chili flakes for some heat. You can also mix in fresh herbs like parsley or dill for extra zest. Cheese is another area to play with. Swap feta with goat cheese or cheddar for a different taste. Each cheese brings its own character, so don't be afraid to experiment! If you want the full recipe, check out the complete details above. Enjoy cooking! {{image_4}} For a fun twist, you can easily make your zucchini boats vegetarian. Start by adding bell peppers or mushrooms to the filling. Both add great flavor and texture to your dish. If you're looking for a dairy-free option, try using vegan cheese alternatives. These can melt well and still give you that cheesy goodness. Want to travel the world with your taste buds? Try a Mediterranean style. Add sun-dried tomatoes for a rich, tangy flavor. If you prefer something more Southwestern, mix in black beans and corn. This adds a hearty touch and gives your zucchini boats a delicious kick. Make the most of what's fresh! Incorporate seasonal vegetables like spinach in spring or squash in fall. This not only boosts flavor but also keeps your meals exciting. Adapt your ingredients based on what’s in season. This way, you can enjoy different tastes throughout the year. For the full recipe, check out the Cheesy Mediterranean Stuffed Zucchini Boats. Store your leftover stuffed zucchini boats in an airtight container. This keeps them fresh. You should eat them within 3-4 days for the best taste. The flavors will stay great if stored properly. You can freeze uncooked zucchini boats for later meals. Just prepare them as per the Full Recipe, then place them in a freezer bag. When you want to eat them, thaw them overnight in the fridge before baking. This helps them cook evenly and taste delicious. For the best texture, reheat your stuffed zucchini boats in an oven. Set it to 350°F (175°C) and bake for about 15 minutes. You can also use a microwave for quick meals, but the oven gives a better result. Enjoy your tasty dishes warm! Follow the outlined recipe steps for best results. Start by preparing the zucchini. Preheat your oven to 375°F (190°C). Slice the zucchini in half and scoop out the flesh. Cook the quinoa in vegetable broth until tender. Sauté the zucchini flesh with tomatoes and olives. Mix everything together and fill the zucchini halves. Top with mozzarella cheese, then bake until golden. Yes, rice or farro work well as substitutes. Both grains provide a nice texture and taste. You can use leftover rice or even couscous if you have it on hand. Just adjust the cooking time based on what you choose. Cheese, fresh herbs, and breadcrumbs add flavor. You can use mozzarella, parmesan, or even goat cheese. Fresh herbs like basil or parsley brighten the dish. For a crunchy topping, sprinkle breadcrumbs mixed with olive oil before baking. Yes, they are low in calories and packed with nutrients. Zucchini is full of vitamins and fiber. The quinoa and veggies provide protein and antioxidants. Enjoying these boats can help you feel full and satisfied without extra calories. Stuffed zucchini boats are a tasty, healthy dish. We covered key ingredients like zucchini, quinoa, and flavorful toppings. You saw how to prepare, cook, and bake them step by step. Remember, you can mix and match ingredients to fit your taste or what you have on hand. Store extras right to enjoy later. Zucchini boats make a great meal choice. Try different flavors, and you'll find your favorite! Your kitchen will smell great, and you’ll love the results. Enjoy cooking!

Stuffed Zucchini Boats Flavorful and Easy Recipe

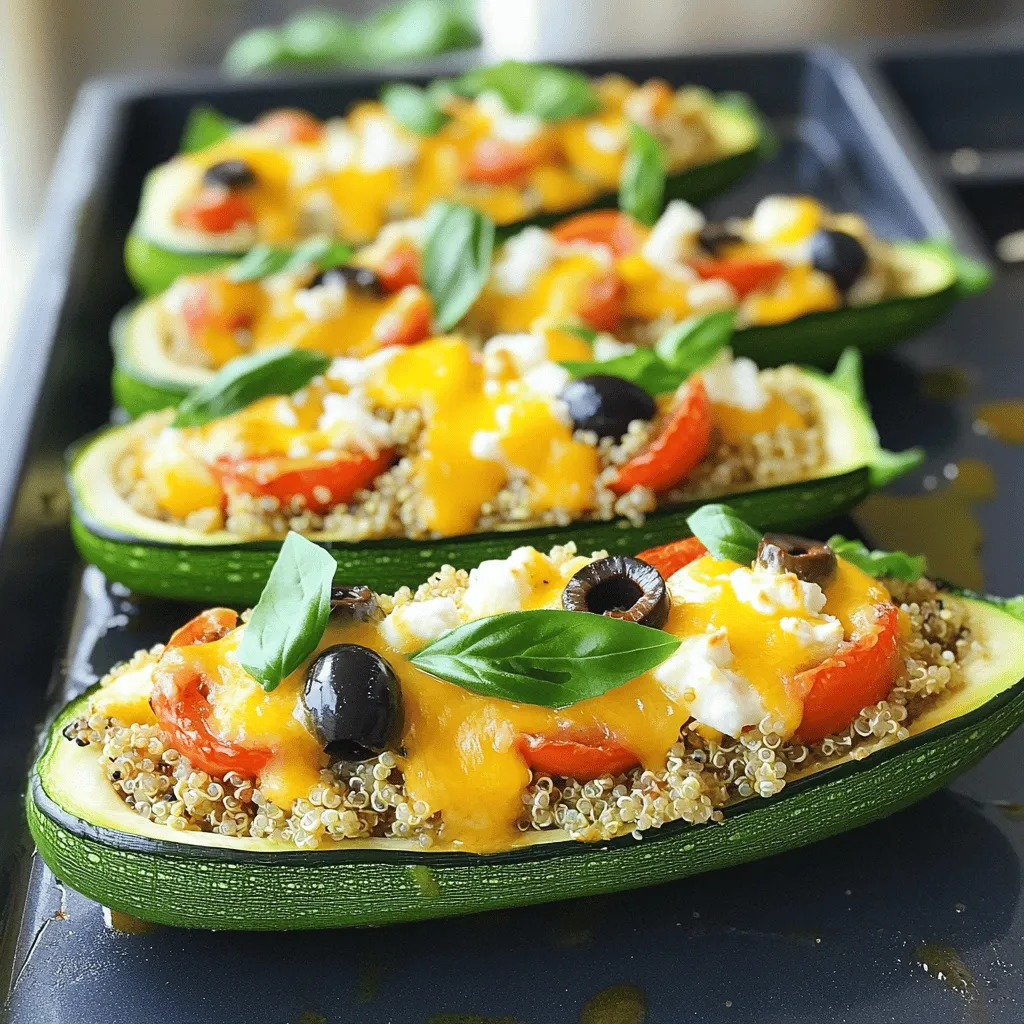
Looking for a quick and tasty dinner idea? Stuffed zucchini boats are your answer! They are simple to make and

- 2 ripe bananas, frozen - 2 tablespoons natural peanut butter - 1 cup unsweetened almond milk (or preferred milk) - Optional sweeteners and additional ingredients The main ingredients in this smoothie are simple yet powerful. The ripe bananas bring natural sweetness and creaminess. When frozen, they give a thick texture. Peanut butter adds rich flavor and healthy fats. Almond milk keeps it light and smooth. You can also add honey or maple syrup for extra sweetness. A dash of vanilla or cinnamon can elevate the taste. - Health benefits of bananas: Bananas are full of potassium. This mineral helps your heart and muscles. They also have fiber, which aids digestion. Plus, they can boost your mood with their natural sugars. - Advantages of peanut butter: Peanut butter is a good source of protein. It keeps you full longer and provides healthy fats. It also contains vitamins and minerals like magnesium and vitamin E. - Nutritional value of almond milk: Almond milk is low in calories. It is often enriched with vitamins like D and E. This makes it a great choice for those watching their weight or lactose-intolerant. - Converting tablespoons to grams: One tablespoon of peanut butter weighs about 16 grams. This is useful for precise measurements. - Adjusting for serving sizes: If you want to make more smoothies, simply multiply the ingredients. For example, double the recipe for four servings. Start by peeling the frozen bananas. Break them into smaller chunks. This helps the blender mix them well. Gather your tools, like a blender and measuring cups. Make sure you have everything ready before you start. Put the banana chunks in the blender first. Then, add the natural peanut butter and almond milk. If you like it sweeter, add honey or maple syrup next. Pour in the vanilla extract, ground cinnamon, and chia seeds if you want extra nutrition. Blend all the ingredients on high speed until smooth. If it’s too thick, add a splash of almond milk to thin it out. Blend again until creamy. Pour your smoothie into tall glasses. For the best taste, serve it cold. You can garnish with a sprinkle of ground cinnamon or a drizzle of peanut butter on top. For a fun touch, add sliced bananas or crushed nuts as decoration. Enjoy your Peanut Butter Banana Smoothie! For a detailed list of ingredients and precise steps, check the Full Recipe. To get your smoothie just right, you may want to adjust the thickness. If it’s too thick, add a splash of milk. Almond milk works great, but feel free to use what you have. You can also toss in some ice cubes for a thicker drink. Blend until smooth and creamy. A powerful blender makes this easier. If you have a regular blender, blend for a bit longer to make it silky. Not everyone likes the same level of sweetness. I suggest starting with one tablespoon of honey or maple syrup. Taste it! If you want it sweeter, add more. You can also use natural sweeteners like agave syrup or dates if you prefer. Each adds a unique flavor to your smoothie. Want more nutrition? Chia seeds are a great choice. Just one tablespoon adds fiber and omega-3s. You can also try adding protein powder for a boost. This can help keep you full longer. Try different nut butters if you want to mix it up. They all bring their own flavor and health benefits. For the full recipe and more tips, check out the [Full Recipe]. {{image_4}} You can easily make this smoothie vegan. First, replace honey with agave syrup. Agave syrup adds sweetness without animal products. Next, choose any plant-based milk. Almond, oat, or soy milk all work well. Each option brings its own flavor and nutrients. If you follow a keto diet, there are great tweaks. Use sugar-free sweeteners like stevia or erythritol. These keep the sweetness without extra carbs. Opt for high-fat dairy options too. Full-fat coconut milk or heavy cream can replace almond milk. This adds creaminess and keeps carbs low. Want to mix up the taste? Try adding cocoa powder for a chocolate twist. It pairs well with bananas and peanut butter. You can also swap peanut butter for almond or cashew butter. Each nut butter offers a unique flavor and texture. It’s fun to experiment with different options! For the full recipe, you can check the above section. Enjoy trying out these variations! To keep your peanut butter banana smoothie fresh, store it in the fridge. Use an airtight container to prevent air from spoiling it. If you have more than one serving, you can pour it into smaller jars. This makes it easy to grab and go. If you want to save it for later, freezing is a great option. Pour the smoothie into ice cube trays. Once frozen, you can blend the cubes later for a quick treat. In the fridge, your smoothie will last about one to two days. After that, its taste and texture may change. Look for signs of spoilage. If the smoothie smells sour or changes color, it’s best to toss it out. Always trust your senses to know if it’s still good. Want to save time in the morning? You can prep your smoothie in advance. Measure out your ingredients the night before and store them in the fridge. You can also blend a big batch and pour it into jars. Just shake or stir before drinking. This way, you’ll always have a nutritious option ready. Portioning your smoothie makes it easy to grab on busy days. For easy access, use clear jars to see how much you have left! For the full recipe, check out the Creamy Dreamy Peanut Butter Banana Smoothie 🥜. To make your smoothie thicker, adjust the ratios of your ingredients. Use less almond milk. You can also add ice cubes. For a creamier texture, use more frozen bananas. Adding chia seeds can help thicken it, too. They absorb liquid and create a nice, smooth blend. So, feel free to experiment until you find your favorite thickness! Yes! You can use many milk types. Almond milk is great, but soy milk works well too. Coconut milk adds a rich flavor. If you prefer dairy, whole milk or yogurt can be nice choices. Each option changes the taste and texture a bit. So, try different kinds to see what you like best! This smoothie is quite nutritious! It has about 300 calories per serving. Bananas provide potassium and fiber, while peanut butter adds protein and healthy fats. Almond milk keeps it light and dairy-free. Chia seeds boost nutrition even more. Overall, this drink offers a good balance of carbs, protein, and fats. You can make this smoothie without a blender! Start by mashing the bananas with a fork. Then, mix in the peanut butter and other ingredients using a whisk. If you have a hand mixer, that works too. This method may take longer, but you can still enjoy a tasty drink! To boost protein, consider adding protein powder. Whey or plant-based powders work well. Greek yogurt is another great choice. It adds creaminess and extra protein. You can also use silken tofu for a smooth texture. These options will help you reach your protein goals while keeping the smoothie delicious! This article covered how to make a delicious peanut butter banana smoothie. You learned about the key ingredients, their health benefits, and how to prepare them. I shared tips for achieving the perfect texture and ways to customize your smoothie. You also found guidance on storage options and meal prep. In conclusion, enjoy your smoothie as a quick snack or breakfast. It's tasty and full of good nutrients. With a few tweaks, you can make it fit your diet needs. Grab your blender and start blending for a tasty treat!

Peanut Butter Banana Smoothie Healthy and Tasty Drink

Are you ready to blend up a deliciously healthy treat? A Peanut Butter Banana Smoothie is a perfect mix of

- Fresh Strawberries: You need about 1 pound of fresh strawberries, which is around 20-25 berries. When selecting strawberries, look for shiny, red ones. Avoid any with bruises or soft spots. Choose berries that are firm and have bright green leaves. - Dark Chocolate: For the best flavor, use dark chocolate with at least 70% cocoa. This richness balances well with the tartness of the strawberries. You can also try chocolate with higher cocoa percentages for a more intense taste. - Coconut Oil: Adding 2 tablespoons of coconut oil is optional, but it helps the chocolate become smoother. This makes it easier to dip the strawberries. Coconut oil also gives a lovely sheen to the chocolate. Plus, it can help the chocolate set quickly. Make sure to gather all these ingredients before you start. This will help keep your process smooth and fun! You can find the full recipe for detailed steps and tips. Start by rinsing the strawberries gently under cool water. This removes dirt and helps keep them fresh. After rinsing, use a paper towel to pat them dry carefully. It's really important that the strawberries are dry. If they have moisture, the chocolate won’t stick well. To melt the chocolate, I recommend using a microwave. Put the dark chocolate and coconut oil in a microwave-safe bowl. Heat it in the microwave for 30 seconds. After each interval, stir the chocolate. Keep doing this until it melts and becomes smooth. This usually takes about 1 to 2 minutes. Watch closely to avoid burning it. You can also use a double boiler if you prefer. Just fill a pot with water and place another bowl on top. Heat it slowly until the chocolate melts. Now, let’s dip the strawberries. Hold each strawberry by its green stem. Immerse it into the melted chocolate. Allow the extra chocolate to drip off. Gently swirl the strawberry as you lift it out for a nice finish. Place the dipped strawberries on a parchment-lined baking sheet. You can add a sprinkle of sea salt or crushed dry rose petals on top for extra flavor. This will make them look special too. Let the chocolate set by chilling the strawberries in the fridge for about 30 minutes. After that, they’ll be ready to enjoy! *Preventing chocolate from overheating:* Keep an eye on your chocolate while melting. If it gets too hot, it may seize up. Use a microwave on low power. Heat for short bursts, about 30 seconds at a time. Stir well after each burst. This way, your chocolate melts smoothly without burning. *Ensuring even coverage on strawberries:* Make sure your strawberries are completely dry. Any water will cause the chocolate to slide off. When dipping, swirl the strawberry gently in the chocolate. This helps coat it evenly. Let any extra chocolate drip off before placing it on the baking sheet. *Adding flavors like vanilla or espresso powder:* You can make your chocolate more exciting. Add a drop of vanilla extract or a sprinkle of espresso powder to the melted chocolate. Both options give a rich taste. You can also try adding a pinch of sea salt for a nice contrast. *Using different types of chocolate (milk, white):* Feel free to mix it up with chocolate types. Milk chocolate is sweeter and creamier. White chocolate is rich and buttery. Each type offers a unique flavor. Experiment to see which you like best! *Best practices for maintaining texture:* When you chill the strawberries, do not leave them too long. If they sit too long in the fridge, the chocolate can become too hard. Aim for about 30 minutes. This will allow the chocolate to set perfectly without losing its shine. *Arranging for presentation:* For a beautiful display, use a nice platter. You can place the strawberries in cupcake liners for added charm. Arrange them in a circular pattern or any fun shape. A bed of mint leaves can add a fresh touch. Enjoy your stunning and tasty creation! {{image_4}} For a sweet twist, try white chocolate dipped strawberries. The steps are similar. Here’s what you need: - 1 pound fresh strawberries - 8 ounces white chocolate - Sprinkles or crushed nuts (optional) 1. Melt the White Chocolate: Use the same method as dark chocolate. Heat white chocolate in a microwave-safe bowl in 30-second bursts. Stir often until it’s smooth. 2. Dip and Decorate: Dip each strawberry into the melted white chocolate. Add sprinkles or crushed nuts while the chocolate is wet for added flair. White chocolate adds a creamy flavor. You can also mix in some vanilla to boost the sweetness. Get creative with toppings! You can use: - Chopped nuts (e.g., almonds or pistachios) - Crushed cookies (like Oreos or graham crackers) - Drizzles of dark or white chocolate For seasonal flavors, think about adding peppermint during winter or zest from citrus fruits in spring. These ideas make each batch unique and fun. Enjoy the process! Each variation brings a new twist to your delightful chocolate dipped strawberries. Check out the Full Recipe for more tips and ideas. To keep your chocolate dipped strawberries fresh, refrigeration is key. Place them in a single layer on a plate or container. Cover them gently with plastic wrap or a lid. This helps prevent air exposure. The strawberries will stay fresh for about 1 to 2 days. If you need them to last longer, avoid washing them until you are ready to eat. To maximize flavor and texture, always store them in the fridge. The cool air helps the chocolate stay firm. Just remember, they taste best when fresh! If you want to save chocolate dipped strawberries for later, freezing is a great option. First, let them cool and set completely. Next, place them on a baking sheet lined with parchment paper. Make sure they are not touching. Freeze them for about 1 to 2 hours until they are solid. Once frozen, transfer them to an airtight container or freezer bag. Be sure to label the bag with the date. They will taste good for about 2 to 3 months. When you are ready to eat, move them to the fridge to defrost for a few hours. This way, they will keep their shape and flavor. Enjoy your delicious treat anytime! To keep chocolate from cracking, ensure it is melted properly. Use a microwave for short bursts, stirring often. You can add coconut oil to the chocolate. This helps make it smooth and less likely to crack. - Make sure your strawberries are dry. Any water can cause the chocolate to crack. - Work in a cool area. Heat can affect the chocolate's texture. - Once dipped, let them chill in the fridge. This helps the chocolate set evenly. Yes, you can use milk chocolate instead of dark. Milk chocolate is sweeter and creamier. This can change the taste of your strawberries. Some people love the sweet mix of milk chocolate with fresh strawberries. - If you love rich flavors, dark chocolate is the way to go. - For a sweeter bite, milk chocolate is a great choice. - You can also mix dark and milk chocolate for a fun blend. You can find pre-made chocolate dipped strawberries at local bakeries or grocery stores. Many shops offer fresh options, especially around holidays. - Check online for delivery from local bakeries. - Some gourmet stores have them ready to go. - You can also order from popular online shops. They often deliver them fresh to your door. For a full recipe, check out the delicious steps to make your own chocolate dipped strawberries at home! Making chocolate dipped strawberries is simple and fun. We covered key ingredients like fresh strawberries, dark chocolate, and coconut oil. I shared step-by-step instructions, from preparing strawberries to melting chocolate and dipping techniques. Tips helped avoid common mistakes and enhance flavor. We explored variations, including white chocolate and toppings. Storage advice ensures your treats stay delicious longer. With these insights, you can create tasty treats that impress and delight. Enjoy your sweet creations!

Chocolate Dipped Strawberries Delightful Dessert Recipe

Chocolate-dipped strawberries are a sweet treat that’s both easy and impressive. If you’re looking to wow your friends or indulge

To make these tasty bites, you need a few simple ingredients. Here’s what you will need: - 1 large head of cauliflower, cut into bite-sized florets - 1 cup all-purpose flour (or gluten-free flour for a gluten-free option) - 1 cup cold water - 1 teaspoon garlic powder - 1 teaspoon onion powder - 1 teaspoon smoked paprika - 1/2 teaspoon salt - 1/2 teaspoon freshly cracked black pepper - 1 cup Buffalo sauce (store-bought or homemade) - 2 tablespoons melted butter (optional, adds richness) - Fresh parsley, finely chopped (for garnish) These ingredients come together to create a crunchy and spicy snack that everyone will love. If you want to make this dish gluten-free, swap the all-purpose flour for gluten-free flour. This change keeps the texture light and crispy. You can find gluten-free flour blends at most grocery stores. Look for one that works well for baking. This ensures a great taste without gluten. Garnish your Buffalo Cauliflower Bites with fresh parsley for a pop of color. This touch makes them look fancy. You can also serve them with dipping sauces. Ranch or blue cheese dressing works best. These creamy dips balance the heat from the Buffalo sauce. You can also try other sauces like yogurt or hummus for a twist. Enjoy experimenting with different flavors! First, you need a large head of cauliflower. Cut it into bite-sized florets. This size helps them cook evenly. Rinse the florets in cold water to remove any dirt. Pat them dry with a clean towel. Dry florets hold the batter better, so this step is key. In a large bowl, mix 1 cup of all-purpose flour with 1 cup of cold water. Add 1 teaspoon of garlic powder, 1 teaspoon of onion powder, 1 teaspoon of smoked paprika, 1/2 teaspoon of salt, and 1/2 teaspoon of black pepper. Whisk until the batter is smooth and thick. It should coat the florets well. If you want gluten-free bites, swap regular flour for gluten-free flour. Preheat your oven to 450°F (230°C). Line a baking sheet with parchment paper. Dip each cauliflower floret into the batter. Make sure each piece is well coated. Let any extra batter drip off. Space the florets out on the baking sheet. This helps them get crispy. Bake them for 20 to 25 minutes. They should turn golden brown and crispy. While the florets bake, mix 1 cup of Buffalo sauce with 2 tablespoons of melted butter in a bowl. Stir until smooth. When the cauliflower is done, carefully move them into the bowl with the sauce. Toss them gently to coat each piece. Put the sauced cauliflower back onto the baking sheet. Bake for another 10 minutes. This step crisps the sauce and adds flavor. Afterward, let them cool for about 5 minutes. Enjoy your Buffalo cauliflower bites with ranch or blue cheese dressing for dipping. For the full recipe, check above. To get your Buffalo Cauliflower Bites extra crispy, follow these steps: - Use cold water in your batter. This helps create a light and airy coating. - Spread the florets apart on the baking sheet. Overcrowding can result in steaming, not crisping. - Bake on a preheated baking sheet. This jumpstarts the crisping process. - Flip the florets halfway through baking. This ensures even crispiness on all sides. If you prefer different cooking methods, try these options: - Air Frying: Preheat your air fryer to 400°F (200°C). Basket-style fryers work best. Cook in batches for about 15-20 minutes. Shake the basket halfway through for even cooking. - Frying: Heat oil in a deep pan to 350°F (175°C). Carefully add the battered florets. Fry in small batches for about 3-4 minutes until golden. Drain on paper towels to remove excess oil. Coating your cauliflower well is key to great flavor and texture: - Make sure the batter is thick enough. It should stick well to the florets. - Dip each floret completely in the batter. Ensure it’s fully covered for best results. - Tap off excess batter. Too much will lead to soggy bites. - Let the coated florets rest for a few minutes before baking. This helps the batter adhere better. For the full recipe, check out the complete guide. {{image_4}} You can make the batter for Buffalo Cauliflower Bites even tastier. Here are some great ideas: - Add spices: Try cumin, chili powder, or cayenne for extra heat. - Herbs: Mix in dried oregano or thyme for a fresh taste. - Cheesy twist: Add nutritional yeast for a cheesy flavor without dairy. These options let you customize your bites to your liking! Buffalo sauce is classic, but don't stop there! - BBQ sauce: Use your favorite BBQ sauce for a sweet and tangy flavor. - Asian-inspired: Try soy sauce, sesame oil, and sriracha for a unique twist. Each sauce brings its own flair, making your bites exciting. Buffalo Cauliflower Bites can fit any diet. - Vegan option: Use plant-based butter or skip the butter altogether. - Non-vegan twist: Add cheese to the batter for a richer taste. These adaptations ensure that everyone at your table can enjoy this snack. Don't forget to check the Full Recipe for all the details! To store leftover Buffalo Cauliflower Bites, let them cool completely. Place them in an airtight container. This keeps the bites fresh for up to three days in the fridge. If you want them to last longer, consider freezing them. For the best texture when reheating, use an oven or an air fryer. Preheat your oven to 350°F (175°C). Spread the bites on a baking sheet. Heat for about 10-15 minutes until they are crispy again. In an air fryer, set it to 350°F (175°C) and cook for about 5-7 minutes. This way, they stay crunchy and delicious. If you want to freeze your Buffalo Cauliflower Bites, the best time to do it is right after cooking. Let them cool, then place them in a single layer on a baking sheet. Freeze until solid, then transfer to a freezer-safe bag. They will last for up to three months in the freezer. When you are ready to eat, bake them from frozen for about 20-25 minutes at 450°F (230°C) for a tasty snack. Yes, Buffalo Cauliflower Bites are vegan. You can use flour and water for the batter. The Buffalo sauce is also usually vegan. Just check the label to be sure. To make Buffalo Cauliflower Bites gluten-free, swap out the all-purpose flour for gluten-free flour. This simple change keeps the recipe tasty and safe for gluten-free diets. Buffalo Cauliflower Bites pair well with many sides. Here are some ideas: - Fresh veggie sticks (carrots, celery, cucumber) - Creamy dips like ranch or blue cheese dressing - A light salad with a tangy vinaigrette - Crispy potato wedges or sweet potato fries You can adjust the heat level of your Buffalo Cauliflower Bites. For a spicy kick, use extra Buffalo sauce or a hotter variety. If you prefer milder bites, reduce the amount of sauce or choose a milder sauce. You can also add honey or maple syrup for sweetness, balancing the heat. Buffalo cauliflower bites are tasty and easy to make. We covered the key ingredients, including tasty sauces and gluten-free swaps. You learned simple steps, from prepping the cauliflower to baking it for crunch. I shared tips on achieving crispiness and cooking methods like air frying. You now have ideas for flavor variations and how to store leftovers. Remember, these bites can fit any meal. Enjoy experimenting with flavors and making this dish your own.

Buffalo Cauliflower Bites Flavorful and Easy Snack

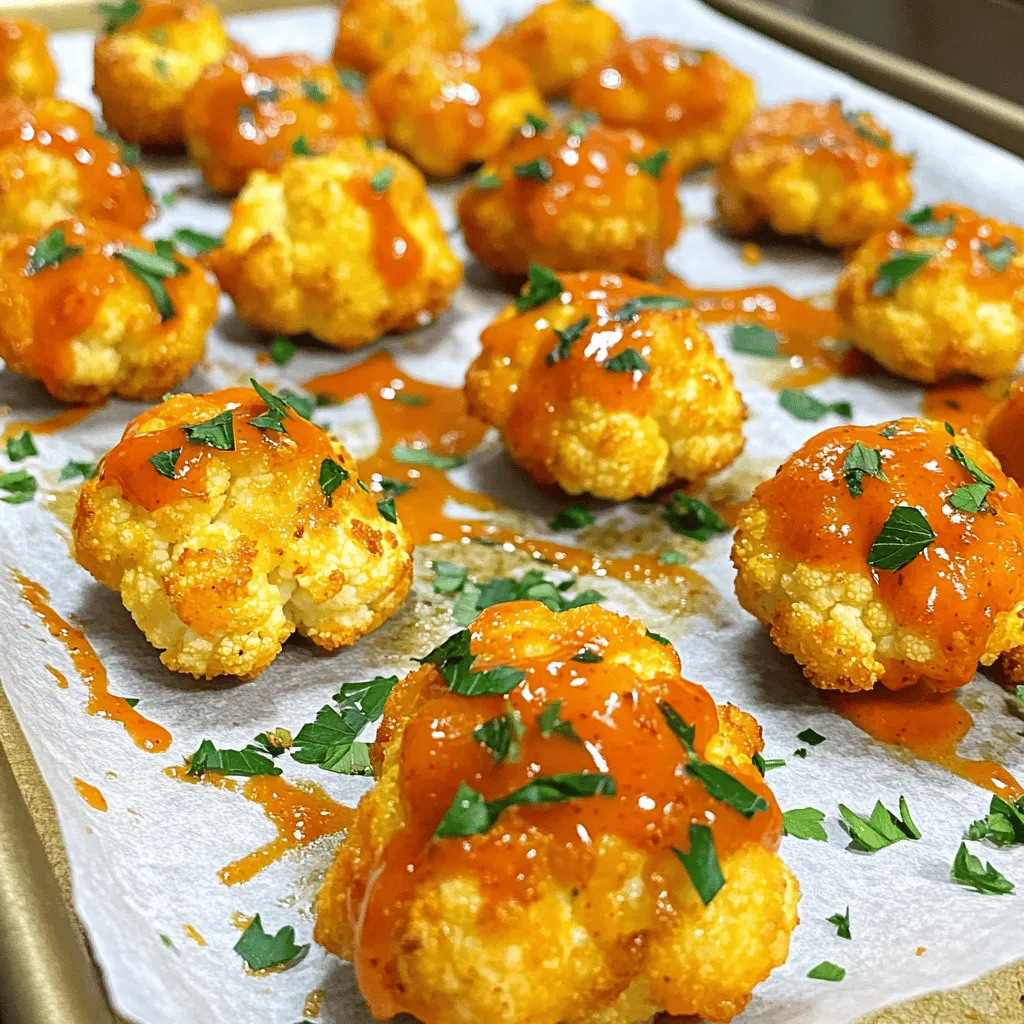
Looking for a fun, tasty snack? You’ll love these Buffalo Cauliflower Bites! They pack a punch of flavor and are

Older posts
Newer posts
← Previous Page1 … Page77 Page78 Page79 … Page83 Next →

dsad

© 2025 yumymoments • Built with GeneratePress

Our Policies

  • Copyright Policy
  • Cookie Policy
  • GDPR Policy
  • Privacy Policy
  • Disclaimer
  • Terms Of Use

More Information

  • Home
  • About
  • Contact
  • Appetizers
  • Dessert
  • Dinner
  • Drinks
©2025, yumymoments About Back To Top