Looking for a delicious, easy dinner idea? Let me introduce you to my Balsamic Glazed Chicken! This dish packs a punch of flavor without a lot of effort. You’ll use simple ingredients you likely have at home. With just a few steps, you’ll be grilling up juicy chicken in a sweet and tangy glaze that’s perfect for any meal. Ready to impress your taste buds? Let’s get cooking!
Ingredients
List of Ingredients
– 4 boneless, skinless chicken breasts
– 1/2 cup balsamic vinegar
– 1/4 cup honey
– 2 tablespoons Dijon mustard
– 3 cloves garlic, minced
– 1 tablespoon olive oil
– 1 teaspoon dried oregano
– 1 teaspoon salt
– 1/2 teaspoon black pepper
– Fresh basil leaves, for garnish
Equipment Needed
– Mixing bowl
– Grill or grill pan
– Resealable plastic bag or shallow dish
Nutritional Information
– Calories per serving: 250
– Macronutrient breakdown:
– Protein: 30g
– Fat: 10g
– Carbohydrates: 15g
When I cook balsamic glazed chicken, I love how simple the ingredients are. Each item plays a huge role in the flavor. Balsamic vinegar gives a tangy kick, while honey adds sweetness. Dijon mustard balances these flavors with a slight bite. Garlic gives it a warm, savory taste.
For equipment, a mixing bowl works well to combine all the marinade ingredients. A grill or grill pan is key for cooking the chicken until it has beautiful grill marks. Using a resealable bag makes marinating easy, ensuring every piece of chicken gets coated.
In terms of nutrition, this dish is packed with protein, which is great for muscle health. It has a good amount of healthy fats from olive oil, and the carbohydrates from honey provide a quick energy boost.
Step-by-Step Instructions
Marinating the Chicken
First, grab a medium bowl. Combine the following ingredients for the marinade:
– 1/2 cup balsamic vinegar
– 1/4 cup honey
– 2 tablespoons Dijon mustard
– 3 cloves garlic, minced
– 1 tablespoon olive oil
– 1 teaspoon dried oregano
– 1 teaspoon salt
– 1/2 teaspoon black pepper
Whisk these ingredients well. This mixture serves as both a marinade and a glaze. Next, take the chicken breasts and place them in a large resealable bag or shallow dish. Pour half of the marinade over the chicken. Make sure each piece is coated. Seal the bag or cover the dish. Place it in the fridge for at least 30 minutes or up to 2 hours. This time lets the flavors sink in deeply.
Preparing the Grill
While the chicken marinates, it’s time to prepare your grill. Preheat your grill or grill pan to medium-high heat. This step is crucial for a good sear. Let the chicken sit out for about 10 minutes before grilling. This helps the chicken reach room temperature, which ensures even cooking.
Grilling the Chicken
Now it’s time to grill! First, remove the chicken from the marinade. Let any excess marinade drip off. Place the chicken on the grill. Cook for about 6-7 minutes per side. You want to check the internal temperature. It should reach 165°F (75°C) to be safe to eat. In the last few minutes, brush the remaining marinade on the chicken. This creates a sticky glaze that adds great flavor.
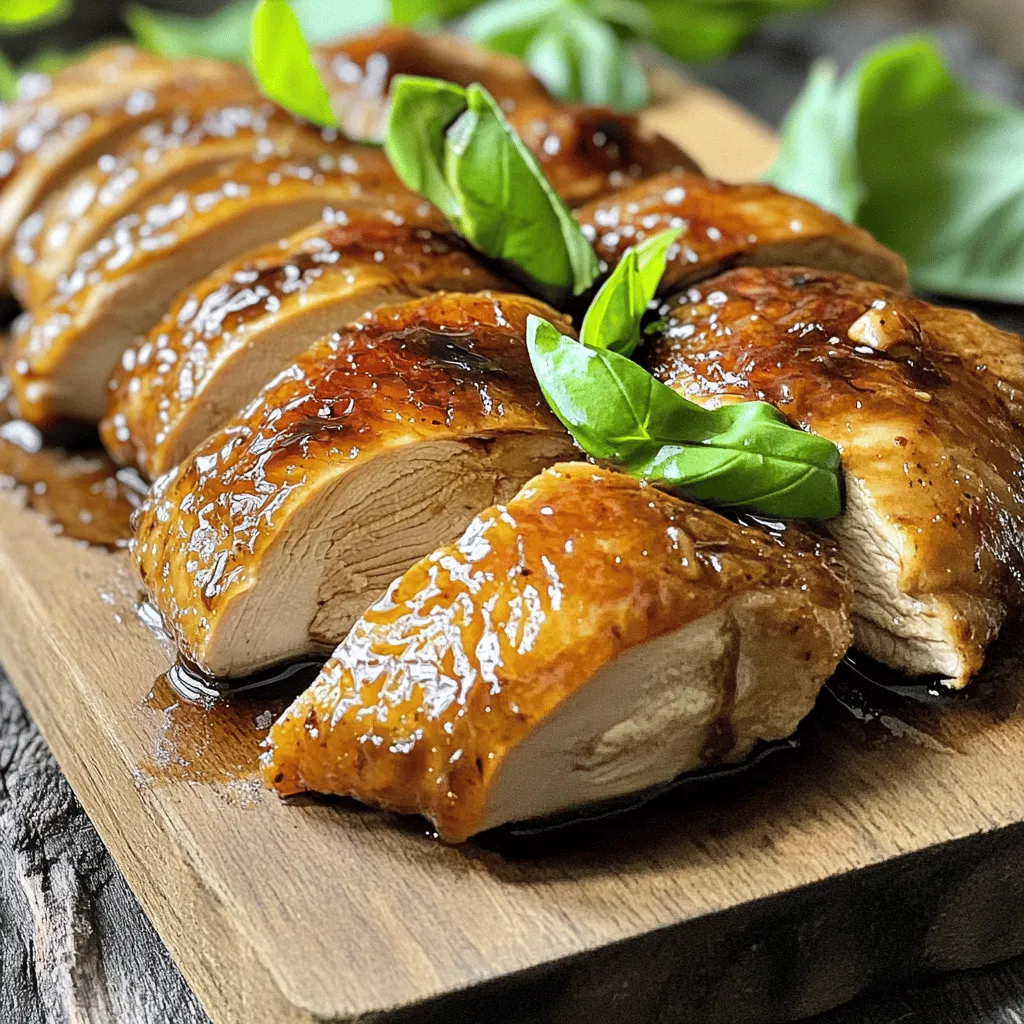
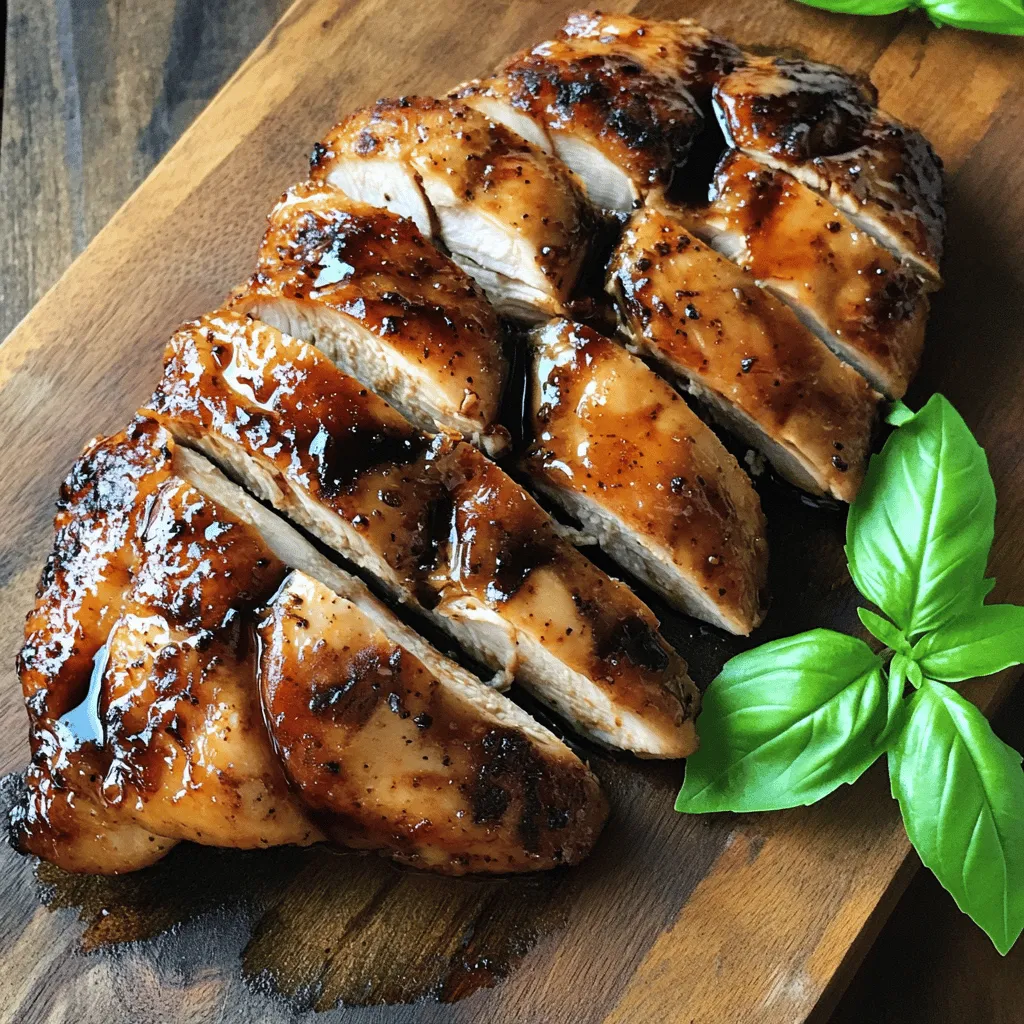
Once the chicken is done, take it off the grill. Let it rest for 5 minutes. This resting time helps keep the chicken juicy. After resting, slice the chicken and drizzle any leftover glaze over the top. Garnish with fresh basil leaves for a lovely touch.
Tips & Tricks
Perfecting the Glaze
To get that sticky glaze, cook the marinade down. Heat it in a pan until it thickens. This step adds great flavor. When using leftover marinade, make sure to cook it first. This keeps everything safe to eat.
Ensuring Tender Chicken
Let your chicken rest after cooking. This helps the juices spread out. A good resting time is about five minutes. Always check the cooking temperature. Chicken should reach 165°F (75°C) to be safe and juicy.
Presentation Suggestions
To serve, place the chicken on a nice wooden board. Slice it to show the juicy inside. Scatter fresh basil leaves around the dish. This adds color and flavor. Pair it with grilled veggies or a quinoa salad for a tasty meal.
Variations
Different Balsamic Glazes
You can change up the flavor of your glaze easily. Look for flavored balsamic vinegars. Options like fig, raspberry, or garlic can add unique tastes. These vinegars often have a sweeter profile. They make the dish fun and different. If you want a sweeter glaze, try using maple syrup or agave nectar. These alternatives can bring a new twist to your Balsamic Glazed Chicken.
Alternative Proteins
Balsamic glaze is not just for chicken! You can use salmon, tofu, or pork instead. Each protein cooks differently, so adjust the times accordingly. Salmon usually cooks in about 4-5 minutes per side. Tofu takes about 6-8 minutes, depending on thickness. Pork can vary too, but aim for 6-8 minutes per side, ensuring it reaches 145°F (63°C). Each protein will soak up the flavors of the glaze well.
Serving Pairings
When serving Balsamic Glazed Chicken, think about balance. Pair it with sides like roasted vegetables or a fresh salad. Quinoa or wild rice also works great. These sides complement the dish’s sweet and tangy notes. For drinks, consider a light white wine or a fruity red. A Pinot Grigio or a Beaujolais will elevate your meal. Enjoy your culinary adventure!
Storage Info
Storing Leftovers
To keep your balsamic glazed chicken fresh, store leftovers in the fridge. Place the chicken in an airtight container to stop moisture loss. This helps keep it juicy. You can store it for up to four days.
If you want to freeze the glazed chicken, wrap each piece tightly in plastic wrap. Then, place them in a freezer-safe bag. This method prevents freezer burn. You can enjoy this chicken for up to three months in the freezer.
Reheating Tips
When reheating, you want to keep the chicken moist. The best way is to use the oven. Preheat your oven to 350°F (175°C). Place the chicken on a baking sheet and cover it with foil. Heat for about 15 to 20 minutes.
You can also use the microwave, but this might dry the chicken. If you use the microwave, add a splash of water to keep it moist. Heat for about 1 to 2 minutes, checking often.
Shelf Life
Balsamic glazed chicken can last in the fridge for four days. If you freeze it, it stays good for about three months. After that, the taste and texture can change. Always check for any signs of spoilage before eating.
FAQs
Can I use other types of vinegar?
Yes, you can use different vinegars. Apple cider vinegar and red wine vinegar work well. Each type adds a unique taste. Apple cider vinegar gives a fruity tone. Red wine vinegar adds a sharper bite. You can experiment to find what you like best. Remember, the key is to balance the flavors in your dish. If you use a stronger vinegar, adjust the sweetness. This way, the dish stays tasty and balanced.
How do I know when the chicken is fully cooked?
To check if the chicken is done, use a meat thermometer. Insert it into the thickest part of the breast. The temperature should reach 165°F (75°C). If you don’t have a thermometer, cut the chicken to check. The juices should run clear, not pink. Also, the meat should be firm yet tender. With practice, you will learn to tell just by looking.
Can balsamic glazed chicken be made ahead of time?
Absolutely! This dish is perfect for meal prep. You can marinate the chicken in advance. Just place it in the fridge for up to 2 hours. If you need to, you can cook it ahead of time too. Store the cooked chicken in an airtight container. It stays fresh in the fridge for 3 to 4 days. Reheat the chicken in the oven or on the stove. This keeps it moist and flavorful.
This blog post covered a simple yet tasty balsamic glazed chicken recipe. You learned about key ingredients, equipment, and nutritional info needed for success. We discussed marinating, grilling tips, and how to achieve a perfect glaze. With variations like using different proteins and unique sides, there are many ways to enjoy this dish.
Remember to store leftovers properly and reheat carefully to maintain their great taste. Experiment with the tips and enjoy your flavorful creations!