Are you ready to indulge in one of the easiest and tastiest treats ever? Chocolate chip cookie dough bites are simple to make and perfect for satisfying your sweet cravings. In this article, I’ll guide you step-by-step through the ingredients, mixing process, and even share tips for delicious variations. Whether you want classic cookie dough or a vegan alternative, you’ll find everything you need to create these delightful bites. Let’s dig in!
Ingredients
All-Purpose Flour: Importance and Tips
All-purpose flour is the base for these cookie dough bites. It gives the dough structure. Use fresh flour for the best taste. I recommend sifting it to remove lumps. This helps the dough mix smoothly. Always measure it correctly to avoid a dry texture.
Sweeteners: Brown Sugar vs. Granulated Sugar
Sweeteners add flavor and texture. Brown sugar makes the bites chewy. It has molasses, which adds moisture. Granulated sugar gives sweetness and a little crunch. Combining both sugars creates the perfect balance in taste. For this recipe, I use 1/2 cup of brown sugar and 1/4 cup of granulated sugar.
Butter: Choosing the Right Type for Texture
Butter is key for a creamy texture. Unsalted butter works best for controlling salt. Make sure it’s softened. This allows it to blend well with the sugars. Cold butter will not mix properly. I suggest leaving it out for about 30 minutes before starting. This helps create a rich flavor in your bites.
Step-by-Step Instructions
Preparing the Flour Safely
To start, you need to treat the flour for safety. Raw flour can hold bacteria. To kill any germs, spread the flour on a baking sheet. Bake it at 350°F for about five minutes. This step is crucial, so do not skip it. After baking, let the flour cool completely before using it in your dough.
Mixing the Dough: Key Steps for Creaminess
Now, it’s time to mix the dough. In a large bowl, add softened butter, brown sugar, and granulated sugar. Use an electric mixer to beat this blend for two to three minutes. The mixture should look creamy and smooth. Then, pour in the vanilla extract and add the salt. Mix again until everything is well combined. Next, gradually add the cooled flour. Mix on low speed until it’s just combined. Finally, gently fold in the mini chocolate chips. Be careful not to overmix here; you want those chips to stay whole.
Chilling Process: Why It Matters
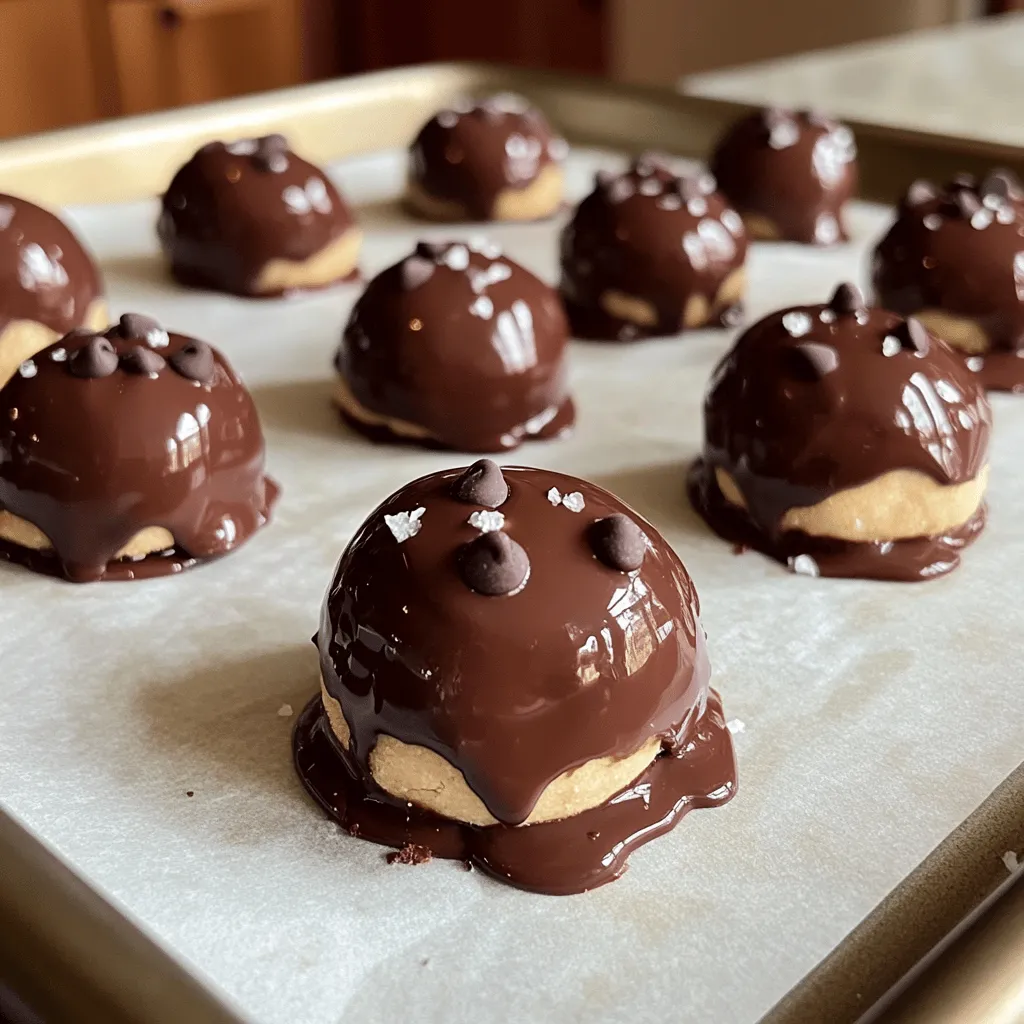
Chilling the dough is a key step. After forming balls of dough, place them on a parchment-lined baking sheet. Space them out well. Then, put the sheet in the fridge for about 30 minutes. This chilling helps the dough firm up, making it easier to coat later. After chilling, dip each ball into melted dark chocolate. This will give your bites a rich coating. Once they are coated, chill them again for another 15 minutes. This sets the chocolate coating. You will love how nice they look and taste!
Tips & Tricks
Achieving the Perfect Dough Consistency
To get the right dough, start with room temperature butter. It helps blend smoothly. Use a mixer on medium speed for about 2-3 minutes. This makes the butter and sugar creamy. When you add flour, mix slowly. You want it mixed but not too dry. If the dough feels too sticky, add a bit more flour. If it’s too dry, a splash of milk can help.
Chocolate Coating Techniques for an Even Finish
For a smooth chocolate coating, melt dark chocolate gently. Use a microwave or a double boiler. Dipping each bite in the warm chocolate gives a nice shine. Use a fork to lift each ball out. This helps remove extra chocolate. Let any drips fall back into the bowl. This way, each bite stays neat and tasty.
Presentation Tips for Serving Cookie Dough Bites
Serve these cookie dough bites on a nice plate. A decorative platter can impress your guests. You can also use small gift boxes for a fun touch. Before serving, sprinkle a bit of sea salt on top. It adds a nice contrast to the sweet chocolate. Enjoy presenting these bites as a treat for any occasion!

Variations
Vegan Recipe Adaptation: Substitutes to Use
To make chocolate chip cookie dough bites vegan, swap butter for coconut oil or vegan butter. This change gives a rich taste while keeping it plant-based. Use brown sugar instead of granulated sugar, as it is often vegan. Make sure to check labels to avoid any hidden animal products. You can also use dairy-free chocolate chips for the coating, keeping everything delicious and ethical.
Gluten-Free Options: Best Flour Choices
If you need gluten-free bites, almond flour or oat flour works great. Almond flour adds a nutty flavor, while oat flour keeps it light. Both options are easy to find. You might need to adjust the amount slightly; start with a little less and add more as needed. Always check for gluten-free labels to avoid cross-contamination.
Flavor Enhancements: Adding Nuts or Spices
Want to jazz up your cookie dough bites? Try adding nuts like walnuts or pecans for extra crunch. You can also mix in spices like cinnamon or nutmeg for warmth. Both options take your bites to the next level. A touch of sea salt on top adds a nice contrast to the sweet chocolate. These small changes can create a unique twist on the classic treat.
Storage Info
Best Practices for Storing Cookie Dough Bites
To keep your cookie dough bites fresh, store them in an airtight container. Place a sheet of parchment paper between layers to avoid sticking. You can keep them on the counter for up to three days. For longer storage, the fridge is perfect. Just remember to let them cool fully before sealing.
Freezing for Longer Shelf Life: How-To Guide
Freezing is a great option for longer storage. Once your cookie dough bites are set, place them on a baking sheet. Make sure they are not touching. Freeze them for about an hour until firm. After that, transfer them to an airtight freezer bag. They will last up to three months in the freezer. When you want to enjoy them, let them thaw in the fridge for a few hours.
Signs of Spoilage: When Not to Eat
Always check your cookie dough bites before enjoying them. If you see any mold or an off smell, toss them out. Also, if the chocolate coating looks dull or chalky, it may have gone bad. Trust your senses—it’s better to be safe than sorry!
FAQs
Can I eat cookie dough bites raw?
Yes, you can eat cookie dough bites raw. However, raw flour can cause issues. To safely enjoy cookie dough, heat-treat the flour first. This process kills harmful bacteria. Once you follow this step, you can indulge in the creamy, sweet goodness without worry.
How long do homemade cookie dough bites last?
Homemade cookie dough bites last about one week in the fridge. Store them in an airtight container. If you want to keep them longer, freeze the bites. They can last up to three months in the freezer. Just remember to thaw them before enjoying!
Where can I buy pre-made chocolate chip cookie dough bites?
You can find pre-made chocolate chip cookie dough bites in many grocery stores. Check the frozen dessert aisle or the snack section. Some stores also offer them in their bakery. Online retailers may have a wider selection as well.
What are the best brands for store-bought cookie dough bites?
Some popular brands for store-bought cookie dough bites are Nestlé Toll House, Edoughble, and Doughp. These brands offer tasty options that are safe to eat raw. Check the labels for ingredients and flavors that suit your taste.
In this blog post, we explored the key ingredients needed for perfect cookie dough bites. We discussed the importance of flour, sweeteners, and butter. I shared step-by-step instructions to mix and chill your dough properly. You learned tips to achieve the right consistency and creative ways to present your treats. We also looked at variations for vegan and gluten-free options and covered essential storage tips.
Enjoy making your cookie dough bites, and remember to try new flavors! Happy baking!