Get ready to indulge with my delightful Chocolate Hazelnut Spread Cookies! These soft treats blend rich cocoa with creamy hazelnut spread, bringing your chocolate dreams to life. Perfect for any occasion, I’ll guide you through each step—from gathering simple ingredients to baking the perfect batch. Whether you’re a baking novice or a pro, this recipe will satisfy your sweet cravings. Let’s dive in and whip up something amazing!
Ingredients
In this section, I will share the key components needed for making chocolate hazelnut spread cookies. Each ingredient plays a big role in creating that soft, chewy texture and rich flavor. Here’s what you need:
– 1 cup all-purpose flour
– 1/4 cup unsweetened cocoa powder
– 1/2 teaspoon baking soda
– 1/4 teaspoon salt
– 1/2 cup unsalted butter, softened
– 1/2 cup packed brown sugar
– 1/4 cup granulated sugar
– 1 large egg
– 1 teaspoon pure vanilla extract
– 1/2 cup chocolate hazelnut spread
– 1/2 cup chopped hazelnuts
– Flaky sea salt for topping
Each of these ingredients blends together to create a cookie that is not only soft but also bursting with flavor. The cocoa powder gives it a deep chocolate taste. The chocolate hazelnut spread adds a creamy texture that makes the cookies melt in your mouth. Chopped hazelnuts provide a nice crunch and extra nutty flavor.
Once you gather these ingredients, you will be ready to create a delicious treat.
Step-by-Step Instructions
Preparation Steps
– Preheat your oven to 350°F (175°C).
– Prepare a baking sheet by lining it with parchment paper. This keeps the cookies from sticking.
– In a medium bowl, whisk together the flour, cocoa powder, baking soda, and salt. Mix until well combined.
Mixing Steps
– In a large bowl, cream together the softened butter, brown sugar, and granulated sugar. Use an electric mixer on medium speed for 2-3 minutes until light and fluffy.
– Next, add the egg and vanilla extract. Beat until the mixture is smooth and fully combined.
– Gradually mix the dry ingredients into the wet mixture. Use low speed to avoid overmixing, which can make the cookies tough.
Final Steps
– Carefully fold in the chocolate hazelnut spread and chopped hazelnuts. Use a spatula to ensure even distribution.
– Scoop generous spoonfuls of dough onto the prepared baking sheet, leaving about 2 inches between each cookie.
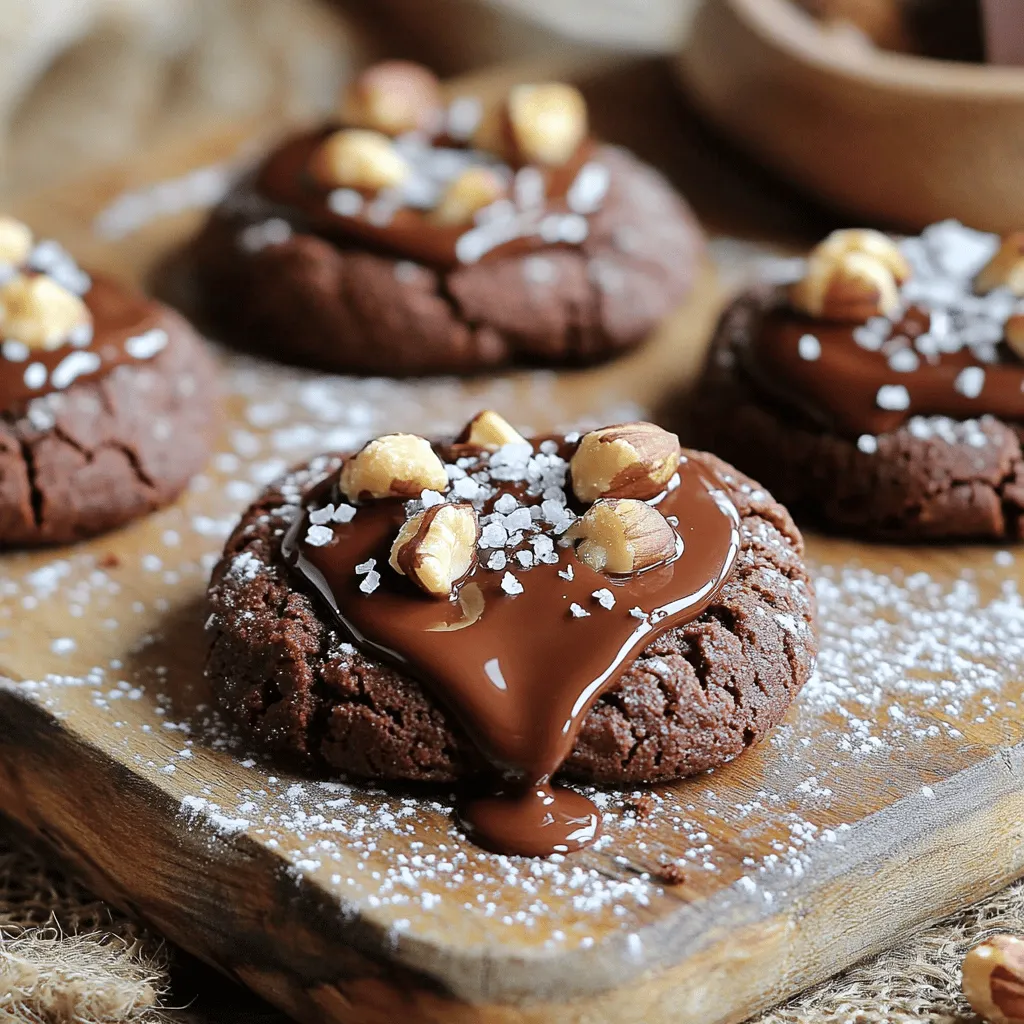
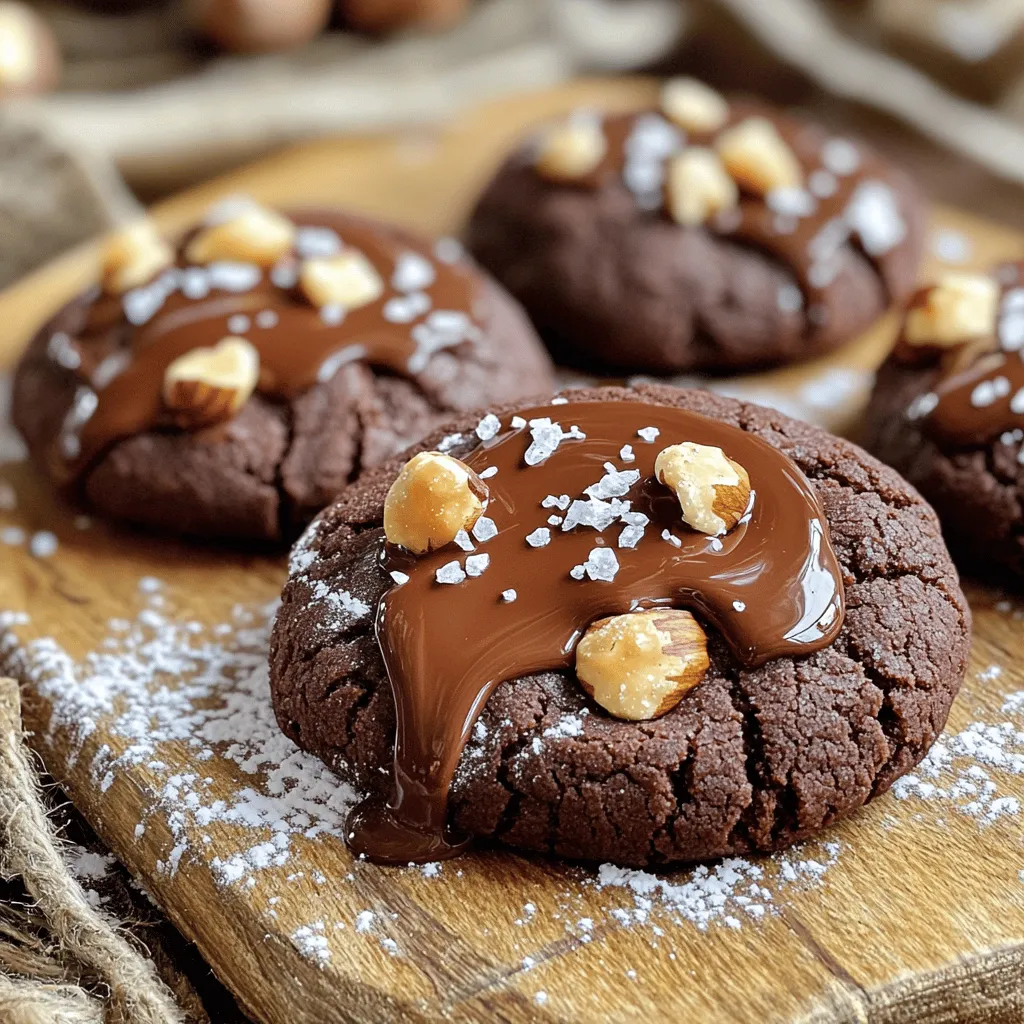
– Sprinkle a light pinch of flaky sea salt on top of each cookie. This adds a nice contrast to the sweetness.
– Bake the cookies for 10-12 minutes. The edges should be set, while the centers stay soft.
– After baking, let the cookies cool on the sheet for 5 minutes. Then, transfer them to a wire rack to cool completely.Enjoy the delightful taste of these chocolate hazelnut spread cookies.
Tips & Tricks
Baking Tips
– Best practices for measuring ingredients: Always use measuring cups and spoons. Level off dry ingredients with a knife for accuracy. For sticky ingredients like honey or syrup, spray the measuring cup with cooking spray first. This helps them slide out easily.
– How to avoid overmixing the dough: Mix just until you see no dry flour. Overmixing can lead to tough cookies. Use a spatula to fold in the chocolate hazelnut spread and hazelnuts gently.
Enhancing Flavor
– Toasting hazelnuts for added depth: Toasting hazelnuts brings out their rich flavor. Spread them on a baking sheet and bake at 350°F (175°C) for about 10 minutes. Keep an eye on them to avoid burning.
– Optional ingredients for flavor variations: You can add a pinch of sea salt for balance or mix in chocolate chips for extra chocolatey goodness. A dash of espresso powder can also deepen the flavor.
Presentation Tips
– Arranging cookies for serving: Place the cookies on a rustic wooden board or a white plate for contrast. Make sure to leave space between them for a neat look.
– Drizzling extra chocolate hazelnut spread: Melt a bit of the spread in the microwave for a few seconds. Use a spoon to drizzle it over the cookies. This adds a lovely finish and extra flavor.
Variations
Ingredient Swaps
You can easily change some ingredients in the cookie recipe. If you want gluten-free cookies, use gluten-free flour instead of all-purpose flour. Brands like Bob’s Red Mill offer good options that work well in baking.
For a dairy-free option, swap the butter for coconut oil or a vegan butter substitute. These will keep your cookies soft and tasty without dairy.
Flavor Combinations
Adding spices can take your cookies to the next level. A pinch of cinnamon gives warmth. If you enjoy coffee, try adding a bit of espresso powder for a rich flavor.
You can also mix in chocolate chips or other nuts. Semi-sweet or dark chocolate chips add extra sweetness. For nut lovers, try pecans or walnuts for a different crunch.
Dietary Adaptations
If you want to make a vegan version, replace the egg with a flaxseed egg. Mix 1 tablespoon of ground flaxseed with 2.5 tablespoons of water. Let it sit for a few minutes until it thickens. This works great in cookies!
For lower sugar options, use a sugar substitute like monk fruit or stevia. Just keep in mind that the taste may change a bit. You can also reduce the sugar in the original recipe by a third.
These swaps and adaptations let you enjoy your cookies while keeping your diet in check.
Storage Info
Cooling and Storing
To keep cookies fresh, cooling them properly is key. After baking, let the cookies sit on the baking sheet for about 5 minutes. This allows them to set. Next, move them to a wire rack to cool completely. This prevents soggy bottoms and keeps them soft.
For storage, choose airtight containers. Glass jars or plastic containers work well. Always wait until cookies are cool before sealing them. If you stack them, place parchment paper between layers to avoid sticking.
Freezing Cookies
Freezing cookie dough is simple and a great way to save time. First, scoop the dough onto a baking sheet. Leave space between each scoop. Freeze them until solid, about 1-2 hours. Then, transfer the frozen dough balls to a zip-top bag. Label the bag with the date and type of cookie.
To bake frozen cookies, no need to thaw. Preheat your oven and add a few minutes to the baking time. This way, you get fresh cookies anytime you want.
Shelf Life
At room temperature, these cookies stay fresh for about 5 days. Store them in an airtight container. Look for signs of spoilage, like a dry or hard texture. If you see mold, toss them out. Enjoy your cookies while they are soft and tasty!
FAQs
Common Questions
Can I use dark chocolate hazelnut spread?
Yes, you can use dark chocolate hazelnut spread. It adds a rich, bold flavor. This option works well if you enjoy deep chocolate taste. Just keep the rest of the recipe the same.
How do I make cookies softer?
To keep cookies soft, don’t overbake them. Bake until the edges are set, but the centers are still soft. Let them cool on the baking sheet. This way, they remain chewy and delicious.
What can I substitute if I don’t have hazelnuts?
If you lack hazelnuts, use walnuts or almonds. Both nuts provide a nice crunch. You can also skip the nuts for a nut-free option.
Recipe-Specific Questions
How do I know when the cookies are done?
Check the edges of the cookies. They should look firm. The centers may appear soft and slightly underbaked. This is perfect as they will firm up while cooling.
Can I adjust the sweetness of the cookies?
Yes, you can adjust the sweetness. Use less sugar if you prefer less sweet cookies. You can also add a pinch of salt to balance flavors.
Baking Techniques
What is the best way to prevent cookies from spreading?
To stop cookies from spreading, chill the dough before baking. This helps maintain their shape. Also, ensure you use enough flour in the mix to create a good texture.
How can I add more chocolate flavor to the cookies?
To boost the chocolate taste, add chocolate chips to the dough. You can also use a mix of cocoa powder and melted chocolate. This adds depth and richness to your cookies.
This blog post provided a clear guide to making delicious hazelnut cookies. We covered the ingredients, step-by-step instructions, and helpful tips. You learned about flavor variations, storage methods, and common questions.
Baking is fun and rewarding. With the right tools and knowledge, you can create amazing treats. Enjoy experimenting with flavors, and share your cookies with friends! Happy baking!


