Lemon bars are a classic treat, striking the perfect balance of sweet and tart. You’ll find that making this delightful dessert is simple and fun. With just a few fresh ingredients, you’ll create a dish that's perfect for any occasion. In this post, I’ll guide you through the easy steps to make the best lemon bars, share helpful tips, and show you how to customize your treat. Let’s get baking!
Why I Love This Recipe
- Bright and Zesty Flavor: The combination of fresh lemon juice and zest delivers a refreshing burst of citrus that is both uplifting and delicious.
- Easy to Make: This recipe is simple and straightforward, making it perfect for bakers of all skill levels to whip up a delightful treat.
- Perfect for Any Occasion: These lemon bars are a versatile dessert, great for parties, picnics, or just a sweet treat at home.
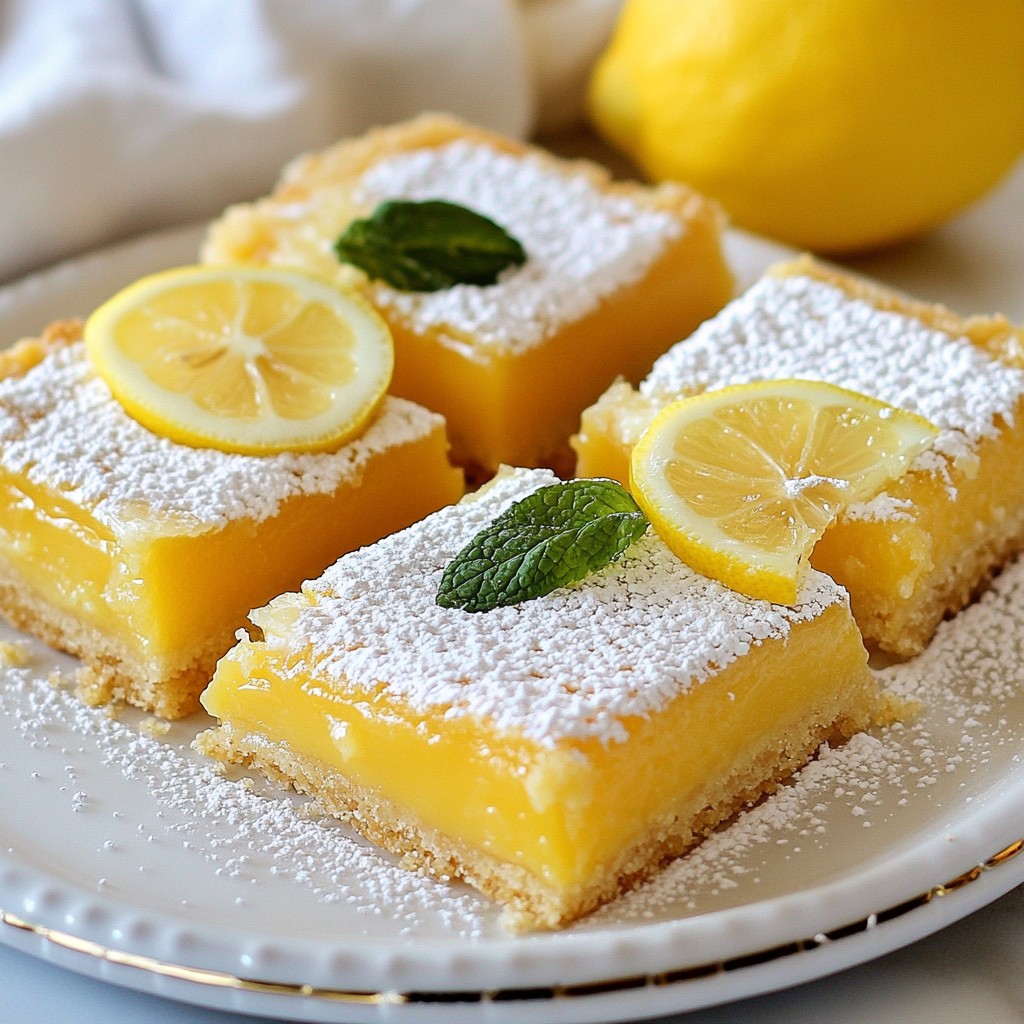
- Beautiful Presentation: Dusting with powdered sugar and garnishing with lemon slices and mint makes these bars not only tasty but visually appealing.
Ingredients
Complete Ingredient List
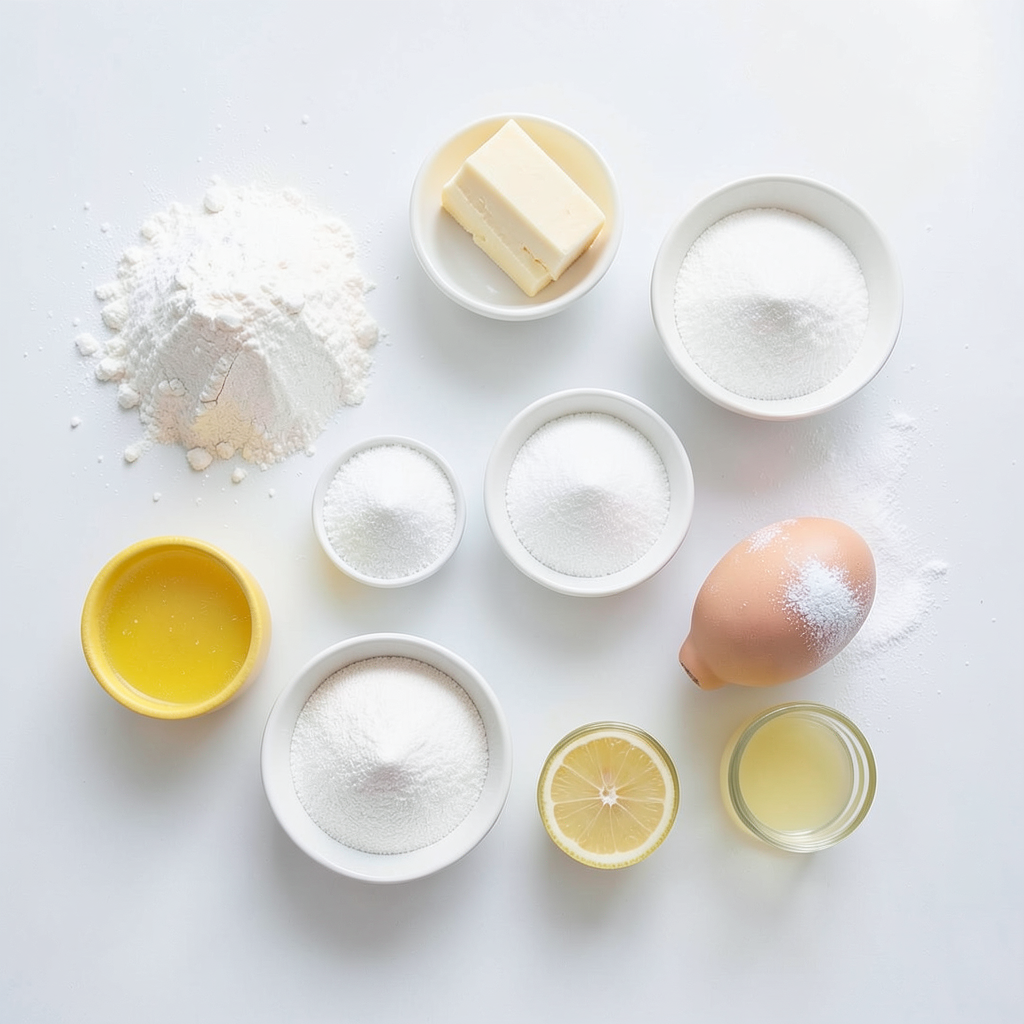
To make classic lemon bars, gather these ingredients:
- 1 cup all-purpose flour
- 1/4 cup powdered sugar
- 1/2 cup unsalted butter, softened
- 1 cup granulated sugar
- 2 large eggs
- 1/4 cup freshly squeezed lemon juice
- Zest of 1 lemon, finely grated
- 1/2 teaspoon baking powder
- 1/4 teaspoon fine sea salt
- Additional powdered sugar for dusting
These simple components create a bright and zesty treat.
Ingredient Substitutions
You can swap ingredients if needed:
- Use coconut oil instead of butter for a dairy-free option.
- Substitute half of the granulated sugar with honey for a different sweetness.
- If you lack fresh lemons, bottled lemon juice works in a pinch.
- For a gluten-free version, use a gluten-free flour blend.
These swaps can still yield tasty results.
Measurement Tips
Accurate measuring helps your bars turn out perfect.
- Use a kitchen scale for precise flour measurement. One cup of flour weighs about 120 grams.
- When measuring brown sugar, pack it firmly into the cup for the right amount.
- For lemon juice, roll the lemons on the counter before juicing. This releases more juice and flavor.
These tips ensure your lemon bars have the right texture and taste.
Step-by-Step Instructions
Preparing the Oven and Baking Pan
Start by preheating your oven to 350°F (175°C). This temperature is key for a nice bake. While the oven heats, get your 8x8-inch baking pan ready. Lightly grease the pan. Then, line the bottom and sides with parchment paper. Make sure some paper hangs over the edges. This helps you lift the bars out later.
Making the Crust
In a medium bowl, mix 1 cup of all-purpose flour and 1/4 cup of powdered sugar. These two ingredients form a sweet base. Next, add 1/2 cup of softened unsalted butter. You can use a pastry cutter or your fingers to mix it. Aim for a texture that looks like coarse crumbs. You want some pea-sized pieces for a nice crust.
Preparing the Lemon Filling
While your crust is baking, it’s time to make the lemon filling. In a large bowl, whisk together 1 cup of granulated sugar and 2 large eggs. Add 1/4 cup of freshly squeezed lemon juice and the zest of 1 lemon. This combination gives a bright flavor. Then, mix in 1/2 teaspoon of baking powder and 1/4 teaspoon of fine sea salt. Whisk until everything is smooth and well mixed.
Combining and Baking the Bars
Once the crust has baked for 15-20 minutes, take it out of the oven. Carefully pour the lemon filling over the hot crust. Use a spatula to spread it evenly. Return the pan to the oven. Bake for another 20-25 minutes. You want the filling to set around the edges, but it can still jiggle in the center.
Cooling and Serving Suggestions
After baking, let the lemon bars cool completely in the pan on a wire rack. This cooling step is important for a good set. Once cool, use the parchment paper to lift the bars out of the pan. Before serving, dust the top with additional powdered sugar. Cut the bars into 16 equal squares. You can garnish each square with a thin lemon slice and a sprig of fresh mint. This makes for a pretty plate and enhances the zesty flavor.
Tips & Tricks
Common Mistakes to Avoid
When making lemon bars, some common mistakes can ruin your treat. First, don't skip the fresh lemon juice. Bottled juice lacks the bright flavor you want. Second, watch the baking time closely. Overbaking makes the bars dry. Underbaking leaves them too gooey. Aim for a slight jiggle in the center. Finally, make sure to cool the bars completely before cutting. This helps them hold their shape.
How to Achieve the Perfect Set
Getting the perfect set for your lemon bars takes care. After baking, let them cool in the pan on a wire rack. This step is key for setting. If you cut them too soon, they won’t hold together. Allow them to chill in the fridge for at least an hour. This cooling time makes for cleaner cuts and better texture.
Dusting with Powdered Sugar: Best Practices
Dusting your lemon bars with powdered sugar adds flair. Use a fine mesh sieve for a light, even dusting. Tap it gently to avoid clumps. Dust the bars right before serving. If you do it too early, the sugar can soak in. For extra elegance, add a lemon slice or mint under the sugar. This makes your bars look even more inviting!
Pro Tips
- Use Room Temperature Eggs: For the best texture, ensure your eggs are at room temperature before mixing. This helps them incorporate more easily into the batter, resulting in a smoother filling.
- Fresh Lemon Juice is Key: Always use freshly squeezed lemon juice instead of bottled for a brighter, more vibrant flavor. The zest also adds a lovely aromatic quality to the bars.
- Don't Overbake: Keep an eye on the bars while they bake; you want the center to have a slight jiggle when you take them out. This ensures a creamy filling that sets as it cools.
- Chill for Best Results: Allow the lemon bars to cool completely in the pan and then refrigerate for at least an hour before serving. This enhances the flavors and makes cutting easier.
Variations
Adding Flavor Enhancements
You can easily add new flavors to your classic lemon bars. Consider adding herbs like fresh basil or mint. A hint of lavender can also work well. For a richer taste, use vanilla or almond extract. Just add a teaspoon to the lemon filling. These small changes can create a unique twist. Experiment and find what you enjoy the most!
Gluten-Free Option
If you need a gluten-free version, it’s simple! Swap the all-purpose flour for a gluten-free blend. Look for one that measures cup-for-cup like regular flour. This way, you keep the same texture and taste. Your lemon bars will still be zesty and delightful. Just make sure to check all other ingredients for gluten.
Alternative Toppings and Garnishes
Toppings can make your lemon bars even better. Dusting with more powdered sugar is a classic choice. You might also try a drizzle of melted chocolate on top. For a fresh touch, add berries like raspberries or blueberries. They add color and flavor. A dollop of whipped cream or yogurt can also enhance the dessert. Each topping brings its own fun twist!
Storage Info
How to Store Lemon Bars
To keep your lemon bars fresh, place them in an airtight container. Use parchment paper between layers to prevent sticking. Store them in the fridge for best results. This helps maintain their flavor and texture.
Freezing Instructions
You can freeze lemon bars for later enjoyment. First, let them cool completely. Then, cut them into squares. Wrap each square in plastic wrap, then place them in a freezer-safe bag. They can stay frozen for up to three months. When you're ready to eat, thaw them in the fridge overnight.
Shelf Life and Best Practices
When stored correctly, lemon bars last about one week in the fridge. Keep an eye on them for any signs of spoilage. If they start to look dry, it’s best to toss them. For the best flavor, enjoy them within the first few days of making them.
FAQs
Can I use bottled lemon juice instead of fresh?
Yes, you can use bottled lemon juice. However, fresh juice gives better taste. Fresh lemons have bright flavor and aroma. Bottled juice can be more tart and less vibrant. If you choose bottled juice, pick a high-quality brand. This ensures a more authentic lemon flavor in your bars.
How do I know when my lemon bars are done?
Look for a firm edge and a slight jiggle in the center. The filling should not be liquid but should be soft. The top may turn a light golden color. Use a toothpick to check; it should come out clean. If there are wet bits on the toothpick, bake a few more minutes.
What other recipes can I make with lemon zest?
Lemon zest adds flavor to many dishes. You can use it in cookies, cakes, or dressings. It enhances marinades and even adds zing to drinks. Try it in savory meals like chicken or fish. Lemon zest brightens flavors and makes dishes pop.
Can I cut the recipe in half for fewer servings?
Yes, you can cut the recipe in half. Use a smaller baking pan, like a 6x6 inch. Adjust the baking time as needed, since it may bake faster. Check the bars often to avoid overbaking. Enjoy your smaller batch of zesty lemon bars!
You learned about the key ingredients for lemon bars and how to use them. I shared tips for perfecting your crust and filling. You now know how to avoid mistakes and achieve a great set. With variations, you can customize flavors and toppings. You also discovered the best ways to store your lemon bars.
Making lemon bars is fun and rewarding. Enjoy baking and sharing your tasty treats!