If you’re craving a meal that’s packed with flavor and crunch, you’ve come to the right place! Crispy Chickpea Wraps are not just tasty; they’re also easy to make and healthy. I’ll guide you through each step, from gathering your ingredients to creating the perfect wrap. Whether you are a busy parent or a meal prep pro, you’ll find quick tips and tasty variations to suit your needs. Let’s dive into this delicious recipe!
Ingredients
Complete Ingredient List for Crispy Chickpea Wraps
To make these crispy chickpea wraps, you will need the following ingredients:
– 1 can (15 oz) chickpeas, drained and rinsed
– 1 tablespoon olive oil
– 1 teaspoon paprika
– 1 teaspoon garlic powder
– ½ teaspoon cumin
– Salt and pepper to taste
– 4 large whole wheat or spinach wraps
– 1 cup mixed greens (lettuce, spinach, arugula)
– ½ cup cherry tomatoes, halved
– ½ cucumber, thinly sliced
– ¼ cup tahini sauce (or your favorite dressing)
– Fresh cilantro or parsley, chopped for garnish (optional)
These ingredients come together to create a tasty and filling meal.
Nutritional Information per Serving
Each serving of crispy chickpea wraps contains:
– Calories: About 300
– Protein: 10g
– Carbohydrates: 40g
– Fiber: 12g
– Fat: 10g
This meal offers a balance of nutrients. The chickpeas provide protein and fiber. The fresh veggies add vitamins and minerals.
Possible Substitutions for Ingredients
If you can’t find some ingredients, here are a few substitutions:
– Chickpeas: You can use black beans or lentils.
– Olive oil: Avocado oil or coconut oil work well too.
– Tahini sauce: You can swap it for hummus or yogurt dressing.
– Wraps: Use gluten-free wraps or lettuce leaves for a low-carb option.
– Mixed greens: Try spinach, kale, or arugula for different flavors.
These swaps can help personalize your wraps to fit your taste or dietary needs.
Step-by-Step Instructions
Prepping the Chickpeas
First, preheat your oven to 400°F (200°C). This heat will help crisp the chickpeas. Next, drain and rinse one can of chickpeas. Place them in a medium bowl. Add one tablespoon of olive oil, one teaspoon of paprika, one teaspoon of garlic powder, and half a teaspoon of cumin. Season with salt and pepper to taste. Mix well so each chickpea gets coated.
Once coated, spread the chickpeas on a baking sheet lined with parchment paper. Ensure they sit in a single layer. Overcrowding can lead to soggy chickpeas. Roast them in the oven for 25-30 minutes. Stir them halfway through to promote even cooking. The chickpeas should be golden and crunchy when done.
Assembling the Wraps
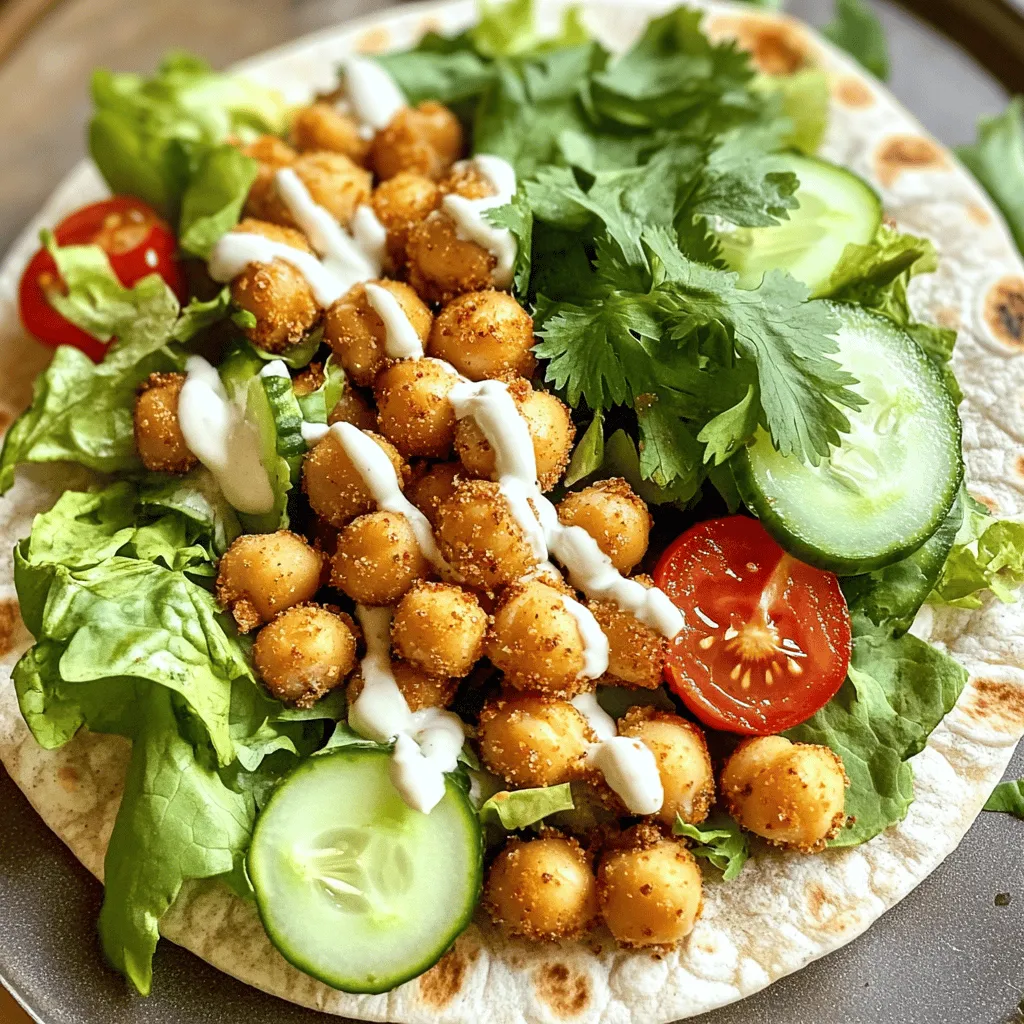
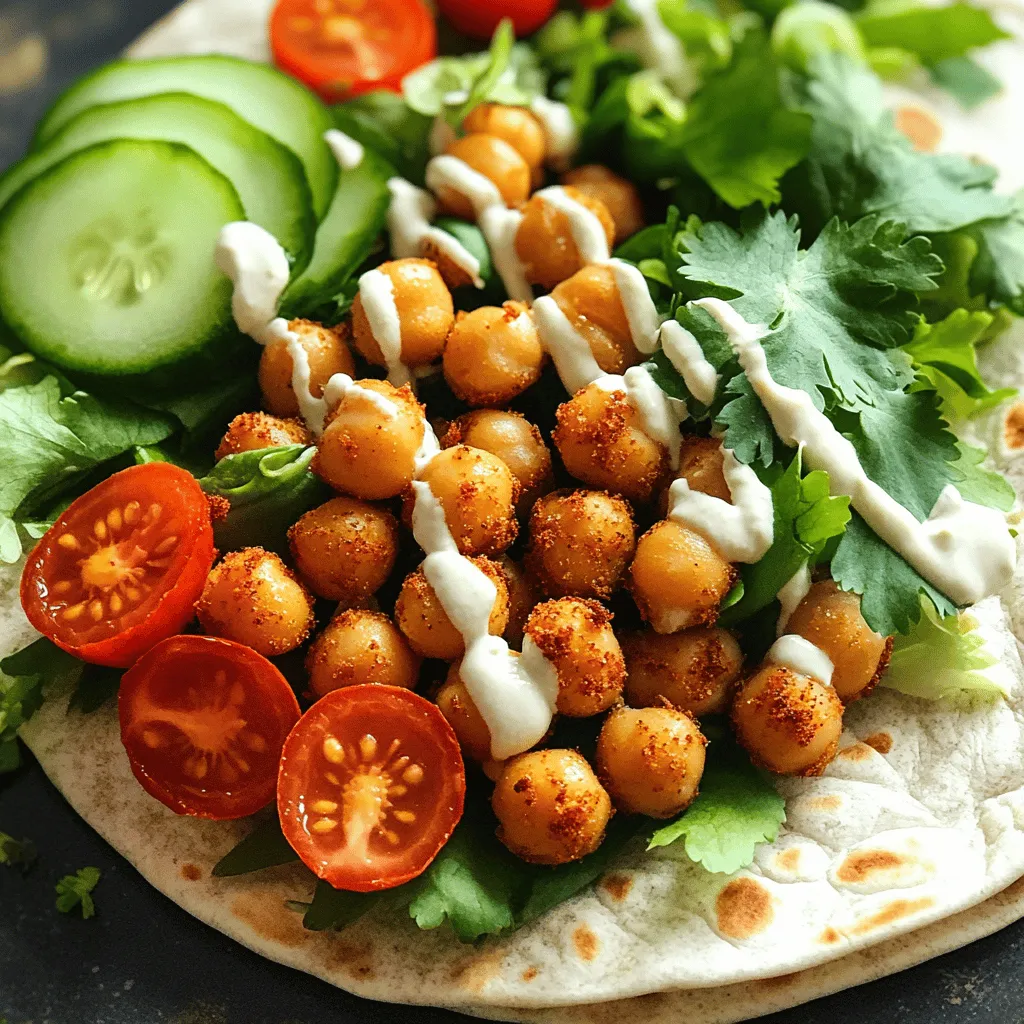
While the chickpeas roast, lay out four large whole wheat or spinach wraps. In the center of each wrap, add a handful of mixed greens. Next, place a few halved cherry tomatoes and thin cucumber slices on top. This mix brings fresh flavors and crunch to your meal.
Once the chickpeas are out of the oven and slightly cooled, add a generous portion over the veggies. Drizzle with tahini sauce or your favorite dressing for a creamy touch. If you want, sprinkle fresh chopped cilantro or parsley on top for extra flavor.
Roasting Tips for Optimal Crispiness
To achieve the best crispiness, make sure the chickpeas are dry before you coat them. Excess moisture can hinder their crunch. The key is to spread them out evenly on the baking sheet, allowing hot air to circulate around each chickpea.
Remember to check for doneness. They should look golden brown and feel crunchy. If they need more time, keep roasting but check every few minutes. Enjoy the process, and soon you will have a tasty meal ready to enjoy!
Tips & Tricks
How to Achieve the Perfect Crispiness
For crispy chickpeas, start with dry chickpeas. Drain and rinse them well. Pat them dry using a clean towel. This step removes extra moisture, helping them crisp up in the oven.
Next, coat the chickpeas in oil and spices evenly. I use a mix of paprika, garlic powder, and cumin for flavor. A good pinch of salt enhances the taste and promotes crispiness. Spread the chickpeas out on the baking sheet. Make sure they aren’t touching. This allows hot air to circulate around them.
Roast them at 400°F (200°C) for 25-30 minutes. Stir them halfway through. This helps them cook evenly. Look for a golden color and a crunchy texture to know they are ready.
Recommended Serving Suggestions
I love serving the wraps warm. They taste best when fresh. You can pair them with a side of lemon wedges for a fresh kick. A light salad or roasted veggies make a great side dish too.
If you want extra flavor, try adding hot sauce or a spicy yogurt dip. You can also serve with a dollop of hummus on the side. This adds creaminess and a nice contrast to the crunch.
Meal Prep Ideas for Crispy Chickpea Wraps
Meal prep is easy with these wraps. You can roast a big batch of chickpeas ahead of time. Store them in an airtight container for up to a week. Just remember to keep them separate from the wraps.
When you’re ready to eat, assemble the wraps fresh. Add your greens, tomatoes, and cucumbers. This keeps the wraps crisp and delicious. You can even prep the veggies in advance. Chop them and store them in the fridge.
For a quick lunch or dinner, grab your chickpeas and veggies. Wrap them up, drizzle with tahini sauce, and enjoy!
Variations
Spicy Chickpea Wraps: Adding Heat
To make your chickpea wraps spicy, add some heat. You can mix in cayenne pepper or chili powder with your chickpeas before roasting. This gives a nice kick. You can also top your wraps with hot sauce or spicy salsa. These options bring bold flavors to your meal. Adjust the heat level to suit your taste.
Vegetarian and Vegan Options
Crispy chickpea wraps are perfect for everyone. For vegetarian options, add cheese or yogurt sauce. If you want vegan options, use tahini or avocado instead. You can also try adding roasted vegetables. Bell peppers, zucchini, or sweet potatoes work well. This makes your wrap colorful and packed with nutrients.
Different Wraps and Fillings to Try
You can switch up your wraps easily. Try using lettuce leaves for a low-carb option. Corn tortillas add a nice twist too. For fillings, mix and match your greens, fruits, and sauces. Add sliced avocado or shredded carrots for extra crunch. Each variation keeps your meal exciting.
Storage Info
How to Properly Store Leftover Wraps
To keep your crispy chickpea wraps fresh, store them in an airtight container. Make sure to let them cool completely before sealing. This helps prevent sogginess. Place a paper towel inside the container to absorb any moisture. You can keep them in the fridge for up to three days.
Reheating Instructions for Crispy Texture
When you are ready to enjoy your wraps again, reheating is key. Preheat your oven to 350°F (175°C). Place the wraps on a baking sheet. Heat them for about 10-15 minutes. This method will help keep them crispy. Avoid the microwave, as it can make them soft and chewy.
Freezing Options for Meal Prep
You can freeze your crispy chickpea wraps for later use. Wrap each one in plastic wrap tightly. Then place them in a freezer bag or container. They can last up to three months in the freezer. When you are ready to eat, let them thaw in the fridge overnight. Reheat them in the oven for the best crispiness.
FAQs
What Makes Chickpeas Crispy in the Oven?
To make chickpeas crispy, you need the right heat and oil. When you roast chickpeas at 400°F, the high heat helps remove moisture. This process creates a crunchy texture. Coating the chickpeas in olive oil and spices also aids in crispiness. The oil helps them brown and prevents them from sticking.
Can I Use Different Types of Beans for This Recipe?
Yes, you can use other beans if you wish. Canned black beans, kidney beans, or even pinto beans work well. Just make sure to rinse and drain them like chickpeas. Each type of bean will add its own flavor and texture. Experimenting can lead to fun new tastes in your wraps.
How Do I Make This Recipe Gluten-Free?
To make these wraps gluten-free, choose gluten-free wraps. Many brands offer great options made from rice, corn, or almond flour. Check the label to ensure they are certified gluten-free. This way, you can enjoy crispy chickpea wraps without worry. The filling remains the same, so you won’t miss out on flavor.
Crispy Chickpea Wraps are easy and fun to make. You learned about the key ingredients, nutrition, and substitutions. I shared step-by-step instructions for prepping, assembling, and roasting. You explored tips for the perfect crispiness and meal prep ideas. Variations let you spice things up with flavors or different wraps. Lastly, I gave storage tips to keep your wraps fresh.
Now you can enjoy delicious, healthy wraps anytime. Try new ideas and share your favorites!