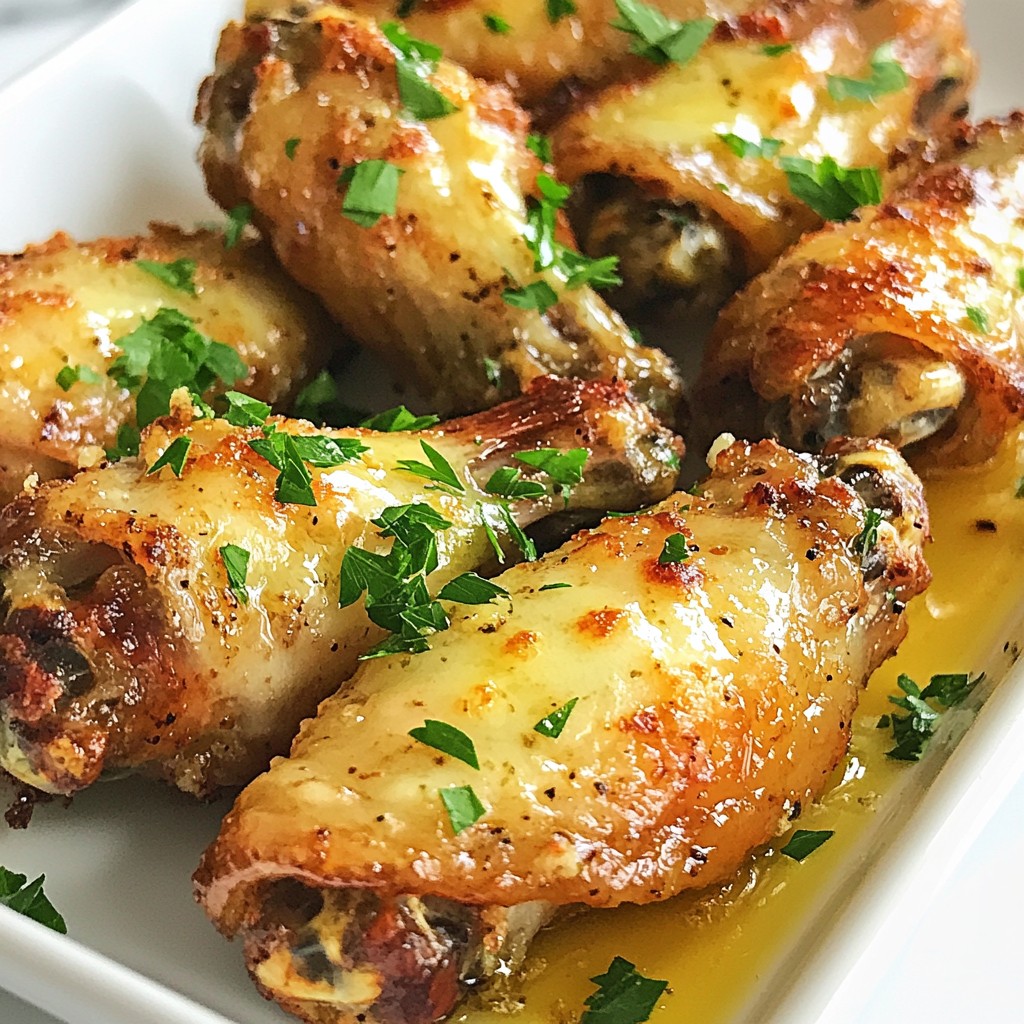
Get ready to elevate your game day snacks! Crispy Garlic Parmesan Wings are your perfect choice for a savory and flavorful meal. With their crunchy exterior and rich, cheesy taste, these wings will become a favorite in your home. In this blog post, I’ll guide you through the simple steps, share expert tips, and offer tasty variations to make your wings even more exciting. Let’s dive into this delicious recipe!
Why I Love This Recipe
- Crispy Perfection: The combination of baking powder and a hot oven creates an irresistibly crispy texture that rivals fried wings.
- Flavor Packed: The garlic and Parmesan coating adds a rich and savory taste, elevating the wings to gourmet status.
- Easy to Make: With simple ingredients and straightforward steps, these wings are perfect for both novice and experienced cooks.
- Great for Gatherings: These wings are a crowd-pleaser, making them an ideal appetizer for parties, game days, or family dinners.
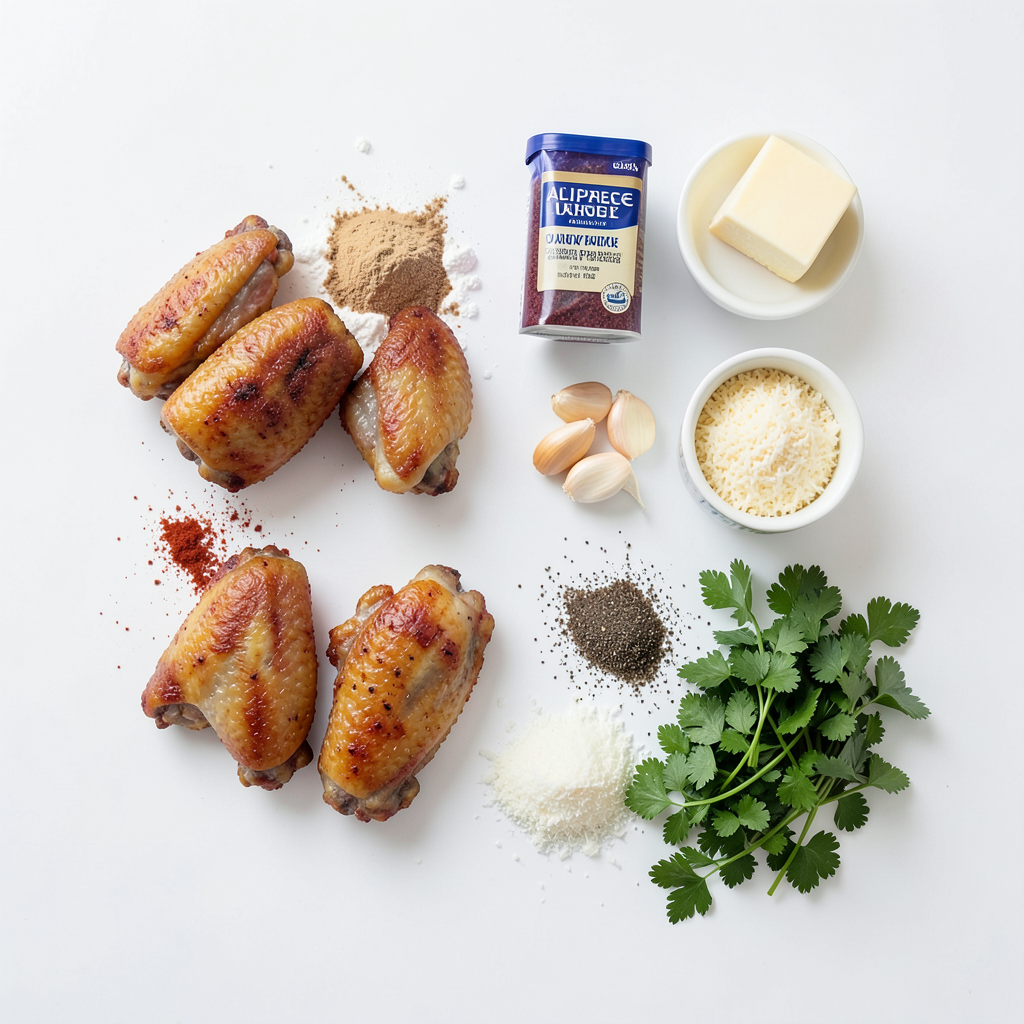
Ingredients
Main Ingredients
- 2 lbs chicken wings
- ½ cup unsalted butter, melted
Seasoning and Coating
- 1 cup all-purpose flour
- 1 teaspoon garlic powder
- 1 teaspoon onion powder
- 1 teaspoon paprika
- 1 teaspoon baking powder
- 1 teaspoon salt
- ½ teaspoon black pepper
Garnish
- ½ cup grated Parmesan cheese
- 2 tablespoons chopped fresh parsley
Gathering the right ingredients makes a big difference. For these crispy garlic Parmesan wings, chicken wings are key. You want fresh wings that can soak up all the flavors. Unsalted butter adds richness. This butter will coat the wings and make them shine.
Next, let's talk about the seasoning. All-purpose flour is the base. It gives a crunch that you want. Garlic powder, onion powder, and paprika bring depth. Each spice adds its own twist. Baking powder is your secret weapon. It helps the wings get crispy. Salt and black pepper round out the flavor.
Don’t forget the garnish! Grated Parmesan cheese gives a nutty taste. Fresh parsley adds color and freshness. These final touches make your wings look and taste great.
Step-by-Step Instructions
Prepping the Oven and Baking Sheet
First, set your oven to 425°F (220°C). This heat makes the wings crispy and golden. Next, take a large baking sheet and line it with parchment paper. This helps with easy cleanup later. Place a wire rack on top of the lined sheet. The rack allows hot air to flow around the wings, giving them that perfect crunch.
Cooking the Wings
Start with the chicken wings. Use paper towels to pat them dry. This step is key for making the wings crispy. In a medium bowl, mix the all-purpose flour, garlic powder, onion powder, paprika, baking powder, salt, and black pepper. Whisk these ingredients together until they blend well. Now, take your dried wings and dredge them in the flour mix. Make sure each wing is coated well. After coating, gently shake off any extra flour. This prevents clumping. Lay the wings down in a single layer on the wire rack. This setup is crucial for even cooking.
Baking Process
Now it's time to bake the wings. Place the baking sheet in the preheated oven. Bake for 40 to 45 minutes. Flip the wings halfway through baking. This step helps them brown evenly and become crispy. Keep an eye on them as they cook. You want them to be golden brown and fully cooked. This method ensures each bite is full of flavor and crunch.
Tips & Tricks
Achieving Extra Crispy Wings
To get extra crispy wings, start by drying them well. Use paper towels to pat them dry. This step is key! If your wings are wet, they will steam instead of crisp.
Next, use a wire rack for baking. A wire rack lets hot air flow around the wings. This helps them cook evenly and become crispy on all sides. Trust me, this method makes a big difference!
Flavor Enhancements
For more flavor, you can add seasonings. Consider using cayenne pepper for heat or Italian herbs for an extra kick. Mix these into the flour for a tasty twist.
Also, make sure to season the flour well. The flour holds the seasonings that stick to the wings. A good mix gives every bite amazing flavor. Don’t skip this step!
Melting Garlic Butter
When preparing garlic butter, melt the butter over low heat. This keeps the garlic from burning. Burning can make the garlic taste bitter.
Once melted, add minced garlic and cook for just a couple of minutes. You want it fragrant, not brown. Stir in the Parmesan cheese until it’s smooth. This mixture is the perfect topping for your wings!
Pro Tips
- Dry the Wings: Ensure your chicken wings are patted dry thoroughly before coating them in flour. This step is crucial for achieving that desired crispy texture.
- Use a Wire Rack: Placing the wings on a wire rack allows hot air to circulate around them, promoting even cooking and crispiness. Avoid laying them directly on the baking sheet.
- Monitor Baking Time: Keep an eye on the wings as they bake, flipping them halfway through to ensure they brown evenly and achieve a perfect crispy exterior.
- Fresh Garlic for Flavor: Using fresh minced garlic rather than garlic powder in the butter sauce will enhance the flavor profile and give your wings a vibrant, garlicky kick.
Variations
Sauces and Seasoning Options
You can change the flavor of your wings easily. For spicy garlic Parmesan wings, add hot sauce to the garlic butter. This gives your wings a kick without losing the cheesy taste. Just mix in about 1-2 tablespoons of your favorite hot sauce. Toss the wings well to coat them evenly.
Another fun option is lemon pepper wings. For this, simply replace some garlic powder with lemon zest. You can also squeeze fresh lemon juice into the garlic butter. This adds a bright, zesty flavor that pairs well with the Parmesan.
Alternative Cooking Methods
If you want to try different ways to cook your wings, use an air fryer. Set it to 400°F (200°C) and cook for about 25-30 minutes. Flip the wings halfway for even crispiness. The air fryer gives you a crunchy texture without the need for much oil.
Grilling your wings is a great outdoor option too. Preheat your grill to medium-high heat. Cook the wings for about 20-25 minutes, turning them often. You can brush them with garlic butter during the last few minutes for extra flavor.
Dietary Modifications
For a gluten-free version, swap the all-purpose flour with gluten-free flour. Make sure all other ingredients, like the baking powder, are gluten-free too.
If you need a dairy-free option, use olive oil instead of butter. Mix minced garlic with the oil for flavor. You can also try nutritional yeast instead of Parmesan for a cheesy taste without dairy.
Storage Info
Short-Term Storage
To store leftover wings, let them cool down first. Place them in an airtight container. Make sure to seal it well to keep the moisture in. This will help the wings stay fresh. I find glass containers work best, as they do not absorb odors. You can also use plastic containers if they are snug.
Reheating Instructions
For the best flavor, I recommend using the oven. Preheat the oven to 350°F (175°C). Place the wings on a baking sheet lined with foil. Heat them for about 10-15 minutes or until they are hot. This method keeps the wings crispy.
If you need a quick option, use the microwave. Place the wings on a microwave-safe plate. Cover them with a damp paper towel to keep them moist. Heat them for about 1-2 minutes, checking every 30 seconds. This method is fast but may not keep the wings crispy.
Freezing Tips
You can freeze cooked wings for later use. Let the wings cool completely. Place them in a freezer bag and remove as much air as possible. This will help prevent freezer burn. Label the bag with the date. They can last up to 3 months in the freezer.
When ready to eat, take them out and thaw in the fridge overnight. To reheat, follow the oven method. This will help restore their crispiness and flavor.
FAQs
How long do Crispy Garlic Parmesan Wings last in the fridge?
Crispy Garlic Parmesan Wings stay fresh in the fridge for about 3 to 4 days. To keep them tasty, store them in an airtight container. Make sure the wings are cool before sealing them up. This helps prevent moisture build-up, which can make the wings soggy.
Can I use frozen chicken wings?
Yes, you can use frozen chicken wings! If you start with frozen wings, do not thaw them before cooking. Just increase the baking time by about 10 to 15 minutes. Make sure the wings reach an internal temperature of 165°F (74°C). This ensures they are safe to eat and cooked through.
What can I serve with Crispy Garlic Parmesan Wings?
You can serve Crispy Garlic Parmesan Wings with a variety of sides. Some great options include:
- Celery sticks
- Carrot sticks
- French fries
- Onion rings
For dipping sauces, consider:
- Ranch dressing
- Blue cheese dressing
- Garlic aioli
These sides and sauces complement the wings nicely and add to the fun!
Crispy Garlic Parmesan wings are simple yet tasty. You only need a few main ingredients and easy steps. Remember to prep correctly for crispy results, like drying the wings well. Consider different sauces and cooking methods for fun twists.
For storage, keep leftovers in the fridge and follow reheating tips. These wings fit many tastes and diets. I hope you enjoy cooking and sharing them.