Looking for a quick dessert that impresses? This Easy Tiramisu Icebox Cake is the answer! With creamy mascarpone, rich coffee, and soft ladyfingers, you can enjoy a taste of Italy right at home. I’ll guide you through simple steps that make it fun to assemble and delicious to eat. Get ready to wow your friends and family with this delightful treat! Let’s dive into the recipe!
Why I Love This Recipe
- Indulgent Flavor: This cake combines the rich taste of chocolate with the boldness of coffee, creating an irresistible dessert experience.
- No-Bake Convenience: Perfect for warm weather, this icebox cake requires no baking, making it easy to prepare and serve.
- Customizable Layers: You can easily adjust the layers and flavors, adding spices or different types of cookies to suit your taste.
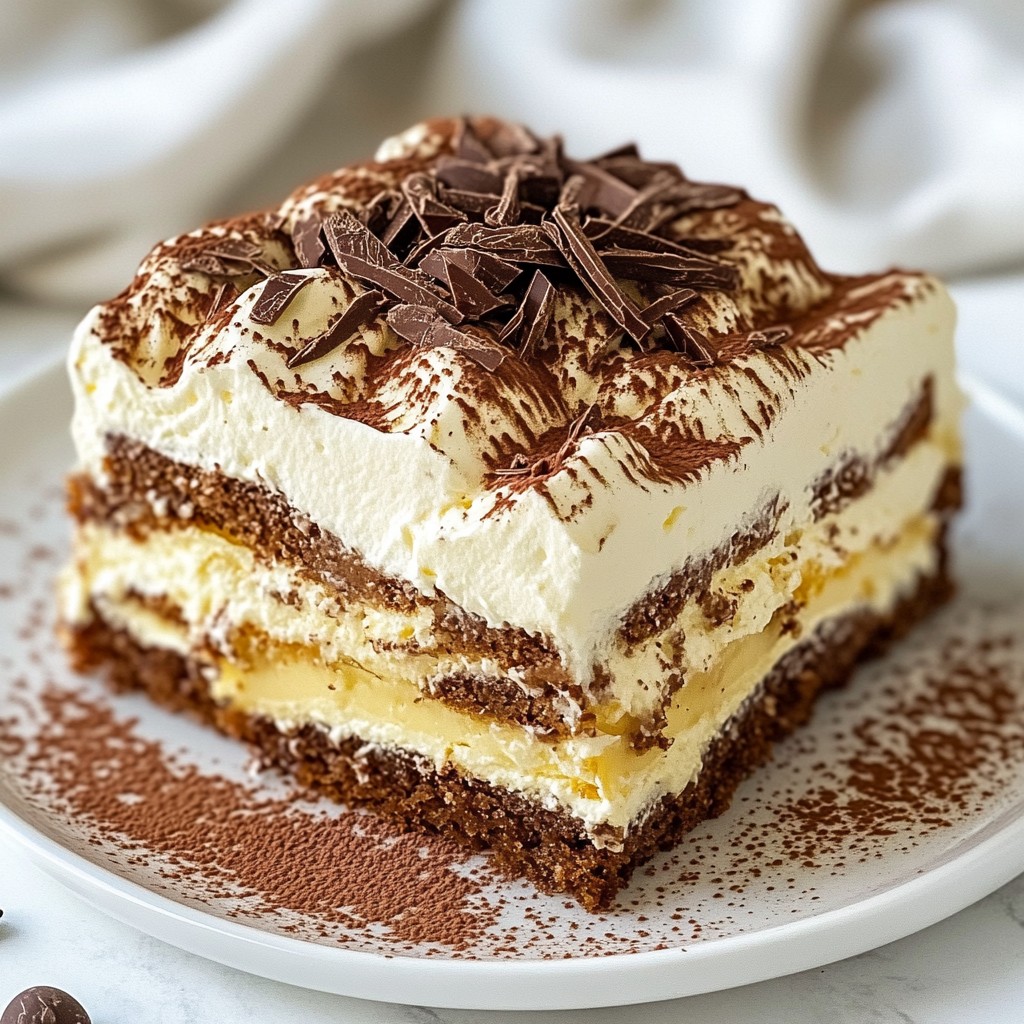
- Impressive Presentation: The final touches of cocoa dusting and chocolate shavings create an elegant and visually stunning dessert.
Ingredients
List of Ingredients
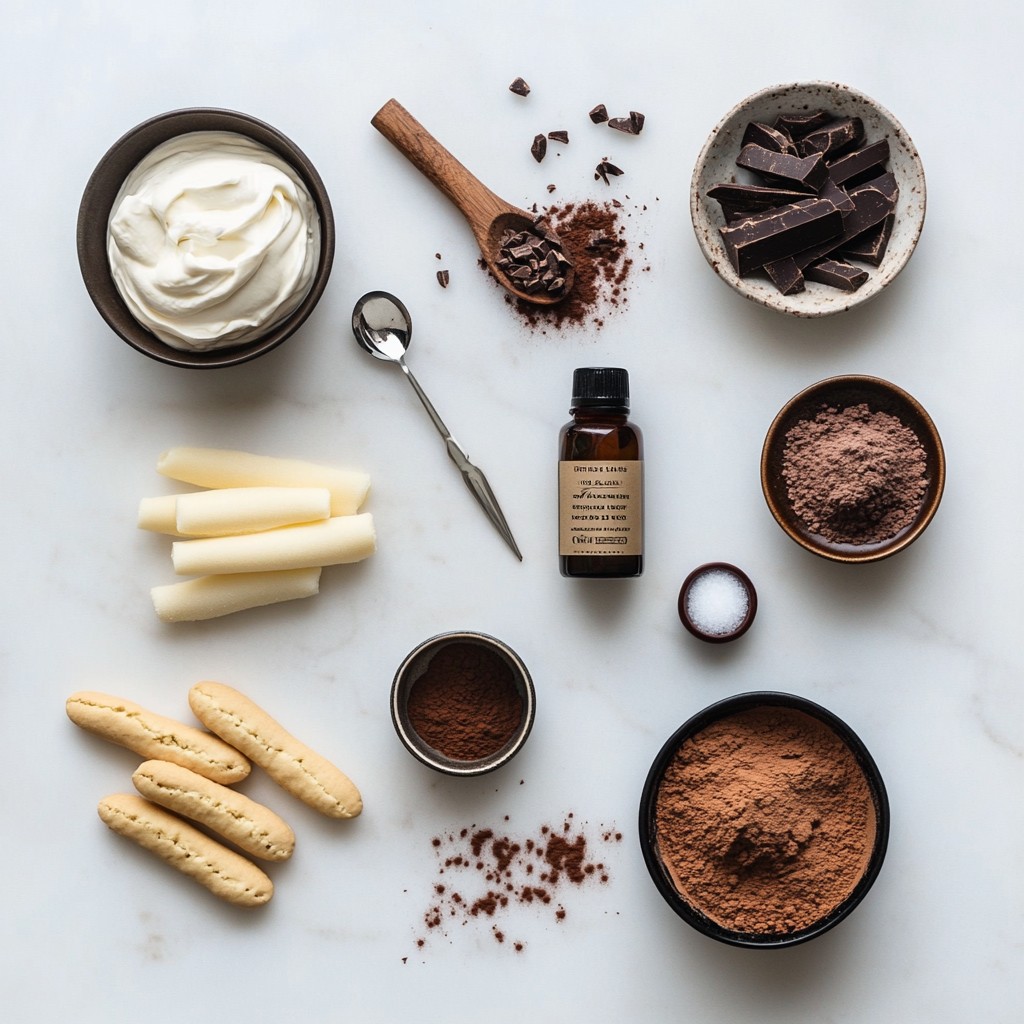
- 2 cups heavy whipping cream
- 1 cup mascarpone cheese
- 1 cup granulated sugar
- 1 teaspoon vanilla extract
- 2 cups brewed coffee
- 30 ladyfinger cookies
- 3 tablespoons unsweetened cocoa powder
- 1/2 teaspoon cinnamon (optional)
- Chocolate shavings for garnish
To make this easy tiramisu icebox cake, gather all your ingredients first. The heavy whipping cream is key for a light texture. Mascarpone cheese adds a creamy richness. Sugar and vanilla give sweetness and flavor.
You will need brewed coffee. Let it cool to room temp. The ladyfinger cookies soak up the coffee and help build the cake. Cocoa powder adds a nice dusting on top. If you want a warm flavor, add cinnamon. Finally, chocolate shavings make for a pretty finish.
This dessert is simple to prepare but looks elegant. You can impress your friends and family with this treat. Enjoy making it!
Step-by-Step Instructions
Preparing the Whipped Cream
To start, grab a large bowl and your electric mixer. Pour in the heavy whipping cream. Beat it on medium speed for about 3 to 5 minutes. You want soft peaks to form. The cream should look fluffy but still slightly wobbly. If it becomes too stiff, it won’t blend well later. This step adds lightness to your cake.
Mixing the Mascarpone
Next, take a separate bowl. Add the mascarpone cheese, granulated sugar, and vanilla extract. Use a whisk or spatula to mix these ingredients. Blend until you have a smooth and creamy mixture. Make sure there are no lumps. A smooth consistency is crucial for a rich flavor and nice texture.
Assembling the Cake
Now it’s time to assemble your cake. Pour the cooled coffee into a shallow dish. Quickly dip each ladyfinger into the coffee for 1 to 2 seconds. You want them to soak just enough for flavor but not become soggy. Lay the dipped ladyfingers in a 9x13 inch baking dish, covering the base evenly.
Spread half of the mascarpone mixture over this layer of ladyfingers. Smooth it out with a spatula. Then, dust half of the cocoa powder and optional cinnamon over it. This adds depth to the flavor. Repeat this process with another layer of dipped ladyfingers and the remaining mascarpone mixture.
Finish with a final dusting of cocoa powder on top. Use a spatula to smooth the surface gently. Cover the dish with plastic wrap and refrigerate for at least 4 hours. For the best taste, let it chill overnight. Just before serving, add chocolate shavings on top for a lovely touch.
Tips & Tricks
Perfecting the Tiramisu Icebox Cake
To make a great tiramisu icebox cake, you need to handle the ladyfingers carefully. If you dip them in coffee for too long, they get too soggy. Just a quick dip of 1-2 seconds is best. This keeps them firm and gives the cake a nice texture.
Smooth layering is key for a pretty cake. Start with a layer of ladyfingers on the bottom. Spread half of the mascarpone mixture over the ladyfingers. Use a spatula to make it even. After that, dust half of the cocoa powder and optional cinnamon on top. Repeat this with another layer. Make sure each layer is nice and smooth.
Serving Suggestions
To serve the cake beautifully, slice it into squares. Place each slice on a dessert plate. For a fancy touch, add a dollop of whipped cream on the side. A light sprinkle of cocoa powder on top makes it look even better. You can also top it with chocolate shavings for a nice finish.
Equipment Recommendations
You will need some basic tools to prepare your cake. A large mixing bowl is a must for the cream and mascarpone. An electric mixer will help you whip the cream quickly. A spatula is great for folding and spreading the mixtures.
For ease of assembly, a shallow dish for dipping the ladyfingers helps a lot. You might also want a 9x13 inch baking dish to layer your cake. These tools make the process smooth and simple.
Pro Tips
- Whipping Cream Secrets: Ensure your mixing bowl and beaters are cold before whipping the cream. This will help achieve better volume and stability.
- Mascarpone Mixing: When combining mascarpone with sugar and vanilla, mix gently to avoid overworking the cheese, which can lead to a grainy texture.
- Coffee Dipping Technique: Just a quick dip of 1-2 seconds is sufficient for the ladyfingers. If they soak too long, they may fall apart in the cake.
- Chilling Time: For the best flavor and texture, allow the cake to chill overnight. This gives the layers time to meld beautifully.
Variations
Flavor Enhancements
You can take this cake to the next level with some simple tweaks. Try adding a splash of liqueur like Kahlua or Amaretto. This adds a rich, warm flavor that pairs well with coffee. Just a tablespoon or two is all you need.
Another fun option is to infuse your coffee with flavored syrups. Hazelnut, vanilla, or even caramel syrups can transform the taste. Simply mix in the syrup while brewing or stir it into your cooled coffee. This small change can make a big impact on your dessert.
Dietary Alternatives
If you need a gluten-free version, look for gluten-free ladyfinger cookies. Many brands offer these, and they work just as well. You won’t lose any of the tasty flavor.
For those who need dairy-free options, you can substitute the mascarpone cheese with a vegan cream cheese. Use coconut cream instead of heavy cream. Both will give you a creamy texture without dairy.
Unique Twists
To mix things up, think about adding fruit layers. Fresh berries like strawberries or raspberries can add a burst of flavor and color. You can layer them between the ladyfingers and mascarpone mixture.
Another twist is to use chocolate ganache. Just melt chocolate with a bit of cream, then pour it over the layers. This adds a rich, decadent touch that chocolate lovers will adore.
Lastly, using flavored whipped cream is a fun idea. You can add cocoa powder or even a hint of mint extract to the whipped cream. This simple change can add a fresh twist to each slice.
Storage Info
How to Store Leftovers
To keep your Easy Tiramisu Icebox Cake fresh, follow these tips:
- Refrigeration: Store the cake in the fridge. It tastes best when chilled.
- Containers: Use an airtight container. If you don’t have one, cover the dish tightly with plastic wrap. This keeps the cake moist and prevents it from absorbing other fridge smells.
Freezing Guidelines
Can you freeze Tiramisu Icebox Cake? Yes, you can freeze it!
- Freezing: Slice the cake first. Wrap each piece in plastic wrap, then foil. This method helps preserve flavor and texture.
Tips for thawing and serving frozen cake:
- Thaw the cake in the fridge overnight. This slow thaw helps maintain the cake's creamy texture.
- Serve the cake cold. This way, you enjoy the delicious layers just as you made them!
FAQs
How long does Tiramisu Icebox Cake last in the fridge?
Tiramisu Icebox Cake lasts about 3 to 4 days in the fridge. To keep it fresh, cover it tightly with plastic wrap. This helps the layers stay moist. The flavors deepen as it sits, making it even more enjoyable on day two or three.
Can I make Tiramisu Icebox Cake ahead of time?
Yes, you can make this cake one day in advance. I suggest preparing it the night before you plan to serve it. This gives the flavors time to blend well. Just remember to cover it and chill it properly. It will taste even better when served cold.
What can I substitute for heavy cream?
You can use coconut cream or whipped coconut milk. These options will change the flavor a bit. For a lighter choice, use half-and-half or whole milk. Keep in mind, the texture may be less creamy. Each substitute can still create a tasty dessert.
Is this recipe suitable for kids?
Yes, this recipe is kid-friendly, but it has coffee. The coffee flavor can be strong. If you want a caffeine-free version, use decaf coffee. You can also skip the coffee and use milk instead. The kids will still enjoy the creamy layers and chocolate dusting.
In this post, we explored how to make a delicious Tiramisu Icebox Cake. You learned about the key ingredients and steps, from whipping cream to layering ladyfingers. We discussed tips for the best texture and storage methods for leftovers. Remember, you can customize flavors and even swap ingredients. This cake is simple to prepare and perfect for any occasion. Enjoy creating your own version of this classic dessert, and impress your friends and family!