If you’re seeking a healthy snack that’s both tasty and easy to make, homemade granola bars are the answer! In this guide, I’ll share a simple recipe and tips to customize them just how you like. With basic ingredients like rolled oats, nuts, and nut butter, you can create a snack that fuels your day. Ready to get started on your new favorite treat? Let’s dive in!
Ingredients
Essential Ingredients for Homemade Granola Bars
To make my homemade granola bars, I use a few key ingredients. These are:
– 2 cups rolled oats
– 1 cup mixed nuts (like almonds, walnuts, and pecans), roughly chopped
– 1/2 cup unsweetened nut butter (like almond or peanut butter)
– 1/2 cup honey or maple syrup
These ingredients create a tasty base. The rolled oats give a chewy texture, while the nuts add crunch. The nut butter helps bind everything together, and the sweetener balances the flavors.
Optional Add-ins for Customized Flavor
I love to personalize my granola bars. Here are some fun add-ins:
– Chocolate chips
– Seeds (like flaxseeds or chia seeds)
– Dried fruits
Adding chocolate chips makes bars extra special. Seeds boost nutrition, while dried fruits add sweetness and chewiness. Mix and match to find your favorite combination!
Tools and Equipment Needed
To make this recipe, you’ll need some simple tools:
– Mixing bowls
– Baking dish
– Parchment paper
Using parchment paper helps with easy removal after baking. A good mixing bowl allows you to blend everything well. A baking dish holds your mixture as it bakes to perfection.
Step-by-Step Instructions
Preparation Steps
1. Preheat your oven to 350°F (175°C). This step warms the oven for even baking.
2. Prepare a 9×9 inch baking dish. Line it with parchment paper, leaving some paper over the edges. This helps you lift the bars out later.
3. In a large mixing bowl, blend together:
– 2 cups rolled oats
– 1 cup mixed nuts, roughly chopped
– 1/4 cup flaxseeds or chia seeds
– A pinch of salt
Mix these dry ingredients well until they are evenly combined.
Making the Nut Butter Mixture
1. In a small saucepan over low heat, combine:
– 1/2 cup unsweetened nut butter (like almond or peanut butter)
– 1/2 cup honey or maple syrup
Stir constantly. Heat until the mixture is smooth and well blended.
2. Once melted, remove it from heat. Add:
– 1/2 teaspoon vanilla extract
Stir to mix in the vanilla.
Combining and Baking
1. Carefully pour the warm nut butter mixture over the dry ingredients in the bowl. Stir well to coat all the dry bits.
2. Gently fold in:
– 1/2 cup mini chocolate chips
Make sure the chocolate chips are spread throughout the mixture.
3. Transfer the mixture into the prepared baking dish. Use a spatula or your hands to press it down firmly. This ensures an even bake.
4. Place the dish in the preheated oven. Bake for 20-25 minutes. Look for a golden brown edge.
5. Once baked, remove the dish from the oven. Let the granola bars cool in the dish for about 10 minutes. Then, lift them out using the overhanging parchment paper. Place the slab on a wire rack to cool completely before cutting into bars.Enjoy your homemade granola bars!
Tips & Tricks
Achieving the Perfect Texture
To get the best texture in your granola bars, pressing the mixture down is key. When you pack the granola tightly, it holds together better after baking. Use your hands or a spatula to press it firmly into the dish.
Baking time can also change the texture. If you like your bars chewy, bake for 20 minutes. For a crunchier bite, go for the full 25 minutes. Keep an eye on them to avoid burning.
Storage Tips for Freshness
Store your granola bars in an airtight container. This keeps them fresh and tasty. You can stack them in layers, placing parchment paper between each layer to avoid sticking.
Homemade bars last about a week at room temperature. If you want them to last longer, consider refrigeration. They can stay fresh for up to two weeks when kept cool.
Presentation Ideas
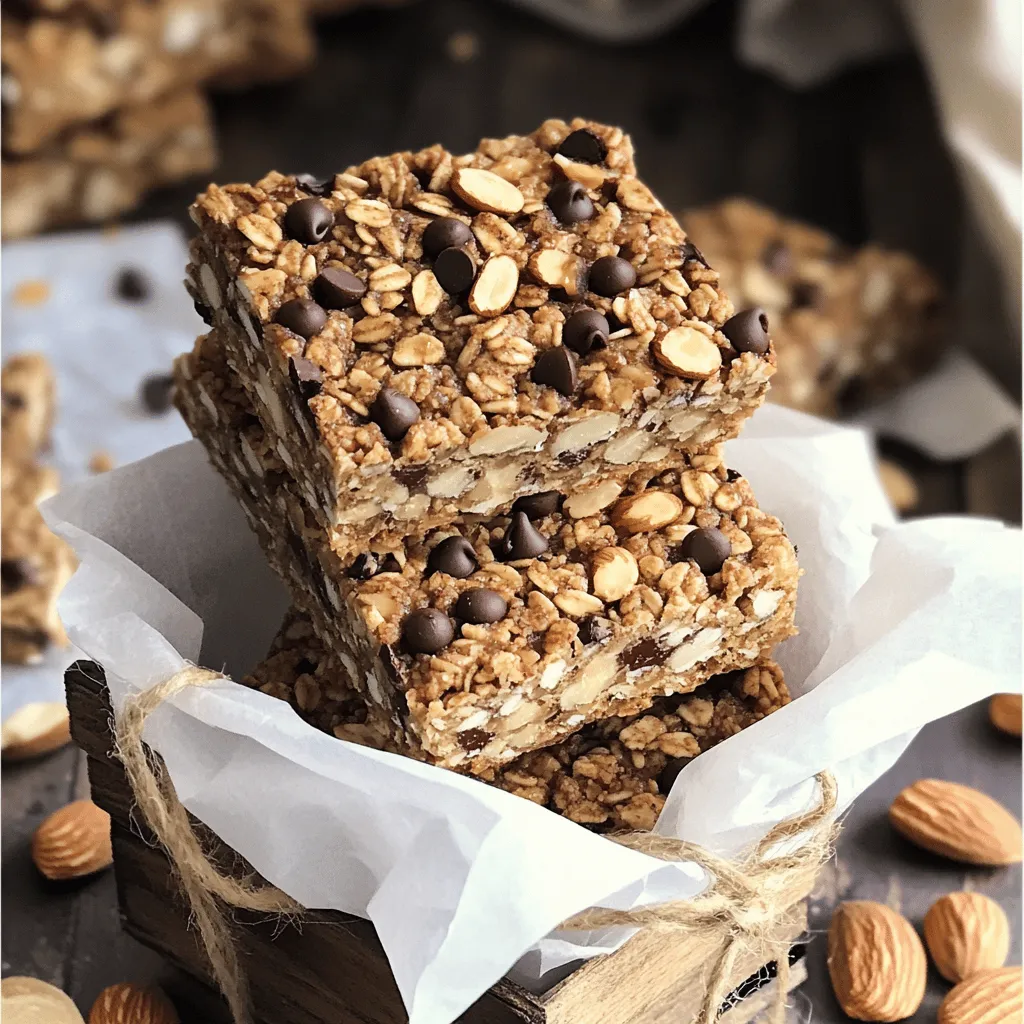
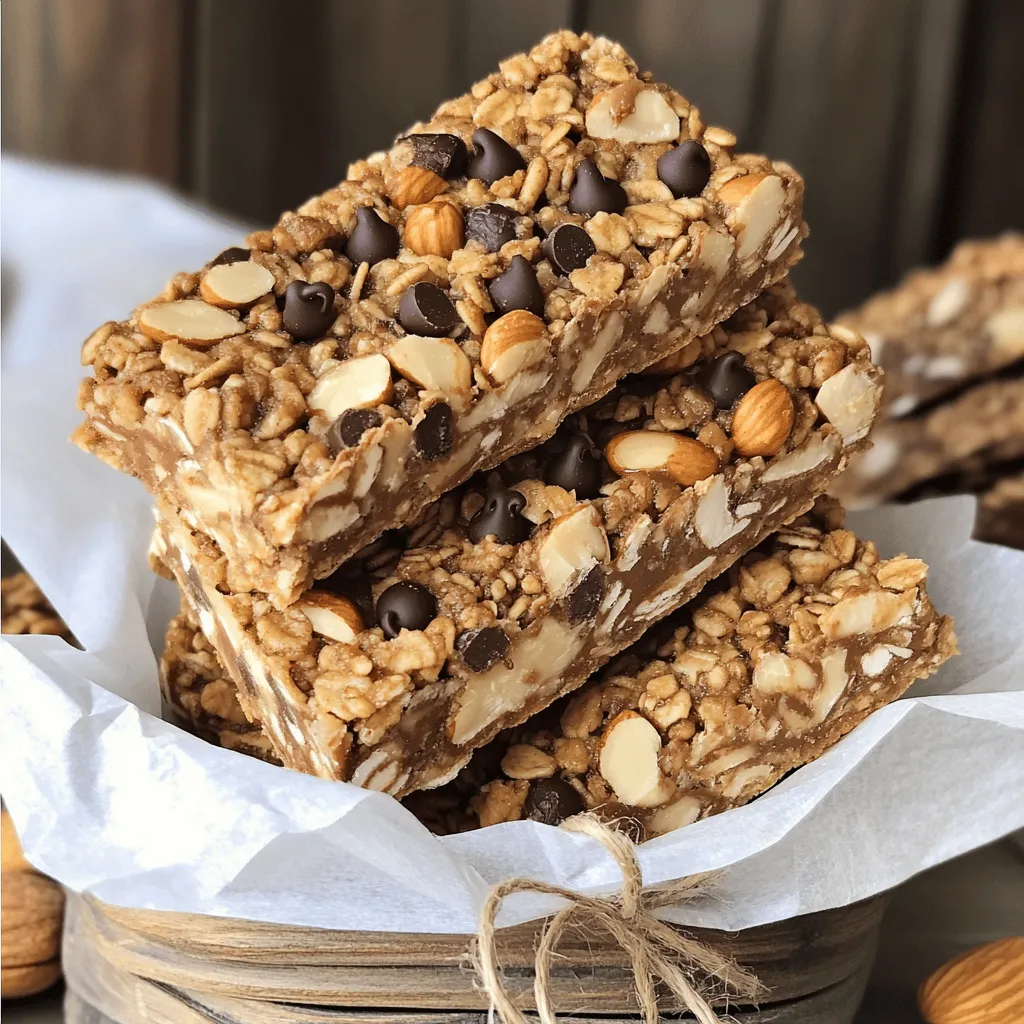
Make your granola bars look appealing! Stack them in a small basket or wrap each bar in parchment paper. Tie them with twine for a rustic touch that looks great.
These bars pair well with yogurt, making them a nice snack option. You can even serve them with fresh fruit for a more filling treat. For added fun, create a snack platter to share with friends or family!
Variations
Flavor Variations to Try
You can change the taste of your granola bars easily. Try using different nut butters. Almond butter gives a milder flavor, while peanut butter is rich and bold. You can also mix them for a fun twist.
Swapping sweeteners can give you new flavors too. Honey adds a warm note, while maple syrup lends a unique taste. Brown rice syrup is another option if you want less sweetness.
Dietary Substitutions
If you need gluten-free options, use certified gluten-free oats. They work just as well. For a vegan alternative, replace honey with maple syrup or agave nectar. This way, everyone can enjoy these bars.
Seasonal Additions
Spices can take your bars to the next level. Adding cinnamon or nutmeg gives warmth and depth. You can experiment with small amounts to find your favorite mix.
Seasonal fruits and nuts also add a fresh twist. In fall, try dried apples or pumpkin seeds. In summer, use dried berries or chopped peaches. They can bring new life to your granola bars.
Storage Info
How to Store Homemade Granola Bars
To keep your granola bars fresh, you have two main options: room temperature or refrigeration. If you plan to eat them within a week, storing them at room temperature is fine. Just place them in an airtight container. This keeps them chewy and tasty.
If you want to store them longer, the fridge is a great choice. It helps maintain their freshness for up to two weeks. Use the same airtight container to prevent moisture from making them soggy.
Freezing for Longer Shelf Life
Freezing granola bars is a smart way to keep them for a longer time. First, cut the bars into pieces. Wrap each piece in plastic wrap or parchment paper. Then, place the wrapped bars in a freezer-safe bag or container. This prevents freezer burn.
When you’re ready to eat them, take out the number you need. Let the bars thaw at room temperature for about 30 minutes. If you’re in a hurry, you can eat them straight from the freezer, too. They will be a bit firmer but still delicious!
Identifying When Granola Bars Go Bad
It’s important to know when your granola bars are no longer good. Look for signs of spoilage. If they smell off or look dry and crumbly, it’s best to toss them.
Homemade granola bars have a recommended usage timeframe of about two weeks at room temperature and up to three months if frozen. Keeping track of when you made them helps ensure you enjoy them at their best!
FAQs
How long do homemade granola bars last?
Homemade granola bars can last about one week at room temperature. To keep them fresh, store them in an airtight container. If you want them to last longer, try refrigerating them. In the fridge, they can last up to two weeks. For even longer storage, freeze them. Frozen granola bars can stay good for about three months. Just wrap them well before freezing.
Can I use quick oats instead of rolled oats?
Yes, you can use quick oats in place of rolled oats. However, the texture will change. Quick oats are finer and can make your bars softer. Rolled oats give a heartier bite. If you like a chewy granola bar, stick with rolled oats. If you prefer a softer texture, quick oats will work just fine.
What can I substitute for nut butter?
If you need a nut-free option, you can use sunbutter or soy nut butter. Both will work well in the recipe. You can also try using seed butter, like pumpkin seed butter. Each option brings its own flavor, so choose what you like best. You can even use coconut oil if you want a dairy-free option.
Why did my granola bars fall apart?
Granola bars may fall apart if they lack binding. Make sure to use enough nut butter and sweetener. If they are too dry, they won’t hold together. Press the mixture firmly into the baking dish. This helps them stick together during baking. If they still fall apart, try adding a bit more honey or nut butter next time.
Can I make these granola bars without added sugar?
Yes, you can make these granola bars without added sugar. Use ripe bananas or unsweetened applesauce for natural sweetness. You can also try dates or pureed figs. These options will add sweetness without refined sugar. Just remember that they may change the texture a bit.
You can easily make tasty homemade granola bars with simple ingredients. Start with oats and nuts, then mix in your favorite nut butter and sweetener. Customize flavors with chocolate chips or dried fruits as you wish.
Remember to press the mixture well and store it properly. Enjoy experimenting with different flavors and textures. With these tips, you’ll create a snack that’s not just healthy but fun. Homemade granola bars can be your go-to treat anytime!