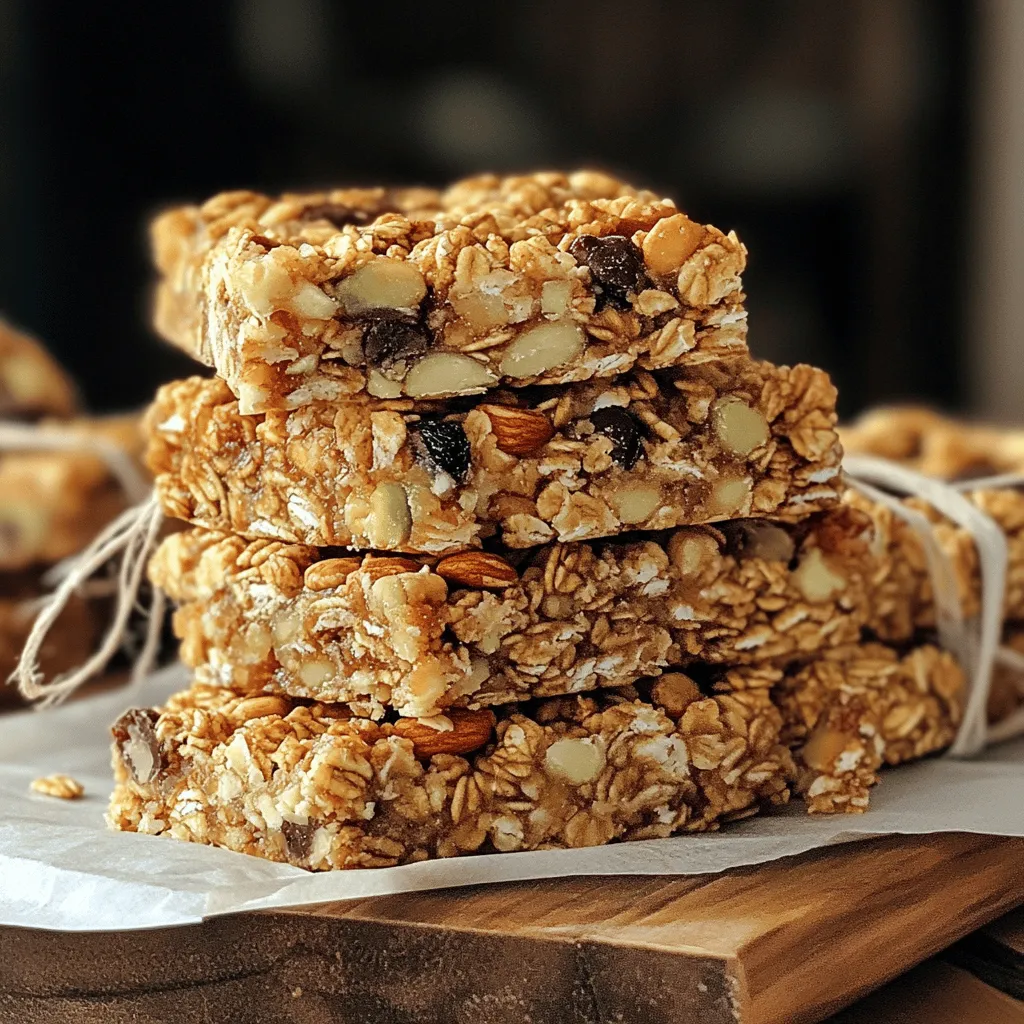
Looking for a tasty snack that’s both simple and healthy? Look no further! In this guide, I’ll show you how to make homemade granola bars that are perfect for any time of day. Packed with nutritious ingredients like rolled oats, nuts, and natural sweeteners, these bars are a must-try! Whether you’re a busy parent or a health-conscious snack lover, you’ll love how easy it is to whip up a batch. Let’s get started!
Ingredients
List of Key Ingredients
To make your homemade granola bars, gather these ingredients:
– 2 cups rolled oats
– 1 cup mixed nuts (such as almonds, walnuts, and pecans), roughly chopped
– 1/2 cup honey or maple syrup
– 1/4 cup peanut butter or almond butter
– 1/2 cup dried fruit (like cranberries, raisins, or chopped apricots)
– 1/4 cup mini chocolate chips (optional)
– 1 teaspoon vanilla extract
– 1/2 teaspoon ground cinnamon
– 1/4 teaspoon salt
Nutritional Benefits
What are the health benefits of oats?
Oats are a great source of fiber. They help keep you full. Oats also support heart health. They can lower cholesterol levels.
Why are nuts and dried fruits good for you?
Nuts provide healthy fats and protein. They also contain vitamins and minerals. Dried fruits add natural sweetness and fiber.
What is the caloric information per serving?
Each bar has about 150 calories. This can vary based on the nuts and sweetener used. Enjoy them as a tasty snack without guilt!
Step-by-Step Instructions
Preparation Steps
1. Preheat the Oven: First, set your oven to 350°F (175°C). This heat helps the bars bake evenly. Grab an 8×8 inch baking dish and line it with parchment paper. Leave some paper hanging over the edges. This makes it easy to lift the bars out later.
2. Mix Dry Ingredients: In a large bowl, combine 2 cups of rolled oats, 1 cup of mixed nuts, and 1/2 cup of dried fruit. If you like chocolate, add 1/4 cup of mini chocolate chips. Sprinkle in 1/2 teaspoon of ground cinnamon and 1/4 teaspoon of salt. Stir everything until it’s mixed well.
Combining Wet and Dry Ingredients
3. Create the Wet Mixture: Take a small saucepan and add 1/2 cup of honey or maple syrup and 1/4 cup of peanut butter. Place it over low heat. Stir gently until it melts and becomes smooth. After mixing, remove it from the heat and add 1 teaspoon of vanilla extract.
4. Ensure Even Mixing: Pour the warm mixture over the dry ingredients. Use a spatula or wooden spoon to mix everything together. Make sure every piece of dry ingredient gets coated with the sticky mixture.
Baking Process
5. Transfer and Press Mixture: Move the granola mixture into the prepared baking dish. Use the spatula or your hands to press it down firmly. This helps it stick together when baked.
6. Bake the Bars: Place the dish in the oven and bake for 20-25 minutes. Look for a golden brown color on the edges. Keep an eye on it to avoid burning. When done, take it out and let it cool completely in the pan.
7. Cooling and Cutting Techniques: Once cooled, use the parchment paper to lift the granola slab out of the dish. Place it on a cutting board. Slice it into squares or rectangles for serving.
Tips & Tricks
Perfecting Your Granola Bars
To make perfect granola bars, you must get the right consistency. The mixture should be sticky but not too wet. If it feels dry, add a bit more honey or nut butter. This helps bind the ingredients together. A good tip is to let the mixture cool slightly before mixing. This prevents any burns and makes it easier to stir.
Pressing the mixture firmly is key. After you combine the wet and dry ingredients, transfer the mix into your baking dish. Use a spatula or your hands to really pack it down. Pressing hard helps the bars hold their shape. You want a nice, even layer. This way, they won’t fall apart when you cut them.
Serving Suggestions
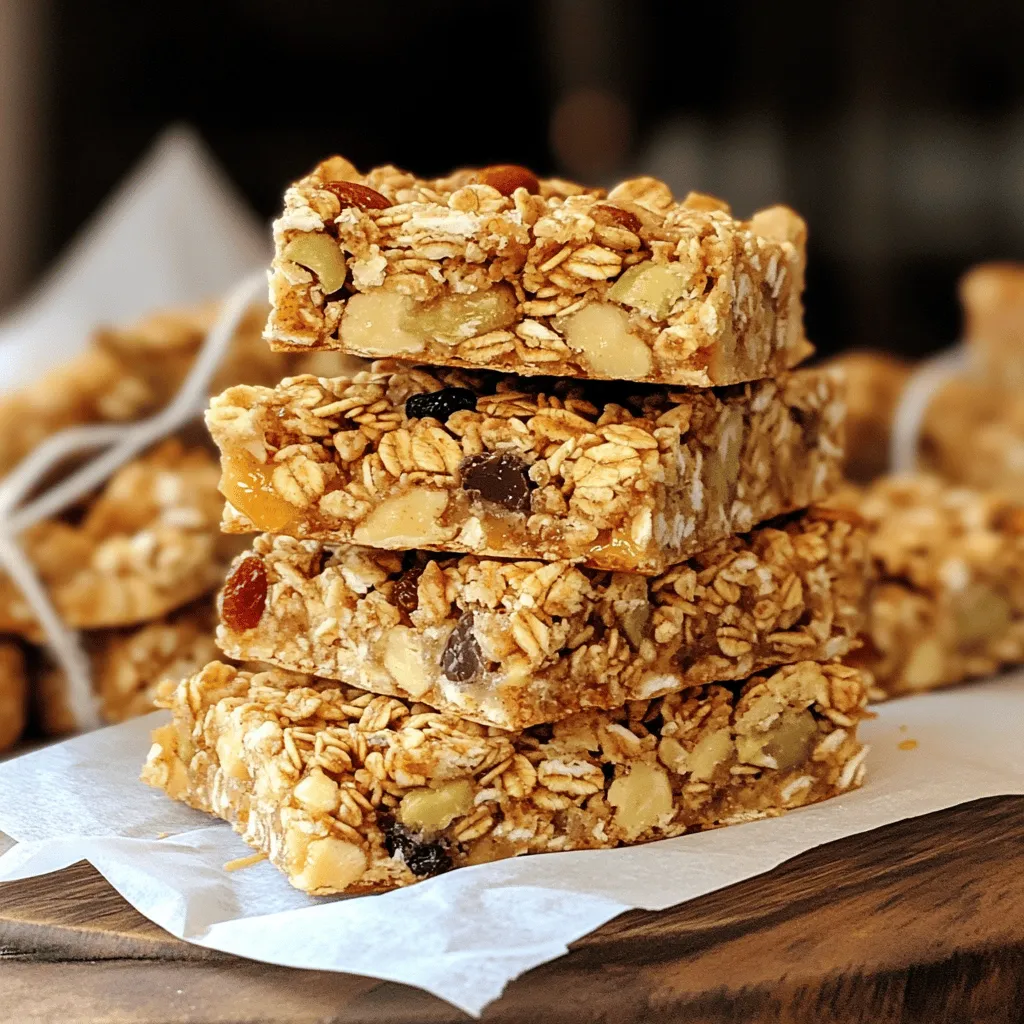
When it comes to serving your granola bars, presentation matters. Stack the bars on a rustic platter for a nice touch. You can also wrap each bar in parchment paper and tie it with twine. This gives them a homemade gift look. It’s perfect for sharing!
For garnishing, try drizzling a bit of melted chocolate on top. Sprinkle some chopped nuts or dried fruit for extra flair. These small details make your bars look even more appealing. You can also serve them with yogurt or fresh fruit for a yummy snack.
Variations
Flavor Options
You can get creative with your granola bars. Start by mixing different nuts and fruits. Try cashews, macadamias, or hazelnuts for a new twist. Dried fruits like mango or coconut can add a unique taste. Mix and match until you find your favorite blend.
Adding spices or extracts can boost flavor. For a warm touch, use cinnamon or nutmeg. A drop of almond or coconut extract gives a fun flavor. Don’t be afraid to experiment!
Dietary Adaptations
Making granola bars can fit many diets. If you’re vegan, swap honey for maple syrup. Use nut butter that is free from animal products, like almond or sunflower seed butter. These changes keep the bars tasty and healthy.
For gluten-free options, choose certified gluten-free oats. This way, everyone can enjoy your tasty treat. If you have allergies, replace nuts with seeds like pumpkin or sunflower. These substitutions keep the bars safe for all.
Storage Info
Best Practices for Storing Granola Bars
Store your homemade granola bars in an airtight container. This keeps them fresh and chewy. You can keep them at room temperature for up to a week. If you want to extend their life, place them in the refrigerator. The cool air helps maintain their texture.
To keep your bars tasting great:
– Layer with parchment paper: If you stack bars, place parchment paper between them. This prevents sticking.
– Avoid moisture: Keep the container in a cool, dry place.
Freezing Instructions
Freezing granola bars is easy. Wrap each bar in plastic wrap or foil. Place them in a freezer-safe bag. This will help keep them fresh for up to three months.
When you’re ready to eat them, thaw the bars in the fridge overnight. You can also leave them at room temperature for about an hour. They will taste just as good as fresh.
Want a quick snack? Just grab a bar from the freezer. Homemade granola bars are perfect for busy days!
FAQs
Common Questions About Homemade Granola Bars
How do I make granola bars without using honey?
You can use maple syrup or agave nectar instead. They work well as a sweetener. Just replace honey with the same amount of your chosen syrup. It will keep your bars sweet and chewy.
Can I use quick oats instead of rolled oats?
Yes, you can use quick oats. They will make the bars softer. Rolled oats give a chewier texture, but quick oats are still tasty. If you prefer, use a mix of both for a unique texture.
What’s the best way to cut granola bars without them falling apart?
Let the bars cool completely before cutting. Use a sharp knife for clean cuts. You can also warm the knife slightly to help slice through easily. This will keep them together and help maintain their shape.
Troubleshooting Tips
Why are my granola bars too crumbly?
If your granola bars are crumbly, they might need more binding. Check if you used enough nut butter or sweetener. Adding a little more can help them stick together better. Pressing the mixture firmly into the pan is also key.
How can I make my bars less sticky?
To reduce stickiness, try using a bit more oats or nuts in your mix. You can also let them cool longer before cutting. Adding a pinch of salt can also help balance the sweetness and reduce stickiness.
You now know how to make delicious, healthy granola bars at home. We covered key ingredients like oats, nuts, and sweeteners. You learned how to mix, bake, and store them. Plus, there are plenty of tips to help you perfect your bars.
Whether you prefer flavors, dietary adaptations, or presentation ideas, you can customize to your taste. Enjoy your tasty and nutritious snack. Happy baking!