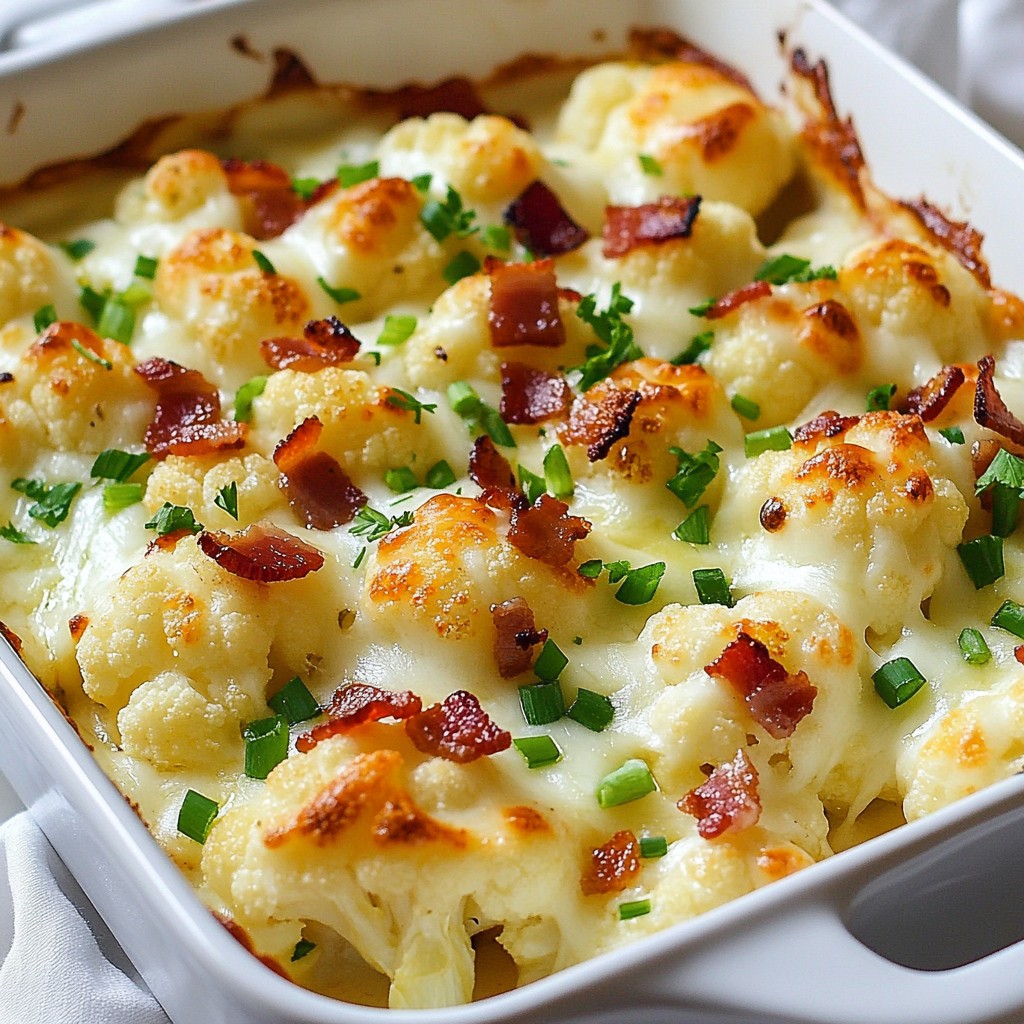
Are you ready to elevate your dinner game? This Loaded Cauliflower Bake is not only delicious but also easy to make. It blends cheesy goodness with fresh flavors for a meal that will impress everyone at your table. I'll share all the tasty ingredients and tips you need to create a creamy, dreamy dish. Let’s dive into the step-by-step process that makes this bake a true winner for family dinners!
Why I Love This Recipe
- Delicious Flavor Combination: This loaded cauliflower bake features a perfect blend of creamy and cheesy flavors that will satisfy your cravings while keeping it low-carb.
- Easy to Prepare:
- Versatile Serving Options: It's versatile enough to be served as a hearty main dish or as a delicious side, pairing wonderfully with meats or salads.
- Customizable Ingredients: You can easily adjust the ingredients to suit your taste, whether adding extra veggies or omitting bacon for a vegetarian version.
Ingredients
Main Ingredients for Loaded Cauliflower Bake
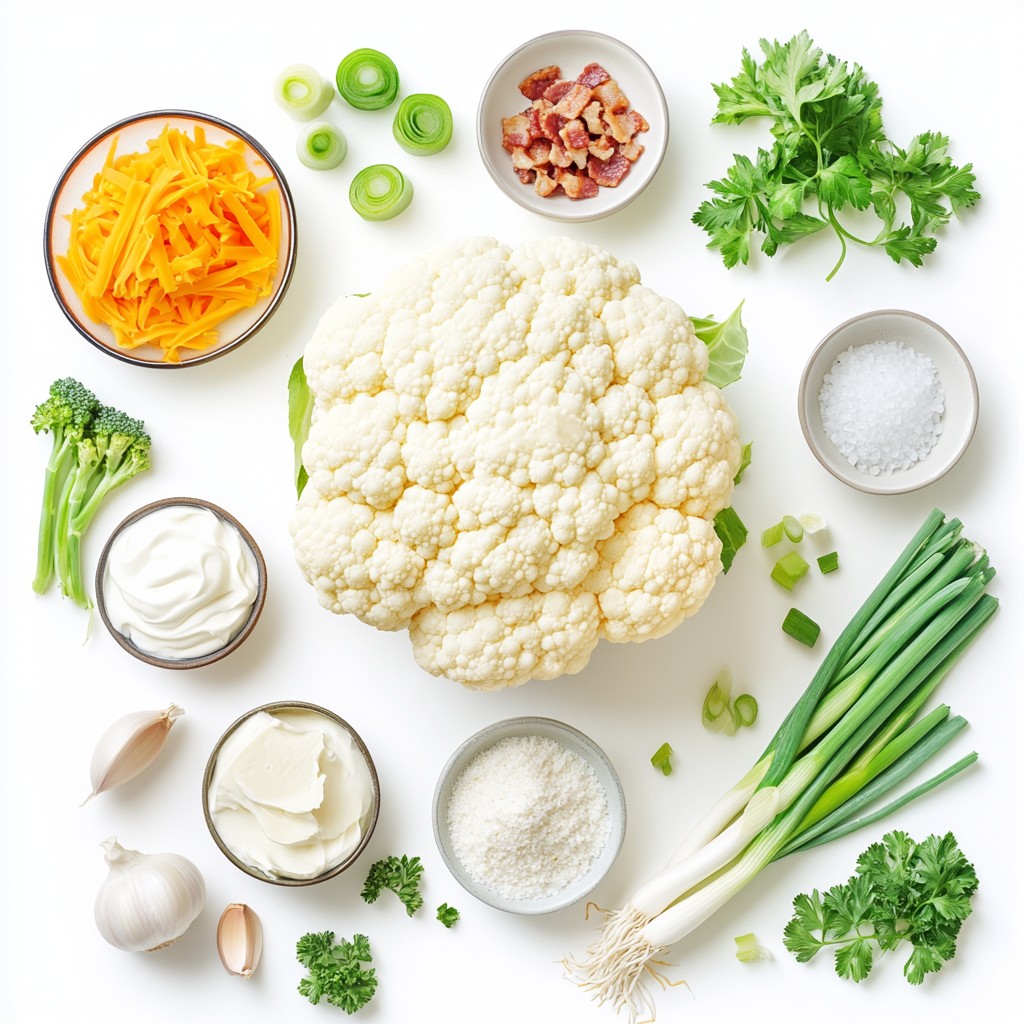
- 1 large head of cauliflower, cut into bite-sized florets
- 1 cup shredded sharp cheddar cheese
- 1/2 cup cream cheese, softened to room temperature
- 1/4 cup sour cream
- 2 green onions, finely sliced
- 1 teaspoon garlic powder
- 1/2 teaspoon onion powder
- Salt and freshly ground black pepper to taste
- 1/2 cup shredded mozzarella cheese (for topping)
I love using fresh cauliflower for this dish. It gives a great texture. The sharp cheddar cheese adds a nice kick, while cream cheese and sour cream make it rich and creamy. Garlic powder and onion powder bring depth to the flavor. Don't forget to season with salt and pepper; they balance everything beautifully.
Optional Add-ins
- 1/2 cup cooked bacon bits (optional, for a non-vegetarian version)
- Fresh parsley, finely chopped (for garnish)
If you enjoy a savory touch, add bacon bits. They give a smoky flavor that enhances the dish. Green onions also add a fresh crunch. Finally, sprinkle parsley on top for a pop of color and freshness. This makes the dish even more inviting!
Step-by-Step Instructions
Preparation Steps
1. Preheat your oven to 375°F (190°C).
2. Lightly grease a baking dish with cooking spray or butter.
3. Fill a large pot with salted water and bring it to a boil.
4. Carefully add the cauliflower florets and cook them for about 5-7 minutes.
5. The florets should be fork-tender when done.
6. Drain the cauliflower well and let it cool slightly.
Mixing the Ingredients
1. In a large bowl, mix the softened cream cheese and sour cream.
2. Add garlic powder, onion powder, and a pinch of salt and pepper.
3. Blend these ingredients until smooth and creamy.
4. Gently fold the cooked cauliflower into this creamy mixture.
5. Make sure each floret gets coated well.
6. Stir in the shredded cheddar cheese and sliced green onions.
7. If you like, add bacon bits for extra flavor.
Baking Process
1. Pour the cauliflower mixture into the prepared baking dish.
2. Spread it evenly across the surface.
3. Top the mixture with shredded mozzarella cheese.
4. Make sure to cover it completely.
5. Bake in your preheated oven for 25-30 minutes.
6. Look for the cheese to be melted, bubbly, and golden brown.
7. Once done, take it out and let it cool for 5-10 minutes.
8. Before serving, sprinkle freshly chopped parsley on top for a pop of color.
Tips & Tricks
Ensuring Perfect Texture
To get the best texture for your loaded cauliflower bake, start by cooking the cauliflower until it is fork-tender. This means you should cook the florets for about 5 to 7 minutes in boiling salted water. They should be soft enough to pierce with a fork but still hold their shape.
Next, to create a creamy mixture without lumps, blend the cream cheese and sour cream together well. Use a hand mixer or a fork to mix until smooth. A lump-free base makes the dish creamy and delightful.
Serving Suggestions
This bake shines as a side dish or a hearty vegetarian main course. It pairs well with grilled chicken or steak. You can also serve it with a crisp green salad for a fresh contrast. The creamy texture complements the flavors of meat or adds a nice touch to your salad.
Customization Ideas
You can easily customize this dish. If you're vegetarian, simply skip the bacon bits. For non-vegetarian options, add cooked bacon for extra flavor.
Adjust the seasonings to match your taste. If you love garlic, add a bit more garlic powder. You can also sprinkle on some extra cheese or fresh herbs to personalize your dish even more. This recipe is flexible and can cater to many preferences!
Pro Tips
- Perfectly Cooked Cauliflower: Steam the cauliflower florets instead of boiling them to retain more nutrients and achieve a firmer texture.
- Cheese Variations: Experiment with different cheeses such as gouda or pepper jack for an exciting flavor twist.
- Make Ahead: Prepare the casserole in advance and store it in the refrigerator. Bake it just before serving for a quick and easy dish.
- Garnish with Extras: Add crispy fried onions or a sprinkle of paprika on top for extra crunch and flavor.
Variations
Cheese Variations
You can change up the cheese in this dish to try new flavors. Gouda adds a rich, creamy taste. Pepper jack gives a nice kick with its spicy notes. You can also mix cheeses for depth. Try using mozzarella for a gooey texture. Each cheese adds a unique spin to your bake.
Vegetable Additions
Want more color and taste? Add other veggies to your bake! Broccoli brings a nice crunch and extra nutrients. Bell peppers add sweetness and a pop of color. You can even try spinach for a healthy twist. Mixing veggies makes this dish even more fun and tasty.
Different Protein Options
Need to make your dish heartier? Consider adding protein! Cooked chicken works great here. It adds flavor and makes it filling. Turkey is another lean option that fits well. If you want a vegetarian option, skip the meat altogether. Each protein option changes the dish in a delightful way.
Storage Info
How to Store Leftovers
Store your loaded cauliflower bake in an airtight container. Place it in the refrigerator. It stays fresh for about 3 to 5 days. Make sure to let it cool before sealing the container. This keeps moisture from building up inside.
Reheating Instructions
For the best texture, reheat leftovers in the oven. Preheat your oven to 350°F (175°C). Place the dish in the oven and cover it with foil. Heat for about 15 to 20 minutes. This helps melt the cheese again and warms the dish evenly. You can also reheat in the microwave for a quick meal. Just use a microwave-safe plate and heat in 30-second bursts, stirring in between.
Freezing Options
You can freeze loaded cauliflower bake if needed. First, cool it completely. Then, wrap it tightly in plastic wrap and aluminum foil. This prevents freezer burn. It will last up to 2 months in the freezer. To thaw, move it to the fridge for 24 hours before reheating. You can bake it straight from the freezer, but add extra time to ensure it heats through.
FAQs
Common Questions About Loaded Cauliflower Bake
Can I make this ahead of time? Yes, you can prepare this dish ahead. Cook the cauliflower and mix it with the creamy blend. Store it in the fridge for up to 24 hours. When ready to serve, just add the mozzarella and bake it.
How can I make it gluten-free? This recipe is already gluten-free! All the ingredients, like cauliflower and cheese, do not contain gluten. Always check labels if you use packaged items.
What are the best sides to serve with this dish? Loaded cauliflower bake pairs well with many sides. Try it with grilled chicken or steak. A fresh green salad also complements the dish nicely.
Can I substitute the cream cheese with a healthier option? Yes, you can use Greek yogurt instead of cream cheese. It gives a nice tang and cuts down on fat. You can also try cottage cheese for a different flavor.
Loaded cauliflower bake combines rich flavors and nutritious ingredients. You get creamy cheese, tender cauliflower, and tasty seasonings. Optional add-ins like bacon and green onions elevate this dish. Remember to cook your cauliflower well for the perfect bite. Customize with different cheeses and veggies to suit your taste. Whether you serve it as a side or a main dish, it's sure to please. Store leftovers in the fridge or freeze for later. Enjoy creating this delicious twist on a classic dish!