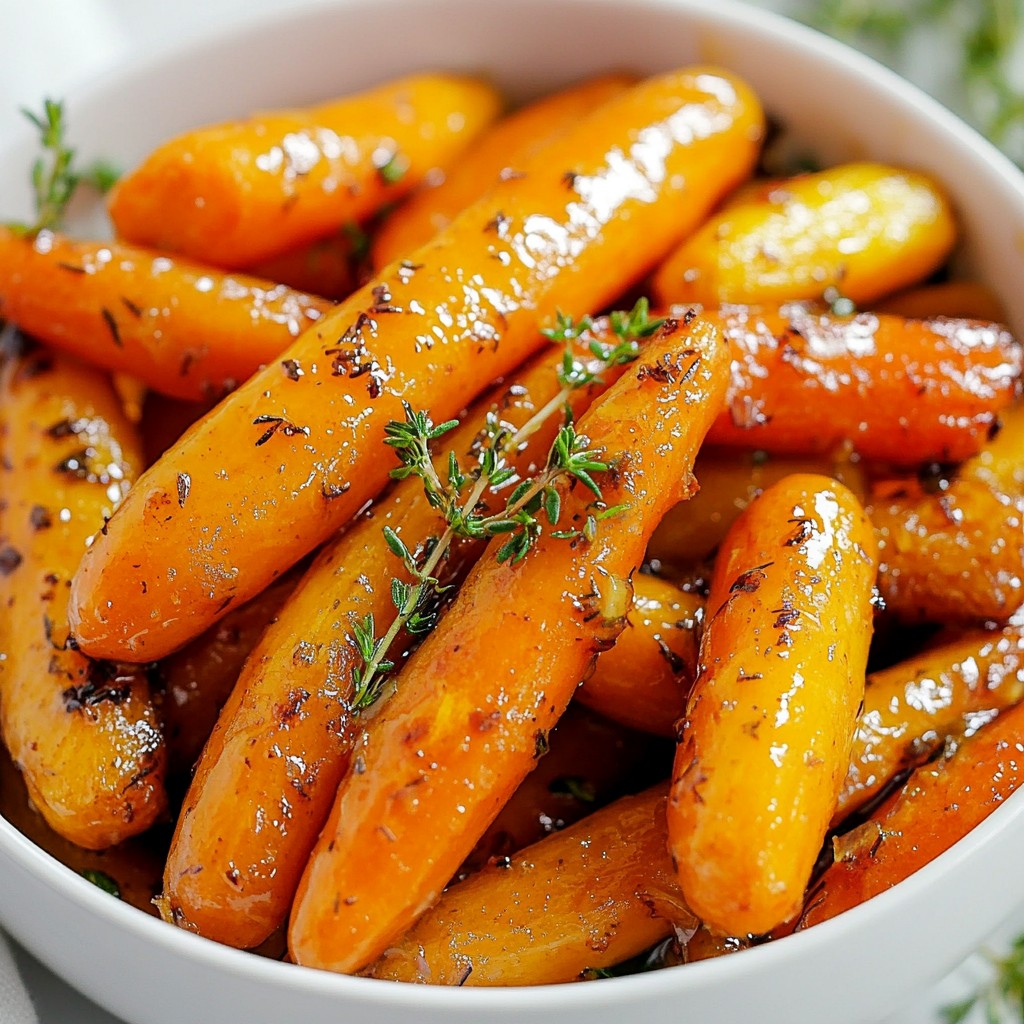
If you’re looking for a dish that’s savory and sweet, then maple glazed carrots are for you. These tender, caramelized bites elevate any meal and bring comfort to your table. I’ll guide you through easy steps to create this delightful side dish. From cooking tips to variations, you’ll soon master a recipe that will impress your family and friends. Let's dive into the delicious world of maple glazed carrots!
Why I Love This Recipe
- Sweet and Savory Balance: The combination of maple syrup and butter creates a delightful harmony of sweetness and richness that makes these carrots irresistible.
- Quick and Easy: This recipe comes together in just 20 minutes, making it a perfect side dish for busy weeknights or last-minute gatherings.
- Versatile Ingredients: Using baby carrots or regular carrots allows for flexibility, and the dish can be easily adapted to include other herbs and spices based on what you have on hand.
- Beautiful Presentation: The vibrant color of the glazed carrots makes for an eye-catching side that will impress your guests and elevate any meal.
Ingredients
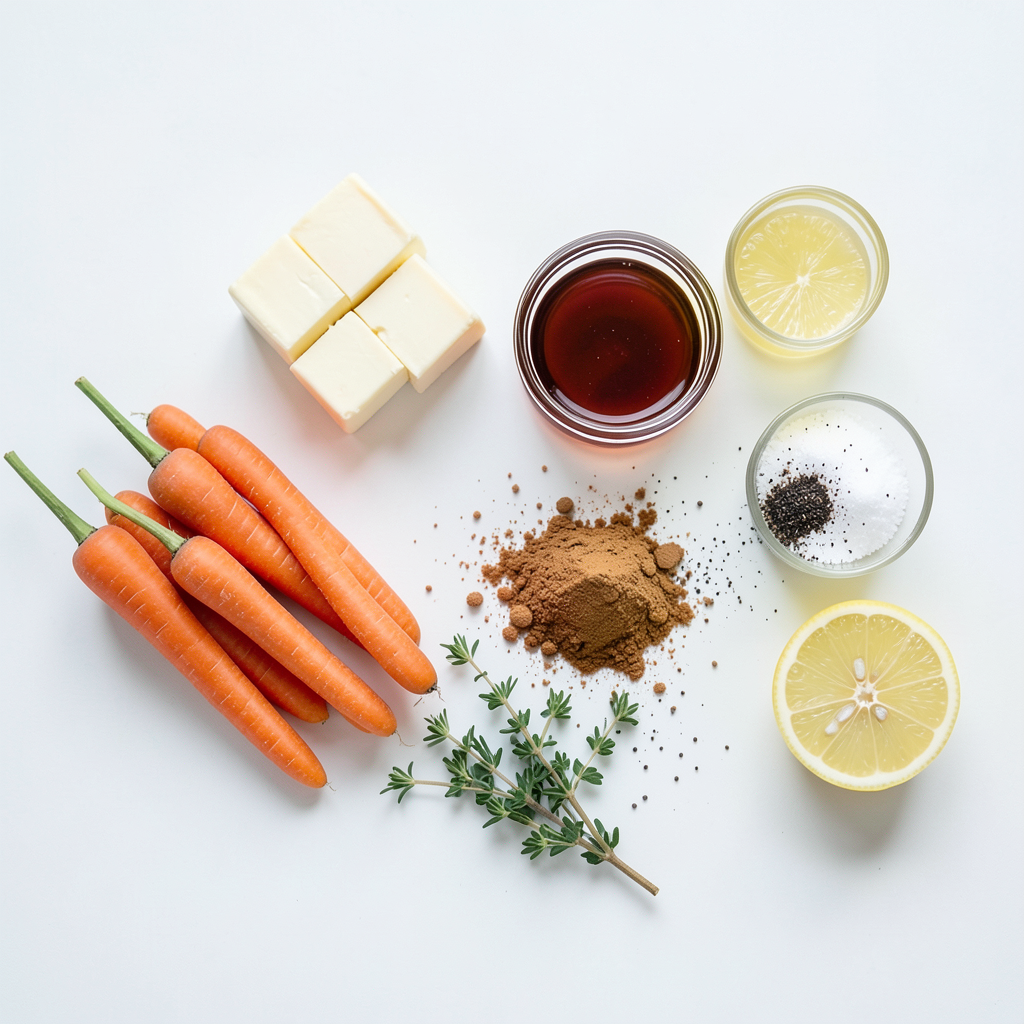
List of Ingredients
- Baby carrots and substitutes: I love using 1 pound of baby carrots for this dish. If you can’t find them, use regular carrots. Just peel and cut them into sticks. This will work well, too.
- Maple syrup options: Always choose pure maple syrup for the best flavor. Look for grade A or B syrup. Both have great taste, but grade B has a stronger flavor.
- Fresh herbs and spices: I add 1 tablespoon of fresh thyme leaves. If fresh thyme is not available, use 1 teaspoon of dried thyme instead. It still brings a lovely aroma. Don’t forget to include 1 teaspoon of ground cinnamon. This spice adds warmth and depth to the dish. Lastly, keep salt and pepper on hand to taste.
Step-by-Step Instructions
Preparation of Carrots
Start by boiling the carrots. Fill a large saucepan with water and bring it to a rolling boil. Once the water is boiling, add your baby carrots. Boil them for about 5 minutes. You want them soft but still crisp. After boiling, drain the carrots well. This step is important to remove excess water so the glaze sticks better.
Making the Glaze
Next, we’ll make the yummy glaze. In the same saucepan, turn the heat to medium. Add the unsalted butter and let it melt completely. Swirl the pan to help it coat the bottom. After the butter melts, return the drained carrots to the pan. Pour in the pure maple syrup and sprinkle in the ground cinnamon. Toss the carrots gently with a spatula. You want each carrot to be coated in the sweet mix. Cook the carrots for about 5 to 7 minutes. Stir them occasionally. This helps them caramelize and become tender but still a bit firm.
Finishing Touches
Now, it's time for the final touches. Add the fresh thyme leaves to the pan. Season with salt and pepper to taste. Just before you finish cooking, pour in the fresh lemon juice. Mix it well with the carrots. This adds a nice brightness to the dish. Remove the pan from the heat and let the glazed carrots rest for a minute. This helps the glaze thicken. Now, they are ready to serve!
Tips & Tricks
Cooking Techniques
To achieve the perfect glaze, start with fresh baby carrots. If you use regular carrots, peel and cut them into sticks. Boil them for about five minutes. This step helps soften the carrots while keeping them crisp. After boiling, drain the carrots well. This prevents excess water from ruining the glaze.
Use a large saucepan for easy mixing. A spatula works well for tossing the carrots in the glaze. If you have a wooden spoon, that’s a great choice too. When melting the butter, keep the heat on medium. This helps the butter melt evenly without burning.
Flavor Enhancements
To boost flavor, try adding herbs like rosemary or parsley. Ground ginger can also add a nice kick. Adjust the sweetness by adding more maple syrup or reducing it for a less sweet taste. You can also mix in a bit of honey for extra depth.
When seasoning, taste as you go. Add salt and pepper gradually to find your perfect balance. You can even add a dash of cayenne for a spicy twist. This allows you to customize the dish to your liking.
Pro Tips
- Choosing the Right Carrots: Opt for fresh, vibrant baby carrots for the best flavor and texture. If using regular carrots, select ones that are firm and free of blemishes.
- Maple Syrup Quality: Use high-quality pure maple syrup for a more robust flavor. Avoid imitation syrup as it can alter the taste of your dish.
- Perfect Caramelization: Ensure your heat is at medium when sautéing the carrots. This allows for even caramelization without burning the butter or syrup.
- Enhancing Flavor: For additional depth, consider adding a pinch of nutmeg along with the cinnamon. It pairs beautifully with the sweetness of the maple syrup.
Variations
Using Different Vegetables
You can swap out baby carrots for other veggies. Try using parsnips for a sweeter taste. Turnips also work well, offering a unique flavor. Sweet potatoes can add a nice twist too. If you want a crunchy bite, use radishes instead. Each of these substitutes brings its own charm to the dish.
Sweetness Levels
You can adjust the maple syrup to control sweetness. If you prefer a milder flavor, use less syrup. For a stronger sweetness, add a bit more. You can also use honey or agave syrup as a substitute. Both options will give a different yet tasty flavor. Just remember, both options can change the dish's texture.
Diet-Friendly Adjustments
If you need gluten-free options, this dish is already safe. Just check your maple syrup and butter brands. For a vegan twist, swap butter for coconut oil. Using plant-based butter also works well. These changes keep the recipe delicious while fitting your diet. Enjoy the same great taste without worry!
Storage Info
Best Practices for Storage
Store your maple glazed carrots in the fridge. Use an airtight container for best results. Make sure the carrots cool down before sealing them to keep moisture out. They stay fresh for up to three days. If you want to store them longer, consider freezing them. Just remember, frozen carrots may lose some crunch.
Reheating Instructions
To reheat, use a skillet for the best texture. Heat on medium-low and stir gently. This method helps keep the glaze intact. You can also use the microwave. Place the carrots in a bowl, cover, and heat in short bursts. Stir in between to ensure even heating.
After reheating, serve them warm. A sprinkle of fresh thyme or a squeeze of lemon juice brightens the flavor. Enjoy them as a side dish or over rice. These carrots add a sweet touch to any plate.
FAQs
Common Questions
How long do maple glazed carrots last in the fridge? These carrots can last about 3 to 5 days in the fridge. Store them in an airtight container. This keeps them fresh and tasty.
Can I use frozen carrots instead of fresh? Yes, you can use frozen carrots. Just remember to thaw them first. Frozen carrots may be softer, so adjust cooking time.
Nutritional Information
What are the calorie counts per serving? One serving has about 150 calories. This can vary based on the amount of butter and syrup used.
How can I make this dish healthier? To make it healthier, reduce the butter or use a low-fat version. You can also cut down on the maple syrup. Adding more herbs can boost flavor without extra calories.
Why is my glaze not thickening?
Troubleshooting common issues If your glaze is thin, you may not have cooked it long enough. Let it simmer for a few more minutes. This helps the liquid reduce and thicken up.
Tips for achieving the right consistency Stir the carrots often while cooking. This helps distribute heat evenly. If you want it thicker, try adding a little cornstarch mixed with water. This can help thicken it quickly.
This blog post covered how to make delicious maple-glazed carrots. We explored key ingredients, like fresh herbs and different sweeteners. You learned detailed steps for preparing and glazing the carrots. Tips on cooking techniques and flavor enhancements helped you perfect this dish.
In the end, whether you’re using baby carrots or other vegetables, small touches matter. Storing and reheating well ensures tasty results each time. Enjoy experimenting with the variations and making this dish your own.