Are you ready to indulge in the perfect bite-sized treat? Mini cheesecake bites are not only delicious but also easy to make. With creamy filling and a crumbly crust, these little desserts will impress everyone. Whether you’re new to baking or a pro, this recipe offers simple steps to create mouth-watering mini cheesecakes. Let’s dive into ingredients, tips, and variations that will make your cheesecake bites a hit!
Ingredients
Essential Ingredients for Mini Cheesecake Bites
To make mini cheesecake bites, you need a few key items. Here’s what you’ll need:
– 8 oz cream cheese, softened to room temperature
– 1/2 cup granulated sugar
– 1 tsp pure vanilla extract
– 1 large egg, room temperature
– 1/4 cup sour cream
– 1 tbsp fresh lemon juice
– 1/2 cup graham cracker crumbs
– 2 tbsp unsalted butter, melted
These ingredients work together to create a creamy and rich filling. The crust gives it a nice texture.
Optional Toppings and Garnishes
You can make these mini cheesecakes even more fun with toppings. Here are some great options:
– Fresh berries (strawberries, blueberries, or raspberries)
– Whipped cream
Adding these toppings can enhance the flavor and look of your bites. Fresh berries add a pop of color and sweetness.
Ingredient Substitutions
If you don’t have something on hand, don’t worry! You can swap some ingredients. Here are some ideas:
– Use Greek yogurt instead of sour cream for a tangy taste.
– Almond extract works well if you don’t have vanilla extract.
– You can try using coconut oil instead of butter for a different flavor.
These substitutions can help you customize your mini cheesecake bites to your taste. Feel free to experiment!
Step-by-Step Instructions
Preparing the Crust
To make the crust, start by preheating your oven to 325°F (160°C). Grab a standard mini muffin pan and line it with paper liners. This helps prevent sticking. In a medium bowl, mix 1/2 cup of graham cracker crumbs with 2 tablespoons of melted butter. Stir until the crumbs look like damp sand.
Next, take about 1 teaspoon of this mixture and press it into the bottom of each liner. You want a solid base. Bake the crusts in the oven for 5 minutes, then let them cool for a bit.
Making the Cheesecake Filling
While the crusts cool, get another bowl. Beat 8 oz of softened cream cheese with 1/2 cup of granulated sugar using an electric mixer. Mix until it’s smooth and creamy. Now, add 1 teaspoon of pure vanilla extract, 1 large room temperature egg, 1/4 cup of sour cream, and 1 tablespoon of fresh lemon juice. Blend this mixture until it is completely smooth.
You can use a spoon or a piping bag to fill each cooled crust. Fill them about 3/4 full for the best results.
Baking and Cooling Process
Place the mini cheesecakes back in the oven. Bake them for 15 to 18 minutes. The centers should be set but still jiggle slightly when you shake the pan. After baking, turn off the oven but leave the cheesecakes inside for another 5 to 10 minutes. This helps them cool gently, reducing cracks.
After that, take them out and let them cool at room temperature. Once they are cool, put them in the fridge for at least 2 hours. This makes them firm and ready to enjoy.
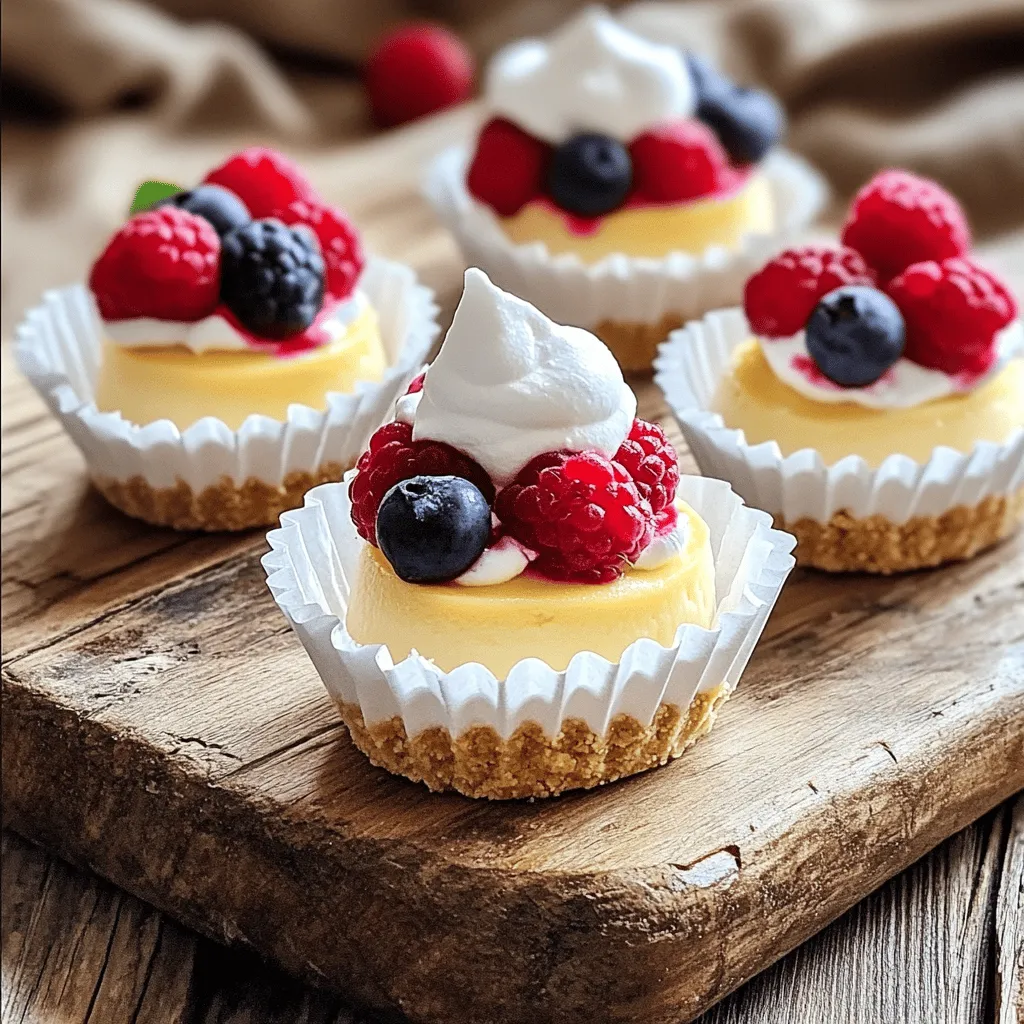
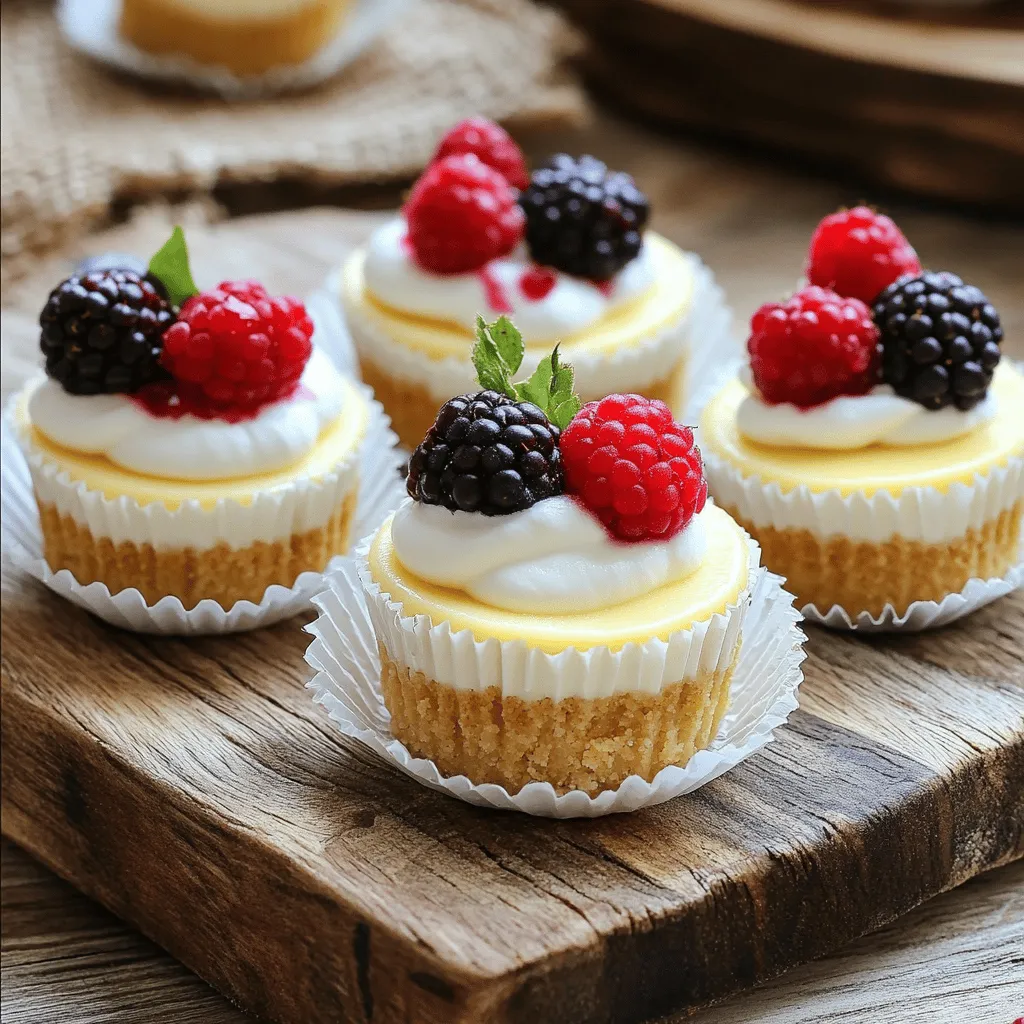
Before serving, top each mini cheesecake with fresh berries and a dollop of whipped cream if you like. Enjoy your delicious treats!
Tips & Tricks
How to Prevent Cracking
To keep your mini cheesecakes smooth, bake them gently. Start by using room temperature ingredients. Cold cream cheese can lead to lumps and cracks. When mixing, beat the cream cheese and sugar slowly. This helps keep air from getting in. Air bubbles can cause cracks when baking.
After baking, turn off the oven and leave the mini cheesecakes inside for a few minutes. This slow cooling helps avoid sudden shifts in temperature. A gentle cooling process makes a big difference!
Best Practices for Cream Cheese
Always use full-fat cream cheese for the best taste and texture. Light or fat-free versions may not set well. Soften the cream cheese completely before mixing. This ensures a smooth filling. You can use an electric mixer for a creamy blend. Mix until there are no lumps left.
If you want a lighter texture, add sour cream. It gives a nice tang and richness. Just be sure to blend it well with the cream cheese.
Serving Suggestions for Mini Cheesecake Bites
For a fun touch, top your mini cheesecakes with fresh berries. Strawberries, blueberries, or raspberries work great! You can also add a dollop of whipped cream for extra flavor.
Serve these bites on a colorful platter. Drizzle berry sauce around them for a pretty look. This not only adds color but enhances the taste too. Enjoy these delightful treats at parties or family gatherings!
Variations
Flavor Variations (Chocolate, Pumpkin, etc.)
You can easily change the flavor of your mini cheesecake bites. For chocolate, add 1/2 cup of melted dark chocolate to the cream cheese mix. Stir it in well. You can also use cocoa powder instead. Just add 1/4 cup for a rich taste. For a fall treat, try pumpkin spice. Mix in 1/2 cup of pumpkin puree and 1 teaspoon of pumpkin spice. These flavors add fun twists to your bites.
Gluten-Free Options
Want gluten-free mini cheesecakes? Use gluten-free graham cracker crumbs for the crust. You can find these at most stores. They taste just as good as regular crumbs. Also, check your cream cheese and sour cream brands. Some may have gluten, so always read the labels. This way, everyone can enjoy these bites.
Seasonal Fruit Toppings
Fruit toppings make your mini cheesecakes extra special. In summer, use fresh berries like strawberries, blueberries, or raspberries. They add a bright color and fresh taste. In fall, try sliced apples with a sprinkle of cinnamon. For winter, pomegranate seeds give a festive look. Each season brings new fruit ideas. These toppings let you customize your bites for any occasion.
Storage Info
How to Store Mini Cheesecake Bites
To keep your mini cheesecake bites fresh, store them in the fridge. Use an airtight container to prevent moisture loss. This helps keep them creamy and tasty. If you want to enjoy them later, you can freeze them. Just make sure they are completely cool before storing.
Freezing Instructions
To freeze mini cheesecake bites, follow these steps:
– Allow the bites to cool completely.
– Place them in a single layer on a baking sheet.
– Freeze for about 2 hours until firm.
– Transfer them to a freezer-safe container or a zip-top bag.
– Label the bag with the date. They can last up to 3 months in the freezer.
When you’re ready to eat, just thaw them in the fridge overnight.
Shelf Life and Signs of Spoilage
Mini cheesecake bites last about 5 days in the fridge. They are still good if they smell fresh and taste creamy. If you see any discoloration or mold, it’s time to toss them. A sour smell or watery texture are also signs they have spoiled. Enjoy your treats while they are fresh for the best flavor!
FAQs
Can I make Mini Cheesecake Bites ahead of time?
Yes, you can make Mini Cheesecake Bites ahead of time. They taste amazing after chilling. I suggest making them a day before serving. This gives the flavors time to blend. Just store them in the fridge in an airtight container. They keep well for about 3 days.
How do I prevent mini cheesecakes from sticking to the liners?
To stop sticking, use paper liners for your mini muffin pan. Before filling, lightly spray the liners with cooking spray. This helps release the cheesecakes easily. Also, make sure you let them cool completely before removing them. This will help keep their shape intact.
What is the best way to serve Mini Cheesecake Bites?
Serve Mini Cheesecake Bites chilled for the best taste. I love topping them with fresh berries. You can also add a dollop of whipped cream for extra flavor. Arrange them on a pretty platter for a nice touch. Drizzle some berry sauce around for a pop of color. This makes your dessert look fancy and inviting.
You learned how to make delicious mini cheesecake bites with simple steps and tips. We covered essential ingredients, and how to prevent cracking, and even shared some fun variations. Whether you stick with classic flavors or try something new, these treats are a hit. Store them well for longer enjoyment. With care, these bites will impress everyone. Now, go ahead and make these mini cheesecakes and share them with friends! You’ll see how fun and easy they can be.


