Craving a sweet treat but short on time? I’ve got you covered with these Easy No-Bake Cheesecake Bites! Perfect for any occasion, they combine creamy cheesecake goodness with a crunchy crust. In this post, I’ll share simple ingredients, step-by-step instructions, and tips to make these bites a hit. Whether you want to impress guests or enjoy a snack, this recipe is a must-try! Let’s dive in!
Ingredients
Main Ingredients for No-Bake Cheesecake Bites
To make these cheesecake bites, you need a few key ingredients:
– 1 cup cream cheese, softened to room temperature
– 1/2 cup Greek yogurt, preferably plain or vanilla
– 1/4 cup powdered sugar
– 1 teaspoon pure vanilla extract
– 1 cup graham cracker crumbs
– 4 tablespoons unsalted butter, melted
These ingredients create a creamy filling and a crunchy crust. The cream cheese adds richness, while the Greek yogurt brings a tangy flavor. The powdered sugar sweetens the mix, and the vanilla enhances the taste. The graham cracker crumbs and butter form a base that holds everything together.
Optional Toppings and Drizzles
You can make these bites even more fun with toppings. Try adding:
– Assorted fresh berries (strawberries, blueberries, raspberries)
– Chocolate sauce for a sweet touch
– Caramel sauce for a rich flavor
These toppings not only taste great but also make your bites look pretty. Fresh berries add color, while sauces give a smooth finish.
Equipment Needed
To prepare these delicious bites, you will need:
– A medium mixing bowl
– An electric mixer
– A separate mixing bowl for the crust
– A mini muffin tin
– Mini cupcake liners
Having these tools ready makes the process easy and fun. You can whip up these treats in no time, and the results will impress everyone.
Step-by-Step Instructions
Preparing the Cheesecake Mixture
To start, gather your ingredients. In a medium bowl, mix the softened cream cheese, Greek yogurt, powdered sugar, and vanilla extract. Use an electric mixer on medium speed. Beat until the mixture is smooth and creamy, which takes about 2 to 3 minutes. Don’t forget to scrape the sides of the bowl to mix well. This step ensures a nice, even blend. The cream cheese gives a rich taste, while the yogurt adds a nice tang.
Making the Graham Cracker Crust
Next, take a separate bowl for the crust. Combine the graham cracker crumbs and melted butter. Stir the mix until it holds together, like wet sand. This is key for a sturdy crust. Now, grab a mini muffin tin and line each cup with mini cupcake liners. Take about one tablespoon of the graham cracker mix and press it firmly into the bottom of each liner. This creates the perfect base for your cheesecake bites.
Assembling the Cheesecake Bites
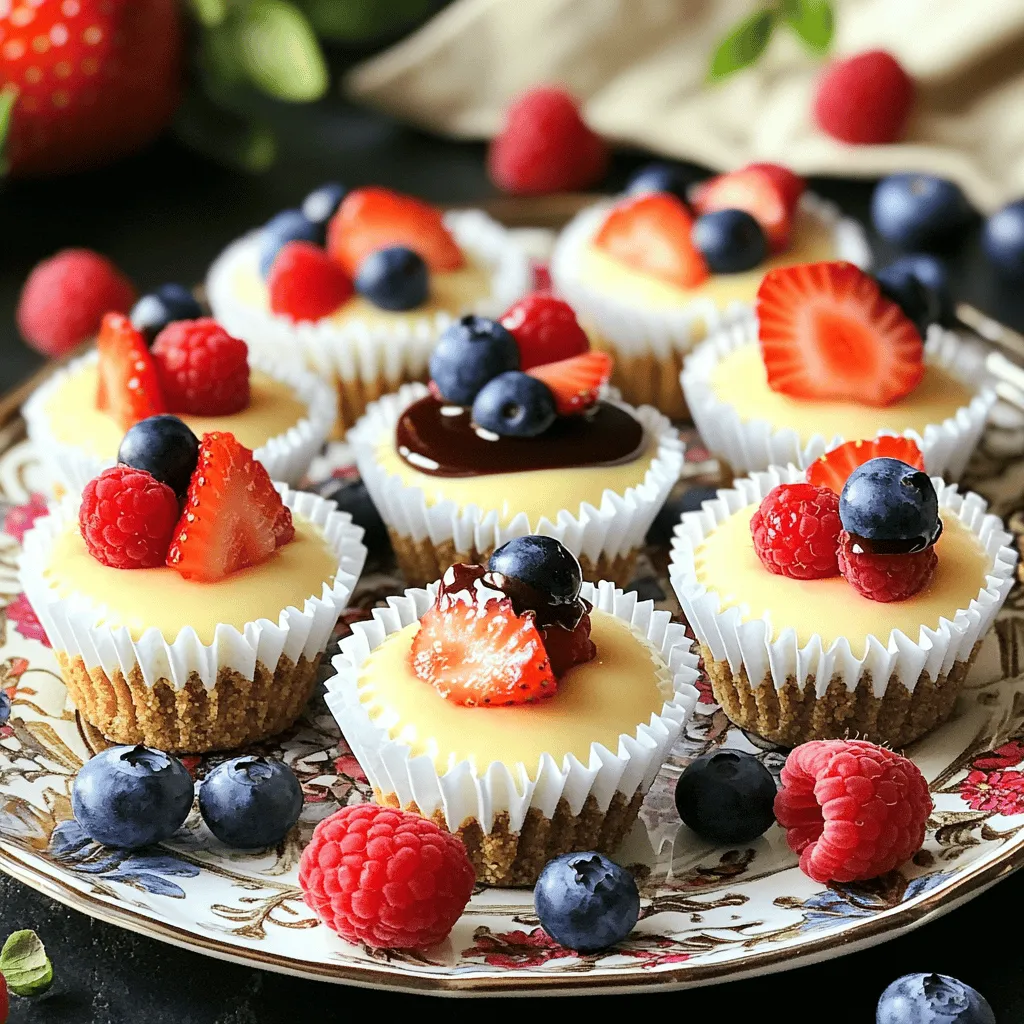
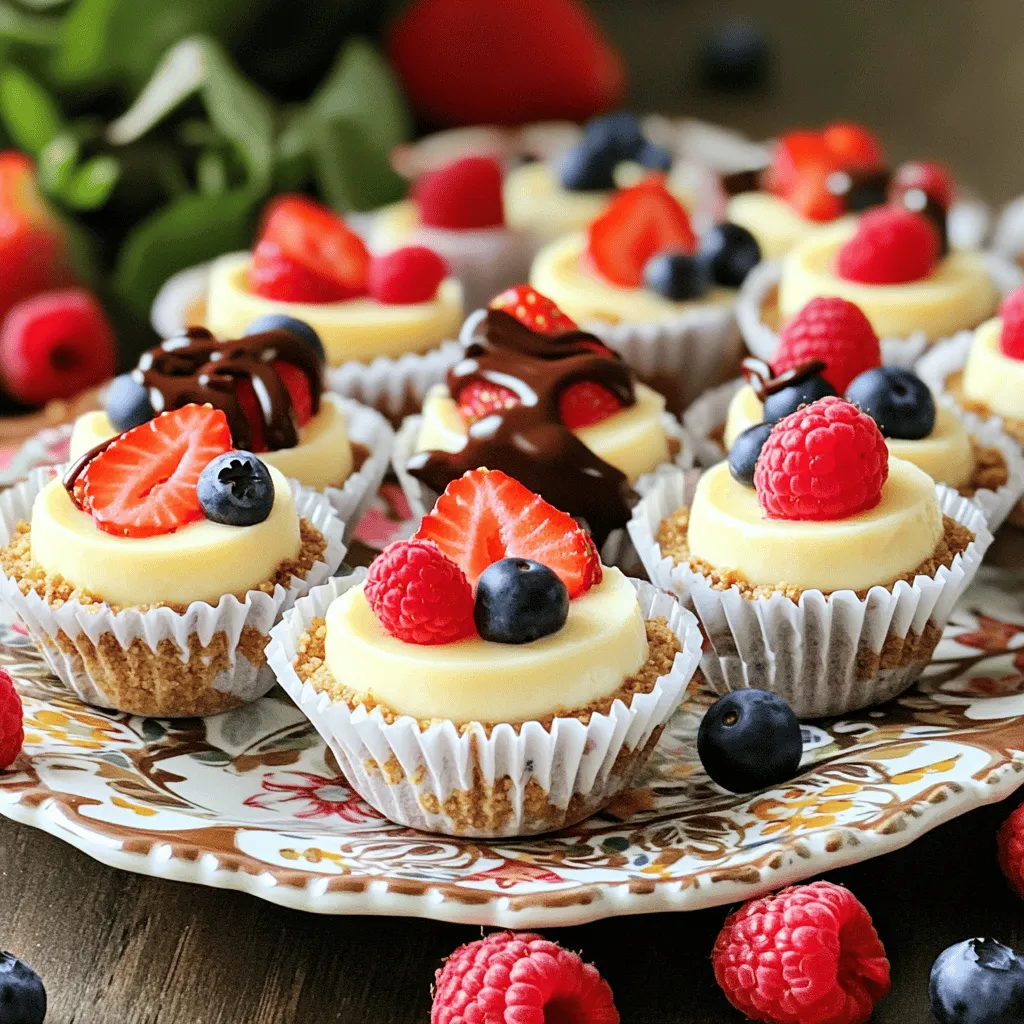
Now it’s time to fill those liners! Use a spoon or small cookie scoop to add the cheesecake mixture on top of the crust. Fill each liner to the top, then smooth the surface with a spatula. Once all the liners are filled, cover the muffin tin with plastic wrap. Place it in the fridge for at least 2 hours. This helps the cheesecake bites set nicely. When ready to serve, gently remove them from the muffin tin and peel away the liners. Top each bite with fresh berries for a pop of color. You can add chocolate or caramel sauce on top if you want to impress your guests. Enjoy these easy and delicious treats!
Tips & Tricks
How to Achieve a Smooth Cheesecake Filling
To make a smooth cheesecake filling, start with softened cream cheese. Cold cream cheese does not blend well. I recommend letting it sit at room temperature for about 30 minutes. Use an electric mixer on medium speed, mixing for 2 to 3 minutes. Scrape down the sides of the bowl often. This step helps mix everything evenly. Adding Greek yogurt gives it a creamy texture and tangy flavor.
Tips for Perfectly Layered Bites
For nice layers, press the graham cracker crust firmly into the muffin liners. Use about one tablespoon for each bite. Then, fill each liner with cheesecake filling to the top. Make sure to smooth the surface with a spatula. This creates a nice finish. If you want to add a fruit topping, do so right before serving for freshness.
Serving Suggestions
Serve these cheesecake bites on a pretty platter. Arrange them in a circle or in rows for a nice look. Scatter fresh berries around the bites for color. You can also drizzle chocolate or caramel sauce on top for extra flavor. For a fun twist, add mint leaves for a pop of green. These bites are perfect for parties or just a sweet treat at home.
Variations
Flavor Variations for the Cheesecake Mixture
You can change the flavor of your cheesecake bites easily. To make chocolate cheesecake, add 1/4 cup of cocoa powder. For a fruity twist, mix in some lemon or orange zest. You can also use flavored yogurt, like strawberry or coconut, for added taste. Experimenting with extracts like almond or mint can create unique flavors.
Different Crust Options
While graham cracker crumbs are classic, other options work well too. You can use crushed cookies like Oreos or gingersnaps for a fun twist. For a healthier choice, try almond flour or oat flour mixed with melted butter. If you like a nutty flavor, consider using crushed nuts like pecans or walnuts. These changes can add texture and taste.
Seasonal Fruit Options for Toppings
Toppings can change with the seasons. In spring and summer, use fresh berries like strawberries, blueberries, and raspberries. In autumn, top with sliced apples and a sprinkle of cinnamon. Winter calls for citrus fruits like mandarin oranges or pomegranate seeds. You can also mix fruits for a colorful look. For extra sweetness, drizzle chocolate or caramel sauce on top.Enjoy your tasty creations!
Storage Info
How to Properly Store Cheesecake Bites
To keep your cheesecake bites fresh, place them in an airtight container. Make sure to layer parchment paper between each layer to avoid sticking. Store them in the fridge. They will stay good for about five days. If you want to keep them longer, freezing is a great option.
Freezing Instructions
If you want to freeze your cheesecake bites, follow these steps. First, let them chill in the fridge for at least two hours. Once firm, remove them from the muffin tin. Wrap each bite tightly in plastic wrap. Place the wrapped bites in a freezer-safe container or bag. They can last up to three months in the freezer. When you’re ready to enjoy them, just thaw in the fridge overnight.
Reheating Tips
Reheating is not necessary for cheesecake bites. They are best served chilled. However, if you prefer a slightly softer texture, let them sit at room temperature for about 10 minutes before serving. This will enhance their creaminess and flavor. Enjoy your cheesecake bites as they are meant to be!
FAQs
How long do No-Bake Cheesecake Bites last?
No-Bake Cheesecake Bites last about 5 days in the fridge. Keep them in an airtight container. This helps keep them fresh and tasty. If you want to make them last longer, you can freeze them. Just remember to thaw them in the fridge before serving.
Can I make these cheesecake bites ahead of time?
Yes, you can make these cheesecake bites ahead of time. They taste best after chilling for at least 2 hours. This allows the flavors to blend well. Making them a day in advance is a great idea. They will be ready to enjoy when you are.
What can I use instead of graham cracker crumbs?
If you don’t have graham cracker crumbs, you can use other options. Crushed cookies like Oreos or vanilla wafers work well. You can also use crushed nuts or oats. Just mix them with melted butter, just like you would with graham crackers. This gives you a tasty crust for your cheesecake bites.
No-bake cheesecake bites are easy to make and fun to enjoy. We covered the main ingredients, optional toppings, and essential equipment. I shared step-by-step instructions to make the cheesecake mixture and crust. You learned tips for a smooth filling and how to serve them. We also explored flavor variations and storage options.
These bites are great for gatherings or a sweet treat anytime. With these simple steps, you can impress friends and family. Enjoy creating and sharing these delicious treats!