Craving a quick treat that’s both delicious and easy? Look no further than these No Bake Chocolate Peanut Butter Bars! This simple recipe takes minimal time and effort while satisfying your sweet tooth. With just a few ingredients, you can whip up a dessert that’s perfect for sharing or indulging alone. Ready to dive into this tasty adventure? Let’s get started!
Ingredients
Necessary Ingredients for No Bake Chocolate Peanut Butter Bars
To make these tasty chocolate peanut butter bars, you need a few key ingredients. Here’s what you will need:
– 1 cup creamy peanut butter
– 1/2 cup honey or maple syrup
– 2 cups rolled oats
– 1/2 cup unsweetened cocoa powder
– 1 teaspoon pure vanilla extract
– 1/4 teaspoon salt
– 1/2 cup chocolate chips (dairy-free if needed)
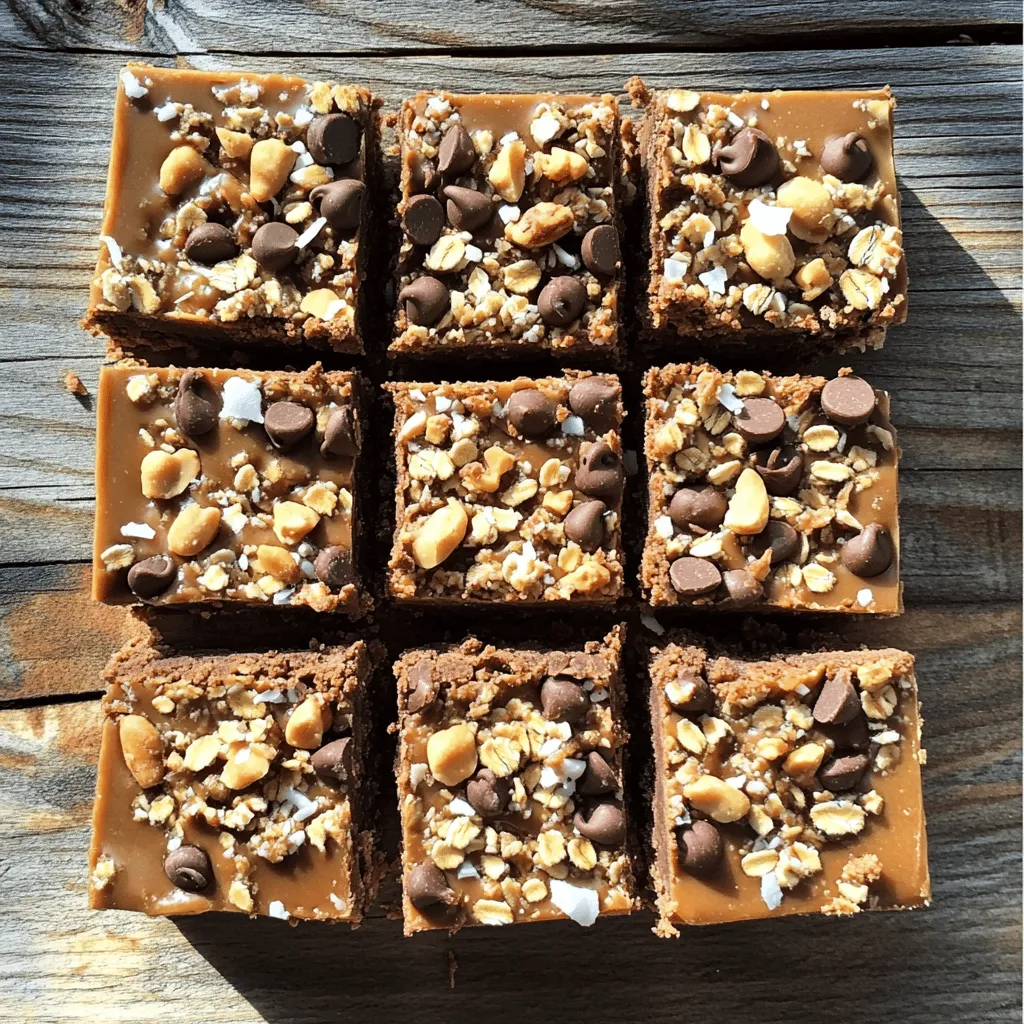
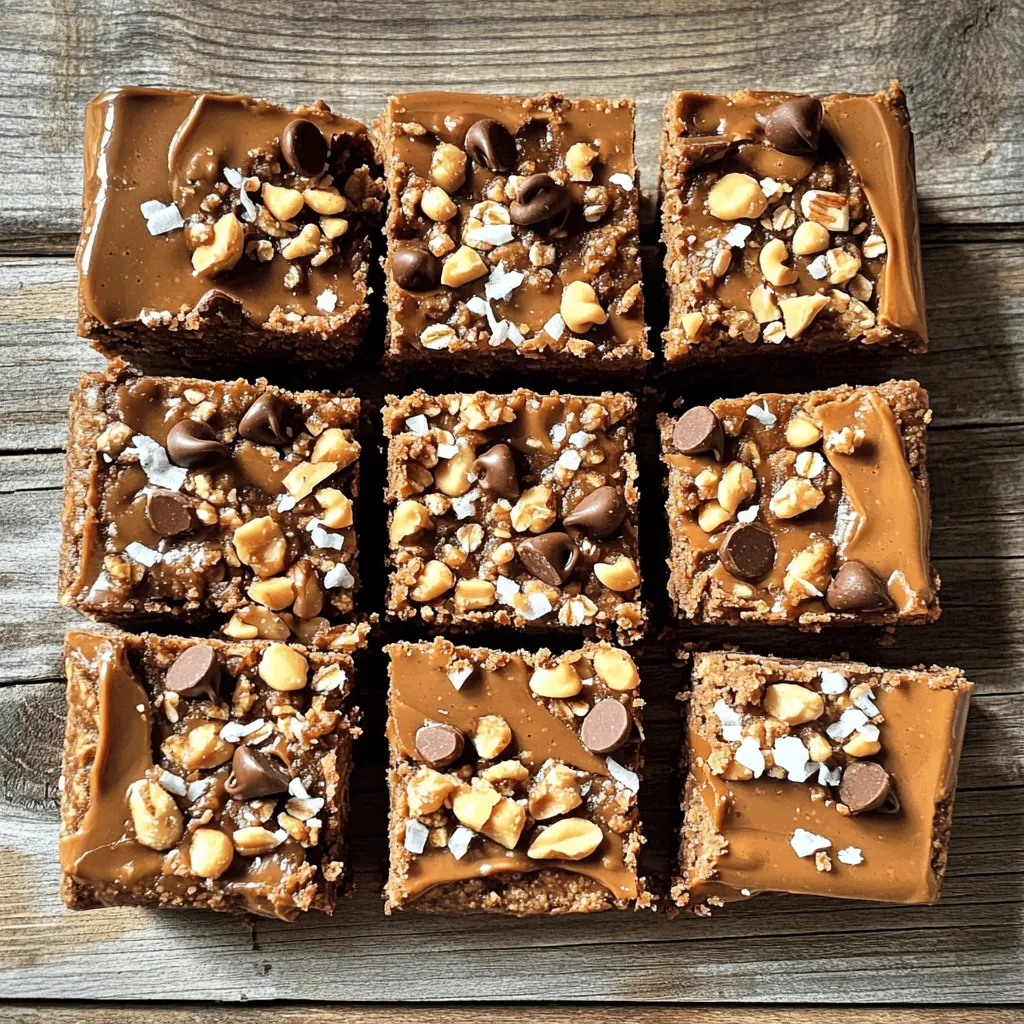
These ingredients come together to create a rich and satisfying treat. The creamy peanut butter gives the bars their smooth texture, while the rolled oats add great chewiness.
Optional Add-ins for Extra Flavor
While the basic recipe is delightful, you can make it even better. Here are some optional add-ins to consider:
– 1/4 cup crushed nuts (like almonds or walnuts)
– 1/4 cup shredded coconut
These add-ins bring extra crunch and flavor. If you love a nutty taste, crushed nuts work great. Shredded coconut adds a sweet touch that can make each bite special.
Equipment Needed
To whip up these bars, you will need some simple tools. Gather the following items:
– A large mixing bowl
– A spatula for mixing
– An 8×8-inch baking dish
– Parchment paper for easy removal
– A sharp knife for cutting
Having the right equipment makes the process smooth. The mixing bowl and spatula help blend the ingredients well, while the baking dish keeps everything contained. Using parchment paper means you can lift the bars out easily when they are ready.
Step-by-Step Instructions
Preparing the Peanut Butter Mixture
Start by taking a large mixing bowl. Add 1 cup of creamy peanut butter and 1/2 cup of honey or maple syrup. Use a spatula to mix them well. You want a smooth and creamy blend. This mix is the base of your bars. The rich flavor of peanut butter shines through when paired with the sweet syrup.
Incorporating Dry Ingredients
Next, add 2 cups of rolled oats, 1/2 cup of unsweetened cocoa powder, 1 teaspoon of pure vanilla extract, and 1/4 teaspoon of salt to the bowl. Stir this mixture vigorously. You want to fully combine all the dry ingredients with the wet mix. The dough will become thick and sticky, which is just what you need for the bars.
Assembling and Pressing into the Dish
Now, get an 8×8-inch baking dish and line it with parchment paper. Leave some paper hanging over the edges. This will help you lift the bars out later. Carefully transfer your thick dough into the dish. Use your hands or a spatula to press it down evenly. Make sure to fill the corners well. If you want, sprinkle crushed nuts or shredded coconut on top. Gently press them into the mixture.
Chilling and Cutting the Bars
Cover the dish with plastic wrap or aluminum foil. Place it in the refrigerator for at least 2 hours. This chilling time helps the bars firm up. After they set, lift the bars out using the parchment paper. Use a sharp knife to cut them into squares or rectangles. Enjoy your tasty creations!
Tips & Tricks
Perfecting the Texture of Your Bars
To get the best texture, mix the peanut butter and honey well. You want a smooth blend. When you add oats, stir until they are fully coated. This helps the bars hold together. If your mixture feels too dry, add a bit more honey or peanut butter. A little goes a long way!
Storing Leftover Bars Properly
Keep your bars fresh by storing them in an airtight container. Place them in the fridge to stay cool. They can last up to a week. If you want to keep them longer, try freezing them. Just wrap each bar in plastic wrap before placing them in a freezer bag. This keeps them tasty for up to three months.
Enhancing Flavor with Additions
You can boost the flavor of your bars with fun add-ins. Try adding a scoop of protein powder for a health kick. Or, mix in some crushed nuts for crunch. Chopped dried fruit can add sweetness, too. You can also sprinkle sea salt on top for a sweet-salty combo. Each addition brings a new twist to your treats!
Variations
Different Nut Butters to Use
You can swap peanut butter for other nut butters. Almond butter works well. Cashew butter also gives a nice taste. Sunflower seed butter is a great choice for nut allergies. Each type brings its own flavor. Just keep the same amounts to keep the bars balanced.
Gluten-Free Options
To make these bars gluten-free, use certified gluten-free rolled oats. Most other ingredients are naturally gluten-free. Always check labels to be sure. You can still enjoy these tasty treats without gluten. They will taste just as good!
Vegan Adaptations
For a vegan version, replace honey with maple syrup. Use dairy-free chocolate chips for a vegan option. You can also choose to skip the chocolate chips if you want. All other ingredients are already vegan-friendly. These small changes keep the bars tasty and plant-based.
Serving Suggestions
Pairing No Bake Bars with Beverages
These no bake chocolate peanut butter bars taste great with drinks. A glass of cold milk pairs well. The creamy milk balances the rich flavors of the bars. You can also enjoy them with coffee or tea. Hot drinks warm up the chocolate and bring out its taste. For a fun twist, try them with a smoothie. A banana or berry smoothie adds a fruity touch.
Serving for Special Occasions
These bars are a hit at parties and gatherings. They are easy to cut into small squares, making them perfect for sharing. Set them on a dessert table with other treats. You can also serve them at picnics or family events. Their sweet and salty mix appeals to many. If you have kids, they will love these bars at birthday parties. They can help you cut and serve them!
Gifting Ideas
No bake chocolate peanut butter bars make great gifts. Wrap them in colorful paper or place them in a nice box. Add a personal note to make it special. They are perfect for holidays or as a thank-you gift. You can even make a batch for a friend who loves sweets. Homemade treats show you care and are fun to make together.
FAQs
How long do No Bake Chocolate Peanut Butter Bars last?
No Bake Chocolate Peanut Butter Bars last up to one week in the fridge. Store them in an airtight container. They taste great even after a few days. The bars may lose some crunch but still remain delicious.
Can I use natural sweeteners instead of honey?
Yes, you can use natural sweeteners like maple syrup or agave nectar. These options work well to keep the bars sweet. They also add a unique flavor to the mix. Adjust the amount based on your taste preference.
What type of chocolate chips should I use?
I recommend using semi-sweet or dark chocolate chips. You can also choose dairy-free chips if you prefer. The type of chocolate can change the taste, so pick what you enjoy most.
Can I freeze these bars for later?
Yes, you can freeze No Bake Chocolate Peanut Butter Bars. Wrap them tightly in plastic wrap or foil. They should last for up to three months in the freezer. Just remember to thaw them in the fridge before eating.
No Bake Chocolate Peanut Butter Bars are easy to make and taste great. We covered what you need, from essential ingredients to optional add-ins. I shared step-by-step instructions for making these bars. You also learned tips for the perfect texture and creative variations.
These bars are tasty for any occasion. Enjoy them with drinks, share them as gifts, or adapt them to fit your needs. Keep experimenting with flavors, and have fun in the kitchen!


