No-Bake Lemon Icebox Pie Simple and Refreshing Treat

Looking for a quick, tasty dessert? You’ve found it! This No-Bake Lemon Icebox Pie is simple and refreshing. You can whip it up without turning on the oven. With a zesty lemon flavor, it’s perfect for warm days. I’ll guide you through easy steps and share tips to make it shine. Ready to impress friends and family? Let’s get started on this delightful treat!

Ingredients

Essential Ingredients for No-Bake Lemon Icebox Pie

To create this tasty Lemon Icebox Pie, you need a few key ingredients. Here’s what you’ll need:

– 1 cup graham cracker crumbs

– 1/2 cup unsweetened shredded coconut

– 1/3 cup granulated sugar

– 1/2 cup (1 stick) unsalted butter, melted

– 1 cup heavy whipping cream

– 1 (14 oz) can sweetened condensed milk

– 1/2 cup freshly squeezed lemon juice (about 2-3 lemons)

– Zest of 2 lemons

– A pinch of salt

These ingredients come together to create a smooth, creamy filling with a crunchy crust.

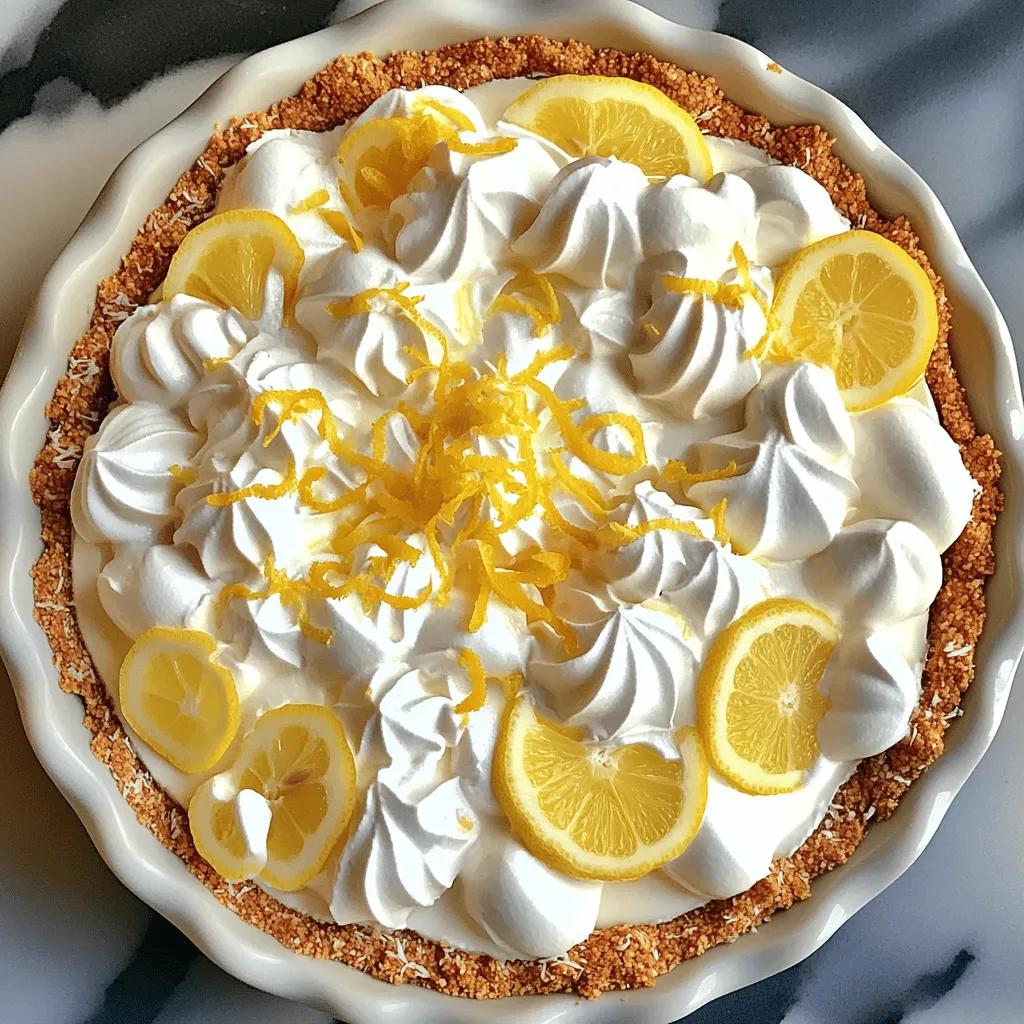
Optional Garnishes to Enhance Flavor

While the pie is already delicious, you can make it even better with some fun garnishes. Here are some ideas:

– Fresh lemon zest on top

– A dollop of whipped cream

– Thin slices of lemon for decoration

– Fresh mint leaves for color

– A few berries like raspberries or blueberries

These garnishes add extra flavor and make your pie look stunning.

Tips for Selecting Fresh Lemons

Choosing the right lemons is key for the best flavor. Here are some tips to help you pick the freshest ones:

– Look for lemons that feel heavy for their size. This means they are juicy.

– Choose lemons with a bright yellow color. Avoid any that have green spots.

– Check for smooth skin. Bumpy skin can mean they are past their prime.

– Smell the lemon! A fresh lemon should have a strong, citrusy scent.

Using fresh lemons will make your pie burst with flavor and freshness.

Step-by-Step Instructions

Preparing the Graham Cracker Crust

To start, gather your ingredients for the crust. In a bowl, combine:

– 1 cup graham cracker crumbs

– 1/2 cup unsweetened shredded coconut

– 1/3 cup granulated sugar

– 1/2 cup (1 stick) unsalted butter, melted

Mix these ingredients with a fork or spatula until it looks sandy. The mixture should stick together when pressed. Next, transfer the crumb mix to a 9-inch pie dish. Press it firmly into the bottom and up the sides. Use your fingers or a measuring cup for an even layer. Chill the crust in the fridge for 15 minutes. This helps it set.

Making the Lemon Filling

Now, let’s create the lemon filling. In a new bowl, whisk together:

– 1 (14 oz) can sweetened condensed milk

– 1/2 cup freshly squeezed lemon juice (about 2-3 lemons)

– Zest of 2 lemons

– A pinch of salt

Mix these until smooth. This blend will give your pie a zesty flavor.

Combining the Ingredients

It’s time to bring everything together! First, whip the heavy cream until stiff peaks form. This should take about 3-5 minutes. Set it aside. Next, gently fold the whipped cream into the lemon mixture in three parts. Use a spatula to keep it airy. Once combined, pour this creamy filling into the chilled crust. Smooth the top with a spatula to make it even.

Cover the pie with plastic wrap. Refrigerate for at least 4 hours to set. For the best taste, let it chill overnight. After it’s set, slice into 8 generous pieces. Enjoy your refreshing treat! For the complete recipe, check out the Full Recipe section.

Tips & Tricks

Common Mistakes to Avoid

When making no-bake lemon icebox pie, some mistakes can change the taste. Here’s what to watch for:

Overmixing the whipped cream: This can turn it into butter. Stop when you see stiff peaks.

Not chilling the crust: A warm crust won’t hold the filling well. Chill it for at least 15 minutes.

Using bottled lemon juice: Fresh juice tastes best. Bottled juice lacks the vibrant flavor.

How to Perfectly Whip Cream

Whipping cream adds a light, fluffy texture. Here’s how to do it right:

1. Use cold tools: Chill your bowl and beaters for a better whip.

2. Start slow: Begin on low speed to avoid splatter. Gradually increase to medium-high.

3. Watch for peaks: Stop mixing as soon as you see stiff peaks form. This takes about 3-5 minutes.

Best Practices for Chilling the Pie

Chilling the pie helps it set and enhances flavor. Here’s how to chill it properly:

Cover it well: Use plastic wrap to prevent the pie from absorbing odors.

Chill for hours: Aim for at least 4 hours, but overnight is best.

Avoid opening the fridge: Keep it closed to maintain a steady temperature.

These tips help create a perfect no-bake lemon icebox pie. For the full recipe, check out the [Full Recipe].

Variations

Adding Fruit to the Filling

You can make your no-bake lemon icebox pie even better by adding fruit. Fresh berries like blueberries or strawberries work well. Just fold them into the creamy lemon filling before pouring it into the crust. This adds color and flavor. You can also try diced peaches or mango for a tropical twist. Each fruit brings its own taste and fun texture.

Altering the Crust Ingredients

Want to change things up? You can alter the crust ingredients. Instead of graham cracker crumbs, try using crushed cookies like Oreos or Nilla Wafers. These will give your pie a different taste. You can also add nuts to the crust for a crunch. Just mix finely chopped nuts with the crumbs and butter. This adds a nice nutty flavor and texture.

Alternative Flavor Profiles (Lime, Orange)

Lemon is great, but you can explore other flavors too. Lime gives a tart and zesty kick. Replace lemon juice and zest with lime juice and zest. Orange can also add a sweet twist. Use orange juice and zest in place of lemon. These variations keep your dessert fresh and exciting. Each flavor profile brings a new taste adventure to your table.

For the full recipe, check out the details above.

Storage Info

How to Store Leftover Pie

To keep your no-bake lemon icebox pie fresh, cover it tightly. Use plastic wrap or aluminum foil. This helps prevent any odors from the fridge from affecting your pie. Store it in the refrigerator for up to 5 days.

Freezing Tips for Long-Term Storage

If you want to save some pie for later, freezing works well. First, let the pie chill in the fridge for at least 4 hours. Then, wrap it securely in plastic wrap. For extra protection, add a layer of aluminum foil. This way, it stays fresh for about 2 months. When you’re ready to enjoy it, thaw it overnight in the fridge.

Best Timeframe for Consumption

For the best taste and texture, eat the pie within the first 3 days. The lemon flavor shines brightest when fresh. After that, the texture may change slightly, but it will still be tasty. Enjoy your delicious creation while it’s at its peak!

FAQs

Can I use bottled lemon juice instead of fresh?

Yes, you can use bottled lemon juice. However, fresh lemon juice gives the pie a better taste. Fresh lemons have a bright and zesty flavor that bottled juice lacks. If you want the best pie, stick with fresh lemons.

How long will the pie last in the fridge?

The pie lasts about 3 to 4 days in the fridge. Make sure to cover it well. This will keep it fresh and safe to eat. After a few days, the texture may change, but it should still taste good.

Can I make the pie ahead of time for an event?

Absolutely! This pie is perfect for making ahead. You can make it up to two days before your event. Just chill it well in the fridge. This way, you can enjoy your gathering without last-minute stress. For the best flavor, let it chill overnight. For the full recipe, check out the details above.

You learned about the key ingredients and steps to make a no-bake lemon icebox pie. Fresh lemons add zest, while optional garnishes enhance each bite. Remember the tips to avoid common mistakes and ensure perfect cream. Variations let you customize your pie with fruits or different flavors. Store leftovers properly for the best taste.

This pie is simple and delicious, making it a great treat for any occasion. Enjoy sharing this refreshing dessert with friends and family!

To create this tasty Lemon Icebox Pie, you need a few key ingredients. Here’s what you’ll need: - 1 cup graham cracker crumbs - 1/2 cup unsweetened shredded coconut - 1/3 cup granulated sugar - 1/2 cup (1 stick) unsalted butter, melted - 1 cup heavy whipping cream - 1 (14 oz) can sweetened condensed milk - 1/2 cup freshly squeezed lemon juice (about 2-3 lemons) - Zest of 2 lemons - A pinch of salt These ingredients come together to create a smooth, creamy filling with a crunchy crust. While the pie is already delicious, you can make it even better with some fun garnishes. Here are some ideas: - Fresh lemon zest on top - A dollop of whipped cream - Thin slices of lemon for decoration - Fresh mint leaves for color - A few berries like raspberries or blueberries These garnishes add extra flavor and make your pie look stunning. Choosing the right lemons is key for the best flavor. Here are some tips to help you pick the freshest ones: - Look for lemons that feel heavy for their size. This means they are juicy. - Choose lemons with a bright yellow color. Avoid any that have green spots. - Check for smooth skin. Bumpy skin can mean they are past their prime. - Smell the lemon! A fresh lemon should have a strong, citrusy scent. Using fresh lemons will make your pie burst with flavor and freshness. To start, gather your ingredients for the crust. In a bowl, combine: - 1 cup graham cracker crumbs - 1/2 cup unsweetened shredded coconut - 1/3 cup granulated sugar - 1/2 cup (1 stick) unsalted butter, melted Mix these ingredients with a fork or spatula until it looks sandy. The mixture should stick together when pressed. Next, transfer the crumb mix to a 9-inch pie dish. Press it firmly into the bottom and up the sides. Use your fingers or a measuring cup for an even layer. Chill the crust in the fridge for 15 minutes. This helps it set. Now, let's create the lemon filling. In a new bowl, whisk together: - 1 (14 oz) can sweetened condensed milk - 1/2 cup freshly squeezed lemon juice (about 2-3 lemons) - Zest of 2 lemons - A pinch of salt Mix these until smooth. This blend will give your pie a zesty flavor. It's time to bring everything together! First, whip the heavy cream until stiff peaks form. This should take about 3-5 minutes. Set it aside. Next, gently fold the whipped cream into the lemon mixture in three parts. Use a spatula to keep it airy. Once combined, pour this creamy filling into the chilled crust. Smooth the top with a spatula to make it even. Cover the pie with plastic wrap. Refrigerate for at least 4 hours to set. For the best taste, let it chill overnight. After it's set, slice into 8 generous pieces. Enjoy your refreshing treat! For the complete recipe, check out the Full Recipe section. When making no-bake lemon icebox pie, some mistakes can change the taste. Here’s what to watch for: - Overmixing the whipped cream: This can turn it into butter. Stop when you see stiff peaks. - Not chilling the crust: A warm crust won't hold the filling well. Chill it for at least 15 minutes. - Using bottled lemon juice: Fresh juice tastes best. Bottled juice lacks the vibrant flavor. Whipping cream adds a light, fluffy texture. Here’s how to do it right: 1. Use cold tools: Chill your bowl and beaters for a better whip. 2. Start slow: Begin on low speed to avoid splatter. Gradually increase to medium-high. 3. Watch for peaks: Stop mixing as soon as you see stiff peaks form. This takes about 3-5 minutes. Chilling the pie helps it set and enhances flavor. Here’s how to chill it properly: - Cover it well: Use plastic wrap to prevent the pie from absorbing odors. - Chill for hours: Aim for at least 4 hours, but overnight is best. - Avoid opening the fridge: Keep it closed to maintain a steady temperature. These tips help create a perfect no-bake lemon icebox pie. For the full recipe, check out the [Full Recipe]. {{image_4}} You can make your no-bake lemon icebox pie even better by adding fruit. Fresh berries like blueberries or strawberries work well. Just fold them into the creamy lemon filling before pouring it into the crust. This adds color and flavor. You can also try diced peaches or mango for a tropical twist. Each fruit brings its own taste and fun texture. Want to change things up? You can alter the crust ingredients. Instead of graham cracker crumbs, try using crushed cookies like Oreos or Nilla Wafers. These will give your pie a different taste. You can also add nuts to the crust for a crunch. Just mix finely chopped nuts with the crumbs and butter. This adds a nice nutty flavor and texture. Lemon is great, but you can explore other flavors too. Lime gives a tart and zesty kick. Replace lemon juice and zest with lime juice and zest. Orange can also add a sweet twist. Use orange juice and zest in place of lemon. These variations keep your dessert fresh and exciting. Each flavor profile brings a new taste adventure to your table. For the full recipe, check out the details above. To keep your no-bake lemon icebox pie fresh, cover it tightly. Use plastic wrap or aluminum foil. This helps prevent any odors from the fridge from affecting your pie. Store it in the refrigerator for up to 5 days. If you want to save some pie for later, freezing works well. First, let the pie chill in the fridge for at least 4 hours. Then, wrap it securely in plastic wrap. For extra protection, add a layer of aluminum foil. This way, it stays fresh for about 2 months. When you're ready to enjoy it, thaw it overnight in the fridge. For the best taste and texture, eat the pie within the first 3 days. The lemon flavor shines brightest when fresh. After that, the texture may change slightly, but it will still be tasty. Enjoy your delicious creation while it’s at its peak! Yes, you can use bottled lemon juice. However, fresh lemon juice gives the pie a better taste. Fresh lemons have a bright and zesty flavor that bottled juice lacks. If you want the best pie, stick with fresh lemons. The pie lasts about 3 to 4 days in the fridge. Make sure to cover it well. This will keep it fresh and safe to eat. After a few days, the texture may change, but it should still taste good. Absolutely! This pie is perfect for making ahead. You can make it up to two days before your event. Just chill it well in the fridge. This way, you can enjoy your gathering without last-minute stress. For the best flavor, let it chill overnight. For the full recipe, check out the details above. You learned about the key ingredients and steps to make a no-bake lemon icebox pie. Fresh lemons add zest, while optional garnishes enhance each bite. Remember the tips to avoid common mistakes and ensure perfect cream. Variations let you customize your pie with fruits or different flavors. Store leftovers properly for the best taste. This pie is simple and delicious, making it a great treat for any occasion. Enjoy sharing this refreshing dessert with friends and family!

No-Bake Lemon Icebox Pie

Satisfy your sweet tooth with this refreshing Zesty No-Bake Lemon Icebox Pie! With a delightful graham cracker and coconut crust filled with a creamy lemon filling, this pie is the perfect treat for any occasion. It's easy to make, requiring no baking, and is sure to impress your family and friends. Click to explore the full recipe and bring a burst of citrus sunshine to your dessert table!

Ingredients
  

1 cup graham cracker crumbs

1/2 cup unsweetened shredded coconut

1/3 cup granulated sugar

1/2 cup (1 stick) unsalted butter, melted

1 cup heavy whipping cream

1 (14 oz) can sweetened condensed milk

1/2 cup freshly squeezed lemon juice (about 2-3 lemons)

Zest of 2 lemons

A pinch of salt

Instructions
 

Prepare the Crust: In a mixing bowl, combine the graham cracker crumbs, shredded coconut, granulated sugar, and melted butter. Use a fork or a spatula to mix everything thoroughly until the mixture takes on a sandy texture and holds together when pressed.

    Form the Crust: Transfer the crumb mixture to a 9-inch pie dish. Press it firmly into the bottom and up the sides, using the back of a measuring cup or your fingers to ensure it's evenly packed and about 1/4 inch thick. Chill the crust in the refrigerator for 15 minutes to help it set.

      Whip the Cream: In a separate large bowl, beat the heavy whipping cream using an electric mixer on medium-high speed. Continue beating until stiff peaks form, which should take about 3-5 minutes. Set the whipped cream aside for later use.

        Mix the Filling: In another mixing bowl, whisk together the sweetened condensed milk, freshly squeezed lemon juice, lemon zest, and a pinch of salt until the mixture is smooth and well blended. This will be the creamy filling for your pie.

          Combine: Gently fold the whipped cream into the lemon mixture in three additions, using a spatula or wooden spoon. Be careful to fold rather than stir, as you want to keep the mixture light and airy.

            Fill the Crust: Once the mixture is combined, pour it into the chilled graham cracker crust. Use a spatula to smooth out the top and create an even surface.

              Chill: Cover the pie with plastic wrap and refrigerate for at least 4 hours, allowing it to set completely. For the best flavor and texture, it's recommended to chill overnight.

                Serve: After the pie is fully set, slice it into 8 generous wedges. Optionally, before serving, garnish each slice with additional lemon zest, a dollop of whipped cream, or thin slices of lemon for a delightful touch.

                  Prep Time: 20 minutes | Total Time: 4 hours 20 minutes (including chilling time) | Servings: 8 slices

                    - Presentation Tips: Serve each slice on a chilled dessert plate for an elegant touch. Adding a sprig of fresh mint or a few berries can enhance both the flavor and visual appeal!

                      Leave a Comment

                      Recipe Rating