No-Bake Peppermint Oreo Pie Easy Holiday Delight

WANT TO SAVE THIS RECIPE?

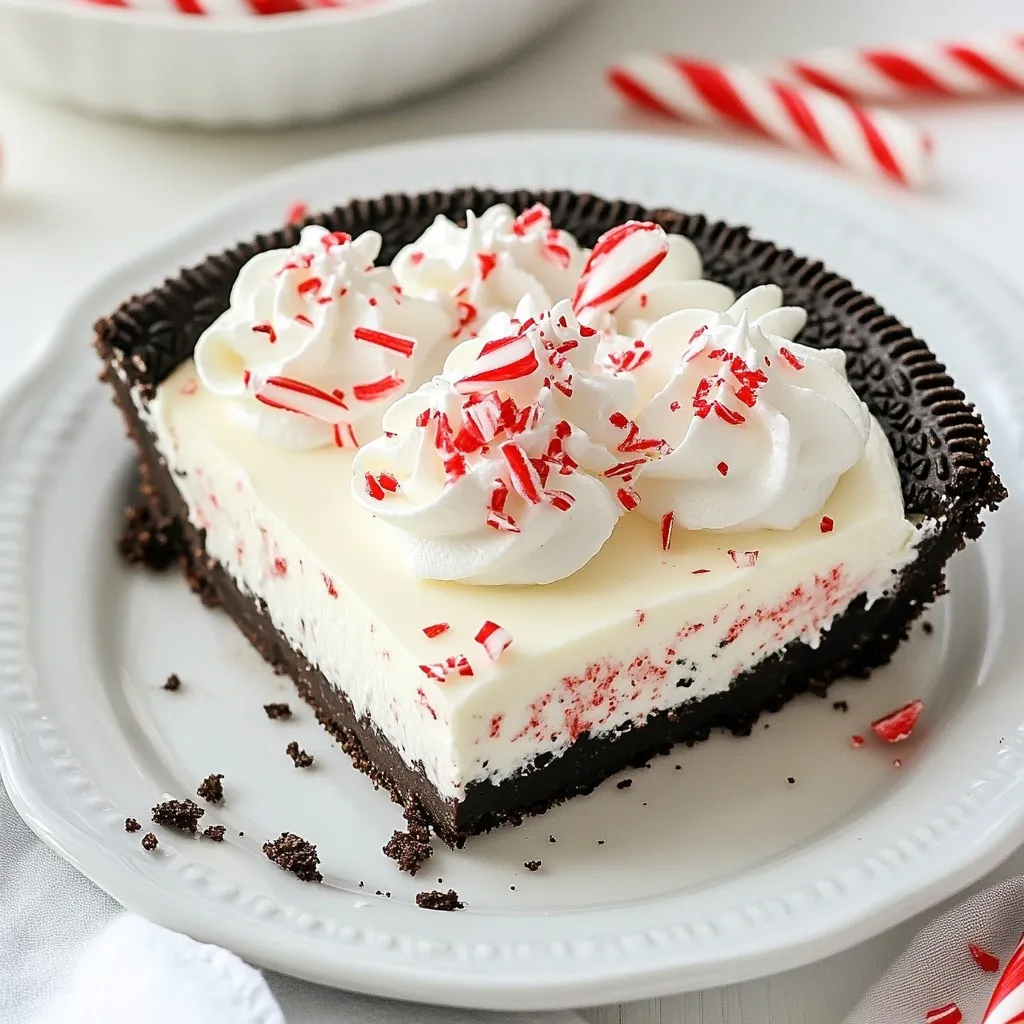
Get ready to impress your friends and family with an easy No-Bake Peppermint Oreo Pie! This festive treat combines creamy filling with crunchy Oreo crust for a delightful dessert that requires no baking. You’ll love how simple it is to whip up this holiday classic. Grab your ingredients, and let’s get started on this yummy dessert that will fill your celebrations with joy!

Why I Love This Recipe

  1. Easy to Make: This no-bake pie requires minimal effort and time, making it perfect for busy schedules or last-minute gatherings.
  2. Festive Flavor: The combination of peppermint and chocolate creates a delightful holiday treat that everyone will love.
  3. Make Ahead: With a chilling time of just 4 hours, you can prepare this pie in advance, freeing up your time for other holiday preparations.
  4. Customize It: Add your own twist by incorporating various toppings or mix-ins, such as different flavored whipped cream or crushed cookies.

Ingredients

List of Required Ingredients

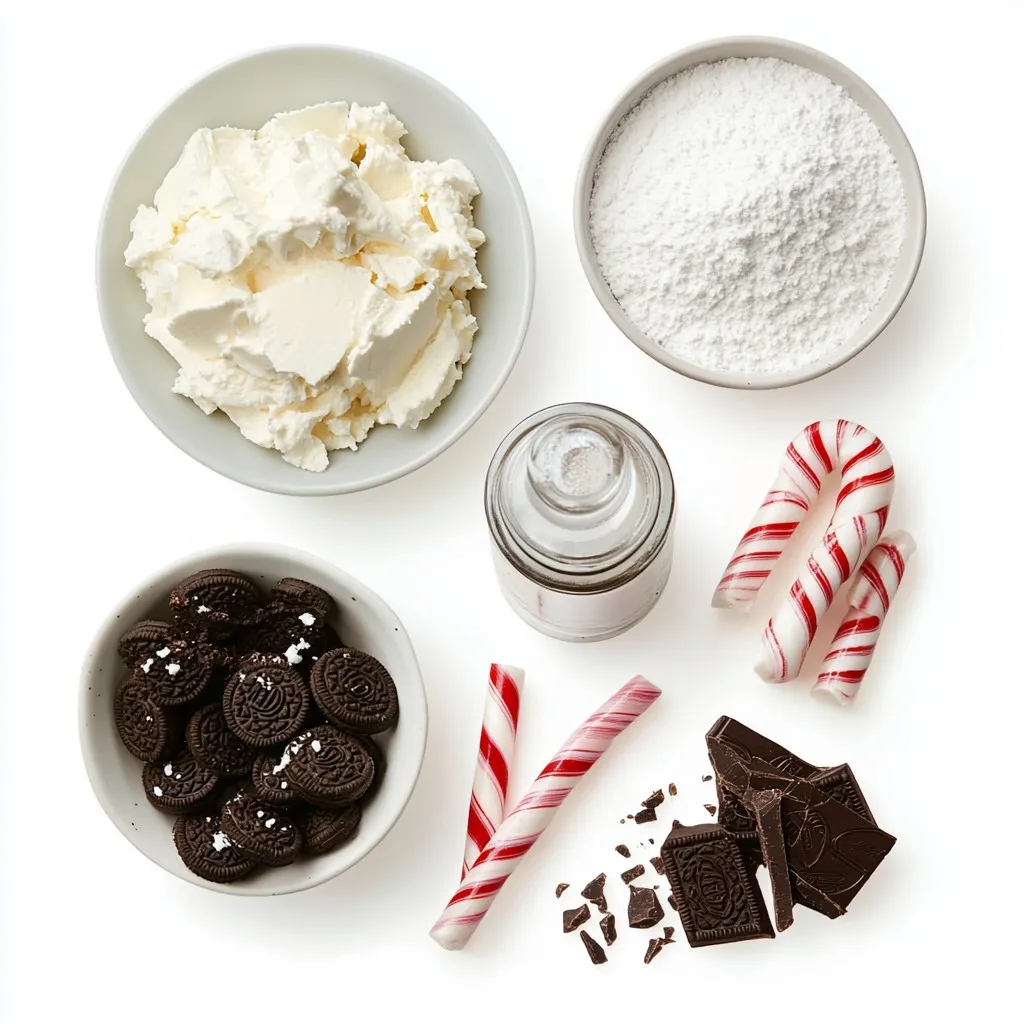
– 24 Oreo cookies, crushed

– 4 tablespoons unsalted butter, melted

– 8 oz cream cheese, softened at room temperature

– 1 cup powdered sugar

– 1 teaspoon peppermint extract

– 2 cups whipped cream (store-bought or homemade)

– Chocolate shavings or crushed candy canes, for garnish

Creating this No-Bake Peppermint Oreo Pie starts with the right ingredients. Each one plays a key role in making this dessert a hit.

First, you need 24 Oreo cookies. Crush them into fine crumbs. This will be the base of your pie. Next, melt 4 tablespoons of unsalted butter. Mix it well with the cookie crumbs for a rich crust.

For the filling, get 8 ounces of cream cheese. It should be soft. This helps blend it smoothly. Add 1 cup of powdered sugar to sweeten the mix. The flavor comes from 1 teaspoon of peppermint extract. This will give your pie a fresh taste.

Finally, you need 2 cups of whipped cream. You can use store-bought or make your own. This adds lightness to the filling.

Don’t forget the garnish! You can use chocolate shavings or crushed candy canes. They add a festive touch and extra crunch. With these ingredients, you’re ready to start building your pie!

Step-by-Step Instructions

Preparing the Crust

To start, grab 24 Oreo cookies. Crush them into tiny pieces. You can use a food processor or place them in a bag and crush them with a rolling pin. In a bowl, mix the crushed cookies with 4 tablespoons of melted unsalted butter. Stir well until all crumbs are coated. This step gives the crust a rich flavor.

Next, take the Oreo mixture and press it into a 9-inch pie pan. Use your fingers or the back of a measuring cup to create an even layer. Make sure to pack it tightly for a strong crust. Place the crust in the refrigerator for 15 minutes to let it firm up.

Making the Filling

Now it’s time to make the filling. In a large bowl, combine 8 ounces of softened cream cheese, 1 cup of powdered sugar, and 1 teaspoon of peppermint extract. Use an electric mixer on medium speed. Beat the mixture until it becomes smooth and creamy. Make sure there are no lumps for the best texture.

After mixing, gently fold in 2 cups of whipped cream. Use a spatula and be careful not to deflate the whipped cream. This keeps the filling light and fluffy.

Filling and Chilling the Pie

Once your filling is ready, take the chilled crust from the fridge. Pour the peppermint filling into the crust. Use a spatula to smooth the top, making it even.

Now, cover the pie with plastic wrap or aluminum foil. Place it in the refrigerator for at least 4 hours. This chilling time helps the pie set and become firm.

Tips & Tricks

Key Preparation Tips

Achieving the right consistency for the filling: Start with softened cream cheese. This helps mix smoothly with the sugar and peppermint. Beat until creamy with no lumps. The filling should be thick yet light.

Best practices for folding in whipped cream: Use a spatula to fold in the whipped cream. Start by adding a small amount to lighten the cream cheese mix. Gently fold until well combined. Avoid stirring too hard to keep the fluffy texture.

Ensuring a sturdy crust: Make sure to mix the crushed Oreos with melted butter well. Press the mixture firmly into the pie pan. A compact crust will hold its shape better after the pie sets.

Serving Suggestions

Creative serving ideas: Serve each slice on a festive plate. Add a dollop of whipped cream on the side. You can also sprinkle crushed candy canes on top for extra color and flavor.

Ideal accompaniments for the pie: Pair the pie with a warm cup of hot chocolate. You can also serve it with coffee for a delightful balance of flavors.

Pro Tips

  1. Chill the Mixing Bowl: Before mixing the cream cheese filling, chill your mixing bowl in the refrigerator for about 15 minutes. This will help keep the filling cool and maintain a fluffy texture when you fold in the whipped cream.
  2. Use Double Stuff Oreos: For an even richer crust, consider using Double Stuff Oreos. The extra cream filling will enhance the flavor and create a more indulgent pie.
  3. Experiment with Flavors: While peppermint is traditional, you can experiment with other extracts like vanilla or almond to give the pie a unique twist. Just adjust the amount to taste.
  4. Let it Set Overnight: For the best texture, let the pie set in the refrigerator overnight. This allows the flavors to meld beautifully and results in a firmer filling.

Variations

Ingredient Substitutions

You can still enjoy this pie even if you have dietary needs. For a dairy-free option, look for dairy-free cream cheese. Brands like Tofutti or Kite Hill work well. You can also use coconut cream as a tasty substitute. It offers a rich texture and flavor.

If you need an alternative for whipped cream, try coconut whipped cream. It adds a nice sweetness and pairs well with peppermint. You can also use a non-dairy whipped topping found in stores.

Flavor Modifications

Want to change up the flavor? You can add chocolate or vanilla extracts for a twist. A teaspoon of vanilla gives a warm taste, while chocolate extract adds depth. Both will enhance your pie’s flavor.

Experimenting with different cookie crusts is fun too. Instead of Oreos, try using chocolate graham crackers or gingersnap cookies. Each choice brings a unique taste and texture to your pie.

Storage Info

Refrigeration Guidelines

You should store your No-Bake Peppermint Oreo Pie in the fridge. Keep it in an airtight container to prevent it from drying out. If you do not have a container, cover it well with plastic wrap or aluminum foil. This will help keep it fresh and tasty. It can last up to 5 days in the fridge. Enjoying it within this time ensures the pie stays creamy and delicious.

Freezing Instructions

To freeze the pie for long-term storage, wait until it is fully set. Wrap the pie tightly in plastic wrap and then in aluminum foil. This double wrap protects it from freezer burn. The pie can stay frozen for up to 2 months. When you are ready to eat it, move the pie to the fridge. Let it thaw overnight for the best texture. Avoid thawing it at room temperature, as this can make it too soft. Enjoy your pie just like fresh!

FAQs

Common Questions about No-Bake Peppermint Oreo Pie

Can I use gluten-free Oreos?

Yes, you can use gluten-free Oreos for this pie. They taste great! Just crush them as you would regular Oreos. This option makes the pie safe for those with gluten allergies.

How long can the pie be stored in the refrigerator?

The pie can stay fresh in the fridge for up to five days. Just make sure to cover it well. This keeps the flavors intact and prevents it from drying out.

Can I make this pie in advance for a party?

Absolutely! This pie is perfect for making ahead. You can prepare it a day or two before your event. Just chill it in the fridge until you are ready to serve. This makes your party prep much easier!

You now know how to make a no-bake peppermint Oreo pie. We discussed the key ingredients, from Oreo cookies to whipped cream. I shared simple steps, like making the crust and mixing the filling. With tips on texture, serving ideas, and variations, you can customize this dessert. Finally, I covered storage methods to keep your pie fresh. This treat is easy, fun, and sure to impress at any gathering. Enjoy your baking adventur

- 24 Oreo cookies, crushed - 4 tablespoons unsalted butter, melted - 8 oz cream cheese, softened at room temperature - 1 cup powdered sugar - 1 teaspoon peppermint extract - 2 cups whipped cream (store-bought or homemade) - Chocolate shavings or crushed candy canes, for garnish Creating this No-Bake Peppermint Oreo Pie starts with the right ingredients. Each one plays a key role in making this dessert a hit. First, you need 24 Oreo cookies. Crush them into fine crumbs. This will be the base of your pie. Next, melt 4 tablespoons of unsalted butter. Mix it well with the cookie crumbs for a rich crust. For the filling, get 8 ounces of cream cheese. It should be soft. This helps blend it smoothly. Add 1 cup of powdered sugar to sweeten the mix. The flavor comes from 1 teaspoon of peppermint extract. This will give your pie a fresh taste. Finally, you need 2 cups of whipped cream. You can use store-bought or make your own. This adds lightness to the filling. Don't forget the garnish! You can use chocolate shavings or crushed candy canes. They add a festive touch and extra crunch. With these ingredients, you're ready to start building your pie! {{ingredient_image_2}} To start, grab 24 Oreo cookies. Crush them into tiny pieces. You can use a food processor or place them in a bag and crush them with a rolling pin. In a bowl, mix the crushed cookies with 4 tablespoons of melted unsalted butter. Stir well until all crumbs are coated. This step gives the crust a rich flavor. Next, take the Oreo mixture and press it into a 9-inch pie pan. Use your fingers or the back of a measuring cup to create an even layer. Make sure to pack it tightly for a strong crust. Place the crust in the refrigerator for 15 minutes to let it firm up. Now it’s time to make the filling. In a large bowl, combine 8 ounces of softened cream cheese, 1 cup of powdered sugar, and 1 teaspoon of peppermint extract. Use an electric mixer on medium speed. Beat the mixture until it becomes smooth and creamy. Make sure there are no lumps for the best texture. After mixing, gently fold in 2 cups of whipped cream. Use a spatula and be careful not to deflate the whipped cream. This keeps the filling light and fluffy. Once your filling is ready, take the chilled crust from the fridge. Pour the peppermint filling into the crust. Use a spatula to smooth the top, making it even. Now, cover the pie with plastic wrap or aluminum foil. Place it in the refrigerator for at least 4 hours. This chilling time helps the pie set and become firm. - Achieving the right consistency for the filling: Start with softened cream cheese. This helps mix smoothly with the sugar and peppermint. Beat until creamy with no lumps. The filling should be thick yet light. - Best practices for folding in whipped cream: Use a spatula to fold in the whipped cream. Start by adding a small amount to lighten the cream cheese mix. Gently fold until well combined. Avoid stirring too hard to keep the fluffy texture. - Ensuring a sturdy crust: Make sure to mix the crushed Oreos with melted butter well. Press the mixture firmly into the pie pan. A compact crust will hold its shape better after the pie sets. - Creative serving ideas: Serve each slice on a festive plate. Add a dollop of whipped cream on the side. You can also sprinkle crushed candy canes on top for extra color and flavor. - Ideal accompaniments for the pie: Pair the pie with a warm cup of hot chocolate. You can also serve it with coffee for a delightful balance of flavors. Pro Tips Chill the Mixing Bowl: Before mixing the cream cheese filling, chill your mixing bowl in the refrigerator for about 15 minutes. This will help keep the filling cool and maintain a fluffy texture when you fold in the whipped cream. Use Double Stuff Oreos: For an even richer crust, consider using Double Stuff Oreos. The extra cream filling will enhance the flavor and create a more indulgent pie. Experiment with Flavors: While peppermint is traditional, you can experiment with other extracts like vanilla or almond to give the pie a unique twist. Just adjust the amount to taste. Let it Set Overnight: For the best texture, let the pie set in the refrigerator overnight. This allows the flavors to meld beautifully and results in a firmer filling. {{image_4}} You can still enjoy this pie even if you have dietary needs. For a dairy-free option, look for dairy-free cream cheese. Brands like Tofutti or Kite Hill work well. You can also use coconut cream as a tasty substitute. It offers a rich texture and flavor. If you need an alternative for whipped cream, try coconut whipped cream. It adds a nice sweetness and pairs well with peppermint. You can also use a non-dairy whipped topping found in stores. Want to change up the flavor? You can add chocolate or vanilla extracts for a twist. A teaspoon of vanilla gives a warm taste, while chocolate extract adds depth. Both will enhance your pie’s flavor. Experimenting with different cookie crusts is fun too. Instead of Oreos, try using chocolate graham crackers or gingersnap cookies. Each choice brings a unique taste and texture to your pie. You should store your No-Bake Peppermint Oreo Pie in the fridge. Keep it in an airtight container to prevent it from drying out. If you do not have a container, cover it well with plastic wrap or aluminum foil. This will help keep it fresh and tasty. It can last up to 5 days in the fridge. Enjoying it within this time ensures the pie stays creamy and delicious. To freeze the pie for long-term storage, wait until it is fully set. Wrap the pie tightly in plastic wrap and then in aluminum foil. This double wrap protects it from freezer burn. The pie can stay frozen for up to 2 months. When you are ready to eat it, move the pie to the fridge. Let it thaw overnight for the best texture. Avoid thawing it at room temperature, as this can make it too soft. Enjoy your pie just like fresh! Can I use gluten-free Oreos? Yes, you can use gluten-free Oreos for this pie. They taste great! Just crush them as you would regular Oreos. This option makes the pie safe for those with gluten allergies. How long can the pie be stored in the refrigerator? The pie can stay fresh in the fridge for up to five days. Just make sure to cover it well. This keeps the flavors intact and prevents it from drying out. Can I make this pie in advance for a party? Absolutely! This pie is perfect for making ahead. You can prepare it a day or two before your event. Just chill it in the fridge until you are ready to serve. This makes your party prep much easier! You now know how to make a no-bake peppermint Oreo pie. We discussed the key ingredients, from Oreo cookies to whipped cream. I shared simple steps, like making the crust and mixing the filling. With tips on texture, serving ideas, and variations, you can customize this dessert. Finally, I covered storage methods to keep your pie fresh. This treat is easy, fun, and sure to impress at any gathering. Enjoy your baking adventure!

No-Bake Peppermint Oreo Pie

A delicious and easy no-bake pie made with crushed Oreo cookies and a creamy peppermint filling, perfect for festive occasions.
Prep Time 20 minutes
Total Time 4 hours
Course Dessert
Cuisine American
Servings 8
Calories 300 kcal

Ingredients
  

  • 24 cookies Oreo cookies, crushed
  • 4 tablespoons unsalted butter, melted
  • 8 oz cream cheese, softened at room temperature
  • 1 cup powdered sugar
  • 1 teaspoon peppermint extract
  • 2 cups whipped cream (store-bought or homemade)
  • 1 for garnish Chocolate shavings or crushed candy canes

Instructions
 

  • In a mixing bowl, combine the crushed Oreo cookies with the melted butter. Stir vigorously until the cookie crumbs are evenly coated with the butter.
  • Take the Oreo mixture and press it firmly into the bottom and up the sides of a 9-inch pie pan. Compact it well for a sturdy crust and refrigerate for 15 minutes.
  • In a large mixing bowl, combine the softened cream cheese, powdered sugar, and peppermint extract. Beat on medium speed until smooth and creamy.
  • Carefully fold in the whipped cream into the cream cheese mixture using a spatula, maintaining the light and airy texture.
  • Retrieve the chilled crust from the refrigerator. Pour the peppermint filling into the Oreo crust, smoothing the top with a spatula.
  • Cover the pie with plastic wrap or aluminum foil and refrigerate for at least 4 hours, or until fully set.
  • After chilling, remove the pie from the refrigerator and garnish with chocolate shavings or crushed candy canes.

Notes

For a festive presentation, serve each slice on a decorative plate and complement it with a dollop of whipped cream on the side. You may also sprinkle additional crushed candy canes on top for an extra pop of color and flavor.
Keyword dessert, no-bake, Oreo, peppermint, pie

WANT TO SAVE THIS RECIPE?

Leave a Comment

Recipe Rating