Get ready for a fun dessert that’s perfect for fall! Pumpkin Patch Dirt Cups are a delightful mix of chocolate and pumpkin flavors. This easy recipe will have your family and friends raving. In just a few simple steps, you can create tasty layers topped with cute decorations. Let’s dive into the world of desserts and embrace the joy of making these delicious treats!
Ingredients
Essential Ingredients
– 1 package (15 oz) of chocolate pudding mix
– 2 cups milk
– 10 oz crushed chocolate sandwich cookies (e.g., Oreo)
– 1 cup whipped topping (such as whipped cream or Cool Whip)
– 1 cup of pumpkin puree
– 1 teaspoon pumpkin pie spice
– 1 teaspoon vanilla extract
These ingredients make the base of your Pumpkin Patch Dirt Cups. The chocolate pudding mix and milk create a rich filling. The crushed cookies add a crunchy texture. The whipped topping lightens up the mix. Pumpkin puree gives a nice autumn flavor. Pumpkin pie spice adds warmth. Lastly, vanilla extract brings it all together.
Optional Decorations
– Gummy worms
– Edible candy pumpkins
– Clear plastic cups
Decorations make this dessert fun. Gummy worms look like they are crawling through the dirt. Edible candy pumpkins add a cute touch. Clear plastic cups let everyone see the layers. You can use any cup, but clear ones show off the dessert best.
Feel free to mix and match your ingredients. You can even swap in different flavors.Enjoy the process and get creative!
Step-by-Step Instructions
Preparation of Chocolate Pudding
First, grab a large mixing bowl. Add one package of chocolate pudding mix. Pour in two cups of milk. Whisk them together for about two minutes. You want the mixture to be thick and creamy. This will be your base layer.
Creating the Pumpkin Mixture
Next, take another bowl. Blend one cup of pumpkin puree with one teaspoon of pumpkin pie spice. Add one teaspoon of vanilla extract. Mix until smooth and well combined. Now, fold half of the chocolate cream into this pumpkin mixture. This will give you a rich, swirled filling.
Layering the Cups
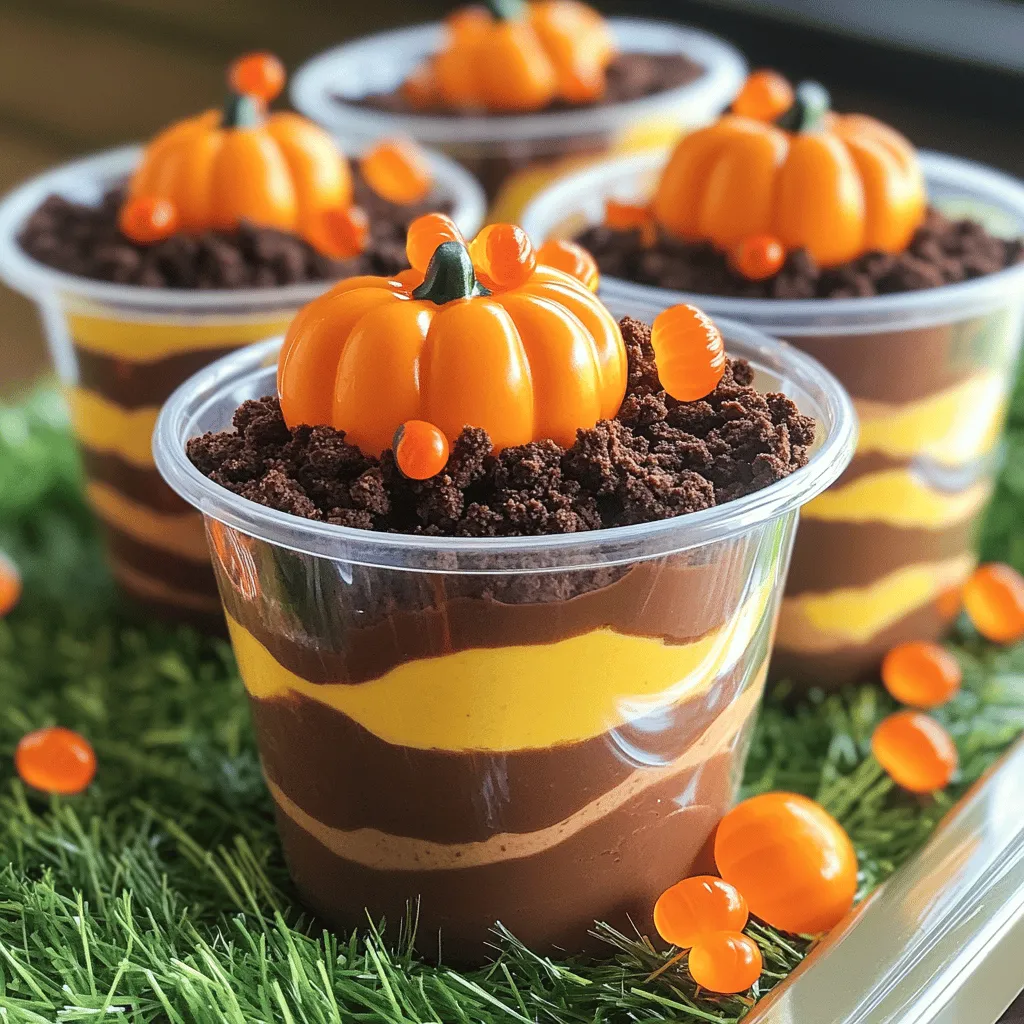
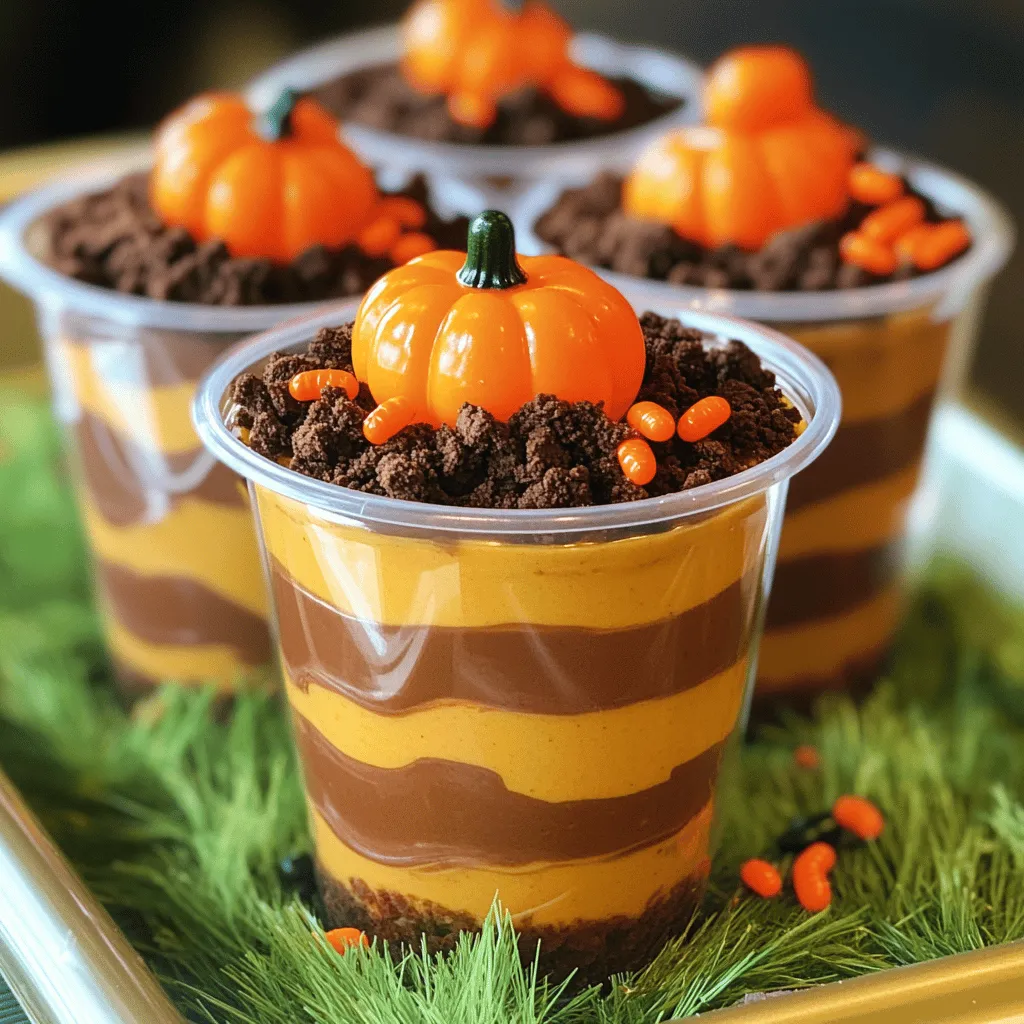
Now, it’s time to build your dessert. Take four small clear plastic cups. Start with about one to two tablespoons of crushed chocolate cookies at the bottom of each cup. Next, add a layer of the creamy pumpkin mixture. Follow that with a layer of the chocolate cream. Repeat the layers until the cups are full, finishing with a layer of chocolate cream on top.
For the final touch, sprinkle the remaining crushed cookies on top. This will look like dirt. Add gummy worms crawling out and a few candy pumpkins for decoration. These little touches make your dessert fun and festive.
Tips & Tricks
Perfecting the Chocolate Cream
To get the right consistency for the chocolate cream, start with cold milk. Use a large bowl and mix the chocolate pudding mix with milk. Whisk for about two minutes. It should thicken nicely. If you see lumps, keep whisking until smooth. A smooth cream makes your dessert look great.
Presentation Ideas
For a festive look, use themed decorations. You can place your cups on a tray lined with fake grass. Shredded coconut dyed green works well too. This adds charm and feels like a real pumpkin patch. You might also add some colorful fall leaves around the cups for extra flair. For serving, clear plastic cups show off the layers. Guests will love the view!
Serving Temperature
These cups taste best when chilled. After making them, place them in the fridge for at least an hour. This helps the flavors blend. Serve them cool, not cold. The creamy chocolate and pumpkin flavors will shine through. Enjoy them fresh for the ultimate dessert experience!
Variations
Alternative Ingredients
You can easily swap ingredients to fit your needs. For a gluten-free option, use gluten-free chocolate cookies. They will work just as well in your cups. For dairy-free options, try almond or oat milk in place of regular milk. You can also use coconut whipped cream instead of regular whipped topping. These swaps keep the fun and flavor while catering to dietary needs.
Flavor Enhancements
Want to spice things up? Add a pinch of cinnamon or nutmeg to your pumpkin mixture. These spices boost the fall flavor, making each bite more delicious. You can also mix in chocolate chips or colorful sprinkles for a fun twist. The chocolate chips add a great texture, while the sprinkles bring a festive look.
Seasonal Adaptations
These cups are not just for Halloween! You can make themed versions for other holidays. For Christmas, use peppermint extract and red-and-green sprinkles. For summer, swap pumpkin puree with fruit purees like strawberry or mango. This gives you a fresh twist that fits any season.
Storage Info
Short-term Storage
To keep your Pumpkin Patch Dirt Cups fresh, store them in the refrigerator. Place the cups in an airtight container. This prevents any odors from mixing in. They will stay good for about 3 to 5 days in the fridge. Make sure to cover the cups if you don’t have a container. This will help keep them moist.
Long-term Storage
If you want to save your Pumpkin Patch Dirt Cups for later, freezing is a great option. However, I recommend freezing only the chocolate cream part. The pumpkin mixture may change texture when thawed. To freeze, first, remove any toppings like gummy worms or candy pumpkins. Then, transfer the chocolate cream to a freezer-safe container. Seal it tightly and label it with the date. It can last up to 2 months in the freezer. When you’re ready to enjoy, thaw it in the fridge overnight.
Shelf Life
These cups are best enjoyed fresh. When stored correctly, they last about 3 to 5 days in the fridge. Look for signs of spoilage, like an off smell or changes in texture. If the chocolate cream separates or the pumpkin mixture looks watery, it’s time to toss them. Enjoy your delicious treats while they’re at their best!
FAQs
Can I make Pumpkin Patch Dirt Cups ahead of time?
Yes, you can make Pumpkin Patch Dirt Cups ahead of time. This dessert stays fresh in the fridge. Prepare the cups up to two days before serving. Just keep them covered. This will help the layers stay fresh.
When making ahead, avoid adding the toppings too early. Gummy worms and candy pumpkins can get soggy. Add these decorations right before you serve. This will keep them looking fun and tasty.
How can I make these dairy-free?
Making Pumpkin Patch Dirt Cups dairy-free is easy. You can use dairy-free milk instead of regular milk. Almond milk or coconut milk works well. For the whipped topping, use coconut whipped cream or a dairy-free alternative.
When picking your chocolate pudding mix, check the label. Some brands offer dairy-free options. If you can’t find it, you can make your own using cocoa powder and cornstarch. This way, you still get that rich chocolate flavor without dairy.
What other toppings can I use?
You can get creative with toppings for your Pumpkin Patch Dirt Cups. Here are some fun ideas:
– Mini chocolate chips for extra crunch
– Crushed nuts like pecans or almonds
– Sprinkles in fall colors for added fun
– Candy corn for a sweet fall touch
– Edible flowers for a fancy look
Feel free to mix and match these toppings. They can add new flavors and fun textures. Enjoy exploring different options!
This blog post shared how to make delicious Pumpkin Patch Dirt Cups. You learned about key ingredients, like chocolate pudding mix and pumpkin puree. I walked you through step-by-step instructions to create the layers. You also found tips for perfecting the cream and fun decoration ideas.
Remember, you can customize the recipe to fit your needs. Whether you choose gluten-free cookies or festive toppings, the options are endless. Enjoy making these treats for your next gathering!