Craving a sweet treat that’s easy to make? Look no further! This Red Velvet Cheesecake Dump Cake is a delight for any occasion. It combines rich red velvet cake with creamy cheesecake, all baked in one pan. You’ll love how simple it is to prepare and how delicious it tastes. Get ready to impress friends and family as we dive into this delightful recipe that’s sure to satisfy your sweet tooth!
Why I Love This Recipe
- Decadent Flavor: The combination of rich red velvet and creamy cheesecake creates a dessert that is both indulgent and delightful.
- Easy Preparation: This dump cake requires minimal effort, making it perfect for busy bakers who want a delicious treat without the hassle.
- Versatile Toppings: Top it off with whipped cream and fresh raspberries for an elegant presentation that impresses guests.
- Perfect for Any Occasion: Whether it's a holiday gathering or a casual weeknight dessert, this cake is sure to be a hit with everyone!
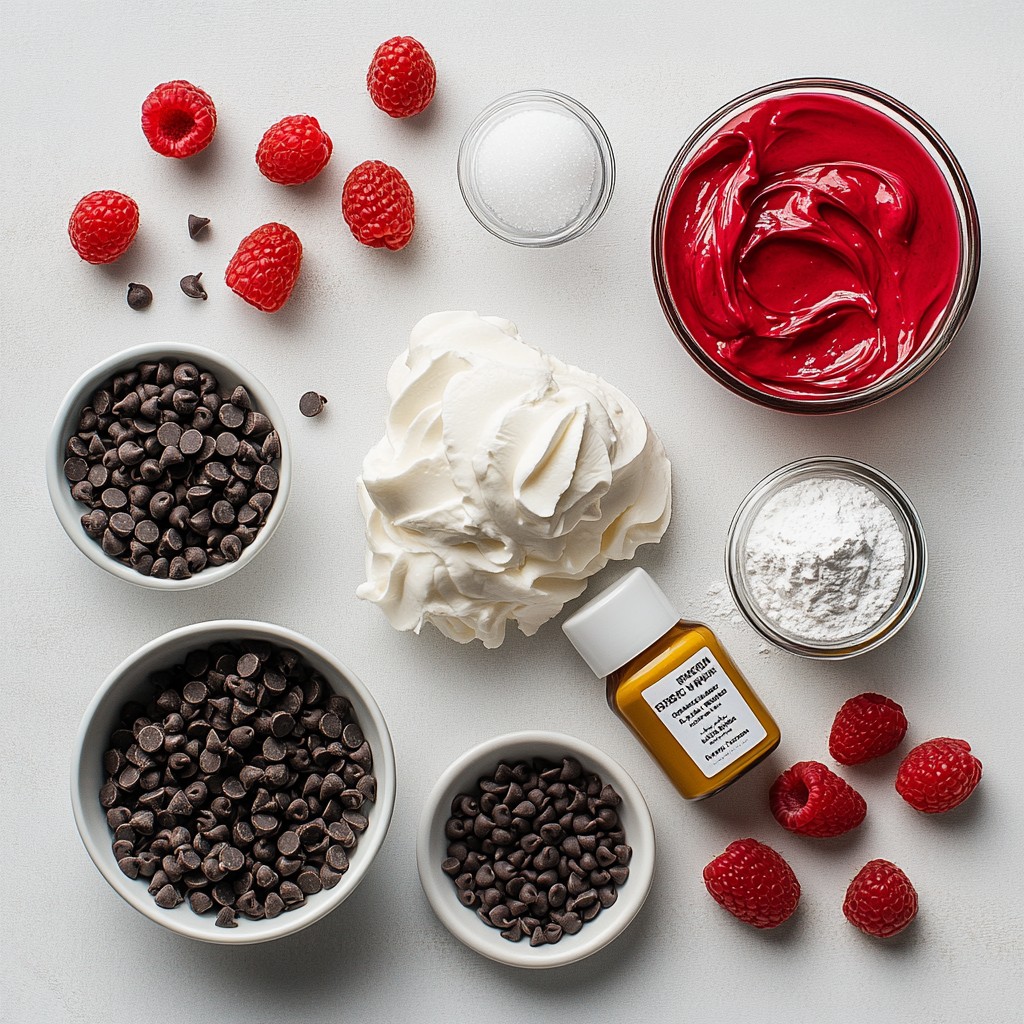
Ingredients
List of Ingredients
- 1 box red velvet cake mix
- 1 (8 oz) package cream cheese, softened
- 1 cup powdered sugar
- 1 teaspoon pure vanilla extract
- 1/2 cup unsalted butter, melted
- 1 cup buttermilk (or milk with 1 tablespoon vinegar)
- 1 cup mini chocolate chips (optional)
- Whipped cream for serving
- Fresh raspberries for garnish (optional)
Key Ingredient Tips
Using a good quality cream cheese is key. It helps create a smooth filling. Make sure it is at room temperature. This ensures easy mixing and a creamy texture.
Choose unsalted butter for this recipe. It gives you better control over the saltiness. For the cake mix, I suggest using a brand you trust. Each brand can vary in sweetness and texture.
Optional Additions
You can add mini chocolate chips to the batter for extra sweetness. They melt slightly, making every bite a treat. Consider mixing in some nuts for added crunch. Chopped pecans or walnuts work well.
For a fun twist, add a splash of almond extract. It gives the cake a nice depth of flavor. Lastly, fresh fruit like strawberries or blueberries can brighten each slice.
Step-by-Step Instructions
Preparation Steps
1. Preheat the Oven: First, set your oven to 350°F (175°C). This helps the cake bake evenly.
2. Grease the Dish: Use cooking spray or butter to coat a 9x13 inch baking dish. This makes it easy to take the cake out later.
Mixing and Layering the Batter
1. Make the Cream Cheese Mixture: In a large bowl, mix the softened cream cheese, powdered sugar, and vanilla extract. Use a hand mixer to blend until smooth and creamy.
2. Combine Cake Ingredients: In another bowl, mix the red velvet cake mix, melted butter, and buttermilk. Stir until just blended. It is fine if the batter has some lumps.
3. Layer the Batter: Pour half of the red velvet batter into your prepared dish. Spread it evenly with a spatula.
4. Add the Cream Cheese Layer: Spoon the cream cheese mixture over the red velvet batter. Space the spoonfuls out evenly for the best flavor.
5. Complete the Cake Batter: Pour the rest of the red velvet batter over the cream cheese layer. Smooth the top gently. If you like, sprinkle mini chocolate chips on top.
Baking Process and Cooling
1. Bake the Cake: Place your dish in the oven. Bake for 30-35 minutes. Check with a toothpick; it should come out clean when the cake is done.
2. Cool the Cake: Take the cake out of the oven. Let it cool in the pan for about 15 minutes. This helps the layers set and makes cutting easier.
Tips & Tricks
Best Practices for Cream Cheese Mixing
Mixing cream cheese well is key for the best flavor. Start with softened cream cheese. This makes it easy to blend. Use a hand mixer on low speed. This keeps lumps from forming. Add the powdered sugar slowly. This helps avoid a messy splash. Finally, mix in the vanilla extract. Make sure everything is smooth and creamy.
Ensuring Perfect Baking
To bake your cake perfectly, preheat your oven to 350°F (175°C). Grease your baking dish well. This helps the cake come out easily. When mixing the cake batter, don’t over mix. It is okay to have small lumps. This keeps the cake moist. Bake for 30-35 minutes. Check for doneness with a toothpick. If it comes out clean, your cake is ready.
Serving Suggestions
Serving this cake is fun and easy. Serve it warm for a cozy treat. Top each slice with whipped cream. Fresh raspberries add color and taste. You can also sprinkle mini chocolate chips on top. This adds a sweet touch. Enjoy this dessert with friends and family!
Pro Tips
- Use Room Temperature Ingredients: Allow your cream cheese and eggs to come to room temperature before mixing. This ensures a smooth and creamy mixture without lumps.
- Don’t Overmix the Batter: When combining your cake mix with wet ingredients, mix just until combined. A few lumps will help maintain the cake's texture.
- Check for Doneness: Baking times may vary; check your cake a few minutes before the suggested time by inserting a toothpick. It should come out clean when the cake is done.
- Serve with Fresh Toppings: Enhance the flavor by serving with whipped cream and fresh raspberries for a delightful contrast to the rich cake.
Variations
Gluten-Free Options
You can make this cake gluten-free with a few changes. Use a gluten-free red velvet cake mix instead of regular. These mixes are easy to find in stores. Check the label to ensure they are safe for your diet. The other ingredients stay the same. This way, everyone can enjoy this tasty treat!
Alternative Toppings
Toppings can change the cake's look and taste. Instead of whipped cream, try cream cheese frosting. It adds a rich flavor. You can also sprinkle crushed nuts or coconut on top. Fresh fruits like strawberries or blueberries make great toppings too. They add freshness and color. Get creative with your choices!
Flavor Additions
Want to mix things up? Add some flavor to your cake! You can stir in a teaspoon of almond extract for a nutty twist. Want chocolate? Mix in mini chocolate chips for a sweet surprise. You can also add a pinch of cinnamon for warmth. Each option gives your cake a new personality!
Storage Information
Storing Leftovers
You may have some cake left after a delicious meal. To keep it fresh, let it cool first. Then, cover it with plastic wrap or foil. Store it in the fridge for up to four days. This keeps the cake moist and tasty. Make sure to slice it as needed to avoid drying out.
Freezing Instructions
Want to save some cake for later? You can freeze it! First, let the cake cool completely. Cut it into pieces and wrap each slice in plastic wrap. Then, place the wrapped slices in a freezer bag or container. Label it with the date. It will stay good for up to three months. When you're ready to eat, just thaw in the fridge overnight.
Reheating Tips
When you want to enjoy your cake again, reheating is easy. Preheat your oven to 350°F (175°C). Place a slice on a baking sheet. Heat for about 10-15 minutes or until warm. You can also microwave a slice. Heat it for 20-30 seconds. Add fresh whipped cream or raspberries on top for a special touch!
FAQs
How do I know when the cake is done?
You can tell the cake is done by checking the center. Insert a toothpick into the middle. If it comes out clean, your cake is ready. The edges will also pull away from the pan slightly. This usually takes about 30 to 35 minutes at 350°F (175°C).
Can I use a different cake mix?
Yes, you can use a different cake mix if you want. A chocolate or vanilla cake mix works well. Just keep in mind that it will change the flavor. You may also want to adjust the cream cheese layer to match the new mix.
What can I substitute for buttermilk?
If you don't have buttermilk, you can make your own. Mix 1 cup of milk with 1 tablespoon of vinegar. Let it sit for a few minutes. This will give you a similar tangy taste. You can also use plain yogurt or sour cream as a substitute.
In this post, I covered the key ingredients, step-by-step instructions, and helpful tips for your cake. I shared variations to suit your needs and provided storage information to keep leftovers fresh. Knowing how to check for doneness and swap ingredients can make baking easier. Remember, practice helps you improve your skills. Enjoy making this cake with your own twist and share it with family and friends. Happy baking!