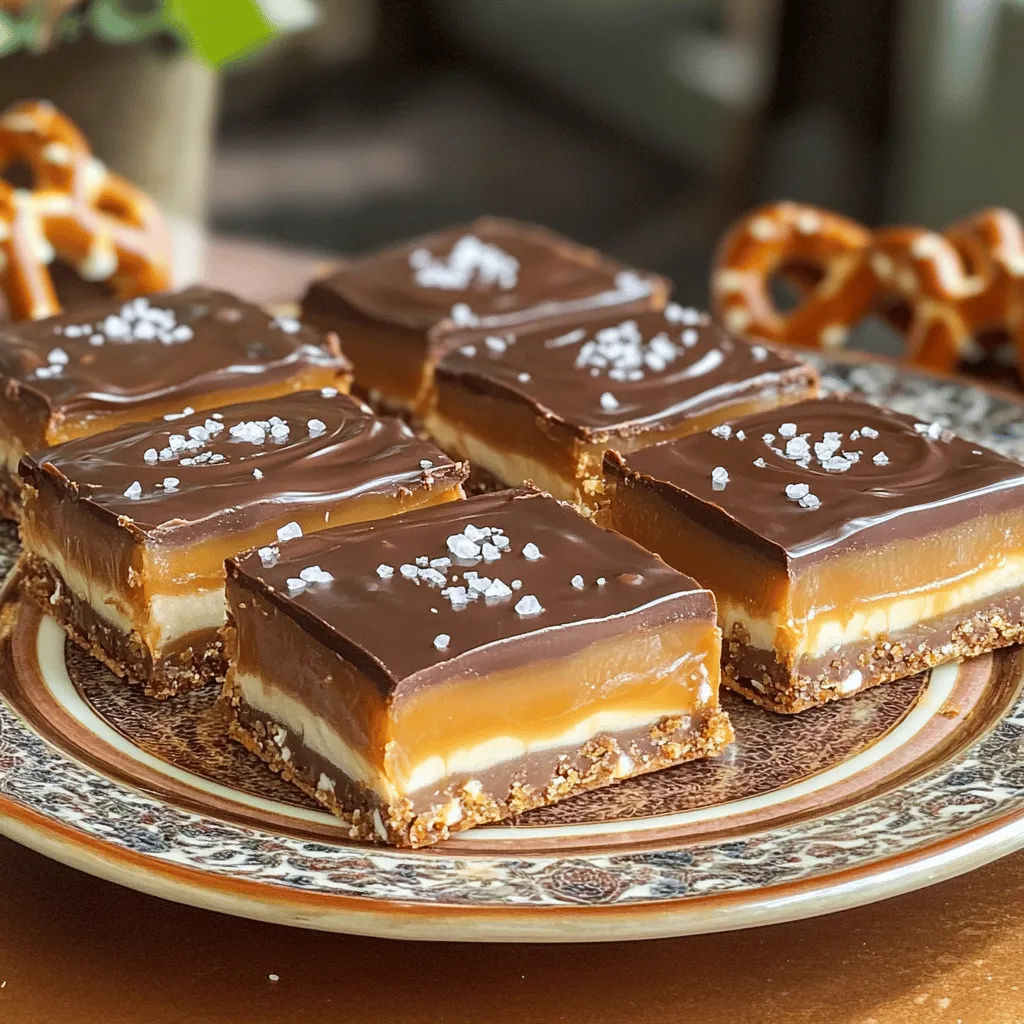
If you’re craving a sweet treat that satisfies both salty and sweet, look no further! My Salted Caramel Pretzel Bars blend crunchy pretzels with rich caramel and smooth chocolate for a snack you’ll adore. This simple recipe gives you layers of flavor and texture, making it an instant favorite. Let’s dive into the deliciousness and get ready to impress your family and friends with this irresistible dessert!
Ingredients
Here is a list of ingredients you will need for the salted caramel pretzel bars:
– 2 cups crushed pretzels
– 1 cup unsalted butter, melted
– 3/4 cup packed brown sugar
– 1 cup granulated sugar
– 1 cup sweetened condensed milk
– 2 cups chocolate chips (semi-sweet or dark)
– 1 teaspoon vanilla extract
– Sea salt for sprinkling
These ingredients create a perfect mix of sweet and salty flavors. The crushed pretzels add crunch. The caramel brings a rich sweetness. The chocolate layers it all together. Using unsalted butter helps control the saltiness. You can adjust the sea salt to your taste. This recipe is a fun way to enjoy treats at home. You’ll find that the combination is truly addictive.
Step-by-Step Instructions
Preparation Steps
1. Preheat your oven to 350°F (175°C).
2. Prepare an 8×8 inch baking dish. Line it with parchment paper. Let the edges hang over for easy removal.
3. In a bowl, mix 2 cups of crushed pretzels with 1 cup of melted butter.
4. Stir well until every pretzel crumb is coated.
5. Press the mix firmly into the bottom of the baking dish to form a solid crust.
Making the Caramel
1. In a saucepan, combine 3/4 cup brown sugar, 1 cup granulated sugar, and 1 cup sweetened condensed milk.
2. Set the heat to medium and stir until the sugars dissolve.
3. Bring the mix to a gentle boil. Cook it for 3-4 minutes without stirring.
4. Remove the pan from heat and stir in 1 teaspoon vanilla extract.
Assembling the Bars
1. Carefully pour the caramel over the pretzel crust.
2. Spread it evenly with a spatula.
3. In the same saucepan, melt 2 cups of chocolate chips over low heat.
4. Stir for 2-3 minutes until the chocolate is smooth.
5. Pour the melted chocolate over the caramel layer. Spread it evenly.
6. Sprinkle sea salt over the chocolate layer to taste.
7. Let the bars cool for 10-15 minutes at room temperature.
8. Transfer them to the refrigerator and let them set for 1 hour.
9. Lift the bars out using the parchment paper. Cut them into squares or rectangles.
Enjoy your Salted Caramel Pretzel Bars!
Tips & Tricks
Tips for Perfecting Texture
To get a great crust for your salted caramel pretzel bars, press the pretzel mix into the dish firmly. This helps create a solid base. If you don’t press hard enough, the crust may crumble when you cut the bars.
For the chocolate topping, melt the chocolate slowly over low heat. Stir it often to keep it smooth. If the chocolate burns, it will not melt well. You want a glossy finish on top that looks inviting.
Recommended Serving Suggestions
These bars go great with ice cream or whipped cream. The cold creaminess pairs well with the sweet and salty flavors of the bars.
For a fancier look, try garnishing them with crushed pretzels or a drizzle of melted chocolate. A sprinkle of sea salt adds a nice touch too. It enhances the sweet and salty mix.
Variations
Flavor Variations
You can change up the flavors in your salted caramel pretzel bars easily. Adding nuts gives a nice crunch. Try pecans or walnuts for a rich taste. You can also mix in your favorite flavored chocolate. Dark chocolate adds depth, while milk chocolate is sweeter. Just pick what you like best!
Dietary Adjustments
If you need gluten-free options, use gluten-free pretzels. They work just as well in this recipe. For a vegan twist, swap out the butter with coconut oil. Use dairy-free chocolate chips too. These adjustments keep the taste great while fitting your needs. Enjoy making these bars in a way that suits you!
Storage Info
How to Store Leftovers
To keep your salted caramel pretzel bars fresh, store them in an airtight container. Place parchment paper between layers if you stack them. This method prevents sticking and maintains texture. Store at room temperature for up to three days. If you want them to last longer, refrigerate them. This can keep them fresh for about a week.
Freezing Tips
You can freeze salted caramel pretzel bars for later enjoyment. Cut the bars into squares before freezing. Wrap each piece tightly in plastic wrap. Then, place them in a freezer-safe bag or container. This method helps avoid freezer burn. When you want to eat them, simply take them out and let them sit at room temperature for about 30 minutes. Enjoy their sweet and salty goodness!
FAQs
Common Questions
What are salted caramel pretzel bars?
Salted caramel pretzel bars are a sweet and salty treat. They have a crunchy pretzel crust, a creamy caramel layer, and a smooth chocolate topping. The mix of flavors makes them hard to resist!
How long do salted caramel pretzel bars last?
When stored in an airtight container, these bars last about a week. If you keep them in the fridge, they can last a bit longer. Just make sure they stay sealed to keep them fresh.
Can I make these bars ahead of time?
Yes, you can easily make salted caramel pretzel bars ahead of time. They are great for parties or snacks. Just prepare them, let them cool, and store them until you are ready to serve.
Troubleshooting Tips
Why is my caramel too thin?
If your caramel is too thin, you might not have cooked it long enough. Make sure to let it bubble gently for the full time stated in the recipe. This helps it thicken properly.
How to fix a chocolate layer that hardens too much?
If your chocolate layer hardens too much, you can gently reheat it. Place it in a microwave for a few seconds at a time, stirring in between. This should help it melt back into a smooth layer.
In this article, we explored how to make delicious salted caramel pretzel bars. We covered ingredients, preparation, and assembly. I shared tips to perfect your texture and suggested fun variations. You learned how to store and freeze leftovers for later enjoyment.
These bars are a tasty treat that anyone can make. Experiment with flavors and serve them in fun ways. Enjoy your baking adventure!