Craving a sweet treat that’s easy to make? Look no further! These S’mores Bars bring all the cozy campfire flavors right to your kitchen in just a few simple steps. You’ll love the mix of graham crackers, chocolate, and marshmallows. Plus, with quick ingredient swaps, you can make these bars gluten-free or vegan. Get ready for a dessert that will have everyone asking for seconds!
Ingredients
List of Ingredients
– 1 ½ cups graham cracker crumbs
– ½ cup unsalted butter, melted
– ½ cup packed brown sugar
– 1 cup mini marshmallows
– 1 cup semi-sweet chocolate chips
– ½ cup creamy peanut butter
– ½ teaspoon vanilla extract
– A pinch of salt
Gathering the right ingredients is key. You want the best flavors for your S’mores Bars. The graham cracker crumbs give a nice base. The unsalted butter adds richness. Brown sugar brings sweetness, while mini marshmallows provide that gooey texture. Semi-sweet chocolate chips melt perfectly. Creamy peanut butter adds a twist, making it even tastier. A little vanilla extract enhances all these flavors. The salt balances the sweetness, making every bite delightful.
Ingredient Substitutions
– Gluten-free options: Use gluten-free graham cracker crumbs. Almond flour can work too.
– Vegan alternatives: Swap unsalted butter for coconut oil or a vegan butter. Use vegan chocolate chips and skip the creamy peanut butter if you prefer.
These substitutions keep the fun alive. You can still enjoy S’mores Bars even with different diets. Get creative and make it your own!
Step-by-Step Instructions
Preparation Steps
First, preheat your oven to 350°F (175°C). This helps the bars bake evenly. Next, prepare a 9×9 inch baking pan. You can grease it lightly or use parchment paper. Parchment makes it easier to lift the bars out later.
Baking Instructions
Now, let’s make the crust. In a bowl, mix together graham cracker crumbs, melted butter, and brown sugar. Stir until it looks crumbly. Press this mixture firmly into the bottom of your pan. It should cover the whole base.
Bake the crust for 8 to 10 minutes. You want it to look light golden brown. After baking, let it cool for a few minutes.
Next, prepare the peanut butter layer. Heat creamy peanut butter in the microwave for about 30 seconds. It should be smooth and pourable. Add vanilla extract and a pinch of salt. Stir well.
Drizzle the peanut butter over the cooled crust. Spread it evenly with a spatula. Then, sprinkle mini marshmallows and chocolate chips on top. Press them down gently so they stick.
Return the pan to the oven. Bake for another 10 to 12 minutes. Look for golden marshmallows and melted chocolate. This gives the bars their gooey texture.
Cooling and Serving
Once baked, take the pan out of the oven. Allow the bars to cool completely in the pan. This prevents them from falling apart when sliced.
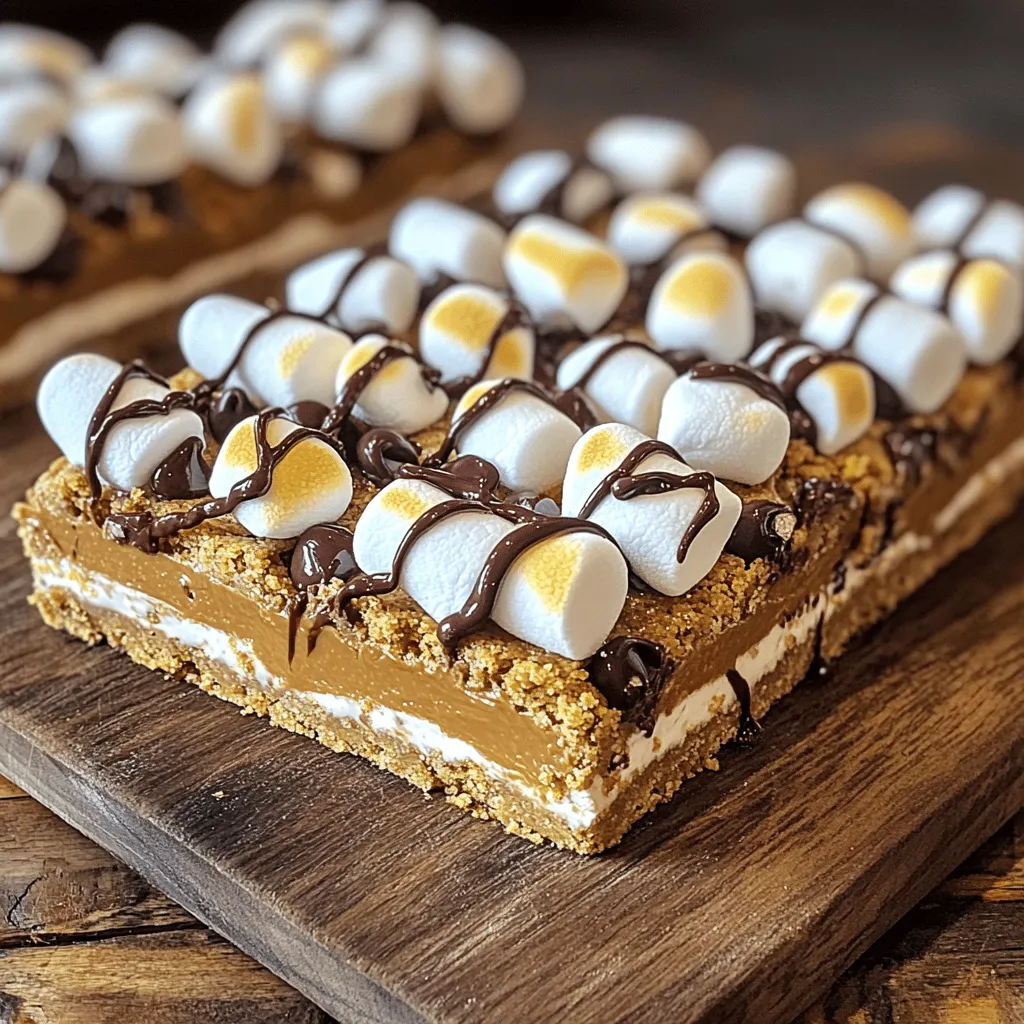
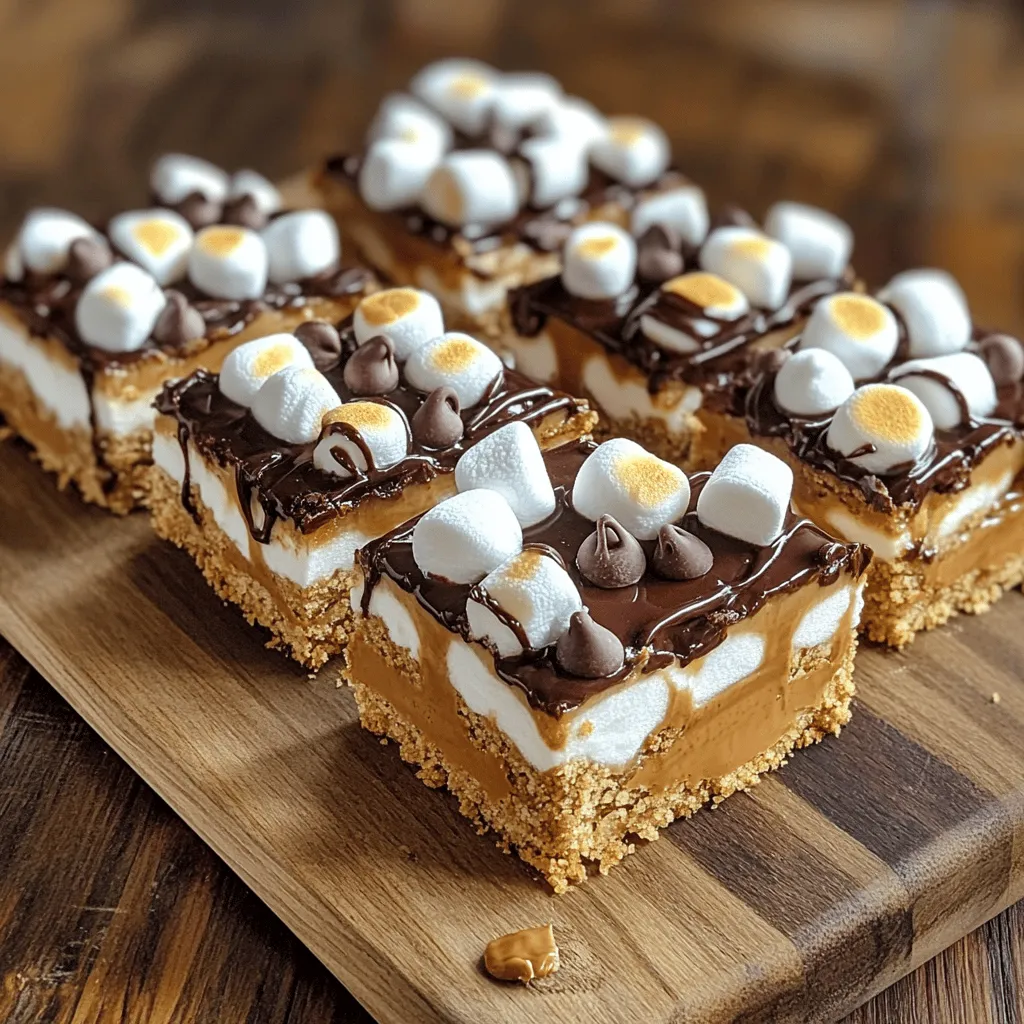
When cool, use a sharp knife to cut the bars into squares. For a fun twist, serve them on a rustic wooden board. You can also add extra mini marshmallows or a drizzle of warm chocolate on top. Enjoy your homemade S’mores Bars!
Tips & Tricks
Baking Tips
– Ensuring optimal texture: To get the best texture, do not skip the cooling step. Let your crust cool for a few minutes before adding the layers. This helps keep the bars from becoming too soggy. You want a nice crunch from the graham cracker base, so watch your baking time closely. Bake the crust until it is light golden brown.
– Avoiding burnt marshmallows: Keep an eye on the marshmallows as they bake. They can go from perfect to burnt quickly. I recommend checking them at the 10-minute mark. If they are golden and puffy, it’s time to take them out. You want that gooey texture, not charred bits!
Presentation Tips
– How to serve beautifully: For a stunning display, cut your bars into neat squares. Arrange them on a rustic wooden cutting board. This adds a homey touch. You can also use small cupcake liners to serve individual pieces. This makes it easy for guests to grab a bar.
– Garnishes to enhance appearance: Add extra mini marshmallows on top for a fun look. A drizzle of warm melted chocolate can elevate the visual appeal. You can also sprinkle a bit of graham cracker crumbs on top for texture. It makes your S’mores Bars look even more inviting!
Enjoy these tips to make your S’mores Bars the star of the show!
Variations
Flavor Variations
You can make S’mores Bars even more fun by changing flavors. Here are a few ideas:
– Adding nuts or fruit: Try adding chopped nuts like walnuts or almonds. You can also mix in fruit like sliced bananas or strawberries. These add great taste and texture.
– Chocolate types: You don’t have to stick to semi-sweet chocolate chips. Use dark chocolate for a richer flavor or white chocolate for a sweeter touch. Each type changes the taste and makes it special.
Dietary Adaptations
S’mores Bars can fit many diets. Here’s how to adapt them:
– Gluten-free S’mores Bars: To make these bars gluten-free, swap graham cracker crumbs with gluten-free crumbs. You can find these at most stores. Make sure all other ingredients are gluten-free too.
– Vegan S’mores Bars: For a vegan option, use vegan butter and dairy-free chocolate. Replace the mini marshmallows with vegan marshmallows. These swaps keep the bars tasty while meeting vegan needs.
With these variations, you can create your perfect S’mores Bars.
Storage Info
Best Storage Practices
To keep your s’mores bars fresh, store them in an airtight container. This will help keep them soft and chewy. Place a piece of wax paper between the bars to prevent sticking. You can also wrap each bar in plastic wrap for added protection.
If you want to save some for later, freezing works great. Cut the bars into squares. Wrap each square in plastic wrap, then place them in a freezer bag. They can last up to three months in the freezer.
Shelf Life
At room temperature, these bars stay fresh for about five days. To maintain their taste and texture, keep them in a cool, dry place away from sunlight.
Look for signs of spoilage. If you see mold or an off smell, it’s best to throw them away. Enjoy your delicious bars while they are fresh!
FAQs
Common Questions
How do I make S’mores Bars without an oven?
You can make S’mores Bars on the stovetop or in a microwave. For the stovetop, use a non-stick pan. Melt the butter and mix in the crumbs and sugar. Press it into the pan. Add layers as usual. For the microwave, layer the ingredients in a microwave-safe dish. Heat in short bursts until the chocolate and marshmallows melt.
Can I make S’mores Bars ahead of time?
Yes, you can make S’mores Bars a day or two in advance. After baking, let them cool completely. Cover them tightly with plastic wrap or foil. Store them in a cool, dry place. This way, they stay fresh and tasty when you’re ready to enjoy them.
What is the best way to reheat S’mores Bars?
To reheat S’mores Bars, use the microwave. Heat them for about 10 to 15 seconds. This warms them up and makes the chocolate soft again. Don’t heat too long, or the marshmallows may melt too much.
Troubleshooting Issues
Why are my bars too crumbly?
Bars can crumble if there isn’t enough butter or if you overbake them. Ensure you measure the butter correctly. When baking, look for a light golden brown color. If they crumble, try pressing them back together with your hands.
How to fix burnt marshmallows?
If your marshmallows burn, remove the pan right away. You can gently scrape off the burnt parts. To avoid this, keep a close eye on the bars as they bake. If you see signs of burning, lower the oven temperature or remove them early.
You learned how to make delicious S’mores Bars with simple steps. We covered the key ingredients, how to layer them, and tips for perfect baking. You can switch ingredients for dietary needs, like gluten-free or vegan options. Storing and serving these sweet treats is easy with my best practices. Enjoy experimenting with flavors and variations that suit your taste. Now, you can bake confidently and share these tasty bars with everyone!