Skip to content
DisclaimerTerms Of UseGDPR PolicyCookie Policy

yumymoments

  • Home
  • Drinks
  • Appetizers
  • Dinner
  • Dessert
  • About
  • Contact
  • Privacy Policy
DisclaimerTerms Of UseGDPR PolicyCookie Policy

NO-ING-IMG

- Olive oil - Onion - Garlic - Diced tomatoes - Vegetable broth - Dried oregano - Sugar - Potato gnocchi - Heavy cream or coconut cream - Fresh basil leaves - Salt and pepper - Grated Parmesan cheese (optional) This creamy tomato basil gnocchi soup needs simple, fresh ingredients. First, gather one tablespoon of olive oil. This will help sauté your onion to start the base. Next, you need one medium onion. Dice it finely for even cooking. You will also want three cloves of garlic. Minced garlic adds great flavor. Use two cups of diced tomatoes, either canned or fresh. The tomatoes create a rich, tasty base. For the soup, four cups of vegetable broth are essential. This adds depth and helps blend the flavors well. One teaspoon of dried oregano adds a nice herbal note. You’ll also want one teaspoon of sugar to balance the tomato’s acidity. The star of the dish is 250 grams of potato gnocchi. This is what makes the soup hearty. To make it creamy, use one cup of heavy cream or coconut cream for a dairy-free option. For freshness, you’ll need one cup of chopped fresh basil leaves. Lastly, add salt and freshly cracked pepper to taste. If you like, you can sprinkle grated Parmesan cheese on top before serving. These ingredients come together to create a warm, comforting dish. To start our creamy tomato basil gnocchi soup, heat 1 tablespoon of olive oil in a large pot over medium heat. Once the oil is hot, add 1 medium onion, diced. Sauté the onion for about 5 minutes. You want it to turn translucent. This step builds a nice base flavor for the soup. Next, add 3 cloves of minced garlic. Cook it for 1-2 minutes while stirring. This helps the garlic release its great aroma without burning. Now, it's time to add some key ingredients. Pour in 2 cups of diced tomatoes, either canned or fresh. Then, add 4 cups of vegetable broth. Stir in 1 teaspoon of dried oregano and 1 teaspoon of sugar. The sugar helps balance the acidity of the tomatoes. Mix it well and bring the pot to a gentle simmer. Let it cook for about 10 minutes. This allows the flavors to meld beautifully. After simmering, it's blending time! If you have an immersion blender, use it to blend the soup until smooth. If not, carefully transfer the soup to a standard blender in batches. Blend until smooth, then return it to the pot. This step makes the soup creamy and velvety. Now, add 250 grams of potato gnocchi to the simmering soup. Cook the gnocchi for 3-5 minutes. You’ll know they are ready when they float to the surface. This means they are cooked through and ready to enjoy. Lower the heat and gently stir in 1 cup of heavy cream, or coconut cream for a dairy-free version. Make sure to heat it through without boiling. This keeps the soup rich and creamy. Finally, add 1 cup of chopped fresh basil leaves. Season the soup with salt and freshly cracked pepper to taste. Stir well to mix in all the flavors. To start off, you want to avoid burnt garlic. Garlic burns fast. Add it to the pot after the onion has cooked for a few minutes. This way, the onion softens before the garlic hits the heat. When you do add garlic, stir it often. This helps keep it from burning. Next, let's focus on achieving a perfect onion texture. Cook the diced onion over medium heat. Stir often until the onion turns translucent. This should take about five minutes. This soft texture adds a great base flavor for your soup. Now, let's talk about blending techniques for a smooth consistency. If you use an immersion blender, pulse slowly at first. This prevents splashing. Blend until the soup is creamy and smooth. If you use a standard blender, wait for the soup to cool a bit before blending. Hot soup can splatter and burn. When blending hot liquids, safety is key. Always fill the blender halfway. Leave room for steam to escape. Use a towel to cover the lid. This way, you keep everything safe and clean. If you're looking for cream alternatives, consider using coconut cream. It gives a rich taste without dairy. Just swap it with heavy cream in the recipe. This change keeps your soup creamy and tasty. Also, adjust for dietary restrictions. If someone is dairy-free, coconut cream is a great choice. You can also use almond or cashew cream. These options keep the soup delicious for everyone. {{image_4}} You can add chicken or sausage to your soup for a hearty meal. Cook the meat first, then add it to the soup after blending. This will give your dish a nice, savory boost. For a vegetarian-friendly option, try adding beans or lentils. They provide protein and make the soup filling. If you like heat, add red pepper flakes. Start with a pinch and adjust to your taste. You can also use spicy diced tomatoes for an extra kick. This simple change will turn your comforting soup into a warm, zesty delight. While basil is classic, you can switch it up with other herbs. Try using parsley or oregano for different flavors. Mixing in thyme can also add depth. Don’t be afraid to explore these combinations. Each herb brings its own unique taste, making your soup exciting and new! To keep your soup fresh, store it in the fridge. Use an airtight container for best results. The soup lasts about three days. If you want to save it for longer, freeze it. Use freezer-safe bags or containers. This way, it can last up to three months. You can reheat your soup in two ways: the microwave or stovetop. For the microwave, place the soup in a bowl. Heat it for 1-2 minutes, stirring halfway. For the stovetop, pour the soup into a pot. Warm it over low heat, stirring often to avoid sticking. When reheating cream-based soups, keep the heat low. High heat can cause separation. Stir in a splash of cream as you reheat. This helps keep that rich, creamy texture. If the soup seems thick, add a little broth or water. This restores the perfect consistency. Yes, you can make this soup dairy-free! Instead of heavy cream, use coconut cream. It adds a rich taste while keeping it plant-based. You can also try almond milk or cashew cream for a lighter option. Both choices work well and keep the soup creamy. You can store the soup in the fridge for up to 3 days. Make sure to keep it in an airtight container. If you want it to last longer, freeze it. Just remember, the gnocchi may change texture when reheated. Absolutely! Fresh gnocchi can make the soup taste even better. If you want to make your own, use a simple potato gnocchi recipe. Just remember to cook it for a few minutes longer than store-bought gnocchi. Fresh gnocchi adds a lovely, soft texture to the soup. This soup pairs well with crusty bread or a fresh salad. A warm baguette is perfect for dipping. You could also serve it with a simple side salad. The freshness of the salad balances the creamy soup nicely. This blog post shared a simple recipe for creamy tomato basil gnocchi soup. We looked at each ingredient, from olive oil to Parmesan. I guided you through step-by-step instructions to create the soup. I offered tips for sautéing and blending. We also explored variations, from adding proteins to adjusting spices. Finally, I discussed storage tips and answered your common questions. With these tools, you can enjoy a comforting, delicious bowl of soup any time. Happy cooking!

Creamy Tomato Basil Gnocchi Soup Easy Comfort Dish

When comfort food calls, nothing beats a bowl of Creamy Tomato Basil Gnocchi Soup. This easy dish blends rich flavors

To make No-Bake Chocolate Peanut Butter Energy Bites, gather these simple items: - 1 cup rolled oats - 1/2 cup natural peanut butter - 1/3 cup honey or pure maple syrup - 1/4 cup mini chocolate chips - 1/4 cup ground flaxseed - 1 teaspoon vanilla extract - A pinch of sea salt These ingredients come together to create a tasty and healthy snack. If you want to switch up the sweeteners, here are some options: - Agave syrup - Coconut nectar - Brown rice syrup Each of these can add a unique flavor. Just make sure to keep the same amount as honey or maple syrup. You can easily customize your energy bites. Here are some ideas: - Add chopped nuts like almonds or walnuts for crunch. - Mix in dried fruit like cranberries or raisins for sweetness. - Use different flavors of nut butter, like almond or cashew, for variety. Feel free to get creative! Each variation can give your bites a new twist. To make these no-bake chocolate peanut butter energy bites, gather your ingredients first. You need rolled oats, peanut butter, honey or maple syrup, mini chocolate chips, ground flaxseed, vanilla extract, and a pinch of sea salt. This recipe is simple and takes about 15 minutes to prep. You will chill the bites to make them firm. Start by taking a large mixing bowl. Add 1 cup of rolled oats, 1/4 cup of ground flaxseed, and a pinch of sea salt. Use a spoon to mix them well. It’s important to blend them evenly. This step gives your bites a nice texture and flavor. Make sure there are no clumps. In another bowl, mix together 1/2 cup of natural peanut butter, 1/3 cup of honey or maple syrup, and 1 teaspoon of vanilla extract. Stir until smooth. This mixture is rich and creamy. Pour it into the bowl with the dry ingredients. Use a spatula or wooden spoon to mix everything well. You want all the dry ingredients coated in the peanut butter blend. Finally, fold in 1/4 cup of mini chocolate chips. Now, scoop small portions and roll them into balls. About 1 inch in size works great. Place each ball on a baking sheet lined with parchment paper. Once done, chill them in the fridge for 30 minutes to firm up. Enjoy your tasty energy bites! To get the right texture, mix well. You want each oat and flaxseed coated in peanut butter. If the mix feels too dry, add a bit more honey or peanut butter. If it is too wet, add more oats or flaxseed. You want the mixture to hold together when rolled. This balance is key for a perfect bite. You can swap peanut butter for other nut butters. Almond or cashew butter works great. Each nut butter brings a unique flavor. Make sure it's natural and smooth for the best results. If you have a nut allergy, sunflower seed butter is a tasty option too. When rolling the bites, keep your hands slightly damp. This will stop the mix from sticking to your hands. Roll them into 1-inch balls for the best size. If you want, you can roll them in extra mini chocolate chips or coconut flakes for a fun twist. Place them carefully on the baking sheet to avoid squishing. {{image_4}} You can make these bites more fun with add-ins. Consider using 1/4 cup of chopped nuts like almonds or walnuts for a crunchy twist. Dried fruit, like raisins or cranberries, adds sweetness and chewiness. You can also mix in 1/4 cup of shredded coconut for a tropical flair. Each option boosts flavor and texture. If you have dietary needs, you can easily adjust this recipe. For a nut-free version, use sun butter instead of peanut butter. If you want to make it vegan, substitute honey with maple syrup. To make it gluten-free, ensure your oats are certified gluten-free. These tweaks help everyone enjoy these bites. You can play with flavors to keep things exciting. Add 1/2 teaspoon of cinnamon for warmth. A bit of instant coffee can give a nice kick. For a minty taste, try a few drops of peppermint extract. Each of these options adds a new layer of flavor that is sure to please. To keep your no-bake chocolate peanut butter energy bites fresh, store them in an airtight container. This will help maintain their taste and texture. Place the container in the fridge. Keeping them cold prevents the bites from becoming too soft. If you plan to eat them within a week, this method works great. When stored properly in the fridge, these energy bites last for about one week. You might notice them getting a bit drier as time goes on. However, they still taste good. If you want to keep them longer, freezing is the way to go. To freeze your energy bites, place them on a baking sheet in a single layer. This helps them freeze without sticking together. After about an hour, transfer the frozen bites into a freezer-safe bag or container. They can last for up to three months in the freezer. When you’re ready to eat, just take out a few and let them thaw in the fridge. Enjoy them as a quick snack or energy boost! No-Bake Chocolate Peanut Butter Energy Bites can last for about one week in the fridge. Store them in an airtight container. If you want to keep them longer, freeze them. They can last up to three months in the freezer. Just thaw them in the fridge before eating. Yes, you can use crunchy peanut butter! It will add extra texture and a nice crunch to the bites. The flavor will stay the same, but the bites will be more fun to eat. If you like a little crunch, go for it! Each No-Bake Chocolate Peanut Butter Energy Bite has about 100 calories. This count can change based on the brands of ingredients you use. For exact numbers, check the labels of your products. They are healthy snacks, but be mindful of how many you eat. Yes, you can make these energy bites vegan! Just swap honey for pure maple syrup. This change keeps the bites sweet and plant-based. All other ingredients are already vegan-friendly. Enjoy these tasty bites while sticking to a vegan diet! In this post, I covered how to make no-bake chocolate peanut butter energy bites. You learned about the key ingredients and step-by-step instructions. I shared tips to perfect texture and rolling. Different variations give you options for every taste. Lastly, I provided storage info to keep them fresh. These energy bites are easy to make and customize. Try them as a quick snack or a treat. Enjoy creating your own versions!

No-Bake Chocolate Peanut Butter Energy Bites Recipe

Are you looking for a quick and tasty snack? I’ve got just the recipe for you! These No-Bake Chocolate Peanut

To make One Pot Creamy Garlic Parmesan Orzo, you will need a few simple ingredients. Here’s what you need: - 1 cup orzo pasta - 2 tablespoons olive oil - 3 cloves garlic, minced - 4 cups vegetable broth - 1 cup heavy cream - 1 cup grated Parmesan cheese - 1 teaspoon dried Italian herbs - Salt and pepper to taste - 1 cup fresh spinach (or arugula) - ½ cup cherry tomatoes, halved - Fresh basil leaves for garnish Each ingredient plays a key role in creating this dish. The orzo pasta gives a nice texture. Olive oil adds richness and helps with cooking. Garlic brings a great aroma and flavor. Vegetable broth adds depth to the dish. Heavy cream makes it rich and creamy. Parmesan cheese adds a salty, umami flavor. Dried Italian herbs enhance the taste with their blend of spices. Fresh spinach (or arugula) adds color and nutrients. Cherry tomatoes provide sweetness and a burst of flavor. Finally, fresh basil leaves make the dish look pretty and add freshness. Gather these ingredients before you start cooking. Having everything ready makes the cooking process smooth and fun! 1. First, grab a large pot or deep skillet. 2. Heat 2 tablespoons of olive oil over medium heat until it shines. 3. Add 3 cloves of minced garlic to the pot. Sauté for 1-2 minutes. 4. Watch for the garlic to turn fragrant and light golden. Do not burn it. 5. Now, stir in 1 cup of orzo pasta. Cook for 1 more minute. 6. This step toasts the orzo. It adds a nice flavor to the dish. 1. Carefully pour in 4 cups of vegetable broth. 2. Turn up the heat to bring the mix to a boil. 3. Once boiling, reduce the heat to simmer. Cover the pot. 4. Let it cook for about 10 minutes. Stir often. 5. Check that the orzo is al dente. Remove the lid. 6. Add 1 cup of heavy cream and 1 cup of grated Parmesan cheese. 7. Mix in 1 teaspoon of dried Italian herbs. Stir until creamy. 1. Gently fold in 1 cup of fresh spinach and ½ cup of halved cherry tomatoes. 2. Let the spinach wilt and tomatoes warm for 2-3 minutes. 3. Taste your dish and add salt and pepper to your liking. 4. Serve hot. Garnish with fresh basil leaves for a lovely finish. - Best practices for sautéing garlic: Start with medium heat. Add olive oil and let it shimmer. Once it's hot, add the minced garlic. Stir it for 1-2 minutes. You want it fragrant and golden, not brown. If it burns, it will taste bitter. - How to achieve the right orzo texture: Cook the orzo in boiling vegetable broth. This helps it absorb flavor. Stir occasionally to prevent sticking. Aim for al dente, which means firm but not hard. This takes about 10 minutes of simmering. - Overcooking the orzo: Keep an eye on the timer. If you cook it too long, it becomes mushy. It should have a slight bite when you taste it. - Skipping the seasoning check: Always taste your dish before serving. Add salt and pepper to enhance the flavors. Don’t skip this step; it makes a big difference! {{image_4}} You can swap out heavy cream for different options. Use half-and-half for less fat. Coconut milk adds a yummy twist. For a lighter version, try plain yogurt. When it comes to cheese, Parmesan is great, but not the only choice. Grate some Pecorino Romano for a sharper taste. You can also use mozzarella for a gooey texture. If you want a vegan option, try nutritional yeast for a cheesy flavor. Want to add protein? Chicken works well. Just cook it in the pot before adding the orzo. Shrimp is another tasty choice. Toss them in during the last few minutes of cooking. For more nutrition, load up on veggies! Peas and bell peppers add color and crunch. Zucchini or broccoli can also blend nicely. These options make your dish more filling and healthy. To keep your One Pot Creamy Garlic Parmesan Orzo fresh, store it in an airtight container. Place it in the fridge if you plan to eat it in a few days. It will last about 3 to 5 days. For longer storage, you can freeze it. Use freezer-safe containers or bags. Make sure to label them with the date. This way, you won't forget when you made it! When it's time to reheat, you want to keep that creaminess. The best method is to use the stove. Place the orzo in a pan over low heat. Add a splash of water or broth to help it warm up. Stir it often to avoid sticking. Heat for about 5 to 10 minutes or until warm. You can also use a microwave. Place the orzo in a microwave-safe dish and cover it. Heat for 1 to 2 minutes, stirring halfway. Always check the heat to make sure it’s warm, but not hot. This keeps your dish creamy and delicious! Yes, you can make it gluten-free. To do this, substitute the orzo with gluten-free pasta. There are many options available, such as rice-based or quinoa-based pasta. Make sure to check the package for cooking time, as it may differ from regular orzo. This way, you can enjoy the creamy goodness without gluten. Absolutely! To make this dish vegan, swap the heavy cream for coconut cream or cashew cream. Instead of Parmesan cheese, use nutritional yeast or a vegan cheese alternative. This keeps the creamy texture and adds a cheesy flavor without any dairy. You can still enjoy this dish while sticking to a plant-based diet. You can store leftovers in the fridge for up to three days. Place them in an airtight container to keep them fresh. If you want to keep it longer, consider freezing it. Just remember to thaw it in the fridge before reheating. Enjoy your creamy orzo for a quick meal later! This blog post covered a creamy orzo recipe from start to finish. We explored key ingredients, detailed cooking steps, and helpful tips for perfect results. I shared ideas for ingredient swaps and how to store leftovers. Remember to adjust seasoning and avoid overcooking your orzo for the best taste and texture. With a few variations, you can make this dish your own. Enjoy experimenting with flavors and have fun in the kitchen!

One Pot Creamy Garlic Parmesan Orzo Delightful Dish

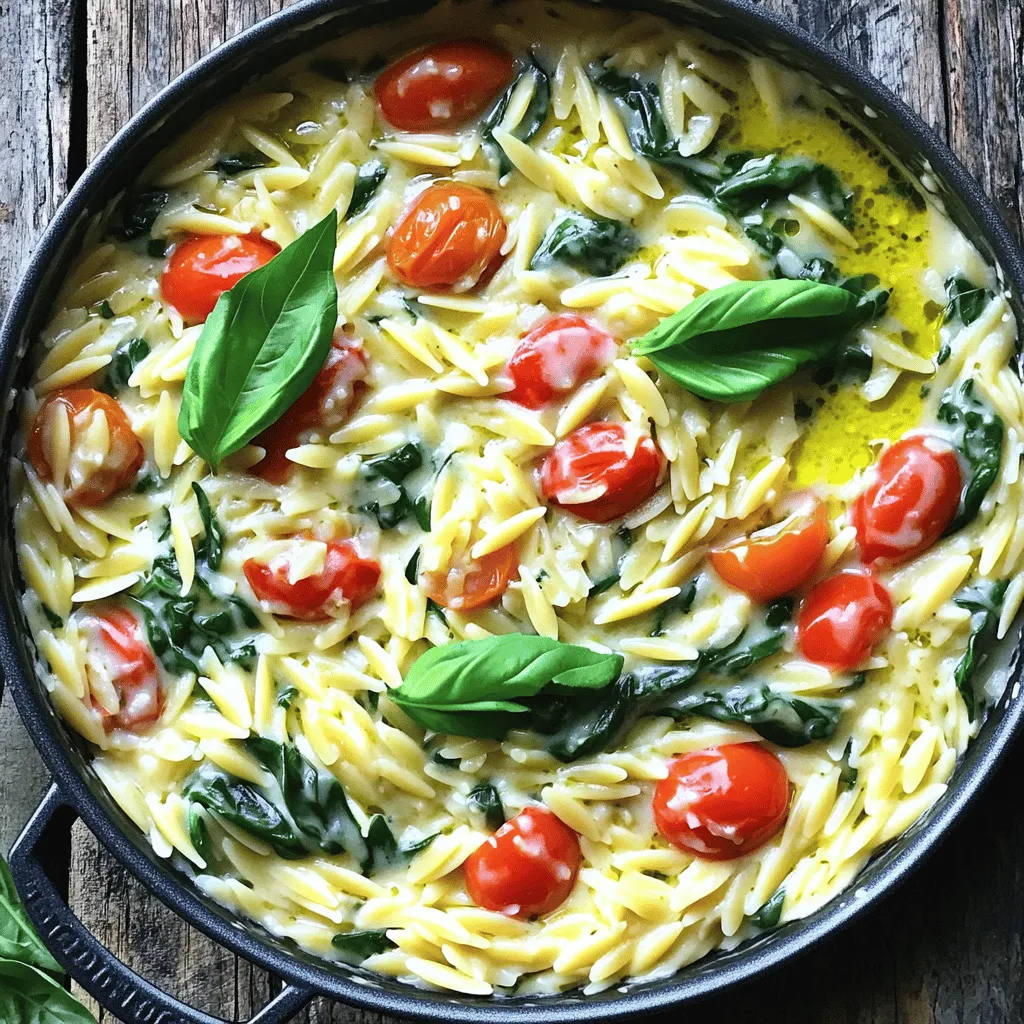
Are you ready to elevate your weeknight dinners? Let’s dive into this One Pot Creamy Garlic Parmesan Orzo recipe. It’s

- 1 pound chicken tenderloins - 1/2 cup all-purpose flour - 1 cup panko breadcrumbs - 1/2 teaspoon garlic powder - 1/2 teaspoon paprika - 1/4 teaspoon salt - 1/4 teaspoon black pepper - 1/4 cup honey - 3 tablespoons Sriracha sauce - 1 tablespoon soy sauce - 1 tablespoon apple cider vinegar - Chopped green onions - Sesame seeds These ingredients come together to create the perfect spicy honey Sriracha chicken tenders. The combination of chicken tenderloins and panko breadcrumbs gives you a crunchy bite. The seasoned flour adds flavor, while the sauce brings the heat. You can adjust the Sriracha to match your spice level. For a tasty touch, add green onions and sesame seeds on top. These simple ingredients lead to a dish that is both fun and flavorful. First, you need to preheat your air fryer to 400°F (200°C). This step is key to getting the chicken tenders crispy and cooked well. Next, let's set up your breading station. In a shallow bowl, mix these dry ingredients: - 1/2 cup all-purpose flour - 1/2 teaspoon garlic powder - 1/2 teaspoon paprika - 1/4 teaspoon salt - 1/4 teaspoon black pepper In a second bowl, whisk one large egg until it is frothy. In a third bowl, place 1 cup of panko breadcrumbs. This will help the tenders get that extra crunch. Now it's time to coat the chicken. Take each tenderloin and first coat it in the flour mixture. Make sure it is fully covered. Next, dip it into the egg, letting any extra egg drip off. Finally, roll it in the panko breadcrumbs. Press gently to help them stick. Set aside the coated tenders on a plate. For the spicy honey sauce, whisk together these ingredients in a clean bowl: - 1/4 cup honey - 3 tablespoons Sriracha sauce - 1 tablespoon soy sauce - 1 tablespoon apple cider vinegar Mix well until all the ingredients blend together. You can adjust the Sriracha for more or less heat. Now, arrange the breaded chicken tenders in a single layer in the air fryer basket. Be careful not to overcrowd the basket. A little cooking oil spray helps them get crispy. Cook the tenders for 8-10 minutes, flipping them halfway through. They should be golden brown and reach an internal temperature of 165°F (75°C). When the chicken is done, transfer it to the bowl with the spicy honey sauce. Toss gently until the tenders are fully coated. For a finishing touch, garnish with chopped green onions and sesame seeds if you like. Serve hot for the best taste! To get that perfect crunch on your chicken tenders, use cooking oil spray. Lightly spray the tenders before air frying. This helps them crisp up without adding too much fat. The oil creates a golden crust. You’ll love the texture it adds! Sriracha can be spicy, so adjust it to fit your taste. Start with a small amount. Mix it with honey, soy sauce, and vinegar. Taste the sauce before tossing in the chicken. If you want it hotter, add more Sriracha. If you prefer it milder, reduce the amount. It's all about making it your own! Air frying works best when you do not overcrowd the basket. Place the chicken tenders in a single layer. This allows hot air to circulate around each tender. If they are too close, they will steam instead of fry. Cook in batches if needed. This ensures even cooking and crispy results every time! {{image_4}} You can switch up the chicken tenderloins for other proteins. Try using shrimp or tofu for a fun twist. If you want a different crunch, use crushed cornflakes or almond flour instead of panko. Both give a great texture and taste. You can change the flavor of the sauce. Add garlic powder, chili powder, or even lime juice for extra zing. If you want a sweeter taste, mix in some brown sugar or maple syrup. You can also try other sauces, like barbecue or teriyaki, for unique flavors. If you do not have an air fryer, you can bake the chicken tenders. Preheat your oven to 425°F (220°C). Place the coated tenders on a baking sheet. Bake for 15-20 minutes, flipping halfway through. Check that they reach an internal temperature of 165°F (75°C). This method keeps them crispy and delicious! To keep your chicken tenders fresh, store them in an airtight container. Place a paper towel at the bottom to absorb moisture. This helps keep them crispy. They will stay good in the fridge for up to three days. If you want to enjoy them longer, freezing is a great choice. When you reheat the chicken tenders, the goal is to keep them crispy. The best way to do this is to use the air fryer. Preheat it to 350°F (175°C). Put the tenders in a single layer and air fry for about 5 minutes. This method helps them regain their crunch without drying out. You can also use the oven at the same temperature for about 10 minutes. To freeze the chicken tenders, let them cool completely first. Once cool, place them in a freezer-safe bag or container. Make sure to remove as much air as possible to avoid freezer burn. They can be frozen for up to three months. When you're ready to eat them, thaw them overnight in the fridge before reheating. This ensures they thaw evenly and taste great! It takes about 8 to 10 minutes to cook chicken tenders in the air fryer. Preheat the air fryer to 400°F (200°C) first. Flip the tenders halfway through cooking for even browning. Make sure the internal temperature reaches 165°F (75°C) for safe eating. Yes, you can use frozen chicken tenderloins. However, you must thaw them first. Thawing helps the breading stick better. This way, the tenders cook evenly and become crispy. These chicken tenders pair well with various sides. Consider serving them with: - Fresh salad - Steamed vegetables - Rice or quinoa - Dipping sauces like ranch or blue cheese These options balance the spicy flavor and enhance your meal. You now have all the details for making Spicy Honey Sriracha Chicken Tenders. We covered the key ingredients, the step-by-step cooking process, and tips for achieving that perfect crunch. Remember, you can adjust the spice and try new flavors. Don't forget to store and reheat leftovers properly to keep them tasty. Enjoy making this dish easy and fun! You'll impress your friends and family with your tasty creations.

Spicy Honey Sriracha Chicken Tenders Air Fryer Delight

Looking to spice up dinner? Let me introduce you to my Spicy Honey Sriracha Chicken Tenders made in the air

For this tasty dish, you will need: - 4 boneless, skinless chicken thighs - 1/2 cup soy sauce (or tamari for gluten-free) - 1/4 cup honey - 2 tablespoons rice vinegar - 3 cloves garlic, finely minced - 1 tablespoon fresh ginger, peeled and grated - 1 tablespoon sesame oil - 2 tablespoons cornstarch - 1/4 cup water These main ingredients create a flavorful teriyaki sauce. The soy sauce adds saltiness, while honey gives it sweetness. The rice vinegar adds a nice tang. Garlic and ginger bring warmth and depth to the dish. You can customize your teriyaki chicken by adding: - Pineapple chunks for sweetness - Bell peppers for color and crunch - Broccoli for added nutrition - Carrots for a hint of sweetness These optional ingredients can make your meal more vibrant and delicious. Feel free to mix and match based on your family's taste. To make your dish shine, try these garnishes: - 1 teaspoon sesame seeds - 2 green onions, finely chopped Serve the teriyaki chicken over warm, fluffy rice. This dish looks great on a large platter. Drizzle extra sauce on top for added flavor. The sesame seeds and green onions add a nice finish. Enjoy the colorful and tasty meal with your family! To start, grab a medium-sized bowl. Add 1/2 cup of soy sauce, 1/4 cup of honey, and 2 tablespoons of rice vinegar. Next, mince 3 cloves of garlic and grate 1 tablespoon of fresh ginger. Toss these into the bowl. Don’t forget to add 1 tablespoon of sesame oil. Whisk everything together until it looks smooth and well mixed. This sauce will make your chicken tasty and sweet. Now, place 4 boneless, skinless chicken thighs at the bottom of your slow cooker. Pour the teriyaki sauce over the chicken. Make sure each thigh gets coated well. Put the lid on the slow cooker. You can set it to cook on low for 6-7 hours or on high for 3-4 hours. When the chicken is done, it should be very tender. After cooking, use tongs or a slotted spoon to lift the chicken out. Place it on a cutting board. Use two forks to shred the chicken into small pieces. In a small bowl, mix 2 tablespoons of cornstarch with 1/4 cup of water. Stir until it’s smooth. Slowly add this mix to the sauce left in the slow cooker. Switch the slow cooker to high heat. Leave it uncovered for 10-15 minutes until the sauce thickens. Return the shredded chicken back into the thickened sauce. Stir well so all the pieces are coated. Serve the chicken over warm rice and enjoy! To get tender chicken, use boneless, skinless thighs. They stay juicy and flavorful. Cook on low heat for the best results. This slow cooking method helps the meat become fork-tender. If you're short on time, you can cook on high heat. Just remember to check the chicken often. You can change the sweetness by adjusting the honey. Add more honey for a sweeter dish or use less for a savory taste. If you want a bit of heat, add red pepper flakes. For a different flavor, try adding a splash of orange juice or pineapple juice. This will give your sauce a fruity twist. Always coat the chicken well with the sauce. This helps the flavors soak in. Avoid lifting the lid too often; it lets out heat and steam. Keep the lid closed during cooking for even results. Let the chicken rest for a few minutes after cooking to keep it moist. {{image_4}} You can easily boost the health of your teriyaki chicken. Adding vegetables gives more flavor and vitamins. Try bell peppers, broccoli, or snap peas. Cut them into small pieces. Add them to the slow cooker during the last hour of cooking. This way, they stay crisp and colorful. You’ll enjoy a balanced meal with great taste. If you want to mix it up, try different proteins. Tofu is a great choice for a vegetarian meal. Use firm tofu and press it to remove excess water. Cut it into cubes and add it to the sauce. For a heartier option, use pork. Pork shoulder works well. Cook it the same way as chicken for a tasty twist. Want a kick? You can spice up your teriyaki sauce. Add sriracha or red pepper flakes for heat. Start with a small amount and taste as you go. You can also switch up the flavor. Try adding pineapple juice for sweetness or sesame paste for depth. These small changes can create new and exciting flavors in your dish. To keep your teriyaki chicken fresh, place the leftovers in an airtight container. This helps lock in flavor and moisture. You can store it in the fridge for up to three days. Make sure it cools down before you seal the container. This will help prevent condensation inside. When it's time to eat again, reheat your chicken in the microwave or on the stove. If using the microwave, place the chicken in a bowl and cover it. Heat in short bursts of one minute until hot. If reheating on the stove, use low heat and stir often. Add a splash of water or soy sauce to keep it moist. If you want to save some for later, freezing is a great option. Pack the chicken in a freezer-safe bag or container. Try to remove as much air as possible. This keeps it fresh for about two to three months. When you’re ready to eat it, thaw it overnight in the fridge. Then, reheat using the instructions above. Yes, you can use frozen chicken in the slow cooker. However, it may take longer to cook. Make sure the chicken reaches a safe temperature of 165°F. If using frozen chicken, set your slow cooker to high. Cook for 4 to 5 hours instead of the usual time. This helps keep the chicken juicy and tender. Using frozen chicken can save time on prep. Just add the teriyaki sauce as usual. The chicken will soak up all that flavor as it cooks. To make this recipe gluten-free, use tamari instead of soy sauce. Tamari is a great option that keeps the flavor intact. Check all other ingredients to ensure they are gluten-free. Some brands of honey and rice vinegar may contain gluten. Always read labels before using. You can also add gluten-free cornstarch for thickening. This way, your teriyaki chicken remains delicious and safe for anyone with gluten sensitivities. Teriyaki chicken pairs nicely with many side dishes. Here are some of my favorites: - Steamed broccoli: Its crunch complements the soft chicken. - Jasmine rice: This is a classic choice and soaks up the sauce well. - Stir-fried vegetables: Use bell peppers, snap peas, and carrots for color. - Cucumber salad: This adds a refreshing crunch and balances the savory chicken. Feel free to mix and match! Each side adds a new flavor to your meal. Enjoy experimenting! To sum up, making slow cooker teriyaki chicken is easy and fun. You learned about the key ingredients and how to customize your dish. I shared step-by-step instructions and tips for perfect texture. You saw different variations, including adding vegetables or using different proteins. Storing and reheating your leftovers was also covered. Enjoy experimenting with this recipe! You can create a meal that fits your taste perfectly. Happy cooking!

Slow Cooker Teriyaki Chicken Easy Family Meal

Looking for an easy, delicious family meal? My Slow Cooker Teriyaki Chicken is just the ticket! With simple steps and

To make the Air Fryer Parmesan Zucchini Fries, gather these items: - 2 medium zucchinis, cut into fries (about 4-5 inches in length) - 1/2 cup finely grated Parmesan cheese - 1/2 cup breadcrumbs (choose either panko for extra crunch or regular) - 1 teaspoon garlic powder - 1 teaspoon onion powder - 1 teaspoon Italian seasoning (or your favorite herb blend) - Salt and freshly ground black pepper, to taste - 1 large egg, beaten - Cooking spray (preferably olive oil or avocado oil) You can change some ingredients to suit your taste: - Use different cheeses like cheddar or mozzarella for a new flavor. - Swap breadcrumbs for crushed nuts for a gluten-free option. - Add cayenne pepper to the mix for a spicy kick. To get the best fries, consider these tips: - Choose firm zucchinis. They hold their shape better when cooked. - Grate the Parmesan cheese finely. This helps it stick to the fries. - If using panko, press it down on the zucchini fries for a thicker coating. - Don’t skip the cooking spray. It helps achieve that golden, crispy finish. By following these tips, you’ll create a tasty snack that everyone will love! First, grab your zucchinis. Wash them well to remove any dirt. Cut the zucchinis into fries about 4 to 5 inches long. Make sure they are even for better cooking. If they are too thick, they won't cook well. You want them crispy! Now, let’s make the coating. In a bowl, mix 1/2 cup of grated Parmesan cheese and 1/2 cup of breadcrumbs. Add 1 teaspoon each of garlic powder, onion powder, and Italian seasoning. Don’t forget a pinch of salt and pepper! Stir it all together until mixed well. In another bowl, beat one large egg until it's mixed and frothy. This will help the coating stick to the zucchini fries. Preheat your air fryer to 400°F (200°C). This step is key for crispiness. Take each zucchini fry and dip it in the beaten egg. Let any extra egg drip off. Next, coat the fry in the cheese and breadcrumb mix. Press lightly to make sure it sticks. Place the coated zucchini fries in the air fryer basket in one layer. Don’t overcrowd them! Spray the tops lightly with cooking spray. This helps them turn golden brown and crispy. Air fry the fries for 10 to 12 minutes. Flip them halfway through for even cooking. Look for a nice golden color when they’re done. Once cooked, let them cool for a few minutes. This will help the flavors pop before you enjoy your snack! To make your zucchini fries extra crispy, choose panko breadcrumbs. Panko adds a great crunch. Also, make sure to coat each fry well. Press the coating onto the zucchini, so it sticks better. Lightly spray the tops with cooking spray before cooking. This helps them brown nicely in the air fryer. One common mistake is overcrowding the air fryer basket. This prevents hot air from circulating. It can lead to soggy fries. Always arrange the fries in a single layer. Another mistake is skipping the cooking spray. Not using it can result in fries that don’t get that golden color. Preheat your air fryer before adding the zucchini fries. This step ensures even cooking. Set the temperature to 400°F (200°C) for best results. Flip the fries halfway through cooking. This helps them brown evenly on both sides. Lastly, let the fries cool a bit after cooking. This enhances their flavor and crunch. {{image_4}} You can change the flavor by using different seasonings. Try adding smoked paprika for a smoky taste. If you like heat, sprinkle in some cayenne pepper. You can also use taco seasoning for a fun twist. Get creative with your favorite herbs! For a gluten-free option, swap regular breadcrumbs for gluten-free ones. You can also crush gluten-free crackers to use as a coating. This keeps the dish safe for those with gluten sensitivities while still being crunchy and tasty. If you want to skip Parmesan, try using nutritional yeast. It gives a cheesy flavor without dairy. Vegan cheese can also work, but make sure it melts well. You can even use crushed nuts like almonds for a unique taste and texture. To store your leftover zucchini fries, let them cool completely. Place them in an airtight container. Keep the container in the fridge. They will stay fresh for up to three days. Make sure not to stack the fries too high to avoid sogginess. For the best taste, reheat your zucchini fries in the air fryer. Preheat the air fryer to 350°F (175°C). Place the fries in a single layer. Heat them for about 5-7 minutes. Check them often to avoid burning. This method keeps them crispy. You can also use an oven. Simply bake at 350°F (175°C) for 10 minutes. You can freeze zucchini fries if you want to save some for later. First, let them cool completely. Then, arrange the fries in a single layer on a baking sheet. Freeze them for about an hour. Once frozen, transfer the fries to a freezer bag. They can last for up to three months in the freezer. To cook from frozen, air fry at 400°F (200°C) for 12-15 minutes. Enjoy your crispy snack anytime! Yes, you can make zucchini fries in the oven. Preheat your oven to 425°F (220°C). Use the same steps for coating the fries. Spread them on a baking sheet lined with parchment paper. Bake for about 20-25 minutes, flipping halfway. This method works well, but they may not get as crispy. To keep zucchini fries crispy, follow these tips: - Use fresh zucchini. Older zucchinis have more moisture. - Cut evenly. Make sure all fries are about the same size. - Pat dry. After cutting, dry the zucchini with a towel to remove extra moisture. - Avoid overcrowding. Air needs space to circulate. Cook in batches if needed. - Spray lightly. Use cooking spray on the fries for added crispiness. Zucchini fries taste great with many sauces. Here are some popular choices: - Marinara sauce gives a classic touch. - Ranch dressing adds creaminess. - Garlic aioli offers a rich flavor. - Spicy mayo brings a kick. Feel free to mix and match your favorites! Zucchini fries are simple and fun to make. We covered the best ingredients, from basic choices to optional changes. I shared tips to achieve crispiness and avoid common mistakes. You can even explore seasoning variations or gluten-free options. In the end, enjoy your tasty, healthier fries. They will impress your friends and family. Happy air frying!

Air Fryer Parmesan Zucchini Fries Crispy and Tasty Snack

If you’re craving a crispy snack that’s both tasty and healthy, you’ve landed in the right spot! My Air Fryer

To make a Loaded Veggie Nacho Skillet, gather these core ingredients: - 2 cups crispy tortilla chips - 1 cup canned black beans, rinsed and drained - 1 cup sweet corn kernels (frozen or fresh) - 1 large red bell pepper, diced - 1 small red onion, finely diced - 1 fresh jalapeño, sliced (seeds removed) - 1 cup ripe diced tomatoes (fresh or canned) - 1 cup shredded cheese (cheddar or Monterey Jack) - 1 ripe avocado, diced - 1/4 cup fresh cilantro leaves, chopped - 1/4 cup sour cream or Greek yogurt - 1 teaspoon ground cumin - 1 teaspoon chili powder - Salt and black pepper to taste - Lime wedges for serving These ingredients form the base of your dish and bring together a mix of flavors and textures. I love to add extra toppings for more flavor and color. Here are some great options: - Sliced olives for a briny touch - Pickled jalapeños for added heat - Fresh lime juice for brightness - Freshly chopped green onions for crunch - Extra cilantro for a fresh finish These toppings let you customize your nachos to fit your taste. If you need to switch things up, here are some ideas: - Use pinto beans or kidney beans instead of black beans for a different taste. - Swap the cheese for a vegan cheese option for a dairy-free dish. - Try different peppers like green bell peppers or poblano for a unique flavor. - Use Greek yogurt instead of sour cream for a healthier option. These substitutions will keep your nacho skillet fresh and exciting. Start by washing and cutting your veggies. Dice one large red bell pepper into small pieces. Finely chop one small red onion. Slice one fresh jalapeño, removing the seeds if you want less heat. Rinse and drain one cup of canned black beans. If using fresh corn, cut it off the cob. You can use frozen corn too. Finally, chop one cup of ripe tomatoes. Gather all these ingredients to make cooking easier. Heat a little olive oil in a large, oven-safe skillet over medium heat. Add the diced onion and bell pepper. Sauté them for about 3-4 minutes until the onion turns soft and clear. Then, add the sliced jalapeño, black beans, corn, and diced tomatoes to the skillet. Sprinkle in one teaspoon of ground cumin and one teaspoon of chili powder. Season with salt and black pepper to taste. Cook this mix for 3-5 minutes until everything is warm and fragrant. Once the veggie mixture is ready, remove the skillet from the heat. Layer two cups of crispy tortilla chips evenly across the top of the veggies. This creates a nice base for your nachos. Then, sprinkle one cup of shredded cheese all over the chips. Choose cheddar or Monterey Jack cheese for the best melt. Now it’s time to bake! Carefully place the skillet in your preheated oven set to 400°F (200°C). Bake for 10-15 minutes until the cheese is melted and bubbly. Keep an eye on it to avoid burning. Once done, take the skillet out using oven mitts. Top your nachos with diced avocado and chopped cilantro. Serve hot with a dollop of sour cream or Greek yogurt and lime wedges on the side. Enjoy your delicious Loaded Veggie Nacho Skillet! For the best cheese melt, choose a mix of cheddar and Monterey Jack. These cheeses melt nicely and have great flavor. Shred your cheese fresh for the best results. Pre-shredded cheese often has additives that prevent smooth melting. Layer the cheese thickly over the chips. Bake until bubbly and slightly golden for that perfect melt. Spices bring your Loaded Veggie Nacho Skillet to life. Use ground cumin for warmth and chili powder for a bit of spice. Adjust the spice levels to your taste. You can add more chili powder if you like heat. A pinch of smoked paprika can add depth. Don't forget to season with salt and black pepper for balance. Presentation matters when serving this dish. Serve it right from the skillet for a rustic feel. Garnish with extra cilantro to add color. Place lime wedges on the side for a zesty touch. You can also drizzle sour cream or Greek yogurt in a swirl on top. This makes each bite look inviting and fresh. {{image_4}} To make this dish vegan, swap cheese with a plant-based option. Use vegan cheese that melts well. You can also replace sour cream with cashew cream or coconut yogurt. Both give a creamy taste without dairy. These swaps keep your nachos tasty and plant-friendly. If you want more protein, add cooked lentils or chickpeas. Both are great choices that blend well with the veggies. For a heartier meal, you might add grilled tofu or tempeh. These will enhance the texture and add nutrition without losing flavor. Cheese makes nachos special. While cheddar and Monterey Jack work great, try pepper jack for a spicy kick. Alternatively, use a blend of cheeses for more depth. A touch of feta can also add a tangy twist. Choose what you love best to make it your own! After enjoying your Loaded Veggie Nacho Skillet, store any extras in an airtight container. Let the dish cool to room temperature before sealing it. This helps keep the chips from getting soggy. Leftovers will stay fresh in the fridge for about 3 days. To reheat, place the nachos on a baking sheet. Preheat your oven to 350°F (175°C). Heat for about 10 minutes or until hot. This method helps keep the chips crispy. You can also use a microwave, but check the nachos every 30 seconds to avoid sogginess. You can freeze the veggie mix before adding the chips and cheese. Allow it to cool, then place it in a freezer-safe bag. Remove as much air as possible. It can last for up to 2 months. When ready to eat, thaw in the fridge overnight and bake as usual. Yes, you can use many types of beans. Black beans are great, but pinto or kidney beans work too. Each type adds a unique taste. You can even mix different beans for fun flavors. Just rinse and drain them well before adding to the skillet. If you want a change, try using veggie chips or pita chips. Both offer a crunchy base. You can also use baked tortilla strips for a lighter option. Even baked sweet potato slices can be a fun twist. Just make sure whatever you choose can hold the toppings! To add spice, include more jalapeños or use spicy cheese. You can also sprinkle in some crushed red pepper flakes. Another option is to add a dash of hot sauce to the veggie mix before baking. Adjust the spice to match your taste for a perfect kick! We explored how to make a delicious nacho skillet. You learned about key ingredients, tasty toppings, and ways to swap items for your needs. I shared easy steps to prep and cook the dish, plus tips for that perfect cheese melt. Variations for vegan and protein options were included. Finally, I covered how to store and reheat leftovers. Enjoy creating this dish, and let your taste buds guide you! Give it a try and impress everyone with your cooking.

Loaded Veggie Nacho Skillet Flavor-Packed Comfort Dish

Looking for a quick and tasty dish that brings comfort to your table? My Loaded Veggie Nacho Skillet is your

- 2 pounds beef chuck, cut into 1-inch cubes - 3 tablespoons olive oil - 1 large onion, diced - 3 cloves garlic, minced - 4 medium carrots, peeled and sliced - 3 medium potatoes, peeled and diced - 2 cups beef broth - 1 tablespoon Worcestershire sauce - 1 teaspoon dried thyme - 1 teaspoon dried rosemary - 1 bay leaf - Salt and freshly ground black pepper to taste - 1-2 tablespoons cornstarch for thickening - Fresh parsley for garnish When I make this beef stew, I love using beef chuck. It has a lot of flavor and becomes tender in the pot. Olive oil helps brown the beef. Dicing the onion adds sweetness. Garlic gives a nice kick. Carrots and potatoes bring heartiness to the stew. Beef broth is key for a rich base. Worcestershire sauce adds depth. Herbs like thyme and rosemary make the dish fragrant. Salt and pepper enhance all these flavors. For thickening, I sometimes use cornstarch. It can turn the broth into a nice sauce. Fresh parsley adds color and taste when I serve the stew. Each ingredient plays a role in making this dish warm and comforting. To start, gather your ingredients. You will need 2 pounds of beef chuck. Cut the beef into 1-inch cubes. This size helps it cook evenly. Next, prepare your vegetables. Dice 1 large onion and peel 4 medium carrots. Slice the carrots into rounds. Peel and dice 3 medium potatoes. Having everything ready makes cooking easier. Now, let’s cook! Set your Instant Pot to Sauté mode. Add 3 tablespoons of olive oil and let it heat. When the oil shimmers, add the beef cubes in batches. Brown the beef on all sides for about 5-7 minutes. This step adds flavor. Once browned, remove the beef and set it on a plate. Next, it’s time for the onions and garlic. In the same pot, add the diced onion. Sauté for 3-4 minutes until it’s soft. Then, add 3 cloves of minced garlic and cook for another 30 seconds. Be careful not to burn the garlic! Now, mix in the sliced carrots and diced potatoes. Stir them well to coat with the onion and garlic. After that, pour in 2 cups of beef broth and 1 tablespoon of Worcestershire sauce. Remember to scrape the bottom of the pot. This gets all the tasty bits! Return the browned beef to the pot. Sprinkle in 1 teaspoon of dried thyme, 1 teaspoon of dried rosemary, and 1 bay leaf. Add salt and pepper to taste. Stir everything together to combine. It's time to pressure cook! Secure the Instant Pot lid and turn the valve to the sealed position. Set it to Manual cooking on high pressure for 30 minutes. This step makes the beef tender and the flavors rich. After 30 minutes, let the pressure release naturally for about 10 minutes. This helps the stew stay moist. Then, switch to quick release for any remaining pressure. If you want a thicker stew, mix 1-2 tablespoons of cornstarch with cold water. Stir this into the stew and use the Sauté function until it thickens. Before serving, taste the stew. Adjust the seasoning with more salt and pepper if needed. Enjoy your hearty and simple beef stew! Adjust the seasoning to your taste. After cooking, taste the stew. If it needs more salt or pepper, add a bit more. Don't be shy to change it up. Scraping the browned bits from the pot is key. These bits hold a lot of flavor. Use a wooden spoon to get every last bit. This step makes your stew even better. For a thicker stew, use cornstarch. Mix 1-2 tablespoons of cornstarch with cold water to make a slurry. Stir this into the stew after cooking. Use the Sauté function to simmer it until thick. This helps create a nice, hearty texture. Serve the stew hot for the best taste. Deep bowls work well for serving. It keeps the stew warm and cozy. Pair it with crusty bread or rice. The bread is perfect for dipping in the savory broth. Enjoy every bite! {{image_4}} You can switch up the veggies in your beef stew. Try adding celery or peas for extra flavor and texture. These vegetables cook well and add a nice crunch. If you want a lighter option, substitute beef with chicken or turkey. Both proteins work great in this stew. Just remember, the cooking time may change slightly with chicken or turkey. If you don't have an Instant Pot, you can still enjoy this beef stew. Use a slow cooker instead. Just follow the same steps and cook on low for 6-8 hours. The meat will be very tender. You can also make it on the stovetop for a traditional stew. Brown the beef in a pot, then add all the ingredients. Simmer on low for about 2 hours, stirring occasionally. For those avoiding gluten, use gluten-free beef broth. It works just as well and keeps the stew delicious. You can also reduce salt by using low-sodium beef broth. This option helps control your sodium intake while still keeping your stew tasty. To keep your beef stew fresh, follow these tips: - Refrigeration: Let the stew cool down. Transfer it to a sealed container. It stays good for up to 3 days in the fridge. - Freezing: For long-term storage, use airtight containers or freezer bags. Label them with the date. Your stew can freeze well for up to 3 months. When reheating, aim to keep the flavor intact. Here are some methods: - Stovetop: Pour the stew into a pot. Heat it over medium-low heat. Stir often until warmed through. - Microwave: Place the stew in a microwave-safe bowl. Cover it loosely. Microwave in short bursts, stirring in between. This helps heat evenly. Yes, you can use frozen beef. First, you need to thaw it. The best way is to place it in the fridge overnight. If you are short on time, you can use the microwave to defrost it. Just be careful not to start cooking it. If the beef is still a bit frozen, increase the cooking time by about five minutes. This will help ensure everything cooks evenly. Beef stew can last up to three to four days in the fridge. Make sure to store it in an airtight container. This helps to keep the flavor fresh. If you want to keep it longer, consider freezing it. Frozen beef stew can last for about three months. Yes, you can double the recipe easily. Just make sure your Instant Pot is large enough to hold all the ingredients. You do not need to change the cooking time if you double it. The pressure cooking time stays the same. Just make sure to stir well to combine everything. This helps the flavors mix nicely. This blog post covered how to make a delicious beef stew using an Instant Pot. We discussed the key ingredients, including beef, vegetables, and spices. I shared step-by-step cooking instructions, tips for flavor, and ways to adjust the recipe. Remember, you can store leftovers and enjoy them for days. Experiment with variations to suit your taste. Whether you’ve made it before or are trying it for the first time, this stew is sure to be a hit. Enjoy your cooking journey!

Instant Pot Beef Stew Hearty and Simple Meal

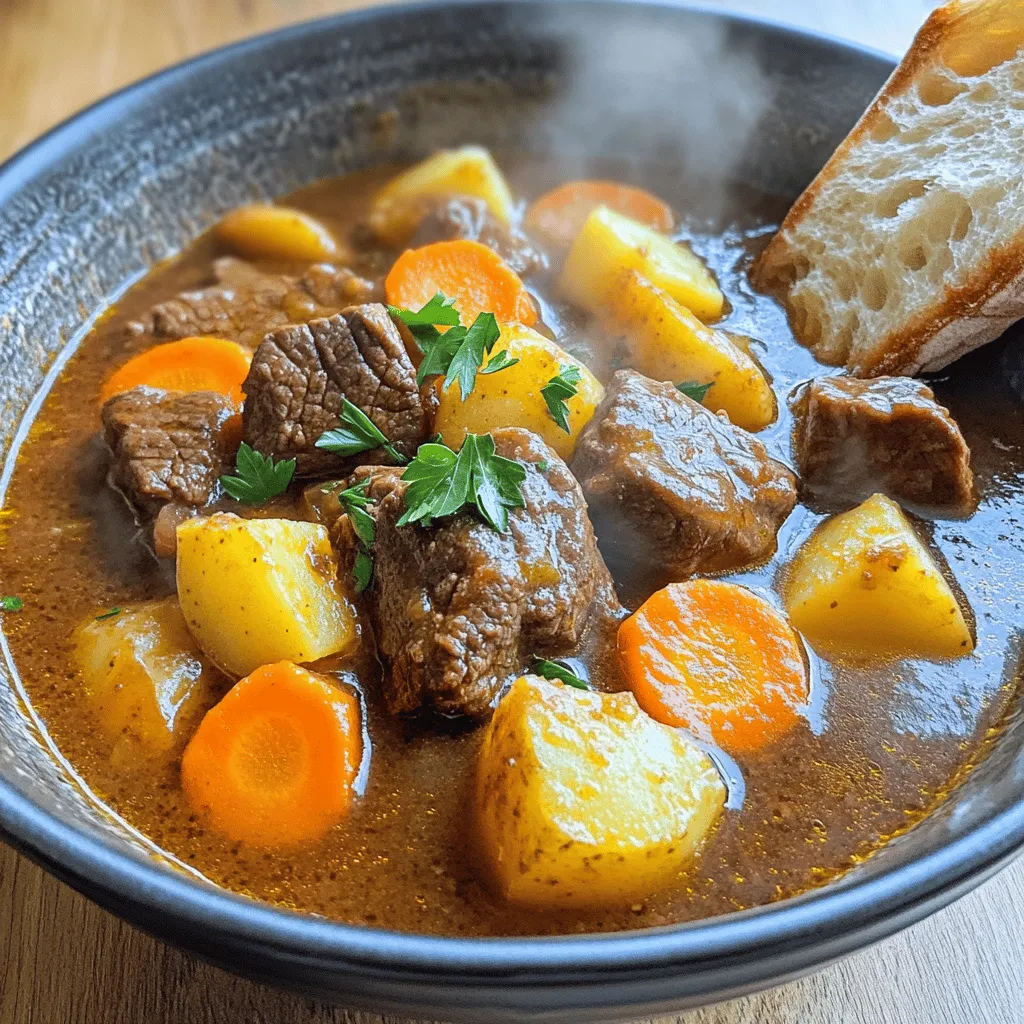
Looking for a warm, comforting dish that’s easy to make? I’ve got you covered with my Instant Pot Beef Stew

- 1 lb ground chicken or turkey - 1/4 cup breadcrumbs - 1 large egg - 2 cloves garlic, finely minced - 1 tablespoon fresh ginger, grated - 2 tablespoons fresh cilantro, finely chopped - 1 tablespoon fish sauce - 1 tablespoon red curry paste - Salt and freshly ground black pepper to taste - 1 can (13.5 oz) full-fat coconut milk - 1 cup vegetable broth The main ingredients in this dish create a rich flavor. Ground chicken or turkey brings protein. Use breadcrumbs to bind the meatballs. Garlic and ginger add depth to the flavor. Fresh cilantro brightens the dish. Fish sauce and red curry paste give it that classic Thai kick. Coconut milk and vegetable broth create a creamy, dreamy sauce. - 1 bell pepper (red or yellow), sliced into strips - 1 cup sugar snap peas, trimmed - Juice of 1 fresh lime For added color and crunch, include bell peppers and snap peas. These veggies not only taste great but also add nutrients. You can garnish with sesame seeds or crushed peanuts for extra texture. A squeeze of lime juice at the end brightens the entire dish. - Ground beef, pork, or plant-based protein as alternatives - Adjustments for gluten-free options with gluten-free breadcrumbs If you want to switch proteins, use ground beef or pork. Plant-based proteins also work well for a vegan option. For gluten-free diets, choose gluten-free breadcrumbs. This flexibility lets you enjoy this dish no matter your dietary needs. {{ingredient_image_2}} - In a large bowl, mix the ground chicken, breadcrumbs, egg, garlic, ginger, cilantro, fish sauce, red curry paste, and a pinch of salt and pepper. Combine until no dry crumbs remain. - Use your hands to shape the mixture into small meatballs, about 1 inch wide. Place them on a tray, ensuring they don't touch. - Heat olive oil in a large skillet over medium heat. When the oil shimmers, add the meatballs, giving them space. - Sear the meatballs for 5-7 minutes. Turn them to ensure they brown evenly on all sides. Once golden, remove them from the skillet and set aside. - In the same skillet, lower the heat slightly. Pour in the coconut milk and vegetable broth, stirring gently to mix. - Add the sliced bell pepper and sugar snap peas, stirring to combine. Bring the sauce to a gentle simmer. - Return the meatballs to the skillet, ensuring they are submerged in the sauce. Let it simmer for 10-15 minutes until the meatballs cook through and the sauce thickens slightly. This method creates a rich, flavorful dish that is easy to make. Enjoy the vibrant taste of Thai coconut curry! To make your Thai coconut curry meatballs truly pop, consider adding spices like cumin, coriander, and turmeric. These will give your dish warmth and depth. Fresh lime juice plays a big role, too. It adds brightness and balances the rich coconut milk. Squeeze it in just before serving for the best flavor. When cooking your meatballs, make sure your skillet is hot but not smoking. This helps achieve a nice golden crust. Cook them in batches if needed, so they don't crowd the pan. This ensures even cooking. Flip them gently to avoid breaking apart. Serve your meatballs over a bed of fluffy jasmine rice or alongside soft rice noodles. This pairs well with the creamy curry sauce. For a pop of color and flair, garnish with fresh cilantro and a sprinkle of sesame seeds. A lime wedge on the side not only adds color but also allows guests to customize their dish with a splash of fresh juice. Pro Tips Use Fresh Herbs: Fresh cilantro adds a bright flavor that enhances the dish, so don't skip it. Consider adding some fresh basil for a unique twist. Control the Spice Level: Adjust the amount of red curry paste according to your heat preference. Start with a smaller amount and taste before adding more. Perfect Meatballs: Ensure your meat mixture is well combined but avoid overmixing, which can lead to dense meatballs. A light hand is key! Thickening the Sauce: If the sauce is too thin, let it simmer uncovered for a few additional minutes to allow it to thicken naturally. {{image_4}} You can make this dish lighter and still tasty. Start by using leaner proteins like ground turkey or chicken breast. These options cut down on fat but keep the flavor. Adding more vegetables is another great choice. Consider using zucchini, carrots, or broccoli. These veggies boost nutrition and add color to your plate. You can also sneak in leafy greens like spinach for extra health benefits. Want to change the taste? You can easily switch up the curry paste. Try green or yellow curry paste for a different kick. Each paste brings its own unique flavor. You can also alter the broth. Swap vegetable broth for chicken broth for a richer taste. If you like, add a splash of soy sauce or tamari for depth. These small changes can make a big difference in flavor. If you want a vegan version, you can replace the meatballs. Use mashed chickpeas or lentils mixed with breadcrumbs. Add spices and fresh herbs to keep them tasty. For gluten-free options, use gluten-free breadcrumbs. Most curry pastes are gluten-free, but always check the label. This way, everyone can enjoy the dish without worry. To store leftovers, cool the meatballs and sauce first. Use an airtight container. Keep them in the fridge for up to three days. This helps maintain their taste and texture. For freezing, place the meatballs and sauce in freezer-safe bags. Remove as much air as you can to prevent freezer burn. You can freeze them for up to three months. When ready to eat, thaw in the fridge overnight. You can reheat on the stovetop or in the microwave. On the stovetop, heat gently over low heat. Stir often to avoid burning. In the microwave, use a microwave-safe dish. Cover it loosely to keep moisture in. Heat in short bursts, stirring in between, to ensure even heating. If your meatballs fall apart, don’t worry! Here are some tips: - Add more breadcrumbs: This helps bind the mixture. - Use a binder: An extra egg can help hold them together. - Chill the mixture: Letting it sit in the fridge for 30 minutes can help firm it up. - Don't overmix: Mix just until combined. Overmixing can make them crumbly. These steps should help you create meatballs that hold their shape. Absolutely! You can swap the ground chicken for: - Ground turkey: A lean option that works well. - Beef or pork: For a richer flavor. - Plant-based meat: If you want a vegetarian version. Each type of meat will give a different taste, so feel free to experiment! To spice things up, try these tips: - Add more red curry paste: A little goes a long way! - Incorporate fresh chili: Sliced Thai chilies can add heat. - Use spicy coconut milk: Some brands offer spicy versions. - Sprinkle red pepper flakes: Add them just before serving for a kick. Adjust these to your taste and enjoy the heat! In this post, we explored how to make tasty meatballs in curry sauce. We covered the main and optional ingredients, and even discussed substitutes. You learned step-by-step instructions for preparing, cooking meatballs, and making a flavorful sauce. I provided helpful tips, variations for health needs, and storage advice. This recipe lets you customize it to your taste while being easy to prepare. I'm excited for you to try it out!

Thai Coconut Curry Meatballs Flavorful and Simple Dish

Are you craving a dish that is both bold and easy to make? Look no further than Thai Coconut Curry

- 2 servings of ramen noodles - 1 tablespoon sesame oil Ramen noodles are the star of this dish. They cook fast and soak up flavors well. You can use any type of ramen you like. I prefer fresh noodles for a great texture. The sesame oil adds a lovely nutty taste and aroma. - 1 cup broccoli florets - 1 bell pepper, thinly sliced (any color) - 1 cup snap peas - 1 medium carrot, cut into thin julienne strips - 2 green onions, finely sliced - Fresh cilantro for garnish (optional) Fresh vegetables make this dish colorful and crunchy. Broccoli adds a nice bite, while bell peppers bring sweetness. Snap peas offer a crisp texture, and carrots give a pop of color. Green onions add a mild onion flavor. If you like, sprinkle fresh cilantro on top for an extra herbaceous touch. - ¼ cup low-sodium soy sauce - 1 tablespoon honey or maple syrup - 1 teaspoon chili flakes (optional, for heat) - 2 tablespoons sesame seeds The soy sauce gives a savory base. Honey or maple syrup adds sweetness and balances the saltiness. Add chili flakes for a kick if you enjoy heat. Finally, sesame seeds add crunch and a nutty flavor to finish. {{ingredient_image_2}} Start by bringing a large pot of water to a full boil. Once boiling, add 2 servings of ramen noodles. Cook them for 3 to 4 minutes or until soft. After cooking, drain the noodles in a colander. Rinse them quickly under cold water to stop them from cooking more. Set the noodles aside for later. Next, take a large skillet or wok and heat 1 tablespoon of sesame oil over medium heat. Add 1 tablespoon of finely grated ginger and 2 minced garlic cloves. Stir constantly for about 1 minute. You want them to become fragrant and a light golden color. Now it's time to add the veggies. Carefully add 1 cup of broccoli florets, 1 sliced bell pepper, 1 cup of snap peas, and 1 thinly julienned carrot to the skillet. Stir-fry these on medium-high heat for about 5 to 7 minutes. Look for vibrant colors and a slight crunch in the veggies. In a small bowl, mix together ¼ cup of low-sodium soy sauce, 1 tablespoon of honey or maple syrup, and 1 teaspoon of chili flakes if you want some heat. Pour this sauce over the cooked vegetables in the skillet. Mix well to coat all the veggies evenly. Gently add the cooked ramen noodles into the skillet with the veggies. Use tongs to toss everything together. Make sure the noodles get fully coated in the sauce and heated through, which should take about 2 to 3 minutes. Once done, take the skillet off the heat. Top your stir-fry with 2 sliced green onions and 2 tablespoons of sesame seeds. If you like, add fresh cilantro for a nice garnish. To boost the taste of your sesame ginger ramen stir-fry, focus on your ingredients. Use fresh ginger and garlic for a vibrant flavor. You can also add a splash of rice vinegar for acidity. If you like heat, sprinkle in extra chili flakes. A squeeze of lime juice at the end adds brightness. Experiment with different vegetables for a unique twist. Stir-frying is all about high heat and quick cooking. Start with a hot skillet or wok. This helps to sear the vegetables and keep them crunchy. Stir constantly to prevent burning. Keep your ingredients cut evenly for even cooking. Always add denser veggies, like carrots and broccoli, first. This ensures they cook through while others stay crisp. Serve your stir-fry in deep bowls. This helps keep the noodles and veggies in place. Top with sliced green onions and sesame seeds for a nice touch. For extra flavor, add fresh cilantro. You can also serve lime wedges on the side. This allows everyone to add a zest that brightens the dish. Enjoy your meal with chopsticks for a fun experience! Pro Tips Prep Your Ingredients First: Before you start cooking, make sure to chop all your vegetables and measure out your sauces. This will streamline the cooking process and ensure that everything cooks evenly. Customize Your Vegetables: Feel free to substitute vegetables based on what you have on hand or prefer. Zucchini, mushrooms, and spinach are great alternatives that will still work well in this dish. Adjust the Spice Level: If you're sensitive to heat, start with a smaller amount of chili flakes and gradually increase to your taste. You can also omit them entirely for a milder flavor. Make It a Meal: To turn this dish into a complete meal, consider adding some protein like chicken, tofu, or shrimp. Just cook the protein first, then add it before mixing in the noodles. {{image_4}} You can add protein to your stir-fry for more nutrition. Here are some options: - Chicken: Cook diced chicken breast until it’s golden. - Tofu: Use firm tofu, cubed and sautéed until crispy. - Shrimp: Add shrimp when you cook the veggies until pink. - Beef: Thinly slice beef and cook it fast for a tender result. Each of these proteins gives a different flavor and texture. Just cook them before adding veggies to the pan. Feel free to change up the veggies based on what you have. Here are some ideas: - Zucchini: Cut into half-moons for a fresh crunch. - Mushrooms: Use sliced mushrooms for a rich, earthy taste. - Spinach: Add fresh spinach at the end for quick wilting. - Cauliflower: Use florets for a hearty bite. These swaps keep the dish exciting and tailored to your tastes. You can easily change the sauce to suit your flavor goals. Here are some fun ideas: - Spicy: Add more chili flakes or some sriracha. - Sweet: Increase honey or maple syrup for extra sweetness. - Savory: Mix in a bit of oyster sauce for depth. - Tangy: A splash of rice vinegar gives a nice zing. Try these variations to create your own version of sesame ginger ramen stir-fry! You can store leftover sesame ginger ramen stir-fry in an airtight container. Keep it in the fridge for up to three days. Make sure to let it cool down before sealing the container. This helps keep the food fresh and safe. To reheat the stir-fry, put it in a skillet over medium heat. Add a splash of water or a bit of sesame oil. Stir regularly until heated through. You can also use the microwave. Place it in a microwave-safe bowl, cover it, and heat in short bursts of 30 seconds. Stir in between to ensure even heating. If you want to freeze the stir-fry, place it in a freezer-safe container. It will last for about two months in the freezer. To defrost, transfer it to the fridge overnight. Reheat as mentioned before for the best flavor and texture. Avoid freezing if you have added fresh herbs, as they lose quality when frozen. Yes, you can use other types of noodles. Try rice noodles or soba noodles. Both can add different textures and flavors. Cook them according to package instructions. Drain and rinse them just like ramen. This way, they won’t stick together. To make this dish vegetarian, skip the honey. Use maple syrup instead. All the veggies are already plant-based. If you want, add tofu for protein. Just sauté the tofu until golden before adding it to the mix. If you don’t have sesame oil, use olive oil or canola oil. They work well in stir-frying. You can also add a bit of toasted sesame seeds for flavor. This will give you a hint of that nutty taste. This stir-fry lasts about three days in the fridge. Store it in an airtight container. Reheat it on the stove or microwave. Add a splash of water to keep it moist when reheating. Enjoy your tasty leftovers! You now have all the steps to create a delicious stir-fry with ramen. We covered the key ingredients, cooking methods, and helpful tips to boost flavor. Mixing in different proteins or veggies can tailor the dish to your taste. Proper storage will keep your meals fresh and ready to enjoy later. Experiment and have fun in the kitchen with your new skills. Each meal can be unique and satisfying! Enjoy your tasty creations.

Sesame Ginger Ramen Stir-Fry Quick and Easy Recipe

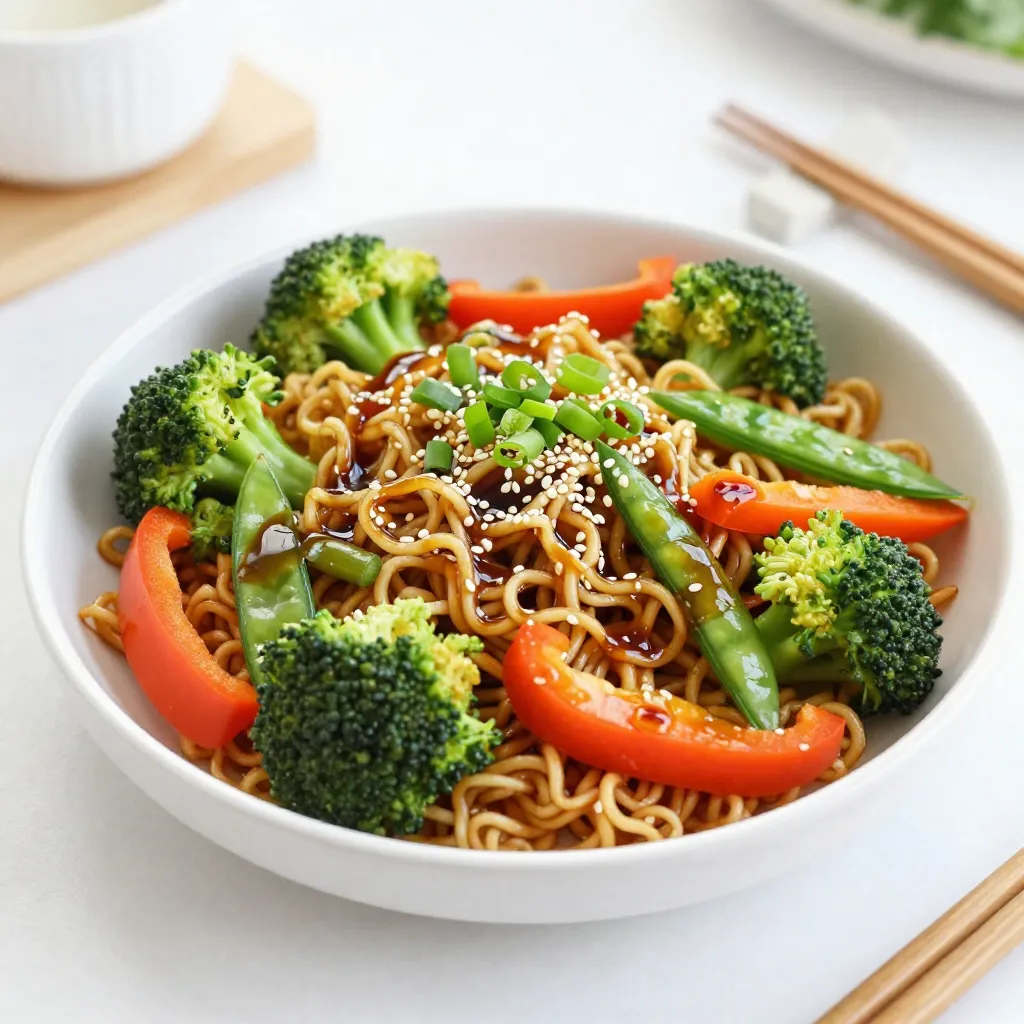
Looking for a quick and tasty dinner idea? My Sesame Ginger Ramen Stir-Fry is here to brighten your weeknight meals!

Older posts
Newer posts
← Previous Page1 … Page10 Page11 Page12 … Page86 Next →

dsad

© 2026 yumymoments • Built with GeneratePress

Our Policies

  • Copyright Policy
  • Cookie Policy
  • GDPR Policy
  • Privacy Policy
  • Disclaimer
  • Terms Of Use

More Information

  • Home
  • About
  • Contact
  • Appetizers
  • Dessert
  • Dinner
  • Drinks
©2026, yumymoments About Back To Top