Skip to content
DisclaimerTerms Of UseGDPR PolicyCookie Policy

yumymoments

  • Home
  • Drinks
  • Appetizers
  • Dinner
  • Dessert
  • About
  • Contact
  • Privacy Policy
DisclaimerTerms Of UseGDPR PolicyCookie Policy

NO-ING-IMG

- Apples: Use 2 large apples. I recommend Granny Smith or Honeycrisp. They add tartness and sweetness. - Sweetener Options: Use 1/4 cup light brown sugar. You can also try maple syrup or honey for a twist. - Pie Crust Choices: You can use pre-made pie crusts. They save time and taste great. If you want to make your own, a simple dough works well too. Using the right ingredients makes a big difference. Fresh apples bring flavor and texture. Brown sugar adds a nice depth. Pre-made crusts are quick and easy. Enjoy these tips as you prepare your apple pie cups! - Prepping the apples: Start by peeling and dicing two large apples, like Granny Smith or Honeycrisp. These apples give the best taste. Place the diced apples in a mixing bowl. Add one tablespoon of freshly squeezed lemon juice. This helps keep the apples bright and fresh. Next, sprinkle in one teaspoon of ground cinnamon and a 1/4 teaspoon of freshly grated nutmeg. These spices add warmth and flavor. Then, mix in 1/4 cup of light brown sugar and one tablespoon of cornstarch. The sugar sweetens and the cornstarch helps thicken the filling. Toss it all gently until the apples are well-coated. Set this mixture aside to marinate for a bit. - Rolling out the pie crust: Take your pre-made pie crusts. You will need one package that has two crusts. Dust a clean surface lightly with flour to stop the dough from sticking. Roll out each crust to about 1/8-inch thick. This thickness helps the cups bake evenly. Using a round cutter or a glass, cut circles that are about 3-4 inches in diameter. This size fits perfectly into a muffin tin. - Assembling the cups: Place each dough circle gently into the cups of a muffin tin. Press down lightly to form little cups. Make sure the dough hugs the sides. Now, fill each cup generously with the apple mixture. Pack the apples in lightly to fit them well, but don't overfill. If you have leftover dough, cut it into small strips to create a cute lattice on top. Alternatively, you can cut slits for steam to escape. Brush the tops with a beaten egg for a golden finish. Once you have assembled everything, your apple pie cups are ready to bake! Choosing the right apples for optimal flavor For the best apple pie cups, use Granny Smith or Honeycrisp apples. These apples stay firm and have a tasty balance of sweet and tart. You want apples that will hold their shape while baking, so avoid mushy varieties. Tips for a flaky crust: Avoiding sogginess To keep your crust flaky, avoid overworking the dough. When rolling it out, use just enough flour to prevent sticking. Always preheat your oven to 375°F before baking your cups. This helps the crust crisp up properly. Ensuring even baking: How to check for doneness Watch for golden brown edges on your pie cups. After 20 minutes, peek inside. The apple filling should bubble slightly. If it looks too pale, let it bake a few more minutes. Use a toothpick to check the apples; they should be tender but not mushy. {{image_4}} You can make your apple pie cups even better with a few easy changes. - Adding nuts or dried fruits: Try mixing in chopped walnuts or pecans for crunch. You can also add dried cranberries or raisins for a sweet twist. These additions bring texture and extra flavor to your cups. - Spice it up: Alternatives to cinnamon and nutmeg can add new flavor notes. Consider using allspice for a warm taste or cardamom for a unique zing. You could also add a bit of ginger for a spicy kick that pairs well with apples. - Different toppings: Toppings can make your dessert shine. A drizzle of caramel sauce adds sweetness and richness. If you love cream, a dollop of whipped cream is light and fluffy. You could even serve with vanilla ice cream for a warm and cold contrast that is hard to resist. These easy changes let you create your perfect apple pie cups. Enjoy experimenting with flavors! To keep your apple pie cups fresh, follow these tips: - Best practices for refrigeration and freezing: Store your cups in an airtight container. They stay fresh in the fridge for up to three days. If you want to freeze them, wrap each cup tightly in plastic wrap, then put them in a freezer bag. They can last up to three months in the freezer. - Reheating tips: How to maintain crisp crust: To reheat, place them in a preheated oven at 350°F (175°C) for about 10-15 minutes. This helps keep the crust crisp. Avoid using the microwave; it can make the crust soggy. - Shelf life: How long they stay fresh: When stored properly, apple pie cups last for three days in the fridge. If frozen, they remain good for three months. Once defrosted, eat them within a day or two for the best taste. Can I make this recipe vegan? Yes, you can make this recipe vegan. Use a plant-based pie crust instead of the pre-made one. You can skip the egg wash or use a mixture of plant milk and a bit of flour to brush on top. For the filling, all the ingredients are naturally vegan. How can I make mini versions of apple pie cups? To make mini versions, use a mini muffin tin instead of a standard one. Roll out the dough thinner and cut smaller circles. This will help you fit the dough into the tiny cups. Fill them with the same apple mixture, and bake just a few minutes less. What can I substitute for cornstarch in the recipe? You can use flour or arrowroot powder as a substitute for cornstarch. Both options work well to thicken the filling. Use about 1 tablespoon of flour or arrowroot powder for each tablespoon of cornstarch. This will keep your filling thick and delicious. You learned how to make great apple pie cups. We covered ingredients, preparation, and cooking tips. Don't forget about the fun variations and storage methods. Experimenting with flavors will enhance your dessert. Follow these steps to impress your friends and family. Enjoy your delicious creations and share them. Happy baking!

Irresistible Apple Pie Cups Easy Recipe to Enjoy

Are you ready to bake something delicious? These Irresistible Apple Pie Cups are super easy to make and perfect for

Chia seeds are tiny powerhouses. They soak up liquid and grow in size. This makes the pudding thick and creamy. They also add fiber and protein to the dish. Each serving gives you energy and helps keep you full. You will need 1/2 cup of chia seeds for this recipe. Coconut milk adds a rich flavor to the pudding. You can choose between canned or carton coconut milk. Canned coconut milk is thicker and creamier. It works well for a rich taste. Carton coconut milk is lighter and often has added water. It is great if you want a less heavy pudding. For this recipe, use 2 cups of coconut milk. Sweeteners can change the taste of your pudding. Maple syrup gives a warm flavor. It has antioxidants and is vegan-friendly. Honey adds a floral sweetness and has natural health benefits. You can use either, but I suggest starting with 2 tablespoons. Adjust the amount to match your taste. A pinch of salt helps balance the sweetness, making each bite delightful! {{ingredient_image_2}} To start, grab a large mixing bowl. Add the chia seeds, coconut milk, maple syrup (or honey), vanilla extract, and a pinch of salt. Whisk it all together until everything blends well. You want no clumps left. This mixture needs to be creamy and smooth. After whisking, let the mixture rest for about 5 minutes. This step is key. The chia seeds will soak up some of the liquid. After the time is up, whisk again to break up any clumps. This makes sure your pudding stays nice and smooth. Next, cover the bowl with plastic wrap or use a jar with a tight lid. Place it in the fridge for at least 4 hours, but overnight is best. This chilling time allows the chia seeds to swell. They turn into a creamy, pudding-like texture that tastes amazing. If you need to, stir in more coconut milk later to get the right thickness. To get the right texture, start with the right chia seed amount. Use 1/2 cup of chia seeds for every 2 cups of coconut milk. This ratio gives you a thick, creamy pudding. If your pudding is too thick, just stir in more coconut milk. If it's too runny, add a bit more chia seeds. Let it rest for five minutes before whisking again. This allows the seeds to absorb the liquid. For a beautiful presentation, layer the pudding in clear glasses. Start with a spoonful of pudding, then add diced mango. Repeat the layers. This shows off the colors and makes it look fancy. Top each glass with fresh mint leaves and extra mango pieces. This adds a pop of color and a refreshing taste. One common mistake is not whisking well enough. Make sure to whisk the mixture thoroughly to avoid clumps. Another mistake is skipping the resting time. Allow the pudding to sit for at least four hours or overnight. This helps the chia seeds swell properly. Lastly, don’t forget to taste it! Adjust the sweetness with more maple syrup or honey if needed. Pro Tips Tip for Perfect Texture: To achieve the best pudding consistency, ensure that you whisk the mixture well after adding the chia seeds and again after resting. This prevents clumps from forming. Tip for Sweetness: Adjust the amount of maple syrup or honey based on the sweetness of your mango. Taste the mixture before refrigerating to find your perfect balance. Tip for Serving: For an elegant presentation, consider layering your chia pudding with the diced mango in clear glasses to showcase the vibrant colors. Tip for Flavor Boost: Add a pinch of cardamom or a splash of lime juice to the pudding for a unique flavor twist that complements the mango and coconut beautifully. {{image_4}} You can mix things up with your mango coconut chia pudding. Try using other fruits. Berries like strawberries, blueberries, or raspberries add a burst of color and taste. Bananas bring a creamy texture. Pineapple chunks give a tropical twist. You can even combine fruits for a fun surprise. Just remember to keep your fruit fresh and ripe for the best flavor. This recipe is already dairy-free and vegan, thanks to coconut milk. If you want even more options, use almond milk or oat milk. Both add a nice flavor without dairy. Make sure to check that any sweetener you use is vegan if that matters to you. You can boost the flavor of your pudding with some extras. A dash of cinnamon or nutmeg can add warmth. For a chocolate kick, mix in cocoa powder. If you like nuts, sprinkle in some chopped almonds or walnuts for crunch. You can also add a spoonful of nut butter for creaminess. These additions make your pudding even more exciting and tasty! To store leftover mango coconut chia pudding, use a clean container. Make sure it has a lid to keep air out. Place the pudding in the fridge right away. This helps keep it fresh and tasty. I suggest using glass jars or plastic containers with tight lids. Glass jars let you see the pudding. They also keep it fresh longer. If you use plastic, ensure it is BPA-free. This choice is safer for your health. The chia pudding lasts about 3 to 5 days in the fridge. After that, check for signs of spoilage. Look for changes in smell, color, or texture. If it smells sour or looks watery, it’s best to toss it. Always trust your senses when deciding if food is still safe to eat. Yes, you can use regular milk if you prefer. However, coconut milk gives a rich taste. It also adds a nice tropical flavor. If you want a lighter pudding, try almond or oat milk. These options work well too. Just remember, the texture may change a bit. The chia pudding lasts about 4 to 5 days in the fridge. Make sure to store it in a tight container. This helps keep it fresh. If you see any changes in color or smell, it’s best to throw it out. Always check before you eat. Yes, this recipe is perfect for meal prep. You can make it ahead of time. Just prepare the pudding and store it in jars. It’s a great grab-and-go breakfast or snack. You can also layer it with mango just before serving. This keeps it looking fresh and tasty! Chia pudding is easy to make with just a few key ingredients. We talked about the benefits of chia seeds, choosing coconut milk, and the best sweeteners. The right steps and tips help you create a smooth pudding, while variations let you get creative with flavors. Proper storage keeps your leftovers fresh. Always check common questions to avoid mishaps. Enjoy experimenting with this tasty treat!

Mango Coconut Chia Pudding Tasty and Healthy Delight

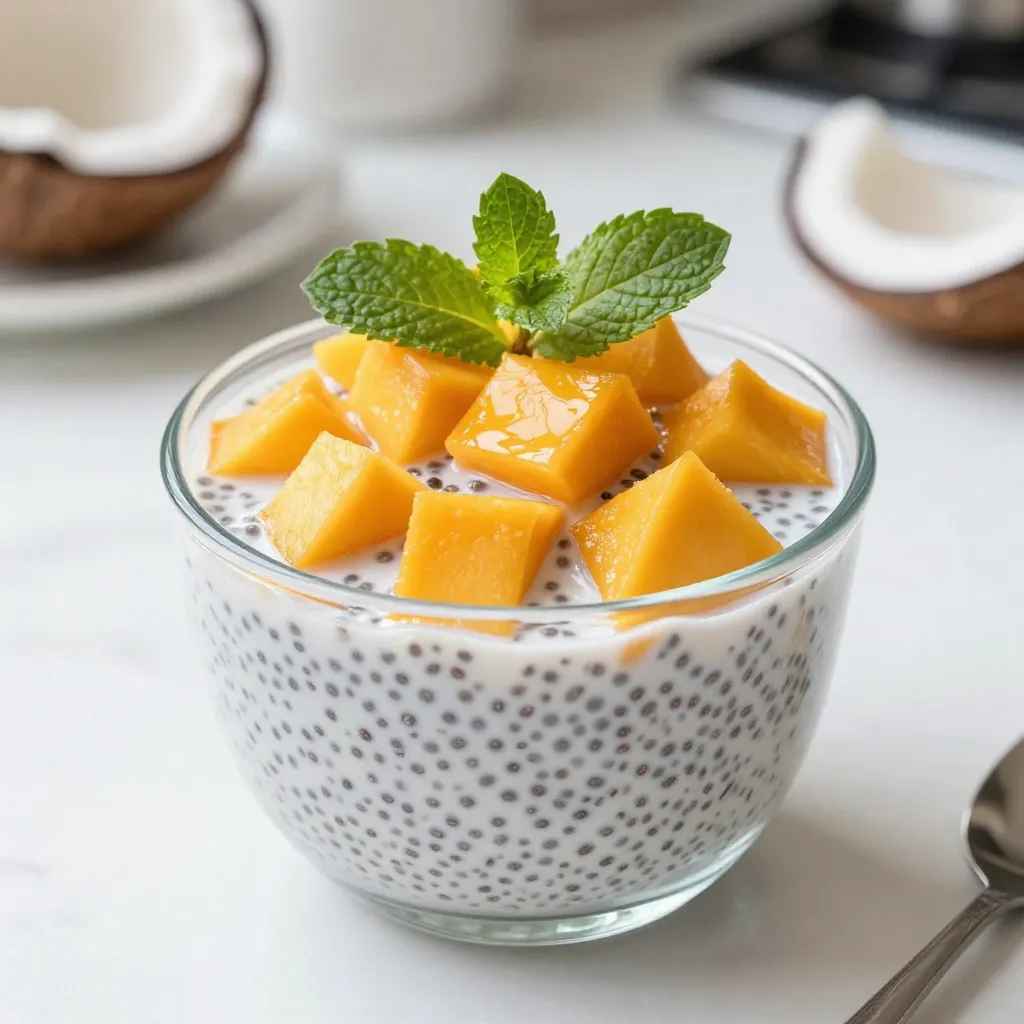
Welcome to a world of flavor and health with my Mango Coconut Chia Pudding! This tasty treat is not just

To make this delightful cake, you will need: - 2 cups all-purpose flour - 1 ½ cups granulated sugar - ½ cup unsalted butter, softened - 1 cup crushed pineapple (with juice) - 3 large eggs - 1 teaspoon baking powder - 1 teaspoon baking soda - ½ teaspoon salt - 1 teaspoon vanilla extract - ½ teaspoon coconut extract - 1 cup shredded coconut (sweetened) - ½ cup chopped pecans (optional) These ingredients create a sweet and moist cake that shines with tropical flavor. While the main ingredients shine, you might want to mix it up. Consider adding: - Chopped walnuts instead of pecans for a different crunch - A splash of rum extract for a festive twist - A layer of cream cheese frosting for extra richness Feel free to get creative and explore what flavors you love! To whip up this cake, gather these tools: - 9x13 inch baking pan - Electric mixer for quick mixing - Mixing bowls for easy prep - Measuring cups and spoons for accuracy - Spatula to spread the batter Having the right equipment makes the process smooth and fun. 1. Start by heating your oven to 350°F (175°C). 2. Grease and flour a 9x13 inch baking pan. This helps the cake release easily. 3. In a big bowl, mix the softened butter and granulated sugar. Use an electric mixer. Beat until it is light and fluffy. This takes about 3-5 minutes. 4. Add the eggs one at a time. Mix well after each egg. This makes the batter smooth. 5. Fold in the crushed pineapple with its juice. Add the vanilla and coconut extracts. Mix until just combined. 1. In another bowl, whisk together the flour, baking powder, baking soda, and salt. This helps spread the leavening agents evenly. 2. Gradually add the dry mix to the wet mix. Mix gently after each addition. Stop when no dry flour is left. 3. Fold in the shredded coconut and chopped pecans if you're using them. Make sure they are mixed well. 4. Pour the batter into the prepared pan. Use a spatula to even it out. 5. Place the pan in the oven. Bake for 35-40 minutes. Check if it's done by inserting a toothpick in the center. It should come out clean or with some crumbs. 1. Once done, take the cake out of the oven. Let it cool in the pan for 20 minutes. 2. After 20 minutes, move the cake to a wire rack to cool completely. 3. Once cool, sprinkle extra shredded coconut on top for a nice touch. 4. Serve slices with fresh pineapple or whipped cream for a real treat! When making Pineapple Heaven Cake, avoid these common mistakes: - Overmixing the batter: This can make the cake tough. Mix just until you see no dry flour. - Not measuring ingredients: Use accurate measurements for best results. - Skipping the greasing step: Grease and flour the pan well. This helps remove the cake easily. - Not testing for doneness: Use a toothpick to check if the cake is done. To get that perfect fluffy texture: - Cream butter and sugar well: Beat until light and fluffy, about 3-5 minutes. - Add eggs slowly: Add one egg at a time, mixing well after each. - Fold gently: When adding dry ingredients, fold gently to keep air in the batter. - Bake at the right temperature: Make sure your oven is set at 350°F (175°C). You can boost the flavor of your cake with a few extras: - Coconut extract: Adds a nice tropical touch. - Chopped pecans: Adds a lovely crunch and depth of flavor. - Fresh fruit: Try adding diced mango or banana for a fruity twist. - More coconut: Top the cake with extra shredded coconut after baking. By following these tips, you can create a Pineapple Heaven Cake that delights every palate! {{image_4}} You can make Pineapple Heaven Cake even better by adding more fruit. Tropical fruits like mango, banana, or papaya add a fresh twist. Simply chop the fruit into small pieces and mix them into the batter. This adds flavor and texture. Do not add too much, or the cake might not bake well. About one cup of chopped fruit works great. If you need a gluten-free cake, you can swap the flour. Use a gluten-free all-purpose blend instead. Many blends work well in baking and taste great. Check that your blend has xanthan gum, which helps with texture. Follow the same mixing steps as in the original recipe. The cake will still be soft and delicious. To make this cake vegan, you can replace the eggs and butter. Use a flax egg for each egg. Just mix one tablespoon of ground flaxseed with three tablespoons of water. Let it sit for a few minutes to thicken. For the butter, use a vegan butter substitute. This keeps the cake moist and fluffy. Your friends won’t even notice it’s vegan! To keep your Pineapple Heaven Cake fresh, you should store it properly. First, let the cake cool completely. Then, wrap it tightly in plastic wrap or foil. You can also place it in an airtight container. This helps to keep moisture in and prevents drying out. Store the cake at room temperature for up to three days. For longer storage, move it to the fridge. It can last for about a week in the fridge. If you want to freeze your cake, it's easy to do. After cooling, slice the cake into individual pieces. Wrap each piece tightly in plastic wrap. Then place them in a freezer bag or container. Make sure to label the bag with the date. The cake can stay good for up to three months in the freezer. When you're ready to eat, just thaw it in the fridge overnight. To reheat your cake, take it out of the fridge or freezer. If it's frozen, let it thaw first. Once thawed, place a slice in the microwave for about 15-20 seconds. If you want it warm but not hot, this works great. You can also reheat it in the oven. Preheat the oven to 350°F (175°C). Wrap the cake in foil and heat for about 10-15 minutes. This way, it stays moist and delicious. Enjoy your tasty treat! You can know the cake is done by using a toothpick. Insert it into the center of the cake. If it comes out clean or has a few moist crumbs, the cake is ready. It usually takes about 35 to 40 minutes to bake. If it needs more time, check every few minutes. Yes, you can use fresh pineapple! Just chop it into small pieces and crush it. Make sure to add the juice too. This will give your cake a fresh taste. Fresh pineapple adds a nice texture and flavor to the cake. Some great ways to serve this cake include topping it with more shredded coconut. You can also add fresh pineapple wedges on the side. A dollop of whipped cream can make it even better. These toppings add a tropical touch and enhance the flavors. At room temperature, Pineapple Heaven Cake can last for up to three days. Make sure to cover it well to keep it fresh. If you want it to last longer, store it in the fridge. This will keep it good for about a week. In summary, we explored the key ingredients and steps to make Pineapple Heaven Cake. You learned about optional variations, tools needed, and tips for perfecting your bake. With proper storage and reheating, you can enjoy this treat longer. Remember, adjustments like gluten-free and vegan options ensure everyone can enjoy a slice. Baking is fun and rewarding. You can create delicious memories with Pineapple Heaven Cake.

Pineapple Heaven Cake Delightful and Easy Recipe

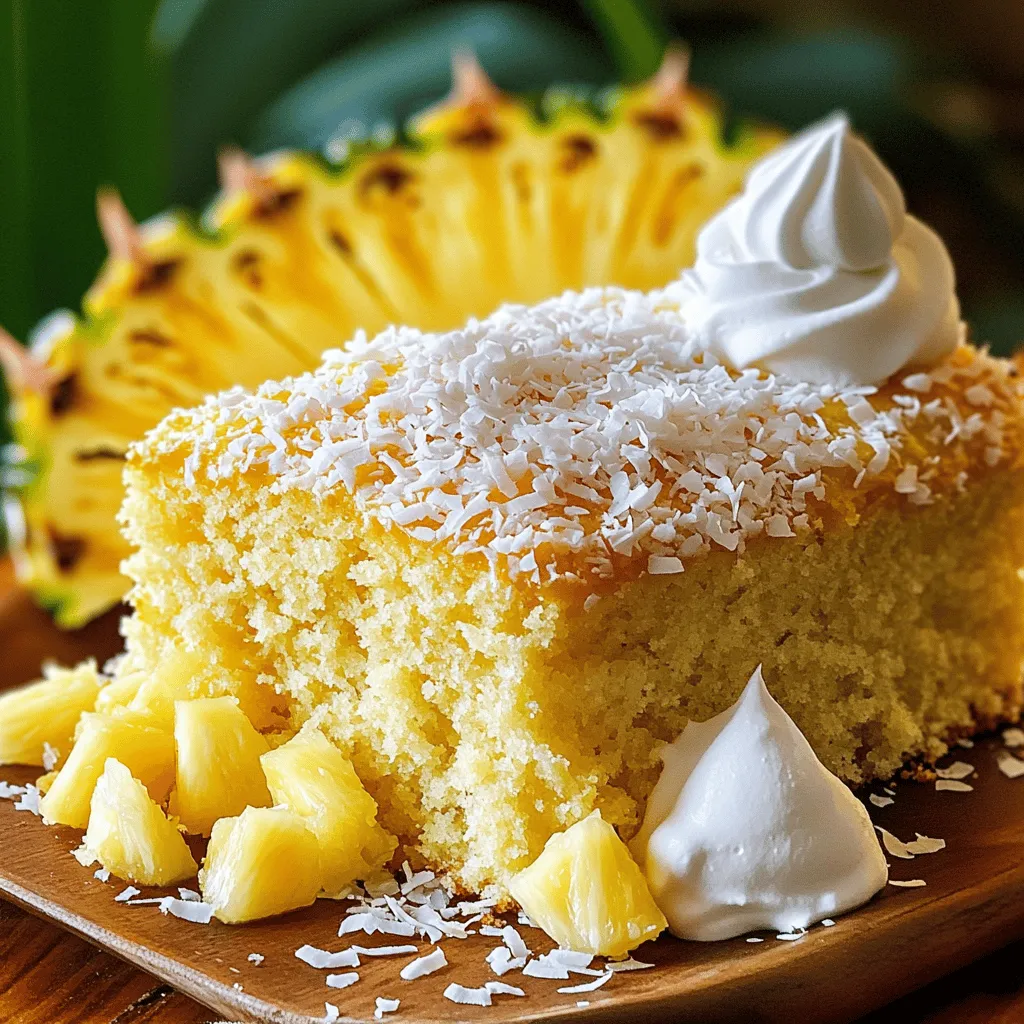
If you crave a sweet treat that’s both easy to make and full of tropical flavor, Pineapple Heaven Cake is

- 2 boneless, skinless chicken breasts - Salt and pepper, to taste - 1 tablespoon olive oil - 3 cloves garlic, minced - 1 teaspoon Italian seasoning - 1 cup heavy cream - 1 cup chicken broth - 1 cup cherry tomatoes, halved - 1 cup fresh spinach - 8 oz penne pasta - 1/2 cup grated Parmesan cheese - Fresh basil leaves, for garnish When making Marry Me Chicken Pasta, gather all your ingredients first. This makes cooking smooth and fun. The chicken breasts are the star of the dish. I love using boneless and skinless chicken, as it cooks quickly and stays juicy. Don’t forget to season the chicken well with salt and pepper. The garlic adds a lovely flavor. I use fresh minced garlic for the best taste. Italian seasoning brings a nice mix of herbs, adding depth to the dish. Heavy cream and chicken broth create a rich sauce. The cherry tomatoes and spinach add color and nutrients. Penne pasta is perfect for this recipe. It holds sauce well, making every bite delicious. Lastly, grated Parmesan cheese adds a creamy finish. Garnish your pasta with fresh basil leaves. They make the dish look pretty and taste fresh. With these ingredients, you’re set for a meal that’s sure to impress! - First, season both sides of the chicken breasts with salt and pepper. - Heat olive oil in a large skillet over medium-high heat. - Cook the chicken breasts for about 6-7 minutes on each side until golden brown. - Check the internal temperature; it should be 165°F. - Remove the chicken from the skillet and let it rest on a cutting board. - In the same skillet, add the minced garlic and Italian seasoning. - Sauté for about 1 minute until the garlic smells good. - Pour in the heavy cream and chicken broth, stirring well. - Bring the mixture to a gentle simmer to blend the flavors. - Add halved cherry tomatoes and fresh spinach to the skillet. - Cook for about 3-4 minutes until the spinach wilts and the tomatoes soften. - Bring a pot of water to a boil. - Add the penne pasta and cook according to package instructions until al dente. - Once cooked, drain the pasta and set it aside for later. - Slice the rested chicken into strips and return it to the skillet. - Add the cooked penne and grated Parmesan cheese. - Mix everything until well combined and the cheese melts. - Taste and add more salt and pepper if needed. - Allow the mixture to simmer for an extra 2-3 minutes to meld the flavors. - Ensure chicken reaches 165°F internal temperature. This keeps the chicken safe to eat. - Use fresh ingredients for enhanced flavor. Fresh herbs and vegetables make a big difference. - If you want to thicken the sauce, add more cheese. You can also use a little flour. - Adding pasta water improves creaminess. The starchy water helps the sauce cling to pasta. - Pair Marry Me Chicken Pasta with a side salad for a complete meal. Garlic bread is a great choice too. - Garnish with fresh basil leaves for visual appeal. A sprinkle of extra cheese adds flavor and looks nice. {{image_4}} You can swap chicken for shrimp or tofu. These options work great in this dish. If you need dairy-free options, look for nut-based cream or vegan cheese. These will keep the flavors smooth without dairy. To add a kick, try spices like red pepper flakes or smoked paprika. They will wake up the dish! You can also toss in seasonal vegetables. Think zucchini, bell peppers, or asparagus for extra color and nutrition. You can cook this dish on the stovetop for quick meals. For a baked version, place all in a casserole dish and bake. If you want to prep ahead, use a slow cooker. Just add all ingredients and cook on low for 6-8 hours, making it super easy! To store leftovers safely, let the pasta cool first. Place it in an airtight container. This keeps the flavors fresh and prevents spoilage. I like using glass containers; they are sturdy and easy to clean. You can store it in the fridge for up to three days. For freezing portions, divide the pasta into smaller servings. Use freezer-safe bags or containers to save space. Remember to remove as much air as possible. This helps maintain the dish's quality. To thaw, place the container in the fridge overnight. Reheat gently on the stove or in the microwave until warm. Stored Marry Me Chicken Pasta can last about three days in the fridge. If frozen, it can hold for up to three months. Watch for signs of spoilage, like a sour smell or mold. If you see any, it's best to toss the pasta. Always trust your senses when it comes to food safety. What can I serve with Marry Me Chicken Pasta? I suggest serving a light salad or garlic bread. Both add freshness and flavor. A side of steamed vegetables also complements the dish well. Can I make this recipe ahead of time? Yes! You can cook the chicken and sauce ahead. Just store them in the fridge. Cook the pasta fresh when ready to serve. This keeps everything tasty. How can I make it extra spicy? Add red pepper flakes to the sauce. You can also use spicy Italian sausage instead of chicken. Both ways will give this dish a nice kick. What to do if the sauce is too thin? If your sauce is thin, mix a bit of cornstarch with water. Stir it into the sauce while it simmers. This will thicken it nicely. Tips for overcooked chicken. If your chicken is overcooked, slice it thin. Add it back to the sauce to soak up flavor. This helps keep it moist and tasty. Calories and nutritional breakdown per serving. Each serving has about 600 calories. It includes protein from chicken and healthy fats from cream. Dietary considerations for different diets. This recipe is not gluten-free due to pasta. To make it gluten-free, use gluten-free pasta. It can also be made dairy-free with non-dairy cream. You learned how to make Marry Me Chicken Pasta, a simple yet delicious dish. We covered the ingredients, cooking steps, and tips for success. Remember to use fresh items and adjust flavors to suit your taste. Experiment with variations, like adding different proteins or spices. Store leftovers safely for later enjoyment. With these instructions, you can create a meal that impresses. Enjoy your cooking adventure!

Marry Me Chicken Pasta Delightful and Simple Recipe

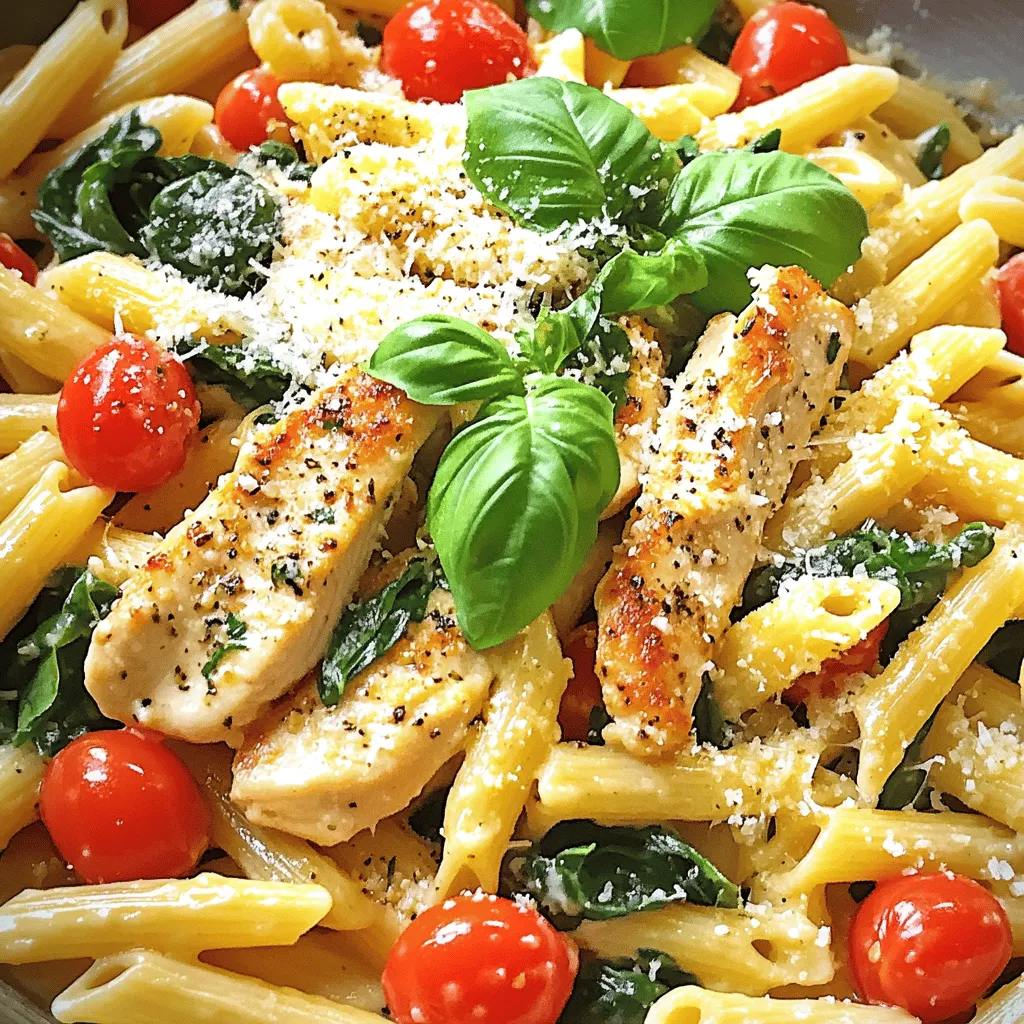
If you’re looking for a dish that will impress your loved ones, look no further! My Marry Me Chicken Pasta

- 4 boneless, skinless chicken breasts - 1 ripe mango, diced - 1 red bell pepper, chopped - 1 small red onion, diced To make mango salsa chicken, you need four main items. First, grab four chicken breasts. They should be boneless and skinless. Next, find a ripe mango and dice it into small pieces. A red bell pepper adds a nice crunch. Chop it finely. Lastly, you will need a small red onion, diced for flavor. - 1 fresh jalapeño, minced - 2 tablespoons cilantro - 2 tablespoons lime juice - 1 tablespoon olive oil Add some zing with a fresh jalapeño. Mince it to mix well in the salsa. Two tablespoons of chopped cilantro will brighten the dish. Fresh lime juice, about two tablespoons, gives a tangy taste. Use one tablespoon of olive oil to help the flavors blend together. - 1 teaspoon garlic powder - Salt and black pepper to taste Seasoning makes the chicken tasty. Use one teaspoon of garlic powder for depth. Add salt and black pepper based on your taste. These simple ingredients ensure each bite is flavorful. {{ingredient_image_2}} To make the mango salsa, start by gathering your fresh ingredients. In a medium bowl, combine the diced mango, chopped red bell pepper, diced red onion, minced jalapeño, and chopped cilantro. This mix brings a burst of colors and flavors to your dish. Next, drizzle in the lime juice. This adds a tangy kick that pairs well with the sweetness of the mango. Now, season with salt and pepper to taste. Give everything a good stir to blend the flavors. Set the salsa aside. Letting it sit helps the flavors meld together while you cook the chicken. Now, it’s time to grill the chicken. Preheat your grill or grill pan over medium-high heat until it is hot. If you're using a grill pan, lightly grease it with olive oil to keep the chicken from sticking. Pat your chicken breasts dry with paper towels. This helps them brown well. Drizzle the chicken with olive oil and rub it in on both sides. Then, sprinkle garlic powder, salt, and black pepper evenly across the chicken. This seasoning adds great flavor. Place the seasoned chicken breasts on the preheated grill. Grill for about 6-7 minutes on each side. To be sure the chicken is cooked through, use a meat thermometer. The internal temperature should reach 165°F (75°C). Once cooked, carefully take the chicken off the grill. Let it rest on a cutting board for about 3-5 minutes. Resting helps the juices redistribute, making your chicken moist and tender. After resting, slice the grilled chicken into strips. Now, generously top each piece with the vibrant mango salsa. This adds freshness and flavor to each bite. For a great presentation, serve the mango salsa chicken warm. You can garnish with extra cilantro leaves on top for that final touch. Enjoy this colorful and tasty dish! Preheating the grill is key. Heat it to medium-high so the chicken cooks evenly. A hot grill gives you nice grill marks too. Always use a meat thermometer. It helps you check the chicken’s doneness. The internal temperature should reach 165°F (75°C) for safe eating. This ensures juicy, tender chicken. Letting the salsa sit is important. It allows all the flavors to blend and deepen. Aim for at least 15 minutes before you serve. You can also play with spice levels. Add more jalapeño for heat, or leave it out for a milder taste. This way, you can make the salsa just right for your taste buds. Serving your mango salsa chicken on colorful plates makes it pop. Think bright colors like red, green, and yellow. You can also add a bed of greens like lettuce or spinach. It adds freshness and looks great. Garnish with lime wedges on the side. This not only looks nice but adds a zesty kick when squeezed over the chicken. Pro Tips Marinate for More Flavor: For an extra burst of flavor, marinate the chicken in lime juice, garlic, and cilantro for at least 30 minutes before grilling. Choose the Right Mango: Look for a ripe mango that gives slightly to pressure and has a sweet aroma. This ensures your salsa is fresh and delicious. Adjust Spice Level: If you prefer a milder salsa, reduce the amount of jalapeño or leave it out entirely. For more heat, add sliced jalapeños as a garnish. Resting is Key: Always let the grilled chicken rest for a few minutes before slicing to keep it juicy and flavorful. {{image_4}} You can switch out chicken for shrimp or tofu. Shrimp cooks fast and adds a nice flavor. Tofu is a great choice for a plant-based dish. Both proteins pair well with mango salsa. Try using different fruits in your salsa. Pineapple gives a sweet twist. You can also use peaches or kiwi for fun flavors. Each fruit adds a unique taste. To change the flavor, add spices like cumin or paprika. Cumin brings warmth, while paprika adds a sweet smokiness. Just a pinch can transform your dish. Consider adding avocado or black beans. Avocado gives creaminess, while black beans add texture. Both ingredients make the salsa heartier and more filling. You can bake the chicken in the oven if you don’t want to grill. Preheat your oven to 400°F (200°C). Bake for about 20-25 minutes. This method keeps the chicken juicy. Pan-searing chicken is another quick option. Heat a skillet over medium heat. Cook each side for about 6-7 minutes. This method gives a nice golden crust and saves time. To keep your mango salsa chicken fresh, store it in the fridge. Use airtight containers to block air. This helps keep the chicken juicy and the salsa tasty. Always cool the chicken to room temperature before sealing it up. You can store it for up to three days. If you want to save some for later, freeze the chicken and salsa separately. Wrap the chicken in plastic wrap and place it in a freezer bag. For salsa, use a container, leaving some space for it to expand. This way, both keep their best taste. When you're ready to eat, thaw the chicken in the fridge overnight for the best result. To heat your chicken without drying it out, use the oven. Preheat it to 350°F (175°C) and place the chicken in a baking dish. Cover it with foil to keep moisture. Heat for about 15-20 minutes. You can also microwave it on low. For leftover salsa, just give it a quick stir and serve it cold. If you have extra chicken, use it in salads or wraps for a tasty twist. Yes, you can make Mango Salsa Chicken ahead of time. It helps save time during busy days. For meal prep, cook the chicken and salsa separately. Store them in airtight containers. Keep the chicken in the fridge for three to four days. The salsa can last for about two to three days. When ready to eat, reheat the chicken and serve with fresh salsa. Mango Salsa Chicken pairs well with many sides. Here are some tasty options: - Rice or quinoa for a filling base - Grilled veggies like zucchini and bell peppers - A fresh green salad with lime dressing - Tortilla chips for a crunchy side - Corn on the cob for a sweet touch Try mixing and matching these sides to create a balanced meal. Mango Salsa Chicken is a nutritious choice. Chicken is a great source of protein. Mango adds vitamins A and C, plus fiber. Bell peppers and onions offer antioxidants, too. Use fresh ingredients for the best health benefits. Just watch the amount of salt you add. Overall, this dish is a good option for a balanced meal. Scaling Mango Salsa Chicken is easy! If you want to serve more people: - Double or triple the chicken and salsa ingredients. - Ensure the grill has enough space for all chicken pieces. - Cook in batches if needed to avoid crowding the grill. - Check the cooking time, as more chicken may need extra time to cook fully. Always use a meat thermometer to ensure safety. Mango Salsa Chicken is a bright, tasty dish that everyone can enjoy. The main ingredients—chicken, mango, and veggies—combine well for great flavors. You learned easy steps to make this meal, along with tips for grilling and storage. Don’t forget to explore variations and spices. You can even prep it ahead or adjust for more servings. Enjoy making this delightful dish that is healthy and fresh! Your next meal just got better with Mango Salsa Chicken.

Mango Salsa Chicken Flavorful Grilled Delight

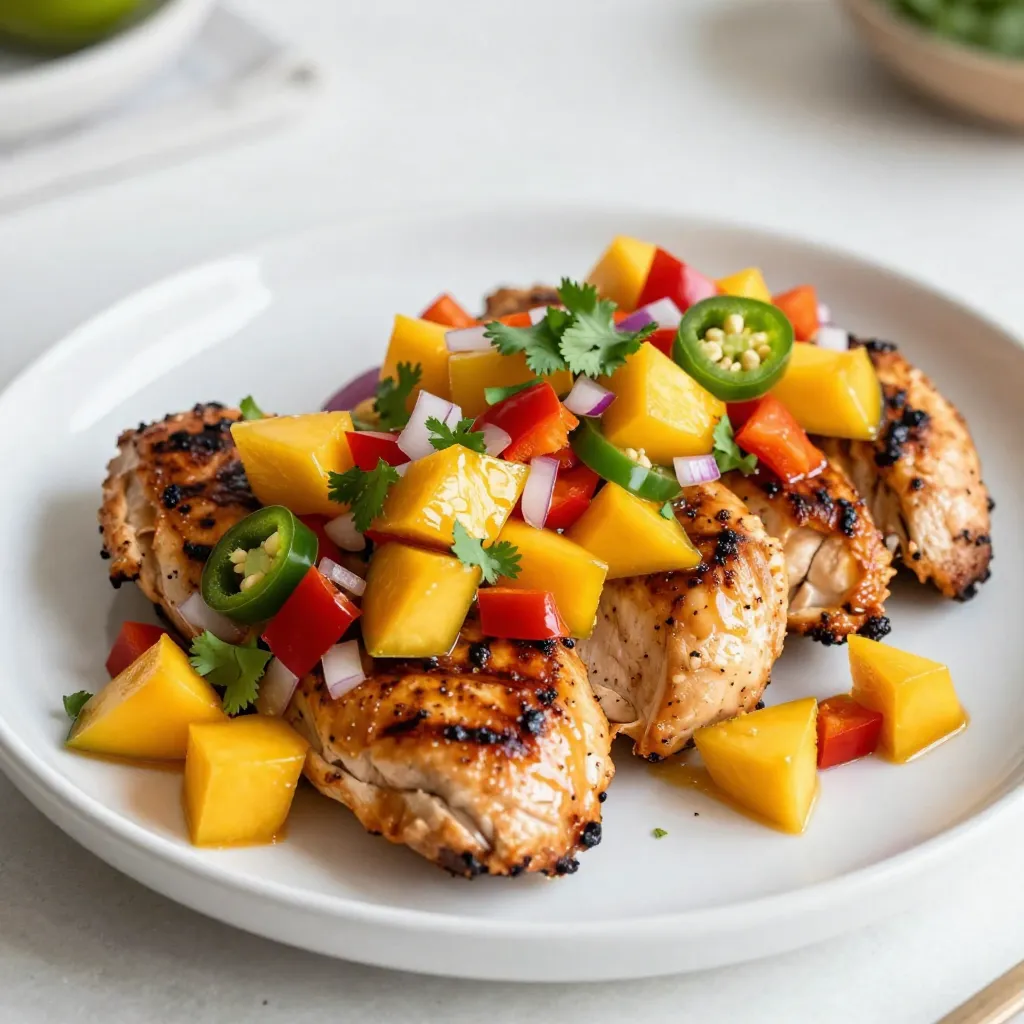
Get ready to spice up your dinner with Mango Salsa Chicken! This dish is a burst of flavor, combining juicy

To create this dish, you'll need: - 1 pound store-bought potato gnocchi - 1 cup basil pesto (store-bought or homemade) - 1 cup heavy cream - 1/2 cup grated Parmesan cheese - 2 tablespoons extra virgin olive oil - 2 cloves garlic, finely minced - Sea salt and freshly cracked black pepper to taste - Fresh basil leaves for garnishing These ingredients blend together to form a rich, creamy delight that will make your taste buds sing. You can customize your creamy pesto gnocchi by adding: - 1 cup cherry tomatoes, halved - Fresh spinach or arugula for extra greens - Toasted pine nuts for a crunchy texture These add-ins can bring extra flavor and color to your dish, making it even more appealing. If you have specific needs, don’t worry. You can adjust the recipe: - Use gluten-free gnocchi for a gluten-free option. - Swap heavy cream with coconut cream for a dairy-free version. - Replace Parmesan with nutritional yeast for a vegan alternative. These substitutions let you enjoy creamy pesto gnocchi while catering to dietary restrictions. {{ingredient_image_2}} To start, grab a large pot and fill it with water. Make sure to add a good amount of salt. Bring the water to a lively boil. Once it bubbles, carefully add the pound of potato gnocchi. Cook them according to the package. This usually takes about 2 to 3 minutes. Watch closely! They’re done when they float to the top. Drain the gnocchi in a colander and let them sit for a moment. This helps any extra water escape. Next, take a big skillet and pour in the olive oil. Set the heat to medium until the oil shimmers. Add two minced garlic cloves and stir them for about 30 seconds. Be careful not to let the garlic burn; we want that nice aroma! Now, lower the heat and pour in 1 cup of heavy cream. Stir it for 1 to 2 minutes until it warms up. Gradually add in 1 cup of basil pesto. Mix it well until the sauce becomes rich and creamy. Now comes the fun part! Gently add the cooked gnocchi to the skillet with the sauce. Sprinkle in half a cup of grated Parmesan cheese over the top. Carefully toss everything together. Make sure each piece of gnocchi is coated in that delicious creamy pesto. Taste your dish and season it with sea salt and freshly cracked black pepper as you like. If the sauce feels thick, add a splash of the reserved gnocchi cooking water. This helps achieve that perfect creaminess. To make gnocchi truly shine, start with the right cooking method. Use a large pot of salted water. Bring it to a boil before adding the gnocchi. Cook them until they float, about 2-3 minutes. This shows they are ready. Make sure to drain them well. Excess water can make your dish runny. If you want extra fluff, consider making your gnocchi from scratch. Use light hands when mixing the dough. Overworking it can lead to dense gnocchi. Using fresh ingredients can take your creamy pesto gnocchi to new heights. Start with fresh basil for your pesto. If you can, make your own for a bright taste. Fresh garlic also adds a nice kick. Don't skip the Parmesan cheese; it brings a rich flavor. You can also add halved cherry tomatoes for a pop of freshness. They contrast well with the creamy sauce. Lastly, always taste your dish before serving. Adjust the seasoning to your liking with sea salt and pepper. For those busy days, you can prepare some parts ahead. Cook your gnocchi and store them in the fridge. They last for 1-2 days. You can also make your creamy pesto sauce ahead of time. Just store it in an airtight container. When ready to eat, heat the sauce, add the gnocchi, and combine. This saves time and still gives you that fresh taste. You can also freeze the sauce. Just remember to thaw it before use. Enjoy your creamy pesto gnocchi even on the busiest nights! Pro Tips Use Fresh Pesto: If you have the time, making homemade pesto will elevate the flavor of your dish significantly. Fresh basil, garlic, nuts, and cheese combined with quality olive oil create a vibrant sauce. Don’t Overcook the Gnocchi: Keep a close eye on the gnocchi while cooking. They are done as soon as they float to the top, which usually takes just 2-3 minutes. Overcooking can result in a mushy texture. Adjust Creaminess: If the sauce is too thick for your liking, add a splash of the reserved gnocchi cooking water to loosen it up. This also helps to bring all the flavors together. Garnish for Freshness: Adding fresh basil leaves and cherry tomatoes not only enhances the presentation but also provides a refreshing contrast to the creamy sauce. {{image_4}} You can choose between store-bought or homemade pesto. Store-bought pesto saves time and still tastes great. Look for a brand that uses fresh ingredients. If you want to make it yourself, blend fresh basil, pine nuts, garlic, Parmesan, and olive oil in a food processor. Each option gives you a different flavor. Homemade pesto has a bright, fresh taste that’s hard to beat. To make this dish vegetarian, simply use a cheese that fits your diet. For a vegan version, swap out the heavy cream with coconut cream or cashew cream. Replace Parmesan cheese with nutritional yeast or a vegan cheese alternative. These changes keep the dish creamy and delicious without animal products. Adding seasonal vegetables boosts flavor and nutrition. In spring, toss in fresh peas or asparagus. Summer is perfect for cherry tomatoes or zucchini. In fall, roasted butternut squash adds sweetness. Winter calls for hearty greens like kale or spinach. This way, you create a colorful, tasty dish that changes with the seasons. After you enjoy creamy pesto gnocchi, store leftovers in an airtight container. Let the dish cool to room temperature before sealing. Place it in the fridge, where it will stay fresh for about 3 days. Keeping it sealed helps prevent it from drying out. When you're ready to eat your leftovers, reheat gently. Use a skillet over low heat to keep the creaminess. Add a splash of water or cream to help revive the sauce. Stir often to ensure even heating. This way, your gnocchi stays soft and creamy. If you want to save gnocchi for later, freezing works well. Portion the dish into freezer-safe bags or containers. Seal tightly to avoid freezer burn. It can last up to 2 months in the freezer. To reheat, thaw overnight in the fridge before warming on the stove. This helps maintain the texture and flavor. You cook store-bought gnocchi for about 2-3 minutes. They are ready when they float to the top. This quick cooking time makes them easy to prepare. Just remember to keep an eye on them so they don’t overcook. Yes, you can use different cheeses. Try mozzarella or goat cheese for a new taste. Each cheese brings its own flavor and texture. Just ensure it melts well to blend with the creamy sauce. This choice allows you to personalize your dish. Creamy pesto gnocchi pairs well with a fresh salad or garlic bread. You can also serve it with grilled chicken or roasted vegetables for extra flavor. The bright, fresh flavors enhance the meal, making it more satisfying. Feel free to mix and match sides to suit your taste! In this article, we covered how to make creamy pesto gnocchi. We explored key ingredients, cooking steps, and useful tips. You learned about different variations and how to store leftovers. This dish is tasty and easy to customize. With fresh ingredients and helpful tricks, you can impress anyone. Enjoy your cooking, and remember, making this dish is fun and rewarding.

Creamy Pesto Gnocchi Irresistible Flavor Journey

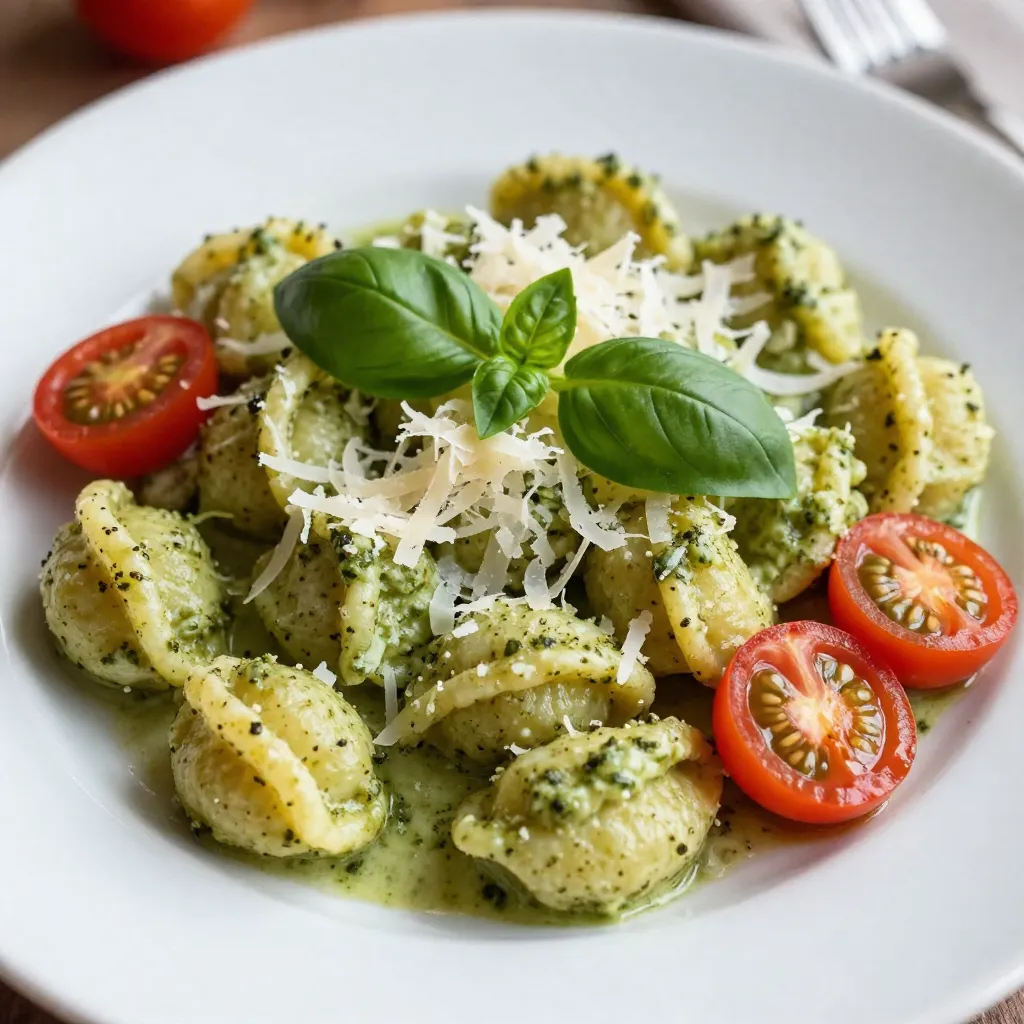
Are you ready to indulge in a bowl of Creamy Pesto Gnocchi? This dish combines soft gnocchi with a rich,

To make Honey Butter Cornbread Poppers, gather these main ingredients: - 1 cup cornmeal - 1 cup all-purpose flour - 1 tablespoon baking powder - 1/2 teaspoon salt - 1/4 cup granulated sugar - 1 cup buttermilk - 1/4 cup unsalted butter, melted - 2 large eggs - 1/2 cup sweet corn (canned or frozen) - 1/4 cup honey - 1/4 cup butter, softened (for honey butter) For those who want to add more taste, consider these optional ingredients: - 1/2 teaspoon cinnamon This spice adds warmth and depth to the poppers. Here are the tools you need to make these poppers: - Mini muffin tin - Mixing bowls (one large and one small) - Whisk - Spatula or wooden spoon - Measuring cups and spoons - Toothpick (for checking doneness) - Wire rack or plate (for cooling) Having these tools ready will help you make the process smooth and fun! First, preheat your oven to 400°F (200°C). This step is crucial for even baking. Next, grab a mini muffin tin. Grease it well or line it with mini muffin liners. This will help the poppers come out easily without sticking. In a large mixing bowl, combine the following dry ingredients: - 1 cup cornmeal - 1 cup all-purpose flour - 1 tablespoon baking powder - 1/2 teaspoon salt - 1/4 cup granulated sugar If you like a hint of spice, add 1/2 teaspoon cinnamon. Whisk these dry ingredients together until they are smooth and free of lumps. This helps create a better texture. In a separate smaller bowl, mix together the wet ingredients: - 1 cup buttermilk - 1/4 cup unsalted butter, melted - 2 large eggs Whisk these until they look smooth with no lumps. Now, pour this wet mixture into your bowl of dry ingredients. Use a spatula or wooden spoon to mix gently. You want to combine them without overmixing. It's fine if a few lumps remain. Next, fold in 1/2 cup of sweet corn gently. Make sure to distribute it evenly through the batter. Now, take a spoon or a small scoop to fill each muffin cup about two-thirds full. This gives them room to rise while baking. Place the muffin tin in your preheated oven and bake for 12-15 minutes. They are done when a toothpick comes out clean and the tops are golden brown. While they bake, prepare the honey butter. In a small bowl, mix 1/4 cup softened butter with 1/4 cup honey. Mix until it’s light and fluffy. Once the poppers are done, let them cool in the tin for a few minutes. Then, transfer them to a wire rack or plate. Serve warm with a generous dollop of honey butter on top for a sweet and savory treat. To make tender Honey Butter Cornbread Poppers, focus on mixing. Combine your wet and dry ingredients gently. Stir until just mixed. It's okay to have a few lumps. Overmixing makes the poppers tough. Use room temperature buttermilk for a smooth blend. It helps create a soft texture. Baking time is key too. Keep an eye on them; 12-15 minutes should do. The tops should look golden brown. A few common mistakes can ruin your poppers. First, don't skip the greasing or lining of the muffin tin. This prevents sticking. Second, measure your cornmeal and flour correctly. Too much flour can dry out your poppers. Make sure to use fresh baking powder. Old baking powder may not rise well. Lastly, watch the baking time closely. Check with a toothpick for doneness. Serving your Honey Butter Cornbread Poppers is fun! Warm them up and add honey butter on top. This adds a sweet, creamy touch. You can also drizzle extra honey for a glaze. For a rustic look, serve them on a wooden board. Consider adding fresh herbs or fruits as garnish. These poppers pair well with chili or barbecue too. Enjoy them as a tasty snack or side dish! {{image_4}} You can make your Honey Butter Cornbread Poppers even more exciting. Add savory items for a twist. Consider mixing in cheese. Cheddar or pepper jack work well. You can also add cooked bacon bits for a hearty flavor. Fresh herbs like chives or cilantro add a nice touch too. Just remember to chop them finely. Fold these ingredients gently into your batter. This keeps the poppers light and fluffy. If you want to switch things up, try using different sweeteners. Maple syrup is a great choice. It gives a unique taste to your poppers. You can also use agave nectar or coconut sugar. These options work well with the corn’s natural sweetness. Adjust the amount based on your preference. Just keep in mind that using liquid sweeteners may change the batter’s texture slightly. Corn is the star of these poppers. You can experiment with various types of corn. Fresh sweet corn adds a burst of flavor. If you use canned corn, drain it well first. Frozen corn is also a good choice. Just thaw it before adding. You can even try using cornmeal made from blue corn for a fun color and taste. Each type of corn brings its own unique flavor to the dish. To keep your honey butter cornbread poppers fresh, place them in an airtight container. You can stack them in layers, with parchment paper between each layer to avoid sticking. Store them at room temperature for up to two days. If you need to keep them longer, refrigeration is a good option. Just remember to wrap them well to prevent drying out. Reheating your poppers is easy and quick. Preheat your oven to 350°F (175°C). Place the poppers on a baking sheet and cover them with foil. Heat for about 10-15 minutes or until warmed through. You can also use a microwave for a faster option. Just heat them for 10-15 seconds at a time until warm. Be careful not to dry them out. Freezing is a great way to save these tasty treats. Allow the poppers to cool completely before freezing. Place them in a freezer-safe bag or container. They will keep well in the freezer for up to three months. When you’re ready to enjoy them, just thaw in the fridge overnight and reheat as mentioned above. Enjoy your sweet and savory poppers any time! You can use milk with lemon juice or vinegar. Add one tablespoon of lemon juice or vinegar to a cup of milk. Let it sit for five minutes. This creates a similar tangy taste and texture to buttermilk. It works great in recipes like honey butter cornbread poppers. Yes, you can make them ahead. Bake the poppers and let them cool. Store them in an airtight container for up to three days. Reheat them in the oven or microwave before serving for the best taste. Check the poppers after 12 minutes. Insert a toothpick into the center. If it comes out clean, they are done. The tops should be golden brown and slightly firm to the touch. Yes, you can use regular butter. Just be aware it will add salt to the recipe. If you choose salted butter, reduce the added salt in the dry mix. This keeps the taste balanced. Absolutely! Use gluten-free all-purpose flour instead of regular flour. It works well and keeps the texture light. Just check if your baking powder is gluten-free too. Enjoy your gluten-free honey butter cornbread poppers! These poppers are fun and easy to make. We covered ingredients, steps, and tips to help you. You learned about flavor options and how to store leftovers. Keep experimenting with variations for new tastes. Each time, aim for those perfect, tender poppers. Enjoy sharing them, especially with honey butter. Your baking journey has just begun!

Honey Butter Cornbread Poppers Tasty Snack Delight

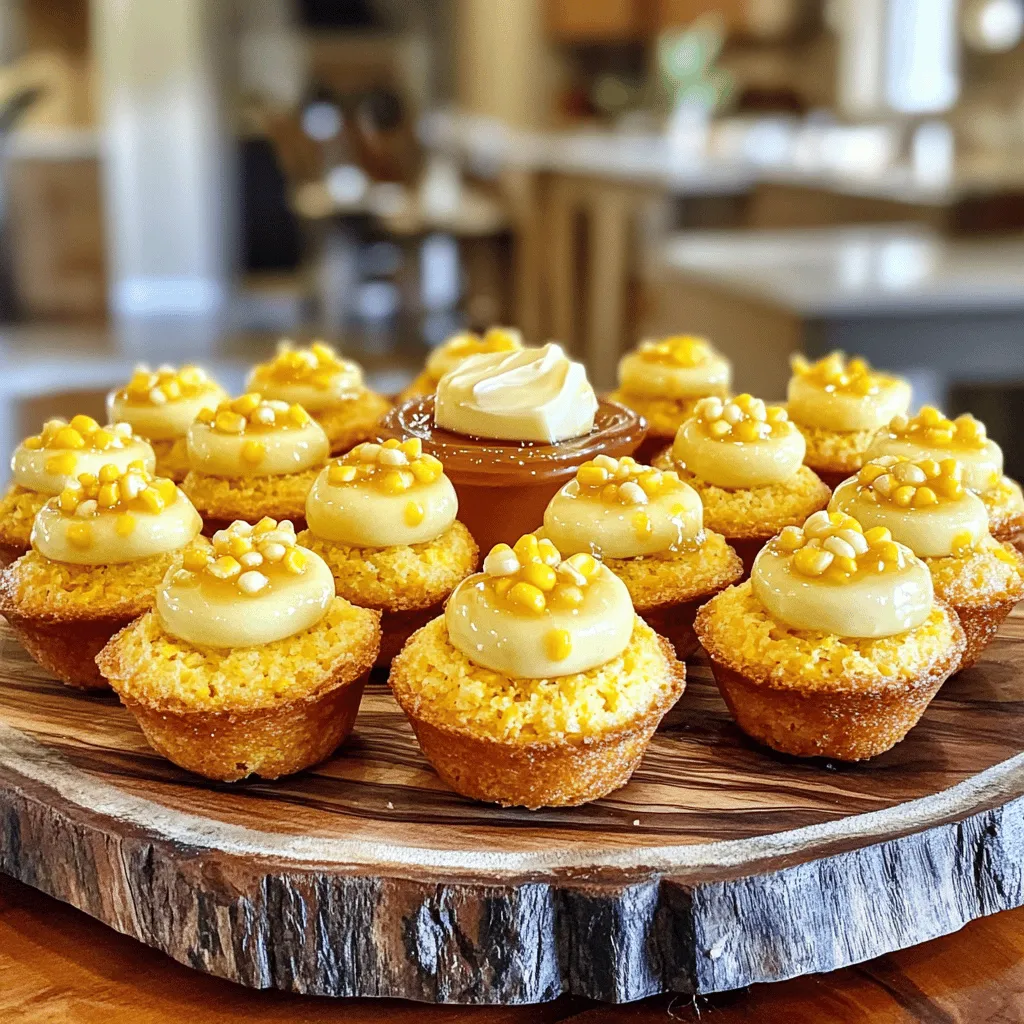
Looking for a delicious snack that’s easy to make? Honey Butter Cornbread Poppers are the answer! In this article, I

To make this delicious Cinnamon Swirl Bundt Cake, you will need: - 2 ½ cups all-purpose flour - 1 ½ teaspoons baking powder - 1 teaspoon baking soda - ½ teaspoon salt - 1 teaspoon ground cinnamon - ¾ cup unsalted butter, softened - 1 ½ cups granulated sugar - 3 large eggs, at room temperature - 1 teaspoon vanilla extract - 1 cup buttermilk, at room temperature These ingredients come together to create a rich and flavorful cake base. Each plays a key role in the cake's texture, taste, and rise. The swirl in this cake adds a wonderful touch. For the cinnamon swirl, you will need: - ½ cup brown sugar - 1 tablespoon ground cinnamon Mixing these two together creates that sweet, spicy layer that makes each slice special. It adds a warm, cozy flavor to your cake. If you want to take your cake to the next level, you can add: - ½ cup chopped walnuts or pecans These nuts bring a nice crunch and flavor contrast. They make the cake even more enjoyable and can be a fun surprise in each bite. Start by preheating your oven to 350°F (175°C). Grab a 10-inch Bundt pan and grease it well with unsalted butter. Then, dust it lightly with flour. This helps the cake come out easily after baking. In a medium bowl, sift together the dry ingredients. You need 2 ½ cups of all-purpose flour, 1 ½ teaspoons of baking powder, 1 teaspoon of baking soda, ½ teaspoon of salt, and 1 teaspoon of ground cinnamon. Set this mixture aside. In a large bowl, cream ¾ cup of softened unsalted butter and 1 ½ cups of granulated sugar using an electric mixer. Mix for 4 to 5 minutes until it is light and fluffy. Then, add 3 large eggs one at a time. Mix well after each egg. Next, add 1 teaspoon of vanilla extract. Now, slowly add the dry mixture to the butter mix. Do this while also adding 1 cup of buttermilk. Start and end with the dry mix. Mix until just combined to keep the cake light. In a small bowl, mix ½ cup of brown sugar with 1 tablespoon of ground cinnamon. If you like, you can add ½ cup of chopped walnuts or pecans now for extra crunch. To layer the cake, pour half of the batter into the prepared Bundt pan. Then, sprinkle half of the cinnamon mix on top. Pour the rest of the batter over that, followed by the remaining cinnamon mix. Take a knife or skewer and gently swirl the mix together. This creates a lovely marbled look in your cake. To create the perfect swirl, layer the batter and cinnamon mix carefully. Start with half the cake batter. Spread it evenly in the pan. Then, sprinkle half the cinnamon-sugar mix over this layer. Pour the remaining batter on top. Finish by adding the last of the cinnamon mix. Use a knife or skewer to gently swirl the two together. Aim for a nice marble look but don’t overdo it. Light swirls create a lovely effect without losing the layers. Baking time is crucial for a great cake. Set your timer for 45 minutes. Check the cake with a toothpick inserted into the center. If it comes out clean, it’s done. If it has wet batter on it, bake for an extra 5 to 10 minutes. Keep an eye on it after 45 minutes to avoid over-baking. Every oven is different, so adjust your time as needed. After baking, let the cake cool in the pan for 15 minutes. This helps it hold its shape. Then, place a wire rack on top of the Bundt pan. Carefully flip it over to release the cake. If it sticks, gently tap the pan. Let it cool completely on the rack. Cooling helps the flavors settle and makes it easier to slice. For a special touch, dust with powdered sugar before serving. {{image_4}} To make a gluten-free version, swap the all-purpose flour with a gluten-free blend. Look for one that works well in baking. Ensure it contains xanthan gum for the right texture. The rest of the recipe stays the same. This swap allows everyone to enjoy the cake, even those who can't have gluten. For a vegan twist, replace the butter with coconut oil or vegan butter. Use plant-based milk instead of buttermilk. A mix of almond milk and lemon juice works well. Substitute the eggs with flaxseed meal mixed with water. Use 1 tablespoon of flaxseed meal with 2.5 tablespoons of water for each egg. These changes keep the cake moist and delicious. You can enhance the flavor in fun ways. Add a splash of almond extract for a nutty twist. You can also mix in a bit of citrus zest, like lemon or orange, to brighten the cake. If you love chocolate, fold in chocolate chips for a decadent touch. Mix and match these ideas to create your perfect cake. To keep your cinnamon swirl Bundt cake fresh, wrap it tightly in plastic wrap. This keeps moisture in and air out. You can also place it in an airtight container. Store it at room temperature for up to three days. If you want it to last longer, consider freezing it. You can freeze your Bundt cake for later enjoyment. First, let it cool completely. Then wrap it in plastic wrap and foil to prevent freezer burn. You can freeze it for up to three months. When ready to enjoy, thaw it in the fridge overnight. After storing, the cake may feel a bit dry. To fix this, warm individual slices in the microwave for a few seconds. This will help revive its soft texture. You can also drizzle it with a bit of warm glaze or serve it with whipped cream for added moisture. Enjoy your cake just like it was fresh out of the oven! To stop your Bundt cake from sticking, you need to grease the pan well. Use unsalted butter for this. Coat every part of the pan, especially the center tube. After greasing, sprinkle a light layer of flour over the butter. Tap the pan to remove the extra flour. This method creates a non-stick barrier. When baked, your cake should slide right out. Make sure to cool the cake for 15 minutes before flipping it onto a rack. Yes, you can use different nuts in this recipe. Walnuts and pecans are great options. If you prefer another nut, try almonds or hazelnuts. Just chop the nuts into small pieces before mixing them in. This adds a nice crunch and flavor. You can even skip the nuts if you want a nut-free cake. The cake will still taste delicious without them. If you don't have buttermilk, you can easily make a substitute. Mix 1 cup of milk with 1 tablespoon of lemon juice or vinegar. Let it sit for about 5 minutes. This will create a tangy milk similar to buttermilk. You can also use plain yogurt or sour cream. Just thin them with a bit of water to match the buttermilk's consistency. These options work well and keep your cake moist. This blog post covered how to make a delicious cinnamon swirl Bundt cake. We explored the main ingredients, optional add-ins, and step-by-step instructions to help you bake perfectly. I shared tips to enhance your baking skills, along with ideas for variations like gluten-free and vegan options. Remember to store your leftovers right to keep them fresh. Now, you can impress your friends and family with this delightful treat. Happy baking!

Cinnamon Swirl Bundt Cake Irresistible and Easy Recipe

Ready to bake something special? This Cinnamon Swirl Bundt Cake recipe is not just easy; it’s simply irresistible. With warm

To make salted caramel pretzel brownies, you will need the following ingredients: - 1 cup unsalted butter, melted - 2 cups granulated sugar - 4 large eggs - 1 teaspoon vanilla extract - 1 cup all-purpose flour - 1 cup unsweetened cocoa powder - 1 teaspoon baking powder - 1/2 teaspoon salt - 1 cup pretzels, crushed (plus extra for topping) - 1 cup semi-sweet chocolate chips - 3/4 cup store-bought salted caramel sauce - Sea salt for garnishing Each ingredient plays a key role. The unsalted butter gives the brownies a rich flavor. Granulated sugar adds sweetness and moisture. Eggs bind the mix and create a soft texture. Vanilla extract enhances the taste, making it more inviting. Flour and cocoa powder form the base, creating that perfect brownie structure. Baking powder helps them rise slightly. Salt balances all the sweetness. Crushed pretzels add crunch, while chocolate chips provide gooey goodness. Lastly, salted caramel sauce creates a sweet, salty swirl. Topping with sea salt adds a delightful finish. Enjoy gathering these ingredients! They will come together to make a treat that you won't forget. {{ingredient_image_2}} Start by preheating your oven to 350°F (175°C). Next, grab a 9x13 inch baking pan. Lightly grease it with butter or spray. Line the pan with parchment paper. Make sure to leave some paper hanging over the edges. This helps you lift the brownies out later. In a big bowl, mix one cup of melted butter with two cups of sugar. Whisk until the mix is smooth. Add four large eggs, one at a time, mixing well after each. Then stir in one teaspoon of vanilla extract. In another bowl, sift together one cup of flour, one cup of cocoa powder, one teaspoon of baking powder, and half a teaspoon of salt. Gradually add this dry mix to the wet mix. Stir until just combined. Be careful not to overmix! Now, gently fold in one cup of crushed pretzels and one cup of chocolate chips. Pour half of the brownie batter into the pan. Spread it evenly to make the first layer. Drizzle half of the salted caramel sauce over this layer. Let it zigzag across the surface. Now, pour the rest of the brownie batter on top and smooth it out. Drizzle the remaining caramel sauce over this layer, too. Use a knife to swirl it lightly for a marbled look. Sprinkle extra crushed pretzels on top, and add a sprinkle of sea salt. Bake in the oven for 30-35 minutes. Check with a toothpick. It should come out with a few moist crumbs. Let the brownies cool in the pan for 20 minutes. Use the parchment paper to lift them out and cool completely on a wire rack. To get soft and fudgy brownies, avoid overmixing. When you add the dry ingredients, mix just until combined. This keeps the brownies tender. Checking for doneness is key. A toothpick should come out with a few moist crumbs, not clean. This tells you they are still fudgy and not overbaked. You can make these brownies even better! Consider adding nuts, like walnuts or pecans, for crunch. You can also try swapping half the cocoa with dark chocolate for richer taste. If you love peanut butter, swirl some into the batter. It adds a fun twist to the flavor. For a stunning look, serve these brownies on a nice platter. Drizzle extra caramel sauce on top for extra flair. Add whole pretzels for a fun touch. You can also sprinkle sea salt lightly on each piece. This enhances the sweet and salty balance. Enjoy serving these treats to friends and family! Pro Tips Use High-Quality Chocolate: Opt for high-quality semi-sweet chocolate chips for a richer flavor that elevates your brownies. Adjust Caramel Consistency: If your caramel sauce is too thick, gently warm it in the microwave to make it easier to drizzle. Don’t Overbake: For fudgy brownies, keep an eye on the baking time and remove them from the oven as soon as a toothpick comes out with a few moist crumbs. Let Them Cool: Allow the brownies to cool completely before cutting; this helps them set and makes for cleaner squares. {{image_4}} You can make these brownies gluten-free easily. Use a gluten-free flour blend. This blend works well in place of all-purpose flour. Just be sure to check the label. It should be safe for baking. The taste stays rich and delicious. Want some crunch? Add nuts! Chopped walnuts or pecans give a nice bite. Mix about half a cup into the batter. You can also sprinkle some on top with the pretzels. This adds extra texture to each bite. Feel free to switch up the caramel. You can use homemade caramel if you prefer. This gives a fresh taste. If you want a twist, try flavored caramel. Salted caramel works great, but chocolate or vanilla caramel adds fun flavors, too. To keep your salted caramel pretzel brownies fresh, store them in an airtight container. Place a piece of parchment paper between layers to prevent sticking. Keep the container at room temperature for up to three days. If you want them to last longer, refrigeration is an option. However, note that cold storage may change the texture. Freezing is a great way to save brownies for later. Cut the brownies into squares and wrap each piece tightly in plastic wrap. Place the wrapped brownies in a freezer bag and remove as much air as possible. They can last in the freezer for up to three months. When you're ready to enjoy them, just thaw them in the fridge overnight. To reheat your brownies, simply microwave them for about 10-15 seconds. This process warms them up and restores their gooey texture. If you prefer, you can also warm them in the oven at 350°F (175°C) for 5-10 minutes. Just cover them with foil to keep them from drying out. Enjoy your brownies warm, with a drizzle of extra caramel if you like! Yes, you can make these brownies ahead of time. Once they cool, store them in an airtight container. They stay fresh for up to five days. You can also freeze them for later. Wrap each brownie in plastic wrap and place them in a freezer bag. They can last for about three months in the freezer. Just thaw them in the fridge overnight before serving. You can use several egg substitutes in this recipe. Here are a few options: - Flaxseed meal: Mix 1 tablespoon of flaxseed meal with 2.5 tablespoons of water. Let it sit for 5 minutes. - Applesauce: Use 1/4 cup of unsweetened applesauce for each egg. - Greek yogurt: Replace each egg with 1/4 cup of plain Greek yogurt. These options help keep your brownies moist and tasty. To check if your brownies are done, use a toothpick. Insert it into the center of the brownies. If it comes out with a few moist crumbs, they are done. If it comes out wet with batter, they need more time. Bake them for about 30-35 minutes. Keep an eye on them toward the end to avoid overbaking. Enjoy that fudgy goodness! We covered all the key steps to make delicious brownies. You learned about the simple ingredients, easy instructions, and useful tips. Remember to check the texture and taste before serving. You can even try different variations to suit your preferences. Store any leftovers properly to enjoy later. With these pointers, you can bake perfect brownies every time. Happy baking!

Salted Caramel Pretzel Brownies Tasty and Easy Recipe

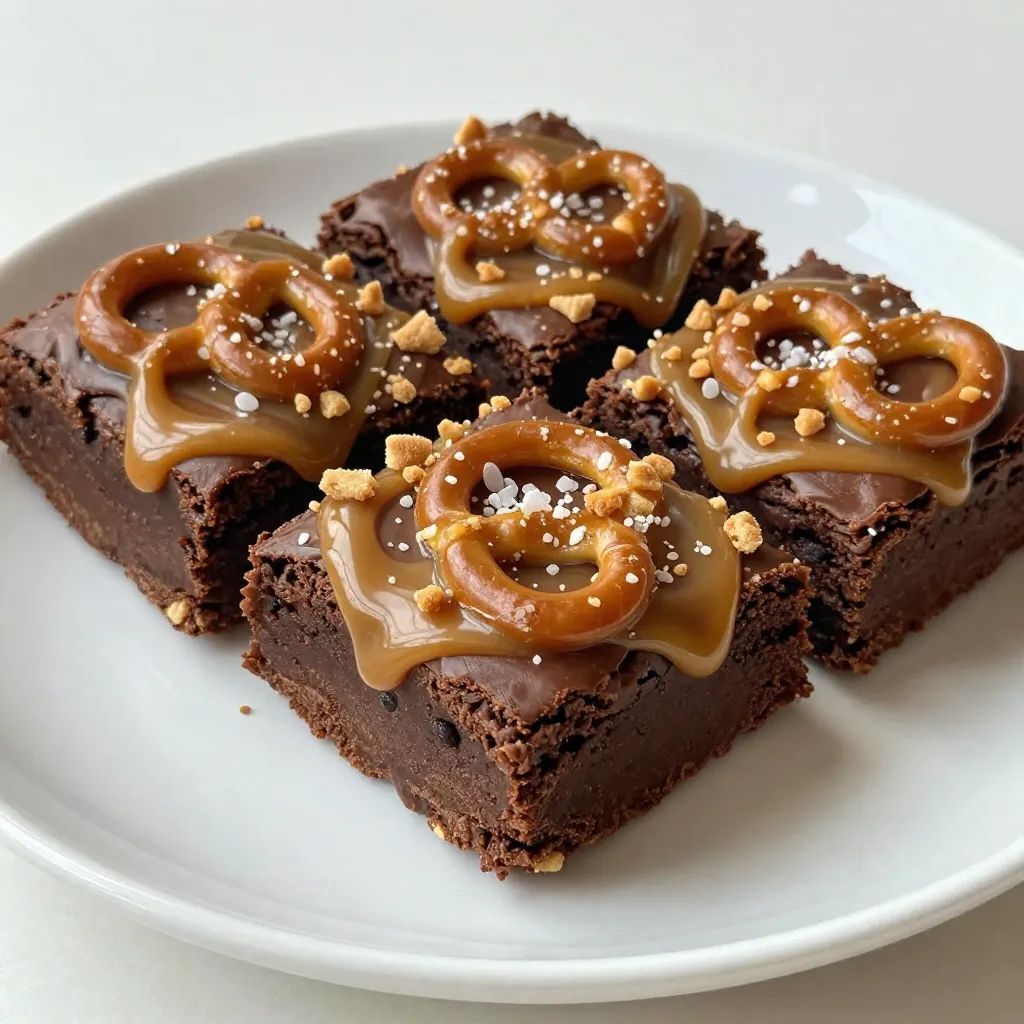
Ready to whip up a treat that combines sweet and salty in every bite? Salted Caramel Pretzel Brownies are your

To make Honey Butter Cornbread Poppers, you need a few key ingredients: - 1 cup cornmeal - 1 cup all-purpose flour - 1/4 cup granulated sugar - 1 tablespoon baking powder - 1/2 teaspoon salt - 1 cup buttermilk - 2 large eggs - 1/4 cup unsalted butter, melted - 1/4 cup honey - 1/2 cup corn kernels (fresh or frozen) - Extra honey and butter for topping These ingredients come together to create a sweet and tasty treat. The cornmeal gives texture, while the honey adds a nice touch of sweetness. You can customize your poppers with some fun add-ins: - 1/2 teaspoon garlic powder (for a savory twist) - 1/4 teaspoon cayenne pepper (for a little heat) These add-ins can change the flavor profile of your poppers. Feel free to mix and match based on what you like. Using high-quality ingredients makes a big difference. Choose fresh corn kernels for the best taste. Good butter helps create a rich flavor. For the best results, use real buttermilk instead of substitutes. The quality of your ingredients directly impacts the taste and texture of your poppers. First, preheat your oven to 400°F (200°C). Grab a mini muffin pan and grease it. You can use non-stick spray or softened butter. This helps the poppers release easily after baking. In a large mixing bowl, combine the following dry ingredients: - 1 cup cornmeal - 1 cup all-purpose flour - 1/4 cup granulated sugar - 1 tablespoon baking powder - 1/2 teaspoon salt Make sure to mix them well. This step ensures that each popper has a balanced taste. Now, take a medium bowl and whisk together these wet ingredients: - 1 cup buttermilk - 2 large eggs - 1/4 cup melted unsalted butter - 1/4 cup honey Whisk until the mixture is smooth. This helps combine the flavors before adding to the dry mix. Pour the wet mixture into the dry ingredients bowl. Gently stir with a spatula or wooden spoon. Mix until just combined. Avoid overmixing to keep the poppers fluffy. Next, add in 1/2 cup corn kernels. If you like, sprinkle in garlic powder and cayenne pepper for extra flavor. Fold these ingredients into the batter until evenly mixed. Use a spoon or small ice cream scoop to fill each muffin cup about 3/4 full. This leaves room for the poppers to rise. Place the muffin pan in the hot oven. Bake for 12-15 minutes. Check for doneness with a toothpick. If it comes out clean, your poppers are ready! As they bake, make honey butter. Mix equal parts of softened butter and honey in a small bowl. Stir until creamy and smooth. Once the poppers are baked, let them cool for a few minutes. Then, gently lift them out of the pan. Serve warm, drizzled with honey and topped with honey butter. Enjoy your tasty treat! To get that light and fluffy texture, start with room temperature ingredients. This helps the batter mix well. Use fresh baking powder too. Old baking powder can cause your poppers to be dense. Whisk the dry ingredients well to avoid lumps. When you mix the wet and dry ingredients, stir gently. This keeps the air in the batter, making it rise beautifully. Overmixing can make your poppers tough. Mix until you see no dry flour, but don’t keep stirring. If you see lumps, that’s okay. These will bake out. Use a spatula or wooden spoon for gentle mixing. Remember, it’s better to have a few lumps than a tough texture. You can add more flavor to your poppers with a few simple ingredients. Garlic powder gives a nice savory touch. If you like a bit of heat, cayenne pepper adds a great kick. You can also mix in cheese or herbs for a twist. Fresh corn adds sweetness and texture, so don’t skip it! These extras make your poppers unique and tasty. {{image_4}} You can turn these poppers into a sweet treat. Just add chocolate chips or dried fruits like raisins or cranberries. These additions mix well with the cornbread. You can also try a sprinkle of cinnamon or nutmeg for warmth. These flavors give the poppers a cozy, dessert-like feel. Want something savory? Cheese is a great choice! Add shredded cheddar or crumbled feta. You can also mix in herbs like chopped chives or parsley. These will add a fresh burst of flavor. If you want heat, try adding diced jalapeños or pepper jack cheese for a spicy kick. Need a gluten-free version? Substitute the all-purpose flour with gluten-free flour blends. Make sure the blend has xanthan gum for the right texture. You can also use corn flour for a richer corn flavor. Just check that all other ingredients are gluten-free too. Enjoy these poppers without worry! To keep your leftover Honey Butter Cornbread Poppers fresh, place them in an airtight container. This helps lock in moisture and flavor. You can store them at room temperature for up to two days. If you want to keep them longer, refrigerate them for up to a week. Just make sure they are fully cooled before you seal them away. To enjoy your poppers again, you can reheat them in the oven. Preheat your oven to 350°F (175°C). Place the poppers on a baking sheet and cover them with foil. Heat them for about 10-15 minutes. This keeps them soft and warm. You can also use a microwave. Heat them for about 15-20 seconds. Just be careful not to dry them out. If you want to save poppers for later, freezing is a great option. First, let them cool completely. Then, place them in a freezer-safe bag or container. Remove as much air as possible to prevent freezer burn. They can last up to three months in the freezer. When you’re ready to eat them, thaw them in the fridge overnight before reheating. Honey butter cornbread poppers are small, sweet bites of cornbread. They are soft and moist, with a hint of honey. You make them in a mini muffin pan for easy serving. Each popper is topped with a creamy honey butter mix. They are perfect as snacks or sides for meals. Yes, you can prepare these poppers ahead of time. Make the batter and store it in the fridge for up to 24 hours. When ready, bake them fresh for a warm treat. You can also bake them and keep them in an airtight container. Reheat them in the oven for the best taste. These poppers pair well with many dishes. Here are some ideas: - Chili or stew for a hearty meal. - A fruity jam for a sweet twist. - Fresh berries for a pop of color. - Grilled meats like chicken or pork. To keep your poppers moist, follow these tips: - Use buttermilk for a rich flavor and texture. - Don't overmix the batter; it should be lumpy. - Bake them until they are golden brown, not dry. - Serve them warm with extra honey butter to add moisture. Here’s the complete recipe to make your own honey butter cornbread poppers: Ingredients: - 1 cup cornmeal - 1 cup all-purpose flour - 1/4 cup granulated sugar - 1 tablespoon baking powder - 1/2 teaspoon salt - 1 cup buttermilk - 2 large eggs - 1/4 cup unsalted butter, melted - 1/4 cup honey - 1/2 cup corn kernels (fresh or frozen) - 1/2 teaspoon garlic powder (optional) - 1/4 teaspoon cayenne pepper (optional) - Extra honey and butter for topping Instructions: 1. Preheat your oven to 400°F (200°C). Grease a mini muffin pan. 2. In a large bowl, mix cornmeal, flour, sugar, baking powder, and salt. 3. In another bowl, whisk buttermilk, eggs, melted butter, and honey. 4. Combine wet and dry ingredients. Stir gently; do not overmix. 5. Fold in corn, garlic powder, and cayenne, if using. 6. Fill muffin cups 3/4 full with batter. 7. Bake for 12-15 minutes until golden and a toothpick comes out clean. 8. While baking, mix equal parts butter and honey for the topping. 9. Let poppers cool slightly before removing from the pan. 10. Serve warm with honey and your honey butter. Enjoy your baking! You learned how to make Honey Butter Cornbread Poppers step-by-step. We discussed key ingredients, tips for texture, and ways to customize your poppers. Remember to choose quality ingredients for the best taste. With these instructions, you can enjoy sweet and savory options, plus know how to store leftovers. I hope you feel ready to create this fun snack. Enjoy every delicious bite!

Honey Butter Cornbread Poppers Tasty and Simple Treat

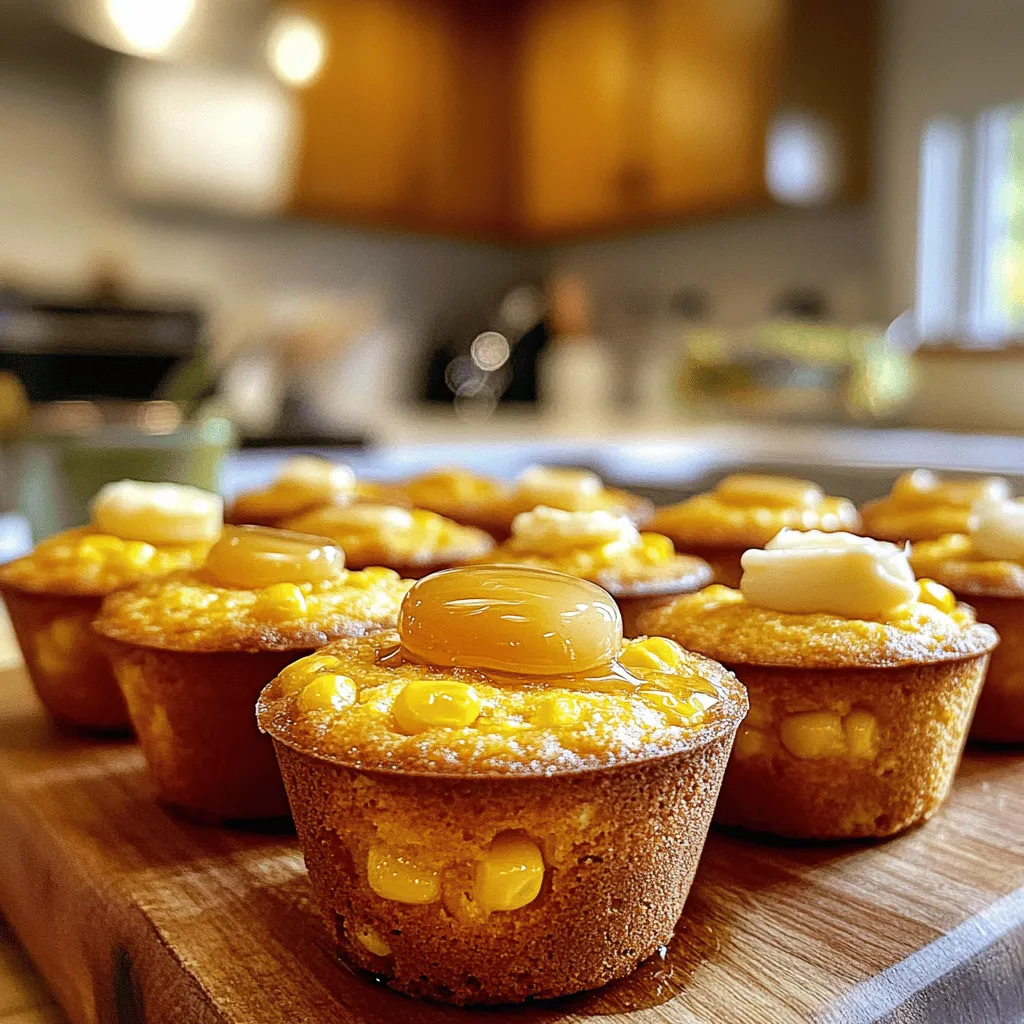
If you’re craving a tasty snack that’s both fun and simple to make, you’re in the right place! Honey Butter

Older posts
Newer posts
← Previous Page1 … Page14 Page15 Page16 … Page86 Next →

dsad

© 2026 yumymoments • Built with GeneratePress

Our Policies

  • Copyright Policy
  • Cookie Policy
  • GDPR Policy
  • Privacy Policy
  • Disclaimer
  • Terms Of Use

More Information

  • Home
  • About
  • Contact
  • Appetizers
  • Dessert
  • Dinner
  • Drinks
©2026, yumymoments About Back To Top