Skip to content
DisclaimerTerms Of UseGDPR PolicyCookie Policy

yumymoments

  • Home
  • Drinks
  • Appetizers
  • Dinner
  • Dessert
  • About
  • Contact
  • Privacy Policy
DisclaimerTerms Of UseGDPR PolicyCookie Policy

NO-ING-IMG

- 1 lb shrimp, peeled and deveined - 3/4 cup all-purpose flour - 1/4 cup cornstarch - 1 teaspoon paprika - 1/2 teaspoon garlic powder - 1/2 teaspoon salt - 1/2 teaspoon black pepper - 1 cup buttermilk (or substitute with milk mixed with 1 tablespoon of lemon juice) - 8 small corn tortillas - 1/2 cup mayonnaise - 2 tablespoons sweet chili sauce - 1 tablespoon sriracha (adjust based on your heat preference) - 1 teaspoon fresh lime juice - Shredded cabbage - Sliced jalapeños - Chopped fresh cilantro - Lime wedges The main ingredients set the stage for a great meal. You want fresh, high-quality shrimp. The dry coating mixture adds crunch. You can use buttermilk for a rich taste or a milk and lemon mix for a tangy twist. Soft corn tortillas are the perfect base. For the sauce, mayonnaise gives creaminess. Sweet chili sauce adds a nice balance. Sriracha brings heat, but you can adjust it to your taste. Fresh lime juice brightens the sauce. Toppings make these tacos fun. Shredded cabbage adds crunch. Sliced jalapeños give spice. Chopped cilantro adds freshness. Lime wedges are a must for a zesty kick! {{ingredient_image_2}} To start, mix the bang bang sauce. In a small bowl, combine half a cup of mayonnaise, two tablespoons of sweet chili sauce, one tablespoon of sriracha, and one teaspoon of fresh lime juice. Stir until smooth. Taste the sauce. If you want more heat, add more sriracha. Set this aside for later. Next, prepare the shrimp. In a medium bowl, whisk together three-quarters of a cup of all-purpose flour, one-fourth cup of cornstarch, one teaspoon of paprika, half a teaspoon of garlic powder, half a teaspoon of salt, and half a teaspoon of black pepper. This mix will coat the shrimp and give them crunch. Now, coat the shrimp. First, dip each shrimp into one cup of buttermilk. Let the extra drip off. Then, roll the shrimp in the flour mix. Make sure they are fully covered. This is key for a crispy bite. Now it’s time to cook the shrimp. In a large skillet, pour enough vegetable oil to create about a one-inch depth. Heat the oil over medium-high heat. It should shimmer and reach around 350°F. You can test this by dropping in a small pinch of the flour mix. If it sizzles, the oil is ready. Carefully add the shrimp to the hot oil in batches. Don’t overcrowd the skillet. Fry them for about two to three minutes on each side. They should turn golden brown and crispy. Once done, use a slotted spoon to transfer the shrimp to a paper towel-lined plate. This helps absorb the extra oil. Now it’s time to build the tacos. Warm the corn tortillas in a skillet or microwave. If using a microwave, 10-15 seconds should be enough. On each tortilla, place a few fried shrimp. Drizzle the bang bang sauce over the shrimp. Then, add shredded cabbage, slices of jalapeños, and fresh cilantro. Feel free to adjust the toppings to your taste. Serve the tacos on a platter, adding lime wedges for a fresh burst of flavor. Enjoy your tasty creation! To get that perfect crunch, the coating is key. Use a mix of all-purpose flour and cornstarch. This blend gives the shrimp a light, crispy shell. When you dip the shrimp in buttermilk, let the excess drip off. This step helps the dry coating stick better. For frying, heat the oil to about 350°F. You can check the oil by dropping in some flour. If it sizzles, it’s ready. Fry the shrimp in batches. This keeps the oil hot and helps each shrimp crisp up nicely. Overcrowding can make them soggy. Fry for 2-3 minutes on each side. The shrimp should turn golden brown. The Bang Bang sauce needs balance. Start with mayonnaise and sweet chili sauce. Then add sriracha based on how spicy you want it. A little lime juice adds brightness. Taste and tweak until you get the flavor just right. If it's too hot, add more mayo or sweet chili. This will tone down the heat while keeping the flavor. When it comes to serving, make it fun! Arrange the tacos on a large platter. Place toppings like cabbage and jalapeños around them. This adds color and invites people to dig in. For an extra pop, add lime wedges for freshness. You can also use pickled carrots or radishes. They add great color and taste to your dish. Enjoy the art of plating! Pro Tips Control the Heat: Ensure your oil is at the right temperature (about 350°F) before adding the shrimp for perfectly crispy results. Customize Your Sauce: Feel free to adjust the sweetness or spice level of the Bang Bang sauce by varying the amounts of sweet chili sauce and sriracha. Fresh Ingredients Matter: Use fresh lime juice and high-quality mayonnaise for the best flavor in your Bang Bang sauce. Keep Tacos Warm: If making in batches, keep the assembled tacos warm in a low oven (around 200°F) to ensure they stay hot for serving. {{image_4}} You can switch shrimp for chicken or tofu. Both options work well in this recipe. For chicken, cut it into bite-sized pieces. Marinate them for a few minutes in the same buttermilk mix as the shrimp. This keeps the chicken moist. For tofu, use firm tofu. Press it to remove extra water, then cut it into cubes. Coat and fry just like the shrimp. Both choices provide great flavors and textures. Toppings can really change the taste of your tacos. You can use other vegetables like diced tomatoes, corn, or avocado. These add color and crunch. For sauces, try adding a drizzle of ranch or a spicy mango salsa. You can also sprinkle some feta cheese for a tangy kick. Experiment with different combinations to find your favorite mix. You can choose between soft and hard shell tacos. Soft corn tortillas give a more traditional feel. They are easy to fold and bite into. Hard shells offer a crunchy texture. They hold toppings well but can be messy. For a fun twist, try taco bowls. Just use a bowl-shaped tortilla and fill it like a taco. This way, you get all the flavors in every bite. To keep leftover shrimp tacos fresh, use a tight container. Place the tacos in a shallow dish. If you have extra shrimp, store them separately. This helps prevent sogginess. Let the tacos cool to room temperature before sealing. When reheating, aim to keep the shrimp crispy. Use an oven or air fryer. Preheat your oven to 350°F. Place the shrimp on a baking sheet. Heat for about 10 minutes. This keeps the texture just right. Avoid using a microwave, as it makes the shrimp wet. Cooked shrimp last in the fridge for 3 days. After that, their texture and taste change. For longer storage, freeze the shrimp. Wrap them tightly in plastic wrap and then in foil. They can last for up to 3 months in the freezer. Just remember to thaw them in the fridge before reheating. I love pairing Bang Bang Shrimp Tacos with fresh sides. Here are some great options: - Mexican rice – Fluffy and flavorful, it complements the tacos well. - Black beans – Rich in protein and fiber, they add a hearty touch. - Guacamole – Creamy and zesty, it contrasts nicely with the crispy shrimp. - Corn on the cob – Sweet and crunchy, it brings a fun flavor. - Chips with salsa – Perfect for a crunchy snack on the side. These sides enhance the meal and offer a great balance of textures. Yes, you can make the Bang Bang Sauce ahead of time. It stores well in the fridge. - Storage – Place it in an airtight container. - Flavor development – Letting it sit for a few hours enhances the taste. - Duration – It stays fresh for about 3-5 days in the fridge. This makes it easy to prepare for a busy week or a fun gathering! Absolutely! This recipe works great for meal prepping. Here are some tips: - Batch cook – Prepare a larger quantity of shrimp and sauce. - Storage – Use airtight containers to keep everything fresh. - Tortilla tips – Store tortillas separately to prevent sogginess. You can enjoy delicious meals throughout the week without much fuss! You've learned how to make Bang Bang Shrimp Tacos step by step. We covered the main ingredients, including shrimp, tortillas, and a tasty sauce. I shared tips for perfecting crispiness and customizing your tacos. Remember, cooking is fun, so feel free to experiment with different proteins and toppings. Keep your leftovers stored well and use them creatively. Enjoy every bite of your homemade tacos!

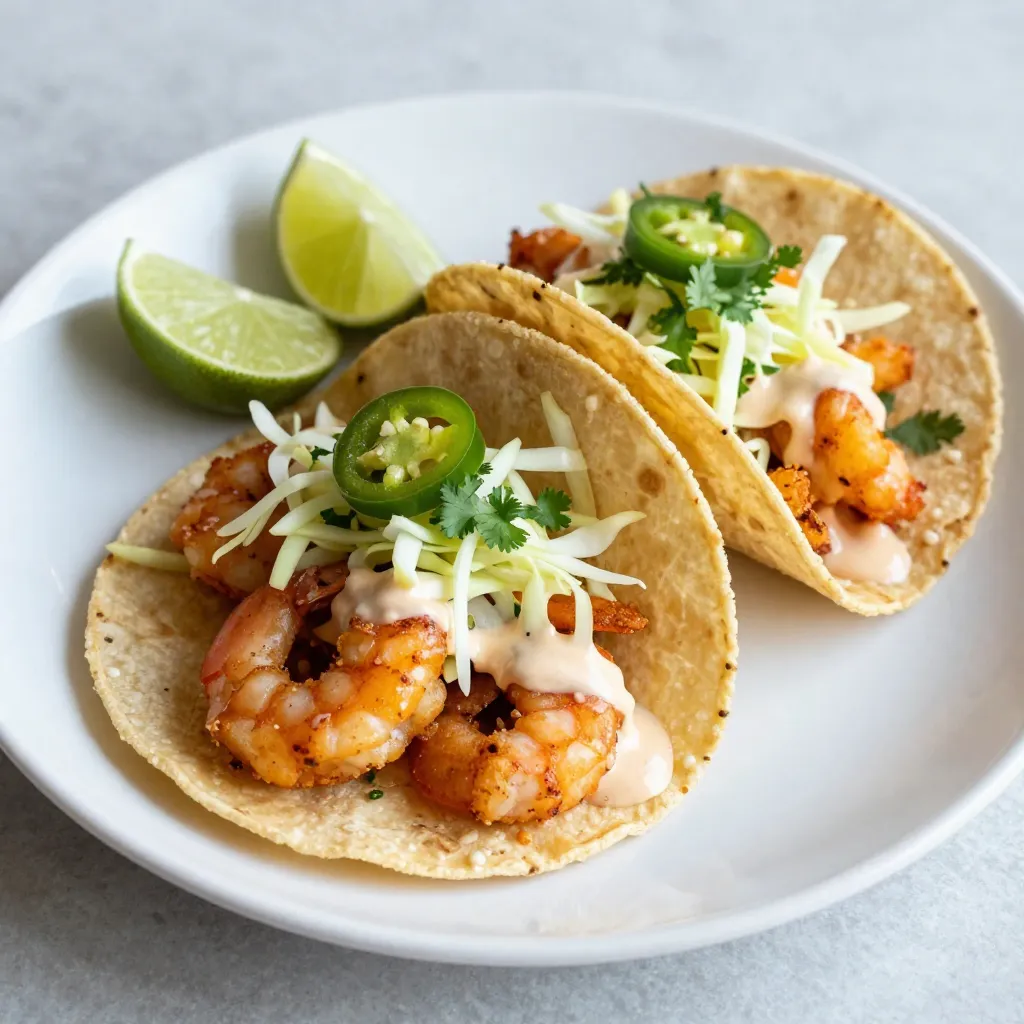
Bang Bang Shrimp Tacos Flavorful and Easy Recipe

Ready to spice up your dinner routine? Bang Bang Shrimp Tacos deliver bold flavors and are a breeze to make!

- 2 medium zucchinis - 1 cup panko breadcrumbs - 1/2 cup freshly grated Parmesan cheese - 2 large eggs - 1 teaspoon garlic powder - 1 teaspoon onion powder - 1 teaspoon dried Italian seasoning - 1/2 teaspoon sea salt - 1/4 teaspoon freshly ground black pepper - Cooking spray or a light drizzle of olive oil When picking zucchinis, look for firm ones. They should have a bright color. Avoid any that feel soft or have blemishes. Fresh zucchinis are key for great fries. Choose medium-sized zucchinis, as they have the best flavor and texture. If they are too large, they can be watery and less tasty. {{ingredient_image_2}} Start by preheating your air fryer to 400°F (200°C). This step is key. It helps the fries cook evenly. Let it heat for about 5 minutes. This way, you get that nice crispy texture. While the air fryer warms up, wash the zucchinis well. Trim off the ends first. Then slice each zucchini into sticks, about 1/2 inch thick. Aim for uniformity to help them cook evenly. Grab two shallow bowls for the breading. In one bowl, whisk the eggs until smooth. In the second bowl, mix the panko breadcrumbs, Parmesan cheese, garlic powder, onion powder, Italian seasoning, salt, and pepper. Make sure it’s well blended. This mix brings out great flavors. Take a zucchini stick and dip it in the egg mixture. Let any excess egg drip off. Next, roll the stick in the breadcrumb mix. Ensure it’s fully coated. This step is crucial for crispiness. Place the coated zucchini fries in a single layer in the air fryer basket. Avoid overcrowding. This ensures each fry gets crispy and golden. You may have to cook in batches if your fryer is smaller. Lightly mist the tops of the zucchini fries with cooking spray. This helps them achieve that golden-brown color. Cook the fries for about 10-12 minutes. Remember to shake the basket halfway through. This step promotes even cooking and crisping. Once they look golden, they are ready to enjoy! To get that perfect crunch on your zucchini fries, start with dry zucchini. After slicing, pat them with a paper towel. This helps remove excess moisture. When breading, make sure to coat each stick well. The panko breadcrumbs add great texture. A light mist of cooking spray before cooking also helps them crisp up. Overcrowding the air fryer basket can ruin your fries. If the fries are too close, they won’t crisp well. Instead, place them in a single layer. If you have a lot of zucchini fries, cook them in batches. This gives each fry enough space to cook evenly. Using the right cooking spray can make a big difference. Look for sprays that have no added chemicals. Olive oil spray is a great choice for flavor. You can also use avocado oil spray for a high smoke point. Just a light mist will do the trick for that crispy finish. Pro Tips Choose Firm Zucchini: Select firm zucchinis that are free of blemishes for the best texture and flavor. Experiment with Seasonings: Feel free to customize the seasoning mix by adding your favorite spices or herbs for a personal touch. Maintain Airflow: Ensure that the zucchini fries are not overcrowded in the air fryer to allow for proper airflow and even cooking. Check for Doneness: Keep an eye on the fries during the last few minutes of cooking to avoid over-browning and achieve the perfect crispiness. {{image_4}} You can mix things up with seasonings. Try adding a sprinkle of smoked paprika for a smoky taste. Chili powder adds heat if you like spice. For a zestier option, use lemon zest or a pinch of cayenne pepper. These changes give your fries a unique twist. While Parmesan is classic, other cheeses work well too. Use mozzarella for a melty pull. Cheddar adds a sharp flavor that many love. Pecorino Romano brings a salty kick. Mixing cheeses can create a rich flavor profile. Experiment and find what you like best. Dipping sauces elevate your zucchini fries. Marinara is a popular choice. It's tangy and pairs well with the crunch. Ranch dressing offers a creamy option that many enjoy. For something different, try a spicy aioli or garlic dip. These sauces make each bite even better. To keep your Air Fryer Parmesan Zucchini Fries fresh, store them in an airtight container. Make sure they cool to room temperature before sealing. This helps prevent moisture build-up. You can keep these fries in the fridge for about 3 days. If you want them to last longer, consider freezing them. When you’re ready to enjoy leftovers, reheating is key. Preheat your air fryer to 350°F (175°C). Place the zucchini fries in the basket in a single layer. Heat for 5 to 7 minutes. This method helps regain that crispy texture. Avoid the microwave; it makes them soggy. To freeze your zucchini fries, first let them cool completely. Arrange them in a single layer on a baking sheet. Freeze them for about 1 hour, then transfer to a freezer bag. This process prevents them from sticking together. You can keep them in the freezer for up to 2 months. When you’re ready to cook, no need to thaw; just air fry directly from frozen. Adjust cooking time to about 14-16 minutes for best results. To make these fries gluten-free, simply use gluten-free panko breadcrumbs. Many brands offer this option. Check the label to ensure it fits your needs. You can also use ground almonds or crushed rice cereal as a substitute. The best way to serve zucchini fries is hot and crispy. I like to arrange them on a colorful platter. Pair them with warm marinara sauce or a creamy dip. A sprinkle of fresh parsley adds a nice touch. These zucchini fries typically cook in about 10 to 12 minutes. Be sure to shake the basket halfway through. This helps them cook evenly and get extra crispy. Yes, you can use fresh breadcrumbs, but the texture may differ. Panko gives a crunchier finish. If you prefer fresh breadcrumbs, pulse day-old bread in a food processor until coarse. While Parmesan adds great flavor, you can skip it if needed. For a dairy-free option, try nutritional yeast for a cheesy taste. However, using Parmesan will make the fries extra tasty and crispy. Air Fryer Parmesan Zucchini Fries are simple and fun to make. We covered ingredients, from fresh zucchini to spices and cheese. I walked you through each step, from preheating to crisping. Don’t forget the tips for perfect fries and storage. In the end, you can enjoy these tasty fries in many ways. Feel free to experiment with flavors and sauces. The air fryer makes crisp, healthy snacks easy. So, gather your ingredients and start cooking today!

Air Fryer Parmesan Zucchini Fries Crispy and Tasty

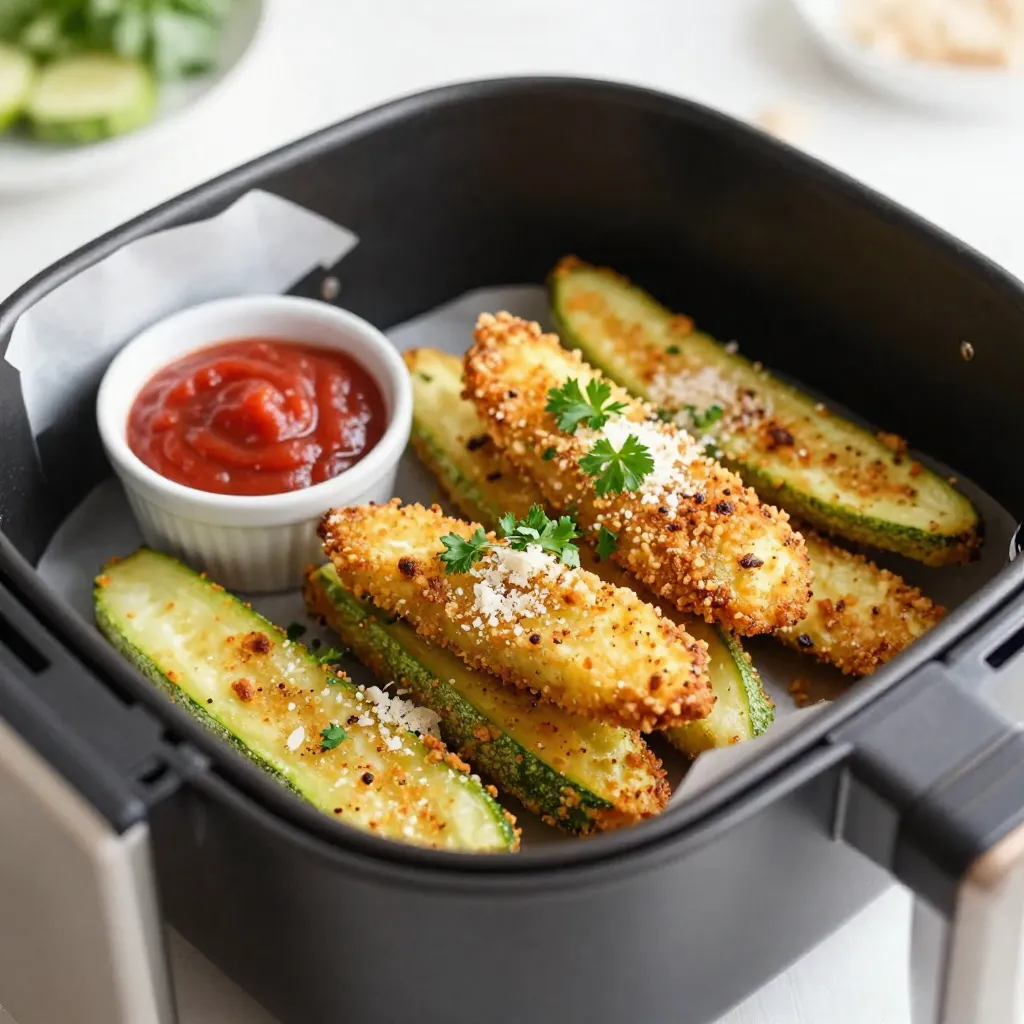
Looking for a tasty snack that’s both crispy and healthy? Let’s talk about Air Fryer Parmesan Zucchini Fries! These crunchy

- 1 block (14 oz) firm tofu, thoroughly drained and pressed - 2 tablespoons cornstarch - 2 tablespoons vegetable oil - 1 bell pepper (choose either red or yellow), thinly sliced - 1 cup broccoli florets - 1 cup snap peas, trimmed - 2 green onions, finely chopped - 3 cloves garlic, minced - 1 teaspoon fresh ginger, grated - 1/4 cup teriyaki sauce - Sesame seeds for garnish To create a delicious Crispy Teriyaki Tofu Stir-Fry, these ingredients are key. The firm tofu provides a great base. Cornstarch helps achieve that crunchy texture we all love. Vegetable oil is important for frying. Fresh veggies bring color and flavor to the dish. Garlic and ginger add depth. Finally, the teriyaki sauce ties everything together with a sweet, savory touch. For the best results, start with firm tofu. Press it well to remove extra water. This makes it easier to achieve crispiness. Cut the tofu into 1-inch cubes. This size helps it fry evenly. Then, coat the cubes in cornstarch. Make sure every piece is well-covered. This step is crucial for that perfect crunch. You can mix and match your veggies to suit your taste. Bell peppers, broccoli, and snap peas work well together. They add great color and crunch. Other good options are carrots, zucchini, or baby corn. Feel free to experiment! Using seasonal veggies can also enhance the dish's flavor. Just remember to cut them into similar sizes for even cooking. {{ingredient_image_2}} Start by cutting the pressed tofu into cubes. Aim for 1-inch pieces. This size helps the tofu crisp up nicely. Next, take a medium bowl and add the cornstarch. Toss the tofu cubes in the cornstarch until they are fully coated. This step is what gives the tofu its crunchy texture. Now it's time to cook the veggies. Heat 2 tablespoons of vegetable oil in a large skillet or wok over medium-high heat. When the oil shimmers, carefully add the tofu cubes in a single layer. Cook them for 5-7 minutes. Flip them occasionally to brown all sides. You want a golden-brown color on the outside. Remove the tofu and set it aside on a paper towel-lined plate to soak up excess oil. In that same skillet, add your sliced bell pepper, broccoli florets, and snap peas. Stir-fry these veggies for about 4-5 minutes. You want them to be bright and just tender. Once they look good, stir in the minced garlic and grated ginger. Cook for another minute to let those flavors come out. Next, add the crispy tofu back into the skillet. Pour in the teriyaki sauce and gently toss everything together. Ensure that the tofu and veggies get coated in that yummy sauce. Let it all heat through for another 2-3 minutes. Lastly, take the skillet off the heat. Sprinkle chopped green onions and sesame seeds on top for a nice finish. This adds color and crunch. Serve your stir-fry in a bowl. Maybe drizzle some extra teriyaki sauce on top for good measure! To get the best crispiness, start with firm tofu. Drain and press it well. Cut the tofu into 1-inch cubes. This size helps it fry evenly. Coat the tofu cubes in cornstarch. This step is key for that crunchy texture. Heat your skillet until the oil is shimmering. Place the tofu in a single layer to avoid steaming. Flip them often for even browning. Aim for a golden-brown color on all sides. Boost the flavor with fresh garlic and ginger. They add great depth to the dish. You can also use low-sodium teriyaki sauce for a lighter option. For a bit of heat, add red pepper flakes or sriracha. Fresh herbs like cilantro or basil can brighten the dish. Finally, a sprinkle of sesame seeds adds a nice crunch and nutty flavor. To save time, prepare your veggies ahead of time. Slice bell peppers and trim snap peas a day before. Store them in airtight containers. You can also pre-cook the tofu and store it in the fridge. When you’re ready to eat, just stir-fry the veggies and add the tofu. Serve it over rice or noodles for a complete meal. This makes dinner quick and simple on busy nights. Pro Tips Press Tofu Well: Ensure you press the tofu for at least 30 minutes to remove excess moisture, which helps achieve the desired crispiness when cooked. Use High Heat: Cooking on medium-high heat is crucial for achieving that golden-brown, crispy exterior on the tofu while keeping the inside tender. Customize Veggies: Feel free to swap in your favorite vegetables! Carrots, snow peas, or zucchini can all be delicious alternatives in this stir-fry. Garnish Options: Besides sesame seeds and green onions, consider adding crushed peanuts or a squeeze of lime for an extra pop of flavor. {{image_4}} If you want a vegan teriyaki sauce, you can make it at home. Combine soy sauce, maple syrup, rice vinegar, and sesame oil. This mix gives you a sweet and salty flavor without any animal products. You can also add garlic or ginger for extra taste. Feel free to change up the veggies in your stir-fry! Some great choices include carrots, zucchini, or mushrooms. You can even use leafy greens like spinach or bok choy. Each vegetable adds a unique flavor and texture, making your dish even better. If you’re not into tofu, you can use chicken or shrimp instead. Cut your protein into bite-sized pieces. Cook it in the skillet before adding the veggies. This swap will still keep the meal tasty and satisfying. You can also try beef or pork for a heartier option. To store leftover stir-fry, let it cool first. Place it in an airtight container. Make sure to seal it well to keep air out. This helps the flavors stay fresh. You can store it in the fridge for up to three days. If you want to keep it longer, freeze it for up to two months. Just remember to label the container with the date. To reheat your stir-fry, you can use a few methods. The best way is to use a skillet. Heat it on medium heat and add your stir-fry. Stir it often until it is hot. You can also use a microwave. Place your stir-fry in a microwave-safe bowl and cover it loosely. Heat it in short bursts, stirring in between, until it is warm. The shelf life of the main ingredients varies. Tofu can last about a week in the fridge once opened. Fresh vegetables like bell peppers and broccoli will stay good for about a week, too. Snap peas should be eaten within three to five days for the best taste and crunch. Teriyaki sauce can last for months if kept sealed and refrigerated. Always check for any signs of spoilage before using ingredients. Yes, you can use different types of tofu. Firm tofu works best for this recipe. Soft or silken tofu can break apart when cooked. If you prefer a different texture, try extra-firm tofu. It will still crisp up nicely in the pan. Some great side dishes include: - Steamed rice or quinoa - A fresh green salad - Stir-fried vegetables - Edamame beans These sides pair well and add more nutrition to your meal. To make this recipe gluten-free, choose a gluten-free teriyaki sauce. Many brands offer this option. Check the label to ensure it meets your needs. You can also use tamari sauce, which is naturally gluten-free. This blog post explored making a tasty Crispy Teriyaki Tofu Stir-Fry. We discussed key ingredients, tofu prep, and the best veggies. I shared step-by-step instructions for cooking. You learned how to make crispy tofu and enhance flavors. I also covered meal prep tips and variations for dietary needs. Finally, we looked at proper storage and answered common questions. Try this dish for a quick, delicious meal that everyone will enjoy!

Crispy Teriyaki Tofu Stir-Fry Simple and Tasty Meal

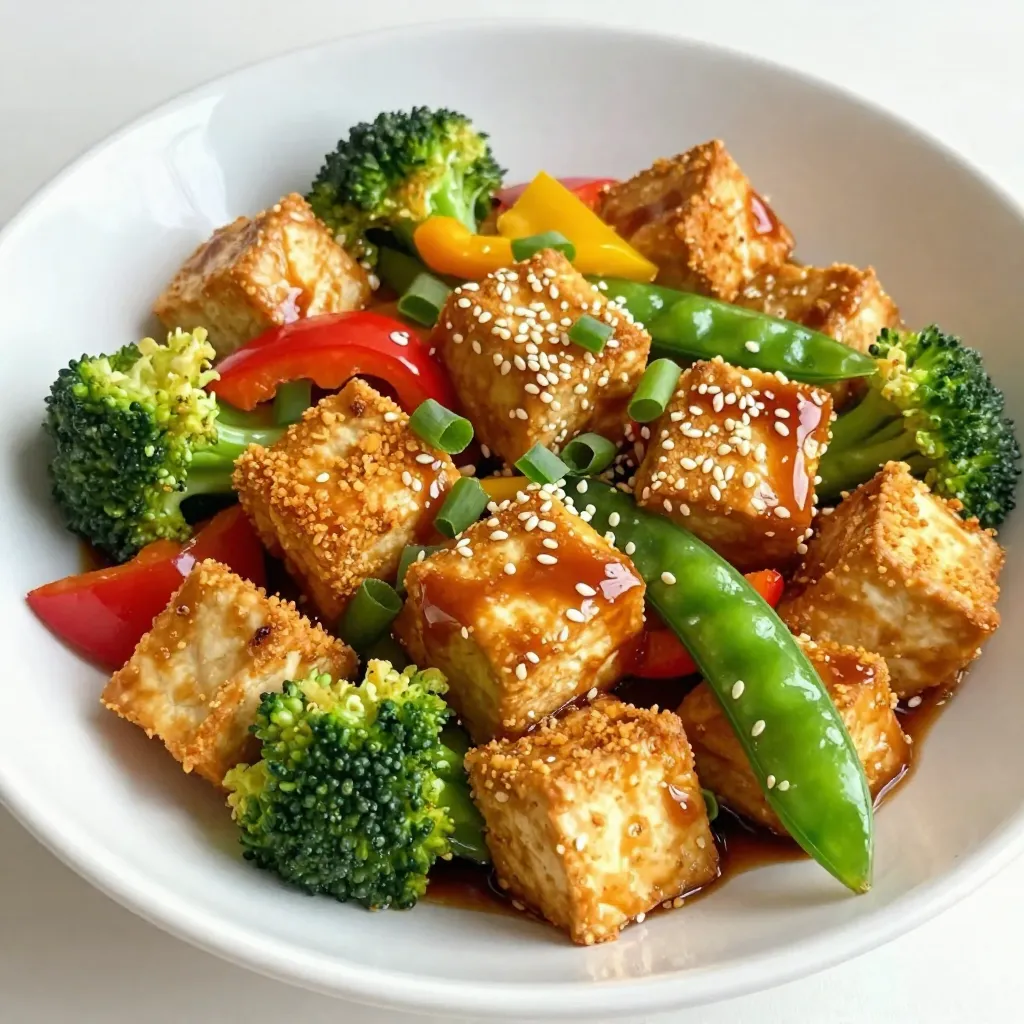
Are you ready to whip up a simple and tasty meal? This Crispy Teriyaki Tofu Stir-Fry will quickly become your

To make a classic Italian tiramisu, gather these key ingredients: - 1 cup strong brewed coffee, cooled to room temperature - 3 large eggs, separated into yolks and whites - 3/4 cup granulated sugar - 1 cup mascarpone cheese, at room temperature - 1 cup heavy whipping cream - 1 teaspoon pure vanilla extract - 24 ladyfinger cookies - Unsweetened cocoa powder, for dusting - Dark chocolate shavings, for garnish Each ingredient plays a vital role in building the layers of flavor and texture. Strong brewed coffee gives a bold taste. The egg yolks and whites add richness and lightness. Sugar sweetens the dish while the mascarpone cheese provides a creamy base. Heavy whipping cream creates a fluffy texture. Vanilla adds a warm, inviting flavor. Ladyfinger cookies soak up the coffee, making them soft yet firm. Cocoa powder and chocolate shavings offer a delightful finish. Using quality ingredients enhances the dish's taste. I always recommend using fresh eggs and high-quality coffee for the best results. This mix of flavors and textures makes tiramisu a dessert you can't resist. {{ingredient_image_2}} First, take three egg yolks and place them in a large bowl. Add three-fourths cup of granulated sugar. Use an electric mixer to beat them together. Mix until the yolks turn light and fluffy. This should take about five minutes. Once ready, gently fold in one cup of mascarpone cheese. Add one teaspoon of pure vanilla extract too. Mix until it becomes smooth and creamy. Next, grab another bowl and pour in one cup of heavy whipping cream. Use a mixer on high speed. Whip the cream until it forms stiff peaks. This means the cream stands tall when you lift the beaters. Now, carefully fold this whipped cream into the egg mixture. Do this in three parts to keep it light and airy. Take a clean bowl and add the three egg whites. Whisk them on high speed until soft peaks form. This means the egg whites will bend but hold their shape. Gently fold the whipped egg whites into your mascarpone mixture. Be careful not to lose the airiness you created. Now, it’s time to build your layers. Take each ladyfinger cookie and dip it quickly into one cup of cooled coffee. Make sure to soak each side for just a second. Do not let them get soggy! Arrange half of the soaked ladyfingers in a single layer at the bottom of a 9x9-inch baking dish. Spread half of the mascarpone cream over the ladyfingers. Smooth it out with a spatula. Repeat this step with the remaining ladyfingers and cream. Cover the baking dish tightly with plastic wrap. Place it in the refrigerator for at least four hours, or better yet, overnight. This chilling time helps the flavors mix. When you’re ready to serve, dust the top with unsweetened cocoa powder. For an extra touch, sprinkle some dark chocolate shavings on top. Enjoy your delicious tiramisu! To make the best tiramisu, choose strong coffee. I like using espresso for its rich flavor. Brew it fresh and let it cool to room temperature. The key is to dip the ladyfingers quickly. Soak each side for just a second. If you dip too long, they will become soggy, which is not ideal. Folding the cream is very important. Use a spatula to gently mix instead of beating. This keeps the cream light and fluffy. Also, make sure your mascarpone cheese and heavy cream are at room temperature. This helps them blend smoothly and evenly. For a beautiful presentation, serve tiramisu in dessert glasses. Layer the creamy mix and ladyfingers to show off the design. Dust the top with cocoa powder for that classic look. You can also add dark chocolate shavings on top. Pair it with a glass of dessert wine or coffee. This will enhance the flavors and make it a perfect treat. Pro Tips Fresh Ingredients: Always use fresh mascarpone cheese and high-quality coffee for the best flavor in your tiramisu. Egg Safety: If you're concerned about using raw eggs, opt for pasteurized eggs to minimize any risk. Layering Technique: Ensure that each layer of ladyfingers is evenly soaked but not soggy to maintain the perfect texture. Chill Time: For optimal flavor and texture, allow the tiramisu to chill overnight; this enhances the melding of flavors. {{image_4}} You can make your tiramisu unique by adding flavors. Try using liqueurs like Amaretto or coffee liqueur. This will give your dessert a rich, adult taste. Another fun idea is to use seasonal flavors. Think about adding pumpkin spice in the fall or fresh berries in the summer. Chocolate lovers can mix in cocoa or dark chocolate for extra indulgence. If you want a dairy-free tiramisu, you can swap mascarpone with silken tofu or cashew cream. These options still give a creamy texture. For a healthier version, consider using sugar alternatives like honey or maple syrup. They add sweetness without refined sugar. These swaps keep the essence of the dessert while catering to different diets. To keep your tiramisu fresh, store it in the fridge. Cover it tightly with plastic wrap. This prevents it from absorbing other smells. Properly stored, tiramisu lasts about 3 to 4 days. After that, it may lose its nice texture and flavor. Yes, you can freeze tiramisu! Freezing helps if you want to make it ahead. First, cut it into portions and wrap each piece well in plastic wrap. Place the wrapped pieces in an airtight container or a freezer bag. Tiramisu can last up to 2 months in the freezer. When you're ready to enjoy it, take it out and thaw in the fridge overnight. This keeps the texture smooth. Avoid thawing at room temperature, as it can make it too soggy. Once thawed, serve it cold, just like fresh tiramisu. Tiramisu comes from Italy. Many believe it started in the Veneto region. The name means “pick me up” in Italian. This dessert uses coffee and cocoa, giving it a rich taste. Some say it dates back to the 1960s, while others think it is older. The blend of flavors and textures makes it unique. It combines coffee-soaked ladyfingers with creamy mascarpone. You can taste the love and care in each bite. Yes, you can make Tiramisu ahead of time. In fact, it tastes better after chilling. I suggest letting it sit in the fridge for at least 4 hours. For the best flavor, chill it overnight. This wait lets the flavors mix and deepen. The longer it chills, the more delicious it becomes. Just remember to cover it well to keep it fresh. Eating raw eggs can be risky. They may carry bacteria, like Salmonella. However, many people eat Tiramisu safely. You can use pasteurized eggs to reduce risks. They are treated to kill harmful bacteria. If you're unsure, feel free to cook the eggs. Simply heat the yolks and sugar over a double boiler. This will make your Tiramisu safe and still tasty. Making tiramisu is easy and fun. You start with strong coffee and egg mixtures. Then, layer ladyfingers and creamy mascarpone for the perfect treat. Remember to chill it well for the best taste. In the end, feel free to explore variations and substitutions. With simple tips and tricks, you can create your ideal dessert. Enjoy the process and impress your friends and family with your delicious results!

Classic Italian Tiramisu Irresistible Dessert Delight

Are you ready to indulge in the rich layers of Classic Italian Tiramisu? This irresistible dessert delight combines strong coffee,

To make Jalapeño Popper Stuffed Chicken, you will need: - 4 boneless, skinless chicken breasts - 4 oz cream cheese, softened at room temperature - 1 cup shredded sharp cheddar cheese - 1/2 cup jalapeños, seeded and finely diced (fresh or pickled) - 1/4 cup breadcrumbs (preferably panko for extra crunch) - 2 tablespoons olive oil - 1 teaspoon garlic powder - 1 teaspoon onion powder - Salt and pepper to taste - Optional: Fresh cilantro or parsley chopped, for garnish You can swap some ingredients for different options. Here are a few ideas: - Use low-fat cream cheese for a lighter version. - Swap cheddar cheese for pepper jack for extra heat. - Replace breadcrumbs with crushed tortilla chips for a unique crunch. - If you don't have jalapeños, you can use diced bell peppers for a milder taste. Using fresh, quality ingredients makes a big difference in flavor. Fresh chicken breasts ensure moist, tender meat. Good cream cheese and cheddar provide rich, creamy filling. Fresh jalapeños give a nice kick. Always choose the best you can find. This investment pays off with every bite of your delicious dish. {{ingredient_image_2}} Start by preheating your oven to 375°F (190°C). This step helps the chicken cook perfectly. Next, take your chicken breasts and lay them flat on a cutting board. Carefully slice a pocket into the thickest side of each breast. Make sure not to cut through to the other side. You want a deep pocket that holds the filling securely. In a medium bowl, mix together the softened cream cheese, shredded cheddar cheese, and diced jalapeños. Add garlic powder, onion powder, and a pinch of salt and pepper. Stir well until everything blends into a creamy filling. This mixture gives your chicken a spicy and cheesy burst of flavor. Now it’s time to stuff the chicken. Use a spoon or your fingers to fill each pocket with the jalapeño cheese mixture. Be careful not to overstuff, or it may spill out during cooking. If needed, use toothpicks to secure the openings of the stuffed chicken. This keeps the filling inside while cooking. To get a nice crust, heat olive oil in a large skillet over medium heat. Once hot, add the stuffed chicken breasts. Sear for about 3-4 minutes on each side until they turn golden brown. After searing, transfer the chicken to a baking dish and place it in the oven. Bake for 25-30 minutes. Make sure the chicken reaches an internal temperature of 165°F (74°C). Let it rest for about 5 minutes after baking for the best flavor. To avoid overstuffing your chicken, start with a small amount of filling. Use about two tablespoons for each chicken breast. You want enough to fill the pocket, but not so much that it spills out. If you find the filling is oozing, it’s a sign you’ve added too much. Keep it simple to ensure a neat presentation. For even cooking, make sure your chicken breasts are of similar size. If they vary, larger pieces may not cook fully while smaller ones can dry out. You can also pound them to an even thickness. This helps all parts cook at the same rate. Use a meat thermometer to check that the internal temperature reaches 165°F (74°C) for safe eating. To keep your chicken juicy, don’t skip the resting step after cooking. Letting the chicken rest for about five minutes allows the juices to redistribute. Also, be careful not to overcook. Use a timer and monitor closely. Searing the chicken first helps lock in moisture, creating a tasty crust that holds in flavor. Pro Tips Use Fresh Jalapeños: For the best flavor and heat, opt for fresh jalapeños when making the filling. If you prefer a milder taste, use fewer jalapeños or remove the seeds and membranes. Seal the Chicken Properly: Ensure the chicken pocket is sealed well either by using toothpicks or kitchen twine. This prevents the filling from leaking during cooking and keeps the flavors intact. Let it Rest: Allow the stuffed chicken to rest for about 5 minutes after baking. This resting period helps the juices redistribute, resulting in a juicier and more flavorful chicken. Experiment with Cheese: Feel free to mix different types of cheese in your filling. Cream cheese and cheddar work well together, but adding pepper jack or mozzarella can give it an extra kick or creaminess. {{image_4}} You can switch the cheese in this recipe. Cream cheese is great, but try others! Mozzarella adds a stretchy, chewy bite. Pepper jack gives a nice kick. For a tangy twist, use goat cheese. Each choice changes the taste and texture. Mix and match to find your favorite! Want more heat? Add more jalapeños or use spicy peppers. You could also sprinkle in some cayenne pepper. If you prefer mild, use less jalapeño or pickled peppers. Adjust the spices to match your taste. Balance is key to enjoy every bite! You can get creative with the stuffing. Consider adding cooked bacon for a smoky flavor. Spinach or other veggies can add color and nutrition. For a Mediterranean twist, try sun-dried tomatoes and feta. The options are endless! Experiment and make this dish your own. To keep your leftover Jalapeño Popper Stuffed Chicken fresh, let it cool first. Place the chicken in an airtight container. You can store it in the fridge for up to 3 days. If you want to keep it longer, consider freezing it. When you’re ready to enjoy the leftovers, reheat them gently. Preheat your oven to 350°F (175°C). Place the chicken in an oven-safe dish. Cover it with foil to keep it moist. Heat for about 15-20 minutes, or until warmed through. You can also use a microwave. Heat it in short bursts to avoid drying it out. To freeze your stuffed chicken, wrap each piece tightly in plastic wrap. Then, place them in a freezer-safe bag. Make sure to remove as much air as possible. You can freeze them for up to 3 months. When you’re ready to eat, thaw them in the fridge overnight before reheating. To check if the chicken is done, use a meat thermometer. The chicken should reach 165°F (74°C). Insert the thermometer into the thickest part of the chicken. If it hits this number, your chicken is safe to eat. If not, return it to the oven for a bit longer. The juices should run clear when you cut into it. If you see pink juices or meat, it needs more time. Always let the chicken rest for 5 minutes after cooking. This helps keep it juicy. Yes, you can use skin-on chicken breasts. The skin adds flavor and texture. It will also keep the chicken moist while cooking. Just make sure you adjust the cooking time slightly. Skin-on breasts may take a few minutes longer to cook through. Searing the skin side first gives a nice crispy layer. Just remember to check the internal temperature as you cook. This dish pairs well with several sides. Here are some tasty ideas: - Sautéed vegetables like zucchini or bell peppers - A fresh green salad with avocado and lime dressing - Creamy mashed potatoes or garlic mashed cauliflower - Rice or quinoa for a heartier option These sides complement the rich, cheesy flavors of the stuffed chicken. Enjoy mixing and matching to find your favorite combo! In this blog post, we covered everything about making Jalapeño Popper Stuffed Chicken. We listed the best ingredients and their substitutes, and shared the importance of using quality items. I gave step-by-step details on prepping, stuffing, and cooking. You also found tips to avoid mistakes and ways to store leftovers. Remember, a few swaps or variations can change a dish. Enjoy the cooking process, and don’t hesitate to try new flavors. You can create a delicious meal any time!

Jalapeño Popper Stuffed Chicken Flavorful Dinner Recipe

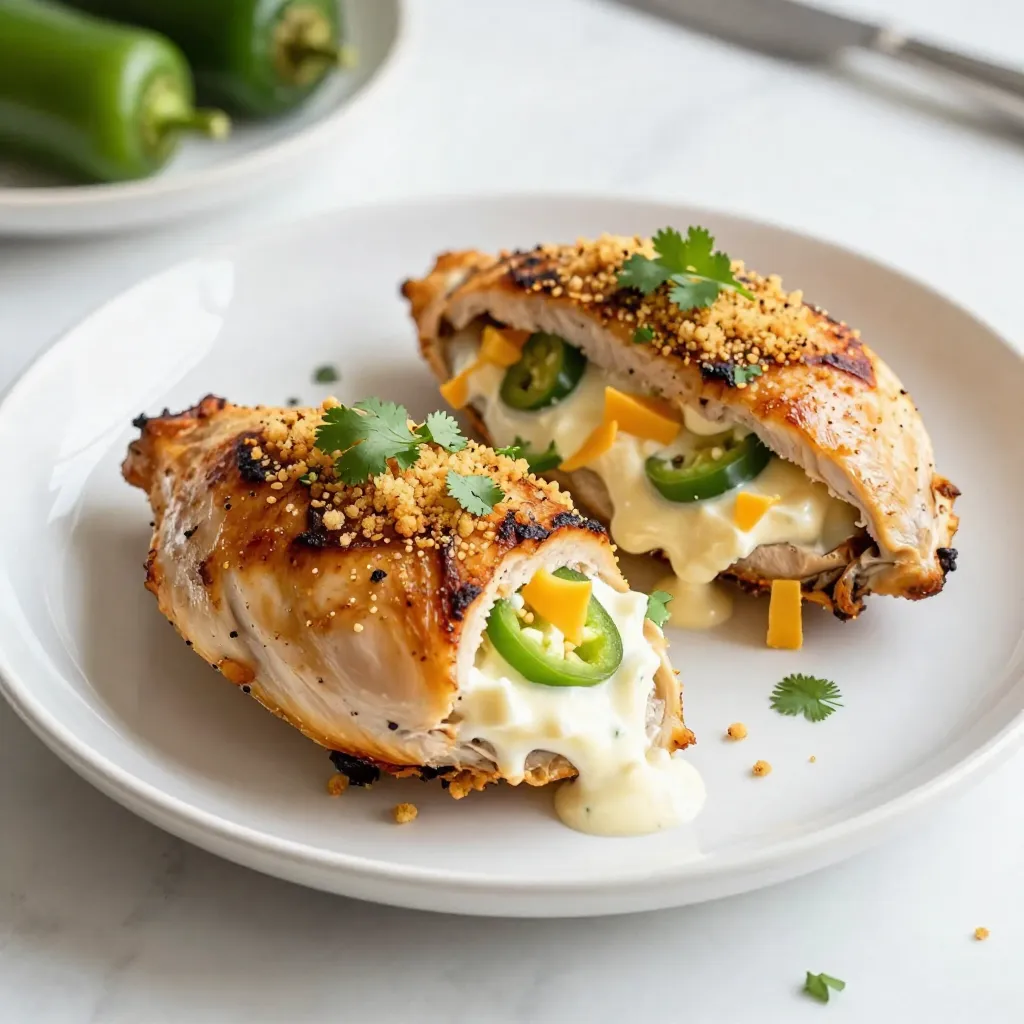
Looking for a dinner that packs a punch? You’ve found it! My Jalapeño Popper Stuffed Chicken is a flavor bomb

- 3 ripe bananas, mashed until smooth - 1/2 cup unsalted butter, melted and slightly cooled - 1/2 cup packed brown sugar - 1/2 cup granulated sugar - 2 large eggs, at room temperature - 1 teaspoon pure vanilla extract - 1 teaspoon baking soda - 1/4 teaspoon fine sea salt - 1 1/2 cups all-purpose flour, sifted - 1 cup semi-sweet chocolate chips, plus an extra 1/4 cup for topping - 1/2 teaspoon ground cinnamon (optional but recommended) For this chocolate chip banana bread, ripe bananas are key. They should be soft, sweet, and full of flavor. You want them to mash easily. The butter adds richness. Use unsalted butter for better control over saltiness. Brown sugar gives depth, while granulated sugar keeps it light. You’ll need two large eggs to bind everything together. The vanilla extract brings warmth and sweetness. Baking soda helps the bread rise. Sea salt enhances all the flavors. All-purpose flour gives structure to your loaf. The chocolate chips are the stars, adding sweetness and texture. If you want, sprinkle in some ground cinnamon. It gives a warm, cozy touch. Gather all these ingredients before you start. This makes the process smooth and fun. Happy baking! {{ingredient_image_2}} Set your oven to 350°F (175°C). This is the perfect temperature for baking. Grease a 9x5 inch loaf pan with some butter. You can also dust it with flour. If you prefer, line it with parchment paper. This helps with easy removal later. In a large bowl, mash 3 ripe bananas until they are smooth. Add 1/2 cup of melted butter to the bananas. Mix them well until they look creamy. This mixture forms the base of your bread. Next, add 1/2 cup of brown sugar and 1/2 cup of granulated sugar to the bowl. Stir until it is mixed well. Then, crack in 2 large eggs and pour in 1 teaspoon of vanilla extract. Whisk everything together until smooth and combined. Now, sprinkle 1 teaspoon of baking soda and 1/4 teaspoon of fine sea salt over the mixture. If you want a warm flavor, add 1/2 teaspoon of ground cinnamon. Stir gently to make sure everything is evenly mixed. Carefully fold in 1 1/2 cups of sifted all-purpose flour. Use a spatula or wooden spoon to mix it in. Stop when you see no more flour. It's okay if there are small lumps. This step keeps the bread tender. Now, gently fold in 1 cup of semi-sweet chocolate chips. Make sure they are spread out in the batter. Set aside some chips for the top. Pour the batter into your prepared loaf pan. Smooth the top with a spatula. Sprinkle the reserved chocolate chips on top for a nice finish. Place the pan in the oven. Bake for about 60 to 65 minutes. Check doneness by inserting a toothpick in the center. It should come out clean or have a few moist crumbs. After baking, take the loaf out of the oven. Let it cool in the pan for about 10 minutes. Then, carefully transfer it to a wire rack. Allow it to cool completely before slicing. This helps keep the bread moist and tasty. - Use ripe bananas. They should be brown and soft. Ripe bananas add natural sweetness. - Mix wet ingredients well. Combine bananas and melted butter until smooth. This helps your bread rise. - When adding sugars and eggs, mix until you see no lumps. This ensures even sweetness. - Add dry ingredients gently. Over-mixing can make your bread tough. Stir just until combined. - Want more flavor? Add 1/2 teaspoon of ground cinnamon. This gives a warm, cozy taste. - Try different chocolates. Use dark chocolate chips for a rich flavor. White chocolate adds a sweet twist. - Add nuts or dried fruits for extra texture. Walnuts or pecans work great in this bread. - Slice the bread and serve on a clean plate. Use a colorful dish to make it pop. - Sprinkle toasted coconut on top for a tropical look. It adds crunch and flavor. - Add a few chocolate chips on each slice before serving. This makes it tempting! - Consider serving with a dollop of whipped cream. It adds a nice touch and makes it feel special. Pro Tips Use Overripe Bananas: The riper the bananas, the sweeter and more flavorful your bread will be. Look for bananas with brown spots for the best results. Don't Overmix: When combining the flour, mix just until no dry streaks remain. Overmixing can lead to a dense loaf instead of a light and fluffy one. Experiment with Mix-ins: Add nuts, dried fruits, or even a swirl of peanut butter for extra flavor and texture. Just keep the total mix-ins to about 1 cup to maintain the structure. Storage Tips: Once cooled, store the bread in an airtight container at room temperature for up to 3 days, or freeze for longer storage. This keeps it moist and fresh! {{image_4}} You can make simple swaps for a healthier banana bread. - Substituting sugars or flours: Try using coconut sugar instead of brown sugar. It adds a nice caramel flavor. For flour, you can use whole wheat flour. It makes the bread more nutritious without losing taste. - Using yogurt or applesauce: Replace some butter with plain yogurt or applesauce. This will cut down on fat and add moisture. Want to get creative? Here are some fun ideas for add-ins. - Nuts, dried fruits, or spices: Add walnuts or pecans for crunch. Dried cranberries or raisins add sweetness. You can also sprinkle in some nutmeg or cardamom for a warm spice kick. - Creative twists on chocolate flavors: Experiment with different chocolate types. You can use dark chocolate chips for a richer taste. Or try white chocolate chips for a sweet twist. If you need a gluten-free option, don’t worry. You can still enjoy this treat. - Alternative flour options: Use almond flour or oat flour instead of all-purpose flour. Both add a nice texture and flavor. Just make sure to check for gluten-free labels. - Tips for gluten-free baking: Gluten-free batters can be thicker. Add a bit of milk or water to get the right consistency. Keep an eye on baking time, as it may differ from the original recipe. To keep your bread fresh, use an airtight container. A glass or plastic container works well. If you don't have one, wrap the bread in plastic wrap. This helps keep moisture in and air out. Store the bread at room temperature for up to three days. If your kitchen is hot or humid, it’s best to refrigerate it. This can keep it good for up to a week. To freeze your banana bread, let it cool completely first. Wrap it tightly in plastic wrap. Then, place it in a freezer-safe bag or container. Label it with the date for easy tracking. You can freeze the bread for about three months. When you're ready to eat it, remove the bread from the freezer. Thaw it in the fridge overnight for the best texture. You can also leave it at room temperature for a few hours. Once thawed, enjoy it as is or warm it up in the oven. This will help restore its soft texture. Yes, you can use frozen bananas. Before using, let them thaw completely. Then, mash them until smooth. Frozen bananas may make the bread a bit softer. This can add moisture and enhance the flavor. If you want a vegan option, use ground flaxseed or applesauce. For each egg, mix 1 tablespoon of flaxseed with 3 tablespoons of water. Let it sit for a few minutes to thicken. Alternatively, use 1/4 cup of applesauce per egg. At room temperature, the bread lasts about 3 to 4 days. If you keep it in the fridge, it can last up to a week. Store it in an airtight container to keep it fresh. Yes, you can use dark, milk, or white chocolate chips. Each type adds a unique flavor. Dark chocolate gives a rich taste, while white chocolate adds sweetness. Mix and match to find your favorite combination. This blog post covered how to make perfect chocolate chip banana bread. We discussed key ingredients like ripe bananas and baking methods. You learned tips for mixing and baking, plus fun variations. Storage tips help keep your bread fresh. Remember, the right ingredients and techniques make all the difference. Enjoy baking, and share your delicious results!

Chocolate Chip Banana Bread Delightful and Easy Recipe

Are you ready to create a deliciously easy treat? This Chocolate Chip Banana Bread recipe is perfect for both beginners

- 1 can chickpeas - Hot sauce (recommendation: Frank's RedHot) - Whole grain tortillas Chickpeas are the star of this dish. They add protein and a nice texture. I always use a can for ease. Just drain and rinse them well. The hot sauce brings the heat. Frank's RedHot has a great flavor. Whole grain tortillas are my choice for a healthy wrap. They hold everything together nicely. - Vegan ranch dressing - Fresh herbs for garnish I love adding vegan ranch dressing. It cools down the spice and adds creaminess. You can buy this or make your own. Fresh herbs like cilantro or parsley make a lovely garnish. They add color and flavor to the wraps. - Garlic powder - Onion powder - Smoked paprika Seasonings are key to great flavor. Garlic powder gives a nice punch. Onion powder adds depth to the taste. Smoked paprika brings warmth and a touch of smokiness. A bit of salt and black pepper rounds it all off. {{ingredient_image_2}} - First, preheat your oven to 400°F (200°C). This step gets the oven hot for the chickpeas. - Next, take a can of chickpeas. Drain and rinse them well. Then, place them in a bowl. Use a fork or potato masher to mash the chickpeas. You want a mix of smooth and chunky bits. This gives a nice texture. - Now, add hot sauce, olive oil, garlic powder, onion powder, smoked paprika, salt, and pepper to the mashed chickpeas. Mix well until everything is combined. - Transfer this mixture to a baking sheet lined with parchment paper. Spread it out evenly. Bake in the oven for about 15-20 minutes. You want the edges to turn crisp and golden. - While the chickpeas bake, prepare your tortillas. Lay them flat on a clean surface. - Spread about a tablespoon of vegan ranch dressing on each tortilla. This adds a creamy flavor. - Once the chickpeas are done, scoop the spicy mixture onto the center of each tortilla. - Top with shredded lettuce, diced tomatoes, and sliced cucumbers. This adds freshness and crunch. - Roll each wrap tightly. Tuck in the ends as you roll to keep everything inside. - For a nice touch, slice each wrap in half diagonally. You can garnish with fresh cilantro or parsley for a pop of color. To get the best texture in your chickpeas, start by mashing them gently. Use a fork or potato masher. You want a mix of smooth and chunky bits. This gives your wraps a delightful bite. For added crispiness, spread the chickpea mixture evenly on the baking sheet. Bake at 400°F for 15 to 20 minutes. Watch for golden edges, which signal that they are perfectly crispy. Pair these wraps with fresh side dishes. I love serving them with a simple salad. You can also add carrot sticks or celery for crunch. For a fun presentation, arrange the wraps on a rustic platter. Drizzle extra vegan ranch on the side for dipping. Add a small dish of hot sauce for those who crave heat. Feel free to make substitutions based on your needs. If you have a gluten allergy, use gluten-free tortillas. You can also swap chickpeas for lentils or tofu. For more flavor, add toppings like avocado or olives. Consider mixing in different sauces, too. Experiment with a spicy aioli or a tangy salsa for a twist. Pro Tips Adjust the Spice Level: Feel free to modify the amount of hot sauce to suit your taste. For a milder version, start with less and gradually add more until you find your perfect heat level. Make Ahead: The spicy chickpea mixture can be prepared in advance and stored in the refrigerator for up to 3 days. This makes it a great option for quick lunches or snacks! Experiment with Fillings: Don't hesitate to get creative with your wraps! Add your favorite veggies or even some avocado for creaminess to enhance the flavor and nutrition. Toasting the Wraps: For an extra touch, toast the wrapped tortillas in a skillet for a few minutes on each side. This adds a delightful crunch and warms the fillings nicely. {{image_4}} If you want to switch things up, try lentils or tofu. Lentils give a nice texture and are packed with protein. Just cook them until soft, then mix with the spices. Tofu is another great choice. You can cube it, marinate it in hot sauce, and bake until crispy. Both options will keep your wraps exciting and tasty. You can easily change the hot sauce for different spice levels. If you like it mild, use a sweet chili sauce. For more heat, try a ghost pepper sauce. Toppings can also change your wrap game. Add creamy avocado for richness or olives for a salty bite. Feel free to get creative here! Tortillas are great, but you have other choices too. Gluten-free tortillas work well if you need a gluten-free option. Lettuce wraps are also a fun low-carb choice. Just use large leaves like romaine or butter lettuce. These options can keep your meal fresh and interesting while still being delicious. To store leftovers in the fridge, place the wraps in an airtight container. This keeps them fresh for about three days. If you want to enjoy them later, wrap them in foil or plastic wrap first. For reheating, remove the wraps from the fridge. Heat them in a skillet over medium heat for about five minutes. This makes them warm and crispy. You can also use a microwave. Just heat them for about 30 seconds. But, the skillet gives a better texture. You can freeze the chickpea mixture for long-term storage. Allow the mixture to cool completely before placing it in a freezer-safe bag. Squeeze out as much air as possible. This helps prevent freezer burn. The mixture can stay fresh for up to three months. To thaw, place the bag in the fridge overnight. Once thawed, reheat it in a skillet. Then, assemble your wraps with fresh veggies and ranch dressing. This keeps the wraps tasting great, even after freezing. How do you make your own vegan ranch dressing? To make your own vegan ranch, mix 1 cup of vegan mayonnaise with 1 tablespoon of lemon juice. Add 1 teaspoon of garlic powder, 1 teaspoon of onion powder, and a pinch of salt. Stir until smooth. You can also add fresh herbs for more flavor. Can I use canned chickpeas for this recipe? Yes, using canned chickpeas is perfect. Just drain and rinse them well. Canned chickpeas save time and work great in this recipe. What can I substitute for the hot sauce? You can use sriracha or a dash of cayenne pepper. If you prefer less heat, try a mild salsa or a sweet chili sauce. How do I know when the chickpeas are done baking? Your chickpeas are done when they are heated through and the edges look crispy. They should smell delicious and feel warm to the touch. How to adjust the recipe for more servings? To make more wraps, simply double the amount of chickpeas and other ingredients. You can also use more tortillas to match. Can I make this recipe ahead of time? Yes, you can prepare the chickpea mixture ahead. Just store it in the fridge. Assemble the wraps when you're ready to eat for the best taste and texture. This recipe for chickpea wraps packs flavor and nutrition. We covered essential ingredients, helpful preparation steps, and tips for the best texture. Customization options let you make it your own, while storage tips ensure freshness. Try different proteins or swap out spices to suit your taste. With easy instructions and fun variations, you'll love making these wraps again and again. Enjoy your cooking adventure!

Vegan Buffalo Chickpea Wraps Flavorful and Crisp Bite

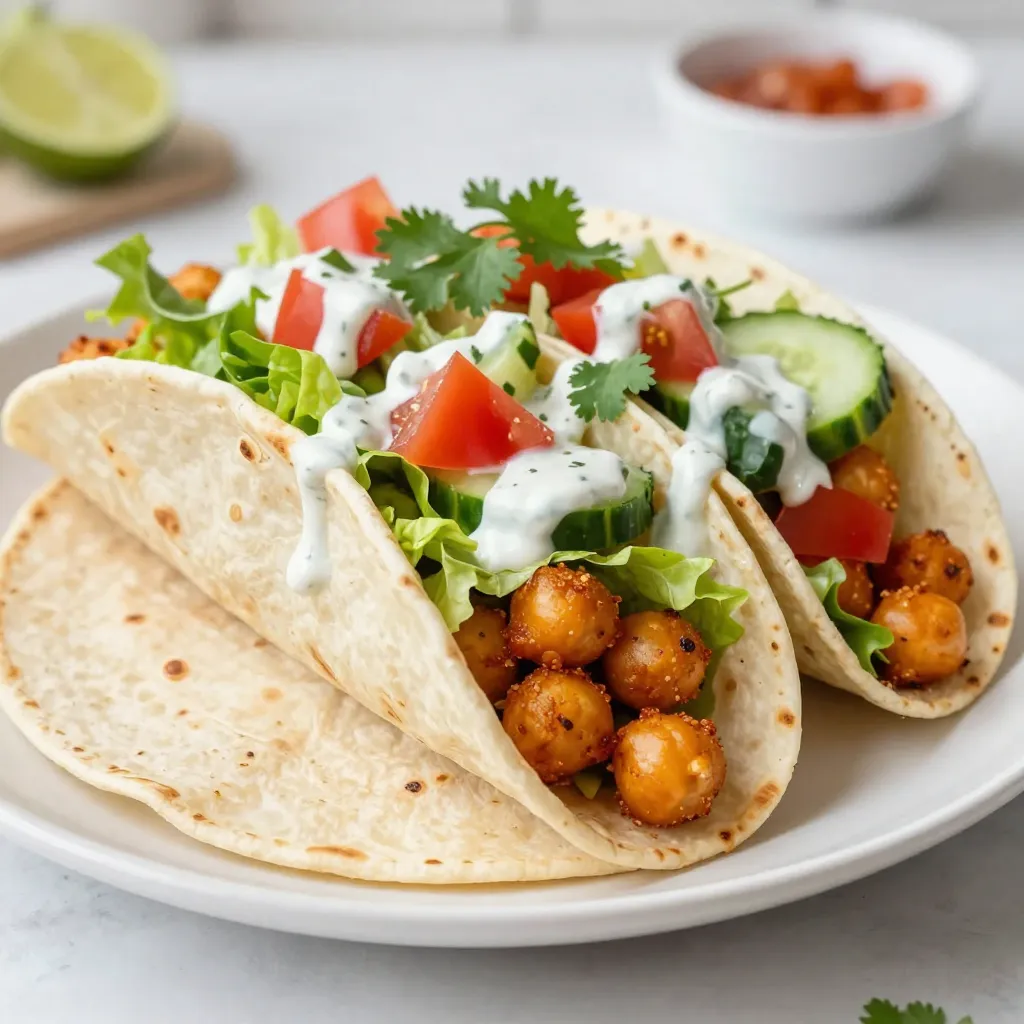
Ready to spice up your meal routine? These Vegan Buffalo Chickpea Wraps pack a punch with flavor and crunch. Picture

To make Classic Chicken Noodle Soup, you will need: - 1 tablespoon olive oil - 1 medium onion, finely diced - 2 cloves garlic, minced - 3 carrots, peeled and sliced into rounds - 2 celery stalks, sliced - 1 teaspoon dried thyme - 1 teaspoon dried oregano - Salt and freshly ground black pepper to taste - 8 cups low-sodium chicken broth - 2 cups shredded cooked chicken (store-bought rotisserie chicken works beautifully) - 2 cups egg noodles - 2 bay leaves - Fresh parsley, roughly chopped (for garnish) You can easily swap some ingredients if you have dietary needs. Here are a few ideas: - Olive oil can be replaced with avocado oil for a different flavor. - If you're short on time, use pre-chopped veggies. - For a vegetarian version, replace chicken broth with vegetable broth and skip the chicken. - Use gluten-free egg noodles if you need a gluten-free option. - Fresh herbs can replace dried herbs for a brighter taste. Selecting good ingredients makes a big difference. Here are some tips: - Choose fresh vegetables. Look for bright colors and firm textures. - Use low-sodium chicken broth. It helps control the salt level. - Opt for a rotisserie chicken that looks juicy and tender. - Fresh parsley should be vibrant and aromatic. Avoid wilted leaves. - Select high-quality egg noodles. They should feel firm and not too soft. These tips ensure your soup tastes great and is full of flavor. Use the freshest ingredients you can find for the best results. To start, grab a large pot. Heat 1 tablespoon of olive oil over medium heat. Once the oil shimmers, add the finely diced onion. Sauté the onion for about 4-5 minutes. You want it to turn translucent and smell great. Next, add 2 minced garlic cloves. Stir in 3 sliced carrots and 2 sliced celery stalks. Cook these veggies for another 3-4 minutes. They should start to soften but still hold their shape. After your veggies soften, it’s time to add flavor. Sprinkle in 1 teaspoon of dried thyme and 1 teaspoon of dried oregano. Add a good pinch of salt and freshly ground black pepper too. Stir well and let the spices cook for about 1 minute. This step brings out their best flavors and scents. Now, pour in 8 cups of low-sodium chicken broth. Toss in 2 bay leaves for extra depth. Raise the heat until the soup boils. Once it’s bubbling, reduce the heat to low. Cover the pot and let it simmer for 15 minutes. This lets all the flavors mix nicely. After that, stir in 2 cups of shredded cooked chicken. Add 2 cups of egg noodles next. Cover the pot again and cook for 8-10 minutes. You want the noodles tender and cooked through. Remember to remove the bay leaves before serving. Taste the soup and adjust the seasoning if needed. Finally, ladle the soup into bowls and garnish with fresh parsley. Enjoy! To boost the flavor, use fresh herbs. Add thyme and oregano while cooking. You can also squeeze in lemon juice for brightness. A splash of soy sauce adds depth and umami. Consider adding a dash of hot sauce for a little kick. Cook egg noodles separately for best results. Boil them in salted water until tender but firm. Drain and rinse them under cold water to stop cooking. This way, they won’t soak up all the broth. Add them to the soup just before serving. Always taste your soup before serving. Use salt and black pepper to balance the flavors. If it tastes flat, add more herbs or a pinch of garlic powder. For a richer flavor, consider adding a bit of chicken bouillon. Adjust slowly, as you can always add more. {{image_4}} You can make chicken noodle soup healthier by using low-sodium broth. This helps cut down on salt without losing flavor. Add more veggies like spinach, kale, or zucchini. They add color and nutrients. You can also swap in whole-grain egg noodles for extra fiber. This makes the soup heartier and boosts its health benefits. For a creamy twist, add some milk or cream. Stir it in after you cook the noodles. This gives the soup a rich, smooth texture. You can also use a blend of cream cheese and broth for a lighter option. This version feels cozy and comforting, perfect for chilly days. If you need gluten-free noodles, look for rice noodles or gluten-free pasta. They work well in this soup, too. Just be sure to adjust the cooking time. You want them to be tender, but not mushy. This way, everyone can enjoy the soup, no matter their diet. After you enjoy your soup, let it cool. Pour any leftovers into an airtight container. Seal the container tightly. Store it in the fridge. It keeps well for about three to four days. If you want to keep it longer, freezing is a great choice. Use freezer-safe containers or bags. Leave some space at the top for expansion. Label the container with the date. Your soup can last up to three months in the freezer. To reheat, take the soup out of the fridge or freezer. If frozen, let it thaw in the fridge overnight. Heat the soup in a pot over medium heat. Stir it often to warm it evenly. Check the temperature and enjoy! Yes, you can use store-bought chicken for your soup. A rotisserie chicken works great. Just shred the meat and add it to the pot. This saves time and still gives you tasty soup. If you don’t have egg noodles, you can use other types of pasta. Try small shapes like elbows or shells. You can also use rice or quinoa for a different twist. Just adjust the cooking time as needed. Chicken noodle soup lasts about three to four days in the fridge. Store it in a covered container. If you want to keep it longer, freeze it for up to three months. Always reheat it until it's hot. This blog post covered all you need for classic chicken noodle soup. We discussed key ingredients, so you can adapt for dietary needs. I shared step-by-step instructions to make your soup easy and tasty. You learned tips to boost flavor and explore fun variations. Lastly, I provided storage and reheating advice to keep leftovers fresh. In conclusion, cooking chicken noodle soup is simple and rewarding. Enjoy making it your way!

Classic Chicken Noodle Soup Simple and Hearty Recipe

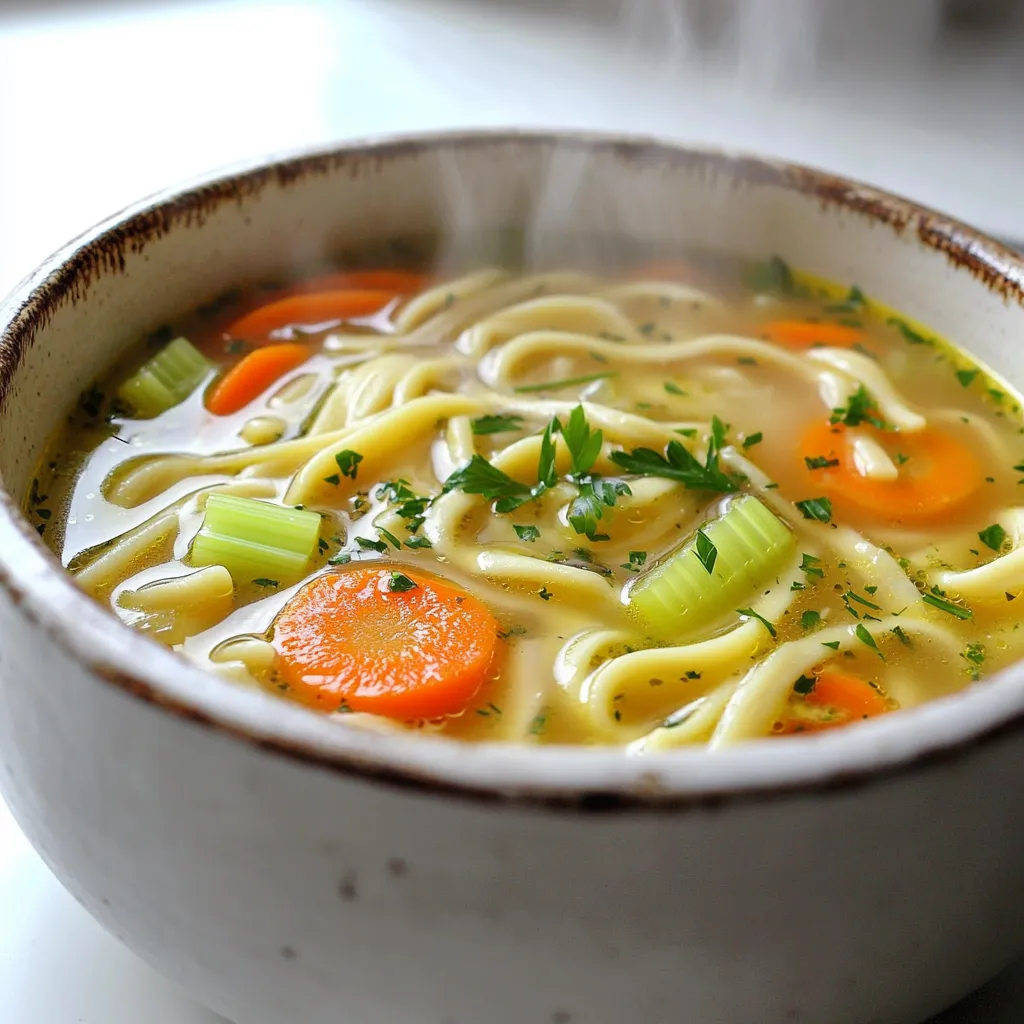
Warm, comforting, and packed with flavor, Classic Chicken Noodle Soup is a dish everyone loves. In this simple and hearty

- 1.5 lbs of beef sirloin, cut into bite-sized pieces - 1/2 cup unsalted butter - 6 cloves garlic, minced - 2 tablespoons soy sauce - 1 tablespoon Worcestershire sauce - 1 teaspoon dried thyme - 1 teaspoon freshly ground black pepper - 1 teaspoon smoked paprika - 1 tablespoon fresh parsley, finely chopped (for garnish) When I make Crockpot Garlic Butter Beef Bites, I focus on quality ingredients. Beef sirloin is my top choice. It’s tender and has great flavor. Cutting it into bite-sized pieces helps it cook evenly. Using unsalted butter lets me control the salt. I love the rich taste it adds. Garlic is a must for this dish. Fresh minced garlic gives it that amazing aroma. For the marinade, I use soy sauce and Worcestershire sauce. These add depth and umami. Dried thyme is my go-to herb. It pairs perfectly with beef. I also add black pepper and smoked paprika for a bit of heat and smokiness. Garnishing with fresh parsley adds a nice touch. It brightens the dish and makes it look appealing. Each ingredient plays an important role in building flavor. Together, they create a tasty and satisfying meal. - Melting the butter: Start by heating a skillet on medium heat. Add 1/2 cup of unsalted butter. Watch it melt slowly. - Sautéing the garlic: Once the butter is melted, add 6 minced garlic cloves. Stir for about a minute. You want the garlic to smell great but not turn brown. - Mixing ingredients together: In a big bowl, combine 1.5 lbs of beef sirloin, 2 tablespoons of soy sauce, 1 tablespoon of Worcestershire sauce, 1 teaspoon of dried thyme, 1 teaspoon of black pepper, 1 teaspoon of smoked paprika, and 1/2 teaspoon of salt. - Ensuring even coating: Use your hands or a spatula to mix well. Make sure each beef piece is coated with the marinade. - Transferring to the crockpot: Pour the marinated beef into your crockpot. Then, drizzle the melted garlic butter over it. - Setting the cooking temperature and time: Cover the crockpot. You can cook on low for 6 hours or high for 3 hours. The beef should be tender when done. Marinating beef is key. Aim for at least 30 minutes, but longer is better. This time allows flavors to soak in. You can even marinate overnight for a deeper taste. Fresh herbs, like parsley or thyme, always add a brighter flavor. Dried herbs work too, but they lack that fresh zing. To avoid tough beef, check your cooking time. For tender bites, cook on low for 6 hours. High heat cooks faster but can dry meat. Use beef sirloin for the best texture. This cut is tender and flavorful. Cheaper cuts may work, but they can be chewier. When serving, arrange the beef bites on a large platter. This makes it easy for guests to grab some. Use toothpicks for a fun touch. Don’t forget a small bowl for the rich juices. This adds flavor and keeps the bites moist. A sprinkle of fresh parsley on top adds a nice pop of color. {{image_4}} You can change the cut of beef to suit your taste. Try flank steak or chuck roast. These cuts are often more tender after slow cooking. You can also swap unsalted butter for olive oil. This keeps the dish lighter and adds a different flavor. Adding vegetables can give this dish a fresh twist. Consider bell peppers, onions, or mushrooms. Toss in some carrots for a hint of sweetness. You can also adjust the seasonings to add spice. A pinch of red pepper flakes or cayenne can elevate the heat. For a gluten-free option, use tamari instead of soy sauce. This keeps the flavor while making it safe for gluten-free diets. If you want to cut sodium, opt for low-sodium soy sauce. This way, you can enjoy the rich taste without the extra salt. After enjoying your Crockpot Garlic Butter Beef Bites, store leftovers right away. Use air-tight containers to keep the beef fresh. Make sure the beef is cooled before sealing. This helps prevent moisture loss. I recommend using glass containers for easy reheating and cleaning. To reheat, avoid drying out the beef. Use a microwave or a stovetop. For the microwave, place the beef in a bowl with a splash of broth or water. Cover it with a damp paper towel. Heat in short bursts, stirring in between. On the stovetop, use low heat and add a little broth. Stir often until it’s warm. You can freeze your beef bites for later use. First, let them cool completely. Then, place them in a freezer-safe bag. Try to remove as much air as possible. Label the bag with the date. When ready to eat, thaw in the fridge overnight. Reheat them using the stovetop or microwave methods mentioned above. Crockpot Garlic Butter Beef Bites can last in the fridge for about 3 to 4 days. Store them in an airtight container to keep the flavor fresh. If you want to enjoy them later, consider freezing them. This way, they can last for up to 3 months. Just remember to thaw them in the fridge before reheating. Yes, you can cook this recipe on high heat. If you choose this option, set your crockpot to high for about 3 hours. The beef will still turn out tender and full of flavor. Just be sure to check it a little earlier to avoid overcooking. The key is to ensure the beef is tender and easily shredded. - Side dish recommendations - Mashed potatoes: The creamy texture pairs well with the beef. - Rice: White or brown rice absorbs the delicious garlic butter sauce. - Steamed vegetables: Broccoli or green beans add color and nutrition. - Bread: A crusty baguette is great for soaking up the sauce. - Complementary sauces or dips - Horseradish sauce: It adds a spicy kick that contrasts well with the beef. - BBQ sauce: For a sweet and tangy flavor. - Garlic aioli: This creamy dip enhances the garlic flavor in the beef. This blog post covered all you need for Garlic Butter Beef Bites. We discussed key ingredients like beef sirloin, garlic, and marinades. Following our step-by-step guide makes cooking easy and delicious. Don’t forget the tips for the best flavor and texture. You can even try variations to suit your taste. Proper storage ensures your leftovers stay fresh. With these insights, you’ll impress friends and family at your next meal. Enjoy cooking and sharing this tasty dish!

Crockpot Garlic Butter Beef Bites Tasty Dinner Recipe

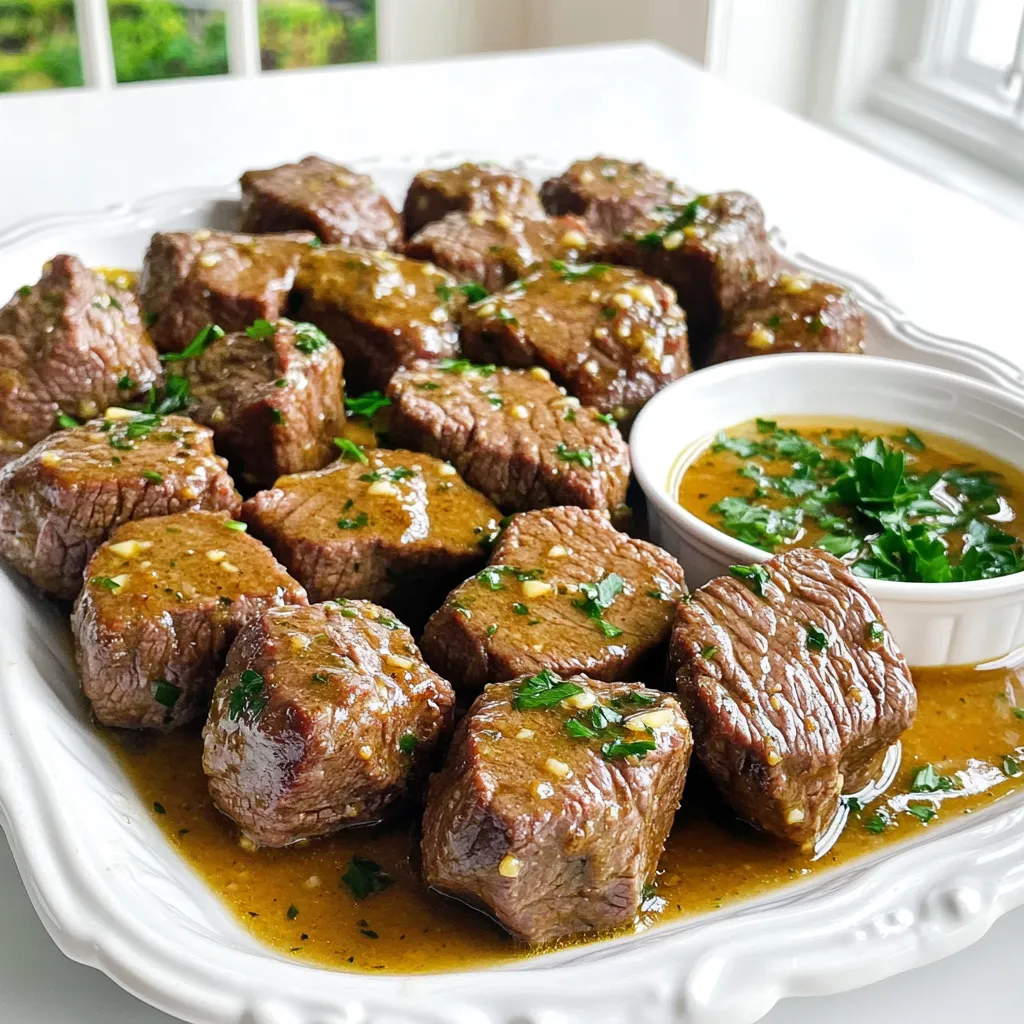
If you’re craving a hearty and scrumptious dinner, look no further! My Crockpot Garlic Butter Beef Bites recipe is an

Here’s what you need for a warm bowl of slow cooker loaded potato soup: - 6 medium russet potatoes, peeled and cut into 1-inch dice - 1 medium onion, finely chopped - 3 cloves garlic, minced - 4 cups vegetable broth - 1 cup heavy cream - 1 cup sharp cheddar cheese, shredded - 1/2 cup crispy turkey bacon, crumbled - 1/2 cup sour cream - 2 green onions, thinly sliced - 1 teaspoon smoked paprika - Salt and freshly ground black pepper, to taste These ingredients work together to create a rich and creamy soup. The russet potatoes give a hearty base. The onion and garlic add a depth of flavor. Vegetable broth brings everything together, while heavy cream and cheddar cheese make it smooth and indulgent. Turkey bacon adds a crunchy texture, and green onions give a fresh finish. Don't forget to season with salt, pepper, and smoked paprika for that extra kick! To start, gather your ingredients. You will need six medium russet potatoes. First, peel them and cut them into 1-inch dice. This size helps the potatoes cook evenly. Next, chop one medium onion finely. This adds flavor to the soup. Mince three cloves of garlic. The garlic gives a nice, rich taste. Now, layer the ingredients in the slow cooker. Place the diced potatoes, chopped onion, and minced garlic at the bottom. Pour in four cups of vegetable broth. Ensure all the ingredients are covered with the broth. Stir gently to mix everything well. Next, add one teaspoon of smoked paprika for a warm flavor. Season with salt and freshly ground black pepper to taste. Cover the slow cooker. Set it to cook on low for 6 to 8 hours or on high for 4 hours. You know it's ready when the potatoes are fork-tender. Once the cooking time is up, mash some of the potatoes in the slow cooker. This will make the soup creamier. If you want a smooth texture, use an immersion blender to blend it all together. Gradually stir in one cup of heavy cream and one cup of shredded sharp cheddar cheese. Mix until the cheese melts and blends well. Taste the soup. Adjust the seasoning with more salt or pepper if needed. Just before serving, fold in half a cup of crumbled turkey bacon and half a cup of sour cream. Mix gently to keep the texture nice. Now, ladle the loaded potato soup into bowls while it's hot. You can garnish each bowl with slices of green onion and extra cheddar cheese for a lovely finish. Enjoy your hearty comfort dish! To get the right texture in your soup, you can either mash or blend the potatoes. Mashing gives a chunky feel, while blending makes it smooth. I often mash some potatoes for a mix of both. If you want a creamier soup, add more heavy cream. Taste it after adding cream. You can always add a bit more if you like. For best flavor, balance your seasonings well. Start with the salt and pepper. I usually add a bit, then taste to see if it needs more. You can always add more, but it’s hard to take away. The smoked paprika adds depth, so don’t skip it. Adjust the seasoning at the end for the best results. Serving is as fun as cooking. Use wide bowls for your soup. Top each bowl with extra cheddar cheese and a dollop of sour cream. Green onions add a nice touch and some color. To complete the meal, serve with warm crusty bread. It makes the soup feel even more cozy and comforting. {{image_4}} You can easily make this soup vegetarian. Instead of crispy turkey bacon, try using plant-based bacon. This swap keeps the smoky flavor but makes it meat-free. For a creamier soup without dairy, use coconut milk or almond milk instead of heavy cream. You can also find dairy-free cheese options that melt well. To make your soup even tastier, think about adding spices. A pinch of cayenne or some garlic powder can bring more warmth. If you want more veggies, add carrots or celery. These add nutrients and crunch. You can also throw in some corn for sweetness. In winter, add flavors that warm you up. Try using roasted garlic or fresh herbs like rosemary. For summer, use fresh corn and diced tomatoes. These ingredients keep the soup light and bright. You can switch it up based on what you have on hand. To keep your loaded potato soup fresh, store it in an airtight container. Let it cool first before sealing. This soup lasts in the fridge for about 3 to 4 days. Always check for any signs of spoilage before eating. You can freeze your potato soup for up to 3 months. To do this, let the soup cool completely. Then, pour it into freezer-safe bags or containers. Make sure to leave some space at the top for expansion. When you want to eat it, thaw it overnight in the fridge. For the best taste, reheat the soup on the stove over medium heat. Stir it often to keep it from burning. You can also use the microwave, heating it in short bursts. This helps to warm it evenly. To keep the texture creamy, add a splash of milk or cream while reheating. Yes, you can prepare this soup ahead of time. I recommend cooking the soup fully and then storing it in the fridge. Let it cool before you put it in an airtight container. It will stay fresh for about three days. When you are ready to serve, just reheat it on low heat. Stir it gently to keep the texture nice. If you want, you can also make the soup base without the cream and cheese. Then add those last for a fresh taste. If you want a lighter version, you can use half-and-half or whole milk instead of heavy cream. For a dairy-free option, try coconut milk or almond milk. These will still give you a creamy texture. Just keep in mind that the flavor may change a bit. Make sure to taste it and adjust the seasoning if needed. You can also add a bit more cheese to keep that rich taste. Yes, you can easily make this soup gluten-free! The main concern is the broth. Make sure to use a gluten-free vegetable broth. Most brands offer this option. Also, check the labels on the cheese and bacon you use. Most are gluten-free, but it’s always good to double-check. By making these simple swaps, you can enjoy a tasty bowl of loaded potato soup without any gluten worries. We covered the key steps to make a tasty potato soup. You learned about ingredients, cooking methods, and variations. Remember to adjust flavors and textures to your liking. Use the tips for storage to keep your soup fresh. Whether you prefer it creamy or chunky, this recipe fits right in. Enjoy creating and sharing this comforting dish. Happy cooking!

Slow Cooker Loaded Potato Soup Hearty Comfort Dish

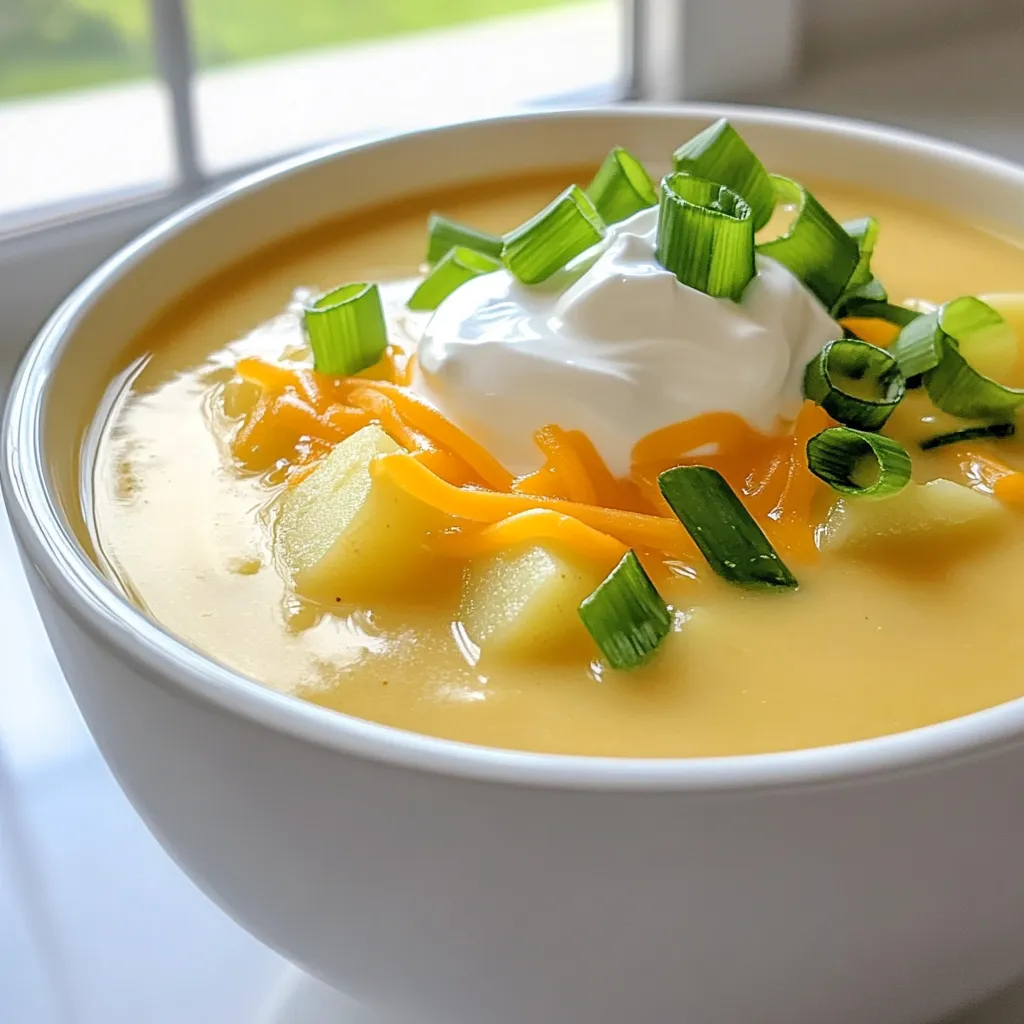
Looking for a warm and filling meal that’s easy to prepare? My Slow Cooker Loaded Potato Soup is your answer!

Older posts
Newer posts
← Previous Page1 Page2 Page3 … Page86 Next →

dsad

© 2026 yumymoments • Built with GeneratePress

Our Policies

  • Copyright Policy
  • Cookie Policy
  • GDPR Policy
  • Privacy Policy
  • Disclaimer
  • Terms Of Use

More Information

  • Home
  • About
  • Contact
  • Appetizers
  • Dessert
  • Dinner
  • Drinks
©2026, yumymoments About Back To Top