Skip to content
DisclaimerTerms Of UseGDPR PolicyCookie Policy

yumymoments

  • Home
  • Drinks
  • Appetizers
  • Dinner
  • Dessert
  • About
  • Contact
  • Privacy Policy
DisclaimerTerms Of UseGDPR PolicyCookie Policy

NO-ING-IMG

- 1 pound large shrimp, peeled and deveined - 1/4 cup honey - 3 cloves garlic, finely minced - 2 tablespoons soy sauce - 1 tablespoon extra virgin olive oil - 1 tablespoon cornstarch (for thicker sauce) - 1/2 teaspoon red pepper flakes (for a touch of heat) - Salt and freshly ground black pepper to taste - 2 green onions, for garnish - Cooked rice or quinoa, for serving When I prepare this honey garlic shrimp skillet, I focus on the main ingredients first. Fresh large shrimp, honey, and garlic are key. The shrimp must be peeled and deveined. This makes for a cleaner dish and a better bite. Honey adds sweetness and richness. It balances the strength of garlic. Minced garlic gives the dish a fragrant aroma. Soy sauce adds depth and umami. I use extra virgin olive oil for cooking because it has a nice flavor. If you want a thicker sauce, add cornstarch. This makes the sauce cling to the shrimp better. For some heat, a pinch of red pepper flakes does the trick. I like to season with salt and black pepper to enhance the taste. Garnishing with green onions adds a fresh touch. Finally, serve this dish with cooked rice or quinoa. The grains soak up all the tasty sauce. You can find the full recipe in the article to try for yourself! First, grab a medium bowl. In this bowl, combine the following ingredients: - 1/4 cup honey - 3 cloves garlic, finely minced - 2 tablespoons soy sauce - 1/2 teaspoon red pepper flakes (optional) If you want a thicker sauce, you can also add: - 1 tablespoon cornstarch Whisk all these ingredients together until they are smooth and well mixed. This sauce will bring great flavor to the shrimp. Now, take a large skillet and heat: - 1 tablespoon extra virgin olive oil Set the heat to medium-high. Wait until the oil shimmers, then add: - 1 pound large shrimp, peeled and deveined Make sure to place the shrimp in a single layer. This helps them cook evenly. Season them with salt and freshly ground black pepper to taste. Cook the shrimp for about 2-3 minutes. Flip them halfway through cooking to ensure they turn pink and opaque. After the shrimp are cooked, pour the honey garlic sauce over them in the skillet. Gently toss the shrimp in the sauce to make sure they are well coated. Let the sauce simmer for 2-3 minutes. This will help the sauce thicken and cling to the shrimp. When it's done, remove the skillet from the heat. For a fresh finish, garnish the shrimp with: - 2 green onions, finely chopped Serve the honey garlic shrimp over a bed of cooked rice or quinoa. The grains will soak up the tasty sauce. Enjoy your meal! For the full recipe, check the details above. To make the best honey garlic shrimp, avoid overcrowding the pan. When shrimp sit too close together, they cook unevenly. Cook them in a single layer for even heat. Adjust your cooking time based on the shrimp size. Larger shrimp may need a minute or two more, while smaller shrimp will cook faster. If you want a thicker honey garlic sauce, use cornstarch. Mix it with a little water before adding it to the pan. Let the sauce simmer for a few minutes. This process enhances the flavor and helps it thicken perfectly. Garnish your dish to impress! Add sesame seeds for a nice crunch. Lime wedges add zest and color, making the dish pop. These small touches can elevate your meal's look and taste. For the full recipe, check the earlier section. {{image_4}} You can make your honey garlic shrimp even tastier. - Add ginger for an extra zing. A small amount of fresh ginger gives a warm spice. - Incorporate vegetables like bell peppers or snap peas. These veggies add color and crunch. How you serve this dish can change the meal. - Serve with zucchini noodles for a low-carb option. This makes a light meal that feels fresh. - Pair with a side salad for a complete meal. A crisp salad adds a nice contrast. You can adapt this recipe to fit your needs. - Use tamari for a gluten-free version. This option keeps all the great flavors without gluten. - Substitute shrimp with tofu for a vegetarian option. Tofu soaks up the sauce and gives good texture. For more details on how to make this dish, check the Full Recipe. Store any leftovers in an airtight container. Keep it in the fridge for up to 3 days. This way, your honey garlic shrimp stays fresh and tasty. You can freeze cooked shrimp for up to 1 month. Use a sealed container to keep out air. When you're ready to eat, thaw the shrimp in the refrigerator. This helps keep the texture nice. Reheat gently on the stovetop. This prevents the shrimp from overcooking. Add a splash of water to the skillet. This refreshes the sauce, keeping it delicious and flavorful. Typically, shrimp take 2-3 minutes per side, depending on size. You want them pink and opaque. Be careful not to overcook. Overcooked shrimp can become tough and rubbery. Yes, just thaw completely before cooking for best results. You can thaw shrimp overnight in the fridge. If you want a quicker option, run them under cold water for about 10-15 minutes. Make sure they are fully thawed; otherwise, they will cook unevenly. Maple syrup or agave nectar can be used as alternatives. Both options add sweetness and flavor. Maple syrup gives a slight hint of earthiness. Agave nectar is lighter in flavor and works well too. In this blog post, we explored a simple shrimp dish with a sweet and savory sauce. We covered main and optional ingredients, step-by-step cooking instructions, and helpful tips to perfect your meal. Remember, you can customize flavors and serve with various sides to suit your taste. Leftovers store well, making this recipe great for busy days. Enjoy making this dish and impressing family or friends with your cooking skills. Cooking should be fun, so get creative in the kitchen!

Honey Garlic Shrimp Skillet Quick and Flavorful Recipe

Looking for a quick and tasty dinner idea? Try my Honey Garlic Shrimp Skillet! This dish packs a punch of

- 1 large loaf of artisanal bread (sourdough or ciabatta recommended) - 1 cup shredded mozzarella cheese - 1 cup shredded cheddar cheese - 4 tablespoons unsalted butter, melted - 3-4 cloves garlic, finely minced - 1 tablespoon fresh parsley, finely chopped - 1 teaspoon garlic powder - Salt and freshly ground black pepper to taste - ½ teaspoon red pepper flakes (optional) When you prepare cheesy pull apart garlic bread, quality matters. Choose a fresh loaf of bread. Sourdough or ciabatta gives the best flavor. For cheese, I recommend using brands like Galbani for mozzarella and Tillamook for cheddar. These brands melt well and taste great. If you have dietary needs, you can make swaps. Use gluten-free bread if you avoid gluten. For a dairy-free option, try vegan cheese. The taste may change a bit, but it can still be delicious! - Preheat oven to 375°F (190°C). - In a bowl, mix melted butter, minced garlic, garlic powder, parsley, salt, and pepper. To cut the loaf, use a serrated knife. Start by slicing down the center lengthwise. Then, make crosswise cuts to form a grid. It is key not to cut all the way through the bottom crust. This keeps the bread intact so you can pull it apart easily. The grid pattern helps the garlic butter soak in and the cheese melt perfectly. Lay the cut loaf flat on a piece of aluminum foil, shiny side up. This keeps the bread moist as it bakes. Generously drizzle the garlic butter into the cuts. Stuff the shredded mozzarella and cheddar into each crevice. Wrap the loaf snugly in foil and place it on a baking sheet. Bake the wrapped loaf for 15-20 minutes. This allows the cheese to melt and the bread to warm. After that, open the foil and bake for another 5-10 minutes. This will get the top golden brown and crispy. When done, let it cool slightly before serving. To get that perfect cheese melt, I recommend using a mix of mozzarella and cheddar. Mozzarella gives you that stretchy, gooey texture, while cheddar adds a sharp flavor that really shines. Use equal parts of both for the best result. Butter plays a big role in the flavor. It helps the cheese melt evenly and makes every bite rich and tasty. Don’t skip the butter; it’s key to making your bread irresistible! You can take your garlic bread to the next level with herbs and spices. Try adding fresh basil, oregano, or thyme to your garlic butter mix. This will add layers of flavor that everyone will love. Adjust the garlic levels based on your taste. If you love garlic, add more cloves! If you prefer a milder taste, stick to three or even two cloves. It’s all about what you enjoy! For a stunning presentation, serve your cheesy pull-apart bread on a wooden cutting board or a rustic platter. This makes it look great and fun to share. Dipping sauces are a must! Pair your bread with marinara sauce or herb-infused olive oil. These options not only taste great but also enhance the overall experience. For the full recipe, check out the details above! {{image_4}} You can change the cheese blend to create new flavors. Try using gouda or fontina for a rich taste. For a spicy twist, add jalapeños or a splash of hot sauce. This adds a kick that makes the bread even more fun. Mix and match until you find your favorite combo! If you need a gluten-free option, use gluten-free bread. Look for brands that hold up well when baked. For a vegan version, swap the cheese for your favorite plant-based cheese. Many brands now offer great choices that melt well. Use seasonal ingredients to give the bread a festive flair. In fall, add roasted pumpkin or sage. For winter holidays, sprinkle in some cranberries or rosemary. Pair with soups or salads that match the season for a complete meal. To keep your cheesy pull apart garlic bread fresh, wrap it tightly in plastic wrap or foil. This helps keep moisture in and air out. You can store it in the fridge for up to three days. When you want to enjoy it again, reheating is key. To reheat, place the wrapped bread in the oven at 350°F (175°C) for about 10-15 minutes. This warms it up and melts the cheese again, making it just as tasty. If you want to save some for later, freezing is a great option. You can freeze the bread before or after baking. To freeze before baking, wrap the loaf tightly in foil and place it in a freezer bag. This keeps out air and prevents freezer burn. For baking later, just remember to thaw it in the fridge overnight before baking. If you bake it first, let the bread cool completely. Wrap it well, then place it in a freezer bag. When you’re ready to eat it, thaw it in the fridge overnight. Reheat it in the oven at 350°F (175°C) for 15-20 minutes. This keeps the bread warm and delicious, just like the first time you made it. You can tell the bread is done when the cheese melts and the top is golden brown. The aroma of garlic and cheese fills the air. If you gently press the top, it should feel soft but not mushy. You can also insert a knife into the center. If it comes out clean, it’s ready! Yes, you can make this dish ahead of time. First, cut the bread and prepare the garlic butter mix. After that, brush the mix into the cuts. You can wrap the bread in foil and place it in the fridge. Bake it just before serving. This way, you save time and still enjoy warm, cheesy bread! For pull-apart garlic bread, I recommend using sourdough or ciabatta. These breads have a good crust and soft inside. They hold up well when cut and filled. Their texture allows all the flavors to soak in, making every bite a delight. To adjust the recipe, simply scale the ingredients. For smaller groups, use half of the loaf and halve the cheese and butter. For larger groups, double the ingredients. Make sure to adjust baking time if you use more than one loaf. Just keep an eye on the cheese melting! Yes, you can skip the garlic! Try using herbs like basil or rosemary instead. You can even add sun-dried tomatoes or olives for a twist. This way, you still get a tasty pull-apart bread without garlic. Experiment and find what you love! For the full recipe, check out the previous section! You learned how to make a tasty pull-apart garlic bread. Quality ingredients play a big role in the flavor. Pay attention to the cutting technique for the best results. Don’t forget to customize your bread with herbs and spices. Perfect for gatherings, it also freezes well. Use these tips to impress your guests or enjoy at home. With the right tweaks, this dish can fit any diet. Enjoy baking and sharing your delicious creation!

Cheesy Pull Apart Garlic Bread Irresistible Delight

Are you ready for the ultimate comfort food? This Cheesy Pull Apart Garlic Bread is a game changer. Picture gooey

- 2 medium zucchini, sliced into fry-shaped sticks - 1 cup panko breadcrumbs - 1/2 cup freshly grated Parmesan cheese - 1 teaspoon garlic powder - 1 teaspoon dried Italian seasoning - 2 large eggs - Salt and freshly ground black pepper, to taste - Olive oil spray You start with fresh zucchini. Look for firm, smooth ones. This gives your fries the best texture. Slice them into fry shapes. Aim for even sizes so they cook evenly. Next, gather your dry mix. Panko breadcrumbs add great crunch. Mix them with freshly grated Parmesan cheese for salty flavor. Garlic powder and Italian seasoning boost the taste. Don’t forget to season with salt and pepper for balance. Now, you need eggs. They help the breadcrumbs stick to the zucchini. Whisk the eggs until they are frothy. This makes them easier to coat the fries. For the best result, use olive oil spray. It helps the fries crisp up nicely without soaking them in oil. - Fresh herbs (e.g., parsley or basil) - Different cheese options (e.g., mozzarella, cheddar) - Seasoning variations (e.g., smoked paprika, cayenne pepper) If you want to mix things up, add fresh herbs. They give a fresh taste. You can also try different cheeses. Mozzarella adds a nice melt, while cheddar gives a sharpness. For those who enjoy a kick, use smoked paprika or cayenne pepper. These spices can transform the flavor. Experimenting with these options keeps the dish exciting! Check out the full recipe for all the details and enjoy making these delicious Air Fryer Parmesan Zucchini Fries! - Preheat air fryer to 400°F (200°C). - Slice zucchini into fry-shaped sticks. Start by preheating your air fryer. This step is key to getting crispy fries. While it warms up, take your zucchini and slice it into sticks. Aim for a size that matches classic fries. This helps them cook evenly. - Combine panko breadcrumbs, Parmesan cheese, garlic powder, Italian seasoning, salt, and pepper. Next, gather a shallow bowl. In it, mix panko breadcrumbs with grated Parmesan cheese. Add garlic powder and Italian seasoning. Don’t forget a pinch of salt and pepper. Stir it well to blend all the flavors. This mixture will give your fries a tasty crunch. - Whisk eggs in a separate bowl. - Coat zucchini fries in egg mixture and then in breadcrumb mixture. In another bowl, crack two large eggs. Whisk them until they are frothy. Take each zucchini fry and dip it into the egg mixture. Make sure it is well-coated. Let any excess egg drip back into the bowl. Then, transfer the fry to the breadcrumb mix. Press it gently to help the crumbs stick. - Arrange fries in the air fryer basket. - Air fry for 10-12 minutes, flipping halfway through. Now, place the breaded zucchini fries in the air fryer basket. Make sure they are in a single layer. Don’t crowd them. This lets the hot air circulate and crisps them up. Lightly spray the tops with olive oil for extra crunch. Cook them for about 10 to 12 minutes. Flip them halfway to ensure even cooking. Keep an eye on them as they finish. You want them golden and crispy, not burnt. Follow these steps, and you'll have delicious Air Fryer Parmesan Zucchini Fries. For the complete recipe, check the [Full Recipe]. To make crispy zucchini fries, avoid overcrowding the air fryer basket. If fries touch, they may steam instead of crisp. Also, lightly spray the tops with olive oil. This helps create a golden brown crust. Cooking time can change based on the thickness of your fries. Thicker fries need more time. Your air fryer model may also affect cooking time. Look for a golden brown color to know when they are done. This is the best sign of crispiness. For dipping, marinara and ranch dressing are great choices. You can also try spicy mayo for a kick. When serving, arrange the fries on a platter. Place a small bowl of sauce in the center. Add a sprinkle of extra Parmesan and fresh parsley for a beautiful touch. For the full recipe, check out the [Full Recipe]. {{image_4}} You can make a lighter version of these fries by baking them. Simply preheat your oven to 400°F (200°C) and place the breaded zucchini fries on a baking sheet. Bake for about 20-25 minutes, flipping halfway through. This method cuts down on calories while still keeping that crispy texture. Another option for a healthier twist is to swap out the traditional breadcrumbs for almond flour. This change lowers the carbs and adds a nutty flavor. Just mix the almond flour with Parmesan and spices for a new take on the coating. To boost flavor, try adding spices like paprika or chili powder. A little kick can enhance the taste a lot. You can mix these spices right into the breadcrumb mixture for even distribution. Experimenting with different cheese blends can also change the game. Mixing mozzarella or cheddar with Parmesan creates a unique taste. Don't be afraid to combine flavors to find what you love best! If you're feeling adventurous, you can use other vegetables instead of zucchini. Eggplant and sweet potatoes make great substitutes. Just slice them into fry shapes and follow the same breading process. You can also adjust the recipe based on what’s in season. Using fresh, seasonal veggies can bring new flavors and nutrition to your dish. This keeps your meals exciting and varied! For the complete recipe and more tips, check [Full Recipe]. After you enjoy your crispy Air Fryer Parmesan Zucchini Fries, store any leftovers in the fridge. Place them in an airtight container. This helps keep them fresh. You can use glass or plastic containers. Both work well. Make sure to cool the fries to room temperature before sealing. This prevents moisture build-up, which can make them soggy. To reheat, you can use the air fryer, oven, or microwave. For the air fryer, set it to 350°F (175°C). Heat the fries for about 5 minutes. This method helps keep them crispy. In the oven, preheat to 375°F (190°C) and bake for 8-10 minutes. If you use the microwave, place a paper towel under the fries. Heat them for about 30 seconds. This will keep some crispiness, but they won’t be as crunchy. If you want to freeze zucchini fries, you can freeze them uncooked or cooked. For uncooked fries, place them on a baking sheet in a single layer. Freeze them for about 1-2 hours until solid. Then, transfer them to a freezer bag. For cooked fries, let them cool completely first. Then, pack them in a freezer-safe container. When ready to eat, thaw them in the fridge overnight. Cook the uncooked fries straight from frozen. Just add a few extra minutes to the cooking time. Enjoy a tasty treat anytime! Check the Full Recipe for more details on making your fries. Yes, you can make these fries without eggs. Use a few simple substitutes. One great option is unsweetened applesauce. You can use 1/4 cup of applesauce for each egg. Another option is using a mix of ground flaxseed and water. Mix one tablespoon of flaxseed with three tablespoons of water. Let it sit until it thickens. This mix works well as a binding agent. If you want a vegan choice, try a plant-based yogurt. It helps the breadcrumbs stick just like eggs. These substitutes keep the fries crispy and tasty. Perfect zucchini fries are golden brown and crispy. They should look a bit darker than the original color. When you bite into one, it should feel crunchy outside and tender inside. If they are soft or soggy, they need more time. Check them at the 10-minute mark. Flip them halfway through cooking to ensure even browning. You want to avoid overcooking, as that can make them chewy. Keep a close eye for that nice golden color. You can use fresh zucchini without salting. However, salting can help remove excess moisture. This step prevents sogginess in your fries. If you choose to salt, slice the zucchini and lay the pieces on paper towels. Sprinkle a little salt over them and let them sit for about 15 minutes. Pat them dry afterward. This process keeps your fries crispier. If you skip salting, just ensure your zucchini is fresh and firm for the best results. Air Fryer Parmesan Zucchini Fries are quick, tasty, and fun to make. We covered all you need, from the right ingredients to step-by-step cooking tips. Remember, don't overcrowd your air fryer and use olive oil for the best crispiness. You can also play with flavors and pair these fries with your favorite dips. Try them with fresh herbs or different cheeses for a tasty twist. Enjoy your cooking and make these fries a new family favorite!

Air Fryer Parmesan Zucchini Fries Crispy and Tasty Treat

Looking for a tasty way to eat your veggies? Try my Air Fryer Parmesan Zucchini Fries! They are crispy, flavorful,

To make No Bake Oreo Cheesecake Bars, you need a few key items. Here is a list of the required ingredients: - 24 Oreo cookies, finely crushed - 4 tablespoons unsalted butter, melted - 16 oz cream cheese, softened to room temperature - 1 cup powdered sugar, sifted - 1 teaspoon pure vanilla extract - 1 cup heavy whipping cream, chilled - 8 Oreo cookies, roughly chopped (for mixing in) - Additional Oreo cookies, crushed (for topping - optional) Each of these items plays an important role. The Oreo cookies form the base and give a rich flavor. The cream cheese provides a creamy texture that is essential for cheesecake. When you mix in the heavy whipping cream, it makes the filling light and fluffy. For toppings, you can add more crushed Oreo cookies. This gives an extra crunch and looks nice on the finished bars. You can also think about adding some chocolate sauce or whipped cream on top for a fun twist. If you are unsure about any ingredient, feel free to check the [Full Recipe] for more details. Preparation Overview To make No Bake Oreo Cheesecake Bars, follow these clear steps. - How to prepare the crust: Start by mixing 24 finely crushed Oreo cookies with 4 tablespoons of melted unsalted butter. Stir until the crumbs look damp. This means they will hold together well. Line an 8x8 inch baking dish with parchment paper. Pour in the crust mixture and press it down firmly. Chill it in the fridge for 15-20 minutes to set. - Steps for mixing the cheesecake filling: In a large bowl, beat 16 oz of softened cream cheese using an electric mixer. Mix until smooth, which takes about 2-3 minutes. Gradually add 1 cup of sifted powdered sugar and 1 teaspoon of pure vanilla extract. Mix until there are no lumps. In another bowl, whip 1 cup of chilled heavy whipping cream on high speed until stiff peaks form, about 3-5 minutes. Be careful not to over-whip, or it may become grainy. Gently fold the whipped cream into the cream cheese mixture until combined. Then, fold in 8 roughly chopped Oreo cookies. - Chilling and serving instructions: Pour the cheesecake filling onto the chilled crust. Spread it evenly with a spatula. Cover the dish and refrigerate for at least 4 hours, or overnight for best results. When ready to serve, lift the cheesecake out of the dish using the parchment paper. Cut into bars and, if you like, sprinkle some crushed Oreo cookies on top. Enjoy your delicious treat! For the full recipe, check the details above. To get the best texture for your No Bake Oreo Cheesecake Bars, start with the cream cheese. Use full-fat cream cheese for a rich and creamy filling. Make sure it is softened to room temperature. This step helps it blend smoothly. If it is too cold, lumps may form in your mix. Next, pay attention when whipping the cream. Use heavy whipping cream that is chilled. Whip on high speed until you see stiff peaks. This should take about 3-5 minutes. Be careful not to over-whip. If you do, the cream can become grainy and lose its lightness. When combining the ingredients, gently fold them together. Use a rubber spatula to mix the whipped cream and cheesecake mixtures. Fold slowly to keep the air in the whipped cream. This keeps the mixture light and fluffy, giving you that dreamy texture. These tips will help you create bars that are smooth, creamy, and full of flavor. For the full recipe, check out the details above. Enjoy making your dessert! {{image_4}} You can make your Oreo cheesecake bars even more fun! Here are some ideas to switch things up. - Flavors: Want a twist? Try mint Oreo cookies for a fresh taste. You can also use chocolate or even peanut butter cookies. Each adds a new flavor that pairs well with the cream cheese. - Crust: If you want to change the crust, consider using graham crackers or vanilla wafers. These will give a different taste and texture. Just crush them the same way you do with Oreo cookies. - Mix-ins and Toppings: Get creative with mix-ins! Add mini chocolate chips or crushed candy bars for extra crunch. You can also top your bars with whipped cream, fresh berries, or drizzles of chocolate sauce. These will not only add flavor but will also make the bars look stunning. These variations keep your no bake Oreo cheesecake bars exciting and perfect for any occasion. For the complete recipe, check the Full Recipe section. To keep your no bake Oreo cheesecake bars fresh, always store them in the fridge. Place them in an airtight container or cover the dish tightly with plastic wrap. This will prevent them from drying out and keep them tasty. - Refrigeration guidelines: These cheesecake bars stay fresh in the fridge for up to five days. If you want to enjoy them longer, consider freezing. - Freezing instructions for long-term storage: You can freeze these bars for up to three months. First, cut them into squares. Then, wrap each piece in plastic wrap and place them in a freezer-safe container. Make sure to label the container with the date. - Tips for keeping the bars fresh: When ready to eat, thaw the frozen bars in the fridge overnight. Avoid leaving them out at room temperature for too long, as this might affect their texture. Always keep them covered to maintain their rich flavor and creamy texture. For more detailed steps and tips, check the full recipe. What can I substitute for cream cheese? You can use mascarpone cheese or Greek yogurt instead of cream cheese. Mascarpone gives a rich taste, while Greek yogurt adds a nice tang. Both will change the texture a bit, but they work well. How long can these bars last in the fridge? These bars will stay fresh in the fridge for about five days. Just keep them covered to avoid drying out. If you want them to last longer, consider freezing them. Can I make this recipe gluten-free? Yes, you can make gluten-free bars! Use gluten-free Oreo cookies for the crust. The rest of the ingredients are naturally gluten-free. Just check labels to ensure safety. You learned about making no-bake Oreo cheesecake bars. We covered the key ingredients, step-by-step instructions, and helpful tips. You can customize these bars in many ways. Storing them properly keeps them fresh. If you follow these guidelines, your cheesecake bars will be a hit. Enjoy the process and share your tasty results!

No Bake Oreo Cheesecake Bars Easy and Delicious Recipe

Craving a sweet treat that’s easy to make? Look no further! This No Bake Oreo Cheesecake Bars recipe is both

- 2 boneless, skinless chicken breasts, cut into thin strips - 8 oz fettuccine or your choice of pasta - 1 cup heavy cream - 1 cup freshly grated Parmesan cheese For this dish, I love using chicken breasts. They cook quickly and soak up flavors well. Fettuccine is my go-to pasta, but you can use any type you enjoy. The heavy cream adds a rich, smooth texture, while the Parmesan cheese gives it a savory, cheesy finish. - 1 teaspoon Italian seasoning blend - 3 cloves garlic, minced finely - 1 cup fresh baby spinach leaves - 1 cup cherry tomatoes, halved - Fresh basil leaves for garnish The Italian seasoning blend brings a warm, herbaceous taste to the dish. Fresh garlic adds a punch of flavor, while baby spinach gives a nice green touch. Cherry tomatoes burst with sweetness when cooked, making them a perfect addition. Finally, fresh basil leaves not only look pretty but also add aroma and flavor to the plate. For the full recipe, click here. To cook fettuccine correctly, start by boiling a large pot of salted water. Once it boils, add the fettuccine. Cook it for about 8-10 minutes until it is al dente. This means it should be firm but not hard. Afterward, drain the pasta and be sure to save about one cup of the pasta water. This water is full of starch, and it helps make the sauce creamy. For the chicken, I recommend seasoning it well. Use salt and freshly cracked black pepper. You can also add Italian seasoning for extra flavor. Heat extra virgin olive oil in a skillet over medium heat. Once hot, add the seasoned chicken. Cook it for about 6-7 minutes, until it turns golden brown. Make sure it cooks all the way through. Once done, place the chicken on a plate and cover it to keep it warm. To create the cream sauce, start by adding minced garlic to the skillet. Sauté it for about 30 seconds. You want it fragrant, but not browned. Then, add halved cherry tomatoes. Cook them for 3-4 minutes until they soften. Next, pour in the heavy cream and stir. Bring it to a gentle simmer. Add grated Parmesan cheese and mix until it melts. This makes the sauce rich and creamy. If you need to adjust the sauce's thickness, gradually stir in the reserved pasta water. Add it little by little until you reach your desired consistency. Mix in the chicken and fresh spinach, then combine everything with the cooked fettuccine. Toss gently to coat the pasta well in the sauce. For the full recipe, check out the details provided. - Best practices for sautéing garlic: Always heat your pan before adding garlic. Use medium heat to avoid burning. Stir frequently for about 30 seconds until it’s fragrant but not brown. This keeps the flavor bright and fresh. - Ensuring chicken is perfectly cooked: Cut chicken into thin strips for even cooking. Season well with salt and pepper. Sauté in olive oil for 6-7 minutes until golden brown. Always check if it’s cooked through by cutting into a piece. No pink should remain. - Pairing recommendations: A light white wine, like Pinot Grigio, complements this dish well. A crisp green salad with lemon dressing makes a nice side. - Ideal garnishes for presentation: Fresh basil leaves brighten the plate. A sprinkle of Parmesan cheese on top adds a lovely touch. - Overcooking the pasta or chicken: Follow package instructions for pasta. Cook until al dente to avoid mushiness. For chicken, ensure it turns golden but remains juicy inside. - Skipping the reserved pasta water: This water is starchy and helps the sauce cling to the pasta. Always reserve a cup before draining. Add it slowly to adjust the sauce’s thickness as needed. These tips enhance your experience with creamy Tuscan chicken pasta. For the full recipe, check out the detailed steps above! {{image_4}} You can change up the protein in this dish. Shrimp adds a nice touch, or you can use tofu for a plant-based option. Both cook quickly and will soak up the creamy sauce. For those who need dairy-free options, swap heavy cream with coconut milk or cashew cream. Nutritional yeast can replace Parmesan for a cheesy flavor without dairy. To boost flavor, consider adding spices or herbs. A pinch of red pepper flakes can give a nice kick. Fresh herbs like thyme or oregano can brighten the dish. You can also add seasonal vegetables. Zucchini or bell peppers work well and add color. Just sauté them with the garlic to keep them crisp. While fettuccine is a classic choice, try other pasta shapes like penne or farfalle. Each type has its own unique texture. Cooking times vary, so check the package. Most pasta takes about 8 to 12 minutes. Just remember to cook until it's al dente, so it holds up in the creamy sauce. If you want a gluten-free option, use rice or quinoa pasta. It brings a different flavor and pairs well with the sauce. For the full recipe, check out the Creamy Tuscan Chicken Pasta Delight! To keep your creamy Tuscan chicken pasta fresh, store it in the fridge. Place it in an airtight container to maintain its flavor. This dish stays good for about 3 to 4 days. For best taste, eat leftovers within this time. When reheating, keep the creaminess intact. You can use the microwave or the stove. For the microwave, heat in 30-second intervals. Stir in between to ensure even heating. On the stove, warm it over low heat. Add a splash of cream or reserved pasta water to restore its creamy texture. Yes, this dish can be frozen! To freeze, let it cool completely. Then, place it in a freezer-safe container. It can last up to 2 months in the freezer. When ready to eat, thaw it in the fridge overnight. Reheat gently on the stove, adding a bit of cream for extra creaminess. Fettuccine is my top choice because it holds sauce well. It has a nice balance of thickness and texture. You can also use penne or farfalle if you prefer. Both work great for this creamy dish. They trap the sauce in their shapes, giving you more flavor in every bite. Yes, you can prepare this dish ahead of time! Cook the pasta and chicken but leave the sauce separate. Store them in airtight containers. When you are ready to eat, heat the sauce and combine everything. This will keep your pasta from getting mushy. You can also add a splash of reserved pasta water to revive the creaminess. You can make a low-carb version by swapping pasta for zucchini noodles or spaghetti squash. These options give you a similar shape without the carbs. You can also use a low-carb pasta made from almond flour or chickpeas. This keeps the dish tasty while fitting into your diet. This article covered the key ingredients needed for Creamy Tuscan Chicken Pasta, including chicken breasts, pasta options, and the perfect cream sauce. I shared step-by-step cooking tips and how to avoid common mistakes. Feel free to tweak the recipe with variations like different proteins or pasta styles. Remember, storing and reheating leftovers properly keeps them enjoyable. Use this guide to make a tasty meal that anyone can master. With these tips, your dish will shine at any table. Enjoy your cooking!

Creamy Tuscan Chicken Pasta Flavorful and Simple Dish

If you’re hunting for a dish that bursts with flavor and gives you comfort in every bite, look no further

- 4 salmon fillets (approximately 6 ounces each) - 4 cloves garlic, finely minced - 2 tablespoons extra virgin olive oil - 1 medium lemon (zested and juiced) - 1 teaspoon dried oregano - 1 teaspoon smoked paprika - Sea salt and freshly ground black pepper, to taste - 1 cup cherry tomatoes, halved - 1 cup asparagus, trimmed and cut into 2-inch pieces - Fresh parsley, chopped, for garnish When making One Pan Lemon Garlic Salmon, fresh ingredients matter. The salmon fillets should be bright and firm. Fresh garlic gives the dish a bold flavor. Olive oil adds richness and helps with cooking. Choose a lemon that feels heavy for its size. This means it is juicy. For the seasonings, dried oregano brings a warm herb note. Smoked paprika adds a subtle smokiness. Sea salt and black pepper enhance all the flavors. Use fresh black pepper for the best taste. The vegetables are just as important. Cherry tomatoes should be plump and vibrant. They add sweetness and color. Asparagus gives crunch and freshness. Don't forget fresh parsley! It adds a pop of green and a hint of brightness. This recipe is quick and simple with these ingredients. You can find the full recipe at the end. Enjoy cooking! 1. First, preheat your oven to 400°F (200°C). This step is key for even cooking. 2. Next, prepare the lemon garlic marinade. In a bowl, mix minced garlic, olive oil, lemon zest, and lemon juice. Add oregano, smoked paprika, sea salt, and black pepper. Whisk until it blends well. 1. Grab a large baking sheet or an ovenproof skillet. Make sure it’s big enough for all the ingredients. 2. Place the salmon fillets in the center, skin-side down. This helps with cooking and flavor. 3. Drizzle the lemon garlic mixture over the salmon. Make sure each piece is well coated. 4. Now, add the halved cherry tomatoes and asparagus around the salmon. Pour any leftover marinade over the veggies for extra flavor. 1. Slide the baking sheet into the preheated oven. Roast for about 15-20 minutes. The salmon should be flaky and the vegetables tender. 2. For a crispy top, switch your oven to broil mode for 2-3 minutes. Keep an eye on it to avoid burning. 3. Once cooked, take the baking sheet out. Sprinkle freshly chopped parsley over everything for a pop of color. For the full recipe, check out the details above. Enjoy your meal! To get the best salmon, cook it for about 15-20 minutes at 400°F. Keep an eye on the fish. Salmon is done when it flakes easily with a fork. If it looks shiny and slightly opaque, it's ready. You can mix up the flavors in this dish. Try adding honey or soy sauce to the marinade for a sweet kick. Fresh herbs like dill or thyme can also work great instead of oregano. Experiment to find your favorite blend. Serve your salmon right from the baking sheet for a cozy feel. If you want a fancier look, plate each portion individually. Drizzle the pan juices over the salmon for extra flavor. Add lemon wedges on the side for a pop of color and zest. {{image_4}} You can swap salmon for other fish like trout or cod. These fish cook well and taste great with lemon and garlic. If you want a meat option, try chicken breasts. For veggies, you can use broccoli or green beans instead of asparagus. Both add nice color and flavor. You can mix in bell peppers or zucchini too. To spice things up, try adding red pepper flakes for heat. You can use fresh herbs like dill or thyme for a fresh twist. If you love more zest, try lime or orange instead of lemon. You can also add some mustard or honey to the marinade for a sweet kick. These flavors mix well with garlic and make the dish unique. If you need a gluten-free option, this recipe is already safe! Just check the spices for hidden gluten. For a low-carb meal, skip the tomatoes. You can add extra veggies like spinach or cauliflower. This keeps your meal light and healthy without losing flavor. Feel free to explore these variations to make the dish your own! Check the Full Recipe for all the details. To store leftovers, place the salmon and veggies in an airtight container. This keeps them fresh for up to three days. When reheating, use the oven or microwave. The oven helps keep the salmon moist. Heat at 350°F (175°C) for about 10 minutes. If using a microwave, cover the dish with a damp paper towel. This helps avoid dry spots. You can also freeze this dish if you want to save some for later. First, let the salmon cool completely. Next, wrap each piece in plastic wrap. Place the wrapped salmon in a freezer bag. Remove as much air as possible. This helps prevent freezer burn. For reheating, thaw the salmon overnight in the fridge. Then, reheat it in the oven as mentioned earlier. For the best taste, eat the dish within three days when refrigerated. If frozen, try to consume it within two months. Check for signs of spoilage before eating. If the salmon smells off or has a strange color, do not eat it. Freshness is key for great flavor! For cooking salmon, timing depends on the size of the fillets. A general rule is to cook salmon for about 4-6 minutes per 1/2 inch of thickness. For standard 6-ounce fillets, aim for 15-20 minutes in a preheated oven at 400°F (200°C). If you use thicker fillets, add a few extra minutes. Always check for doneness by seeing if the salmon flakes easily with a fork. Yes, you can prepare parts of this dish ahead of time. You can mix the lemon garlic marinade and store it in the fridge for up to 24 hours. For the salmon, you can season it and keep it in the fridge for a few hours before cooking. However, I recommend not adding the vegetables until right before you cook to keep them fresh and crisp. This salmon pairs well with many side dishes. Here are a few ideas: - Quinoa or rice for a hearty base - A fresh salad with mixed greens and a light vinaigrette - Roasted potatoes or sweet potatoes for a filling option For a complete meal, serve the salmon with a side of steamed broccoli or green beans. With these sides, you’ll create a balanced and colorful plate. This blog post covered everything you need for a tasty One Pan Lemon Garlic Salmon meal. We explored the main ingredients, seasonings, and vegetables that create vibrant flavors. You learned the steps to prepare, cook, and enhance your dish for perfect results. Plus, we shared tips for variations, storage, and answers to common questions. Remember, cooking is fun! Experiment with the flavors and make this dish your own. Enjoy each bite as you master this simple recipe and impress your family or friends.

One Pan Lemon Garlic Salmon Quick and Simple Recipe

Are you looking for a quick and tasty dinner idea? This One Pan Lemon Garlic Salmon recipe is your answer!

To make this dish, gather these key items: - 1 lb (450g) boneless, skinless chicken breasts, cut into bite-sized cubes - 2 tablespoons extra virgin olive oil - 2 cloves garlic, finely minced - 1 cup low-sodium chicken broth - 8 oz (225g) fettuccine pasta - 1 cup rich heavy cream - 1 cup freshly grated Parmesan cheese - 1 teaspoon Italian seasoning blend - Salt and freshly cracked black pepper to taste These ingredients create a creamy and rich sauce that makes the chicken Alfredo shine. You can elevate your dish with these garnishes: - Fresh parsley, finely chopped Adding chopped parsley gives a fresh touch and bright color to the meal. For this recipe, you will need the following tools: - Instant Pot - Wooden spoon - Measuring cups and spoons - Knife and cutting board These tools help ensure a smooth cooking process and make preparation easy. For the full recipe, check the complete instructions above! - Gather all your ingredients. - Cut the chicken into bite-sized cubes. - Mince the garlic finely. - Measure out the chicken broth and cream. - Grate the Parmesan cheese. 1. Sauté the Chicken: Turn on the sauté function of your Instant Pot. Heat the olive oil until it shimmers. Add the cubed chicken. Season it with salt, pepper, and Italian seasoning. Cook for about 4-5 minutes until it's lightly browned but not fully cooked. Remove the chicken and set it aside. 2. Cook Garlic: In the same pot, add the minced garlic. Sauté for about 30 seconds, stirring often. This step adds a nice flavor. Be careful not to burn the garlic. 3. Deglaze the Pot: Pour in the chicken broth. Use a wooden spoon to scrape any brown bits from the bottom. This is very important to avoid the burn notice. 4. Add Pasta and Chicken: Place the fettuccine on top of the broth. Make sure it is spread out evenly. Gently return the chicken to the pot. Do not stir; just ensure the pasta is under the liquid. 5. Pressure Cook: Close the lid tightly. Set the Instant Pot to high pressure for 8 minutes. 6. Release Pressure: After cooking, turn the valve to venting for a quick release. Open the lid carefully, keeping your face away from the steam. 7. Incorporate Cream and Cheese: Stir in the heavy cream and Parmesan cheese. Mix well until the sauce is creamy and smooth. 8. Adjust Seasoning: Taste and add more salt or pepper if needed. For a richer sauce, add more cream or cheese. 9. Serve: Serve the creamy chicken Alfredo in bowls. Top with chopped parsley for color and freshness. For the full recipe, check out the earlier section. Enjoy your delightful meal! To make the best Instant Pot Chicken Alfredo, avoid overcooking the chicken. This can make it tough. Sauté it until lightly browned, then set it aside. Also, watch the garlic. It can burn quickly. Stir it for only about 30 seconds. When adding the pasta, make sure it’s submerged in the broth. This stops it from sticking to the bottom. Use the sauté function wisely. Heat the olive oil until it shimmers before adding the chicken. This helps create a nice sear. Always deglaze the pot after cooking the garlic. Scraping up those bits adds flavor. For pressure cooking, ensure the lid is secure. This keeps the steam in and cooks your meal perfectly. Serve your Instant Pot Chicken Alfredo hot. Top it with fresh parsley for color. You can also add extra Parmesan for a cheesy kick. Pair it with a side salad or garlic bread. This makes for a well-rounded meal. For a fun twist, try adding steamed broccoli or peas to the dish. They add color and nutrients. You can find the full recipe above. {{image_4}} You can switch up the chicken in your Alfredo. Try shrimp for a seafood twist. Another tasty option is diced turkey. For a vegetarian dish, use firm tofu. Cook it the same way as chicken. Each protein gives a unique flavor. If you need gluten-free pasta, choose brown rice or corn-based fettuccine. These options cook well in the Instant Pot. You will still get a creamy sauce that tastes amazing. Just check the cooking time on the package. Adjust it if needed. Adding veggies makes this dish even better. Try spinach, broccoli, or peas. They add color and nutrition. For best results, add them right before pressure cooking. This way, they stay bright and crisp. Just mix them in after you release the pressure. You can use the Full Recipe as a guide for cooking times. Once your Instant Pot Chicken Alfredo cools, store it in an airtight container. This keeps it fresh for up to three days in the fridge. Make sure to let it cool to room temperature before sealing. If you want to enjoy it later, avoid adding extra cream and cheese until you reheat. You can freeze Chicken Alfredo for up to three months. Use a freezer-safe container or bag. If you freeze it, it’s best to omit the heavy cream and cheese beforehand. When you thaw it, you can add these ingredients back in for a creamy texture. To reheat, place the chicken Alfredo in a pot over low heat. Stir in a splash of chicken broth or cream to loosen the sauce. Heat until warm, stirring often. You can also use the microwave. Heat it in short bursts, stirring in between to ensure even heating. Enjoy your creamy dish as if it was fresh! For the full recipe, check the main article. You can replace cream with milk or a plant-based milk. Use a mix of broth and flour to thicken. Start with 1 cup of milk and 2 tablespoons of flour. Whisk them together before adding to the pot. This method keeps the sauce creamy without using heavy cream. Yes, you can use other pasta shapes like penne or rotini. Just make sure to adjust the cooking time. Thinner pasta cooks faster, while thicker pasta may need a minute or two more. Always check the package for guidance on cook times. To avoid the burn notice, deglaze the pot after sautéing. Scrape the bottom well to remove any bits stuck there. Also, ensure there is enough liquid in the pot. Use at least 1 cup of broth. This helps keep the Instant Pot from overheating and causing issues. In this blog post, we explored key ingredients and step-by-step instructions for your dish. You learned helpful tips to avoid mistakes and variations like gluten-free options. We also discussed storage tips to keep your meal fresh. Remember, cooking is about having fun. Don’t fear mistakes; they help you learn. Enjoy experimenting with flavors and make the recipe your own!

Instant Pot Chicken Alfredo Easy and Creamy Recipe

Are you ready to whip up a creamy and comforting dish in no time? This Instant Pot Chicken Alfredo recipe

To make Air Fryer Apple Hand Pies, you need the following ingredients: - 2 medium Granny Smith apples, peeled and diced - 1 tablespoon fresh lemon juice - 1 tablespoon packed brown sugar - 1 teaspoon ground cinnamon - 1 tablespoon unsalted butter, melted - 1 package of refrigerated pie crusts (contains 2 crusts) - 1 egg, beaten (for the egg wash) - 1 tablespoon granulated sugar (for topping) You can find these items at any grocery store. Granny Smith apples work best because they are tart and hold their shape. The lemon juice helps keep the apples fresh and bright. Brown sugar and cinnamon add sweetness and warmth. The butter makes the filling rich. The pie crusts save time, but you can make your own if you prefer. The egg wash gives the pies a nice golden color. The sugar on top adds a sweet crunch. Gather your ingredients, and let’s create something delicious! For the full recipe, refer to Air Fryer Apple Hand Pies . - Combine diced apples with lemon juice, brown sugar, cinnamon, and butter. - Let the mixture sit for 10 minutes. To make the apple filling, start by mixing diced Granny Smith apples with fresh lemon juice. This juice helps keep the apples bright and fresh. Add packed brown sugar for sweetness and ground cinnamon for warmth. Finally, mix in melted butter to add richness. After mixing, let it sit for about 10 minutes. This waiting time softens the apples and blends the flavors nicely. - Unroll and cut the refrigerated pie crusts into circles. - Create a total of 8 circles using a large round cutter. Next, grab your refrigerated pie crusts. Unroll them onto a clean surface. Use a large round cutter to cut out circles. You should aim for 8 circles in total. This step is easy and fun. Keep the scraps for later if you want to make mini pies or decorations. - Add apple filling to the pie circles. - Seal the edges with water and a fork. Now it’s time to fill the dough. Place about 1 tablespoon of apple filling in the center of half the pie circles. Be careful not to overfill; a small border is key to sealing. Lightly moisten the edges with water using your fingertip. Fold the dough over to create a half-moon shape. Use a fork to press the edges firmly. This keeps the delicious filling inside while they cook. - Brush with beaten egg and sprinkle with sugar. - Preheat air fryer to 350°F (175°C) for 5 minutes. For a golden crust, brush the top of each hand pie with beaten egg. This egg wash gives a nice shine when baked. Sprinkle a little granulated sugar on top for extra sweetness and crunch. While you do this, preheat your air fryer to 350°F (175°C) for about 5 minutes. This step ensures even cooking right from the start. - Arrange hand pies in the air fryer basket. - Cook for 10-12 minutes until golden brown. Carefully place the hand pies in a single layer in the air fryer basket. Make sure they do not touch each other. Cook them for 10 to 12 minutes. You want them to turn golden brown and crisp. Keep an eye on them; every air fryer cooks a bit differently. - Remove and cool on a wire rack. - Serve warm, optionally with powdered sugar or ice cream. Once cooked, take the hand pies out and let them cool slightly on a wire rack. This cooling helps keep the crust crisp. Serve them warm. You can dust them with powdered sugar or add a scoop of ice cream for a delightful treat. These hand pies are sure to please everyone! To make the best hand pies, you must keep the filling from being too watery. If it is too wet, the pies will get soggy. Mix the diced apples with the lemon juice, brown sugar, and cinnamon well. Let it sit for about 10 minutes to help the flavors blend. Also, use cold pie crusts. Cold crusts help create a flaky texture. Storing them in the fridge before use makes a big difference. When you cook these hand pies, you may need to adjust the time. Different air fryer models may cook at different speeds. Start with 10 minutes and check for doneness. If they need more time, add a minute or two. Flipping the hand pies halfway through helps them brown evenly. This way, both sides get that perfect golden color. To serve your hand pies, try pairing them with ice cream or whipped cream. The warm pie and cold cream create a delicious contrast. Dust them with powdered sugar for a fancy finish. It adds sweetness and makes the pies look beautiful. For the full recipe, check the Air Fryer Apple Hand Pies . {{image_4}} You can switch out apples for pears or berries. Both fruits bring a sweet and juicy twist. If you want more texture, add nuts or raisins. These little extras create a surprise in every bite. Think about adding spices like nutmeg or ginger. These spices can change the flavor profile and make your hand pies special. A splash of vanilla extract can also add richness. This small step brings warmth and depth to your dessert. For a new texture, use puff pastry instead of pie crust. Puff pastry gives a flaky and light bite. If you need gluten-free options, look for gluten-free pie crusts. They still taste great and fit dietary needs. You can keep leftover hand pies fresh easily. Store them in an airtight container in the fridge for up to 3 days. If you want to save them longer, freeze the pies. They will stay good in the freezer for up to 3 months. Just make sure they are sealed well to prevent freezer burn. To enjoy your hand pies again, reheat them in the air fryer. Set it to 350°F (175°C) and heat for a few minutes. This helps keep the crust crispy. If you prefer a crispier texture, use your oven instead. This method works well and gives you a delightful snack once more! Yes, assemble them and refrigerate until ready to cook. This makes it easy to have a fun snack on hand. Ensure proper sealing and avoid overfilling. A little filling goes a long way! Consider caramel drizzle, chocolate sauce, or cinnamon sugar. These add great flavor! Absolutely! Homemade crusts can enhance the flavor. Plus, it adds a personal touch. Look for a golden brown color and an internal temperature of 165°F (74°C). This means they are perfectly cooked! For a detailed recipe, refer to Air Fryer Apple Hand Pies . This recipe is simple and fun to make. You will love how easy it is to create these tasty treats. Here’s a closer look at the steps you need to follow. - Prepare the Apple Filling: Start by mixing diced apples with lemon juice, brown sugar, ground cinnamon, and melted butter. This mix gives the apples a sweet, tangy flavor. Let it sit for about 10 minutes. This step helps soften the apples and blend the flavors. - Prepare the Pie Crusts: Unroll the refrigerated pie crusts on a clean surface. Use a large round cutter or a glass rim to cut each crust into circles. You will make 8 circles total. - Fill the Hand Pies: Place about 1 tablespoon of the apple mix in the center of half the circles. Be sure not to overfill them. Leave some space around the edges for sealing. - Seal the Edges: Lightly dampen the edges of the filled circles with a tiny bit of water. Fold the dough over to create a half-moon shape. Use a fork to press the edges tightly. This keeps the filling inside while they cook. - Add Egg Wash and Sugar: Brush the tops of each hand pie with the beaten egg. This gives them a nice golden color. Sprinkle a little granulated sugar on top for sweetness and a nice crunch. - Preheat the Air Fryer: Preheat your air fryer to 350°F (175°C) for about 5 minutes. - Air Fry the Hand Pies: Place the hand pies in a single layer in the basket. Make sure they don’t touch each other. Air fry them for 10-12 minutes until they turn golden brown and crisp. - Cool and Serve: Once done, take the hand pies out and let them cool on a wire rack. This makes the crust even crispier. You can serve them warm with a sprinkle of powdered sugar or alongside a scoop of vanilla ice cream for a special treat. Enjoy your delicious air fryer apple hand pies! You learned how to make delicious Air Fryer Apple Hand Pies. We covered the ingredients, step-by-step instructions, and useful tips. Now you can enjoy a treat that’s easy and fun to make. Try different fillings or toppings to make them unique. Don’t forget to store leftovers properly. With these hand pies, you’ll impress friends and family. Enjoy your baking adventure!

Air Fryer Apple Hand Pies Delightful Snack Recipe

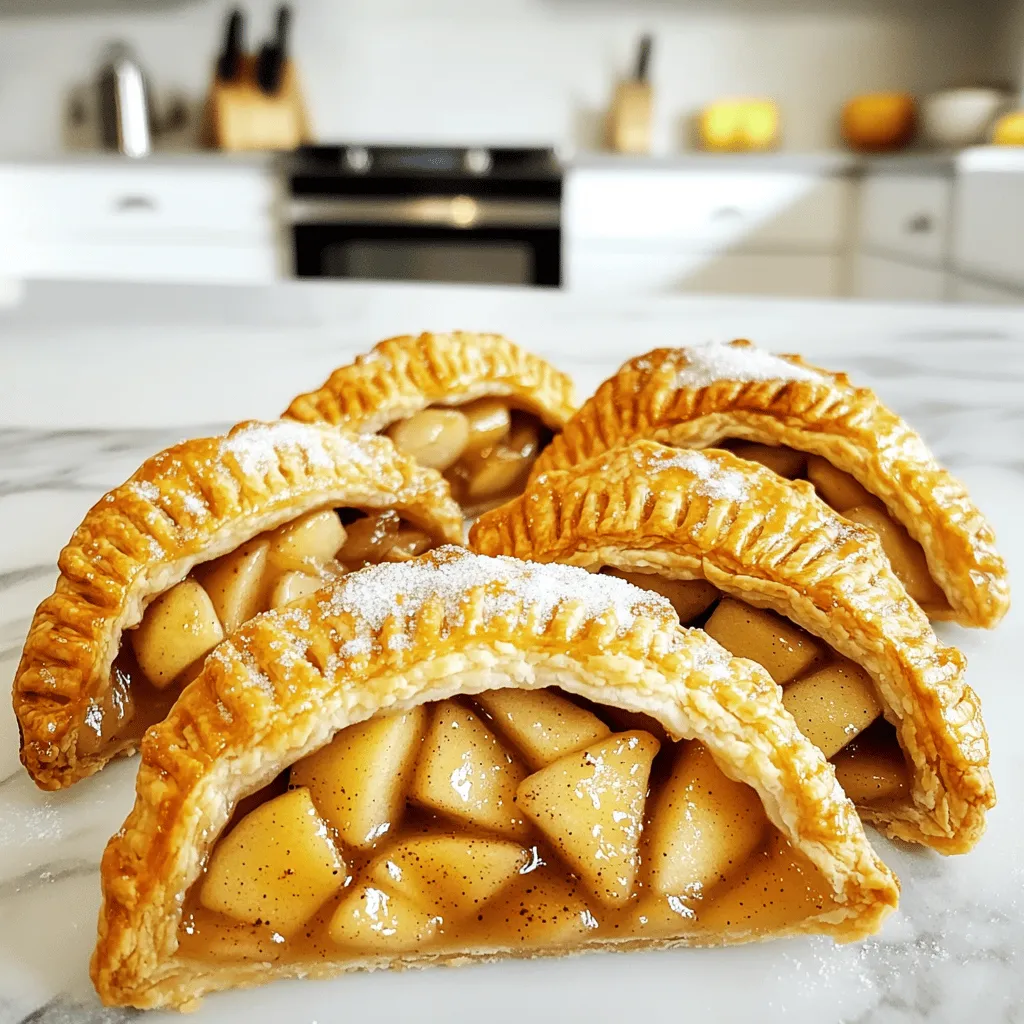
Are you ready for a snack that warms your heart? Let’s make Air Fryer Apple Hand Pies! These sweet treats

- 1 lb boneless chicken breast, cut into bite-sized pieces - 2 tablespoons olive oil - 3 cloves minced garlic - 2 tablespoons honey - 1 tablespoon soy sauce - 1-2 teaspoons chili flakes (to taste) - Salt and black pepper (to taste) - 2 green onions, sliced for garnish - Sesame seeds, for garnish To make these spicy honey garlic chicken bites, start with fresh, high-quality ingredients. The chicken breast is your main star. Cut it into bite-sized pieces for easy cooking and eating. Use olive oil to coat the chicken. This adds flavor and helps it cook nicely. For the sauce, honey brings sweetness, while soy sauce adds depth. Chili flakes give the spice. You can adjust the amount of chili flakes to match your spice level. Don't forget the garnishes! Fresh green onions brighten the dish. Sesame seeds add a nice crunch. Season with salt and black pepper to taste. You can find the full recipe and step-by-step instructions to create this delicious dish. Enjoy cooking! - Season chicken pieces with salt and black pepper. - Toss with olive oil until fully coated. To start, you want to take 1 pound of boneless chicken breast and cut it into bite-sized pieces. This size makes them easy to eat and perfect for dipping. After cutting, sprinkle salt and black pepper over the chicken. This simple step brings out the chicken's natural flavor. Next, pour 2 tablespoons of olive oil into a large mixing bowl. Toss the chicken pieces in the oil until they are fully coated. This helps the seasoning stick and keeps the chicken moist during cooking. - Heat skillet over medium-high heat. - Cook chicken pieces for 5-7 minutes until golden brown. Now, heat a skillet over medium-high heat. Make sure it gets hot before adding the chicken. This helps create a nice sear. Once the skillet is hot, add the seasoned chicken pieces. Spread them out in a single layer. Avoid overcrowding the pan, as this can lead to steaming rather than browning. Cook the chicken for about 5 to 7 minutes. Turn the pieces occasionally. You want them to be golden brown and cooked through. - Sauté garlic until fragrant, about 1 minute. - Prepare honey garlic sauce and pour over cooked chicken. After the chicken is cooked, lower the heat to medium. Add 3 cloves of minced garlic to the skillet. Sauté the garlic for about 1 minute until it smells fragrant. Be careful not to burn it. Next, in a small bowl, mix 2 tablespoons of honey, 1 tablespoon of soy sauce, and 1-2 teaspoons of chili flakes. Whisk these ingredients well. Pour this sweet and spicy sauce over the cooked chicken. Stir gently to coat the chicken evenly. Let it simmer for 2-3 minutes. This allows the sauce to thicken and stick to the chicken. You can find the full recipe for this dish later on. To make perfectly cooked chicken bites, start with good chicken. Cut the chicken into even pieces. This helps them cook at the same rate. Season the chicken well with salt and black pepper. Toss them in olive oil to keep them moist. Heat your skillet over medium-high heat. Cook the chicken for 5 to 7 minutes. Turn them occasionally until they turn golden brown. To adjust heat levels, start low if you're unsure. You can always add more chili flakes later. If you want a milder dish, use less chili. You can also try adding honey to balance out the spice. For added complexity, consider using spices like smoked paprika or cumin. These can bring depth to your dish without overpowering it. You can also try different types of honey for unique flavors. For a sweeter kick, mix in a splash of apple cider vinegar. To make the dish spicier, add fresh chopped chili or cayenne pepper. For a milder option, reduce the chili flakes or add more honey. You can even add a splash of coconut milk for a creamy touch. Serving is key for any dish. Try placing the chicken bites on a large platter. Line it with fresh lettuce leaves to add color. Drizzle some extra sauce over the chicken bites for shine. Garnishing is important too. Use freshly sliced green onions for a pop of green. A sprinkle of sesame seeds adds crunch and elegance. You can even add edible flowers for a special touch. These simple tips will make your dish look as great as it tastes. For the full recipe, check the earlier section. {{image_4}} You can switch up the protein in this recipe. Try using different cuts of chicken, like thighs or drumsticks. They will add more flavor and moisture. You can also use pork or shrimp for a tasty twist. If you want a vegetarian option, use tofu. Cut the tofu into bite-sized cubes and press it to remove extra moisture. This helps the tofu soak up the sauce better. Don’t be afraid to get creative with the sauce! You can use maple syrup instead of honey for a different sweetness. Agave nectar works well, too. Want more heat? Add some extra chili powder or black pepper. You could even try spices like ginger or cumin for a unique flavor. Each of these changes can give your chicken bites a new and exciting taste. When serving Spicy Honey Garlic Chicken Bites, think about the sides. Steamed rice or fluffy quinoa pairs perfectly with the dish. Fresh veggies like carrots or cucumbers add crunch and color. For a party, consider serving these bites with toothpicks for easy eating. You can also set up a dipping sauce bar with options like ranch, sriracha, or a sweet chili dip. These ideas make your meal fun and tasty! To keep your spicy honey garlic chicken bites fresh, store them in an airtight container. Place the leftovers in the fridge within two hours of cooking. They can stay good for up to three days. Make sure to let them cool before sealing the container. This helps keep their delicious flavor intact. Freezing is a great option if you want to save some chicken bites for later. First, let the chicken cool completely. Then, place them in a freezer-safe bag or container. Squeeze out as much air as possible to prevent freezer burn. You can freeze them for up to three months. When you’re ready to enjoy them, thaw in the fridge overnight. This keeps them safe from bacteria. To reheat your chicken bites, use the oven for the best results. Preheat the oven to 350°F (175°C). Spread the chicken bites on a baking sheet. Heat for about 10-15 minutes until they are warm. If you want to use the microwave, place them on a microwave-safe plate. Heat in short bursts of 30 seconds, checking to avoid overcooking. This way, you keep the bites juicy and flavorful. Enjoy your meal! Spicy Honey Garlic Chicken Bites last about 3 to 4 days in the fridge. To keep them fresh, store them in an airtight container. This way, they stay tasty and safe to eat. Yes, you can make these chicken bites ahead of time. Prepare them and store them in the fridge. Just reheat them before serving. They still taste great and are perfect for busy nights. You can serve these chicken bites with many sides. Here are some ideas: - Steamed rice - Noodles - Fresh salad - Veggie sticks - Dipping sauces Pairing them with rice or noodles makes a filling meal. A fresh salad adds a nice crunch. Yes, you can freeze the chicken bites. Place them in a freezer-safe bag or container. They last up to 3 months in the freezer. Thaw them overnight before reheating. The best way to reheat them is in a skillet. Heat a little oil over medium heat. Add the chicken bites, stirring gently until warmed through. This keeps them crispy and flavorful. Absolutely! You can change the amount of chili flakes to suit your taste. Add less for a milder flavor or more for extra heat. Experiment until you find your perfect balance. Yes, they are kid-friendly! The sweet honey and garlic sauce make them tasty for kids. You can adjust the spice level to make them even milder if needed. These bites combine sweet, spicy, and savory flavors. The honey adds sweetness, while the garlic gives a rich taste. This balance makes them a fun and tasty treat for any meal. For the full recipe, check out the complete guide to creating these delightful bites. In this blog post, we covered how to make spicy honey garlic chicken bites. You learned about the main ingredients, cooking steps, and how to add your own twist. I shared tips for perfecting your dish and variations to try. Remember, cooking is fun and your options are endless. With these bites, your meals can be exciting, tasty, and memorable. Enjoy the process, share with friends, and savor every bite!

Spicy Honey Garlic Chicken Bites Savory Weeknight Treat

Looking for a quick and tasty meal? Spicy Honey Garlic Chicken Bites will wow your taste buds! This dish combines

Making easy cheesy garlic bread twists is fun and simple. You only need a few key ingredients to create this tasty treat. This recipe uses pizza dough as the base, topped with melted butter, garlic, and two types of cheese. The mix of flavors gives these twists a delightful taste that you can enjoy anytime. - Pizza dough: This is the main ingredient. You can buy it pre-made in a tube or make it from scratch. Using refrigerated pizza dough saves time and makes this recipe super easy. - Cheese varieties: For this recipe, I like to use shredded mozzarella cheese and grated Parmesan cheese. Mozzarella melts well and gets gooey, while Parmesan adds a nice salty flavor. You can mix in other cheeses if you prefer. - Seasonings: Garlic is the star here. I use three cloves of minced garlic to add that strong, savory taste. Dried oregano and parsley enhance the flavor even more. A little salt and pepper round out the flavors nicely. These ingredients come together to create cheesy garlic bread twists that are perfect for sharing or enjoying alone. If you want to see the complete recipe, check out the Full Recipe above. To start, preheat your oven to 400°F (200°C). This step helps the twists bake evenly. Next, grab a baking sheet and line it with parchment paper. This will stop the twists from sticking. Now, let’s make the garlic butter. In a small bowl, mix together 4 tablespoons of melted unsalted butter, 3 minced garlic cloves, 1 teaspoon of dried oregano, and 1 teaspoon of dried parsley. Add a pinch of salt and pepper. Stir it well until everything blends nicely. Next, dust your clean work surface with a little flour. Unroll the tube of refrigerated pizza dough. Roll it out into a rectangle about ¼ inch thick. Try to keep the edges even for the best shape. Once rolled out, brush the garlic butter mixture all over the dough. Make sure to save some for later! Then, sprinkle 1 cup of shredded mozzarella cheese and ½ cup of grated Parmesan cheese evenly across the dough. Cover every inch to get that cheesy goodness. Using a pizza cutter, slice the dough into long strips that are about 1 inch wide. Now comes the fun part—twisting! Take each strip and twist it several times to form a spiral shape. Place each twist on the baking sheet, leaving some space between them for even baking. Before you pop them in the oven, brush the tops with any leftover garlic butter. This adds more flavor! Bake the twists for 12-15 minutes. You want them to turn golden brown and see the cheese bubbling. To ensure even cooking, space the twists apart on the baking sheet. This way, hot air can flow around each one. Also, keep an eye on them as they bake. If you notice some are browning faster, you can rotate the baking sheet halfway through the cooking time. Following these steps will help you create delicious Easy Cheesy Garlic Bread Twists. For the full recipe, check out the recipe section above. Enjoy your tasty treat! When making cheesy garlic bread twists, avoid using too much flour while rolling. This can dry out the dough. Also, don’t skip the garlic butter. It adds flavor and keeps the twists moist. Ensure your oven is fully preheated before baking. This helps the twists rise and brown evenly. Lastly, resist the urge to overcrowd the baking sheet. Give each twist space to expand and cook properly. To boost the flavor, try adding fresh herbs like basil or thyme to the garlic butter. You can also mix in some crushed red pepper for a spicy kick. For a richer taste, use a blend of cheeses. Mixing mozzarella with Gouda or cheddar creates a unique flavor profile. To improve texture, let the dough sit for a few minutes after rolling. This relaxes the gluten and makes twisting easier. For perfect twists, ensure your dough is evenly rolled out to about ¼ inch thick. Use a sharp knife for clean cuts when slicing into strips. Twist each strip tightly but not too much, or they may lose shape. Apply a light brush of garlic butter on top before baking for a glossy finish. Finally, watch your twists closely during the last few minutes of baking. Remove them when they are golden brown and the cheese is bubbly for the best results. For the full recipe, check out the original source. {{image_4}} You can make these twists a bit healthier. Use whole wheat pizza dough instead of regular. This adds fiber, which is great for your body. You can also swap out butter for olive oil. Olive oil adds good fats and a nice flavor. For a lighter twist, try using less cheese or low-fat versions. This way, you still enjoy a cheesy treat without too many calories. You can easily spice up these twists with extra flavors. Add red pepper flakes for heat. Mix in chopped sun-dried tomatoes for a tangy bite. Fresh herbs like basil or thyme can also enhance the taste. Truffle oil drizzled on top before serving adds a touch of luxury. Get creative and make these twists your own! While mozzarella and Parmesan are classic, try other cheeses. Cheddar gives a sharp flavor that many love. A mix of gouda and fontina will create a rich taste. For something fun, use pepper jack for a spicy kick. The cheese you choose can change the whole vibe of your twists. Experiment with different blends to find your favorite! For the full recipe, check out the details above. Enjoy your cooking! To keep your cheesy garlic bread twists fresh, store them in an airtight container. Make sure the twists are completely cool before sealing. This helps prevent sogginess. You can keep them at room temperature for one day. If you need them to last longer, refrigerate them for up to three days. When you are ready to enjoy your leftovers, you can reheat them easily. Preheat your oven to 350°F (175°C). Place the twists on a baking sheet. Heat them for about 10 minutes. This will help restore their crispy texture and warm the cheese inside. If you want, you can cover them with foil to keep them moist. If you want to save your cheesy garlic twists for later, freezing is a great option. Place the cooled twists in a freezer-safe bag. Be sure to remove as much air as possible before sealing. You can freeze them for up to two months. When you are ready to eat them, thaw overnight in the fridge. Reheat as directed above for best results. For the full recipe, check out the earlier section to make these tasty treats! You can prepare the cheesy garlic bread twists in advance. Make them up to the point before baking. After twisting, place them on a baking sheet and cover with plastic wrap. Store them in the fridge for up to 24 hours. When ready, simply bake them straight from the fridge. This saves time and keeps them fresh. Yes, fresh dough works well for these twists. It may require a bit more rolling. Be sure to roll it out to the same thickness as refrigerated dough. Fresh dough can give a softer texture. Just keep an eye on the baking time, as it might vary a bit. These twists pair great with many dishes. You can serve them with marinara sauce for dipping. They also work well as a side with pasta or salad. For a fun twist, use them as a base for mini pizzas. Your guests will love the cheesy goodness! In this post, I covered how to make cheesy garlic bread twists. We explored the key ingredients like pizza dough, cheese, and seasonings. I gave step-by-step instructions for preparation and baking, plus tips to avoid common mistakes. You also learned about healthy variations and how to store leftovers. Making these twists can be fun and rewarding. With a few simple steps, you can enjoy a delicious treat any time. Now, get in the kitchen and create your perfect twists!

Easy Cheesy Garlic Bread Twists Simple and Tasty Treat

Craving a snack that’s simple and full of flavor? You’re in the right place! Today, I’ll show you how to

Older posts
Newer posts
← Previous Page1 … Page20 Page21 Page22 … Page86 Next →

dsad

© 2026 yumymoments • Built with GeneratePress

Our Policies

  • Copyright Policy
  • Cookie Policy
  • GDPR Policy
  • Privacy Policy
  • Disclaimer
  • Terms Of Use

More Information

  • Home
  • About
  • Contact
  • Appetizers
  • Dessert
  • Dinner
  • Drinks
©2026, yumymoments About Back To Top