Skip to content
DisclaimerTerms Of UseGDPR PolicyCookie Policy

yumymoments

  • Home
  • Drinks
  • Appetizers
  • Dinner
  • Dessert
  • About
  • Contact
  • Privacy Policy
DisclaimerTerms Of UseGDPR PolicyCookie Policy

NO-ING-IMG

To make these No Bake Basil Lime Cheesecake Cups, gather the following: - Crust Ingredients: - 1 cup graham cracker crumbs - 4 tablespoons unsalted butter, melted - Cream Cheese Filling Components: - 2 cups cream cheese, softened to room temperature - 1 cup powdered sugar - 1/2 cup freshly squeezed lime juice (about 4 limes) - Zest of 2 limes - 1/2 cup heavy whipping cream, chilled - 1/4 cup fresh basil leaves, finely chopped - A pinch of salt - Suggested Garnishes: - Lime slices - Fresh basil leaves These ingredients create a bright and creamy dessert. The graham cracker crust offers a sweet crunch. The cream cheese filling balances tangy lime with fresh basil. You can find the Full Recipe for a detailed guide on how to put it all together. Start by mixing the graham cracker crumbs and melted butter in a bowl. Use your hand or a spoon to stir until the crumbs look like wet sand. This texture is key for a great crust. Next, take six serving cups and divide the crumb mixture evenly between them. Press the crumbs down firmly with your fingers or the back of a spoon. Make sure each cup has a compact and even layer. This crust will hold up the creamy cheesecake filling. For the filling, take a large bowl and add the softened cream cheese. Beat it with an electric mixer until smooth. You want a creamy texture with no lumps. Gradually add the powdered sugar, mixing until smooth. Then, pour in the fresh lime juice and zest. Add the finely chopped basil and a pinch of salt. Mix until everything is well combined. Now, whip the chilled heavy cream in a separate bowl until you see soft peaks form. This part is fun! Gently fold the whipped cream into the cream cheese mixture. Be soft here; you don’t want to lose the airiness. This step makes the cheesecake light and fluffy. Now, it's time to put everything together. Spoon the creamy cheesecake filling into the cups over the crust. Use a spatula to smooth the tops, so they look nice. Cover the cups with plastic wrap and place them in the fridge. Chill for at least 4 hours. This time helps the flavors meld and the cheesecake firm up. When ready, each cup will be a delightful treat bursting with flavor. For the full recipe, refer back to the beginning of the article. To get the best texture for your cheesecake cups, follow a few simple steps. First, make sure your cream cheese is at room temperature. This helps it blend smoothly. Next, when mixing the filling, beat it until there are no lumps. This gives a nice creamy texture. When you fold in the whipped cream, do it gently. This keeps the filling light and airy. Chilling is key for this recipe. After you assemble your cups, cover them and place them in the fridge. Allow at least four hours for them to set. The longer they chill, the better the flavors meld together. When it comes to serving, presentation makes a big difference. Use clear cups so guests can see the layers. This adds visual appeal. Place the cups on a wooden board or a bright tray. You can surround them with fresh mint or basil leaves and lime slices for extra color. These cheesecake cups are perfect for many occasions. Serve them at summer parties, barbecues, or even at family dinners. They are a refreshing treat that everyone will love. For a fun twist, pair them with fresh fruit or a drizzle of honey. This adds even more flavor and makes the dessert feel special. {{image_4}} You can change the crust to fit different diets. For a gluten-free option, use gluten-free cookies or almond flour. These will give you a tasty base without gluten. If you want to try a new flavor, use crushed vanilla cookies for a sweet twist. For the filling, you can switch herbs or add fruit. Instead of basil, try mint or cilantro for a fresh taste. If you love berries, add pureed strawberries or blueberries to the mix. This will give your cheesecake cups a fruity flair. These cheesecake cups are great on their own, but you can make them even better. Top them with fresh fruits like raspberries or mango slices. You can also drizzle honey or chocolate sauce on top for added sweetness. If you want to serve a crowd, make a larger batch. Just double the recipe and use a big dish. This way, everyone can enjoy a slice. For smaller servings, use mini cups or shot glasses. These ideas will keep your treats fun and fresh! To keep your cheesecake cups fresh, store them in the fridge. Use an airtight container or cover them with plastic wrap. This helps to keep the flavors locked in and prevents drying out. The cheesecake cups stay tasty for about 3 to 5 days. Always check for any signs of spoilage before eating. If you notice any change in smell or texture, it’s best to throw them out. You can freeze these cheesecake cups for longer storage. To do this, place them in a freezer-safe container. Make sure to wrap them well with plastic wrap to avoid freezer burn. They can last up to 2 months in the freezer. When ready to eat, take them out and let them thaw in the fridge overnight. This way, they maintain their creamy texture and bright flavor. Avoid reheating, as this can change the consistency. Enjoy your delightful treat whenever you wish! For the full recipe, refer to the recipe section above. Yes, you can change the herb for new flavors. Some great options include mint, thyme, or rosemary. Mint adds a fresh taste. Thyme gives a warm touch. Rosemary adds a hint of earthiness. Each herb brings its own twist to the cheesecake. Feel free to experiment with your favorite herbs. These cheesecake cups stay fresh for about 3 to 5 days in the fridge. Store them in an airtight container to keep them safe. If you notice any changes in smell or texture, it’s best to toss them. For the best taste, enjoy them within the first few days. You can serve these cheesecake cups with fresh fruit, like berries or mango slices. They pair well with whipped cream or a drizzle of honey. For drinks, try serving them with iced tea or lemonade. These additions make the dessert even more delightful. You can find the Full Recipe in this section for more ideas. These cheesecake cups combine creamy goodness with zesty lime and fresh basil. You learned how to craft the perfect crust and filling while exploring tasty variations. Remember, chilling time is key for the best flavor and texture. Try different herbs or fruits for a personal twist. Enjoy these desserts at any occasion or as a delightful treat any time. With proper storage, your creations can last days. Keep experimenting, and enjoy each refreshing bite!

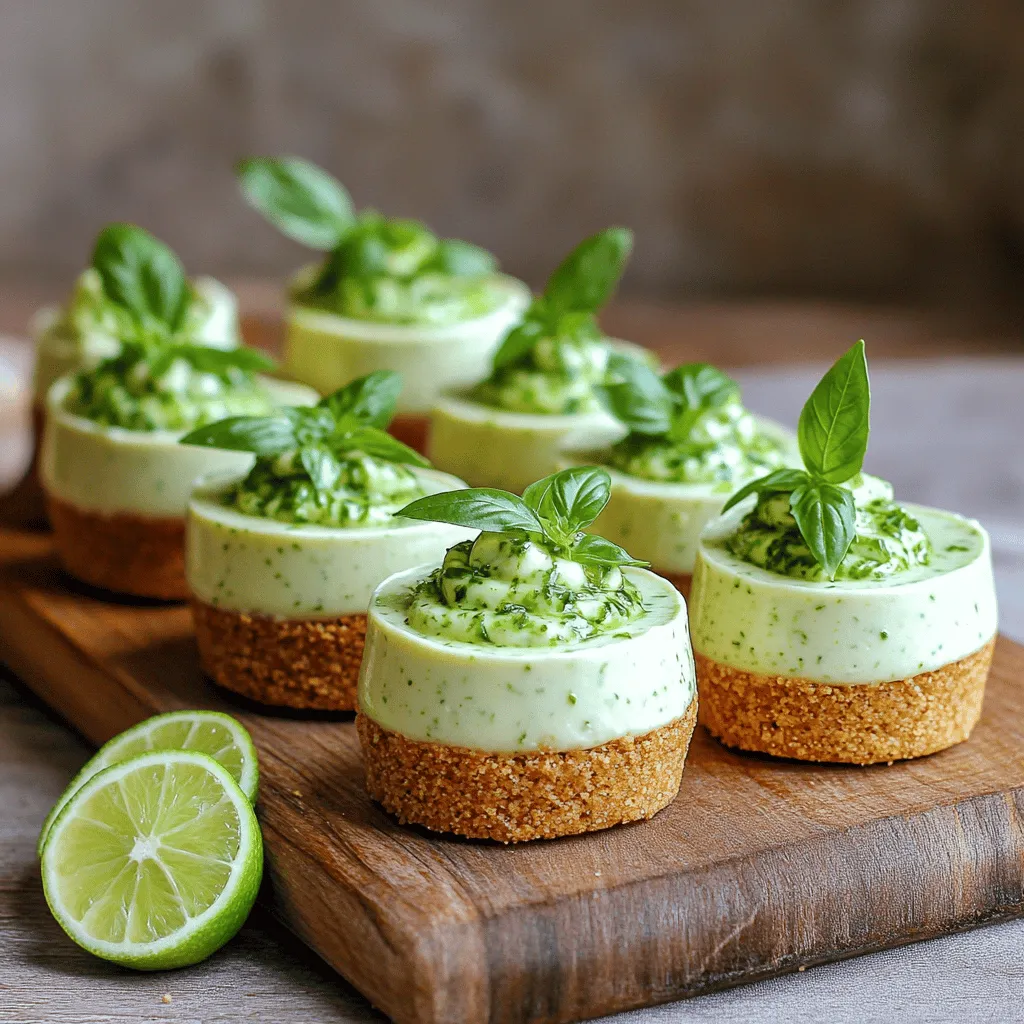
No Bake Basil Lime Cheesecake Cups Delightful Treat

Looking for a fun and easy dessert? Try my No Bake Basil Lime Cheesecake Cups! These delightful treats combine fresh

To make Sweet Heat Pickle Popcorn, you’ll need the following ingredients: - 1/2 cup popcorn kernels - 1/4 cup pickle juice - 2 tablespoons granulated sugar - 1 teaspoon smoked paprika - 1/2 teaspoon cayenne pepper (adjust to taste) - 1/4 cup melted butter - Salt to taste - 1/4 cup finely chopped dill pickles (for garnish) These ingredients create a unique blend of sweet and spicy flavors. The popcorn kernels pop into fluffy bites, while the pickle juice adds a tangy twist. You can customize your Sweet Heat Pickle Popcorn with various add-ins or substitutions: - Different Pickle Types: Try using bread and butter pickles for a sweeter taste. - Spices: Add garlic powder or onion powder for extra depth. - Cheese: Sprinkle some grated Parmesan for a savory touch. - Nuts: Mix in some roasted peanuts or cashews for crunch. Feel free to experiment with these options to find your favorite flavor combination. Here’s a quick look at the nutritional facts for a serving of Sweet Heat Pickle Popcorn: - Calories: Approximately 200 - Fat: 10g - Carbohydrates: 26g - Protein: 3g - Sugar: 3g This snack offers a fun and flavorful way to enjoy popcorn. It packs a punch with every bite while still being a guilt-free treat. For the full recipe, check out the earlier section. 1. Pop the Corn: Start by melting 2 tablespoons of butter in a large pot over medium heat. Add 1/2 cup of popcorn kernels. Cover the pot with a lid and gently shake it. Listen closely; when the popping slows to 2-3 seconds between pops, take the pot off the heat. 2. Flavor the Butter: In a bowl, mix the rest of the melted butter with 1/4 cup of pickle juice, 2 tablespoons of sugar, 1 teaspoon of smoked paprika, 1/2 teaspoon of cayenne pepper, and some salt. Whisk this mix well until smooth. 3. Combine: Carefully move the popcorn to a big bowl. Drizzle the pickle-flavored butter over the warm popcorn. Toss gently to coat every piece. 4. Add Pickles: Now, fold in 1/4 cup of finely chopped dill pickles. Make sure they spread out well without crushing too many popcorn pieces. 5. Serve: Scoop the popcorn into a large serving bowl. For a nice touch, sprinkle extra chopped dill pickles on top. Enjoy it right away while it’s warm for the best taste. - Use fresh popcorn kernels for the best results. Old kernels may not pop well. - Ensure your pot has a tight lid to keep steam inside. This helps with popping. - Shake the pot often to prevent burning and help all kernels pop evenly. - If you want extra crispy popcorn, try popping it in a hot air popper. To get the best flavor in your Sweet Heat Pickle Popcorn, focus on these key points: - Salt: Start with a little salt, then taste and adjust. Salt brings out the flavor. - Sugar: The sugar balances the heat. Adjust it if you prefer a sweeter or spicier taste. - Spices: Feel free to add more smoked paprika or cayenne for a stronger flavor. Always taste as you go. - Pickle Juice: The right amount of pickle juice gives that tangy kick. Don’t add too much, or it may get soggy. Experiment with these tips and find your perfect mix! For the full recipe, check the recipe section above. To make light and fluffy popcorn, always start with fresh kernels. Old kernels may not pop well. Use a heavy pot with a tight lid. This helps trap heat and steam. Heat the pot on medium, not high. High heat can burn the popcorn. Shake the pot gently while popping. This keeps the kernels moving and helps them pop evenly. Listen for the pops. When there are 2-3 seconds between pops, it’s time to take it off the heat. If you have leftover popcorn, store it in an airtight container. This helps keep it fresh and crunchy. Avoid plastic bags, as they can trap moisture. Place the container in a cool, dark place. Popcorn can stay fresh for about 3 days. To revive any stale popcorn, pop it in the oven for a few minutes. It will regain some crunch. Sweet Heat Pickle Popcorn is great for parties or movie nights. Serve it in fun bowls or bags for guests. You can even make a popcorn bar! Offer toppings like cheese, nuts, or extra spices. This way, everyone can customize their snack. Pair it with drinks like lemonade or iced tea for a refreshing combo. For a festive touch, sprinkle some colorful herbs on top. Enjoy this unique snack at any gathering! If you're ready to make this delightful treat, check out the Full Recipe for Sweet Heat Pickle Popcorn. {{image_4}} You can change the flavor of your Sweet Heat Pickle Popcorn easily by using different types of pickles. Each type will give a unique twist. For instance, bread and butter pickles add a sweet flavor, while dill pickles bring a tangy bite. You can even try spicy pickles for an extra kick. Just chop them finely and fold them into the popcorn, just like in the full recipe. Adjusting the spice level is simple and fun. If you like it mild, use less cayenne pepper. Start with a pinch, then taste. You can always add more heat if you want. For those who love spice, try adding crushed red pepper flakes or even a splash of hot sauce. This way, you can make the popcorn perfect for your taste buds. Get creative with flavors! You can mix in cheese powder for a cheesy twist. Or add ranch seasoning for a savory flavor. For a sweet touch, try adding a drizzle of honey or a sprinkle of cinnamon. Each of these options can change your Sweet Heat Pickle Popcorn into something new and exciting. Don't be afraid to experiment; your taste buds will thank you! You can find Sweet Heat Pickle Popcorn at many places. Here are the best options. For an easy shopping experience, check these online stores: - Amazon: They usually have many brands and flavors. - Walmart: Their website often stocks unique snacks like this. - Target: You can find special snacks and local brands here. Ordering online gives you the chance to read reviews. This helps you pick the best choice. If you prefer shopping in person, visit these local stores: - Grocery stores: Big chains often have unique snack sections. - Health food stores: They may carry gourmet popcorn options. - Specialty snack shops: These shops often have local flavors and brands. Ask store staff for help if you can’t find it. They may even suggest a similar product. Reading reviews helps you pick the right product. Many people love the sweet and spicy mix. - Some brands focus more on heat. Others lean towards sweet flavors. - Check for reviews to see what others liked best. Taste testing is fun! Buy a few different brands. Compare the flavors, and share with friends. You’ll find a favorite that suits your taste. For a full recipe to make your own at home, check the Full Recipe. Enjoy the adventure of finding the perfect Sweet Heat Pickle Popcorn! Sweet Heat Pickle Popcorn lasts about three days when stored properly. To keep it fresh, place it in an airtight container. This helps to keep the popcorn crispy and flavorful. Yes, you can make Sweet Heat Pickle Popcorn in the microwave. Use microwave popcorn bags or a microwave-safe bowl. Add the pickle juice mixture after popping. Just be careful not to burn the popcorn. Sweet Heat Pickle Popcorn is great for movie nights, game days, or parties. It adds a fun twist to snacks. You can serve it as an appetizer or a unique treat during gatherings. Everyone loves a tasty surprise! For the full recipe, check out the details above. In this blog post, we covered how to make Sweet Heat Pickle Popcorn. I shared its main ingredients, step-by-step instructions, and tips for the perfect pop. You learned about flavor variations and where to buy it. This unique snack brings great taste to any event. Whether you love it sweet or spicy, there’s a version for you. Try it out and enjoy this fun treat!

Sweet Heat Pickle Popcorn Irresistible Flavor Boost

If you love bold flavors, this Sweet Heat Pickle Popcorn will thrill your taste buds! This snack combines tangy pickles

To make this flatbread, you need a few key items: - 1 large flatbread or pita bread - 2 ripe peaches, thinly sliced - 1 cup burrata cheese, torn into bite-sized pieces - 4 slices prosciutto, cut into strips - 2 tablespoons honey - 1 tablespoon balsamic reduction - Fresh basil leaves, for garnish - Olive oil, for drizzling - Salt and freshly ground black pepper, to taste These ingredients blend sweet and savory flavors. The peaches add freshness, while the prosciutto brings a salty kick. Burrata cheese offers creamy richness. You can personalize your flatbread with a few extra items: - Arugula for a peppery touch - Crushed red pepper flakes for heat - Goat cheese as an alternative to burrata - Walnuts or pecans for crunch These options let you play with flavors and textures. Choose what you like to make it your own. Keep these items handy for this and other recipes: - Olive oil for drizzling and cooking - Honey for sweetness - Balsamic vinegar for tang - Salt and pepper for seasoning Having these staples makes cooking easier. You can whip up many dishes quickly, enhancing your cooking skills. For the full recipe, check the detailed instructions. Start by gathering all your ingredients. You will need flatbread, peaches, burrata, prosciutto, honey, balsamic reduction, basil, olive oil, salt, and pepper. Make sure your oven is ready by preheating it to 400°F (200°C). This step is key for a crispy flatbread. Next, line a baking sheet with parchment paper. Place your flatbread on it. Drizzle olive oil over the flatbread. This not only adds flavor but also helps it crisp up nicely. Layer the thinly sliced peaches evenly on top. Be sure to give them space for even cooking. Now, take the burrata cheese and tear it into bite-sized pieces. Scatter these over the peaches. The creaminess of the cheese pairs well with the sweet peaches. Then, add the prosciutto strips on top. Arrange them in a way that looks good and tastes great. Sprinkle salt and freshly ground black pepper over your creation. This small touch can enhance all the flavors. Carefully place the flatbread in the oven. Bake it for about 10 to 12 minutes. Watch for the edges to turn golden and the cheese to melt. When the flatbread is done, take it out of the oven. Drizzle honey and balsamic reduction over the top. This adds a sweet and tangy flavor that ties everything together. Finally, add fresh basil leaves for a pop of color and aroma. Slice it into portions and serve warm. Enjoy your delicious Peach Burrata Prosciutto Flatbread! To get a crispy flatbread, start by using a high oven temperature. Preheat your oven to 400°F (200°C). This heat helps the flatbread crisp up nicely. Drizzle olive oil on the flatbread to add flavor and promote browning. Make sure to spread the oil evenly. When you bake, keep an eye on it. You want a golden edge, not burnt. Bake for about 10-12 minutes for the best result. You can play with flavors to make this dish unique. Try adding arugula for a peppery bite. Swap peaches for figs or nectarines for different sweetness. You can also mix in nuts like walnuts for crunch. A sprinkle of chili flakes adds heat. Experiment with herbs too. Fresh thyme or mint can give a nice twist to the dish. Pair this flatbread with a light, fruity white wine. A Sauvignon Blanc works well to balance the richness of the burrata. For a non-alcoholic option, try sparkling water with a splash of lemon. Sides like a simple green salad or roasted veggies can round out your meal. For a fun touch, serve with a charcuterie board to complement the flavors. If you want the full experience, check out the Full Recipe for detailed steps and tips! {{image_4}} You can switch fruits for a new taste. Try ripe figs or juicy strawberries. Each fruit brings its own flavor. For cheese, consider creamy goat cheese or tangy feta. Both add a unique twist to the dish. Mix and match to find your favorite combo. If you need a gluten-free option, use cauliflower flatbread. It has a light texture and works well with toppings. For low-carb choices, you can use zucchini slices or eggplant. These options keep the dish tasty while cutting carbs. You still get the same great flavors. To make this dish vegan, swap burrata with a cashew cheese spread. It mimics the creaminess of burrata. Replace prosciutto with marinated mushrooms or smoked tempeh for a savory kick. Use agave syrup instead of honey for sweetness. These changes keep the essence of the dish while making it plant-based. Check out the Full Recipe for more ideas! To keep your Peach Burrata Prosciutto Flatbread fresh, store it in the fridge. Use an airtight container to prevent moisture loss. Make sure it cools down first. This helps keep the flavors intact. Eat leftovers within two days for the best taste. When you want to enjoy your leftover flatbread, reheat it in the oven. Set your oven to 350°F (175°C). Place the flatbread on a baking sheet and cover it with foil. This keeps it from drying out. Heat for about 10 minutes. Check that the cheese is melty and the edges are crispy again. You can freeze the flatbread but without the toppings. Just bake it plain, let it cool, and wrap it tightly. Use plastic wrap and then foil to prevent freezer burn. This way, you can store it for up to a month. When you’re ready to eat, thaw it in the fridge overnight. Add your toppings and bake as usual. Enjoy the fresh flavors anytime! For the full recipe, click here. Yes, you can prepare the flatbread ahead of time. You can assemble it and store it in the fridge. Just wrap it well in plastic wrap. When you are ready to eat, bake it fresh. This keeps the flatbread crispy. If you don’t have burrata, you can use fresh mozzarella. Cream cheese is another option, though it won't have the same texture. Ricotta also works well and gives a creamy taste. Each choice adds its own flavor to the dish. To change the sweetness, add more or less honey. You can also use maple syrup for a different flavor. If you want less sweetness, cut back on the honey. You can balance it with more balsamic reduction for a tangy kick. Yes, grilling adds a nice smoky flavor. Preheat your grill and place the flatbread directly on the grates. Cook for about 5-7 minutes, checking often. Keep an eye on it to avoid burning. Use a grill-safe pan if needed. Enjoy that smoky taste! In this article, I covered how to make a Peach Burrata Prosciutto Flatbread. I shared the main and optional ingredients, as well as pantry staples. You learned step-by-step instructions for baking, tips for a perfect flatbread, and ways to customize this dish. Remember, you can make this flatbread personal with different flavors and textures. Enjoy experimenting with variations and storage tips for future meals. Happy cooking!

Peach Burrata Prosciutto Flatbread Simple and Tasty

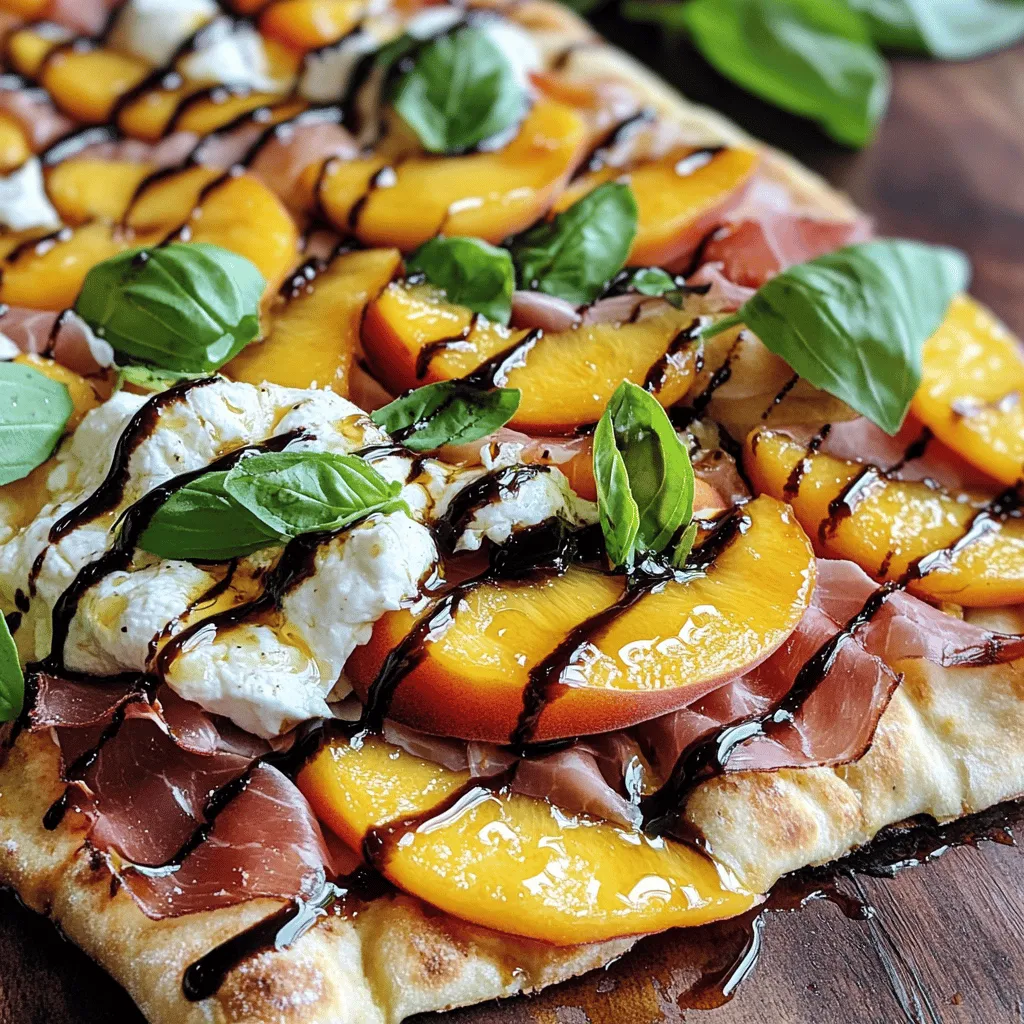
Looking for a fresh, simple dish that impresses? My Peach Burrata Prosciutto Flatbread is both tasty and easy to make.

- 2 cups cooked chicken, shredded - 1 can (10 oz) enchilada sauce - 1 cup shredded cheese (cheddar or Monterey Jack) - 1 cup corn (frozen or canned, drained if using canned) - 1 cup black beans, drained and rinsed - 1 cup sliced bell peppers (any color) - 8 medium flour tortillas - 1 teaspoon ground cumin - 1 teaspoon garlic powder - 1 tablespoon olive oil - Salt and pepper to taste For these enchiladas, use cooked chicken you have on hand. Shredded rotisserie chicken works great. The enchilada sauce adds a rich flavor and moisture. I like to use cheddar or Monterey Jack cheese for a nice melt. You can mix in colorful bell peppers and black beans for extra taste and texture. Corn adds a sweet crunch, making every bite delightful. - Fresh cilantro, chopped (for garnish, optional) - Sour cream, guacamole, and salsa for serving For garnishments, fresh cilantro brings a burst of freshness. You can also serve the enchiladas with sour cream or guacamole. These toppings add creaminess and balance the flavors. If you want more heat, try adding some salsa on the side. Pair these enchiladas with a simple salad or rice for a complete meal. First, preheat your oven to 375°F (190°C). This step is key for baking your enchiladas evenly. While the oven heats, grab a large skillet. Pour in 1 tablespoon of olive oil and set it over medium heat. Once the oil is hot, add 1 cup of sliced bell peppers. Sauté these for about 3-4 minutes. You want them tender yet crisp, adding a nice crunch to your filling. In a mixing bowl, combine 2 cups of shredded chicken with 1 cup of corn and 1 cup of black beans. Add the sautéed bell peppers to this mix. Sprinkle in 1 teaspoon of ground cumin and 1 teaspoon of garlic powder. Season with salt and pepper to taste. Stir everything well so the flavors mix. This filling is both tasty and simple, perfect for your enchiladas. Now, take a greased 9x13 inch baking dish. Pour a thin layer of enchilada sauce at the bottom. This helps prevent sticking and adds flavor. Next, grab a flour tortilla. Spoon a generous amount of the chicken mixture down the center. Roll the tortilla tightly, tucking in the edges as you go. Place it seam-side down in the dish. Repeat this for all tortillas until you use all the filling. Once done, cover the rolled tortillas with the remaining enchilada sauce. Make sure all the tortillas are well-coated. Finish by sprinkling 1 cup of shredded cheese on top. Place your baking dish in the preheated oven. Bake for about 20-25 minutes. Keep an eye on the cheese; it should melt and bubble, creating a golden crust. Once done, remove the dish from the oven and let it cool for a few minutes. This helps the enchiladas set, making them easier to serve. Enjoy this easy chicken enchiladas recipe! For the full recipe, refer to the details provided earlier. How can I shred chicken quickly? To shred chicken fast, use two forks. Hold one fork steady and pull the chicken apart with the other fork. You can also use a stand mixer with a paddle attachment. Just mix on low speed for a few seconds. This method works well and saves time. How do I prep ingredients in advance? You can chop vegetables and shred chicken a day ahead. Store them in airtight containers. This way, when you're ready to cook, everything is ready to go. It cuts down on your cooking time. What are some suggestions for achieving the best flavor? To boost flavor, add spices like cumin and garlic powder. Use fresh herbs like cilantro for garnish. If you want a kick, add diced jalapeños. Choosing a good enchilada sauce makes a big difference too. How can I avoid soggy enchiladas? To keep enchiladas from getting soggy, ensure the sauce is not too watery. Also, cover the bottom of the baking dish with sauce, but don’t drown the enchiladas. Bake them until the cheese is bubbly and golden. This keeps the tortillas soft yet firm. For the full recipe, check out the [Full Recipe]. {{image_4}} You can easily change the filling in your enchiladas to suit your taste. If you want a vegetarian option, try using beans or lentils instead of chicken. You can also add extra veggies like zucchini or spinach. These add a nice crunch and color to your dish. The sauce is another area for creativity. While enchilada sauce is classic, you can switch it up with green salsa or mole. Each option offers a different flavor profile and can make your meal unique. Do you like it hot? You can add heat to your enchiladas using spices or fresh peppers. Try adding jalapeños to the filling for a kick. You can also sprinkle chili powder into your sauce for extra flavor. If you prefer mild enchiladas, skip the spicy peppers. Instead, you can use sweet bell peppers and stick with mild sauce. This way, everyone can enjoy them without the burn. After you enjoy your chicken enchiladas, store any leftovers in an airtight container. This keeps them fresh and tasty. Place the enchiladas in the fridge within two hours of cooking. They stay good for about three to four days. If you notice any change in smell or texture, it’s best to toss them. You can freeze enchiladas for later meals. To freeze before baking, prepare your dish as usual. Cover it tightly with plastic wrap and then foil. This keeps out air and moisture. You can freeze them for up to three months. To freeze after baking, let them cool completely first. Then, wrap them the same way. To reheat frozen enchiladas, simply thaw them in the fridge overnight. Once thawed, bake them at 350°F (175°C) for about 25 to 30 minutes. If they are still frozen, add 10 to 15 minutes to the baking time. Check that they are hot all the way through before serving. Enjoy them as if they were fresh! Can I use corn tortillas instead of flour? Yes, you can use corn tortillas. They add a nice flavor and texture. Keep in mind that corn tortillas can break more easily. Warm them up slightly before using. This will make them easier to roll. How can I make enchiladas ahead of time? You can prepare enchiladas a day in advance. Assemble them, but do not bake. Cover the dish with plastic wrap or foil and store it in the fridge. When you are ready to eat, just bake them as directed. This saves time and keeps dinner stress-free. Caloric content per serving Each serving of these chicken enchiladas is around 350 calories. This number can change based on the ingredients you choose. If you add more cheese or sour cream, it will be higher. Dietary adjustments and substitutions for health concerns You can make these enchiladas healthier by using lower-fat cheese or beans. If you want to cut carbs, try zucchini slices instead of tortillas. For a gluten-free option, use corn tortillas, as mentioned earlier. Always check labels to meet your dietary needs. In this blog post, we explored easy chicken enchiladas, from key ingredients to baking tips. You can mix shredded chicken, cheese, and veggies for a tasty filling. Don't forget optional garnishes like cilantro to elevate your dish. Try different sauces to change flavors or make it vegetarian. Storing tips ensure you enjoy these enchiladas later. In short, this dish is simple, fun, and great for sharing. Make it your own and enjoy!

Easy Chicken Enchiladas Simple and Flavorful Recipe

Craving a delicious meal that’s quick and easy? Look no further! This recipe for easy chicken enchiladas is your answer.

- 1 pound ground turkey or beef - 1 medium onion, finely diced - 2 cloves garlic, minced - 1 can (15 oz) black beans, rinsed and thoroughly drained - 1 can (15 oz) kidney beans, rinsed and thoroughly drained - 1 can (15 oz) corn, drained - 1 can (28 oz) diced tomatoes, including all juices - 1 packet taco seasoning (or homemade for extra flavor) - 4 cups chicken or vegetable broth - 1 jalapeño, finely diced (optional, for added spice) - 1 cup bell pepper, diced (choose any color for a vibrant dish) - Toppings: sour cream, avocado slices, shredded cheese, fresh cilantro, and crunchy tortilla chips Gather these ingredients to whip up a delicious One-Pot Taco Soup. You can use ground turkey or beef, based on your taste. The diced onion and minced garlic form a strong base. The black beans and kidney beans add protein and texture. Corn and diced tomatoes bring sweetness and moisture. Using taco seasoning adds that signature flavor. Chicken or vegetable broth gives the soup depth. Feel free to spice it up with jalapeño or add color with bell peppers. Finish it off with your favorite toppings for extra flavor and texture. Trust me, this soup is a fun way to make a tasty meal in no time. For the full recipe, check out the Fiesta One-Pot Taco Soup . - Heat olive oil in a large pot over medium heat. - Sauté onions and garlic until translucent (3-4 minutes). To start, you will want to warm the olive oil in the pot. This oil will help the onions and garlic cook nicely. Once the oil is hot, toss in the finely diced onion and minced garlic. Stir them every now and then. They should turn soft and clear in about 3-4 minutes. This step builds a great base of flavor for your soup. - Add ground turkey or beef and cook until browned (5-7 minutes). Now it’s time for the meat. Add either ground turkey or beef to the pot. Use a wooden spoon to break it apart. Cook the meat for about 5-7 minutes. You want it to be browned all over. This step adds richness to your taco soup, making it hearty and filling. - Incorporate taco seasoning and stir for 1-2 minutes. - Add beans, corn, tomatoes, jalapeño, bell pepper, and broth. Once the meat is ready, sprinkle in the taco seasoning. Stir for 1-2 minutes. This helps the spices bloom and gives your dish a bold flavor. Then, throw in the rinsed black beans, kidney beans, drained corn, and diced tomatoes with all their juices. If you like it spicy, add diced jalapeño and the colorful bell pepper. Finally, pour in the broth. This will turn your mixture into a delicious soup. - Season with salt and pepper. - Bring to a boil, reduce heat, and let simmer for 20-25 minutes. Next, add salt and pepper to taste. Stir everything well, then bring the mixture to a rolling boil. Once it’s boiling, reduce the heat to low and let it simmer. Allow it to cook for 20-25 minutes. This lets the flavors meld together beautifully. - Taste and adjust seasoning. - Allow to cool slightly before serving. After the simmering time, give your soup a taste. Adjust the seasoning if needed. Once you’re happy with the flavor, remove it from heat. Let it cool for a few minutes before serving. This waiting time helps the soup thicken a bit. Now you have a warm, tasty One-Pot Taco Soup ready to enjoy! For the full recipe, check out the details above. To make your One-Pot Taco Soup burst with flavor, consider these tips: - Use homemade taco seasoning for a custom flavor profile. You control the spices and salt. This option gives you a unique taste. - Consider adding lime juice for zest. A squeeze of lime brightens the dish. It adds a fresh kick that pairs well with the soup's rich flavors. Getting the best results involves some simple practices: - Stir occasionally to prevent sticking. This keeps the soup from burning at the bottom. A gentle stir helps mix the flavors well. - Use a lid to retain heat while simmering. Covering the pot helps cook the soup evenly. It also traps moisture, making it rich and tasty. Serving your soup with extras enhances the meal: - Top with fresh ingredients for added brightness. Chopped cilantro, creamy avocado, and a dollop of sour cream make it pop. - Pair with tortilla chips for a crunchy side. The crunchy chips balance the soft soup. They add texture and are fun to dip! For the complete recipe, check out the Full Recipe section! {{image_4}} You can switch the ground beef for ground chicken or turkey. This makes the soup lighter but still tasty. If you want a vegetarian twist, try using lentils or meat substitutes. They add texture and protein without meat. Want more heat? Add extra jalapeños to your soup. If you have kids or prefer milder flavors, use sweet peppers instead. This way, everyone can enjoy their bowl of soup. Mix in other veggies like zucchini or spinach. They add color and nutrition. For a heartier soup, consider adding cooked quinoa. It boosts the protein and makes the meal more filling. For the full recipe, check out the link provided above. After you make One-Pot Taco Soup, let it cool. Store it in an airtight container. This way, it stays fresh for up to 4-5 days. This makes it easy to grab a bowl for lunch or dinner. If you want to save some for later, freeze it in portions. Use freezer-safe containers or bags. This makes reheating quick and simple later on. You can enjoy this tasty soup even when you’re busy. To enjoy your soup again, reheat it on the stovetop. Just warm it over low heat, stirring often. You can also use the microwave. Heat it in short bursts, stirring in between, until it’s hot throughout. Yes, it’s great for meal prep and flavors improve after a day. I love making a big batch on Sunday. It saves time on busy nights. After a day in the fridge, the taste deepens. You can enjoy it all week long. Add more beans or use a cornstarch slurry for thickness. I suggest mashing some beans against the pot. This adds a nice texture too. If you want a quick fix, mix cornstarch with water. Stir it in and let it simmer until thick. Sour cream, avocado, shredded cheese, and tortilla chips are classic choices. These toppings add creaminess and crunch. I like to mix and match. You can also try fresh cilantro or lime juice for a zesty touch. Yes, simply substitute the meat for more beans or lentils. Use vegetable broth to keep it vegetarian. This option is just as tasty and filling. You can even add more veggies for extra nutrition. Serve with crusty bread, a green salad, or corn muffins for a complete meal. I love a fresh salad with lime dressing. It adds a nice contrast to the rich soup. Corn muffins bring a sweet touch that pairs well too. This One-Pot Taco Soup is simple and full of flavor. You learned about key ingredients, from the meat to beans and spices that create a rich base. I shared tips for enhancing taste and suggested fun variations. You can also store leftovers easily for future meals. This recipe is perfect for anyone who wants a quick, delicious dish. Whether you’re cooking for family or friends, this taco soup will impress. Enjoy making it your own with toppings and tweaks!

One-Pot Taco Soup Flavorful and Easy Weeknight Meal

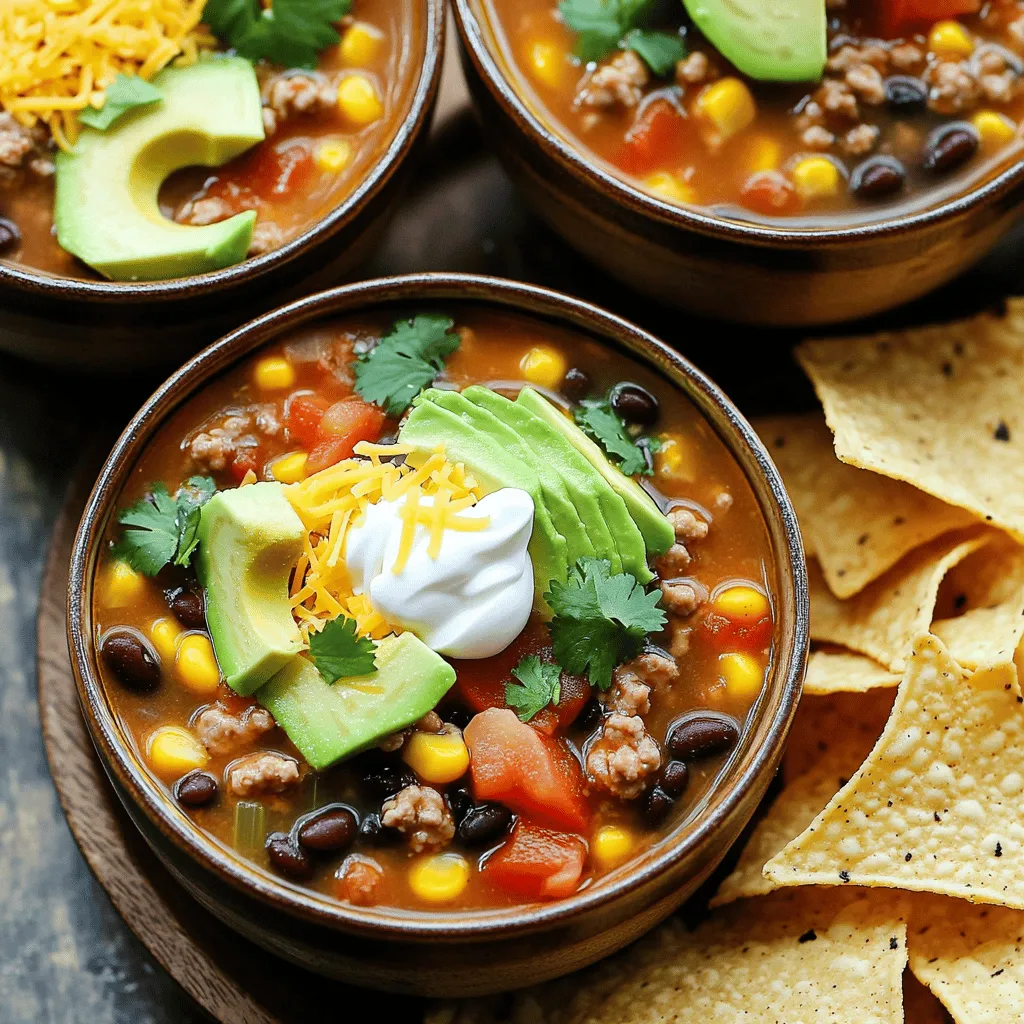
Looking for a quick and tasty dinner idea? One-Pot Taco Soup is your answer. This meal combines savory ground meat,

- 24 Oreo cookies (plus extra for topping) - 1/4 cup unsalted butter, melted - 16 oz cream cheese, softened - 1/2 cup granulated sugar - 1 teaspoon vanilla extract - 1 cup heavy whipping cream - 1/2 cup powdered sugar The main stars of this dessert are the Oreo cookies and cream cheese. The cookies form a crunchy crust that pairs perfectly with the rich, creamy filling. When I make this cheesecake, I always use fresh cream cheese. It gives the best texture and flavor. The butter helps the crust stick together. Just melt it and mix it well with the crushed Oreos. This step is key for a solid base. - Crushed Oreos - Whipped cream - Chocolate sauce Garnishes add a fun touch. I love to sprinkle crushed Oreos on top. It adds a nice crunch and looks great. Whipped cream is another option. A dollop makes the dessert feel fancy. If you want to get creative, drizzle chocolate sauce over the cheesecake. It adds sweetness and richness. These ingredients combine to create a dessert that’s easy to make and hard to resist. For the full recipe, check out what I’ve shared above. Enjoy your no-bake Oreo cheesecake! To start, grab 24 Oreo cookies. Place them in a food processor. Crush them until they turn into fine crumbs. This will be the base of your cheesecake. Next, melt 1/4 cup of unsalted butter. Combine the crushed cookies with the melted butter. Mix until all the crumbs are coated. Now, take a 9-inch springform pan. Press the crumb mixture firmly into the bottom. Use your fingers or the back of a measuring cup. Aim for an even layer. After this, put the crust in the fridge. This will help it firm up while you make the filling. For the filling, take 16 oz of softened cream cheese. Put it in a large mixing bowl. Beat it with an electric mixer until smooth. You want no lumps. Gradually add 1/2 cup of granulated sugar and 1 teaspoon of vanilla extract. Mix until everything is fluffy and well combined. In another bowl, pour 1 cup of heavy whipping cream. Add 1/2 cup of powdered sugar. Whip this mixture until stiff peaks form. This step makes the filling light and creamy. Carefully fold the whipped cream into the cream cheese mixture. Use a spatula and mix gently. Be careful not to deflate the whipped cream. For extra flavor, add in 10 crushed Oreos. Fold them in gently as well. Now, pour the creamy filling over the crust in the springform pan. Smooth the top with a spatula to make it look nice. Cover the cheesecake with plastic wrap or a lid. Place it in the refrigerator. Let it chill for at least 4 hours or overnight. This allows the cheesecake to set properly. To check if it is set, lightly press the top with your finger. If it feels firm, it is ready. If it wobbles, it needs more time. To get the best texture, avoid overmixing. This keeps your cheesecake light and airy. Use room temperature ingredients for the smoothest blend. Cold cream cheese may lead to lumps, which we want to avoid. One common mistake is not chilling the cheesecake long enough. It needs at least 4 hours, but overnight is best. Also, using too much heavy cream can make your filling too dense. Stick to the recipe for perfect results. A food processor makes crushing cookies easy. You can also use a sealed bag and a rolling pin if needed. An electric mixer is key for beating the cream cheese. It helps create a smooth and fluffy filling. {{image_4}} You can make this cheesecake even better with flavors. Try adding chocolate or caramel swirls. Just drizzle them into the filling before you chill it. This will give a nice look and taste. You can also swap out Oreo cookies for other cookies. Try chocolate chip cookies or peanut butter cookies for a fun twist. Each type will change the flavor and texture. If you need vegan options, use dairy-free cream cheese. This keeps the taste without dairy. You can also make it gluten-free. Simply choose gluten-free cookies. These changes let everyone enjoy this tasty dessert without worries. This cheesecake is great on its own, but you can make it even better. Pair it with fresh fruit like strawberries or raspberries. A drizzle of chocolate or caramel sauce adds extra flavor. For special occasions, consider adding candles or fun toppings. This makes it a hit at any party! To keep your No-Bake Oreo Cheesecake fresh, store it in the refrigerator. Use an airtight container or cover it tightly with plastic wrap. This helps prevent it from absorbing other smells in the fridge. If you want to save it for later, you can freeze it. First, let the cheesecake set for about an hour. Then, wrap it in plastic wrap and place it in a freezer-safe container. This helps keep the cheesecake from getting freezer burn. Your cheesecake can last in the fridge for about 5 to 7 days. Just make sure it stays covered. If you freeze it, it can last for up to 2 months. To tell if the cheesecake is no longer good, check for any signs of mold or an off smell. If it looks or smells strange, it’s better to be safe and throw it away. Always trust your senses when it comes to food safety! It takes about 30 minutes to prep the cheesecake. You will then need to chill it for at least 4 hours. For the best taste, I recommend chilling it overnight. This waiting time helps the cheesecake set up perfectly. No, you should not leave the cheesecake out for long. It needs to stay cool. Serve it right from the fridge. If you have leftovers, put them back in the fridge. This keeps it fresh and tasty. If you want a different option, you can use a dairy-free cream cheese for vegan diets. Another choice is Greek yogurt for a lighter version. Both options keep the creamy texture. Just make sure to adjust the flavor to your liking. Yes, you can make this cheesecake ahead of time. Just follow the Full Recipe steps and store it in the fridge. It will stay fresh for up to 5 days. This makes it a great choice for parties or gatherings. In summary, this blog post covers how to make a no-bake Oreo cheesecake. You learned about the key ingredients and step-by-step instructions. I shared tips to improve texture and avoid common mistakes. You discovered tasty variations and how to store your cheesecake well. This dessert is simple and delightful. By following these steps, you can impress anyone with your baking skills. Enjoy making this treat!

No-Bake Oreo Cheesecake Easy and Delicious Dessert

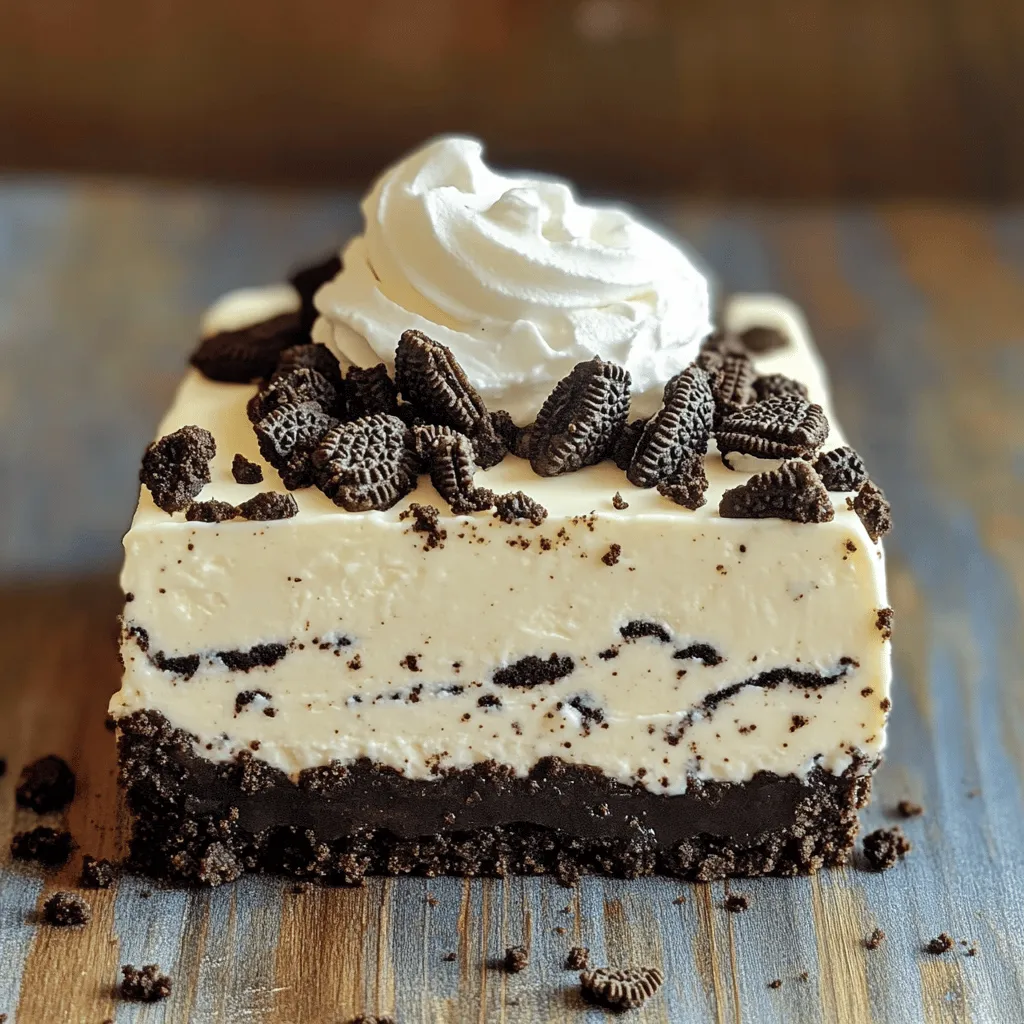
Craving a dessert that’s easy and oh-so-delicious? This No-Bake Oreo Cheesecake is your answer! With just a few simple ingredients,

To make mini cheesecake bites, you need a few simple ingredients. Each one plays a key role in creating that creamy, dreamy texture and flavor. Here’s what you’ll need: - 1 cup graham cracker crumbs - 1/4 cup unsalted butter, melted - 2 tablespoons granulated sugar - 1 (8 oz) package cream cheese, softened to room temperature - 1/2 cup powdered sugar - 1 teaspoon pure vanilla extract - 1 large egg, at room temperature - 1/3 cup sour cream - Fresh berries (raspberries, blueberries, or strawberries) for topping - Whipped cream, for garnish (optional) The graham cracker crumbs serve as the base for your mini cheesecakes. They give a nice crunch and flavor. Melted unsalted butter helps bind the crumbs together. The granulated sugar sweetens the crust just right. For the filling, softened cream cheese is a must. It creates that rich and creamy texture we all love. Powdered sugar adds sweetness without any grittiness. Pure vanilla extract gives a lovely aroma and enhances the flavor. You’ll also need an egg to help set the filling. Sour cream adds creaminess and a slight tang, balancing the sweetness. Don't forget the toppings! Fresh berries bring brightness and color to the dessert. Whipped cream is optional but adds a nice touch of indulgence. For the full recipe, just check the details above. 1. Preheat the Oven: First, set your oven to 325°F (160°C). This heat will help cook the cheesecakes evenly. Line a mini muffin tin with mini cupcake liners. This step makes it easy to lift the bites out later. 2. Mixing the Crust Ingredients: In a medium bowl, mix together graham cracker crumbs, melted butter, and granulated sugar. Use a fork or your hands to combine. The mix should feel like wet sand when it’s ready. 3. Forming the Crust in the Muffin Tin: Take about one tablespoon of the crust mix. Place it into each cupcake liner. Press it down firmly with a spoon or your fingers. You want a compact base that holds together well. 1. Combining Key Filling Ingredients: In another bowl, add the softened cream cheese, powdered sugar, and vanilla extract. With an electric mixer or whisk, beat until smooth. This step is key for a creamy filling without lumps. 2. Blending for a Smooth Consistency: Next, add the egg and sour cream to the cream cheese mix. Blend until everything is well combined and creamy. Scrape down the sides of the bowl to mix all ingredients evenly. 1. Filling the Crusts: Carefully spoon the cheesecake filling over the crusts in the mini muffin tin. Fill each cup about 3/4 full. This leaves room for the filling to rise a bit while baking. 2. Baking Time and Texture Checks: Bake in the preheated oven for 15-18 minutes. The centers should be set but a little jiggly. This means they will firm up as they cool. 3. Cooling and Chilling Instructions: Once baked, let the cheesecakes cool in the pan for about 10 minutes. Carefully transfer them to a wire rack to cool completely. After that, refrigerate the mini cheesecakes for at least 2 hours. This step helps them firm up and chill, making them perfect for serving. You can find the full recipe at the beginning of the article. Enjoy your delicious mini cheesecake bites! To create a smooth cheesecake filling, start with softened cream cheese. Cold cream cheese can lead to lumps. Beat it well with powdered sugar and vanilla until creamy. Mix slowly to avoid air bubbles. These bubbles can cause cracks during baking. For optimal baking, preheat your oven to 325°F (160°C). Bake the bites for 15-18 minutes. Check when the centers are set but still jiggle slightly. Overbaking can dry them out. Allow them to cool in the pan for about 10 minutes before moving them to a wire rack. Plating matters! Arrange the cheesecake bites on a beautiful platter. Use mini cupcake liners for easy serving. Top each bite with fresh berries for color. A sprinkle of powdered sugar can add a touch of elegance. Garnishing ideas include drizzling chocolate sauce or adding mint leaves. You can also use whipped cream for a lovely finish. These small details make your treats look gourmet. Pair your mini cheesecake bites with beverages like coffee, tea, or dessert wine. They are perfect for parties, birthdays, or family gatherings. You can also serve them at holiday events as a sweet treat. These bites work well for potlucks too. They are easy to grab and enjoy. For a fun twist, offer different toppings for guests to choose from. Enjoy these mini cheesecake bites with your favorite drinks and share the joy! For a detailed guide on making these delicious treats, check out the Full Recipe. {{image_4}} You can mix up your cheesecake filling in fun ways. Try adding chocolate for a rich taste. Melt some chocolate and blend it in. Lemon adds a nice zing. Just mix in some lemon juice and zest. You can also use fruit purees for a fruity twist. Swirling in these flavors can give a unique look and taste. Top with fresh fruit or chocolate shavings to wow your guests! If you want a gluten-free option, use almond flour instead of graham crackers. You can also use gluten-free cookies. They can add great flavor and texture. Try different cookies like Oreos or vanilla wafers to change your crust. A chocolate cookie crust can make a great base for your mini cheesecakes too. Seasonal flavors can make your mini cheesecakes special. In fall, add pumpkin spice for a cozy treat. For summer, use fresh berries and mint. You can decorate them with fun toppings for holidays. For Halloween, use orange and black sprinkles. For birthdays, top them with colorful frosting or candles. These themed mini cheesecakes can be a hit at any event! To keep your mini cheesecake bites fresh, refrigerate them in an airtight container. This will protect them from drying out and absorbing odors from other foods. Just make sure to let them cool completely before placing them in the fridge. You can enjoy your bites for up to five days when stored this way. If you want to save some for later, freezing works well too. Place the cheesecake bites on a baking sheet and freeze them until firm. After that, transfer them to a freezer-safe bag or container. They can last up to three months in the freezer. When you're ready to eat them, let them thaw in the fridge overnight. For the best taste, enjoy your mini cheesecake bites within the first few days. They taste best fresh but still hold up well in the fridge for a few days. If you have leftovers, remember to check for signs of spoilage. Look for changes in texture or color. If they smell sour or off, it's best to toss them. Keeping an eye on your bites will help you enjoy them at their best. Always label your containers with dates to track how long they’ve been stored. This way, you can savor each delicious bite without worry. How do I know when mini cheesecakes are done? You can check if mini cheesecakes are done by looking at the center. It should be set but still slightly jiggly. A good rule is to bake them for 15-18 minutes at 325°F (160°C). If they look too firm, you may have overbaked them. Can I make mini cheesecakes ahead of time? Yes, you can make mini cheesecakes ahead of time. After baking, allow them to cool completely. Then, refrigerate them for up to three days. This makes them perfect for parties or gatherings. What's the best way to garnish mini cheesecakes? Garnishing mini cheesecakes is fun and easy! I love using fresh berries like raspberries, blueberries, or strawberries. They add color and flavor. You can also add a dollop of whipped cream on top for extra richness. Can I use lower-fat cream cheese? Absolutely! You can use lower-fat cream cheese to make these bites lighter. The texture may be slightly different, but they will still taste great. Alternatives for sour cream If you don't have sour cream, you can use plain yogurt as a substitute. Greek yogurt works well too and adds a nice tangy flavor. Where to buy mini cheesecake bites You can find mini cheesecake bites at many grocery stores, bakeries, and dessert shops. Look in the bakery section or the frozen dessert aisle. How to choose quality options from stores When choosing pre-made mini cheesecakes, check the ingredients. Look for options with real cream cheese and minimal preservatives. Freshness is key, so always check the expiration date. Making mini cheesecake bites is simple and fun. We explored ingredients, from crust to toppings. You learned how to prepare, bake, and chill them for the perfect treat. I shared tips for smooth filling and great presentation, plus tasty variations to try. These mini desserts are great for any occasion. With the right storage, they'll stay fresh and delicious. Enjoy customizing your cheesecakes! Your friends and family will love these delightful bites. Happy baking!

Mini Cheesecake Bites Simple and Tasty Treats

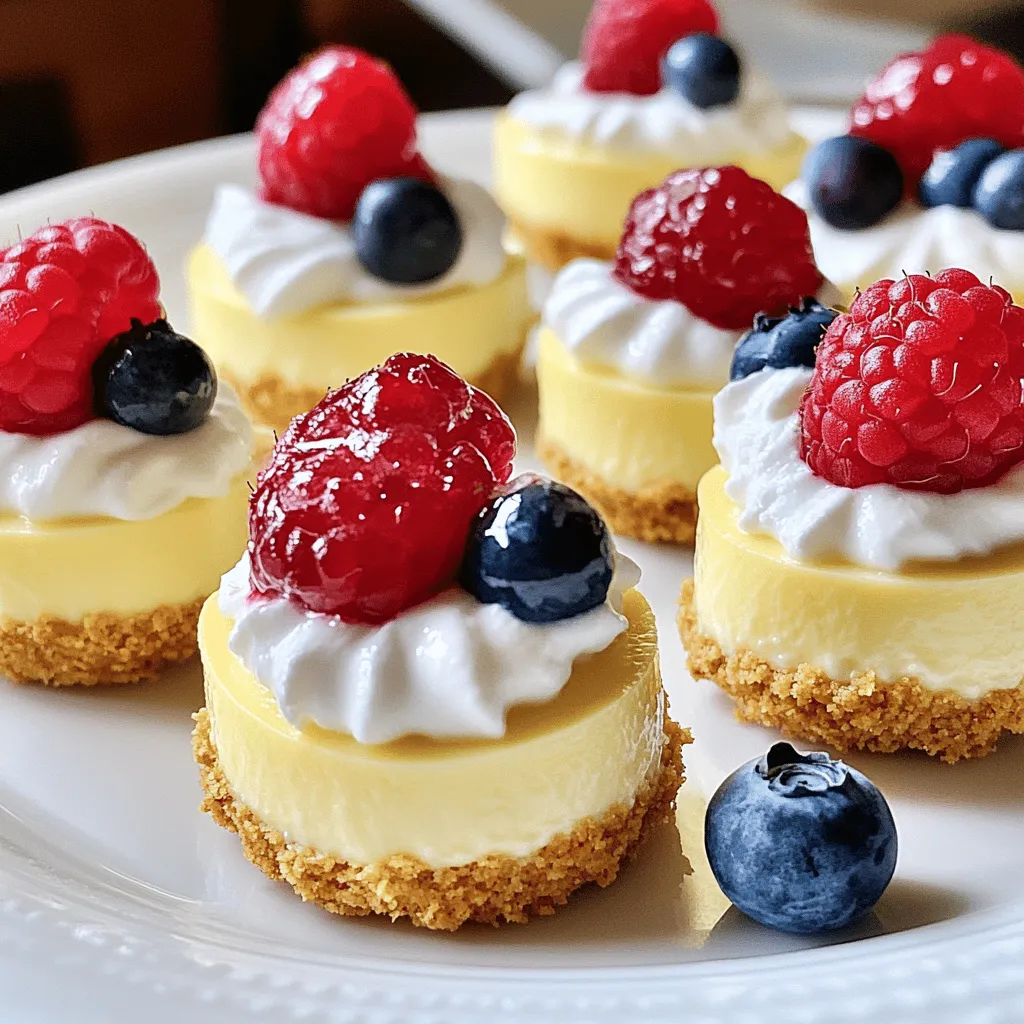
Craving a delectable dessert that’s easy to make? Look no further! My Mini Cheesecake Bites are simple yet oh-so-tasty. They’re

- 4 boneless, skinless chicken breasts - 1 cup all-purpose flour - 2 large eggs - 1 cup Italian-seasoned bread crumbs - 1 cup marinara sauce - 2 cups shredded mozzarella cheese - 1/2 cup grated Parmesan cheese (divided) - 2 tablespoons fresh basil, finely chopped - 1 teaspoon garlic powder - 1 teaspoon onion powder - Salt and freshly ground black pepper to taste - Olive oil spray Each serving of baked chicken parmesan has about 400 calories. It packs around 30 grams of protein, 20 grams of fat, and 25 grams of carbs. This dish is filling and offers a good balance of nutrients. You can enjoy it as a hearty meal. For more detailed nutritional breakdowns, check the Full Recipe. I love these ingredients because they work together so well. The chicken stays juicy and tender. The bread crumbs give a nice crunch. The cheese melts beautifully, creating that gooey texture we all crave. Don't forget to season well; it makes a big difference! Preheat the Oven and Prep Baking Dish First, set your oven to 375°F (190°C). While it heats, grab your baking dish. Lightly spray it with olive oil. This helps the chicken not stick and gives it a nice golden color. Prepare and Season the Chicken Use a paper towel to pat the chicken breasts dry. This step is key to getting the seasonings to stick. Season both sides with salt, black pepper, garlic powder, and onion powder. This adds great flavor to the chicken. Set Up the Breading Station Now, it’s time to create a breading station. You need three shallow dishes: - In the first dish, add 1 cup of all-purpose flour. - In the second dish, crack open 2 large eggs and whisk them well. - In the third dish, mix 1 cup of Italian-seasoned bread crumbs with 1/4 cup of grated Parmesan cheese. This mix gives the chicken extra taste. Bread the Chicken Thoroughly Take a seasoned chicken breast and dip it in the flour. Make sure to shake off the extra flour. Next, dip it in the eggs, letting the excess drip back into the bowl. Finally, coat it with the bread crumb mixture, pressing gently to help it stick. Arrange in Baking Dish and Spray Place the breaded chicken breasts in your baking dish in a single layer. Lightly spray the tops with olive oil. This helps them crisp up nicely in the oven. Bake the Chicken and Add Marinara Sauce Put the dish in your preheated oven. Bake for 25-30 minutes, until the chicken reaches 165°F (75°C). When it’s done, take it out and spoon marinara sauce over each piece. Make sure each piece is well-coated. Top with Cheese and Final Bake Sprinkle shredded mozzarella cheese over the marinara. Add the rest of the grated Parmesan on top. This combo will melt beautifully. Rest and Garnish Put the dish back in the oven for 10-15 minutes. Wait until the cheese is melted and bubbly. After baking, let the chicken rest for a few minutes. Just before serving, sprinkle with fresh basil for a pop of color. For the full recipe, check out the detailed steps above! To boost flavor, try adding herbs like oregano and thyme. These herbs add depth and freshness. You can also mix in some fresh parsley for a bright touch. Different cheeses can change the taste too. Use provolone for a sharper bite or ricotta for creaminess. Experimenting with cheese keeps the dish exciting. To keep your chicken moist, start by patting it dry. This helps the seasoning stick. Also, avoid overbaking. Check the chicken's internal temperature; it should be 165°F (75°C). For a crispy crust, use olive oil spray. This helps the breading crisp up without excess grease. Bake until golden for the best crunch. Pair your baked chicken parmesan with sides that complement its flavors. A simple arugula salad adds a nice touch. Serve it on a bed of sautéed spinach for vibrancy. For plating, drizzle extra marinara sauce around the chicken. Sprinkle fresh basil on top for color and aroma. This makes the dish look as great as it tastes! For the full recipe, check the section above. {{image_4}} You can make baked chicken parmesan even healthier with simple swaps. - Whole wheat bread crumbs: These add fiber and nutrients. They also keep the dish crunchy. - Turkey or plant-based options: Turkey is leaner than chicken. Plant-based options like tofu or tempeh can also work well. They absorb flavors nicely. You have options for how you cook this dish. - Air frying vs. baking: Air frying gives you a crispy texture with less oil. It cooks faster too. Baking is more traditional and allows for a juicy chicken. - Grilling for a lighter option: Grilling adds a smoky flavor. It also reduces the fat content. Just season your chicken well before grilling. You can switch up the flavors for a new twist. - Adding different sauces: Try using pesto or alfredo instead of marinara. They bring unique tastes to the dish. - Incorporating vegetables for nutrition: Mix in some spinach, bell peppers, or zucchini. They add color and nutrients. Plus, the veggies pair well with the cheese and sauce. Explore these variations to make baked chicken parmesan truly your own. For a complete guide, check the Full Recipe to see how these changes fit in! To store leftover baked chicken parmesan, let it cool first. Place it in an airtight container. This keeps it moist and tasty. You can refrigerate it for about 3 to 4 days. If you want to freeze the dish, first wait for it to cool. Cut it into portions. Wrap each piece tightly in plastic wrap. Then place the wrapped pieces in a freezer bag. This helps keep out air. Baked chicken parmesan can last up to 3 months in the freezer. When you're ready to eat, thaw it in the fridge overnight. To reheat, place it in the oven at 350°F (175°C) for about 20 minutes. This helps it heat evenly and stay crispy. You can also use a microwave, but the oven gives better results. This dish is great for meal prep. You can make it ahead of time for busy weeks. Just freeze portions after baking. When you’re ready to serve, reheat and enjoy! Serve it with a side of pasta or a fresh salad. This adds color and nutrition to your meal. You can also drizzle more marinara sauce on top for extra flavor. How long does baked chicken parmesan take to cook? Baked chicken parmesan takes about 50 minutes in total. This includes 15 minutes for prep and 35 minutes for baking. You want to ensure the chicken reaches 165°F inside. Can I make this recipe gluten-free? Yes, you can! Use gluten-free flour and gluten-free bread crumbs. These swaps work well and keep the dish tasty. What should I serve with baked chicken parmesan? Serve it with a simple salad or pasta. Garlic bread also makes a great side. You can also add sautéed veggies for extra flavor. What can I substitute for marinara sauce? You can use pesto or Alfredo sauce instead of marinara. Both add their unique flavors and make the dish special. Alternatives for chicken breasts? You can use chicken thighs for more flavor. You can also try turkey cutlets or even eggplant for a plant-based option. How to tell if the chicken is fully cooked? Check the internal temperature with a meat thermometer. It should reach 165°F. The juices should also run clear. Can I store leftovers? How long do they last? Yes, store leftovers in an airtight container. They last about 3 to 4 days in the fridge. You can also freeze them for up to 3 months. In this post, I covered how to make baked chicken Parmesan from start to finish. We explored the needed ingredients, the step-by-step cooking process, and tips for serving. I shared ways to adjust flavors, explore variations, and properly store your dish. You can now create a delicious meal that pleases many. Enjoy experimenting with flavors and share your tasty results!

Baked Chicken Parmesan Simple and Flavorful Recipe

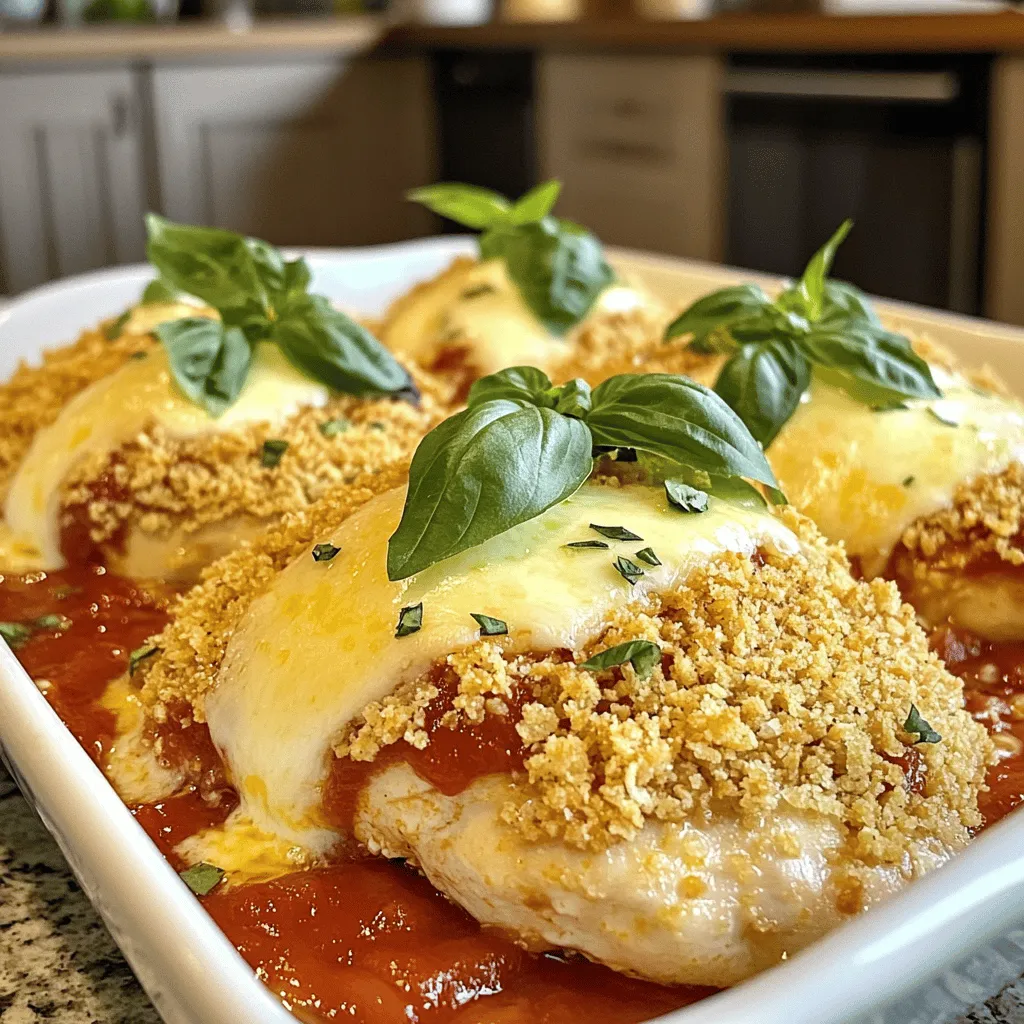
Are you ready to delight your taste buds with a tasty twist on a classic? This Baked Chicken Parmesan recipe

- Ripe cherry tomatoes - Fresh mozzarella balls (bocconcini) - Fresh basil leaves - Balsamic glaze - Sea salt - Black pepper - Bamboo or wooden skewers For Easy Caprese Skewers, you need fresh and simple ingredients. Start with ripe cherry tomatoes; they bring sweetness. Next, choose fresh mozzarella balls, known as bocconcini. These add creaminess to every bite. Fresh basil leaves are a must; their fragrant flavor balances the dish. A drizzle of balsamic glaze gives a sweet and tangy touch. Finally, season with sea salt and black pepper for extra taste. You’ll also need bamboo or wooden skewers to hold it all together. This recipe is quick and perfect for any gathering. For the full recipe, check the earlier section. Start by rinsing the cherry tomatoes and basil leaves under cold water. After washing, gently pat them dry with a clean paper towel. This helps remove extra moisture. For the mozzarella, you want to use fresh mozzarella balls, also known as bocconcini. They should be small and soft. Drain them from their liquid and let them sit for a bit. This keeps them from being too wet on the skewers. Now, it's time to make the skewers. Take a bamboo or wooden skewer and slide a cherry tomato onto it. Push it down to the bottom but leave room for more ingredients. Next, add a basil leaf, letting it rest just above the tomato. After that, add a fresh mozzarella ball, pushing it down to keep everything tight. Repeat this order—cherry tomato, basil leaf, mozzarella ball—until the skewer is filled. Aim for about 3-4 of each item. This creates a fun and colorful look. Once your skewers are complete, it's time for the finishing touches. Drizzle some balsamic glaze over the skewers for a sweet and tangy flavor. You can use as much or as little as you like. Finally, sprinkle a bit of sea salt and freshly cracked black pepper on top. This adds a nice touch of flavor. Arrange your skewers on a platter for a beautiful presentation that will surely impress your guests. For more details, check the Full Recipe. To make your skewers pop, arrange them neatly on a platter. Use a circular or diagonal layout. This draws the eye and adds flair. Adding small bowls of balsamic glaze on the side can enhance the look. Fresh basil leaves can also serve as a garnish. They add color and a delightful aroma. For extra taste, sprinkle a bit of garlic powder or Italian seasoning on the skewers. You can also try a drizzle of lemon juice for a zesty kick. If you want a different dressing, consider using pesto or a simple vinaigrette. These can add a new twist while keeping the dish light. These skewers are perfect for parties, picnics, or family gatherings. Serve them as a starter or alongside drinks. They pair well with white wine or sparkling water. For a complete spread, consider adding crunchy bread or olives. This mix will delight your guests and create a fun dining experience. {{image_4}} You can switch up the cheese for a fun twist. Try using feta or goat cheese instead of mozzarella. Both add a unique taste and texture. If you want more crunch, add fresh vegetables. Bell peppers or zucchini work great. They bring color and extra flavor to your skewers. For a Mediterranean twist, use olives and artichokes. These flavors will transport you to sunny shores. You can also create an Italian-inspired version. Use sun-dried tomatoes and pesto instead of basil. This gives your skewers a rich, bold taste. Think about the seasons when you choose your ingredients. In summer, ripe tomatoes and fresh basil shine. In winter, use roasted vegetables like squash or sweet potatoes. It's a great way to enjoy local produce, too. Choose what's fresh at your local market for the best flavor. For the full recipe, check out the details above. To store your assembled skewers, place them in a single layer in a shallow dish. Cover the dish tightly with plastic wrap. This keeps the skewers fresh for a day. Avoid stacking them, as this can crush the ingredients. To keep the cherry tomatoes and mozzarella fresh, store them in separate containers. Use airtight containers to lock in moisture. Basil leaves are best stored in a damp paper towel inside a bag. This helps them stay crisp. You can freeze the mozzarella and tomatoes for long-term storage. However, this may change their texture. I recommend using them in cooked dishes after thawing. If you have leftovers, you can repurpose them in salads or sandwiches. Simply chop up the skewers and mix them into your favorite dish. This way, nothing goes to waste, and you enjoy new meals! For the full recipe, check the earlier section. Yes, you can make Easy Caprese Skewers ahead of time. Prepare them a few hours before your event. Just store them in the fridge. Cover them with plastic wrap to keep them fresh. They taste great chilled or at room temperature. If you don’t have balsamic glaze, use balsamic vinegar. Mix it with a bit of honey or sugar to sweeten it. You can also try a simple olive oil and lemon juice mix. These options will still give you great flavor. To keep the mozzarella fresh, drain it well before using. Pat it dry with a paper towel. You can also choose mozzarella packed in oil instead of water. This keeps it firm and tasty on the skewers. Yes, Easy Caprese Skewers are naturally gluten-free. The main ingredients are fresh and safe for those on a gluten-free diet. Just make sure your balsamic glaze is gluten-free. Always check the labels to be sure. You’ve learned how to make delicious caprese skewers. We covered the key ingredients, step-by-step instructions, and helpful tips. Making these skewers is simple and fun, perfect for gatherings. Try adding your favorite flavors and ingredients. Customize them for any occasion. Whether it’s summer or winter, you can keep them fresh. Enjoy serving these tasty bites with friends and family!

Easy Caprese Skewers Simple and Tasty Appetizer

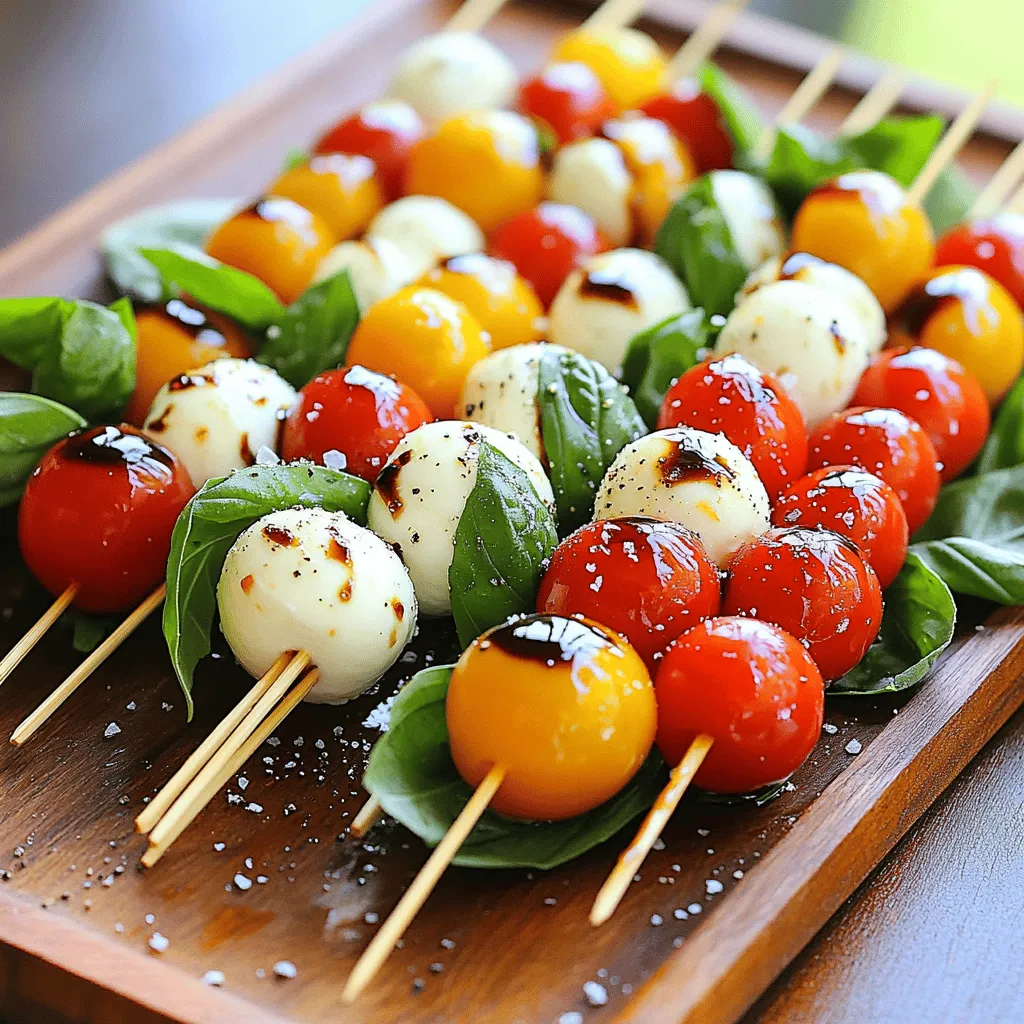
Looking for a quick and tasty appetizer? Easy Caprese Skewers are perfect for you! With ripe cherry tomatoes, fresh mozzarella,

To make garlic butter green beans, you need fresh and simple ingredients. Here’s what you’ll need: - 1 pound fresh green beans, trimmed - 4 tablespoons unsalted butter - 4 cloves garlic, minced - 1 teaspoon lemon zest - 1 tablespoon fresh lemon juice - Salt and freshly cracked black pepper to taste - 1/4 teaspoon crushed red pepper flakes (optional for heat) - 1 tablespoon toasted sesame seeds (for garnish) These ingredients bring rich flavors to your dish. Fresh green beans give a crisp bite, while garlic adds depth. Lemon zest and juice brighten the taste. The butter creates a creamy texture that ties everything together. You can add red pepper flakes if you like a little spice. The sesame seeds on top add a nice crunch. This blend of flavors makes the dish stand out. For the full recipe, check the complete instructions. Enjoy cooking! Start by rinsing the fresh green beans under cold water. This step removes dirt and grit. Next, trim the ends. You can snap them off or use a knife. Set the beans aside for later use. Now, let's blanch the green beans. Fill a large pot with water and add a good pinch of salt. Bring it to a rolling boil. Once boiling, carefully add the green beans. Blanch them for about 3-4 minutes. You want them bright green and just tender, but still crisp. After blanching, quickly drain the green beans. Transfer them to a bowl filled with ice water. This technique stops the cooking process and keeps their vibrant color. Let them sit in the ice water for a few minutes, then drain again and set aside. In a large skillet, heat the unsalted butter over medium heat. Allow it to melt completely and begin to bubble gently. Once melted, add the minced garlic. Stir constantly with a spatula. Sauté the garlic for about 1-2 minutes. You want it fragrant and lightly golden, but be careful not to let it burn. Now, add the blanched green beans to the skillet. Use tongs or a spatula to toss the beans in the garlic butter. Make sure they are well coated. Next, sprinkle in the lemon zest and freshly squeezed lemon juice. Add salt and freshly cracked black pepper to taste, along with crushed red pepper flakes if you like some heat. Continue tossing the green beans for an additional 2-3 minutes. This warms them through and mixes the flavors. Once done, remove the skillet from heat. Carefully transfer the garlic butter green beans to a serving dish. For the final touch, sprinkle toasted sesame seeds on top. This adds a delightful crunch. Serve warm as a delicious side dish! To get the best green beans, avoid overcooking them. Blanch the beans for just 3-4 minutes. Look for bright green color and a crisp bite. After blanching, place them in ice water. This stops the cooking and keeps that fresh look. When it comes to flavor, balance is key. Add lemon juice for brightness. The acidity cuts through the richness of the butter. You can also adjust the spice level. If you like heat, add crushed red pepper flakes. Just a pinch can make a big difference. For a stunning look, arrange the green beans on a platter. Pile them in the center. This creates a nice focal point. Drizzle a bit of melted butter on top for shine. Garnishing adds flair. Sprinkle toasted sesame seeds over the beans. This adds crunch and a nutty flavor. A touch of lemon zest brightens the dish visually. It adds a pop of color that’s hard to resist. Try these tips for a beautiful dish that impresses! {{image_4}} You can mix things up with garlic butter green beans. Adding nuts can give them a great crunch. Try using sliced almonds or chopped walnuts. These add texture and flavor. You can also add other veggies like cherry tomatoes or bell peppers. They bring color and taste to the dish. Another fun idea is to introduce different herbs or spices. Fresh herbs like basil or parsley can brighten the dish. You could also try a pinch of cumin or paprika for warmth. These simple swaps can make the dish more exciting. If you want to make garlic butter green beans vegan-friendly, swap butter for olive oil or vegan butter. This keeps the flavor rich and satisfying without dairy. For gluten-free options, the recipe is already safe. Just check that any added ingredients, like nuts or spices, are gluten-free. This way, everyone can enjoy this tasty side dish without worry. To store garlic butter green beans, first let them cool down. Place them in an airtight container. This keeps them fresh and tasty. Make sure to use them within three days. The flavor stays best when enjoyed fresh, but leftovers can still be good. - Store in an airtight container - Use within three days You can keep garlic butter green beans in the fridge for up to three days. After that, they may lose their crispness and flavor. If you want to keep them longer, consider freezing them instead. Reheating garlic butter green beans is easy. Use a microwave or a skillet for the best results. If using a microwave, place them in a bowl and cover it to avoid drying out. Heat in short bursts, stirring in between. This keeps the beans tender. For a skillet, add a little butter over medium heat. Toss the beans until warmed through. This method helps to revive the flavors and texture. Enjoy them warm for the best taste! - Microwave: Cover and heat in short bursts - Skillet: Add butter and toss until warm To make garlic butter green beans less salty, reduce the amount of added salt. Use unsalted butter for cooking. You can also add more lemon juice. The acidity from the lemon can help balance the flavors. If you use soy sauce or broth, choose low-sodium options. Taste the dish as you go, adding salt slowly. Yes, you can use frozen green beans. They are quick and easy. Just cook them briefly in boiling water. Follow the package instructions for timing. Frozen beans may have a softer texture, so adjust your cooking time. Blanching them helps keep their bright color and flavor. Garlic butter green beans pair well with many dishes. Here are some quick suggestions: - Grilled chicken - Pan-seared salmon - Roasted pork chops - Quinoa or rice - A fresh salad Yes, this recipe fits well into a larger meal plan. You can serve it alongside protein and grains. For a full meal, consider preparing grilled chicken or baked fish. You can also add a grain like quinoa. This way, you create a balanced plate. Check out the Full Recipe for more ideas. In this post, we explored how to make garlic butter green beans. You learned what ingredients to use and how to prepare them. I shared tips for perfecting the texture and flavor, along with ideas for variations and storage. This dish is simple yet delicious. Whether you serve it for a weeknight dinner or a special occasion, it adds a bright touch to any table. Enjoy making this recipe and feel free to explore your own twists!

Garlic Butter Green Beans Simple and Flavorful Dish

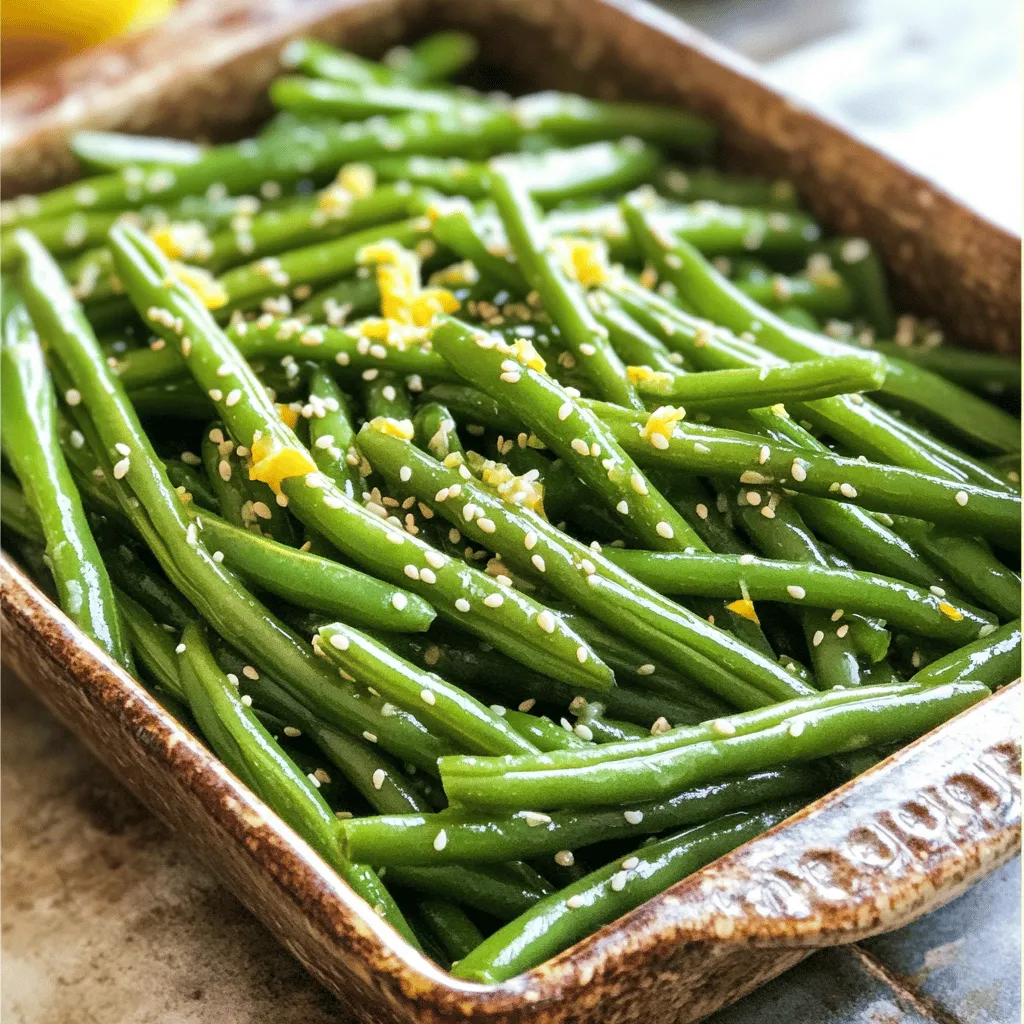
Are you ready to elevate your side dishes? Garlic Butter Green Beans are simple, quick, and bursting with flavor. This

Older posts
Newer posts
← Previous Page1 … Page24 Page25 Page26 … Page86 Next →

dsad

© 2026 yumymoments • Built with GeneratePress

Our Policies

  • Copyright Policy
  • Cookie Policy
  • GDPR Policy
  • Privacy Policy
  • Disclaimer
  • Terms Of Use

More Information

  • Home
  • About
  • Contact
  • Appetizers
  • Dessert
  • Dinner
  • Drinks
©2026, yumymoments About Back To Top