Skip to content
DisclaimerTerms Of UseGDPR PolicyCookie Policy

yumymoments

  • Home
  • Drinks
  • Appetizers
  • Dinner
  • Dessert
  • About
  • Contact
  • Privacy Policy
DisclaimerTerms Of UseGDPR PolicyCookie Policy

NO-ING-IMG

To make Roasted Garlic Parmesan Carrots, you need simple and fresh ingredients. Each one adds a unique flavor. Here’s what you’ll need: - 1 pound baby carrots, peeled - 4 cloves garlic, finely minced - 2 tablespoons extra virgin olive oil - 1 teaspoon sea salt - 1/2 teaspoon freshly ground black pepper - 1/4 teaspoon red pepper flakes (optional) - 1/2 cup freshly grated Parmesan cheese - 1 tablespoon fresh parsley, finely chopped (for garnish) These ingredients create a tasty blend of garlic and cheese. The Parmesan adds a rich flavor, while the carrots provide a sweet base. The garlic gives depth, and the olive oil helps everything roast perfectly. You can also add red pepper flakes for a little heat if you like. For the full recipe, check out the detailed instructions that follow. - Preheat your oven to 425°F (220°C). This helps the carrots roast nicely. - In a large bowl, mix the peeled baby carrots with minced garlic. Pour in the olive oil, and sprinkle with sea salt, black pepper, and red pepper flakes. Toss everything well so each carrot gets coated. - Spread the coated carrots in a single layer on a baking sheet lined with parchment paper. This makes cleanup easy. - Roast the carrots for 20-25 minutes. Be sure to stir them halfway through. This helps them cook evenly and become tender. - After roasting, take the baking sheet out of the oven. Sprinkle grated Parmesan cheese over the hot carrots. This adds a great flavor. - Return the baking sheet to the oven and roast for an extra 5 minutes. The cheese should melt and become golden. For the complete recipe, check out the Full Recipe section! Using fresh ingredients makes a big difference in flavor. Fresh baby carrots taste sweet and vibrant. Look for firm carrots with a bright color. Avoid any that feel soft or have blemishes. When you spread your carrots on the baking sheet, give them space. If they are too close, they will steam instead of roast. A single layer works best. This way, each carrot gets nice and caramelized. You can add more flavor easily. Try spices like thyme, rosemary, or paprika. Each herb brings its unique twist to the dish. If you like heat, consider adding more red pepper flakes or a dash of cayenne. Adjusting the heat level is simple. If you want a milder dish, skip the red pepper flakes. For a spicier kick, add more to your taste. Just remember to start small and increase as needed. To make your dish look great, choose shallow bowls or platters. These let the vibrant colors of the carrots shine. You can also layer the carrots for a more inviting look. Garnishing adds a nice touch. After serving, sprinkle fresh parsley on top. You can also add more Parmesan cheese for an extra cheesy finish. A little goes a long way in making your dish eye-catching. For the full recipe, check out the Roasted Garlic Parmesan Carrots. {{image_4}} You can use other root veggies in this recipe. Try parsnips for a sweet twist. Sweet potatoes add a creamy texture. Beets bring a vibrant color and earthy flavor. If you use larger carrots, slice them into sticks. This ensures even cooking. Cooking times may vary by vegetable. For parsnips and sweet potatoes, roast for about 30 minutes. Beets may take longer—around 35 to 40 minutes. Always check for tenderness with a fork. Parmesan is great, but other cheeses work well too. Try Pecorino Romano for a sharper taste. Grana Padano gives a nutty flavor. If you want a creamy touch, mozzarella is a nice choice. For vegan options, use cashew cheese. Nutritional yeast also adds a cheesy flavor without dairy. Add a burst of flavor with citrus juice. Lemon or orange juice brightens the dish. Balsamic vinegar gives a sweet and tangy twist. You can also add nuts for crunch. Toasted almonds or walnuts add texture and richness. Seeds like pumpkin or sunflower offer a nice crunch too. For the full recipe, check the section above. Enjoy making these tasty roasted garlic Parmesan carrots! To keep your roasted garlic Parmesan carrots fresh, place them in an airtight container. Choose a container that fits well to avoid excess air. For best results, store them in the refrigerator. They will stay good for about three to four days. When it's time to enjoy your leftovers, reheating is key. The oven gives the best texture. Preheat your oven to 350°F (175°C). Spread the carrots on a baking sheet. Heat for about 10-15 minutes until warm. If you're in a hurry, use the microwave. Place the carrots in a microwave-safe dish. Cover them with a damp paper towel to trap moisture. Heat in short bursts of one minute, stirring in between. This way, they won’t dry out. For more details, check the Full Recipe to see how to make these tasty carrots. Yes, you can use regular carrots. The main difference lies in their size. Regular carrots take longer to cook. I suggest cutting them into smaller pieces. Aim for uniform sizes to ensure even cooking. This helps them become tender without burning. Baby carrots tend to be sweeter and softer after roasting, while regular carrots might be firmer and less sweet. Adjust your cooking time to around 30-35 minutes for regular carrots. To achieve crispier carrots, follow these tips: - Use a higher oven temperature. Roasting at 425°F (220°C) helps. - Make sure the carrots are spread out. They should not touch each other on the baking sheet. - Avoid overcrowding, as this causes steaming instead of roasting. - Toss them halfway through cooking to promote even browning. - For an extra crunch, add a few minutes to the cooking time. Yes, you can prepare these carrots ahead of time. Prep the carrots and mix them with garlic and oil. Store them in the fridge for up to 24 hours. When you're ready, roast them right before serving. This keeps the flavor fresh. If you have leftovers, store them in an airtight container. Use them within three days for the best taste. Reheat them in the oven for crispy results. If you want to save time, check out the Full Recipe for a detailed guide. In this article, I showed you how to make delicious roasted baby carrots. We covered important ingredients, steps, and tips to achieve the best flavor. I also shared ways to customize the dish and store leftovers. Roasted carrots are easy and healthy. With fresh ingredients and simple steps, you can impress anyone at your table. Enjoy these tasty carrots for a bright addition to any meal. Start roasting today and experiment with flavors that suit your taste!

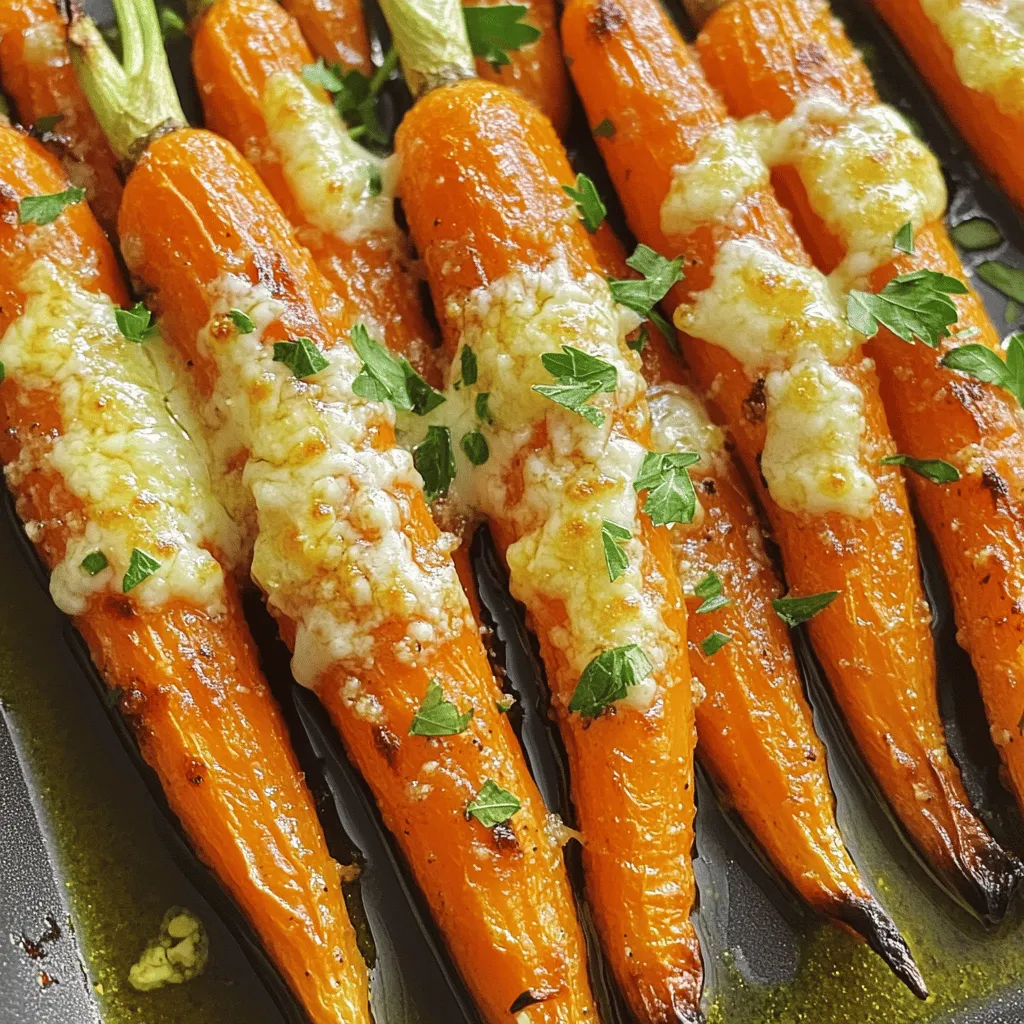
Roasted Garlic Parmesan Carrots Flavorful and Easy Recipe

Are you ready to elevate your dinner game? My Roasted Garlic Parmesan Carrots recipe combines sweet baby carrots, savory garlic,

- Fresh Romaine lettuce - Ripe tomatoes - Cucumbers - Kalamata olives - Feta cheese - Extra virgin olive oil - Red wine vinegar or lemon juice - Dried oregano - Salt and pepper to taste - Aim for about 1.5 cups per serving. - Scale up by multiplying ingredients for larger groups. When I craft a Classic Greek Salad, I focus on fresh, high-quality ingredients. The Romaine lettuce forms a crisp base. I love using ripe tomatoes for a juicy bite. Cucumbers add crunch and freshness. Kalamata olives bring a briny richness. Feta cheese gives a creamy texture and tang. For the dressing, I mix extra virgin olive oil with red wine vinegar. You can also use lemon juice for a bright touch. Dried oregano adds that authentic flavor. Finish with a sprinkle of salt and pepper to taste. When serving, I recommend about 1.5 cups per person. If you have more guests, simply multiply the ingredients. This way, everyone gets a taste of this fresh and flavorful delight. For the full recipe, check out the details above. Start by choosing a large, attractive salad bowl. This will showcase your fresh ingredients. I like to use a clear glass bowl. It makes the colors pop! Next, layer the chopped Romaine lettuce at the bottom. This crisp lettuce forms the base of your salad. Now, it’s time to add the vegetables. Begin with the cucumber. Slice it into half-moon shapes for great texture. Then, chop the tomatoes into medium cubes. Their juicy flavor is a must! Add the bell pepper, cutting it into bite-sized chunks. Each vegetable adds color and taste to your dish. Once your base is set, layer in the Kalamata olives. Their briny taste enhances the salad. Next, crumble the feta cheese over the top. It adds creaminess that pairs perfectly with the veggies. Now, let’s make the dressing. In a small bowl, mix the extra virgin olive oil, red wine vinegar, and oregano. Add salt and pepper to taste. Whisk until it becomes smooth and golden. Drizzle the dressing over the salad. Use salad tongs to gently toss everything together. This helps blend the flavors without breaking the feta too much. Taste the salad to see if it needs more salt or pepper. If you want a stronger flavor, adjust it now. For the best experience, serve the salad right away. You can also chill it for 15 minutes. This allows the flavors to marry beautifully. Enjoy your Classic Greek Salad, fresh and flavorful! For the complete recipe, check [Full Recipe]. To make a Classic Greek Salad, quality matters. Use the best feta and olives. Feta brings creaminess, while olives add a briny zest. I recommend brands like Dodoni for feta and Kalamata olives from the Greek Isles. These choices ensure you capture true Greek taste. Pair your salad with warm pita bread for a classic touch. Grilled meats, like chicken or lamb, also complement the fresh flavors. For a stunning presentation, serve in chilled bowls. A sprig of fresh oregano or extra feta crumbles on top looks fabulous. Avoid overdressing your salad. Too much dressing masks the fresh ingredients. Use just enough to coat them lightly. Also, be careful when preparing vegetables. Cut them evenly for the best texture and taste. Big chunks can ruin the bite, while too-small pieces may get lost. {{image_4}} You can make your Greek salad unique by adding proteins. Grilled chicken or chickpeas give a nice boost. They add heartiness and flavors that mix well. You can also explore alternative dressings. Try a honey mustard or a spicy yogurt dressing. These options can change the taste and make it exciting. In spring and summer, you can add fresh herbs like basil or mint. They bring a bright, refreshing flavor to your salad. You might also try adding ripe avocados for creaminess. During winter, consider warming things up. You can add roasted vegetables like sweet potatoes or bell peppers. These additions create a cozy, comforting version of the Greek salad. If you're vegan, you can swap the feta cheese. Look for vegan feta or use avocado slices for creaminess. These options still keep the salad delicious. For gluten-free choices, be sure to check the labels of your ingredients. Most fresh veggies and olives are naturally gluten-free. This way, everyone can enjoy your Greek salad! For the [Full Recipe], check the ingredients list earlier in this article. To keep your Greek salad fresh, store it in an airtight container. This prevents moisture loss and keeps flavors intact. If you mix your salad, it lasts about one day in the fridge. If you keep the ingredients separate, they can last up to three days. This way, you enjoy crisp veggies and creamy feta longer. Can you freeze Greek salad? It’s not recommended. The veggies become soggy when thawed. However, you can freeze the dressing. Pour it into ice cube trays. Once frozen, store the cubes in a bag. This way, you have dressing ready for your next salad. To refresh a chilled salad before serving, bring it to room temperature. Take it out of the fridge about 15 minutes before serving. Toss it gently to mix the flavors again. This helps restore the salad's vibrant taste, making it a delightful dish every time. Greek salad has roots in the Mediterranean. It celebrates fresh, local ingredients. This dish reflects the Greek way of life, which values simplicity and freshness. Traditionally, it features tomatoes, cucumbers, and olives. Feta cheese is a key part, adding rich flavor. The salad symbolizes Greek culture and hospitality. In Greece, it's common to enjoy this salad with meals. Each bite offers a taste of the land and sea. Yes, you can prepare Greek salad ahead of time! To do this, chop your veggies early in the day. Store them in a bowl, but keep the dressing separate. This way, your salad stays crisp and fresh. Combine the salad and dressing just before serving. If you want to enhance the flavors, let it chill for 15 minutes. This allows the tastes to blend nicely. If you need a feta cheese substitute, try goat cheese or queso fresco. Both options offer creamy textures and tangy flavors. For a vegan option, use tofu or cashew cheese. These alternatives can mimic the taste of feta without dairy. When using substitutes, adjust the seasoning to enhance the overall flavor. Feel free to experiment and find the best fit for your palate. For a full recipe, check out the Mediterranean Delight: Classic Greek Salad 🥗! In this post, we explored the essentials for making a Classic Greek Salad. I covered the key ingredients, from fresh veggies to feta cheese, and shared step-by-step instructions for perfect preparation. We discussed tips for authentic flavor and avoided common mistakes. Remember, customize your salad to fit your taste and season. Store it properly to keep it fresh, and don't hesitate to experiment with variations. A delicious Greek Salad can be simple, healthy, and exciting. Enjoy creating this timeless dish!

Classic Greek Salad Fresh and Flavorful Delight

If you crave a fresh and healthy dish, a Classic Greek Salad is a must-try. This vibrant salad combines crisp

- 3 medium zucchinis, spiralized into noodles - 1 cup shredded carrots - 1 red bell pepper, thinly sliced - 1 cup red cabbage, shredded - 1 cup snap peas, trimmed and halved - ½ cup fresh cilantro, chopped - ¼ cup green onions, chopped - ½ cup unsalted roasted peanuts, crushed for garnish - ¼ cup natural peanut butter - 2 tablespoons soy sauce or tamari - 1 tablespoon coconut sugar or honey - 2 tablespoons fresh lime juice - 1 tablespoon rice vinegar - 1 teaspoon sesame oil - 1 teaspoon fresh ginger, grated - 1 clove garlic, minced - Water, as needed to adjust consistency The zoodles are the star here. They add a fresh crunch and make the salad light. Zucchinis are low in calories and full of water, perfect for summer. The carrots bring a nice sweetness that pairs well with the dressing. Red bell pepper adds color and crunch. It provides vitamin C and antioxidants. Red cabbage gives the salad a lovely purple hue and adds fiber. Snap peas are sweet and crisp, giving extra texture. Fresh cilantro and green onions add a burst of flavor that brightens the whole dish. The peanut dressing is creamy and rich. Natural peanut butter gives it a lovely taste without added sugars. Soy sauce or tamari adds umami and saltiness. Coconut sugar or honey balances the flavors with sweetness. Fresh lime juice and rice vinegar add tartness that cuts through the creaminess. Ginger and garlic bring warmth and depth. If the dressing is too thick, just add a little water. This dressing makes every bite of the salad pop! {{ingredient_image_2}} - In a medium bowl, combine the following ingredients: - ¼ cup natural peanut butter - 2 tablespoons soy sauce (or tamari) - 1 tablespoon coconut sugar (or honey) - 2 tablespoons fresh lime juice - 1 tablespoon rice vinegar - 1 teaspoon sesame oil - 1 teaspoon fresh ginger (grated) - 1 clove garlic (minced) - Whisk these together until the mixture is smooth. - If the dressing seems thick, add water one tablespoon at a time. Adjust until it is creamy yet pourable. - Use a spiralizer to turn 3 medium zucchinis into zoodles. - If you don’t have a spiralizer, a vegetable peeler works too. Just peel long strips from the zucchini to create thin noodles. - In a large mixing bowl, add the zoodles, shredded carrots, sliced red bell pepper, shredded red cabbage, halved snap peas, chopped cilantro, and green onions. - Mix gently to ensure all ingredients are evenly distributed. - Drizzle the prepared peanut dressing over the salad mixture. - Toss everything with tongs or two forks to coat all the veggies well with the dressing. - Let the salad sit at room temperature for about 5 minutes. - This helps all the flavors blend together beautifully. - Spoon the vibrant salad into individual serving bowls. - Top with a generous sprinkle of crushed peanuts for that perfect crunch. To make the peanut dressing just right, start with thick peanut butter. If it feels thick, add water. Use one tablespoon at a time. Whisk until smooth and creamy. For flavor, balance sweet and salty. Add more lime juice for tang. If you like spice, a pinch of chili flakes works well. Try mixing in a splash of coconut milk for extra creaminess. When spiralizing zucchinis, make sure they are firm and fresh. Cut off both ends first. Place the zucchini in the spiralizer and turn slowly. This creates long, noodle-like zoodles. If you don’t have a spiralizer, use a vegetable peeler. Peel the zucchini into long strips for a different look. You can also use other veggies for zoodles. Carrots, cucumbers, or sweet potatoes are great options. Each adds its own flavor and texture. For a beautiful salad, layer the ingredients instead of mixing them. Start with zoodles, then add colorful veggies on top. This creates a stunning visual. Consider adding a lime wedge on the side. It adds color and extra flavor. You can also sprinkle sesame seeds or extra crushed peanuts on top. These garnishes add crunch and style. Pro Tips Adjusting Dressing Consistency: If your peanut dressing is too thick, add water gradually until it reaches your desired consistency. This will help it coat the zoodles evenly without being overwhelming. Fresh Ingredients Matter: Use fresh vegetables and herbs for the best flavor and texture. Fresh cilantro and crispy snap peas elevate the dish significantly. Marination Time: Letting the salad marinate for about 5 minutes allows the flavors to meld together beautifully, enhancing the overall taste. Presentation Techniques: For a visually appealing presentation, layer the salad ingredients in bowls rather than mixing them all together. This creates a stunning display of colors. {{image_4}} You can easily add protein to your Thai Peanut Zoodle Salad. Grilled chicken is a great choice. Just slice it thin and toss it in. Tofu is another excellent option. Choose firm tofu, cube it, and pan-fry until golden. If you prefer seafood, shrimp works well too. Cook them until they turn pink and tender. For a plant-based option, try chickpeas. They add protein and a nice texture. Just rinse and drain canned chickpeas before mixing them in. This salad can be fully vegetarian or vegan. Ensure all ingredients are plant-based. For the dressing, use tamari instead of soy sauce for a gluten-free option. You can swap honey for coconut sugar to keep it vegan. If you want to change the base, use almond or sunflower seed butter instead of peanut butter. This keeps the flavor tasty while catering to nut allergies. Get creative with your veggies! You can add cucumbers for a refreshing crunch. Slice them thinly to match the zoodles. Broccoli is also a great choice. Lightly steam it and chop it into bite-sized pieces. Seasonal variations keep it fresh all year. In summer, add cherry tomatoes for sweetness. In fall, try shredded Brussels sprouts for a hearty flavor. Don’t shy away from mixing different vegetables to find your favorite combo! To store leftovers, place the salad in an airtight container. Keep it in the fridge. This helps keep it fresh for up to three days. For best results, store the salad and dressing separately. This way, the zoodles stay crisp. Use glass or BPA-free plastic containers. They work well and are easy to clean. Freezing zoodles is a good option, but note that they can get mushy. To freeze, place zoodles in a single layer on a baking sheet. Freeze them for about one hour. After that, transfer to a freezer bag. For the dressing, store it in a sealed container. You can freeze it for up to three months. When ready to use, thaw the dressing overnight in the fridge. To refresh zoodles after storage, quickly rinse them under cold water. This helps revive their texture. You can also warm them in a pan for a minute. If the salad seems bland, add a splash of lime juice or extra dressing. This boosts the flavors and makes it taste fresh. Enjoy your salad just as vibrant as when you first made it! You can still make zoodles without a spiralizer! Use a vegetable peeler to create long, thin strips. Simply run the peeler along the zucchini. This gives you a similar noodle-like shape. You can also use a box grater. Just grate the zucchini lengthwise for flat strands. Both methods work well and taste great in the salad. Yes, you can make this salad ahead of time! Prepare the zoodles and chop the veggies a day before. Store them in an airtight container in the fridge. Keep the dressing separate until you’re ready to serve. This helps keep the veggies fresh and crunchy. Mix in the dressing just before eating for the best flavor. If you have nut allergies, there are great options. You can use sunflower seed butter as a nut-free choice. Another option is tahini, which is made from sesame seeds. Both alternatives will still give you a creamy texture. You can also skip the nut butter and use a simple vinaigrette instead. Yes, Thai Peanut Zoodle Salad is very healthy! It’s packed with fresh veggies and has plenty of nutrients. Zucchini is low in calories and high in water content. Carrots add fiber and vitamins. The peanuts give healthy fats and protein. Overall, this salad offers a balanced meal full of flavor and nutrition. This Thai Peanut Zoodle Salad offers a fresh mix of vibrant veggies and a creamy dressing. You learned how to spiralize zucchinis, mix salad ingredients, and make a tasty peanut dressing. Remember, you can customize with proteins or other veggies to suit your taste. Store leftovers properly to keep them fresh. Enjoy making this healthy and colorful dish that nourishes both body and soul!

Thai Peanut Zoodle Salad Fresh and Flavorful Delight

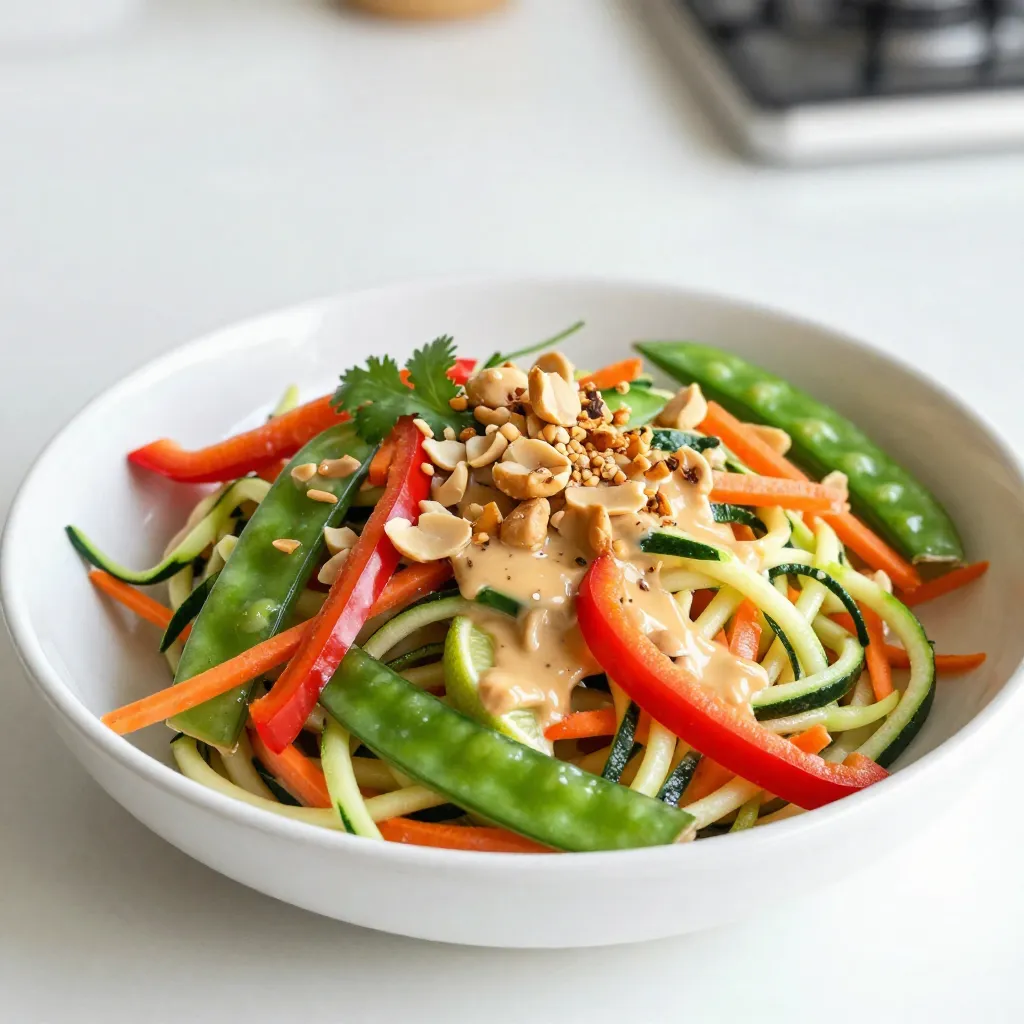
Looking for a dish that’s both fresh and packed with flavor? My Thai Peanut Zoodle Salad fits the bill! With

To make these crispy chickpea wraps, you will need the following ingredients: - 1 can (15 oz) chickpeas, drained and rinsed - 1 tablespoon olive oil - 1 teaspoon paprika - 1 teaspoon garlic powder - ½ teaspoon cumin - Salt and pepper to taste - 4 large whole wheat or spinach wraps - 1 cup mixed greens (lettuce, spinach, arugula) - ½ cup cherry tomatoes, halved - ½ cucumber, thinly sliced - ¼ cup tahini sauce (or your favorite dressing) - Fresh cilantro or parsley, chopped for garnish (optional) These ingredients come together to create a tasty and filling meal. Each serving of crispy chickpea wraps contains: - Calories: About 300 - Protein: 10g - Carbohydrates: 40g - Fiber: 12g - Fat: 10g This meal offers a balance of nutrients. The chickpeas provide protein and fiber. The fresh veggies add vitamins and minerals. If you can’t find some ingredients, here are a few substitutions: - Chickpeas: You can use black beans or lentils. - Olive oil: Avocado oil or coconut oil work well too. - Tahini sauce: You can swap it for hummus or yogurt dressing. - Wraps: Use gluten-free wraps or lettuce leaves for a low-carb option. - Mixed greens: Try spinach, kale, or arugula for different flavors. These swaps can help personalize your wraps to fit your taste or dietary needs. For the full recipe, check the detailed instructions to ensure you create a delightful meal. First, preheat your oven to 400°F (200°C). This heat will help crisp the chickpeas. Next, drain and rinse one can of chickpeas. Place them in a medium bowl. Add one tablespoon of olive oil, one teaspoon of paprika, one teaspoon of garlic powder, and half a teaspoon of cumin. Season with salt and pepper to taste. Mix well so each chickpea gets coated. Once coated, spread the chickpeas on a baking sheet lined with parchment paper. Ensure they sit in a single layer. Overcrowding can lead to soggy chickpeas. Roast them in the oven for 25-30 minutes. Stir them halfway through to promote even cooking. The chickpeas should be golden and crunchy when done. While the chickpeas roast, lay out four large whole wheat or spinach wraps. In the center of each wrap, add a handful of mixed greens. Next, place a few halved cherry tomatoes and thin cucumber slices on top. This mix brings fresh flavors and crunch to your meal. Once the chickpeas are out of the oven and slightly cooled, add a generous portion over the veggies. Drizzle with tahini sauce or your favorite dressing for a creamy touch. If you want, sprinkle fresh chopped cilantro or parsley on top for extra flavor. To achieve the best crispiness, make sure the chickpeas are dry before you coat them. Excess moisture can hinder their crunch. The key is to spread them out evenly on the baking sheet, allowing hot air to circulate around each chickpea. Remember to check for doneness. They should look golden brown and feel crunchy. If they need more time, keep roasting but check every few minutes. Enjoy the process, and soon you will have a tasty meal ready to enjoy! You can find the full recipe linked above. For crispy chickpeas, start with dry chickpeas. Drain and rinse them well. Pat them dry using a clean towel. This step removes extra moisture, helping them crisp up in the oven. Next, coat the chickpeas in oil and spices evenly. I use a mix of paprika, garlic powder, and cumin for flavor. A good pinch of salt enhances the taste and promotes crispiness. Spread the chickpeas out on the baking sheet. Make sure they aren’t touching. This allows hot air to circulate around them. Roast them at 400°F (200°C) for 25-30 minutes. Stir them halfway through. This helps them cook evenly. Look for a golden color and a crunchy texture to know they are ready. I love serving the wraps warm. They taste best when fresh. You can pair them with a side of lemon wedges for a fresh kick. A light salad or roasted veggies make a great side dish too. If you want extra flavor, try adding hot sauce or a spicy yogurt dip. You can also serve with a dollop of hummus on the side. This adds creaminess and a nice contrast to the crunch. Meal prep is easy with these wraps. You can roast a big batch of chickpeas ahead of time. Store them in an airtight container for up to a week. Just remember to keep them separate from the wraps. When you're ready to eat, assemble the wraps fresh. Add your greens, tomatoes, and cucumbers. This keeps the wraps crisp and delicious. You can even prep the veggies in advance. Chop them and store them in the fridge. For a quick lunch or dinner, grab your chickpeas and veggies. Wrap them up, drizzle with tahini sauce, and enjoy! For the full recipe, check out the detailed instructions above. {{image_4}} To make your chickpea wraps spicy, add some heat. You can mix in cayenne pepper or chili powder with your chickpeas before roasting. This gives a nice kick. You can also top your wraps with hot sauce or spicy salsa. These options bring bold flavors to your meal. Adjust the heat level to suit your taste. Crispy chickpea wraps are perfect for everyone. For vegetarian options, add cheese or yogurt sauce. If you want vegan options, use tahini or avocado instead. You can also try adding roasted vegetables. Bell peppers, zucchini, or sweet potatoes work well. This makes your wrap colorful and packed with nutrients. You can switch up your wraps easily. Try using lettuce leaves for a low-carb option. Corn tortillas add a nice twist too. For fillings, mix and match your greens, fruits, and sauces. Add sliced avocado or shredded carrots for extra crunch. Each variation keeps your meal exciting. For the full recipe, check the details above. To keep your crispy chickpea wraps fresh, store them in an airtight container. Make sure to let them cool completely before sealing. This helps prevent sogginess. Place a paper towel inside the container to absorb any moisture. You can keep them in the fridge for up to three days. When you are ready to enjoy your wraps again, reheating is key. Preheat your oven to 350°F (175°C). Place the wraps on a baking sheet. Heat them for about 10-15 minutes. This method will help keep them crispy. Avoid the microwave, as it can make them soft and chewy. You can freeze your crispy chickpea wraps for later use. Wrap each one in plastic wrap tightly. Then place them in a freezer bag or container. They can last up to three months in the freezer. When you are ready to eat, let them thaw in the fridge overnight. Reheat them in the oven for the best crispiness. For the full recipe and more tips, check out the recipe section. To make chickpeas crispy, you need the right heat and oil. When you roast chickpeas at 400°F, the high heat helps remove moisture. This process creates a crunchy texture. Coating the chickpeas in olive oil and spices also aids in crispiness. The oil helps them brown and prevents them from sticking. Yes, you can use other beans if you wish. Canned black beans, kidney beans, or even pinto beans work well. Just make sure to rinse and drain them like chickpeas. Each type of bean will add its own flavor and texture. Experimenting can lead to fun new tastes in your wraps. To make these wraps gluten-free, choose gluten-free wraps. Many brands offer great options made from rice, corn, or almond flour. Check the label to ensure they are certified gluten-free. This way, you can enjoy crispy chickpea wraps without worry. The filling remains the same, so you won’t miss out on flavor. For the full recipe, check the earlier section. Crispy Chickpea Wraps are easy and fun to make. You learned about the key ingredients, nutrition, and substitutions. I shared step-by-step instructions for prepping, assembling, and roasting. You explored tips for the perfect crispiness and meal prep ideas. Variations let you spice things up with flavors or different wraps. Lastly, I gave storage tips to keep your wraps fresh. Now you can enjoy delicious, healthy wraps anytime. Try new ideas and share your favorites!

Crispy Chickpea Wraps Savory and Satisfying Meal

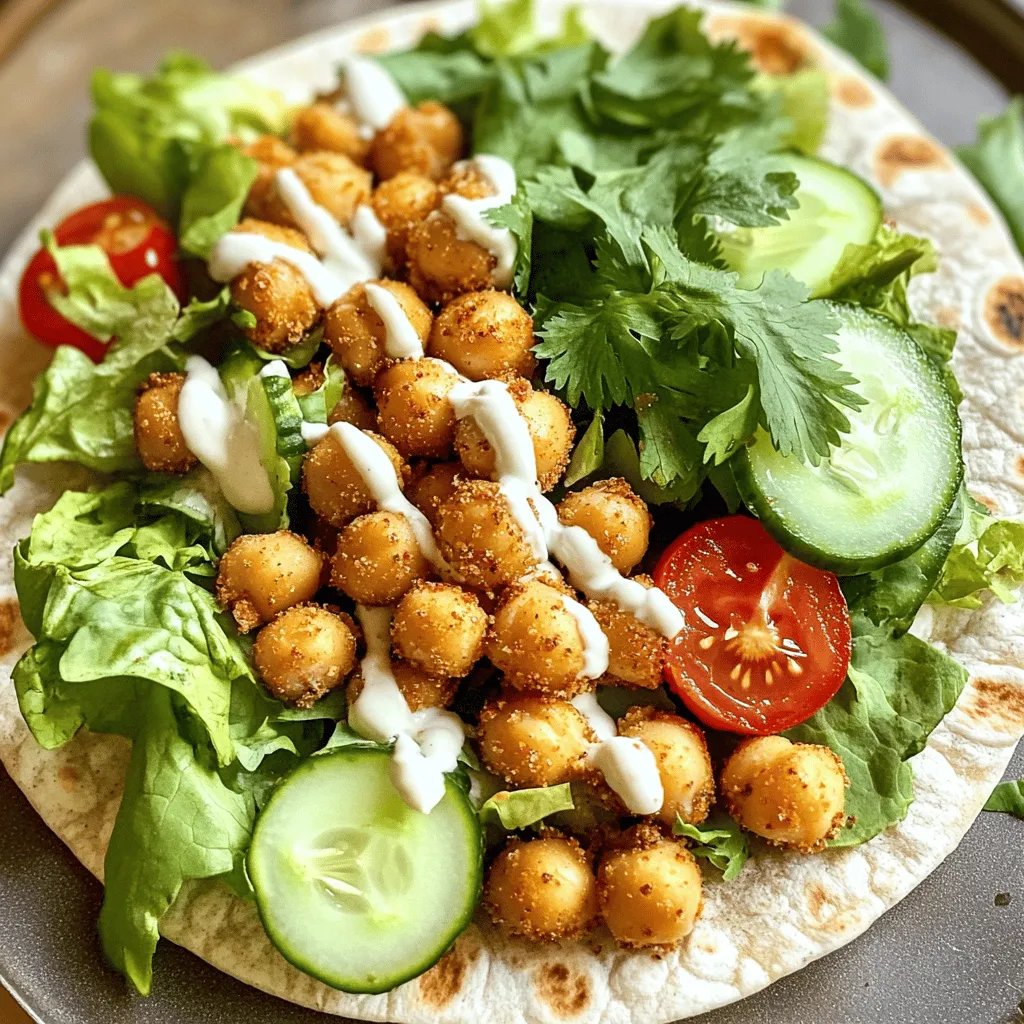
If you’re craving a meal that’s packed with flavor and crunch, you’ve come to the right place! Crispy Chickpea Wraps

- 1 cup uncooked long-grain white rice - 2 cups broccoli florets - 1 can (10.5 oz) cream of mushroom soup - 1 cup shredded cheddar cheese - 1 cup milk - 1 small onion, finely chopped - 2 cloves garlic, minced - Seasonings: garlic powder, onion powder, salt, pepper - 1 tablespoon olive oil - 1/2 cup breadcrumbs (optional) Choosing fresh vs. frozen broccoli: I often use fresh broccoli for its bright color and crunch. Fresh broccoli cooks quickly and adds great flavor. If you use frozen, make sure to thaw it well. This helps avoid extra moisture in your dish. How to properly measure rice: To measure rice, use a dry measuring cup. Avoid packing the rice down. This ensures you get the right amount for your casserole. Selecting the right cheese: I love sharp cheddar cheese for its bold flavor. It melts well and gives the dish a rich taste. You can also mix in other cheeses like Monterey Jack for a twist. For the Full Recipe, you can explore more steps to make this delicious casserole. - Preheat the oven to 350°F (175°C). - In a large pot, boil 2 cups of water. - Add 1 cup of uncooked rice to the boiling water. - Cook the rice for 18-20 minutes. Check if the water is absorbed. - Heat 1 tablespoon of olive oil in a skillet. - Sauté 1 small chopped onion for about 5 minutes. - Add 2 cloves of minced garlic and cook for 1 more minute. - If using fresh broccoli, blanch 2 cups of florets for 2 minutes. - If using frozen, thaw and drain it. - In a bowl, mix the cooked rice, sautéed onions, garlic, broccoli, cream of mushroom soup, 1 cup of milk, and 1 cup of cheese. - Season with garlic powder, onion powder, salt, and pepper. - Transfer the mixture into a greased 9x13-inch baking dish. - Sprinkle 1/2 cup of breadcrumbs and extra cheese on top. - Bake for 25-30 minutes until golden and bubbly. For the full recipe, check the detailed instructions above. Enjoy your delicious Cheesy Broccoli Rice Casserole! To boost the taste of your cheesy broccoli rice casserole, try adding spices and herbs. A pinch of paprika or a dash of cayenne can add warmth. Fresh herbs like thyme or parsley brighten the dish, too. For a creamier texture, use cream cheese or sour cream in your mixture. These will make each bite richer and more satisfying. Ovens can vary, so keep an eye on your casserole. If your oven runs hot, check it a bit early. If you use brown rice instead of white, you may need to cook it longer. Just remember to adjust the water amount too, as brown rice absorbs more liquid. This casserole pairs well with a simple salad or roasted vegetables. The crunch of the salad balances the creaminess of the casserole. For a nice touch, you can add a sprinkle of fresh herbs on top before serving. It adds color and makes the dish pop. Enjoy your meal with friends and family! {{image_4}} You can swap cheeses to match your taste. Try mozzarella for a mild flavor. Pepper jack gives a spicy kick. Feta adds a tangy twist. Each cheese will change the taste and texture. You can also substitute veggies. Cauliflower works great if you want a low-carb option. Carrots or bell peppers add color and crunch. Peas bring sweetness. Feel free to mix and match based on what you have. To make it gluten-free, use gluten-free breadcrumbs. Check that your cream of mushroom soup is gluten-free too. For a dairy-free version, try almond milk and dairy-free cheese. Coconut cream can add a rich texture. If you want it vegetarian, skip the meat options. This dish is already packed with veggies. You can also add beans for protein. They blend well with the rice and cheese. Leftover casserole can be a fun meal. You can turn it into a soup. Just add broth and heat it up. Top it with fresh herbs for flavor. Another idea is to make stuffed peppers. Fill halved bell peppers with the leftover casserole. Bake until the peppers are tender. This makes a great lunch or snack. For storage, keep the casserole in an airtight container. It lasts about three to four days in the fridge. Reheat in the oven or microwave until warm. To keep your Cheesy Broccoli Rice Casserole fresh, store leftovers right. First, let it cool to room temperature. Then, put the casserole in an airtight container. This helps prevent moisture loss and keeps flavors intact. The best containers for storage are glass or plastic with tight lids. These containers help avoid spills and make stacking easy. If you have a lot of leftovers, divide them into smaller portions. This way, you can heat just what you need. You can freeze the casserole before or after baking. If you freeze it before baking, assemble everything in your dish. Cover it tightly with plastic wrap and then foil. This helps keep it fresh for up to three months. If you freeze it after baking, let it cool completely first. Then, wrap it well in plastic and foil. When you're ready to eat, thaw the casserole in the fridge overnight. To reheat, bake it at 350°F (175°C) for about 30 to 40 minutes. Make sure it’s hot all the way through before serving. Enjoy your delicious meal without worry! You can use cream of chicken soup as a swap. If you prefer a vegan option, try a homemade cream of celery soup. Another good choice is a simple mix of milk, flour, and spices to create a creamy base. This keeps the dish flavorful and rich. Yes, you can make this casserole in advance. Just prepare it up to the baking step, cover it, and store it in the fridge. When you're ready to eat, bake it straight from the fridge. You may need to add a few extra minutes to the baking time. This casserole lasts about 3 to 5 days in the fridge. Make sure to store it in an airtight container for best results. If you want to keep it longer, consider freezing it. Absolutely! You can add cooked chicken, turkey, or even ham for extra flavor. If you want a vegetarian option, consider adding chickpeas or cooked lentils. These options boost nutrition and make the dish heartier. Yes, you can use brown rice, but it needs more cooking time. Brown rice takes about 40-50 minutes to cook, so adjust your water and time accordingly. This adds a nutty flavor and more fiber. The casserole is done when it is hot and bubbly. The cheese should be melted and slightly golden on top. A fork inserted in the center should come out warm. Always check the edges; they should be firm but not dry. Cheesy Broccoli Rice Casserole is a warm hug in a dish. It blends creamy cheese with tender broccoli and fluffy rice. This meal is not just tasty; it’s easy to make and perfect for any table. To start, gather your ingredients. You will need: - 1 cup uncooked long-grain white rice - 2 cups broccoli florets (fresh or frozen) - 1 can (10.5 oz) cream of mushroom soup - 1 cup shredded cheddar cheese (plus more for topping) - 1 cup milk (whole or low-fat) - 1 small onion, finely chopped - 2 cloves garlic, minced - 1 teaspoon garlic powder - 1 teaspoon onion powder - Salt and freshly ground black pepper to taste - 1 tablespoon olive oil - 1/2 cup breadcrumbs (optional) The first step is to preheat your oven to 350°F (175°C). This ensures your casserole bakes evenly. Next, boil water in a saucepan for the rice. Once boiling, add the rice and let it simmer. While the rice cooks, heat olive oil in a skillet. Sauté the onion until it turns soft and clear. Then, add garlic and let it cook for a minute. This mix gives your casserole a lovely flavor. If you use fresh broccoli, blanch it briefly in boiling water. This keeps it bright and crisp. For frozen broccoli, just thaw and drain it. In a large bowl, combine the cooked rice, sautéed onion and garlic, broccoli, cream of mushroom soup, milk, and cheese. Season with garlic powder, onion powder, salt, and pepper. Mix until creamy. Transfer this mixture to a greased baking dish. If you want a crunchy top, sprinkle breadcrumbs and extra cheese on top. Bake it for 25-30 minutes. Look for golden cheese and bubbling edges. When it's ready, let it cool for a few minutes before serving. Serve this dish hot, straight from the oven. You can even add fresh herbs for a pop of color. Enjoy your delicious Cheesy Broccoli Rice Casserole! For a complete cooking guide, check out the Full Recipe. In this article, we explored making a Cheesy Broccoli Rice Casserole. You learned about the key ingredients, like rice, broccoli, and cheese. I shared tips to prep fresh ingredients and cook rice just right. We covered steps for blending flavors and baking the dish to perfection. Don't forget the variations you can try and how to store leftovers. This dish is easy, tasty, and fun to customize. Enjoy creating your version and sharing it with others!

Cheesy Broccoli Rice Casserole Flavor-Packed Comfort

If you’re looking for a dish that combines comfort and flavor, you’ve found it! My Cheesy Broccoli Rice Casserole is

To make the best blueberry lemon scones, you need these key ingredients: - 2 cups all-purpose flour - 1/3 cup granulated sugar - 1 tablespoon baking powder - 1/2 teaspoon baking soda - 1/2 teaspoon salt - 1/2 cup unsalted butter, cold and cubed - 1 cup fresh blueberries (frozen blueberries can be used if fresh are unavailable) - Zest of 1 lemon - 1/2 cup buttermilk - 1 large egg - 1 teaspoon vanilla extract - 1 tablespoon lemon juice - 1 tablespoon coarse sugar for topping (optional) These ingredients come together to create a bright and tasty treat. The all-purpose flour gives the scones their structure. Sugar adds sweetness, while baking powder and baking soda help them rise. Cold butter is essential for a flaky texture. Fresh blueberries burst with flavor, and lemon zest adds a refreshing kick. Buttermilk helps keep the scones moist. I love adding a sprinkle of coarse sugar on top for a delightful crunch. This recipe is simple and quick, making it great for any morning. You can find the full recipe above to guide you through the steps! Preheat your oven to 400°F (200°C). This helps the scones rise well. Next, prepare a baking sheet by lining it with parchment paper. This step prevents the scones from sticking. In a large bowl, combine the dry ingredients. Whisk together 2 cups of all-purpose flour, 1/3 cup of granulated sugar, 1 tablespoon of baking powder, 1/2 teaspoon of baking soda, and 1/2 teaspoon of salt. Mix well until everything is even. Now, add the cold, cubed unsalted butter. Use a pastry cutter or your fingers to mix. Aim for a crumbly texture, leaving some pea-sized pieces of butter. This gives the scones a nice flakiness. Gently fold in 1 cup of fresh blueberries and the zest of 1 lemon. Be careful not to crush the berries. This adds a burst of flavor. In another bowl, whisk together the wet ingredients. Combine 1/2 cup buttermilk, 1 large egg, 1 teaspoon vanilla extract, and 1 tablespoon lemon juice. Mix until fully combined. Pour the wet mixture into the bowl with the dry ingredients. Stir gently until just combined. A slightly shaggy dough is perfect. Avoid overmixing. Turn the dough out onto a floured surface. Knead it gently for about 30 seconds. Shape the dough into a circle that is about 1 inch thick. Using a sharp knife, cut the dough into 8 equal wedges. Place each wedge on the prepared baking sheet. Leave some space between them to allow for rising. If you want a sweet crunch, sprinkle the tops with 1 tablespoon of coarse sugar. Bake the scones for 15-18 minutes. Look for a golden brown top. A toothpick inserted should come out clean. Enjoy your delicious Blueberry Lemon Scones! For the full recipe, refer to the earlier section. To get great scones, keep your butter cold. I always use cold butter, cut into small cubes. This helps create a flaky texture. When the butter melts in the oven, it makes little pockets. These pockets make the scones rise and become light. Next, avoid overmixing the dough. Mix just until everything blends together. If you mix too much, the scones can turn tough. A light hand keeps them soft and tender. You can boost the flavor with herbs or spices. Try adding a pinch of fresh thyme or a dash of cinnamon. These small additions can create a unique twist that everyone will love. For an even stronger lemon taste, use lemon extract. A teaspoon can make your scones pop with citrus flavor. This is especially nice if you want a more intense lemon bite. Pair your scones with delicious jams or clotted cream. Strawberry jam or lemon curd works perfectly with blueberry lemon scones. These toppings add sweetness and richness. For a special touch, present the scones on a pretty platter. Dust them lightly with powdered sugar. Add fresh blueberries and bright lemon slices for color. This will make your dish look as good as it tastes. Enjoy your baking! Check out the Full Recipe for more details on making these delightful scones. {{image_4}} You can swap blueberries for other fruits. Raspberries work well in this recipe. They add a nice tartness. Cranberries can also be great, especially in the fall. For a tangy twist, try adding lemon curd. This gives your scones a zesty burst of flavor. It pairs perfectly with both the blueberries and the lemon. If you need gluten-free scones, use a gluten-free flour blend. Many brands work well in baking. You can also make this recipe vegan. Swap the butter for vegan butter and the buttermilk for plant-based milk with a splash of vinegar. These changes keep your scones tasty and light. Mixing flavors can elevate your scones. Try adding fresh herbs like lavender for a floral note. It adds a unique twist that many love. You might also want to incorporate nuts or chocolate chips. Chopped walnuts or dark chocolate can give a delightful crunch and richness. Each option brings its own fun twist to the classic scone. For the full recipe, check out the earlier sections! To keep your scones fresh, store them in an airtight container. This helps lock in moisture. For short-term storage, place them at room temperature for up to two days. If you want to keep them longer, consider the freezer. Make sure the container fits your scones well. A glass jar or a plastic box works great. You can freeze scones before or after baking. To freeze before baking, shape the dough into wedges. Place them on a baking sheet and freeze for about an hour. Once frozen, transfer the wedges to an airtight bag. If freezing after baking, let them cool first. Then, wrap them individually in plastic wrap. Finally, place them in a freezer-safe bag. To thaw, leave them in the fridge overnight. For a warm treat, reheat them in the oven at 350°F for about 10 minutes. At room temperature, these scones stay fresh for about two days. After that, they may dry out. Look for signs of spoilage like mold or an off smell. If you see any of these, it's best to toss them. Enjoy your Blueberry Lemon Scones Delightful and Easy Recipe to the fullest! For the full recipe, refer back to the section above. Yes, you can make these scones ahead of time. You can prepare the dough and cut it into wedges. Place the wedges on a baking sheet and cover them tightly. Store the sheet in the fridge for up to 24 hours. When you're ready to bake, just pop them in the oven straight from the fridge. This way, you will have fresh scones in no time. To check if the scones are done, look for a golden brown color on top. You can also insert a toothpick into the center of a scone. If it comes out clean, the scones are ready. They should feel firm to the touch. Trust your senses—the aroma will also be a good hint! To reheat leftover scones, place them on a baking sheet. Preheat your oven to 350°F (175°C). Bake for about 5 to 10 minutes. This warms them up and keeps them nice and soft. You can also use a microwave, but this may make them a bit chewy. Absolutely! You can use frozen blueberries if fresh ones are not available. Just toss them in flour before adding to the dough. This helps prevent them from sinking during baking. They will still taste great and give you that burst of flavor in every bite. If you don't have buttermilk, you can make a simple substitute. Mix 1/2 cup of milk with 1/2 tablespoon of white vinegar or lemon juice. Let it sit for about 5 minutes. This will give you a similar acidity and richness as buttermilk. You can also use plain yogurt or sour cream mixed with a little milk. Blueberry lemon scones are a delicious treat that anyone can make. We covered key ingredients, step-by-step baking instructions, and tips for the best results. You learned about tasty variations and how to store your scones for freshness. With these simple steps, you can impress family and friends. Enjoy your baking journey and don't hesitate to get creative with flavors. Your kitchen will be filled with warm, sweet scents in no time!

Blueberry Lemon Scones Delightful and Easy Recipe

If you love the bright flavors of blueberries and lemons, you’re in for a treat! In this blog post, I’ll

- 4 tablespoons all-purpose flour - 3 tablespoons cocoa powder - 3 tablespoons almond milk (or other plant-based milk) - 2 tablespoons maple syrup (or agave syrup) - 1 tablespoon neutral vegetable oil - 1/4 teaspoon baking powder - A pinch of salt - 2 tablespoons dairy-free chocolate chips (optional) You can easily swap out all-purpose flour. Try almond flour or oat flour for a gluten-free option. If you want a different sweetener, use agave syrup or date syrup instead of maple syrup. Both options work well and add their own unique flavor. The fun part of this mug cake is personalizing it! You can mix in nuts like walnuts or pecans for extra crunch. Dried fruit like raisins or cranberries adds a nice chew. For toppings, consider coconut whipped cream, fresh berries, or a drizzle of almond butter. These not only taste great but make your cake look beautiful too! Start by taking a microwave-safe mug. Add 4 tablespoons of all-purpose flour, 3 tablespoons of cocoa powder, 1/4 teaspoon of baking powder, and a pinch of salt. Using a fork, mix these dry ingredients well. A smooth mixture is key for a good cake texture. Check for any clumps and break them up. This helps the cake rise evenly and become fluffy. Now, pour in 3 tablespoons of almond milk, 2 tablespoons of maple syrup, and 1 tablespoon of neutral vegetable oil. Mix these wet ingredients into your dry mix. Stir until you have a smooth batter. Scrape the bottom of the mug to get all the dry bits mixed in. If you want a richer taste, add 2 tablespoons of dairy-free chocolate chips and fold them in. This adds a nice touch of chocolatey goodness. Place the mug in the microwave. Cook it on high for about 1 minute and 30 seconds. Keep an eye on it as it cooks. Check it around the 1-minute mark to avoid overflow. The cake is ready when it has risen and looks set. Let it cool for a minute before enjoying. This will help you avoid burns and let the flavors settle. Enjoy your delicious vegan chocolate mug cake straight from the mug! To make a great vegan chocolate mug cake, avoid common mistakes. Here are a few tips: - Overmixing: Stir just enough to combine. Too much mixing can make the cake tough. - Under-measuring: Use level measurements for dry ingredients. Too much flour or cocoa can ruin the cake. Measuring your ingredients accurately matters. Even a small error can change the texture. Pay close attention, and your cake will have the perfect consistency. You can easily change up your mug cake. Here are some fun ideas: - Flavor Enhancements: Add extracts like vanilla or almond. A pinch of cinnamon can also boost flavor. - Adjusting Sweetness: If you want it sweeter, add more maple syrup. For less sweetness, cut back on the syrup. Feel free to experiment with textures too. Adding more plant milk can make the cake moist. Or try less milk for a denser cake. Make your mug cake look great for serving. Here are some ideas: - Serving Ideas: Present it in a fun mug. You can even layer the batter in a clear glass for a nice view. - Extra Toppings: Top with coconut whipped cream or fresh berries. A sprinkle of cocoa powder can add a nice touch. These simple tips will impress your guests and make your mug cake a visual delight. Enjoy the process! {{image_4}} To make a gluten-free version of this vegan chocolate mug cake, you can swap all-purpose flour for almond flour or a gluten-free flour blend. These options work well in a mug cake. - Ingredient substitutions: - Replace all-purpose flour with: - Almond flour - Gluten-free all-purpose flour blend Make sure your baking powder is gluten-free too. This keeps the cake light and fluffy. You can change the flavor of your mug cake by adding different ingredients. For a mint chocolate mug cake, add a few drops of mint extract. If you like peanut butter, mix in a spoonful of peanut butter before microwaving. - Ideas for different flavor profiles: - Mint chocolate: Add mint extract. - Peanut butter: Mix in a spoonful of peanut butter. You can also add spices like cinnamon or nutmeg. These spices give a warm, cozy taste. Pair your mug cake with a nice drink or dessert. A cup of almond milk or a hot cup of coffee goes well with it. - Suggestions for drinks or side dishes: - Almond milk - Hot coffee To make it a bigger treat, you can serve it with fruit. A scoop of dairy-free ice cream on the side makes it extra special. Explore the full recipe to find the perfect balance for your taste buds! After making your vegan chocolate mug cake, you may want to save some for later. Store leftover cake in an airtight container. This keeps it fresh and moist. A simple glass jar or a plastic container works well. Avoid using a cloth or paper bag, as they let air in. To reheat your mug cake, use the microwave. Place the mug cake in the microwave for about 10 to 15 seconds. Check the cake to see if it’s warm enough. If not, heat it in short bursts. This helps keep the texture soft and the flavor rich. Avoid overheating, as this can dry it out. Yes, you can freeze the mug cake! Allow it to cool completely first. Then, wrap it tightly in plastic wrap or place it in a freezer-safe container. Be sure to label it with the date. For best taste, eat it within a month. When you want to enjoy it, take it out of the freezer. Let it thaw in the fridge overnight. If you need it fast, you can thaw it in the microwave for about 30 seconds on low power. This way, you’ll have a tasty treat ready to go! Yes, you can use an oven or stovetop. For the oven, preheat to 350°F (175°C). Pour the batter into a small oven-safe dish. Bake for 15-20 minutes. Check for doneness with a toothpick. If it comes out clean, your cake is ready! For stovetop cooking, use a steamer. Place the mug in the steamer for about 10-15 minutes. You can use any plant-based milk. Soy milk, oat milk, or coconut milk work great. Each option brings its own flavor. If you want a creamier texture, go for coconut milk. This mug cake tastes best when fresh. It can last up to two days if stored in the fridge. Cover it tightly with plastic wrap or in an airtight container. To enjoy later, warm it up in the microwave for a short time. Yes, the recipe can be nut-free. Use soy milk or oat milk instead of almond milk. Ensure that the vegetable oil you use is also nut-free. Always check labels to avoid hidden nut ingredients. You can top your mug cake with many fun options! Try coconut whipped cream for creaminess. Fresh berries add a nice tartness too. For a richer flavor, sprinkle on some extra dairy-free chocolate chips. You can also add a drizzle of chocolate or peanut butter for a treat! This blog post covered how to make a yummy vegan mug cake. We explored ingredients, cooking steps, and tips for a perfect treat. Personalizing your cake and storing leftovers were also discussed. Remember, baking is fun, and experimenting can lead to delicious results. Enjoy your mug cake creations, and share them with friends! You might find a new favorite dessert along the way.

Vegan Chocolate Mug Cake Quick and Easy Recipe

Craving a quick dessert? This Vegan Chocolate Mug Cake is the answer! It’s simple, sweet, and ready in minutes. With

- 1 cup bell peppers (a mix of red, yellow, and green), sliced into thin strips - 1 cup fresh broccoli florets, cut into bite-sized pieces - 1 cup carrots, julienned into matchsticks - 1 cup sugar snap peas, trimmed and rinsed - 1 cup red cabbage, finely shredded - 1 tablespoon sesame oil, for sautéing - 2 tablespoons soy sauce (or tamari for a gluten-free option) - 1 tablespoon honey or maple syrup for a sweet touch - 2 cloves garlic, minced for flavor - 1 teaspoon fresh ginger, grated for a zing Each ingredient brings color and flavor to your Rainbow Veggie Stir Fry. The bell peppers add sweetness and crunch. Broccoli gives a nice bite and bright green color. Carrots bring a lovely orange hue and sweetness in every bite. Sugar snap peas add a crisp texture, making the stir fry fun to eat. Red cabbage offers a vibrant purple color and a slight crunch, making your dish pop. The sesame oil adds a rich, nutty flavor. Soy sauce or tamari brings a savory kick. Honey or maple syrup gives a touch of sweetness that balances the flavors. Garlic and ginger add warmth and depth. For the full recipe, check out the details. This combination of ingredients makes a beautiful and tasty meal. Enjoy the colors and flavors as you prepare your stir fry! To start, wash all your veggies well. Rinse them under cold water to remove any dirt. Trim any ends off the vegetables, making them ready to slice. For slicing the bell peppers, cut them in half and remove the seeds. Lay them flat and slice them into thin strips. For the carrots, peel them first. Then, slice them into matchsticks. This is called julienning. It makes them cook evenly and look nice. Next, cut the broccoli into bite-sized florets. Make sure they are not too big, so they cook well. Lastly, shred the red cabbage finely. This adds a nice crunch and color to your dish. Heat one tablespoon of sesame oil in a large skillet or wok over medium-high heat. Wait until the oil shimmers, but do not let it smoke. Add the minced garlic and grated ginger to the hot oil. Sauté them for about one minute. Stir continuously so they do not burn. You want to smell that lovely aroma! Now, add the sliced bell peppers and julienned carrots to the skillet. Stir-fry these for about three minutes. They should soften just a bit. Next, toss in the fresh broccoli florets and sugar snap peas. Keep stirring for another two to three minutes until they become bright green and tender-crisp. Finally, add the finely shredded red cabbage. Cook for an extra two minutes. The mix should look beautiful and colorful at this point. In a small bowl, whisk together the soy sauce and honey or maple syrup until blended. Pour this mixture over your stir-fried veggies. Gently toss everything together to coat the vegetables evenly. Let it cook for one more minute to combine all the flavors. Now it's time to serve! Remove the skillet from heat. Sprinkle sesame seeds on top for a nice crunch. Serve this vibrant stir-fry over warm cooked rice or fluffy quinoa. Enjoy your colorful, tasty meal! For the full recipe, check the [Full Recipe]. To make your stir fry great, heat is key. Start with medium-high heat. This helps the veggies cook fast and stay crisp. If you use too low heat, your vegetables will get soggy. Keep them moving in the pan. Stir often to avoid burning. To boost flavor, add spices. Try a pinch of chili flakes for heat. You can also use sauces like teriyaki or hoisin for a twist. Fresh herbs like cilantro or basil add a bright taste. Chop them finely and sprinkle them on top. Garnishing makes your dish pop. For sesame seeds, use your hand to sprinkle them evenly over the stir fry. This adds a nice crunch. A squeeze of lemon or lime adds a fresh zing. Just cut the fruit in half and squeeze it over the dish right before serving. For the full recipe, check out the Rainbow Veggie Stir Fry details. {{image_4}} You can easily boost your Rainbow Veggie Stir Fry with protein. Tofu or tempeh works great for a plant-based option. Cut them into cubes and sauté until golden. If you prefer meat, shrimp or chicken is a tasty choice. Cook shrimp until they turn pink and chicken until no longer pink inside. This adds flavor and makes the meal filling. Seasonal veggies add fun and freshness. In spring, use asparagus or snap peas. For summer, try zucchini or corn. Fall is a good time for squash or Brussels sprouts. Winter veggies like kale or root vegetables can also shine in this dish. Mixing colors not only looks good but also packs in nutrients. Making this stir fry fit your diet is easy. For gluten-free needs, swap soy sauce for tamari. This keeps the flavor without the gluten. If you want a vegan meal, use maple syrup instead of honey. These simple swaps help everyone enjoy a delicious meal. For the full recipe, check out the link. To store your rainbow veggie stir fry, cool it down first. Place it in an airtight container. This helps keep the flavors fresh. You can keep it in the fridge for up to three days. Make sure to check for any signs of spoilage before eating. For freezing, use a sturdy freezer-safe container. You can also use freezer bags, making sure to remove as much air as possible. This keeps the stir fry from getting freezer burn. When you want to eat it, thaw it in the fridge overnight for the best texture. If you’re in a hurry, you can use the microwave on the defrost setting. To reheat, use a skillet over medium heat. Add a splash of water or oil to keep the veggies moist. Stir frequently to ensure even cooking. Avoid using the microwave, as this can lead to overcooked vegetables. You want them to stay crisp and colorful. Enjoy your meal fresh and vibrant! You can add heat in a few easy ways. Try adding chopped chili peppers to the stir fry. Sriracha sauce also works well for a spicy kick. Red pepper flakes are another simple option. Just sprinkle them in while cooking. You can even use spicy soy sauce for an extra burst of flavor. Adjust the amount based on your heat preference. Yes, you can prepare this dish ahead of time. Chop all your veggies and store them in the fridge. This keeps them fresh and ready to cook. You can also cook the stir fry and let it cool before storing. Place it in an airtight container for up to three days. When you’re ready to eat, simply reheat it in a pan or microwave. Serving stir fry can be fun and colorful! I like to use bowls for a vibrant display. Place a scoop of rice or quinoa at the bottom. Then, add the stir fry on top. This lets the colors shine through. You can also add a wedge of lime or lemon for a fresh squeeze before eating. This adds a bright flavor that makes each bite pop! In this blog post, we covered how to make a delicious Rainbow Veggie Stir Fry. We looked at the main and additional vegetables that add color and crunch. Then, we explored sauces and seasonings for flavor. I shared step-by-step instructions to prepare and cook your dish, along with tips for the perfect sauté. You also learned about adding protein and making seasonal swaps. Finally, we discussed how to store leftovers for future meals. Enjoy making this healthy, vibrant dish your own!

Rainbow Veggie Stir Fry Vibrant and Easy Meal Idea

Looking for a quick and colorful meal? My Rainbow Veggie Stir Fry is just what you need! With vibrant bell

- 12 oz (340g) penne pasta - 1 tablespoon extra virgin olive oil - 1 medium onion, finely chopped - 3 cloves garlic, minced - 1 teaspoon red pepper flakes (optional) - 1 (14 oz) can crushed tomatoes - 2 cups vegetable broth - 1 cup heavy cream - 1 teaspoon dried basil - 1 teaspoon dried oregano - Salt and black pepper to taste - ½ cup Parmesan cheese (plus extra for serving) - Fresh basil leaves for garnish - Large pot - Wooden spoon - Measuring cups and spoons - Have all ingredients measured and ready before starting. - Use a pot with a good non-stick surface to prevent sticking. The ingredients play a key role in this dish. The penne pasta serves as a sturdy base. Olive oil adds richness and flavor. Chopped onions and minced garlic bring depth to your sauce. Red pepper flakes add a hint of heat, but you can skip them if you prefer mild flavors. Crushed tomatoes create a smooth, tangy sauce. Vegetable broth gives it body and enhances the tomato taste. Heavy cream makes the sauce creamy and rich. Dried basil and oregano add classic Italian herbs that elevate the dish. Salt and black pepper are important for seasoning. Finally, Parmesan cheese adds a salty, nutty flavor, while fresh basil leaves make a beautiful garnish. For equipment, a large pot is a must. A wooden spoon helps you stir without scratching your pot. Measuring cups and spoons ensure you get your ingredients right. Before you start cooking, I suggest prepping your ingredients. Chop and measure everything. This will make your cooking process smoother. Using a non-stick pot helps keep the pasta from clumping together. Enjoy the cooking journey! First, heat the extra virgin olive oil in a large pot over medium heat. Add the finely chopped onion and sauté it for about 4-5 minutes. You want the onion to become soft and translucent. Next, add the minced garlic and, if you like some heat, stir in the red pepper flakes. Cook for 1-2 minutes to let the garlic release its aroma. Be careful not to burn it. Now, pour in the crushed tomatoes, vegetable broth, and heavy cream. This mix is what makes the sauce creamy and rich. Add the dried basil and oregano for flavor. Stir everything well to combine. This step is key for an even taste throughout the dish. Increase the heat slightly until the mixture comes to a gentle simmer. Once it's simmering, add the penne pasta. Make sure it is fully submerged in the liquid. Cover the pot and let it cook for about 12-15 minutes. Stir occasionally to keep the pasta from sticking. Check for al dente pasta, where it should be firm but not hard. Remove the pot from heat and stir in the freshly grated Parmesan cheese. This makes the dish creamy and cheesy. Taste the pasta and season with salt and freshly ground black pepper as you prefer. If the sauce seems too thick, add a splash of vegetable broth or cream to adjust the consistency. Finally, serve the pasta hot, garnished with fresh basil leaves and a sprinkle of extra Parmesan cheese. Enjoy your meal! For the full recipe, check out the details above. To get a smooth sauce, use fresh cheese. Fresh cheese melts better and avoids lumps. After adding cream, taste the sauce. You might need to adjust the seasoning. A little salt or pepper can really elevate the flavors. While cooking, stir the pasta often. This keeps it from sticking together. Check the pasta for doneness one or two minutes before the time listed. You want it al dente, which means firm to the bite. Feel free to play with spices. Adding Italian seasoning gives your dish a nice twist. For a touch of brightness, add a splash of balsamic vinegar. It lifts the taste and adds depth. For the full recipe, check out the One-Pot Creamy Tomato Pasta Delight. {{image_4}} You can make your pasta heartier by adding protein. - Include cooked chicken or shrimp for more substance. - If you prefer, substitute with vegetarian options like chickpeas. Adding protein boosts flavor and nutrition. If you have leftover chicken, toss it in. Shrimp cooks quickly, so add it last. For a plant-based option, chickpeas add great texture and taste. Want a vegan version? It’s simple! - Use coconut cream instead of heavy cream. - Replace Parmesan cheese with nutritional yeast. Coconut cream gives a nice richness without dairy. Nutritional yeast adds a cheesy flavor. This keeps your dish creamy and delicious. Plus, it’s better for the planet. Change up the pasta for variety. - Experiment with fusilli, rigatoni, or gluten-free options. - Adjust cooking time depending on pasta type. Fusilli and rigatoni hold the sauce well. If you choose gluten-free pasta, follow the package instructions for timing. This keeps your dish tasty and fun! For the full recipe, check out One-Pot Creamy Tomato Pasta Delight. After you enjoy your One-Pot Creamy Tomato Pasta, store any leftovers in an airtight container. This keeps your dish fresh and tasty. For the best flavor, use it within 3-4 days. If you want to save some for later, cool the pasta completely before freezing. It can be frozen for up to 2 months. Just make sure to use a freezer-safe container to avoid freezer burn. When it’s time to eat your frozen pasta, reheat it on the stovetop. Add a splash of broth to keep it creamy. Try to avoid the microwave, as it can make the pasta dry and less tasty. - Prep time: 10 min - Cook time: 15 min - Total time: 25 min - Yes, crushed or diced canned tomatoes work well. They are easy to use and save time. Just pour them in, and you’re good to go! - Pair it with a side salad or garlic bread. A fresh salad adds crunch, while garlic bread brings warmth. Both enhance the meal. - Yes, use gluten-free pasta and check all other ingredients for gluten content. Many brands offer great gluten-free options. - Add more red pepper flakes or a dash of hot sauce while cooking. Adjust to your taste for the perfect heat level. You can make a delicious one-pot creamy tomato pasta with simple steps and key ingredients. From sautéing onions to adding fresh basil, each step builds rich flavors. Remember, adjusting seasonings and using fresh cheese make a big difference. Whether you add protein or make it vegan, this dish suits your taste. Store leftovers smartly or freeze for later. With a total prep and cook time of just 25 minutes, you have an easy meal ready fast. Enjoy your cooking journey and impress family and friends with this tasty pasta!

One-Pot Creamy Tomato Pasta Quick and Simple Recipe

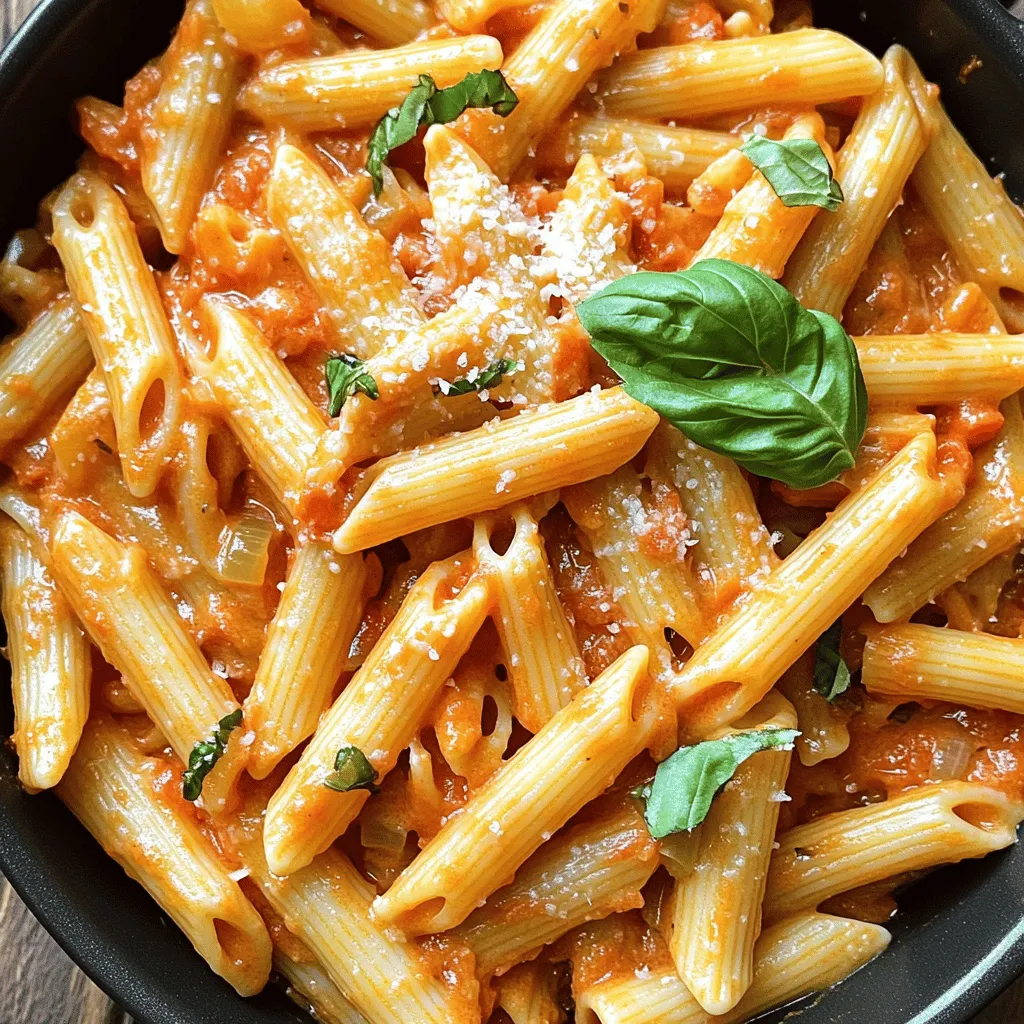
Looking for a quick and tasty dinner? This One-Pot Creamy Tomato Pasta recipe is your answer! In just 25 minutes,

- 1 can (15 oz) chickpeas, thoroughly drained and rinsed - 1 cup quinoa, well-rinsed - 1 cup cherry tomatoes, halved for freshness - 1 cucumber, coarsely diced - 1 ripe avocado, neatly sliced - 2 cups fresh spinach or a mix of seasonal greens The foundation of a Spicy Chickpea Buddha Bowl is its main ingredients. Chickpeas provide protein and fiber. Quinoa adds a nutty taste and complete protein. Fresh vegetables bring color and crunch. Cherry tomatoes burst with sweet flavor. Cucumber cools the bowl, while avocado gives creaminess. Spinach or greens add a fresh touch and nutrients. - 2 tablespoons extra virgin olive oil - 1 teaspoon smoked paprika - 1/2 teaspoon cayenne pepper (adjust according to heat preference) - 1 teaspoon garlic powder - Sea salt and freshly cracked black pepper to taste Spices transform this bowl into a flavor explosion. Smoked paprika adds a warm, smoky taste. Cayenne pepper gives it a spicy kick. Garlic powder enhances the depth of flavor. The olive oil helps the spices stick and adds richness. Sea salt and pepper balance the dish, pulling all the tastes together. - 1/4 cup creamy tahini - 2 tablespoons freshly squeezed lemon juice - Water, as needed to adjust tahini consistency The tahini sauce is the star of this bowl. Tahini adds a nutty creaminess. Lemon juice brightens the sauce with a tangy taste. You may need water to get the right texture. The sauce should be smooth and pourable. It ties all the ingredients together, making each bite delightful. For the full recipe, visit [Full Recipe]. - Preheat the oven: Start by setting your oven to 400°F (200°C). This heat helps to make the chickpeas crispy. - Prepare the quinoa: Rinse 1 cup of quinoa under cold water. This removes any bitter taste. In a medium saucepan, add the quinoa and 2 cups of vegetable broth or water. - Spice and roast chickpeas: In a bowl, mix 1 can of drained chickpeas with 2 tablespoons olive oil, 1 teaspoon smoked paprika, 1/2 teaspoon cayenne pepper, 1 teaspoon garlic powder, and salt and pepper. Toss them until coated. Spread the chickpeas on a baking sheet. Roast for 25-30 minutes, shaking the pan halfway. They should be golden and crispy. - Cook quinoa as per instructions: Bring the quinoa mixture to a boil over medium heat. Once boiling, cover and reduce the heat to low. Let it simmer for about 15 minutes until the quinoa is fluffy and has absorbed all the liquid. - Layering the ingredients: In serving bowls, start with a base of fluffy quinoa. Add fresh spinach, then a generous scoop of roasted chickpeas. Top with halved cherry tomatoes, diced cucumber, and slices of avocado. - Drizzling tahini sauce: In a small bowl, whisk together 1/4 cup tahini and 2 tablespoons lemon juice. Add water to reach a smooth consistency. Drizzle this sauce over your bowl, making it rich and tasty. This recipe is full of flavors and good for you. For the complete instructions, see the Full Recipe. To make your chickpeas crunchy, roasting is key. Here are some tips: - Drain and Rinse: Always drain and rinse the chickpeas well before cooking. This helps remove excess sodium and makes them crispier. - Use Olive Oil: Toss the chickpeas with olive oil. It helps the spices stick, and they roast better. - High Heat: Roast your chickpeas at 400°F (200°C). This temperature gives them a nice crunch. - Shake the Pan: Halfway through roasting, shake the pan. This ensures even cooking. Adjust the heat by changing the cayenne pepper amount. If you like spice, add more. If you prefer milder flavors, reduce it. Spices can be personal. Experiment until you find your perfect balance. Cooking quinoa can be tricky. Here’s how to ensure it’s fluffy and delicious: - Rinse Well: Always rinse quinoa before cooking. This removes a bitter coating called saponin. - Use Broth: For extra flavor, cook quinoa in vegetable broth. It adds depth to the dish. - Water Ratio: Use a 2:1 ratio of liquid to quinoa. This helps it cook evenly and absorb flavors. If you want a twist, try cooking quinoa in coconut milk or tomato juice. These alternatives give new flavors to your Buddha bowl. Presentation makes the meal more fun. Here are some ideas: - Layering: Start with quinoa at the bottom. Add spinach, then top with chickpeas and veggies. This creates a colorful display. - Garnishing: Finish with a drizzle of tahini sauce. Add fresh herbs like cilantro or parsley for a pop of color. - Vibrant Bowls: Use bright bowls that match the meal's colors. It adds joy to your dining experience. For a final touch, sprinkle toasted sesame seeds on top. They add crunch and flavor, making your bowl even more delightful. {{image_4}} You can mix up your grains for a fun twist. Instead of quinoa, try brown rice or farro. Both add great texture and flavor. You can also swap chickpeas for black beans or lentils. Each option brings its own taste. When it comes to vegetables, use what you love or what’s in season. Roasted sweet potatoes, bell peppers, or zucchini work well. Fresh herbs like basil or mint can brighten the bowl. Don't hesitate to get creative! If tahini isn’t your favorite, try a yogurt-based dressing. It adds creaminess and tang. A simple lemon vinaigrette can also work wonders. Combine olive oil, lemon juice, and a pinch of salt for a zesty kick. For added flavor, mix in some crushed garlic or a splash of hot sauce. You can also fold in avocado for an extra creamy texture. These small changes can make a big difference. In summer, use fresh, colorful veggies for a light touch. Think ripe tomatoes, cucumbers, and fresh herbs. These ingredients feel refreshing and bright. In winter, focus on heartier vegetables. Roasted carrots, Brussels sprouts, or butternut squash will warm you up. They’re perfect for a cozy meal that satisfies. You can adjust the spices to match the season too, using warming spices like cumin or cinnamon in cooler months. Remember to check out the Full Recipe for all the details! To keep your spicy chickpea Buddha bowl fresh, follow these steps: - Let the bowl cool to room temperature. - Place leftovers in airtight containers. - Store in the fridge for up to 3 days. I recommend using glass containers. They are great for storing food. They keep flavors intact and are easy to clean. You can freeze both chickpeas and quinoa. Here’s how: - For chickpeas, spread them in a single layer on a baking sheet. - Freeze for 1-2 hours, then transfer to a freezer bag. - For quinoa, let it cool, then scoop into containers or bags. When you want to use them, thaw in the fridge overnight. Reheat chickpeas in the oven. Warm quinoa in the microwave or on the stove. In the fridge, the Buddha bowl lasts about 3 days. Check for signs of spoilage: - Smell: If it smells off, toss it. - Texture: If the greens are slimy, it’s time to let go. - Color: Discoloration is a red flag. Storing it right helps you enjoy every bite of this wholesome meal. A Buddha bowl is a colorful and nutritious meal. It usually has a base of grains, like quinoa. You can add a variety of fresh veggies. Common toppings include chickpeas, nuts, and seeds. The goal is to create a balanced meal. You want to include protein, healthy fats, and fiber. Yes, you can make this recipe vegan. The main ingredients are already plant-based. Just ensure the tahini sauce has no dairy. You can swap any non-vegan items with plant-based options. For example, use vegetable broth instead of chicken broth. To adjust this recipe for meal prep, batch cook your ingredients. Make a larger portion of quinoa and chickpeas. Store them in separate containers. This keeps the flavors fresh. For portion control, use meal prep containers. Divide each component into equal servings. This makes it easy to grab a meal during the week. The chickpeas in this bowl are rich in protein and fiber. They help keep you full longer. Spinach and other greens provide vitamins and minerals. These ingredients also promote good health. Eating a variety of colors boosts nutrition. Each color represents different nutrients. This bowl is not just tasty; it’s a healthy choice too. This blog post covered how to make a Spicy Chickpea Buddha Bowl. We explored key ingredients, spices, and the tahini sauce. The step-by-step guide walked through preparation, cooking, and assembly. I shared tips for perfecting chickpeas and quinoa, plus ideas for variations and storage. In essence, you can create a tasty, healthy dish easily. Experiment with ingredients and find your favorite flavors. This bowl is not just a meal; it’s a canvas for your creativity. Enjoy healthy eating!

Spicy Chickpea Buddha Bowl Flavorful and Nutritious Meal

Are you ready to spice up your meal routine? The Spicy Chickpea Buddha Bowl is packed with vibrant flavors and

Older posts
Newer posts
← Previous Page1 … Page25 Page26 Page27 … Page86 Next →

dsad

© 2026 yumymoments • Built with GeneratePress

Our Policies

  • Copyright Policy
  • Cookie Policy
  • GDPR Policy
  • Privacy Policy
  • Disclaimer
  • Terms Of Use

More Information

  • Home
  • About
  • Contact
  • Appetizers
  • Dessert
  • Dinner
  • Drinks
©2026, yumymoments About Back To Top