Skip to content
DisclaimerTerms Of UseGDPR PolicyCookie Policy

yumymoments

  • Home
  • Drinks
  • Appetizers
  • Dinner
  • Dessert
  • About
  • Contact
  • Privacy Policy
DisclaimerTerms Of UseGDPR PolicyCookie Policy

NO-ING-IMG

- Graham Cracker Crust The base of this pie is a graham cracker crust. You need 1 ½ cups of graham cracker crumbs and ½ cup of unsalted butter, melted. This blend gives the pie a sweet and crunchy start. - Lemon Filling Components For the bright filling, you will use 1 cup of sweetened condensed milk, ½ cup of freshly squeezed lemon juice, and the zest of 2 medium-sized lemons. This mix creates a tart, creamy flavor that shines. You will also need 1 container (8 oz) of whipped topping, thawed. This makes the filling light and fluffy. - Optional Garnishes To make your pie look even better, consider adding fresh lemon slices and mint leaves on top. These garnishes add a splash of color and a hint of freshness to every slice. Each ingredient plays a vital role in making this no-bake lemon icebox pie a refreshing summer treat. Following the Full Recipe will guide you through the simple steps to create this delightful dessert. To start, grab a medium mixing bowl. Combine 1 ½ cups of graham cracker crumbs with ½ cup of melted unsalted butter. Use a fork or spatula to mix until it looks like wet sand. This step is key for a tasty crust. Next, transfer the mixture to a 9-inch pie dish. Press it firmly into the bottom and up the sides. For a smooth finish, use a measuring cup or a glass to compact it well. Now, let’s make the filling. In a clean mixing bowl, add 1 cup of sweetened condensed milk, ½ cup of freshly squeezed lemon juice, and the zest of 2 medium-sized lemons. Whisk them together until smooth. This mix will give your pie a bright, tangy flavor. Next, gently fold in one container (8 oz) of thawed whipped topping. Use a spatula to mix until just combined. This keeps the filling light and fluffy. Pour the lemon filling into your prepared crust. Use a spatula to smooth the top. Cover the pie with plastic wrap or a lid and place it in the fridge. Let it chill for at least 4 hours, or better yet, overnight. This time helps the filling set properly. When you’re ready to serve, you can garnish with fresh lemon slices and mint leaves for a lovely touch. For a complete guide, check out the Full Recipe for all the details! To make your pie shine, focus on your crust. Use fresh graham cracker crumbs for better taste. Mix them well with the melted butter. Aim for a wet sand texture. Firmly press the mixture into your pie dish. This ensures a strong base that holds its shape. Next, let's talk about the filling. Freshly squeezed lemon juice gives the best flavor. The zest also adds a bright taste. When you mix the sweetened condensed milk and lemon, whisk until smooth. This step avoids lumps in your filling. Fold in the whipped topping gently. You want to keep it airy and light. One big mistake is not chilling the pie long enough. The filling needs time to set. Four hours is okay, but overnight is best. This helps the flavors meld and improves the texture. Another mistake is overmixing the filling. If you whisk too hard, you may lose that fluffy texture. Just fold gently until combined. Also, be careful with the crust. If it’s too loose, it won't hold together when serving. To boost the flavor, try adding a pinch of salt to the filling. It enhances the lemon's brightness. You can also experiment with different types of citrus zest. Lime or orange zest can add a nice twist. For a pretty finish, use fresh lemon slices and mint leaves. They not only look great but add a burst of freshness. Serve your pie on bright plates to make it pop. For the full recipe, check out the [Full Recipe]. {{image_4}} You can switch things up with different flavors. Instead of lemon, try lime for a zesty twist. You can also use orange juice for a sweeter taste. Berry flavors work well too! Blend in pureed strawberries or blueberries for a fruity kick. These options keep the pie fresh and exciting all summer long. While a graham cracker crust is classic, you can explore other options. Try using a chocolate cookie crust for a rich taste. A shortbread crust adds a nice buttery flavor. For a gluten-free option, use almond flour or gluten-free cookie crumbs. Each crust brings its own charm and changes the pie's character. Toppings can make your pie shine. Add fresh fruit like berries or slices of kiwi on top. You can also sprinkle crushed nuts for some crunch. Try drizzling honey or a fruit sauce for added sweetness. If you love chocolate, mini chocolate chips mixed in might be your new favorite. Get creative and make your pie unique! For the full recipe, check out the Zesty No-Bake Lemon Icebox Pie . To keep your No-Bake Lemon Icebox Pie fresh, store it in the fridge. Use plastic wrap to cover it tightly. This helps prevent it from absorbing smells. Make sure the pie is chilled before covering. If you want to freeze the pie, here’s how. First, let it chill in the fridge for at least four hours. Then, wrap it well in plastic wrap and foil. This keeps it safe from freezer burn. When ready to enjoy, thaw it overnight in the fridge. This pie stays fresh in the fridge for about five days. After that, the quality may drop. The filling might lose its texture. If frozen, it can last for about two months. Always check for any signs of spoilage before serving. For the best taste, enjoy it sooner rather than later. Yes, you can use bottled lemon juice. However, fresh lemon juice gives the best flavor. Fresh lemons have a bright taste that bottled juice may lack. If you choose bottled, check for 100% lemon juice. You can keep the pie in the fridge for up to five days. Make sure to cover it well with plastic wrap. This keeps the pie fresh and prevents it from absorbing other smells. Absolutely! This pie is great for making ahead. I often prepare it a day or two before serving. This allows the flavors to meld nicely. Just remember to chill it well in the fridge. - Additional Tips for Serving and Enjoyment Serve your pie cold for the best taste. You can add fresh lemon slices and mint leaves on top for a pretty touch. This makes it look festive and fun. If you want a twist, try adding berries on the side! This article covered everything you need for a No-Bake Lemon Icebox Pie. You learned about the key ingredients, from the crust to the filling. The step-by-step instructions ensure you will succeed while perfecting this dessert. I shared tips to avoid common mistakes and explore various flavors. In the end, this pie is easy to make and fun to serve. Enjoy creating this refreshing treat!

No-Bake Lemon Icebox Pie Refreshing Summer Delight

Looking for a simple and refreshing dessert? You’re in the right place! This No-Bake Lemon Icebox Pie is a perfect

- 6 large eggs - 1/4 cup milk (or dairy-free alternative) - 1 cup fresh spinach, chopped - 1 medium zucchini, diced - 1/2 red bell pepper, diced - 1/2 cup cherry tomatoes, halved - 1/4 cup onion, minced - 1/2 cup feta cheese (optional) - Sea salt and black pepper - 2 tablespoons extra virgin olive oil - Fresh basil leaves The Garden Veggie Frittata is a fun dish to make. It uses simple, fresh ingredients. Eggs form the base, while the veggies add color and flavor. You can choose any veggies you like, but I suggest spinach, zucchini, and bell pepper for a tasty mix. To start, gather your eggs, milk, and veggies. The eggs give a rich texture, while the milk makes them creamy. You can use dairy-free milk for a lighter touch. Then, add fresh spinach for a vibrant green. Zucchini adds a nice crunch. The red bell pepper gives a sweet taste. Cherry tomatoes bring a burst of flavor. Don’t forget the onion for its savory base. If you want, add feta cheese. It adds a tangy twist that pairs well with the veggies. For seasoning, use sea salt and black pepper. They enhance the taste without overpowering it. The olive oil helps sauté the veggies until they are tender and fragrant. You can also garnish with fresh basil leaves. They add a lovely aroma and make the dish look pretty. All these ingredients come together to create a frittata that is easy, healthy, and delicious. For the full recipe, check out the details above and start cooking! - Preheat your oven to 375°F (190°C). This step is key for a nice bake. - Gather your fresh veggies and chop them as needed. - Heat 2 tablespoons of olive oil in an oven-safe skillet over medium heat. - Add 1/4 cup of minced onion and cook for 3-4 minutes. It will turn soft and fragrant. - Next, add 1 medium diced zucchini and 1/2 diced red bell pepper. Stir and cook for another 3-4 minutes. - Toss in 1 cup of chopped spinach and 1/2 cup of halved cherry tomatoes. Cook for 2 minutes until the spinach wilts. - In a large bowl, whisk together 6 large eggs and 1/4 cup of milk. - Season this mix with sea salt and black pepper for flavor. - Pour the egg mixture over the cooked veggies in the skillet. Stir gently to mix. - If using, sprinkle 1/2 cup of crumbled feta cheese on top. - Let the frittata cook on the stovetop for about 5 minutes. Watch for the edges to set. - Carefully move the skillet to the preheated oven. Bake for 15-20 minutes. - Check for doneness by inserting a knife into the center. It should come out clean. - Once done, remove the skillet and let it cool for a few minutes before slicing. Follow these simple steps for a delicious frittata. Enjoy your cooking! You can find the Full Recipe for more details. To achieve a fluffy texture, focus on your egg mixture. Whisk the eggs and milk together until frothy. This adds air and lightness. Use room temperature eggs for the best results. They blend better and cook evenly. When pouring the egg mixture over the veggies, do it gently. This helps keep the layers intact and fluffy. Avoid overcooking your frittata. Check it often in the oven. The edges should be set, but the center can be slightly jiggly. It will continue to cook as it cools. Under-seasoning is another issue. Always taste your mixture before baking. A little sea salt and black pepper can make a big difference. Pair your frittata with a fresh salad. A simple green salad adds a nice crunch. You can also serve it with roasted potatoes for a heartier meal. Drizzle some olive oil and lemon over the salad. This brightens the flavors and makes it more enjoyable. Consider adding fresh herbs to your plate, like basil or parsley, for a refreshing touch. {{image_4}} You can easily swap ingredients in your frittata. Try using different veggies or cheeses. Instead of spinach, use kale or Swiss chard. You might like mushrooms or asparagus in place of zucchini. For cheese, goat cheese adds a nice touch. Cheddar or mozzarella can also work well. These swaps let you create a dish that fits your taste. If you need a vegan option, replace eggs with chickpea flour. Mix it with water to create a batter. Use your favorite plant-based milk instead of dairy milk. Skip the cheese or use a vegan cheese for creaminess. This way, everyone can enjoy a tasty frittata. Add herbs or spices to boost flavor. Fresh basil or parsley can brighten the dish. For a kick, try red pepper flakes or smoked paprika. A pinch of garlic powder adds depth. Experiment and find your perfect blend. These small changes can take your frittata to the next level! To keep your frittata fresh, choose a glass or plastic container with a lid. Make sure the frittata cools at room temperature before covering it. You can store it in the fridge for up to three days. If you have more to save, you can cut it into slices for easy access later. To enjoy your frittata again, reheat slices in a skillet over low heat. This method keeps it from drying out and helps maintain the texture. You can also use the microwave, but cover it with a damp paper towel. This keeps moisture in, making it soft and tasty. If you need to freeze the frittata, wait until it cools completely. Wrap each slice in plastic wrap and place them in a freezer bag. Press out as much air as you can before sealing. When you want to eat it, thaw it overnight in the fridge. Reheat it in the oven at 350°F (175°C) for about 15-20 minutes for the best results. A frittata and an omelet differ in a few key ways. First, a frittata cooks more slowly. You mix the eggs with the veggies before cooking. For an omelet, you cook the eggs first. Second, frittatas use more filling than omelets. They often have various vegetables, meats, or cheeses mixed in. Lastly, frittatas bake in the oven, while omelets stay on the stovetop. This gives frittatas a fluffy, light texture. Yes, you can make a Garden Veggie Frittata ahead of time. Meal prepping is a smart way to save time. Cook the frittata, let it cool, and slice it. Store the slices in an airtight container in the fridge. It will last about three days. You can reheat it in the oven or microwave. This makes it easy to grab a slice when you're busy. To know when your frittata is done, look for a few signs. The edges should be set and slightly firm. The center should puff up and not jiggle when you shake it. You can also test it with a knife. Insert the knife into the center; it should come out clean. These signs show that your frittata is perfectly cooked. To make the Garden Veggie Frittata Delight, use the following ingredients: - 6 large eggs - 1/4 cup milk (or your choice of dairy-free alternative) - 1 cup fresh spinach, roughly chopped - 1 medium zucchini, diced into small cubes - 1/2 red bell pepper, diced - 1/2 cup cherry tomatoes, halved - 1/4 cup onion, finely minced - 1/2 cup feta cheese, crumbled (optional for a tangy twist) - 2 tablespoons extra virgin olive oil - Sea salt and freshly ground black pepper to taste - Fresh basil leaves for a fragrant garnish (optional) Follow the detailed recipe for the Garden Veggie Frittata Delight 🥕 to create this tasty dish. This blog post guides you through making a tasty Garden Veggie Frittata. You learned about key ingredients, step-by-step cooking, and helpful tips. Remember to avoid overcooking and explore ingredient swaps for variety. Proper storage and reheating methods will help keep your frittata fresh. You can prepare this dish in advance, making it perfect for busy days. Enjoy your delicious and healthy frittata, packed with flavor and nutrients. It’s easy to customize, so get creative and have fun in the kitchen!

Garden Veggie Frittata Tasty and Easy Dish

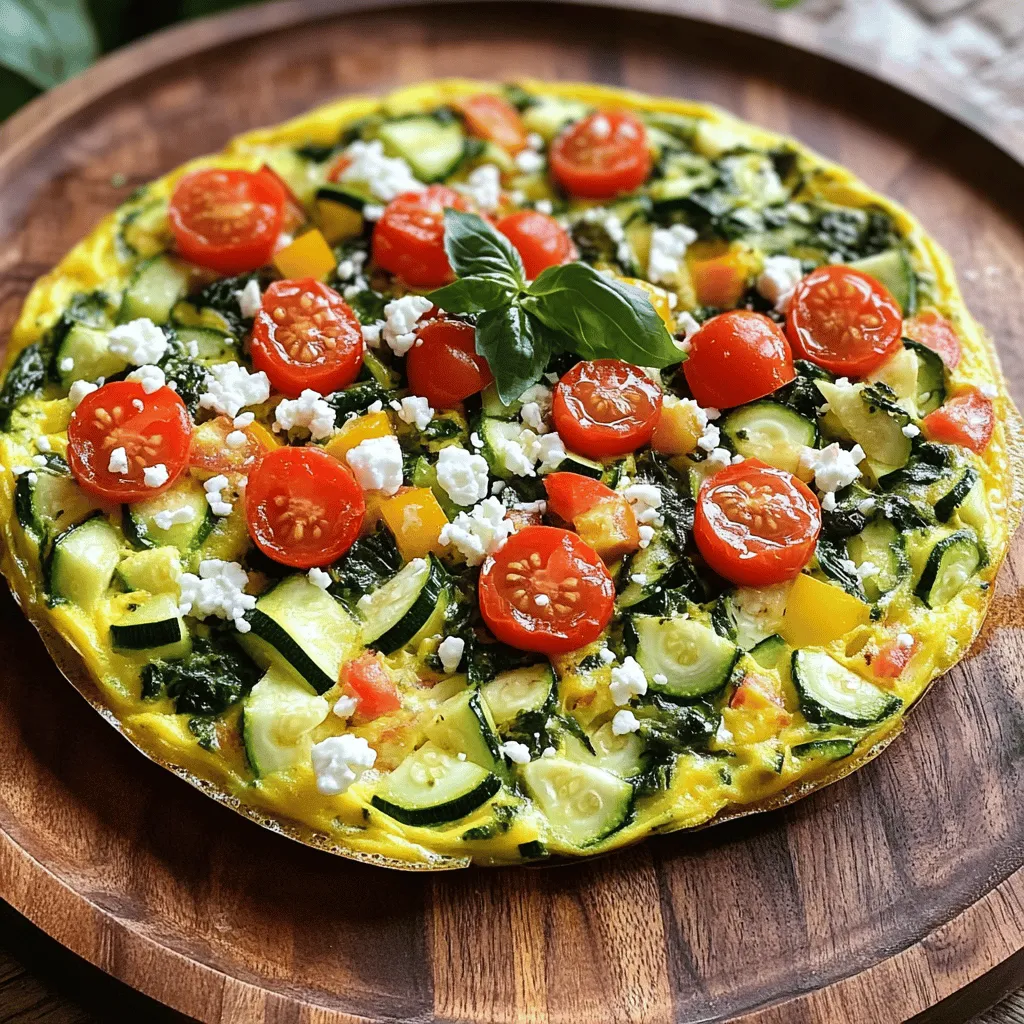
Are you ready to brighten your meals with a delicious Garden Veggie Frittata? This dish combines fresh veggies and fluffy

- 3 ripe peaches, peeled and diced into small cubes - 1 small red onion, finely chopped - 1 red bell pepper, diced - 1 jalapeño, deseeded and minced - 1/4 cup fresh cilantro, finely chopped - 2 tablespoons fresh lime juice - 1 tablespoon honey (optional) - Salt, to taste What are the signs of ripe peaches? Ripe peaches feel slightly soft when you gently squeeze them. They also have a sweet smell. Look for a nice yellow color, with some red blush on the skin. When is the best time to buy peaches? Peaches are usually best in the summer months. Late summer gives you the sweetest peaches. Check your local farmers' market for the freshest picks. How should I store peaches for peak ripeness? Store peaches at room temperature to ripen. Once they are ripe, keep them in the fridge to slow down ripening. Use them within a few days for the best taste. First, peel the ripe peaches. Use a sharp knife to make it easy. After peeling, chop the peaches into small cubes. This helps them mix well. Place the diced peaches into a large mixing bowl. Next, finely chop the red onion. Add the onion to the bowl with the peaches. Then, dice the red bell pepper and mince the jalapeño. Mix both into the bowl with the other ingredients. Lastly, finely chop the fresh cilantro. Gently fold it into the salsa mixture for even flavor. Letting the salsa rest is key for great taste. After mixing, cover the bowl and let it sit for at least 15 minutes. This allows the flavors to blend together. The salt draws out juices from the fruits and veggies, making it even tastier. You’ll notice the salsa tastes better after resting. For serving, use a colorful bowl to show off the vibrant colors of the salsa. Pair it with crispy tortilla chips for a fun snack. You can also use this salsa as a topping for grilled chicken or fish. To make it even more appealing, garnish with sprigs of cilantro and lime wedges. It makes your dish look fresh and inviting. Enjoy the fiesta of flavors! Adjusting sweetness and acidity If your salsa is too sweet, add lime juice. This brightens the taste. If it feels too sour, mix in more diced peaches. Honey can also help if you want to balance flavors. Balancing flavors when too spicy If your salsa is too spicy, try adding more diced peaches or bell pepper. You can also add a dollop of sour cream, which cools the heat. Taste as you go, and adjust slowly. Best practices for dicing peaches and vegetables Always use a sharp knife for clean cuts. Cut the peaches in half, remove the pit, and peel them. Dice them into small cubes for even mixing. For onions and peppers, cut them into small pieces. This helps the flavors blend well. Knife skills tips for precision Hold the knife firmly and use a rocking motion to chop. Keep your fingers curled back to stay safe. Practice makes perfect, so take your time to improve your skills. Optional ingredients to experiment with Try adding mango or pineapple for a tropical twist. You can also include diced cucumbers for crunch. Each adds a new layer of flavor, making your salsa unique. Herbs and spices that complement peach salsa Fresh basil or mint can brighten the taste of your salsa. A pinch of cumin or smoked paprika adds warmth. Experiment with these to find your favorite mix. {{image_4}} You can switch up the fruits in your salsa. Try using nectarines or plums for a fun twist. They bring a sweet and juicy flavor just like peaches. For a bit of heat, use different peppers. Instead of jalapeño, try serrano or even a sweet bell pepper. Each pepper adds its own unique taste. You can also swap the red onion for green onions or shallots. This change gives a milder flavor. Feel free to mix and match based on what you have at home. These small swaps can make a big difference. Have fun with themed salsas! For a tropical peach salsa, add diced mango. The mix of peaches and mango creates a sweet and zesty dip. You can also try a smoky peach salsa. Just add chipotle peppers for a spicy twist. This version is great for BBQs and adds a nice kick. These themed variations are always a hit at parties. They show off your creativity while keeping the fresh taste of summer. Adjust your ingredients based on the seasons. In spring, add fresh herbs like basil or mint. In the fall, consider adding apples for a crisp taste. You can also include vegetables that are in season. Try corn or zucchini in the summer for extra crunch. Using seasonal fruits and vegetables not only boosts flavor but also keeps your salsa fresh and exciting. Enjoy the different tastes that each season brings! To keep your fresh peach salsa tasty, store it in a clean, airtight container. A glass jar or plastic food container works well. Keep your salsa in the fridge right after making it. This helps maintain its zesty flavor and vibrant colors. Make sure the lid fits snugly to keep out air. Air can cause the salsa to spoil faster. If you plan to use it later, store it as soon as you can. Fresh peach salsa lasts about 3 to 5 days in the fridge. After this time, it may not taste as good. Always check the smell and look of your salsa before eating it. Freezing salsa is an option, but it can change the texture. If you freeze it, use it within 3 months for best flavor. Thaw it in the fridge before using. Before eating your salsa, look for signs of spoilage. If it has a bad smell or strange color, it's best to throw it away. Mold is also a clear sign that the salsa is no longer safe to eat. Stick to these safe consumption guidelines: - Always check for mold - Smell it to detect off odors - If in doubt, throw it out Enjoy your peach salsa and keep it fresh! For the full recipe, click here. Yes, you can make peach salsa ahead of time. To keep it fresh, store it in the fridge in an airtight container. The best practice is to mix your salsa one to two hours before serving. This allows the flavors to blend without getting too mushy. If you want to maximize freshness, add ingredients like lime juice just before serving. This helps keep the peaches bright and tasty. Peach salsa pairs well with many dishes. You can serve it with tortilla chips for a crunchy snack. It also goes great on grilled chicken or fish, adding a sweet and spicy kick. For a unique twist, try it over tacos or as a topping for burgers. You can even mix it into a fresh salad for extra flavor. You can use frozen peaches, but they may change the salsa's texture. Frozen peaches often become mushy when thawed. To get the best results, thaw them in the fridge overnight. This way, they stay firmer. When using frozen peaches, drain any excess juice before mixing them into your salsa. This keeps your salsa from becoming watery. For the complete recipe, check out the [Full Recipe](#). This will guide you through the steps to create your own vibrant peach salsa. Enjoy making this delicious dish! In this post, we explored how to make a fresh peach salsa. We covered ingredients, preparation steps, and tips for presenting your dish. Plus, I shared ways to fix common issues and suggested fun variations. Remember, ripe peaches make the best salsa, and storing it correctly keeps it fresh. Enjoy your cooking adventure! With these tips, your salsa will impress and delight everyone.

Fresh Peach Salsa zesty and vibrant summer dip

Summer is here, and it’s time for bright, bold flavors! My Fresh Peach Salsa combines the sweetness of ripe peaches

- 4 medium cucumbers, thinly sliced into rounds - 1 cup apple cider vinegar - 1 cup granulated sugar - 1 tablespoon kosher salt - 1 teaspoon mustard seeds - 1 teaspoon dill seeds - 1 teaspoon garlic powder - 1/2 teaspoon red pepper flakes (optional for a spicy kick) - 1/2 onion, thinly sliced - Fresh dill sprigs for garnish Sweet and tangy refrigerator pickles burst with flavor. Each bite offers a mix of crunch and zest. I love how simple ingredients can create such a delightful treat. The cucumbers provide a refreshing bite. The apple cider vinegar adds tanginess. Sugar balances the sharpness with sweetness. Kosher salt enhances the flavors while helping preserve the pickles. Mustard seeds and dill seeds introduce unique flavors. Garlic powder gives an extra layer of depth. Red pepper flakes add a spicy touch if you want heat. Onions bring an aromatic sweetness. Fresh dill sprigs elevate the taste and look of the pickles. Use high-quality ingredients for the best flavor. For a full recipe, check out the link. Enjoy making these pickles and savor the flavor explosion! To make the brine, start with a bowl. Pour in 1 cup of apple cider vinegar. Next, add 1 cup of granulated sugar and 1 tablespoon of kosher salt. Stir this mixture well. You want the sugar and salt to dissolve completely. This brine will give your pickles their sweet and tangy flavor. Now, let’s spice things up! Add 1 teaspoon of mustard seeds, 1 teaspoon of dill seeds, and 1 teaspoon of garlic powder. If you like heat, sprinkle in 1/2 teaspoon of red pepper flakes. Mix everything again. The spices will add depth to the brine. Now it’s time to prepare the cucumbers and onion. Take 4 medium cucumbers and slice them into thin rounds. You want them to be about 1/4 inch thick. Then, slice 1/2 onion thinly as well. Grab a clean glass jar. Start layering the cucumber slices and onion slices alternately. This way, every bite will have a mix of flavors. Once the jar is full, carefully pour the brine over the veggies. Ensure all the slices are submerged. This helps the pickles absorb all those delicious flavors. Next, seal the jar tightly with its lid. Give it a gentle shake to mix everything together. Now, place the jar in the refrigerator. The pickles need to marinate for at least 24 hours. For the best flavor, let them rest for 48 hours. After waiting, your sweet and tangy refrigerator pickles are ready to enjoy. For an extra touch, add fresh dill sprigs before serving. This will make your pickles look great and taste even better. For the full recipe, check out the complete instructions. To make sweet and tangy refrigerator pickles, you want full flavor. This means you must submerge the cucumbers in the brine. If they float, they won't absorb all the tangy goodness. I like to place a small weight on top. A clean, heavy lid or a small jar can do the trick. Recommended marination time: Let the cucumbers soak in the brine for at least 24 hours. For the best taste, wait 48 hours. This gives the flavors time to mingle and deepen. Using fresh ingredients is key. Choose firm cucumbers and vibrant onions. Freshness impacts both taste and crunch. Tips for cleaning jars: Start by washing the jars with hot, soapy water. Rinse them well. Then, you can also sterilize them. Place them in boiling water for a few minutes. This step ensures no bad bacteria spoil your pickles. By following these tips and tricks, you can create the perfect sweet and tangy refrigerator pickles that burst with flavor! {{image_4}} You can change the spice level of your pickles easily. Just add different chili peppers for heat. For a mild kick, use sweet peppers. For more heat, try jalapeños or serranos. You can chop them finely and mix them into the brine. You can also infuse your pickles with herbs like thyme or rosemary. Just add a few sprigs to the jar. These herbs will give your pickles a fresh, earthy flavor. It’s fun to experiment with different combinations until you find your favorite! Not everyone loves sweet pickles. You can reduce the sugar in the recipe for less sweetness. Start with half the sugar and taste as you go. Adjust until it suits your taste buds. You can also explore alternative sweeteners. Consider using honey or maple syrup. These options add unique flavors and can be healthier. Make sure to balance the sweet with the tangy for the best results. For the full recipe, check the Sweet and Tangy Refrigerator Pickles section. Enjoy making your pickles truly your own! To keep your sweet and tangy refrigerator pickles fresh, choose the right container. A clean glass jar with a tight lid works best. Glass helps keep the pickles crisp and tasty. Avoid plastic containers because they can trap air and cause spoilage. Next, store your jar in the coldest part of your fridge. The ideal temperature is around 35°F to 40°F. This prevents bacteria growth and keeps flavors intact. How long do the pickles last? When stored properly, sweet and tangy refrigerator pickles can last up to four weeks. Their taste will get better as they sit. Look for signs of spoilage. If you see mold or smell something off, it’s best to toss them. Also, if the pickles become soft or mushy, they are no longer good. Always trust your senses for the best experience when enjoying your pickles. Yes, you can! Try carrots, radishes, or green beans. All these veggies work great. Just slice them thinly like cucumbers. You can even mix different vegetables for fun. Each will bring its own taste and crunch. The pickles need at least 24 hours in the fridge. However, I recommend waiting 48 hours. This time helps the flavors blend well. The longer they sit, the tastier they become. You can even taste one after 24 hours to check, but patience pays off! Canning is different from refrigeration. These pickles are best for quick storage. Canning involves heat to seal jars for long use. If you want long-term storage, you should follow proper canning methods. This recipe is all about fresh flavors, so stick to refrigeration for the best taste. No problem! You can swap spices based on what you have. For mustard seeds, use celery seeds. Dill seeds can be replaced with fresh dill. Garlic powder is easy to replace with fresh garlic, just chop it finely. Get creative with what you have on hand! These pickles shine as a side dish. Serve them with sandwiches or burgers for a zesty crunch. You can also add them to salads for extra flavor. Try them as a snack on their own, or with cheese and crackers. They are fun and versatile! This post covered how to make sweet and tangy refrigerator pickles. You learned about ingredients like cucumbers, vinegar, and spices. I shared steps to prepare the brine, layer the ingredients, and marinate the pickles. I also included tips for flavor, variations for spice, and best storage practices. Making these pickles is simple and fun. You can adjust flavors to suit your taste. Enjoy your homemade pickles in many tasty ways!

Sweet and Tangy Refrigerator Pickles Flavor Explosion

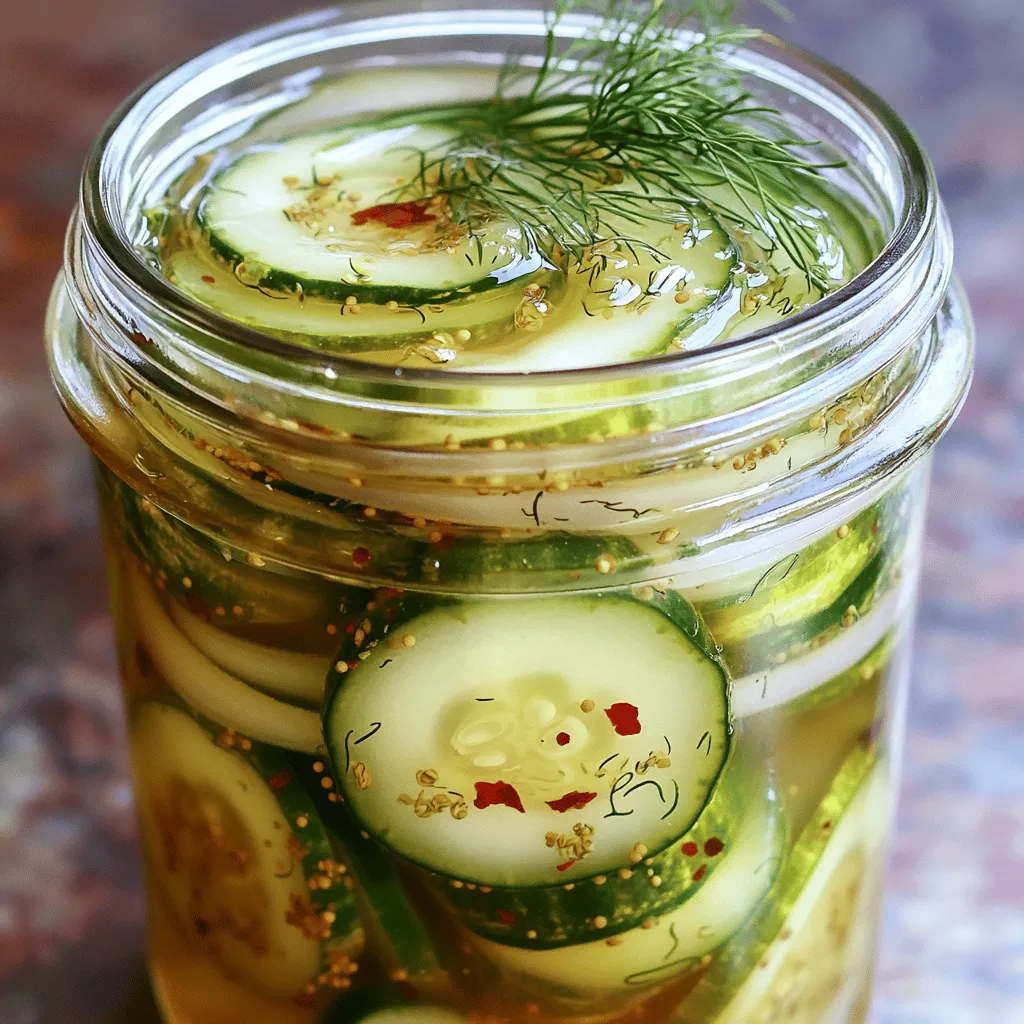
Are you ready to add a burst of flavor to your meals? My Sweet and Tangy Refrigerator Pickles bring that

For this recipe, you'll need 1 pound of fresh okra. Look for firm, bright green pods. Trim the stems but leave the okra whole. This keeps the texture crunchy and fun to eat. To make your pickled okra pop, gather these spices: - 4 cloves garlic, smashed - 1 teaspoon red pepper flakes (you can adjust this based on how spicy you like it) - 1 tablespoon pickling salt - 1 teaspoon mustard seeds - 1 teaspoon whole black peppercorns These ingredients add layers of flavor to your dish. The garlic gives a strong aroma, while the red pepper flakes add the heat that makes it special. Now, let's talk about the brine. It’s key to the pickling process. For this, you will need: - 1 cup distilled white vinegar - 1 cup water - 1 tablespoon granulated sugar This mix balances tartness and sweetness. The vinegar acts as a preservative, while the sugar rounds out the flavors. For the full recipe, check out the link above. Happy pickling! Start by rinsing the fresh okra. Use cold water to wash off any dirt. Next, trim the stems carefully. Keep the okra whole for that nice crunch. This step is key to a great texture. In a medium saucepan, mix the distilled white vinegar, water, granulated sugar, and pickling salt. Heat the mix over medium heat. Stir it often until the salt and sugar dissolve completely. Once it boils, take it off the heat and let it cool for about ten minutes. Cooling the brine helps keep that crispy texture we love. Grab your sterilized canning jars. Place the smashed garlic cloves, red pepper flakes, mustard seeds, and black peppercorns in each jar. Then, pack the okra tightly into the jars. Leave about an inch of space at the top for the brine. Carefully pour the cooled brine over the okra until they are fully submerged. If needed, add more vinegar or water to cover them well. Seal the jars with their lids and let them cool on the counter. After cooling, put them in the fridge for at least 24 hours. This waiting time allows the flavors to blend. The pickles will taste even better after a few days. You can find the full recipe for more details. To keep your okra crunchy, start with fresh, young pods. Look for pods that are bright green and firm. Avoid any that are soft or blemished. When rinsing, do not soak them for long. Trim the ends but leave the okra whole. After cooking the brine, let it cool for about ten minutes. This helps the okra stay crisp. Always pack the okra tightly in jars but don’t squish them. Leave space for the brine to circulate. You can easily change the spice level of your pickled okra. If you want more heat, add extra red pepper flakes. For less spice, reduce the amount. You can also add sliced jalapeños or other peppers to the jars. Just remember, the flavor gets stronger over time. Taste the brine before pouring it over the okra. This way, you can adjust it to your liking. Sterilizing jars is key for safe pickling. Start by washing the jars and lids in hot, soapy water. Rinse well and place them in a pot of boiling water for ten minutes. This kills any germs. Let them air dry on a clean towel. You can also put them in the oven at 225°F for about 15 minutes. Make sure they are hot when you fill them with okra. This keeps your pickles safe and tasty. For the full recipe, check out the Spicy Garlic Pickled Okra section. {{image_4}} You can change the heat of your spicy garlic pickled okra easily. If you want a milder taste, reduce the red pepper flakes to half a teaspoon. You can also use sweet peppers for a gentler kick. For more spice, add sliced jalapeños or even habaneros. Just remember, a little goes a long way. Adjusting heat lets you enjoy this snack just the way you like it! Herbs can add depth to your pickled okra. Dill is a classic choice, giving a fresh taste. You can also try thyme or rosemary for a unique flavor twist. Just add a few sprigs to your jars before pouring in the brine. The herbs will infuse as the okra pickles, creating a zesty treat packed with flavor. While okra shines in this recipe, you can pickle other veggies too! Try cucumbers for a classic crunch or carrots for a sweet bite. Green beans and cauliflower also work well. Just cut them to fit your jars and follow the same brining steps. Each veggie brings its own flavor, making this recipe versatile and fun! For the full recipe, check out the details above. Store your spicy garlic pickled okra in the refrigerator. Keep it in a cool, dark place. Make sure the jars are sealed tightly to prevent spoilage. Avoid exposing them to direct sunlight. When stored properly, spicy garlic pickled okra lasts about 2 to 3 months in the fridge. The flavors deepen and get better over time. However, for the best taste, enjoy them within the first month. For long-term storage, consider canning the okra. Use sterilized jars to keep them fresh. Ensure the brine fully covers the okra. This helps prevent spoilage and keeps them crunchy. Always check for signs of spoilage before eating. If the jar is bulging or leaking, discard it immediately. It takes about 2 days to pickle okra properly. You need to allow the okra to sit in the brine for at least 24 hours. This time helps the flavors blend well. After that, the taste improves over the next few days. I do not recommend using frozen okra. Frozen okra loses its crunch and texture. Fresh okra gives the best results. If you can find fresh, use it for a crispier pickle. You can find pre-made spicy garlic pickled okra at many grocery stores. Check the international or pickle aisle. Local farmers' markets may also sell homemade versions. Online shops often offer diverse brands too. Pickled okra is low in calories and high in fiber. It helps with digestion and keeps you full. It also contains vitamins A, C, and K. The probiotics from fermentation can boost gut health. Enjoying this snack can be a tasty way to eat healthy! We covered how to pickle okra, from ingredients to storage. Fresh okra, the right spices, and a solid brine work wonders. Remember to pack jars tightly for a good crunch. Play with spices to fit your taste, and try other veggies too. Store them correctly to keep their flavor and crispness. Hopefully, you feel ready to enjoy homemade pickled okra!

Spicy Garlic Pickled Okra Crunchy and Zesty Treat

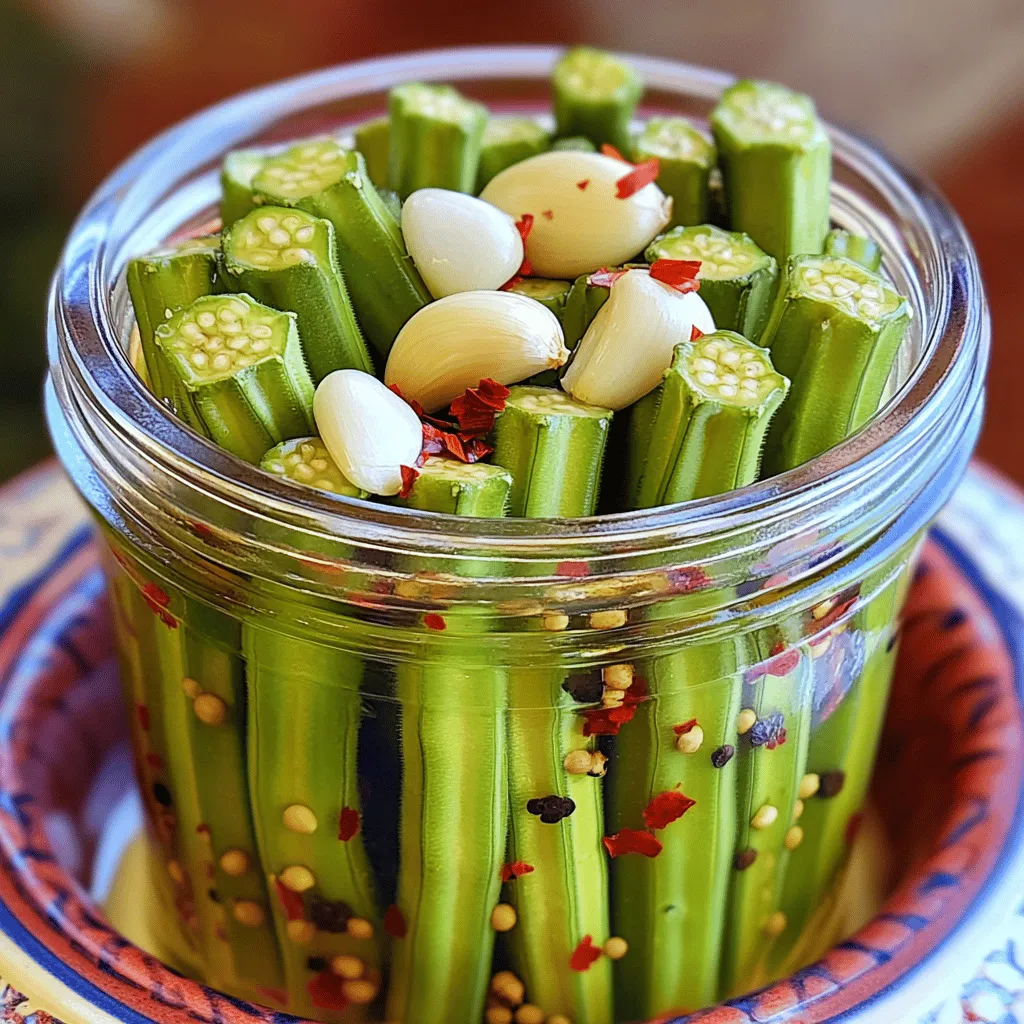
If you crave a crunchy, zesty snack, Spicy Garlic Pickled Okra is for you! This easy recipe packs flavor and

- 2 medium zucchinis - 1 cup panko breadcrumbs - ½ cup finely grated Parmesan cheese - 2 large eggs - Garlic powder - Onion powder - Paprika - Salt - Pepper To make crispy zucchini fries, you need fresh zucchinis. Choose ones that feel firm. The panko breadcrumbs give a great crunch. They are light and airy, perfect for frying. Parmesan cheese adds a nutty flavor. It also helps the coating stick to the fries. You will need two eggs for the egg wash. This step helps the breadcrumbs stick better. Garlic powder and onion powder add depth. Paprika gives a nice smokiness. Adjust salt and pepper to your taste. - Herbs and spices for extra flavor - Various dipping sauces Feel free to play with herbs. You can use dried thyme, basil, or oregano for a twist. Dipping sauces also add fun. Try ranch, marinara, or a spicy mayo. Each sauce can change the way you enjoy your fries. For the full recipe, check the detailed instructions above. First, you need to cut the zucchinis into fry shapes. Aim for long, thin strips. This helps them cook evenly. Next, set up your workstations. You’ll need a clean area for cutting, one for coating, and a baking sheet ready for the fries. Now, let's prepare the egg wash. In a bowl, beat the two eggs until they are mixed well. This will help the crumbs stick better. Next, mix your breadcrumb coating. In another bowl, combine the panko breadcrumbs, grated Parmesan cheese, garlic powder, onion powder, paprika, salt, and pepper. Stir this mix until everything is evenly blended. Before baking, preheat your oven to 425°F (220°C). Line a baking sheet with parchment paper to prevent sticking. Once your oven is hot, arrange the coated fries on the sheet. Place them in a single layer, making sure they do not overlap. This ensures they cook properly. Lightly spray the tops with olive oil for that golden finish. Bake the fries for 20-25 minutes. Remember to turn them halfway for even cooking. They should be golden brown and crispy when done. Enjoy them fresh out of the oven with your favorite dipping sauce! To get the best crunch from your zucchini fries, use panko breadcrumbs. Panko is lighter and airier than regular breadcrumbs, which helps them crisp up nicely. Here’s how to ensure even cooking: - Cut evenly: Make sure to cut the zucchinis into uniform fry shapes. This allows them to cook at the same rate. - Don’t overcrowd: When placing the fries on the baking sheet, space them out. Overlapping them traps moisture and makes them soggy. - Flip halfway through: Turning the fries halfway during cooking helps them brown evenly on all sides. When serving your crispy zucchini fries, presentation matters. Here are some ideas to make your dish pop: - Use a colorful plate: Choose a plate that contrasts with the golden color of the fries. This makes them stand out. - Arrange in a stack: Stack the fries in a small pile for a fun look. You can also place them in a cone-shaped paper holder for a casual vibe. Pair your fries with favorite dipping sauces. Ranch, marinara, or spicy aioli all work great. Dipping not only adds flavor but also makes eating more fun. You can find the full recipe for making these tasty bites and impress your family or guests. {{image_4}} You can switch up the cheese in this recipe. Try using mozzarella for a gooey, stretchy bite. Alternatively, go with cheddar for a sharp taste. You could even mix a few kinds for a fun twist. If you need gluten-free options, use crushed gluten-free crackers instead of panko breadcrumbs. You can also try almond flour for a nutty flavor. Each option gives a new texture and taste. Want to add some spice? Try adding cayenne pepper or chili powder to the breadcrumb mix. This gives your fries a nice kick. You can also add Italian seasoning for a herbaceous taste. Fresh herbs can make a big difference, too. Chop some parsley or basil and mix it into the breadcrumbs. This not only adds flavor but also makes your dish look beautiful. You can really make these fries your own! To keep your crispy zucchini fries fresh, cool them completely before storing. This step helps prevent moisture buildup, which can lead to sogginess. Place the fries in an airtight container. This method keeps them from drying out or absorbing odors from other foods. When it’s time to enjoy your leftover fries, reheat them in the oven. Set your oven to 375°F (190°C). This temperature helps restore their crunch. Spread the fries in a single layer on a baking sheet. Bake for about 10-15 minutes until they are warm and crispy again. Avoid using the microwave, as it can make them soggy. Enjoy your crispy zucchini fries just like they were fresh! For the full recipe, check the section above. To keep zucchini fries crispy, start with the right zucchini. Choose firm zucchinis. Look for those that feel heavy for their size. Avoid soft or overly large zucchinis, as they can be watery. Cut the zucchini into even fry shapes. This helps them cook evenly and reduces sogginess. After cutting, sprinkle them lightly with salt. Let them sit for about 10 minutes. This draws out extra moisture. Pat them dry with a paper towel before coating. This step is key to achieving that perfect crunch. Yes, you can fry zucchini fries! Frying gives them a different texture and taste. To fry, heat oil in a pan over medium heat. Dip the coated fries in hot oil, cooking in batches. Fry until golden, about 2-3 minutes per side. However, frying adds more fat and calories. If you want a lighter option, stick to baking. Baking still gives you crispy, flavorful fries. Zucchini fries are versatile and pair well with many dips. Here are some favorites: - Ranch dressing - A classic and creamy choice. - Marinara sauce - A tangy option for a fun twist. - Garlic aioli - Adds a rich, garlicky flavor. - Honey mustard - A sweet and tangy dip that complements the fries. Feel free to get creative! You can mix dips or try new flavors. Enjoy your crispy zucchini fries with a tasty sauce for the best experience. For the complete dish, check out the Full Recipe. This post covered how to make crispy zucchini fries. We talked about essential ingredients, like zucchini and panko. You learned step-by-step instructions for coating and baking. I shared tips for crispiness and how to store leftovers. In closing, these fries are fun to make and eat. You can add your own twist with spices or sauces. With simple steps, you'll create a tasty snack everyone will love. Enjoy your cooking!

Crispy Zucchini Fries Packed with Flavor and Crunch

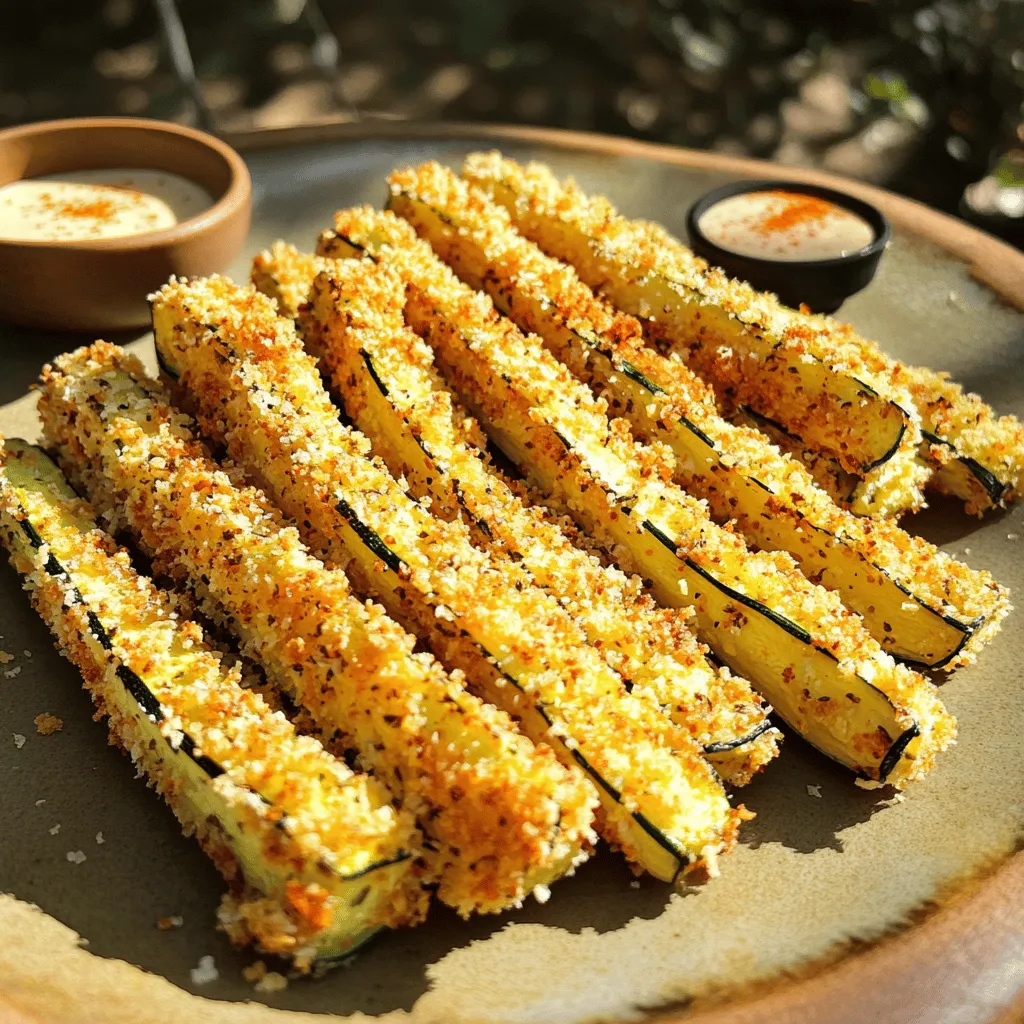
Are you ready to enjoy a tasty snack that’s both crispy and healthy? These Crispy Zucchini Fries are not just

To make a delicious summer squash gratin, you need some key ingredients. Each part adds its own flavor, creating a dish you will love. - Summer Squash and Zucchini - 3 medium yellow summer squash, thinly sliced - 2 medium zucchinis, thinly sliced - 1 small onion, finely chopped - 2 cloves garlic, minced - Dairy and Cheese Components - 1 cup heavy cream - 1 cup shredded Gruyère cheese - 1/2 cup grated Parmesan cheese - Seasoning and Toppings - 1 teaspoon fresh thyme leaves (or 1/2 teaspoon dried thyme) - Salt and pepper to taste - 1 tablespoon olive oil - 1/2 cup breadcrumbs (for topping) - 1 tablespoon fresh parsley, chopped (for garnish) Each ingredient plays an important role. The squash gives a fresh taste and texture. The cheeses add creaminess and a rich flavor. Thyme brings a lovely herb note. Don't forget the breadcrumbs for a crispy topping! For the full recipe, check the detailed instructions on how to prepare this tasty dish. Prepping the Vegetables Start by washing the summer squash and zucchini. Slice them thinly. This helps them cook evenly. Next, chop the onion finely and mince the garlic. Heat olive oil in a skillet over medium heat. Add the onion first. Sauté it for about 3-4 minutes until soft. Then, add the minced garlic and cook for another minute. Stir well to avoid burning. Now, add the sliced squash and zucchini. Cook them for 5-7 minutes. Season with salt, pepper, and fresh thyme. Mixing the Cream and Cheese Sauce In a large bowl, whisk together the heavy cream, half of the shredded Gruyère cheese, and half of the Parmesan cheese. Mix well. Season the mixture with a pinch of salt and pepper. This creamy sauce adds richness to the gratin. Creating the Base Layer Grease a 9x13-inch baking dish. Spread half of the sautéed vegetables in the bottom. Make sure they form an even layer. This is your base layer for the gratin. Adding the Cream Mixture Now, pour half of the cream mixture over the vegetables. Ensure it covers them evenly. This will make the layers rich and flavorful. Repeat the process with the remaining vegetables, creating another layer. Finally, pour the rest of the cream mixture on top. Setting the Oven Temperature Preheat your oven to 375°F (190°C). This temperature will help the gratin cook evenly and brown nicely. Baking Time and Techniques Bake the gratin for 25-30 minutes. Keep an eye on it. You want the top to turn golden brown and bubble. This shows it's ready. Once done, let it rest for 5 minutes before serving. This helps it set for easier serving. You can find the Full Recipe for complete details. To make your gratin just right, focus on the texture first. You want it creamy and smooth but not too watery. Here are some tips: - Use fresh squash: Fresh veggies have the best flavor. - Slice thinly: Thin slices cook evenly and blend well. - Sauté well: Cook the veggies until soft before layering. Common mistakes can ruin your dish. Avoid these: - Skipping seasoning: Salt and pepper boost flavor. Don't forget to use them. - Overcrowding the pan: Cook in batches if needed. This helps even cooking. - Not resting before serving: Let it sit for 5 minutes. This helps it set. Pair your gratin with great sides. Here are some ideas: - Grilled meats: Chicken or steak work well. - Salads: A fresh green salad adds contrast. - Crusty bread: Serve with a baguette for a full meal. For presentation, keep it simple and pretty: - Rustic serving: Serve it in the baking dish for a homey feel. - Individual servings: Scoop onto plates and garnish with parsley. This adds color and charm. These tips will help you create a delightful dish. You can find the Full Recipe for more details. Enjoy your cooking! {{image_4}} Different Cheeses to Use You can change the cheese for more flavor. Instead of Gruyère, try mozzarella for a milder taste. Cheddar adds a sharp kick, while goat cheese gives a creamy touch. Mix different cheeses for a unique twist. Always remember, cheese makes the gratin richer and tastier. Vegetable Alternatives Feel free to swap summer squash and zucchini. Eggplant is a great option with a similar texture. Bell peppers add sweetness, and mushrooms bring umami. Carrots can add color and crunch. Use what you have on hand for the best flavor. Herbs and Spices to Consider Herbs brighten up your dish. Basil can add a fresh note, while rosemary gives depth. Oregano brings warmth, and red pepper flakes add spice. Experiment with fresh or dried herbs to find your favorite mix. Adding Protein Options Boost the gratin’s heartiness by adding protein. Cooked chicken or turkey works well. You can also use crispy bacon or sausage for a savory punch. For a vegetarian option, try adding cooked lentils or chickpeas. Protein makes this dish filling and satisfying. To keep your Summer Squash Gratin fresh, store it in the fridge. Use an airtight container to prevent moisture loss. It will stay good for about 3 to 4 days. If you want to save it longer, consider freezing it. For freezing, let the gratin cool completely. Next, wrap it tightly in plastic wrap and then in foil. This helps protect it from freezer burn. You can freeze it for up to 3 months. When you're ready to eat, just thaw it in the fridge overnight. You can reheat the gratin in the oven or microwave. For the oven, preheat it to 350°F (175°C). Place the gratin in a baking dish and cover it with foil. Heat for about 20 minutes or until it's hot all the way through. Using the microwave is faster. Place a portion on a microwave-safe plate. Heat it in 30-second intervals until it’s warm. However, reheating in the oven keeps the top crunchy and tasty. After reheating, check the quality. If it looks dry, add a little cream or milk to restore moisture. Enjoy your delicious Summer Squash Gratin again! For the full recipe, refer to the previous sections. To make your gratin creamy, start with heavy cream. This rich ingredient adds smoothness. Mix half of the cheeses with the cream for extra flavor. Make sure to season with salt and pepper. This simple step can boost the taste. You can also add a bit of sour cream for a tangy kick. Yes, you can prepare this dish ahead of time. Cook the vegetables and mix the cream. Layer them in a baking dish. Cover and store in the fridge for up to 24 hours. When you’re ready, bake it straight from the fridge. Just add a few extra minutes to the bake time. Summer squash gratin pairs well with grilled meats. Try serving it with chicken or fish. A fresh salad also complements the dish nicely. You can even serve it with a light pasta for a full meal. The flavors work well together. Summer squash is low in calories and high in vitamins. It offers fiber, which is great for digestion. The cheeses add calcium but can increase fat content. Using less cheese can make it lighter. Overall, it can be a healthy side dish when made with care. For detailed instructions, check the [Full Recipe](#). This blog post covered how to make a delicious summer squash gratin. We looked at ingredients like squash, cheese, and seasonings. You learned step-by-step instructions for prepping, layering, and baking. I shared tips for perfecting the dish and serving ideas. We also explored tasty variations and storage options. Remember, cooking is fun and easy. Try the tips and enjoy your creation. Happy cooking!

Summer Squash Gratin Simple and Flavorful Dish

If you’re looking for a tasty way to enjoy summer squash, you’ve come to the right place! My Summer Squash

- 1 medium zucchini, thinly sliced - 1 medium yellow squash, thinly sliced - 1 bell pepper (any color), seeded and diced These fresh vegetables bring color and flavor to the dish. Zucchini adds a mild taste and soft texture. Yellow squash offers a sweet note that balances well. Bell peppers add crunch and vibrancy. - 1 cup cherry tomatoes, halved - 1 red onion, cut into wedges - 2 cloves garlic, finely minced Cherry tomatoes burst with juiciness and sweetness. Red onion adds a hint of sharpness. Garlic infuses the dish with rich flavor. Together, they create a medley that shines. - 3 tablespoons extra virgin olive oil - 1 teaspoon dried oregano - 1 teaspoon dried thyme - Salt and freshly ground black pepper to taste Extra virgin olive oil not only helps roast the veggies but also adds depth. Oregano and thyme give an earthy, warm flavor to the mix. Salt and pepper enhance all the tastes, making each bite delightful. For the Full Recipe, check the complete instructions and enjoy your cooking adventure! First, set your oven to 400°F (200°C). This temperature is perfect for roasting. Preheating your oven helps the veggies cook evenly. This step also helps create that nice caramelization. Next, let’s get your vegetables ready. Start by cutting the zucchini and yellow squash into thin slices. Dice the bell pepper into small pieces. Halve the cherry tomatoes and cut the red onion into wedges. Cutting all the veggies the same size helps them cook at the same rate. In a big bowl, mix the sliced zucchini, squash, bell pepper, cherry tomatoes, and onion. Now it’s time to roast! Spread the mixed veggies on a large baking sheet. Make sure they are in a single layer. This helps them roast well without steaming. Place the sheet in your preheated oven. Roast for about 20-25 minutes. Halfway through, stir the veggies gently. This ensures they cook evenly. When done, they should be tender and a little caramelized. Once they’re ready, take the pan out of the oven. Let it cool for a couple of minutes before serving. Garnish with torn fresh basil leaves for extra flavor. For the full recipe, check out the instructions above. Enjoy your colorful and tasty One Pan Summer Veggie Medley! To get a nice caramelization on your veggies, make sure they are dry. Pat them with a paper towel to remove excess moisture. This helps them roast better and develop that golden color. Arrange the veggies in a single layer on the pan. If they are too close together, they will steam instead of roast. Adding fresh herbs can boost the flavor of your dish. Try basil, parsley, or thyme. These herbs add freshness and aroma. You can also experiment with different oils or spices. For a kick, use chili oil or add paprika. For a beautiful presentation, serve your veggie medley on a large platter. Arrange the vegetables in a colorful way. Drizzle some extra olive oil on top for shine. You can also pair this dish with proteins like grilled chicken or fish. Quinoa or brown rice will also make it more filling. For the full recipe, check out the link. {{image_4}} What can you use in spring versus summer? In spring, consider using asparagus, sugar snap peas, and radishes. These vegetables bring freshness and crunch. In summer, stick with zucchini, bell peppers, and cherry tomatoes. They shine in the heat and add vibrant colors to your dish. What local vegetables should you consider? Head to your farmer’s market for the best choices. Look for fresh, in-season veggies. They taste better and support local farms. You might find heirloom tomatoes, colorful peppers, or even fresh herbs. What about vegan and gluten-free options? This recipe is vegan-friendly already! Just check that your olive oil is pure. For gluten-free needs, all the ingredients work perfectly. You can enjoy this dish without worry. Are there low-carb options? Yes! You can swap out the zucchini and squash for cauliflower or broccoli. Both add a hearty feel. You still get that great roasted taste without the carbs. What’s the difference between stovetop and oven roasting? Stovetop cooking is quick and allows for easy stirring. Use a large skillet and cook over medium heat. Oven roasting gives you even cooking and caramelization. It’s perfect for a large batch. Can you grill these veggies for a smokier flavor? Absolutely! Toss the seasoned vegetables in a grill basket and cook over medium heat. This method adds a nice char and depth of flavor. It’s perfect for summer gatherings! For the Full Recipe, check out the complete instructions to create your delicious One Pan Summer Veggie Medley. How long does the One Pan Summer Veggie Medley last in the fridge? When stored properly, it lasts about 3-5 days. Make sure to let it cool before putting it in the fridge. What are the best storage containers? Use airtight containers or glass jars. These keep the veggies fresh and prevent smells from mixing with other foods. What methods can I use to reheat without losing flavor? The best way is to use the oven. Preheat it to 350°F (175°C) and place the veggies on a baking sheet. Cover with foil to keep moisture in. What are the ideal cooking times? Reheat for 10-15 minutes until warm. You can also use a microwave but check every 30 seconds to avoid overcooking. What are the best practices for freezing? First, let the medley cool completely. Then, place it in freezer bags, removing as much air as possible. How do I thaw and use frozen veggies? Thaw them in the fridge overnight. For quick use, microwave on low power. You can also add them directly to soups or stir-fries without thawing. Yes, you can use frozen vegetables. They save time and are easy to find. However, frozen veggies often have more water. This can make your dish a bit watery. To fix this, you can thaw them first. Pat them dry with a towel before cooking. Fresh veggies have a better taste and crunch. They also keep their bright colors when cooked. You can try many herbs in this medley. Fresh parsley or cilantro adds a nice touch. You can also use fresh dill or tarragon for a unique flavor. If you want dried herbs, try rosemary or basil. Mix and match to find your favorite taste. Each herb brings its own magic to the dish. To make this dish more filling, think about adding protein or grains. Chickpeas or black beans work great. They add protein and fiber. You can also serve the veggie medley over rice or quinoa. This gives you a hearty meal. For a fun twist, add some cooked pasta. This will make it more satisfying. A serving of the One Pan Summer Veggie Medley is packed with nutrients. It has about 150 calories. You also get fiber, vitamins, and minerals. This dish is low in fat because of the olive oil. It is rich in vitamins A and C from the veggies. Eating this medley helps you stay healthy and feel good. This blog post shared a simple guide to roasting fresh vegetables. We covered the best ingredients, from zucchini to garlic, and how to prepare them for roasting. I shared step-by-step instructions to make the process easy. You learned tips for perfect flavor and ways to adapt the recipe for your needs. Finally, I provided storage and reheating advice to keep your veggies fresh. Enjoy roasting and experimenting with your favorite ingredients!

One Pan Summer Veggie Medley Fresh and Tasty Recipe

Looking for a quick, healthy meal that bursts with summer flavor? My One Pan Summer Veggie Medley is here to

Let’s gather the ingredients needed for this delightful Lemon Herb Roasted Okra dish. Each item adds its unique touch to the flavor. - 1 pound fresh okra, trimmed and halved lengthwise - 2 tablespoons extra virgin olive oil - Zest and juice of 1 bright lemon - 2 cloves of garlic, finely minced - 1 teaspoon dried thyme - 1 teaspoon dried oregano - ½ teaspoon smoked paprika - Salt and freshly ground black pepper to taste - Fresh parsley, finely chopped (for garnish) Using fresh okra is key to this recipe. You want it to be firm and vibrant. The lemon zest and juice bring brightness, making the dish lively. Garlic adds depth, while thyme and oregano give it a warm, herbal note. Smoked paprika introduces a subtle smokiness, enhancing the overall flavor profile. Don't worry about the process. You’ll find it easy and fun to prepare. For the full recipe, check out the detailed instructions in the recipe section. First, you need to preheat your oven to 425°F (220°C). This high temperature is key for getting that crispy, golden finish on the okra. A hot oven helps the flavors blend and brings out the best in the ingredients. Next, grab your fresh okra. Trim the ends off and cut them in half lengthwise. This helps the okra cook evenly and allows the flavor to soak in. Make sure each piece is roughly the same size for the best results. In a large bowl, toss the cut okra with olive oil and seasonings. Add the lemon zest, lemon juice, minced garlic, dried thyme, dried oregano, smoked paprika, salt, and pepper. Mix it well so every piece is coated with the tasty blend. This step is crucial; it infuses the okra with flavor. Spread the okra in a single layer on a baking sheet. Leave space between each piece. This is important! If they touch, the okra will steam instead of roast, which makes them soggy. Roast them in the oven for 15-20 minutes. Halfway through, give the pan a light shake to ensure even cooking. Once the okra is tender and crispy on the edges, take it out of the oven. Let it cool for a couple of minutes. Before you serve, sprinkle some fresh parsley on top. This adds a nice pop of color and freshness to your dish. Enjoy your Lemon Herb Roasted Okra! You can find the Full Recipe for more details. To get the best flavor and texture from your okra, roast it in a single layer. This means spreading the okra pieces apart on the baking sheet. If they touch, some pieces will steam instead of roast. Roasting in a single layer helps each piece get that nice, crispy edge. Feel free to switch up the flavors based on your taste. You can add more garlic if you love it. A pinch of cayenne pepper adds a nice kick. If you prefer different herbs, try fresh basil or rosemary. Experiment with your favorite flavors to make this dish your own. Lemon herb roasted okra pairs well with many meals. Serve it as a side with grilled chicken or fish. It also goes great with rice or quinoa. You can enjoy it on its own as a tasty snack. Don’t hesitate to add a wedge of lemon to brighten up the flavors even more. For the full recipe, check out the details above. {{image_4}} You can boost the heat by adding cayenne pepper. Just a pinch can make a big difference. If you like it spicy, start with 1/4 teaspoon. Mix it into the okra with the other seasonings. This small change adds a nice kick without overpowering the lemon. Using fresh herbs is a great way to change the flavor. You can swap dried thyme and oregano for fresh ones. For example, use a tablespoon of fresh thyme or oregano instead. The taste will be brighter and more vibrant. Fresh herbs add a lovely touch to your dish. If you want to try something new, consider air frying or grilling the okra. Air frying gives you a crispy texture with less oil. Set your air fryer to 400°F and cook for about 10-12 minutes. Grilling adds a smoky flavor. Just toss the okra on a grill for about 5-7 minutes. Both methods keep the dish healthy and flavorful. For the full recipe, check out my detailed guide. Store leftover lemon herb roasted okra in an airtight container. This keeps it fresh and tasty. Place the container in the fridge. Eat the leftovers within three days for the best flavor. To reheat, use the oven or a skillet. The oven helps keep the okra crispy. Preheat your oven to 350°F (175°C). Bake for about 10 minutes. If using a skillet, heat it over medium heat. Add a little olive oil and warm the okra, stirring gently. This method keeps the flavor strong and the texture just right. You can freeze roasted okra for later. First, let it cool completely. Then, place the okra in a freezer-safe bag. Make sure to squeeze out as much air as you can. This helps prevent freezer burn. To thaw, place the bag in the fridge overnight. You can reheat it in the oven for a crispy finish. Enjoy this tasty treat any time! For the full recipe, check out the Lemon Herb Roasted Okra. Yes, you can use frozen okra. However, it may not get as crispy. Frozen okra often has extra moisture. This can lead to steaming instead of roasting. If you use frozen okra, thaw it first and pat it dry. This helps reduce moisture. Then, follow the same steps from the Full Recipe. You can use other oils like avocado or canola oil. These oils have mild flavors that won’t overpower the dish. Avocado oil has a high smoke point, making it great for roasting. Canola oil is another good option, as it’s light and neutral. Just remember, different oils can give a slight twist to the taste. This recipe is already vegan! It uses plant-based ingredients. The olive oil, okra, and spices are all vegan. If you want to add protein, consider serving it with chickpeas or quinoa. Both pair well with roasted okra. This way, you keep it plant-based and satisfying. Yes, roasted okra is healthy! It is low in calories and high in fiber. Fiber helps with digestion and keeps you full. Okra is also rich in vitamins A and C, which are good for your skin and immune system. Plus, roasting enhances the flavor without adding unhealthy fats. Enjoying this dish is a tasty way to eat your veggies! Roasting okra is simple and tasty. We covered ingredients, step-by-step cooking, and helpful tips. You can add your favorite spices or swap herbs for variety. Remember to store leftovers properly and reheat for the best taste. Exploring cooking methods like air frying can make it fun, too. Enjoy this healthy dish as a side or main meal. Embrace the joy of cooking and share your creations with others. Your okra journey starts now!

Lemon Herb Roasted Okra Flavorful and Easy Recipe

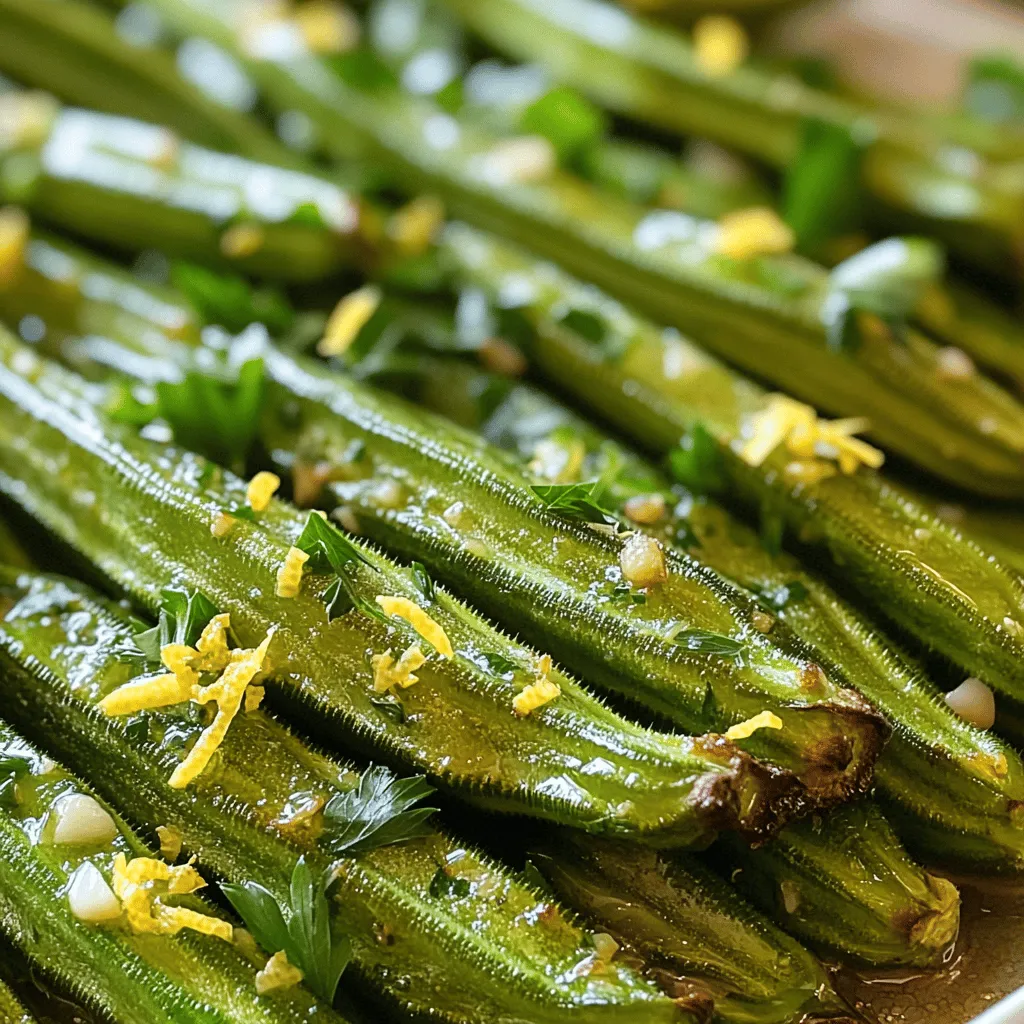
Looking for a tasty side dish that’s both easy and healthy? Try my Lemon Herb Roasted Okra! This simple recipe

- 4 cups fresh peaches: Start by choosing ripe, juicy peaches. Wash them well, then peel off the skin. Slice each peach into wedges. This gives you the sweet, tender fruit that makes the crisp so delicious. - 1 tablespoon fresh lemon juice: This brightens the peach flavor. It also keeps them from browning. If you don’t have lemon, try lime juice or vinegar for a twist. - 1 cup rolled oats: These oats add a chewy texture. They provide fiber, which is great for your digestion. Plus, oats help keep you full longer. - ½ cup all-purpose flour: This helps bind the crumble. If you need a substitute, try almond flour or coconut flour. Each option gives a unique taste and texture. - ½ cup packed brown sugar: This adds a rich sweetness. You can use white sugar or coconut sugar if you prefer. Each will change the flavor slightly. - ½ teaspoon ground cinnamon and ¼ teaspoon ground nutmeg: These spices make the crisp warm and cozy. They enhance the peach flavor. You can also try ginger or cardamom for a different kick. For the full recipe and detailed steps, check the [Full Recipe]. To get started, you need to peel and slice the peaches. First, wash your peaches well. Next, use a sharp knife to cut a small "X" on the bottom of each peach. This helps the skin come off easily. Place the peaches in boiling water for about 30 seconds. Then, move them to an ice bath. The skin will slip right off! Slice the peaches into thin wedges. Adding lemon juice is key. It enhances the peach flavor and keeps them from browning. Just one tablespoon will do. Toss the peach slices with the lemon juice in a bowl. This simple step makes a big difference! Now, let’s make the crumble topping! In a large mixing bowl, combine the dry ingredients. You will need rolled oats, all-purpose flour, brown sugar, ground cinnamon, ground nutmeg, and salt. Mix them well. This helps ensure that flavors spread evenly. Next, pour in the melted butter. Use a fork or your hands to mix it in. You want the texture to resemble coarse crumbs. This will give your topping a nice crunch. If you like pecans, add ¼ cup of chopped ones for extra texture and flavor. Before you bake, you need to grease your baking dish. Use a little butter or non-stick spray. This keeps the crisp from sticking. Spread the peach slices evenly in the bottom of a 9x9 inch baking dish. Now, sprinkle the crumble topping over the peaches. Make sure to cover them well. Preheat your oven to 350°F (175°C). Bake for about 30 to 35 minutes. Look for a golden brown topping and bubbling peach juices around the edges. This shows your crisp is ready! For the best taste, let it cool for about 10 minutes before serving. Enjoy a warm slice with vanilla ice cream or whipped cream. You can find the Full Recipe for all the details! To avoid a soggy bottom crust, I recommend pre-baking the crust for a few minutes. This helps it firm up before you add the juicy peaches. Another tip is to drain excess juice from the peaches. This keeps the filling from making the crust too wet. Letting the peach crisp cool before serving is key. It allows the juices to set and gives you nice portions. If you serve it too hot, it may fall apart. Serving your peach crisp with vanilla ice cream or whipped cream is a must. The cold creaminess pairs well with the warm crisp. You can also drizzle caramel sauce on top for a sweet touch. For extra flavor, consider adding a sprinkle of cinnamon or chopped nuts. These toppings enhance the overall taste and make it even more special. You can add spices or extracts to boost flavor. Instead of cinnamon, try nutmeg or allspice for a twist. A splash of vanilla extract also works well. To add extra textures, mix in chopped pecans or walnuts. They give a nice crunch and complement the soft peaches. You can even use almonds for a different taste. {{image_4}} You can use other fruits in this peach crisp recipe. Apples and berries work great! Apples add a nice crunch, while berries bring a burst of flavor. You can even mix different fruits for fun and unique tastes. Try combining peaches with blueberries or raspberries. The mix creates a colorful and tasty dessert. If you need a gluten-free option, there are great alternatives for flour. You can try almond flour or oat flour. Use the same amount as all-purpose flour for best results. For a vegan version, swap butter with coconut oil or vegan butter. You can use brown sugar or maple syrup instead of regular sugar. These swaps make it easy to enjoy this dish no matter your diet. You might want to reduce the sugar in this recipe. Peaches are sweet on their own! Taste the fruit first. If it's sweet enough, cut back on sugar. You can also use natural sweeteners like honey or maple syrup. These options add a nice flavor and can be healthier. Just remember to adjust the amount based on the sweetness of your fruit. This way, you can find the perfect balance! To store leftover peach crisp, use an airtight container. Glass or plastic containers work well. Make sure the crisp cools completely before sealing. This helps keep it fresh. Store it in the fridge for up to three days. To maintain texture, cover it with foil or plastic wrap. This keeps the topping from getting soggy. Freezing peach crisp is easy. First, let it cool fully. Then, cut it into portions. Wrap each piece in plastic wrap. Place the wrapped pieces in a freezer-safe bag. Make sure to remove extra air before sealing. Peach crisp can last in the freezer for up to three months. For the best taste, eat it within one month. Reheating peach crisp requires care. The best method is to use an oven. Preheat the oven to 350°F (175°C). Place the crisp in an oven-safe dish. Cover it with foil to keep moisture in. Heat for about 15-20 minutes. This method keeps the topping crisp. Avoid microwaving, as it can make the topping soggy. Enjoy your warm peach crisp like new! Can I make this peach crisp ahead of time? Yes, you can make the peach crisp ahead of time. Prepare the dish and cover it well. Store it in the fridge for up to one day. When ready to serve, bake it as directed. It will still taste great! What type of peaches are best for this recipe? I recommend using ripe, fresh peaches. Yellow peaches give a sweet flavor. White peaches are also good if you want a mild taste. Always pick peaches that feel slightly soft and smell fragrant. Can I use canned peaches instead of fresh? You can use canned peaches, but make sure they are in juice, not syrup. Drain them well to avoid extra liquid. Fresh peaches will give a better texture and taste, though. What can I substitute for butter in this recipe? You can use coconut oil or vegetable oil instead of butter. For a vegan option, try using a plant-based butter. Each will add a slightly different flavor but will still work well. Is this recipe suitable for various diets (e.g., gluten-free, vegan)? Yes, you can adjust this recipe for gluten-free and vegan diets. Use gluten-free flour and oats for a gluten-free option. For a vegan version, swap butter for plant-based alternatives. Nutritional information breakdown for this dessert This peach crisp has about 200 calories per serving. It contains carbs from the oats and sugar, fiber from the peaches, and healthy fats if you add nuts. Each scoop of ice cream will add more calories, so consider that when serving. For the full recipe, check out the juicy peach crisp delight! This blog post covered how to make a delicious peach crisp. We discussed fresh peaches, dry mix components, and sweeteners. I provided step-by-step instructions and cooking tips for great texture. We also explored variations, storage info, and common FAQs. In conclusion, this peach crisp recipe is flexible and simple. You can adjust flavors and textures to your liking. Enjoy this treat with family and friends for added joy.

Easy Peach Crisp Simple and Delicious Recipe

Who doesn’t love a delicious peach crisp? This easy recipe brings sweet, juicy peaches together with a crunchy topping. You’ll

Older posts
Newer posts
← Previous Page1 … Page26 Page27 Page28 … Page86 Next →

dsad

© 2026 yumymoments • Built with GeneratePress

Our Policies

  • Copyright Policy
  • Cookie Policy
  • GDPR Policy
  • Privacy Policy
  • Disclaimer
  • Terms Of Use

More Information

  • Home
  • About
  • Contact
  • Appetizers
  • Dessert
  • Dinner
  • Drinks
©2026, yumymoments About Back To Top