Skip to content
DisclaimerTerms Of UseGDPR PolicyCookie Policy

yumymoments

  • Home
  • Drinks
  • Appetizers
  • Dinner
  • Dessert
  • About
  • Contact
  • Privacy Policy
DisclaimerTerms Of UseGDPR PolicyCookie Policy

NO-ING-IMG

- 2 medium zucchinis - 1 cup panko breadcrumbs - 1/2 cup freshly grated Parmesan cheese - 1 teaspoon garlic powder - 1 teaspoon onion powder - 1 teaspoon Italian seasoning - Salt and freshly cracked black pepper - 1 large egg - Olive oil spray - Additional spices for customization - Suggested dipping sauces When making air fryer zucchini chips, start with fresh ingredients. Zucchini is the star here, so pick firm, medium-sized zucchinis. Thinly slicing them is key. This helps them cook evenly and achieve that perfect crunch. I recommend using a mandoline for even slices, but a sharp knife works too. For the coating, panko breadcrumbs give an extra crunch that regular breadcrumbs can't match. Mixing these with freshly grated Parmesan cheese adds a rich flavor. Garlic powder, onion powder, and Italian seasoning bring depth to the chips. Don't forget to season with salt and freshly cracked black pepper to taste. The egg acts as a binding agent. It helps the breadcrumbs stick to the zucchini slices. If you want to spice things up, consider adding your favorite spices like cayenne for heat or smoked paprika for a smoky flavor. When it comes to serving, think about dipping sauces. A herby yogurt dip or classic marinara pairs well with these chips. The options are endless, and you can customize based on your taste. For a quick and delicious snack, this recipe is perfect. Check out the Full Recipe for all the details! To start, wash the zucchinis under cool water. This step removes dirt and pesticides. Next, slice the zucchinis into thin rounds. Aim for about 1/8 inch thick slices. This thickness helps the chips cook evenly and stay crisp. If you slice them too thick, they may become soggy. Now, let’s prepare the coating. In a bowl, mix the panko breadcrumbs, Parmesan cheese, garlic powder, onion powder, Italian seasoning, salt, and pepper. Stir until all dry ingredients blend well. In another bowl, beat the egg until smooth. This egg wash helps the breadcrumbs stick to the zucchini. Take each zucchini slice and dip it into the beaten egg. Make sure it’s coated fully. Let any extra egg drip off. Next, transfer the slice to the bowl with the breadcrumb mix. Press it gently so the crumbs stick well. Repeat this for all slices until you have a nice layer of coating on each. Before cooking, preheat your air fryer to 375°F (190°C). This step takes about 5 minutes. It helps achieve that perfect crunch. While it heats, lightly spray the air fryer basket with olive oil. This step prevents sticking and helps with even cooking. Once preheated, arrange the coated zucchini slices in a single layer in the basket. Avoid overcrowding them. If needed, cook in batches. After placing them, lightly spray the tops with olive oil. This adds extra crispiness. To make your zucchini chips perfectly crispy, cook them at 375°F (190°C) for 8-10 minutes. This temperature helps the chips turn golden and crunchy. Flip the chips halfway through cooking for even crispiness. The key to great zucchini chips is to arrange them in a single layer in your air fryer. If you stack them or overcrowd, they won't cook evenly. This step is very important for that satisfying crunch. After cooking, let the zucchini chips cool on a wire rack. This method allows air to circulate, keeping them crunchy. If you leave them on a plate, they may steam and lose that crunch. For serving, I suggest using a vibrant bowl to show off your chips. Pair them with a zesty dip for extra flavor. A herby yogurt dip or classic marinara sauce works great. Enjoy your tasty, crunchy snack! {{image_4}} You can easily switch up the flavors of your zucchini chips. - Spicy Variation: Add cayenne or paprika to the breadcrumb mix for heat. - Herb-Infused Options: Use different herbs like dill or basil for fresh taste. These simple changes can make your snack exciting. Experiment with what you like best. If you don’t have an air fryer, try these other methods: - Baking in the Oven: Preheat your oven to 400°F (200°C). Arrange zucchini on a baking sheet and bake for about 15-20 minutes. Flip halfway for an even crunch. - Dehydrating: Use a dehydrator for a different texture. Slice zucchini thin, season, and dehydrate for 4-6 hours. This gives a crunchy and chewy snack. Each method brings its own taste and texture, so try them all! After cooking, let your zucchini chips cool completely. Transfer them to an airtight container. This keeps them fresh for up to three days. I recommend using glass or BPA-free plastic containers. These materials help maintain the chips' crunch and flavor. You can freeze zucchini chips for later use. To do this, ensure they are completely cool. Place them in a single layer on a baking sheet. Freeze until solid, then transfer to a freezer bag. This method prevents them from sticking together. For the best results, use them within three months. When you want to enjoy them again, reheat the chips in the air fryer. Set your air fryer to 375°F (190°C). Heat for about 5 minutes or until crispy. This helps restore their crunch and flavor. Avoid using a microwave, as it can make them soggy. Enjoy your snack just like it was fresh! Yes, you can skip the breadcrumbs. Instead, use a mix of spices and cheese. The zucchini will still get crispy. Try using extra Parmesan or nutritional yeast for a cheesy flavor. This option is great if you want a gluten-free snack. You can tell the chips are done when they look golden brown. They should feel crispy to the touch. If you want them crunchier, cook them a little longer. Just be careful not to burn them. These chips are tasty on their own. But you can serve them with dips too. Try ranch dressing, marinara sauce, or a yogurt dip. They add flavor and make snacking fun. Absolutely! Zucchini chips have fewer calories and less fat. They also offer more vitamins and minerals. Plus, they are a great way to eat more veggies. Yes, you can make them without oil. Just skip the olive oil spray. The key is to slice the zucchini thinly. This helps them crisp up in the air fryer. You can also use a non-stick air fryer basket for best results. For the Full Recipe, check out the details above! Making air fryer zucchini chips is fun and easy. You can create a crunchy snack in just a few steps. Let’s go through the process together. What do I need to make zucchini chips? You’ll need the following ingredients: - 2 medium zucchinis, thinly sliced (about 1/8 inch thick) - 1 cup panko breadcrumbs (for extra crunch) - 1/2 cup freshly grated Parmesan cheese - 1 teaspoon garlic powder - 1 teaspoon onion powder - 1 teaspoon Italian seasoning - Salt and freshly cracked black pepper to taste - 1 large egg, beaten until well combined - Olive oil spray How do I slice the zucchini? Start by washing the zucchinis. Then, use a sharp knife or mandoline to slice them. Aim for even rounds about 1/8 inch thick. This thickness is key for even cooking and perfect crunch. How do I prepare the coating? In a mixing bowl, mix the panko breadcrumbs, Parmesan cheese, garlic powder, onion powder, Italian seasoning, salt, and black pepper. Stir well. This blend adds great flavor and crunch. What about the egg wash? In a separate bowl, beat the egg until smooth. This egg wash helps the breadcrumbs stick to the zucchini slices. How do I coat the zucchini? Dip each zucchini slice in the egg wash, making sure it's well-coated. Let any extra egg drip off. Then, transfer the slice to the breadcrumb mix. Press down gently so the crumbs stick. How do I preheat the air fryer? Set your air fryer to 375°F (190°C) and let it preheat for about 5 minutes. This step is important for crispiness. What’s next for the air fryer basket? Spray the basket lightly with olive oil. This prevents sticking and helps with even cooking. How do I arrange the zucchini chips? Place the coated zucchini slices in a single layer in the air fryer basket. Avoid overcrowding. If needed, cook them in batches. How do I ensure they get crispy? After arranging the chips, spray the tops lightly with olive oil. This helps them crisp up nicely. How long do I cook them? Cook the zucchini chips for 8 to 10 minutes. Flip them halfway through for even browning. How do I know when they are done? Look for a golden brown color and a crispy texture. What should I do after cooking? Carefully remove the chips and let them cool on a wire rack. This helps keep them crunchy. If you have more to cook, repeat the steps. Remember, serving your air fryer zucchini chips in a colorful bowl makes them even more inviting. You can pair them with a tasty dip, like herbed yogurt or marinara. Enjoy your crunchy snack! For the complete recipe, check out the Full Recipe. This blog covered how to make delicious air fryer zucchini chips. You learned about the main ingredients, key steps, and tips for crispiness. You can customize your chips with spices and even try baking or dehydrating. For storage, we shared easy methods for keeping your chips fresh. Remember, experimenting with flavors makes this dish exciting. Enjoy your crunchy, healthier snack that’s easy to make!

Air Fryer Zucchini Chips Simple Crunchy Snack Recipe

Looking for a tasty snack that’s easy to make? These air fryer zucchini chips are perfect! With just a few

- 4 large russet potatoes, thinly sliced - 2 cups sharp cheddar cheese, grated - 1 cup mozzarella cheese, grated - 1 medium onion, finely chopped - 3 cloves garlic, minced - 2 cups heavy cream - 2 tablespoons unsalted butter - 1 teaspoon dried thyme - 1 teaspoon paprika - Salt and freshly ground black pepper to taste The beauty of cheesy scalloped potatoes lies in their simple and fresh ingredients. You will want russet potatoes for their starchiness, which helps them hold shape. The sharp cheddar and mozzarella create a creamy and flavorful cheese blend. Using heavy cream gives a rich texture, while onion and garlic add depth. Dried thyme and paprika give this dish a warm aroma. Feel free to adjust the salt and pepper to suit your taste. - 9x13 inch baking dish - Large skillet - Mixing bowl - Whisk Gather these tools before you start. A 9x13 inch baking dish is perfect for layering and baking. A large skillet lets you sauté onions and garlic easily. A mixing bowl helps combine your cream and spices, while a whisk ensures smoothness. For the full recipe, check out the details outlined above. Enjoy the cooking process! - Preheat the oven to 375°F (190°C). - Sauté onions and garlic until fragrant. Start by preheating your oven. This step is key for even cooking. Next, grab a large skillet. Melt the unsalted butter over medium heat. Add the finely chopped onion and sauté for about 5 minutes. You want the onion to turn soft and clear. Then, add the minced garlic. Cook for one more minute. The garlic should smell great, but do not let it brown. - Combine heavy cream with seasonings in a mixing bowl. - Whisk until smooth. In a big mixing bowl, combine heavy cream, dried thyme, paprika, salt, and freshly ground black pepper. Whisk everything together. You want it to be smooth. This cream mixture makes the potatoes rich and creamy. - First layer of potatoes and cheese. - Repeat layering process and bake covered. - Final baking stage and cooling time. Grease a 9x13 inch baking dish. Lay half of the sliced potatoes at the bottom. The slices should overlap a bit. Pour half of the cream mixture over the first layer. Then, sprinkle half of the cheddar and mozzarella cheese on top. Now, repeat the process. Lay the rest of the potato slices on top. Pour the second half of the cream mixture over these potatoes. Finally, add the rest of the cheese. Make sure the top is well covered. Cover the dish with aluminum foil. Place it in the preheated oven. Bake for 45 minutes. This time helps the potatoes cook well. After 45 minutes, take off the foil. Bake it uncovered for another 20-25 minutes. The potatoes should be tender now. Check with a fork. The cheese on top should be bubbly and golden brown. Let the dish cool for about 10 minutes. This time helps the flavors blend well. Enjoy your creamy, cheesy scalloped potatoes! For full details, check the Full Recipe. To make your dish shine, slice the potatoes evenly. I recommend about 1/8 inch thick. This helps them cook at the same rate. When you layer the potatoes, start with a little cream at the bottom. It helps the flavors soak in. Choosing the right cheese is key for great flavor. I love sharp cheddar for its bold taste. Mixing it with mozzarella gives a nice melt. Mozzarella adds creaminess, making every bite heavenly. Try different cheese blends for unique flavors. You can make this dish gluten-free by using cornstarch instead of flour. For a vegan option, swap out the cream for coconut milk. Use plant-based cheese that melts well. These changes keep the dish tasty for everyone. {{image_4}} You can boost the flavor of cheesy scalloped potatoes in fun ways. Adding cooked bacon or ham gives a nice, savory bite. Just chop them up and mix them in with the cheese. You can also explore herb variations. Try rosemary or parsley for a fresh taste. These herbs add a lovely aroma and depth to the dish. You can make cheesy scalloped potatoes in a slow cooker for a hands-off approach. Just layer the ingredients in the slow cooker and let it do its thing. This method takes about 4 to 6 hours on low heat. If you prefer speed, try the Instant Pot. Layer the potatoes, cheese, and cream, then pressure cook for about 30 minutes. Both methods yield creamy and delicious results. Incorporate seasonal vegetables to make your dish unique. Spinach or zucchini works well in the spring and summer. Just slice them thin and layer them with the potatoes. For fall, think about adding squash. Butternut or acorn squash adds sweetness and a nice texture. These variations keep the recipe fresh and exciting all year round. Check out the Full Recipe for detailed steps! To store leftovers, let your Cheesy Scalloped Potatoes cool down first. Place them in an airtight container in the fridge. They stay fresh for up to four days. If you want to freeze them, you can do that too! Cut the dish into portions and wrap each piece tightly in plastic wrap. Then, place the wrapped portions in a freezer-safe bag. This way, they can last for about three months. To reheat, the oven is best. Preheat it to 350°F (175°C). Place the potatoes in a baking dish and cover them with foil. Heat them for about 20-25 minutes. This keeps the cheese melty and the potatoes creamy. If you use a microwave, place a portion on a plate. Heat it in short bursts, around one minute at a time, stirring in between. This helps keep the texture nice and smooth. Enjoy your leftovers just like the first time! You can prepare Cheesy Scalloped Potatoes ahead of time. Start by slicing your potatoes and mixing the cream. Layer the potatoes and cheese as usual. Cover the dish tightly with foil and refrigerate. You can do this up to one day before baking. When you are ready to bake, let the dish sit at room temperature for 30 minutes. Then, bake as directed. This helps the potatoes cook evenly. Yes, you can use many types of cheese. For a sharper taste, try using gouda or gruyère. If you want a milder flavor, go for Monterey Jack. Mixing cheeses can give great results. Just remember that the texture and melting quality will vary. Some cheeses melt better than others. Always choose cheese that you enjoy to make the dish truly yours. Cheesy Scalloped Potatoes last about three to five days in the fridge. Be sure to store them in an airtight container. This keeps the flavors fresh and tasty. If you want to keep them longer, consider freezing. They can last up to three months in the freezer. Just be sure to thaw them in the fridge before reheating for the best texture. In this blog post, we covered the ingredients, steps, and tips for making Cheesy Scalloped Potatoes. We explored ingredient selection, layering techniques, and cooking methods. Remember that you can customize this dish to fit your taste with various cheeses or seasonal veggies. Whether you make it gluten-free or vegan, the dish can adapt to many diets. Enjoy the creamy goodness and flexibility of this classic recipe for your next meal. Happy cooking!

Cheesy Scalloped Potatoes Delightful and Simple Recipe

Are you ready to impress at your next dinner? My Cheesy Scalloped Potatoes are simple yet oh-so-delicious! This dish combines

- 1 cup all-purpose flour - 1/2 cup powdered sugar - 1/4 cup unsalted butter - 1/2 teaspoon salt - 2 large eggs - 1 cup granulated sugar - 1/4 cup fresh lemon juice - Zest of 1 large lemon - 1/2 teaspoon baking powder To make classic lemon bars, you need simple ingredients that pack a punch. Each ingredient plays a key role in creating the perfect balance of sweet and tart. - Extra lemon zest for garnishing - Fresh berries for serving While the basic recipe shines, a touch of extra lemon zest can brighten the flavor. Fresh berries, like raspberries or blueberries, add a lovely color and taste. They make the dessert feel special and inviting. For the full recipe, check the detailed instructions above. You will enjoy making these lemon bars as much as you enjoy eating them! Preheat your oven to 350°F (175°C). While it heats, prepare an 8x8-inch baking dish. Lightly grease the dish and line the bottom with parchment paper. Make sure the paper hangs over the sides. This helps with easy removal later. In a medium mixing bowl, combine: - 1 cup all-purpose flour - 1/2 cup powdered sugar - 1/4 cup unsalted butter, melted - 1/2 teaspoon salt Mix these ingredients using a fork or your fingers. You want it to look like coarse crumbs. Press this mixture evenly into the bottom of your prepared baking dish. Place the baking dish in the preheated oven. Bake the crust for 15-18 minutes. It should be lightly golden around the edges. Once baked, take it out and let it cool slightly before you add the filling. In a separate bowl, whisk together: - 2 large eggs - 1 cup granulated sugar - 1/4 cup fresh lemon juice - Zest of 1 large lemon - 1/2 teaspoon baking powder Make sure the mixture is smooth and free of lumps. This step is key for a creamy filling. Pour the lemon filling over your slightly cooled crust. Spread it evenly. Place the baking dish back in the oven. Bake for another 20-25 minutes. The filling should set and turn a light golden color when done. After baking, let the lemon bars cool completely on a wire rack. This helps them set well and makes cutting easier. Once cool, use the parchment overhang to lift them out. Cut into squares or rectangles. Before serving, dust the tops with extra powdered sugar for a nice touch. Check out the full recipe for more details! - Use room temperature eggs for a smoother filling. - Ensure the crust is adequately cooled before adding filling. This step helps keep the crust firm. - Not baking the crust long enough can lead to a soggy base. - Overmixing the lemon filling makes it less airy. Blend just until smooth. - Dust with powdered sugar for a sweet finish. - Serve with a dollop of whipped cream or fresh fruit for added flavor and texture. These tips will help you create the best lemon bars. Try these suggestions for a delightful treat! For the full recipe, check out the details above. {{image_4}} You can play with flavors in your lemon bars. Here are two favorites: - Coconut lemon bars: Add shredded coconut to the filling. This gives a tropical twist and a chewy texture. Use unsweetened coconut for a balanced flavor. - Blueberry lemon bars: Mix in fresh or frozen blueberries. They add color and a sweet burst. Just fold them gently into the lemon filling. If you want to change the sweetness, try these options: - Using honey or agave syrup instead of sugar: Both honey and agave syrup can add a unique flavor. Use about three-quarters of a cup for each cup of sugar. Adjust to taste, as they are sweeter. - Gluten-free flour substitutions: You can use almond flour or coconut flour. They make the bars gluten-free. Keep in mind that the texture may change slightly. Switching up the crust can give your lemon bars a new twist: - Graham cracker crust: This classic option is sweet and crunchy. Just crush the crackers and mix them with melted butter. Press it firmly into the pan for a sturdy base. - Almond flour crust for a low-carb option: Almond flour is great for a low-carb diet. Mix it with melted butter and a bit of sweetener. This crust is nutty and delicious. These variations allow you to customize your lemon bars. Feel free to mix and match to find your favorite. For the full recipe, make sure to check it out! To keep your lemon bars fresh, store them in the fridge. Place the bars in an airtight container. This will help keep moisture out and preserve their taste. Line the container with parchment paper. This makes it easy to lift out the bars later. You can also cover the dish tightly with plastic wrap if you prefer. If you want to save some lemon bars for later, freezing is a great option. First, cut the bars into squares. Then, wrap each piece in plastic wrap. Place them in an airtight container or a freezer bag. Make sure to remove as much air as possible. You can freeze them for up to three months. When you're ready to eat, thaw them in the fridge overnight. Lemon bars last about one week in the fridge. Keep an eye on them for signs of spoilage. If you see any mold or changes in color, it's best to throw them out. A strong, off smell is also a sign they may have gone bad. For the best taste, enjoy them fresh! To cut lemon bars well, first cool them completely. Then, lift them out of the pan using the parchment paper. Use a sharp knife for clean cuts. Wipe the knife with a damp cloth after each cut. This step helps keep the edges neat. For even squares, mark your cuts lightly before slicing. Yes, you can make lemon bars ahead of time. They taste great after a day in the fridge. Just store them in an airtight container. This helps keep them fresh. You can prepare them up to three days ahead of serving. It makes them a great choice for parties or gatherings. Lemon bars are done when the filling is set. Look for a light golden color on top. You can also gently shake the pan. If the filling jiggles slightly in the center, it's ready. Let them cool fully for the best texture before cutting. Yes, you can swap some ingredients. For a gluten-free option, use almond flour. Instead of granulated sugar, try honey or agave syrup. If you want a richer taste, use brown sugar. Just remember, these changes may shift the flavor and texture a bit. Experiment and find what works for you! In this post, I shared how to make delicious lemon bars. We covered ingredients, step-by-step instructions, and tips for perfect results. Remember to use room temperature eggs and cool your crust fully. Feel free to explore variations, too! These bars are great for sharing or enjoying at home. Following these steps will help you create a treat everyone will love. Enjoy your baking!

Classic Lemon Bars Tasty and Simple Dessert Recipe

Lemon bars are the perfect blend of tart and sweet, making them a favorite dessert. With just a few simple

Here is the complete list of ingredients you'll need for Zucchini Gratin with Yellow Squash: - 2 medium zucchinis, thinly sliced - 2 medium yellow squashes, thinly sliced - 1 cup grated Gruyère cheese (reserve a little for topping) - 1 cup heavy cream - 2 cloves of garlic, minced - 1 teaspoon fresh thyme leaves, chopped - 1/2 teaspoon salt - 1/4 teaspoon freshly ground black pepper - 1/2 cup fine breadcrumbs - 2 tablespoons extra-virgin olive oil - Fresh parsley, chopped (for garnish) These ingredients work together to create a rich and creamy dish. The zucchinis and yellow squashes provide a fresh taste, while the Gruyère cheese adds a wonderful depth of flavor. The heavy cream makes the dish smooth and decadent. Don't forget to save a bit of cheese for the topping! It gives that lovely golden finish when baked. Use fresh herbs, like thyme, for the best taste. They brighten the whole dish. The breadcrumbs add a nice crunch on top. Together, these ingredients create a gratin that is both tasty and comforting. For the full recipe, check out the rest of the article! Set the temperature to 375°F (190°C). Preheating helps your gratin bake evenly. If you skip this step, the dish may not cook well. Combine the thinly sliced zucchinis and yellow squashes in a bowl. Their bright colors make the dish look good. Plus, it means you get more nutrition! Add 2 cloves of minced garlic, 1 teaspoon of fresh thyme leaves, 1/2 teaspoon of salt, and 1/4 teaspoon of black pepper. Toss the veggies gently to coat them well. This step adds flavor to every bite. In a separate bowl, blend 1 cup of heavy cream with 1 cup of grated Gruyère cheese. Stir it until it’s smooth. This rich mixture makes your gratin creamy and delicious. Use 2 tablespoons of extra-virgin olive oil to lightly oil your baking dish. This helps prevent sticking. You can use any baking dish you like, but glass or ceramic works well. Spread half of the zucchini and yellow squash mix evenly in the bottom of the greased dish. Pour half of the creamy cheese mixture over this layer. Sprinkle with half of the remaining Gruyère cheese. This ensures every layer gets flavor. Sprinkle 1/2 cup of fine breadcrumbs evenly on top. This adds a crunchy texture to your dish. If you want, you can use crushed crackers or panko for a different bite. Bake the gratin for 35 to 40 minutes. You’ll know it’s done when it bubbles and the top is golden brown. Let it cool for about 5 minutes before serving. This cooling time helps the layers set nicely. For the full recipe, refer to the instructions provided above. Serve your zucchini gratin in the baking dish for a warm, rustic look. This adds charm and invites everyone to dig in. If you prefer individual portions, scoop servings onto plates. Garnish each with fresh parsley. This adds a bright touch and makes the dish pop. To boost flavor, consider adding fresh herbs like basil or oregano. A sprinkle of red pepper flakes can bring a gentle heat. For cheese lovers, try different options. Feta or cheddar can offer unique tastes. Mixing cheeses can create a rich, layered flavor profile. Slice the zucchini and yellow squash thinly for even cooking. This ensures every bite is tender and delicious. Choose a baking dish that holds all the layers without overflowing. A deeper dish can help keep everything in place. Following these tips makes your gratin a standout dish. For the complete recipe, refer to the Full Recipe section. {{image_4}} You can make this dish even better by adding other veggies. Try mushrooms, peppers, or onions. These ingredients add flavor and texture. For instance, sautéed mushrooms bring earthiness. Bell peppers add a sweet crunch. Onions give a lovely sweetness when cooked. Plus, these vegetables boost nutrition. They add vitamins and minerals to your meal. To make this gratin gluten-free, swap regular breadcrumbs for gluten-free ones. You can find many options at the store. Some good choices are almond flour or crushed cornflakes. Both options provide a nice crunch. Make sure to check labels to confirm they are gluten-free. If you cannot find Gruyère cheese, use other types. Cheddar, mozzarella, or fontina work well. Mixing different cheeses can add a unique taste. For a sharp flavor, combine cheddar with mozzarella. This mix melts beautifully and enhances the dish. You can customize the flavor to your liking. To keep your Zucchini Gratin fresh, use airtight containers. Glass or plastic containers work well. Make sure to chill your gratin before sealing it. This step prevents moisture build-up and keeps the texture nice. When you're ready to enjoy leftovers, reheating gently is key. The oven is best for keeping the gratin's creamy texture. Set it to 350°F (175°C) and heat for about 15-20 minutes. If you're short on time, the microwave works too. Just be careful not to overheat, as it can make the dish soggy. Yes, you can freeze Zucchini Gratin! To prepare it for freezing, let it cool completely first. Then, wrap it tightly in plastic wrap, followed by aluminum foil. This method keeps out air and freezer burn. For defrosting, place it in the fridge overnight before reheating. Enjoy your delicious dish later! For the full recipe, check the section above. Yes, you can use other cheeses. Cheddar will give a sharp taste. Mozzarella adds a mild, creamy touch. Feta brings a nice salty flavor. Each cheese changes the dish a bit. Experiment with what you like best. Leftovers can last for about three to five days. Make sure to store them in a tight container. Check for any signs of spoilage before eating. If it smells off, it’s best to toss it. Zucchini gratin pairs well with grilled chicken or fish. A fresh salad adds a nice crunch. Rice or crusty bread can soak up the creamy sauce too. Think of it as a side dish that complements many meals. Absolutely! You can make it ahead and store it in the fridge. The gratin reheats well, keeping its flavor. Just cover it and warm it in the oven. It’s a great way to have a quick meal ready. For the full recipe, you can find detailed steps on how to prepare it. The Zucchini Gratin recipe combines fresh veggies, creamy Gruyère, and crispy breadcrumbs. We explored all the ingredients, preparation steps, and cooking techniques to ensure great flavor. Don’t hesitate to add your favorite herbs or other veggies for a personal touch. This dish shines as a side or main meal. With tips for storage and reheating, your leftovers will stay delicious. Enjoy your cooking and sharing this delightful dish with friends and family!

Zucchini Gratin with Yellow Squash Flavorful Dish

Are you ready to elevate your veggie game? This Zucchini Gratin with Yellow Squash is a flavor-packed dish that is

- Zucchini and Vegetables - 4 medium zucchinis, sliced into rounds - 1 cup cherry tomatoes, halved - 1 cup corn kernels (fresh or frozen, thawed if frozen) - 1 bell pepper (choose red or yellow), diced into small pieces - 1 medium onion, finely chopped - 2 cloves garlic, minced - Cheese Selections - 1 cup shredded mozzarella cheese - ½ cup grated Parmesan cheese - Breadcrumbs and Seasonings - 1 cup breadcrumbs (whole wheat preferred for added flavor) - 2 tablespoons olive oil - 1 teaspoon dried oregano - 1 teaspoon dried basil - Salt and pepper to taste In this recipe, fresh zucchini is the star. It brings a light flavor that pairs well with the other veggies. I love using cherry tomatoes for their sweetness. Corn adds a nice pop of texture, while bell pepper and onion bring a savory note. Garlic is a must for that aromatic touch. For cheese, mozzarella melts beautifully, while Parmesan gives a sharp contrast. The breadcrumbs create a nice crunchy topping. I choose whole wheat for a more robust flavor and added nutrition. With the right seasonings, this dish becomes even more flavorful. Each ingredient works together to make a simple yet delicious meal. You can find the Full Recipe in the main article. Enjoy cooking! Preheating the Oven First, set your oven to 375°F (190°C). This warms it up for baking. You want it hot to crisp the top. Sautéing the Aromatics Next, grab a large skillet and add olive oil over medium heat. Toss in the chopped onion and minced garlic. Sauté them for about 3-4 minutes. Wait until they smell nice and look clear. Cooking the Vegetables Now, add the sliced zucchini and diced bell pepper to the skillet. Stir them every now and then for 5-7 minutes. This helps them soften a bit. Once soft, mix in the halved cherry tomatoes and corn. Season with oregano, basil, salt, and pepper. Cook for another 2-3 minutes to combine the flavors. Mixing in the Cheese In a big mixing bowl, combine the cooked veggies with half of the mozzarella and Parmesan cheese. Mix well until everything is blended. Transferring to Casserole Dish Grease a 9x13 inch casserole dish with olive oil. Pour the veggie and cheese mix into the dish. Spread it out evenly for the best bake. Topping and Baking In a separate bowl, mix the breadcrumbs with the remaining mozzarella and Parmesan cheese. Sprinkle this topping over the casserole. Bake it in the oven for 25-30 minutes. You want the top golden brown and the cheese melted. After baking, let it cool for 5 minutes before serving. This helps it set nicely. For a great finish, serve it hot with fresh basil on top. You can find the Full Recipe for more details. Choosing Fresh Ingredients Fresh ingredients make a big difference. Look for firm zucchinis with shiny skin. Choose bright tomatoes and sweet bell peppers. Fresh herbs add great taste too. Always wash your veggies well before cooking. This helps remove dirt and pesticides. Adjusting Seasonings to Taste Start with the recipe, but feel free to adjust. Taste as you cook. If you like it spicy, add red pepper flakes. Prefer more flavor? Increase the herbs. Remember, seasonings can change the whole dish! Adding Spices or Herbs Consider adding fresh herbs like thyme or parsley. You can also try spices like cumin or paprika. These add warmth and depth to your casserole. Don't forget to balance flavors. A pinch of sugar can help cut acidity from the tomatoes. Incorporating Extra Vegetables Feel free to add other vegetables to your casserole. Spinach, mushrooms, or even broccoli work well. This not only boosts nutrition but also adds color. Mix and match what you have on hand. The more variety, the better the flavor! For a detailed guide, check out the Full Recipe. {{image_4}} You can make your Easy Zucchini Casserole even better by changing a few ingredients. - Substituting Different Cheeses: If you love cheese, try different types! Cheddar adds a sharp flavor. Feta cheese gives it a nice tang. Goat cheese can make it creamy and rich. Mix and match to find your favorite. - Using Other Vegetables: Zucchini is great, but other veggies work too. Try adding sliced mushrooms for an earthy taste. Spinach can add color and nutrition. You can even mix in some diced carrots for a sweet crunch. The options are endless! Making your casserole fit different diets is easy. - Gluten-Free Breadcrumbs: If you need a gluten-free dish, swap regular breadcrumbs for gluten-free ones. Many brands offer tasty options. This change keeps your casserole light and fluffy. - Dairy-Free Options: To make it dairy-free, use plant-based cheese. Almond or cashew cheese can melt nicely. You can also skip the cheese completely and use more veggies instead. This way, everyone can enjoy the meal! For the complete recipe, check the Full Recipe section. To keep your Easy Zucchini Casserole fresh, follow these steps: - Refrigeration Guidelines: Once cool, cover the casserole tightly with plastic wrap or foil. Store it in the fridge for up to 3 days. - Freezing for Longer Storage: You can freeze the casserole. First, let it cool completely. Then, wrap it tightly in plastic wrap and aluminum foil. It will last for about 2 to 3 months in the freezer. When it's time to enjoy leftovers, use these methods: - Best Methods to Reheat: Preheat your oven to 350°F (175°C). Place the casserole in an oven-safe dish. Cover it with foil to avoid drying out. Heat for 20-25 minutes or until hot. You can also use a microwave for quick reheating. Just cover the dish loosely and heat in short bursts. - Tips to Maintain Texture: To keep the casserole from getting mushy, avoid overcooking it. If you reheat in the microwave, stir it halfway through. This ensures even heating and helps maintain the texture. For the full recipe, check the [Full Recipe]. How do I prevent the casserole from being watery? To prevent a watery casserole, you can salt the zucchini first. Slice the zucchini and sprinkle salt on it. Let it sit for about 15 minutes. This helps draw out excess water. Pat the slices dry with a paper towel before cooking. Using breadcrumbs also helps absorb moisture during baking. Can I make this zucchini casserole ahead of time? Yes, you can make this zucchini casserole ahead of time. Assemble the casserole and cover it. Store it in the fridge for up to 24 hours before baking. When ready, bake it straight from the fridge, but add a few extra minutes to the cooking time. What can I serve with Easy Zucchini Casserole? This casserole pairs well with a light green salad or a side of roasted chicken. You can also serve it with crusty bread or a simple pasta dish. The fresh flavors balance well with many options. How long does a zucchini casserole last in the fridge? A zucchini casserole lasts about 3 to 5 days in the fridge. Store it in an airtight container to keep it fresh. Reheat it in the oven or microwave before serving. Can I adjust the recipe for more servings? Yes, you can easily adjust the recipe for more servings. Simply double or triple the ingredients based on your needs. Make sure to use a larger casserole dish to fit all the mix. Keep an eye on the baking time, as it may increase for larger portions. For the full recipe, check out Zesty Zucchini Delight Casserole. This blog post offered a clear path to making a delicious zucchini casserole. We covered key ingredients, step-by-step cooking methods, and helpful tips for perfection. You can make this dish your own by switching out cheeses and vegetables. Remember to store leftovers properly for future meals. With the right techniques, your casserole will shine on any table. Enjoy your cooking and share this delightful dish with others!

Easy Zucchini Casserole Flavorful and Simple Dish

Looking for a tasty dish that’s simple to make? You’ll love this Easy Zucchini Casserole! Packed with veggies and cheesy

- 6 large eggs - 1 cup milk or dairy-free alternative - 1 cup mixed bell peppers, diced - 1 cup fresh spinach, chopped The main ingredients for your frittata are simple yet versatile. The eggs provide the base, while the milk adds creaminess. Mixed bell peppers and fresh spinach bring color and nutrition. You can use any bell pepper you like. Each one adds a unique taste. - 1/2 cup cherry tomatoes, halved - 1/2 cup onion, diced - 1 cup shredded cheese (cheddar or feta) - Fresh basil leaves for garnish If you want to make your frittata special, add optional ingredients. Cherry tomatoes give sweetness and a burst of flavor. Onions add a savory touch. Cheese melts beautifully and makes it rich. Fresh basil adds a lovely aroma and taste at the end. - Salt and pepper to taste - 1 teaspoon dried oregano - 2 tablespoons olive oil To boost the flavors, season your frittata well. Salt and pepper are must-haves. Oregano adds a hint of earthiness that pairs well with the veggies. Olive oil helps to cook your vegetables and makes the dish rich. For the full recipe, refer to the instructions in the article. - Preheat oven to 375°F (190°C). - Grease a 9x13 inch baking dish with olive oil to avoid sticking. - In a large bowl, whisk 6 eggs and 1 cup of milk until smooth. - Add salt, pepper, and 1 teaspoon of dried oregano to season the mixture. - Heat 2 tablespoons of olive oil in a skillet over medium heat. - Cook 1/2 cup diced onions and 1 cup diced mixed bell peppers until tender, about 4-5 minutes. - Stir in 1 cup of chopped spinach and wilt it for 2 more minutes. - Spread the sautéed vegetables evenly in the greased baking dish. - Pour the egg mixture over the vegetables. Add 1/2 cup halved cherry tomatoes and 1 cup of shredded cheese, folding them in gently. - Place the baking dish in the oven and bake for 25-30 minutes. - Check for doneness; the top should be golden and firm to the touch. - Let the frittata cool for a few minutes. - Cut it into squares and garnish with fresh basil leaves before serving. For the complete recipe, check out the Full Recipe. To achieve a fluffy frittata, start with fresh eggs. I recommend using large eggs for the best results. Whisk them well with milk until the mix is smooth. This step is key! It adds air to the eggs. More air equals more fluffiness. Don't rush this part; take your time to whisk well. For the best frittata, choose a 9x13 inch baking dish. Glass or ceramic works great. Make sure to grease it well with olive oil. This will help prevent sticking. If you skip greasing, your frittata might not come out clean. Herbs can really boost flavor. Try adding chives or parsley to your egg mix. They add a fresh taste that brightens up the dish. Cheese is also a game changer. Sharp cheddar brings a nice bite, while feta adds tang. Experiment with your favorites to find a combination you love! For the full recipe, check out the Baked Veggie Delight Frittata. {{image_4}} You can boost your frittata with tasty proteins. Adding cooked bacon or sausage gives a nice crunch. Just crumble or chop them before mixing in. For a vegetarian option, consider adding beans. Black beans or chickpeas add protein and fiber. They also make your dish heartier without meat. Frittatas are great for using fresh veggies. You can swap spinach for kale or zucchini. They add different flavors and textures. Always think about what is in season. Using seasonal produce makes your frittata fresher and tastier. You can try bell peppers in summer or butternut squash in fall. If you need a dairy-free or vegan frittata, I have options for you. You can use chickpea flour instead of eggs. Mix it with water to form a batter. This gives you a similar texture. For cheese lovers, non-dairy cheese can add flavor without dairy. There are many brands that melt well, so choose your favorite. For more tips and tricks, you can check the Full Recipe for guidance on making the perfect frittata. To keep your leftover frittata fresh, place it in an airtight container. Make sure it cools to room temperature before sealing. Store it in the fridge and use it within 3 to 4 days for the best taste. If you notice any off smells or changes in color, it's time to discard it. You can reheat frittata in the microwave or the oven. For microwave reheating, place a slice on a plate and cover it with a damp paper towel. Heat for about 30 seconds to 1 minute. If you prefer the oven, set it to 350°F (175°C). Place the frittata on a baking sheet and heat for 10 to 15 minutes. To avoid drying out, add a splash of water before heating. If you want to store frittata for longer, freezing is a great option. Cut the frittata into slices and wrap each piece tightly in plastic wrap. Place them in a freezer-safe bag or container. This way, it can stay fresh for up to 2 months. When you're ready to eat, thaw it in the fridge overnight. Reheat using the oven or microwave as mentioned above. Enjoy the full recipe to make this simple and healthy dish! Yes, you can make a frittata ahead of time. Make it a day before serving. Just store it in the fridge. Cover it tightly with plastic wrap or foil. When you are ready to eat, reheat it. You can use the microwave or oven for that. This saves time on busy mornings. A frittata is thicker than an omelet. You cook a frittata in the oven, while an omelet cooks on the stove. A frittata has more fillings mixed in. It is also cut into squares or wedges for serving. An omelet is usually folded over. Both are delicious, but they are made differently. Check for a few signs when your frittata is done. The center should be firm and not jiggly. The top will be lightly golden and set. You can also insert a toothpick in the center. If it comes out clean, your frittata is ready. Enjoy it warm for the best taste! For the full recipe, check out the [Full Recipe]. The oven-baked frittata is simple and full of flavor. You learned how to choose ingredients, mix them well, and bake the dish to perfection. Don't forget the best tips for texture and flavor. Make it your own with proteins or veggies you love. Store leftovers wisely for future meals. Enjoy this dish any time, and know it’s easy to prepare. A frittata makes a tasty meal for breakfast, lunch, or dinner. Try different flavors and share with your family or friends!

Easy Oven Baked Frittata Simple and Healthy Recipe

Are you looking for a simple and healthy meal that impresses? An Easy Oven Baked Frittata is your answer! This

To make Pineapple Teriyaki Chicken, gather these key items: - 4 boneless, skinless chicken thighs - 1 cup fresh pineapple, diced into bite-sized pieces - 1/2 cup low-sodium soy sauce - 1/4 cup packed brown sugar - 1 tablespoon rice vinegar - 1 tablespoon sesame oil - 1 teaspoon garlic powder - 1 teaspoon freshly grated ginger - 1/2 teaspoon freshly ground black pepper These ingredients work well together. They give the dish a sweet, salty, and slightly tangy taste. The marinade makes the chicken juicy and full of flavor. Here are the marinade components: - 1/2 cup low-sodium soy sauce - 1/4 cup packed brown sugar - 1 tablespoon rice vinegar - 1 tablespoon sesame oil - 1 teaspoon garlic powder - 1 teaspoon freshly grated ginger - 1/2 teaspoon freshly ground black pepper Mix these ingredients with the chicken thighs. Let them soak for at least 30 minutes, or overnight for even better flavor. After cooking, you can make the dish look great with these garnishes: - 2 green onions, finely chopped - Sesame seeds These garnishes add color and a nice crunch. They make your Pineapple Teriyaki Chicken even more appealing. For the full recipe, check out the link I provided. First, gather your ingredients for the marinade. You will need low-sodium soy sauce, brown sugar, rice vinegar, sesame oil, garlic powder, grated ginger, and black pepper. In a medium bowl, whisk these together until the sugar dissolves. This step is key for flavor. Next, add the chicken thighs to the marinade. Make sure each piece is well coated. Cover the bowl with plastic wrap and put it in the fridge. Let it marinate for at least 30 minutes. For the best taste, let it sit overnight. Heat a tablespoon of vegetable oil in a large skillet over medium heat. Take the marinated chicken out and set aside the marinade. Place the chicken in the hot oil. Cook it for about 5 to 7 minutes on each side. You want it to be golden brown and reach an internal temperature of 165°F (75°C). Once it’s cooked, move the chicken to a plate. Keep it warm while you make the sauce. In the same skillet, pour in the reserved marinade. Bring it to a rapid boil. Add the diced pineapple and let it cook for about 3 to 5 minutes. This helps the pineapple soften and mix with the flavors. Now, stir in the cornstarch mixed with water. Lower the heat to a simmer. Keep stirring until the sauce thickens, which should take about 2 to 3 minutes. Slice the cooked chicken into strips. Add it back to the skillet. Toss the chicken in the thickened sauce for another 2 to 3 minutes. This allows the flavors to blend beautifully. Serve the chicken hot. Garnish with green onions and sesame seeds. Enjoy your Pineapple Teriyaki Chicken! For more detailed steps, check the Full Recipe. Marinating chicken is key to great flavor. I suggest using a zip-top bag for easy marinating. It helps coat the chicken fully. Make sure to remove excess air before sealing. This ensures the marinade touches every part of the chicken. For best results, marinate for at least 30 minutes. If you can, marinate overnight. This allows the flavors to deepen and create a tasty chicken. To sear chicken well, use a hot skillet. I prefer a cast-iron pan for good heat retention. Start with a tablespoon of vegetable oil. Place chicken thighs in the hot pan without crowding. This helps create a nice golden crust. Cook for 5-7 minutes on each side. If you flip too soon, the chicken may stick. Wait until it releases easily. Always check that the chicken reaches an internal temperature of 165°F (75°C). To thicken your teriyaki sauce, use cornstarch. Mix two tablespoons of cornstarch with two tablespoons of water to create a slurry. When your sauce is boiling, add this mixture slowly. Stir constantly to avoid lumps. The sauce will thicken in about 2-3 minutes. If it gets too thick, you can add a splash of water or broth to adjust it. This method ensures a smooth and glossy finish for your Pineapple Teriyaki Chicken. For the complete recipe, check out the Full Recipe. {{image_4}} You can switch up the protein in this dish. Chicken thighs are great, but try using chicken breasts for a leaner option. Pork tenderloin is a fantastic choice too! It will soak up the flavors well. If you enjoy beef, flank steak can work beautifully. Just make sure to slice it thin against the grain. For seafood lovers, shrimp will cook fast and add a sweet touch. If you're looking for vegetarian options, tofu is a perfect substitute. Use firm or extra-firm tofu for the best texture. Just remember to press it to remove excess water first. You can also try using tempeh, which has a nutty flavor. For a fun twist, use hearty vegetables like bell peppers and mushrooms. These will absorb the teriyaki sauce and create a delicious meal. To make your Pineapple Teriyaki Chicken even more delightful, consider adding extra flavors. A splash of lime juice can brighten the dish. Fresh herbs like cilantro or basil add great color and taste. For some heat, include red pepper flakes or sliced chilies. You can even add nuts like cashews or peanuts for crunch. Try some sesame oil for a richer flavor. These small tweaks can elevate your dish and impress your guests. For the full recipe, don't forget to check out the details above! To store leftover Pineapple Teriyaki Chicken, let it cool first. Place it in an airtight container. Make sure to cover it tightly to keep air out. This helps to keep the chicken moist and the flavors intact. When you're ready to enjoy leftovers, reheat the chicken gently. You can use a microwave or a skillet. If using a microwave, heat it in short bursts. Stir in between to warm evenly. If using a skillet, add a splash of water to keep it juicy. Heat it over low to medium heat until warmed through. Leftover Pineapple Teriyaki Chicken will stay good in the fridge for about 3 to 4 days. If you want to keep it longer, freeze it. It can last up to 3 months in the freezer. Just make sure to label the container with the date. This helps you keep track of freshness. If you want the full recipe for this dish, be sure to check out the Full Recipe! Yes, you can use canned pineapple. However, fresh pineapple gives a brighter taste. Canned pineapple will still add sweetness and moisture. Just be sure to drain it well before using. This helps avoid excess juice in your sauce. You have many great options to serve with this dish. Here are a few to consider: - Steamed jasmine rice - Quinoa - Stir-fried vegetables - A fresh salad - Noodles These sides will balance the sweet and savory flavors of the chicken. To check if the chicken is done, use a meat thermometer. Insert it into the thickest part of the chicken. It should read 165°F (75°C). If you don't have a thermometer, cut into the chicken. The meat should be white, not pink, and the juices should run clear. Jasmine rice is a great choice. It has a nice aroma and fluffy texture. Brown rice is another healthy option. It adds a nutty flavor and extra fiber. Both types will soak up the tasty teriyaki sauce. You can find the full recipe above for more details. Pineapple teriyaki chicken is a fun dish with bold flavors. We covered the key ingredients, like the marinade and garnishes. I shared step-by-step tips to make cooking easy. Remember best practices for marinating and cooking to ensure great taste. You can make tasty variations too, whether using different proteins or going vegetarian. Proper storage keeps leftovers fresh for next time. With these tips, you can cook with confidence. Enjoy your cooking journey and experiment with flavors!

Pineapple Teriyaki Chicken Flavorful and Easy Recipe

Are you ready to impress your family with a dish that bursts with flavor? This Pineapple Teriyaki Chicken recipe is

To make fluffy Japanese pancakes, you need these key items: - 1 cup all-purpose flour - 2 tablespoons granulated sugar - 1 tablespoon baking powder - 1/4 teaspoon fine salt - 1/2 cup warm milk - 2 large eggs, separated (yolks and whites) - 1/2 teaspoon vanilla extract - 1 tablespoon vegetable oil (for cooking) These ingredients work together to create the light texture that sets these pancakes apart. To take your pancakes to the next level, consider these additions: - Butter (for serving) - Maple syrup (for drizzling) - Fresh fruits (such as mixed berries or banana slices) for garnish These toppings add flavor and color to your dish, making it even more appealing. If you need to swap some ingredients, here are a few ideas: - Use almond milk or oat milk instead of regular milk for a dairy-free option. - For gluten-free pancakes, try using gluten-free all-purpose flour. - If you’re out of baking powder, mix 1/4 teaspoon baking soda with 1/2 teaspoon vinegar as a substitute. These substitutions can help you adapt the recipe to your needs while keeping it delicious. For the complete recipe, check out the Full Recipe. Start by gathering your ingredients. In a medium bowl, combine: - 1 cup all-purpose flour - 2 tablespoons granulated sugar - 1 tablespoon baking powder - 1/4 teaspoon fine salt Whisk these dry ingredients together. This gives you a smooth mix. In a separate bowl, mix: - 1/2 cup warm milk - 2 large egg yolks - 1/2 teaspoon vanilla extract Whisk until it is smooth. Pour this mix into the dry ingredients. Stir gently with a spatula. You want to blend without overmixing. Some lumps are okay. In a clean bowl, beat the 2 egg whites. Use an electric mixer or whisk until stiff peaks form. This step is key for fluffy pancakes. Now, gently fold the egg whites into your batter. Do this in three parts. Use a spatula to lift and fold without breaking the bubbles. Your batter should feel light and airy. Preheat your skillet over low heat. Lightly grease it with vegetable oil. Cooking slowly is important for fluffy pancakes. Scoop 1/4 cup of batter onto the skillet. Let it spread a bit. If you want extra fluffiness, stack the batter high. Cover the skillet with a lid. Cook for about 4-5 minutes until golden brown. Carefully flip and cook the other side for another 4-5 minutes. Once cooked, keep the pancakes warm in a low oven as you repeat with the rest of the batter. Serve your pancakes stacked high with butter on top. Drizzle with maple syrup and add fresh fruits for a tasty finish. For the full recipe, refer to the instructions above. To make your pancakes super fluffy, follow these tips: - Separate the eggs. Use the yolks for the batter and beat the whites until stiff peaks form. - Fold gently. When mixing in the egg whites, use a spatula. Be gentle to keep air in. - Use warm milk. This helps the batter mix better and creates a nice texture. - Cook low and slow. Keep your heat low. This ensures the inside cooks well without burning the outside. Many people make mistakes that ruin their pancakes. Here are some to watch out for: - Overmixing the batter. This can make the pancakes tough. Mix until just combined. - Skipping the egg whites. Beaten egg whites are key for fluffiness. Don’t skip this step! - Cooking at high heat. This can burn the outside and leave the inside raw. Use low heat instead. The right tools make a big difference. Here’s what I recommend: - Non-stick skillet or griddle. This prevents sticking and helps with even cooking. - Electric mixer. This makes beating egg whites easier and faster. - Spatula. A silicone spatula is great for folding the batter without deflating it. - Lid for the skillet. Covering the pancakes while they cook helps them rise and stay fluffy. For the complete recipe, check out my Full Recipe section. {{image_4}} You can make matcha fluffy Japanese pancakes for a unique twist. Just add 1-2 tablespoons of matcha powder to the dry ingredients. This gives the pancakes a lovely green color and a subtle earthy flavor. Serve them with a dollop of whipped cream and a drizzle of honey for a sweet finish. If you love chocolate, try chocolate chip fluffy Japanese pancakes. Fold in half a cup of mini chocolate chips into the batter before cooking. The warm pancakes will melt the chocolate slightly, creating a gooey delight in every bite. Top with whipped cream and extra chocolate chips for a fun treat. For a savory option, add diced green onions and cooked bacon to the batter. These savory fluffy pancakes work well as a brunch dish. Serve them with a spoonful of sour cream or a sprinkle of cheese on top. You’ll enjoy a tasty blend of flavors that makes breakfast exciting! To keep your fluffy Japanese pancakes fresh, first let them cool down. Place them in an airtight container. You can stack them, but add parchment paper between layers. This helps to prevent sticking. Store them in the fridge for up to three days. Always check for any signs of spoilage before eating. When you are ready to eat your leftover pancakes, you have a few options. The microwave is quick. Place the pancakes on a plate and cover them with a damp paper towel. Heat for 20-30 seconds. If you want a crispy edge, use a skillet. Heat a little butter over low heat. Warm the pancakes for about one minute on each side. This keeps them fluffy and tasty. Freezing is a great option if you have extra pancakes. First, cool them completely. Place a piece of parchment paper between each pancake to keep them separate. Wrap them tightly in plastic wrap or foil. Then, put them in a freezer bag. Label the bag with the date. They can last up to two months in the freezer. When you want to eat them, thaw in the fridge overnight before reheating. Enjoy your fluffy pancakes anytime! For the full recipe, check out the earlier section. Japanese pancakes are thick and fluffy. They use whipped egg whites. This gives them airiness and a cloud-like texture. Regular pancakes are thinner and denser. The cooking method also varies, with Japanese pancakes often steamed. This helps them rise higher and remain soft. Yes, you can! Use a gluten-free flour blend. Look for a mix that has a good structure. This helps achieve the right texture. You can also try almond flour or oat flour. Just keep in mind that the flavor and texture may change slightly. These pancakes taste best fresh. If you have leftovers, store them in the fridge. They can last up to two days. Place them in an airtight container. Reheat them gently in the microwave or on a skillet. This helps keep them soft and fluffy. You learned how to make fluffy Japanese pancakes, from key ingredients to cooking methods. The tips and variations helped you discover new flavors. Remember to avoid common mistakes for the best results. Store any leftovers properly for later enjoyment. Now you can impress friends and family with your yummy pancakes. Enjoy the process and have fun experimenting with different styles!

Fluffy Japanese Pancakes Light and Tasty Delight

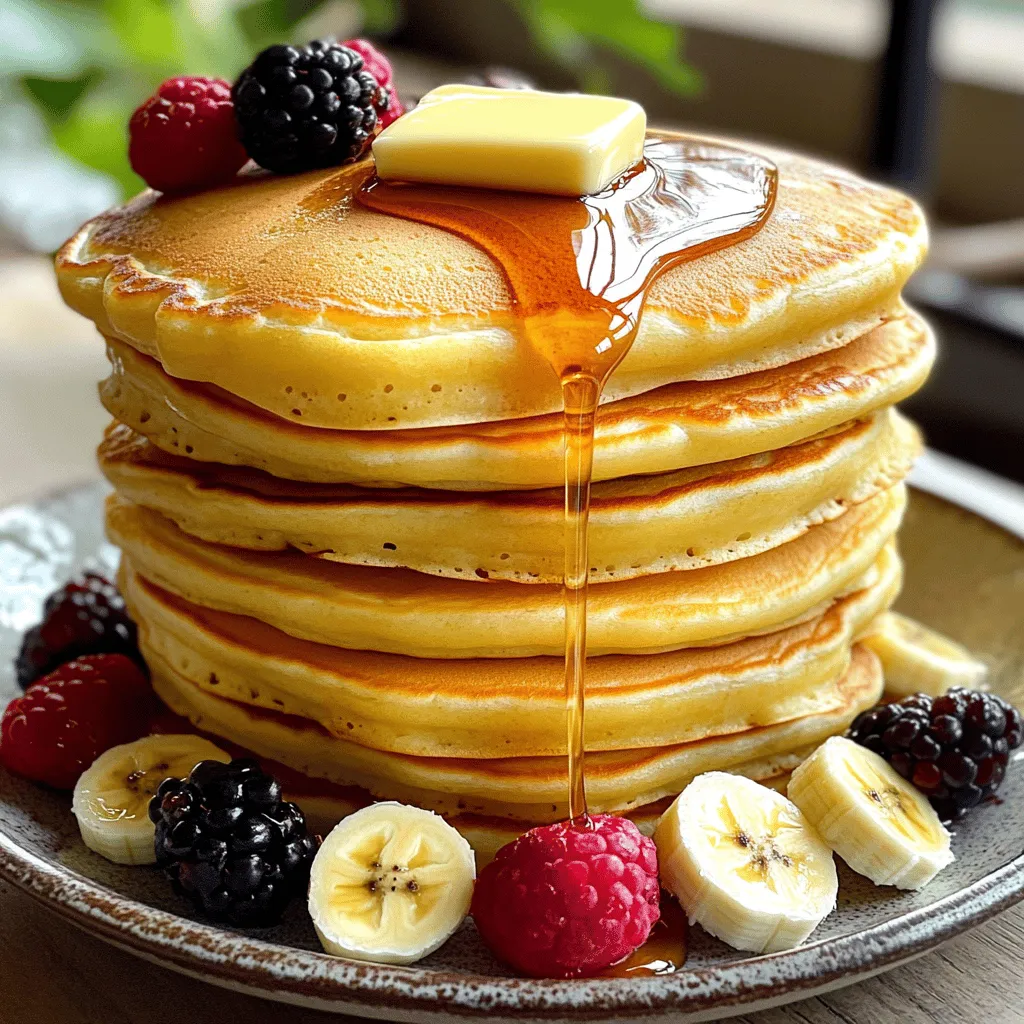
Get ready to flip your breakfast game with Fluffy Japanese Pancakes! These light, airy delights are not your typical pancakes.

To make a tasty vegan chickpea salad sandwich, you'll need some key ingredients: - 1 can (15 oz) chickpeas, thoroughly drained and rinsed - 1/4 cup creamy vegan mayonnaise - 1 tablespoon zesty Dijon mustard - 1 tablespoon freshly squeezed lemon juice - 1 stalk celery, finely diced - 1/4 red onion, finely minced - 1/4 cup bell pepper (any vibrant color), finely chopped - 1 tablespoon fresh dill or parsley, finely chopped - Salt and coarse black pepper to taste - Your favorite bread (whole grain, sourdough, etc.) - Crisp leafy greens (spinach or crisp lettuce) for assembly These ingredients come together to create a refreshing and filling meal. The chickpeas provide a great protein base, while the mayo and mustard add creaminess and tang. You can boost the flavor of your chickpea salad with these optional add-ins: - Freshly sliced tomatoes - Crunchy cucumbers - Avocado for creaminess - A sprinkle of smoked paprika for a hint of spice - Chopped pickles or relish for a tangy twist These add-ins can take your sandwich to new heights. Feel free to mix and match based on what you have on hand. Choosing the right bread can enhance your chickpea salad sandwich. Here are some great options: - Whole grain bread for extra fiber - Sourdough for a tangy flavor - Rye bread for a robust taste - Pita pockets for a fun twist - Ciabatta for a crunchy exterior Each bread type adds its own unique touch to the sandwich. Select what you enjoy most for a satisfying bite. For the full recipe, refer to the details above. Start by draining and rinsing the chickpeas from the can. This step ensures your salad stays fresh. In a medium bowl, use a fork or potato masher to mash the chickpeas. Aim for a mix of whole and smashed beans. This gives your salad a great texture. Next, add the vegan mayonnaise, Dijon mustard, and lemon juice. Stir until everything blends well. Then, fold in the diced celery, minced red onion, chopped bell pepper, and fresh dill or parsley. Make sure these ingredients mix evenly. Finally, taste the mixture. Add salt and coarse black pepper as needed. If you like, toast your bread slices first. This adds a nice crunch. Spread a generous amount of the chickpea salad mixture on one slice of bread. Let it spill slightly over the edges. Top it with crisp leafy greens, and any extras like sliced tomatoes or cucumbers. Finish by placing another slice of bread on top. Press down gently to compact your sandwich. If you want, cut it in half for easier handling. Repeat these steps if you are making more sandwiches. Serve your sandwiches on a rustic wooden board or a bright plate. Garnish with extra sprigs of dill or parsley. Include a side of crunchy carrot sticks or colorful vegetable chips. This makes for a fun and vibrant lunch spread. For the full recipe, check out the details above. Enjoy your tasty, vegan meal! To get the best texture, mash the chickpeas gently. Use a fork or potato masher. You want a mix of whole and smashed beans. This gives your sandwich a nice bite. Avoid over-mashing, or it might turn mushy. Boost the taste with simple ingredients. Add more lemon juice for brightness. Try using fresh herbs like dill or parsley. They add freshness and depth. If you like heat, consider a pinch of cayenne pepper. Adjust salt and pepper to suit your taste. Make your sandwich look appealing. Use fresh leafy greens like spinach or lettuce. Place vibrant toppings like sliced tomatoes or cucumbers on the sandwich. Serve on a rustic wooden board. For a pop of color, add carrot sticks or colorful vegetable chips on the side. This not only looks great but also makes your meal more fun. Enjoy your beautiful meal! {{image_4}} If you want a gluten-free option, choose gluten-free bread. There are many tasty brands available. You can also serve the chickpea salad in lettuce wraps. This keeps it light and fresh. Collard greens or romaine work well for wraps. They add a nice crunch and flavor. You can change the taste with different dressings. Try using tahini for a nutty flavor. A simple olive oil and vinegar mix can brighten the salad. For a spicy kick, add sriracha or hot sauce. These small changes can make the sandwich exciting every time. To boost the protein in your salad, add some nuts or seeds. Chopped walnuts or sunflower seeds add a nice crunch. You can also mix in tofu or tempeh for extra protein. These ingredients make the sandwich more filling and satisfying. For the full recipe, check out the Chickpea Delight Sandwich 🥙. To store leftover chickpea salad, place it in an airtight container. Make sure to cover it tightly. This keeps the salad fresh for up to three days in the fridge. If you plan to eat it later, avoid mixing it with bread until you're ready to serve. This keeps the bread from getting soggy. Store your bread in a cool, dry place. A bread box works great. If you have extra bread, wrap it in plastic wrap or foil. You can also freeze it. When you're ready to eat, simply thaw it at room temperature. Fresh bread tastes best, so only buy what you need for the week. If your chickpea salad gets too thick in the fridge, add a splash of lemon juice. This helps bring back its creamy texture. For bread, you can toast it lightly to revive its crunch. Just pop it in the toaster for a few minutes. This makes your sandwich fresh and tasty again. Enjoy it as a quick meal! A Vegan Chickpea Salad Sandwich is packed with nutrients. Each sandwich offers protein, fiber, and healthy fats. Chickpeas provide about 15 grams of protein per cup. The vegan mayonnaise adds creaminess while keeping it plant-based. Overall, this sandwich can be a healthy choice, especially if you use whole grain bread. It's a great way to fuel your day. Yes, you can meal prep this sandwich! Make the chickpea salad ahead of time and store it in the fridge. It holds up well for a few days. Just keep the salad and bread separate until you are ready to eat. This helps the bread stay fresh and prevents sogginess. It's a simple way to have a quick meal ready. The chickpea salad lasts about 3 to 5 days in the fridge. Make sure to store it in an airtight container. Check for freshness before eating. If it smells off or looks discolored, it's best to toss it. Keeping it well-sealed helps maintain its flavor and texture. Absolutely! This recipe is very flexible. You can swap out the vegan mayo for avocado for a creamier texture. If you're gluten-free, use gluten-free bread or lettuce wraps. Add extra veggies or spices to fit your taste. This sandwich can cater to many diets while staying delicious. Feel free to explore different flavors. Check out the Full Recipe for more ideas! You now have a complete guide to making a tasty vegan chickpea salad sandwich. The recipe covers all main ingredients, helpful tips, and serving ideas. You can add your favorite flavors and choose the best bread. Storing leftovers and meal prep options are also covered. This sandwich is simple and fun to make. It’s easy to customize and enjoy for any meal. Dive in and explore your own versions of this healthy treat!

Vegan Chickpea Salad Sandwich Fresh and Flavorful Meal

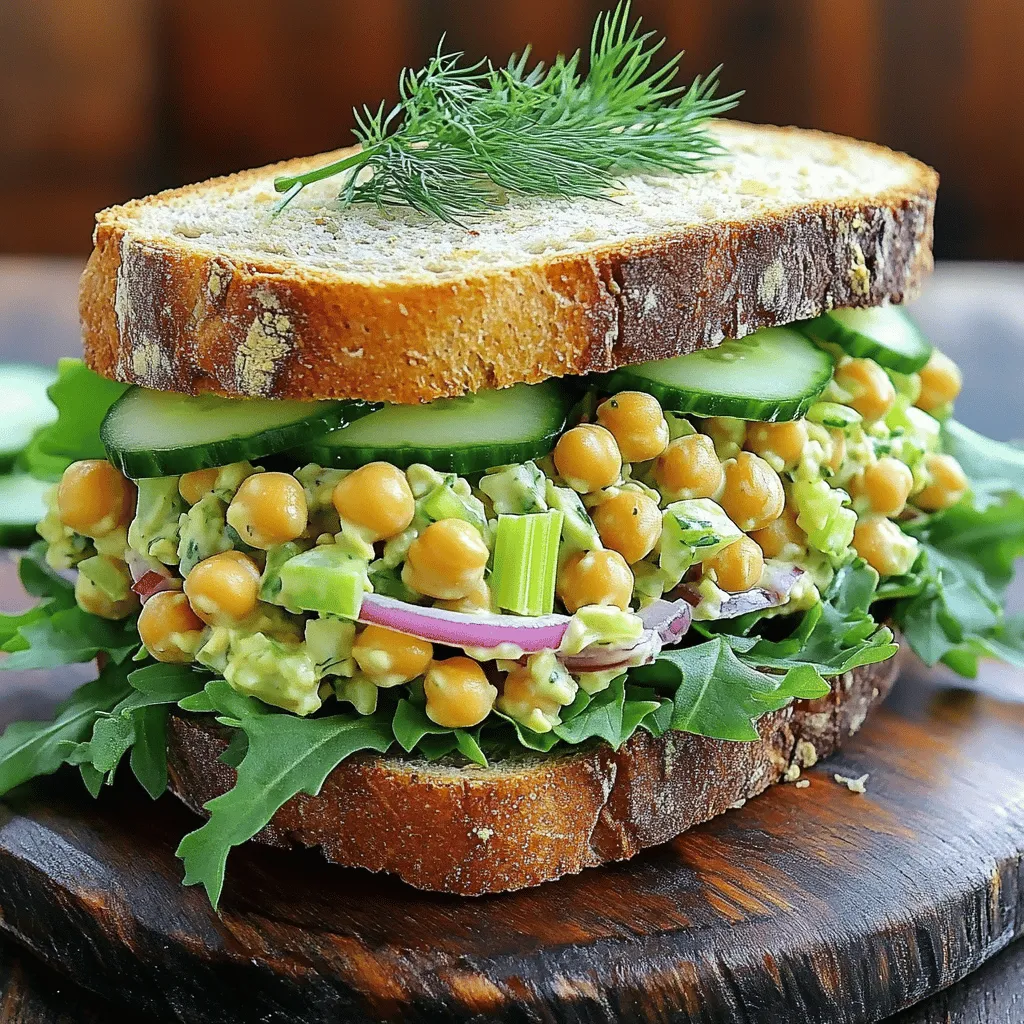
Craving a fresh and tasty meal? Try my Vegan Chickpea Salad Sandwich! It’s packed with flavor and easy to make.

To make a classic chicken pot pie, gather these simple ingredients: - 2 cups cooked chicken, shredded - 1 cup carrots, diced - 1 cup frozen peas - 1 cup potatoes, diced - 1/2 cup onion, finely chopped - 1/2 cup celery, finely chopped - 1/3 cup unsalted butter - 1/3 cup all-purpose flour - 1 3/4 cups chicken broth, preferably low-sodium - 2/3 cup whole milk - 1 teaspoon dried thyme - Salt and black pepper, to taste - 1 package (containing 2 crusts) refrigerated pie crusts - 1 egg, beaten (for egg wash) You can make this chicken pot pie work for different diets. If you're gluten-free, use gluten-free flour and pie crusts. For a dairy-free option, swap the butter with olive oil and use almond milk. If you want a vegetarian dish, replace the chicken with mushrooms or lentils. Always adjust the broth to match your choice. To prepare your chicken pot pie, you'll need some basic tools: - Large saucepan - Wooden spoon or spatula - Whisk - 9-inch pie dish - Rolling pin (if using homemade crust) - Knife and cutting board - Measuring cups and spoons - Oven mitts These tools will help you create a delicious and comforting meal. Enjoy the process! 1. Preheat your oven to 425°F (220°C). A hot oven helps the crust bake well. 2. In a large pan over medium heat, melt the butter. Add the chopped onion, diced carrots, celery, and potatoes. Cook these veggies for about 5-7 minutes until they are tender. 3. Add the flour to the pan to create a roux. Stir for about 1-2 minutes until mixed well. 4. Gradually pour in the chicken broth and milk while whisking. This will help make a smooth sauce. Stir until it thickens, which takes about 3-5 minutes. 5. Fold in the shredded chicken, frozen peas, and thyme. Season with salt and black pepper to taste. Mix everything well and then take the pan off the heat. 6. Roll out one pie crust and lay it in a 9-inch pie dish. Let the edges hang over the side. Pour in the chicken mixture and spread it evenly. 7. Roll out the second pie crust and cover the filling. Crimp the edges with a fork to seal. Cut small slits in the top crust for steam to escape. 8. Brush the top with the beaten egg. This gives a nice golden color when it bakes. 9. Place the pie in the oven and bake for 30-35 minutes. Look for a golden brown crust and bubbling filling. 10. Let the pie cool for 10 minutes before slicing. This helps the filling set. - Prep Time: 20 minutes - Total Cook Time: 30-35 minutes - Oven Temperature: 425°F (220°C) - Use fresh ingredients for the best flavor. - Stir the roux well to avoid lumps. - Let the pie cool slightly before slicing. This keeps the filling from spilling out. - For a flaky crust, do not overwork the dough. - Brush the crust with egg wash for a shiny finish. For the complete ingredient list and more details, check the Full Recipe. To make a flaky crust, keep your ingredients cold. Use chilled butter for the best results. When mixing, don’t overwork the dough. This helps keep the layers light and flaky. Roll the dough gently to avoid heating it. A little bit of chill time in the fridge can also help. After rolling, let the pie crust rest before filling it. This prevents shrinkage while baking. To boost flavor, use fresh herbs like thyme or parsley. They add a bright taste. You can also add garlic for an extra kick. For depth, sauté your vegetables longer to caramelize them. A splash of white wine can lift the dish, too. If you want a richer taste, try using chicken thighs instead of breasts. They stay juicy and flavorful. One mistake is using warm ingredients. This can lead to a tough crust. Another error is not seasoning enough. Taste your filling before baking. Make sure it has enough salt and pepper. Also, don’t skip the steam vents on the top crust. They let the steam escape and keep the filling from getting soggy. Finally, avoid cutting into the pie too soon. Let it rest for a bit to set the filling properly. For the full recipe, check out the Homestyle Chicken Pot Pie section above. {{image_4}} You can make a tasty vegetarian pot pie. Replace the chicken with hearty veggies. Use ingredients like mushrooms, zucchini, and bell peppers. Add more frozen peas and carrots for color. For the sauce, swap chicken broth with vegetable broth. This keeps the flavor rich and comforting. If you have leftover turkey, use it in your pot pie. The method stays the same, and the flavor remains great. You can also try ground beef for a different taste. Brown the beef before adding the vegetables. This will give your dish a nice, savory depth. Experimenting with spices can change the whole vibe of your pot pie. Consider adding rosemary for a woodsy flavor. You can also try sage or even a pinch of nutmeg. Each spice brings its own warmth and comfort to the dish. Mixing in a little garlic powder can also enhance the taste. The possibilities are endless, so have fun with it! To store your classic chicken pot pie leftovers, let it cool completely. Then, cover the pie with plastic wrap or aluminum foil. You can also place it in an airtight container. This helps keep the filling moist and the crust crisp. Store it in the fridge for up to 3 days. If you want to keep it longer, follow the freezing tips below. When you're ready to enjoy your leftovers, preheat your oven to 350°F (175°C). Place the pie on a baking sheet to catch any drips. Cover the pie with foil to prevent the crust from burning. Heat for about 25-30 minutes or until the filling is hot. If you like a crispy crust, remove the foil for the last 10 minutes. This keeps the crust flaky and golden. To freeze your chicken pot pie, let it cool completely first. Wrap the pie tightly in plastic wrap, then in aluminum foil. You can also use a freezer-safe container. This helps protect it from freezer burn. It will stay good for up to 3 months. When you’re ready to eat, thaw it overnight in the fridge. Then, follow the reheating instructions to enjoy it again. For the best taste, try to eat it within the first month. You can tell the pot pie is done by checking the crust. It should be golden brown and crisp. You should also see the filling bubbling through the slits on top. If both of these signs are present, your pie is ready to serve. Yes, you can make chicken pot pie in advance. Prepare the filling and place it in the crust. Cover and store it in the fridge for up to 24 hours. You can also freeze it for later. Just remember to bake it from frozen, adding extra time if needed for cooking. Classic chicken pot pie goes well with many sides. Here are some ideas: - Fresh green salad - Steamed broccoli or green beans - Mashed potatoes - Roasted vegetables - A light fruit salad These sides complement the rich flavors of the pot pie. You can mix and match to fit your taste! For a complete meal, consider a refreshing drink, like lemonade or iced tea. Making classic chicken pot pie is a joy. The rich flavors and warm filling bring comfort to any meal. Here’s how to make it using simple steps and fresh ingredients. Ingredients: - 2 cups cooked chicken, shredded - 1 cup carrots, diced - 1 cup frozen peas - 1 cup potatoes, diced - 1/2 cup onion, finely chopped - 1/2 cup celery, finely chopped - 1/3 cup unsalted butter - 1/3 cup all-purpose flour - 1 3/4 cups chicken broth, preferably low-sodium - 2/3 cup whole milk - 1 teaspoon dried thyme - Salt and black pepper, to taste - 1 package (containing 2 crusts) refrigerated pie crusts - 1 egg, beaten (for egg wash) Follow this Full Recipe for a delightful meal. Each step is easy to follow and fun to make. 1. Preheat your oven to 425°F (220°C). 2. Melt butter in a large saucepan over medium heat. Add onion, carrots, celery, and potatoes. Cook until tender, about 5-7 minutes. 3. Stir in flour to make a roux. Mix for about 1-2 minutes until golden. 4. Gradually add chicken broth and milk while whisking. Stir until the sauce thickens, about 3-5 minutes. 5. Add chicken, peas, thyme, and season with salt and pepper. Mix well and remove from heat. 6. Roll out one pie crust and place it in a 9-inch pie dish. Pour in the chicken mixture. 7. Roll out the second pie crust and cover the filling. Seal the edges and cut slits for steam. 8. Brush the top with beaten egg for a golden finish. 9. Bake for 30-35 minutes until golden brown and bubbling. 10. Let it cool for 10 minutes before slicing. This chicken pot pie is a family favorite. It’s perfect for gatherings or cozy nights in. Enjoy each bite of this hearty meal! This guide covered everything from ingredients to helpful tips for your pot pie. You learned about ingredient substitutions, necessary kitchen tools, and step-by-step cooking instructions. I shared tricks for a flaky crust, flavor enhancements, and variations like vegetarian options. Lastly, we discussed storage best practices and answered common questions. With this knowledge, you can make a delicious pot pie that everyone will love. Happy cooking!

Classic Chicken Pot Pie Comforting and Hearty Meal

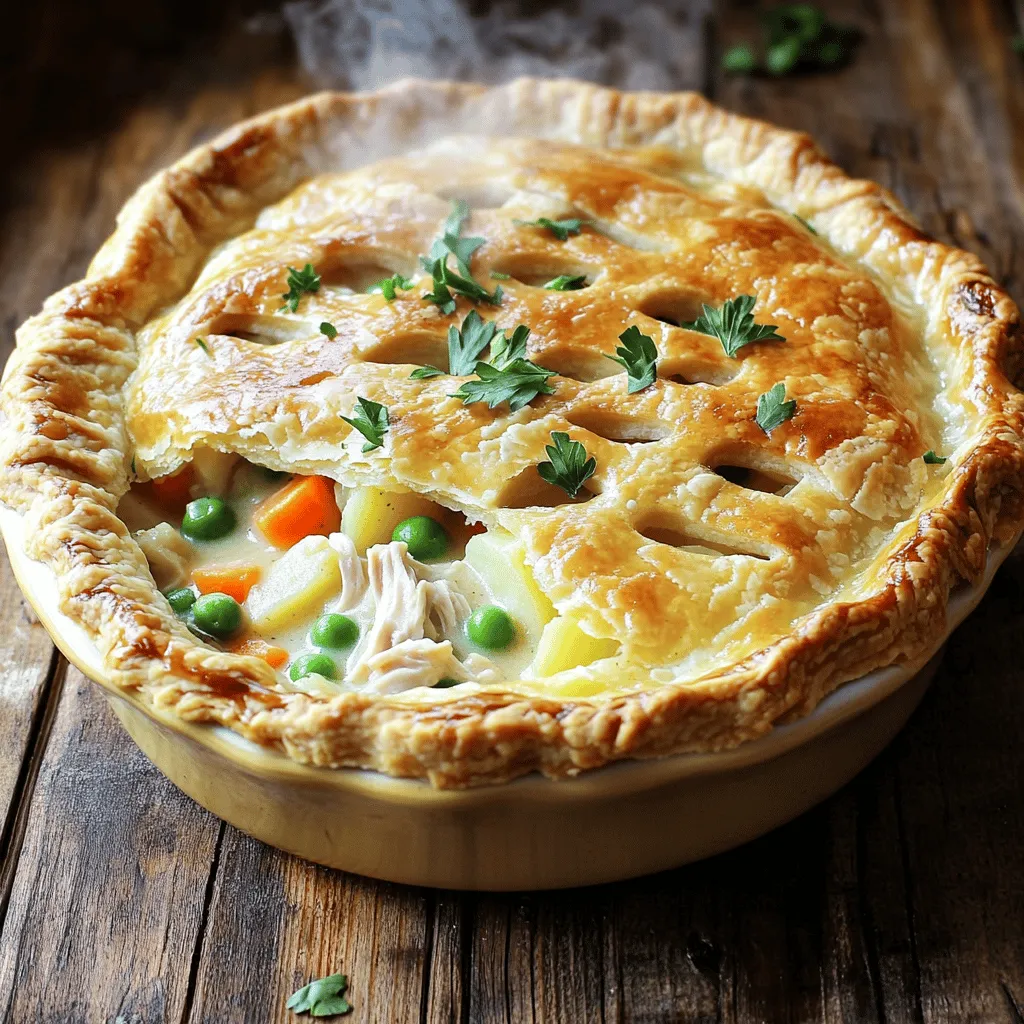
When comfort food calls, there’s nothing quite like a classic chicken pot pie. This dish brings warmth and heartiness to

Older posts
Newer posts
← Previous Page1 … Page43 Page44 Page45 … Page86 Next →

dsad

© 2026 yumymoments • Built with GeneratePress

Our Policies

  • Copyright Policy
  • Cookie Policy
  • GDPR Policy
  • Privacy Policy
  • Disclaimer
  • Terms Of Use

More Information

  • Home
  • About
  • Contact
  • Appetizers
  • Dessert
  • Dinner
  • Drinks
©2026, yumymoments About Back To Top