Skip to content
DisclaimerTerms Of UseGDPR PolicyCookie Policy

yumymoments

  • Home
  • Drinks
  • Appetizers
  • Dinner
  • Dessert
  • About
  • Contact
  • Privacy Policy
DisclaimerTerms Of UseGDPR PolicyCookie Policy

NO-ING-IMG

- 2 cups cooked rotini pasta - 2 cups cooked chicken breast, shredded - 2 cups Alfredo sauce (store-bought or homemade) - 1 cup broccoli florets, steamed until tender - 1 cup cherry tomatoes, halved - 1 cup mozzarella cheese, shredded - ½ cup parmesan cheese, grated - 1 teaspoon garlic powder - Salt and black pepper to taste - Fresh parsley, chopped (for garnish) Choosing the right ingredients makes a big difference. - Chicken: Use the best quality chicken you can find. Fresh chicken is often more flavorful. Look for organic or free-range options if possible. - Vegetables: Fresh vegetables give great taste and texture. However, frozen veggies can also work well if you are in a hurry. Just make sure to steam them until tender before mixing. - Alfredo Sauce: You can save time with store-bought Alfredo sauce. If you have time, homemade sauce can add a personal touch. It is simple to make with cream, butter, and cheese. These details help ensure that your Easy Chicken Alfredo Bake is not just good but truly amazing! For a full recipe, check out the [Full Recipe]. 1. Preheat the oven to 350°F (175°C). This is key for even cooking. 2. In a large bowl, mix the cooked rotini pasta, shredded chicken, steamed broccoli, and halved cherry tomatoes. 3. Add the garlic powder and Alfredo sauce. Stir well to coat everything. 4. Taste the mix. Season with salt and black pepper to your liking. 1. Grease a 9x13-inch baking dish with a bit of oil. This helps prevent sticking. 2. Carefully transfer the pasta mixture into the baking dish. Spread it out evenly. 3. Generously layer the shredded mozzarella cheese and grated parmesan cheese on top. This creates a cheesy crust. 1. Cover the baking dish tightly with aluminum foil. This keeps the moisture in. 2. Place the dish in the preheated oven. Bake for 20 minutes to heat through. 3. After 20 minutes, remove the foil. Let the steam escape. 4. Continue baking for an extra 10-15 minutes. Look for bubbly cheese that's golden brown. 5. Once done, take the dish out and let it cool for about 5 minutes. This allows the flavors to settle. You can find the Full Recipe above for detailed steps and ingredient amounts. You can set this dish up before dinner time. To prep in advance, cook the pasta and chicken ahead of time. Mix them with the other ingredients in a bowl. You can store this mixture in the fridge for up to a day. When you're ready to bake, just pour it into your baking dish. For storing before baking, cover the dish with plastic wrap or aluminum foil. This keeps everything fresh. Be sure to take it out of the fridge about 30 minutes before baking. This helps it bake evenly. To boost the taste, think about adding spices. A pinch of Italian seasoning or red pepper flakes can add a nice kick. You can also try smoked paprika for a deeper flavor. Using fresh herbs really makes a difference. Basil or thyme can brighten the dish. Chop them finely and mix them into your pasta blend for a burst of freshness. If your dish comes out too dry, don’t worry. You can add a bit more Alfredo sauce or some chicken broth. Stir it in gently and return it to the oven for a few minutes. If the seasoning feels off after baking, sprinkle a little salt or pepper on top. You can mix it in and taste again. It's all about getting that perfect flavor! For the full recipe, check out the detailed instructions above. {{image_4}} You can switch proteins easily in this recipe. Shrimp makes a great choice. Just cook it until pink and toss it in. Tofu works too. Make sure to cube it well and pan-fry for crispiness. You can also change the pasta. While rotini is perfect, penne or farfalle are good options. Just ensure they are cooked al dente for the best texture. If you're gluten-free, use gluten-free pasta. Many brands offer great alternatives that taste just as good. You can find rice or corn-based options at your local store. For a dairy-free twist, swap out the Alfredo sauce. Look for cashew-based or coconut milk-based sauces. They add creaminess without the dairy. Adding veggies can make your dish even better. Spinach or bell peppers are tasty choices. Just sauté them lightly before mixing. They will add color and nutrition. For a unique flavor, try different cheeses. Gouda or cheddar can bring a new taste to your bake. Mix them in with mozzarella for a delicious blend. For the full recipe, check out the details above and get cooking! To keep your Easy Chicken Alfredo Bake fresh, use airtight containers. Glass containers work best. They keep the food fresh and make it easy to see what’s inside. Avoid plastic bags since they can let air in. For soft pasta dishes like this, add a layer of sauce on top before sealing. This helps prevent mushiness. When reheating, the oven works best. Preheat it to 350°F (175°C). Place your dish covered with foil. Heat for about 20 minutes or until hot. If you're using a microwave, place a portion in a safe bowl. Heat it on medium power for 2-3 minutes. Stir halfway to ensure even heating. To freeze leftovers, let the dish cool first. Then, cut it into portions and wrap tightly in foil or plastic wrap. You can also use freezer-safe containers. Label them with the date. To thaw, place in the fridge overnight. Reheat in the oven at 350°F (175°C) for 25-30 minutes. This keeps the flavors and texture intact. For best results, enjoy the dish within three months. For the full recipe, check the main section! You can swap chicken for veggies or tofu. Use mushrooms, bell peppers, or zucchini for great flavor. Tofu gives you protein and a nice texture. Just make sure to chop your veggies into small pieces. This helps them cook evenly and mix well with pasta. Yes! You can use any pasta you like. Penne, fusilli, or even gluten-free pasta works well. Just remember to cook it until it is al dente before mixing. This keeps it firm during baking. Making Alfredo sauce is simple. Start with butter and garlic in a pan. Once the garlic is soft, add heavy cream. Stir in parmesan cheese until it melts. Season with salt and pepper for taste. This creamy sauce beats store-bought any day! To make a one-pan meal, cook pasta in a large oven-safe pot. Mix in your chicken, sauce, and veggies right there. Top it with cheese and bake. This saves time and cuts down on dishes! Serve it with a crisp green salad or garlic bread. A side of steamed veggies works great too. These pairings balance the creaminess of the bake and add color to your plate. For more ideas, check out the Full Recipe! This blog post covered a tasty Chicken Alfredo Bake. We looked at the key ingredients, like cooked rotini and shredded chicken. I shared tips for choosing fresh ingredients and explained steps for baking. We also explored variations, storage tips, and FAQs, making it easier for you to customize this dish. Remember, you can tweak it to fit your taste. Whether you make it ahead or change the ingredients, enjoy every bite! Happy cooking!

Easy Chicken Alfredo Bake Irresistible Family Dinner

Looking for a quick, tasty, and family-friendly dinner? This Easy Chicken Alfredo Bake will be your new go-to! With just

To make a great Margherita pizza, you need a few key items. Here’s what you’ll need: - 1 pizza dough (store-bought or homemade) - 1 cup marinara sauce - 8 ounces fresh mozzarella cheese, sliced into 1/4 inch thick pieces - 1/2 cup fresh basil leaves, loosely packed - 2 tablespoons extra virgin olive oil - Salt, to taste - Freshly cracked black pepper, to taste - A pinch of red pepper flakes (optional, for heat) You can switch things up based on your taste. For cheese, you might try burrata or goat cheese. Each will give a unique twist. For the crust, whole wheat or gluten-free options work well. If you love a thicker crust, use more dough or a deep-dish style. The key is to find what you enjoy most. Fresh ingredients make all the difference. Fresh mozzarella gives a creamy texture that melts beautifully. Good-quality marinara sauce adds rich flavor. Fresh basil leaves add a fragrant touch. Always choose ripe tomatoes for the sauce if you make it yourself. When you use fresh items, your pizza will taste better and look more appealing. First, preheat your oven to 475°F (245°C). If you have a pizza stone, place it in the oven to heat. If not, line a baking sheet with parchment paper. This step helps the crust get crispy. Next, take your pizza dough and place it on a clean surface. Lightly flour your hands and the surface. Roll the dough into a circle that’s about 12 inches wide. If using a pizza stone, transfer the dough to a floured pizza peel. For a baking sheet, just put the rolled dough on your prepared sheet. Pour 1 cup of marinara sauce in the center of your dough. Use the back of a spoon to spread it evenly. Leave a half-inch edge for the crust. Now, take 8 ounces of fresh mozzarella cheese. Slice it into 1/4 inch thick pieces. Place the cheese slices evenly over the sauce. This ensures every bite has melty cheese. Drizzle 2 tablespoons of extra virgin olive oil over the cheese. Sprinkle salt and black pepper to taste. If you like heat, add a pinch of red pepper flakes. Now, it’s time to bake! If using a pizza stone, carefully slide the pizza from the peel onto the hot stone. If using a baking sheet, just place it in the oven. Bake for 10-12 minutes. Look for a golden and crispy crust. The cheese should bubble and turn a lovely brown. When done, take the pizza out of the oven. Scatter fresh basil leaves over the top. Let it cool for a minute before slicing. Enjoy your delicious Cheesy Delight Margherita Pizza. For detailed steps, refer to the Full Recipe. To get a great crust, start with good dough. You can use store-bought dough or make your own. Roll your dough evenly to about 12 inches wide. A thicker edge makes a nice crust. Use a pizza stone if you can. It helps the crust get crispy. Preheat your oven to 475°F (245°C) for best results. This high heat cooks the crust quickly. Bake your pizza for 10 to 12 minutes. Keep an eye on it. The crust should be golden brown, and the cheese should bubble. If you see too much browning, lower the oven temperature. Each oven is a bit different. Take notes on the best time for your oven. Seasoning makes a big difference in flavor. Use good olive oil for drizzling. It adds richness. Salt and black pepper are must-haves. Fresh basil leaves on top add a nice touch. You can also try red pepper flakes for heat. Just a pinch adds great flavor without overwhelming the dish. For more ideas, check the full recipe. {{image_4}} You can make your Margherita pizza unique by adding more toppings. Here are some ideas: - Sliced tomatoes for extra freshness. - Arugula for a peppery flavor. - Prosciutto for a savory touch. - Mushrooms for earthiness. - Olives for a briny kick. These toppings can bring a new taste to your pizza without losing its classic charm. If you want a vegan Margherita pizza, it’s easy to adapt. Use these simple swaps: - Replace mozzarella with vegan cheese. - Use cashew cream for a creamy texture. - Ensure your crust has no dairy products. These changes keep the deliciousness while making it plant-based. You won’t miss the cheese! If you love heat, add some spice to your Margherita pizza. Here are a few options: - Sprinkle red pepper flakes on top. - Drizzle with chili oil before serving. - Use spicy marinara sauce for a kick. These spicy additions enhance the flavor. They bring excitement to each bite. Enjoy your flavorful experience! To store leftover pizza, first let it cool to room temperature. Wrap each slice in plastic wrap or foil. You can also place slices in an airtight container. Keep the pizza in the fridge for up to three days. This helps keep it fresh and tasty. For the best reheating, use an oven. Preheat your oven to 375°F (190°C). Place the pizza slices directly on the oven rack or on a baking sheet. Heat for about 10 minutes until the cheese melts again. This method keeps the crust crispy. You can also use a skillet. Heat the skillet over medium heat. Add the pizza slice and cover it. Heat for about 5 minutes. This will warm the pizza and keep the crust crisp. If you want to save pizza for later, freezing is a great option. Wrap each slice tightly in plastic wrap. Then, place the wrapped slices in a freezer bag. Remove as much air as possible before sealing. You can freeze pizza for up to two months. When ready to eat, thaw it in the fridge overnight. Reheat it in the oven for the best taste. Enjoy your delicious Cheesy Delight Margherita Pizza anytime! The best cheese for Margherita pizza is fresh mozzarella. It melts well and has a creamy taste. Look for mozzarella packed in water, as it stays moist. This cheese gives the pizza its classic look and taste. You can also use burrata for an even creamier texture. Yes, you can make your own pizza dough! It is quite easy and fun. All you need is flour, water, yeast, and salt. Combine these ingredients and knead the dough. Let it rise for about an hour. Homemade dough tastes fresh and adds a personal touch to your pizza. If you are short on time, store-bought dough works perfectly too. You can tell when your pizza is fully cooked by checking the crust and cheese. The crust should be golden brown and crispy. The cheese should be bubbling and slightly golden. If you have a pizza stone, the heat helps cook it evenly. For best results, keep an eye on the pizza during the last few minutes of baking. To wrap up, we explored key ingredients and steps for pizza-making. Fresh ingredients add flavor, while variations keep each pizza unique. Mastering dough prep and baking ensures a perfect crust every time. Remember to try out different toppings and seasonings to suit your taste. Finally, you'll want to follow storage tips for enjoying leftovers later. With practice, you’ll create delicious pizzas that impress everyone. Enjoy your pizza-making journey!

Simple Margherita Pizza Flavorful and Easy Recipe

Are you ready to make a delicious Simple Margherita Pizza at home? This recipe is not only easy but bursting

Here are the simple ingredients you need to make a No-Bake Oreo Cheesecake. Gather these before you start your fun kitchen adventure. - 24 Oreo cookies (plus extra for garnish) - 1/4 cup unsalted butter, melted - 16 oz cream cheese, softened - 1/2 cup powdered sugar - 1 teaspoon vanilla extract - 1 1/2 cups heavy whipping cream, chilled - 1/2 cup crushed Oreo cookies (for filling) These ingredients blend together to create creamy layers and a crunchy crust. Each bite delivers a sweet taste that’s hard to resist. Make sure to use fresh ingredients for the best flavor. The cream cheese should be soft enough to mix well, so take it out of the fridge ahead of time. You can also play with the toppings. Extra Oreos on top make it look fancy. If you love chocolate, consider adding chocolate sauce as a drizzle. This no-bake cheesecake is quick to prepare, and it’s a real crowd-pleaser. For the full recipe, check out the detailed steps I’ve outlined. Enjoy crafting this delightful dessert! First, crush the Oreo cookies. Use a food processor for even crumbs. You want them to look like sand. If you don’t have a processor, put the cookies in a bag and crush them with a rolling pin. Next, mix the crumbs with melted butter. In a bowl, combine the cookie crumbs with 1/4 cup of melted unsalted butter. Stir until the crumbs are coated. The mix should feel like wet sand. Now, chill the crust. Press the cookie mixture into a 9-inch springform pan. Make sure it is flat and even. Place the pan in the fridge while you make the filling. This helps the crust set. Start by beating the cream cheese until smooth. Use an electric mixer on medium speed. Beat 16 oz of softened cream cheese in a large bowl. It should be creamy and free of lumps. Next, add powdered sugar and vanilla extract. Gradually mix in 1/2 cup of powdered sugar and 1 teaspoon of vanilla. Keep mixing until the mixture is smooth and well combined. Now, it’s time to whip the cream. Pour 1 1/2 cups of chilled heavy whipping cream into a separate bowl. Use a hand mixer or stand mixer. Beat on medium-high speed until stiff peaks form. Be careful not to overwhip it. Overwhipping can make the cream grainy. After that, mix the whipped cream into the cream cheese mixture. Use a spatula to fold the whipped cream gently into the cream cheese. This keeps the mixture light and fluffy. Then, fold in 1/2 cup of crushed Oreo cookies for extra flavor. Fill the crust with the cheesecake mixture. Spoon the creamy filling over the chilled Oreo crust. Smooth the top with a spatula for an even layer. Next, refrigerate until set. Cover the pan with plastic wrap. Let it chill for at least 4 hours, or overnight if you can wait. This will help the cheesecake firm up nicely. Follow these steps for a perfect No-Bake Oreo Cheesecake. For the full recipe, check out the previous section! - Overwhipping the cream: When making the whipped cream, stop mixing once you see stiff peaks. If you whip too much, the cream can turn grainy. - Not chilling the crust: Always chill the crust before adding the filling. If you skip this step, the cheesecake might not hold its shape. - Importance of room temperature ingredients: Make sure your cream cheese is soft. This helps it blend smoothly with the sugar and vanilla. - Suggested timing for chilling: Chill the filled cheesecake for at least four hours, but overnight is best. This gives it time to firm up. - Garnishing with Oreos and chocolate sauce: Top your cheesecake with whole Oreos and drizzle chocolate sauce for a stunning look. - Serving options for gatherings: Serve slices on individual plates with a dollop of whipped cream. Sprinkle crushed Oreos on top for added flair. These tips ensure your No-Bake Oreo Cheesecake is a hit at any gathering. For the complete recipe, check the Full Recipe section. {{image_4}} You can get creative with the flavors. Try adding chocolate or caramel swirls. Just pour some melted chocolate or caramel into the filling before you mix it. Use a knife to swirl it in. This adds a rich twist to your cheesecake. You can also incorporate different cookie flavors. Instead of Oreos, use peanut butter or mint cookies. This changes the taste and gives a fun new spin. If you need a gluten-free option, use gluten-free cookies instead of Oreos. You can find many brands that taste great. This way, everyone can enjoy the cheesecake. For a vegan twist, swap the cream cheese and whipped cream. Look for vegan cream cheese and coconut whipped cream. These options keep the cheesecake creamy and delicious without dairy. You can transform this cheesecake into parfaits or mini cheesecakes. Layer the crust and filling in small cups for a fun treat. They are great for parties and easy to serve. Pair your cheesecake with fruit toppings or sauces. Fresh berries, chocolate sauce, or caramel work well. This adds color and extra flavor to your dessert. For the full recipe, check out the Heavenly No-Bake Oreo Cheesecake guide. To keep your No-Bake Oreo Cheesecake fresh, refrigerate it right away. Place the cheesecake in the fridge after it sets. It will stay good for up to 5 days. Use plastic wrap or a cake dome to cover it. This prevents it from drying out or absorbing other smells. You can freeze slices for later use. First, cut the cheesecake into wedges. Wrap each slice in plastic wrap. Then, place them in a freezer bag. Make sure to label the bag with the date. The cheesecake can last up to 3 months in the freezer. When you're ready to eat a slice, take it out and thaw it in the fridge overnight. Avoid thawing at room temperature. This helps keep the texture creamy and smooth. Enjoy your delicious No-Bake Oreo Cheesecake whenever you like! For the full recipe, check out the Heavenly No-Bake Oreo Cheesecake. No-Bake Oreo Cheesecake stays fresh in the fridge for about 5 days. Store it covered to keep it from drying out. If you want to enjoy it longer, consider freezing it. Just slice it and wrap each piece tightly. Yes, you can use many types of cookies for the crust. Graham crackers are a popular choice. Chocolate chip cookies also work well. If you want a different flavor, try vanilla wafers or even gingersnaps. Just crush them the same way as the Oreos. If your cheesecake is too soft, chill it longer. Sometimes, it just needs more time to set. If it’s still runny, try adding more whipped cream. Whip an extra half cup and fold it in gently. This should help thicken the mixture. For the best results, check the Full Recipe for detailed steps. You learned how to make a no-bake Oreo cheesecake from start to finish. We covered the important ingredients and steps needed for a tasty treat. You also discovered tips, variations, and storage info to keep your cheesecake fresh. This dessert is easy to customize, so have fun with it! Whether you choose to add caramel swirls or go gluten-free, your options are endless. Now, it's time to enjoy your delicious creation and impress your friends and family!

No-Bake Oreo Cheesecake Simple and Sweet Delight

Are you ready to whip up a dessert that’s both easy and delicious? My No-Bake Oreo Cheesecake is a simple

- 8 ounces elbow macaroni - 2 cups sharp cheddar cheese, shredded - 1 cup mozzarella cheese, shredded - 1 tablespoon butter - 1 tablespoon all-purpose flour - 1/4 teaspoon cayenne pepper - 1/2 cup breadcrumbs - 1 tablespoon olive oil - 1/2 teaspoon garlic powder - 1/2 teaspoon onion powder - Salt and pepper to taste Gathering your ingredients is the first step to a great mac and cheese. You need elbow macaroni, which gives the dish its classic shape. Choose sharp cheddar cheese for a bold flavor and mozzarella for creaminess. The butter and flour help create a smooth cheese sauce. You can spice it up with cayenne pepper if you like some heat. Breadcrumbs add a nice crunch on top, and olive oil helps toast them perfectly. Don’t forget the seasonings! Garlic powder and onion powder add depth. Adjust salt and pepper to your taste. For the full recipe, follow the detailed steps to create this creamy comfort dish. To start, bring a large pot of salted water to a boil. The salt helps flavor the pasta as it cooks. Carefully add 8 ounces of elbow macaroni. Cook it according to the package directions until it's al dente, which means it should have a bit of bite to it. Once done, drain the pasta in a colander and set it aside. This step is crucial for a great mac and cheese because the pasta needs to hold up well in the cheese sauce. Now, let’s make the cheese sauce. In a medium saucepan, melt 1 tablespoon of butter over medium heat. Once the butter melts completely, add 1 tablespoon of all-purpose flour. Use a whisk to stir and combine the two ingredients. Keep stirring for about 1 minute until it turns into a smooth roux. This roux will give your sauce a nice base. Gradually whisk in 2 cups of milk, making sure to avoid lumps. Continue stirring until the mixture thickens, which takes about 5-7 minutes. You want a creamy sauce that coats the back of a spoon. Once thickened, lower the heat and add 2 cups of shredded sharp cheddar cheese and 1 cup of shredded mozzarella cheese. Stir until the cheese melts and the sauce is smooth. Mix in 1/2 teaspoon of garlic powder and 1/2 teaspoon of onion powder for extra flavor. Season with salt and pepper to taste. Next, pour the cooked macaroni into the cheese sauce. Stir well to coat every piece of pasta with the creamy sauce. For a crispy topping, you can toast breadcrumbs. In a small skillet, heat 1 tablespoon of olive oil over medium heat. Add 1/2 cup of breadcrumbs and stir them until they turn golden brown, about 2-3 minutes. If you love baked mac and cheese, preheat your oven to 350°F (175°C). Transfer the mac and cheese mixture to a greased baking dish. Evenly sprinkle the toasted breadcrumbs over the top. Bake for 15-20 minutes, or until the dish is bubbly and the top is golden brown and slightly crispy. Enjoy your creamy comfort dish! You can find the full recipe for this delightful dish in the recipe section above. To avoid lumps in your cheese sauce, whisk the flour and butter well first. This makes a smooth roux. When you add milk, do it slowly while whisking. This keeps the mixture creamy. For enhanced flavor, I recommend using a mix of sharp cheddar and mozzarella. The cheddar gives a rich taste, while mozzarella adds a nice stretch. For al dente pasta, cook the elbow macaroni just until firm. Follow the package instructions closely. Drain it well to prevent sogginess. If you bake the dish, adjust the bake time based on your preference. If you want a creamy texture, bake for less time. For a crispy top, bake longer until golden brown. Serve your mac and cheese steaming hot in individual bowls. To make it look fancy, sprinkle fresh parsley or chives on top. This adds a nice pop of color. Pair it with steamed veggies or a fresh salad for a balanced meal. You can find the full recipe for this creamy comfort dish to help you create the perfect plate! {{image_4}} You can make your mac and cheese even better with some tasty add-ins. Adding vegetables like broccoli or spinach boosts nutrition. They add color and flavor too. You can also mix in meats like crispy bacon or tender chicken. These options create a heartier dish that everyone will love. Want to spice things up? Try adding some heat with jalapeños or hot sauce. If you prefer gourmet flavors, consider using truffle oil or different types of gourmet cheeses. Aged gouda or blue cheese can add a rich taste that transforms your dish. If you need a gluten-free version, don’t worry! You can swap regular pasta for gluten-free pasta made from rice or chickpeas. For the cheese sauce, use gluten-free flour or cornstarch to thicken. These simple changes let everyone enjoy this creamy comfort dish. For the full recipe, check out the detailed instructions above. To store your mac and cheese, let it cool first. This helps prevent extra moisture. Place it in an airtight container. Be sure to close it tightly to keep out air. You can store it in the fridge for up to three days. When it's time to eat, use the oven or stovetop. For the oven, preheat to 350°F (175°C). Place the mac and cheese in a safe dish and cover it with foil. Heat for about 20 minutes. For stovetop reheating, add a splash of milk to a pan. Stir while it warms to keep it creamy. This method helps keep the texture smooth. If you want to freeze mac and cheese, use a freezer-safe container. Let it cool completely before sealing. It can last for up to three months in the freezer. When you want to eat it, thaw it overnight in the fridge. Reheat it using the stovetop or oven. This way, you can enjoy your creamy comfort dish later! For a full recipe, check out the details above. To make mac and cheese from scratch, you need pasta and cheese. First, boil elbow macaroni in salted water. Cook it until it is firm but tender. Drain the pasta and set it aside. Next, make a cheese sauce. Melt butter in a pan, then mix in flour to create a roux. Gradually add milk while whisking to avoid lumps. Once thickened, stir in cheese until melted. Combine the pasta and sauce together. You can find the full recipe above for detailed steps. Yes, you can use different types of cheese! Cheddar is a classic choice, but you can mix in others. Try gouda for a smoky flavor or fontina for creaminess. If you want something sharp, add some blue cheese or parmesan. Feel free to experiment with your favorite cheeses to find the perfect blend. To keep mac and cheese creamy, avoid overcooking the pasta. Cook it al dente so it stays firm. When making the cheese sauce, stir it constantly to melt the cheese smoothly. If the sauce gets too thick, add a bit more milk. You can also cover the mac and cheese while it rests. This helps to retain moisture and creaminess. You can store mac and cheese in the fridge for about 3 to 5 days. Make sure to place it in an airtight container to keep it fresh. If you want to keep it longer, consider freezing it. Just ensure it’s in a freezer-safe container. In this blog post, we covered how to make delicious mac and cheese from scratch. We went through the required and optional ingredients, along with step-by-step instructions. Tips for a perfect cheese sauce and variations to customize your dish helped enhance your cooking skills. Remember to store leftovers properly for future enjoyment. Making mac and cheese can be simple and fun. With your new skills, you can impress your friends and family with this classic dish. Now, it's time to get cooking!

Classic Homemade Mac and Cheese Creamy Comfort Dish

Nothing says comfort like a warm, cheesy bowl of classic homemade mac and cheese. In this guide, I’ll show you

- 4 cups green cabbage, finely sliced - 1 cup red cabbage, finely sliced - 1 cup carrots, ideally julienned - 1 cup bell pepper, thinly sliced (any vibrant color) - 1/2 cup scallions, chopped into small pieces - 1/4 cup fresh cilantro, roughly chopped - 1/4 cup roasted peanuts, coarsely chopped for texture - 1/4 cup sesame oil for richness - 2 tablespoons soy sauce (or tamari for a gluten-free option) - 2 tablespoons rice vinegar for acidity - 1 tablespoon fresh ginger, grated for zest - 1 clove garlic, minced for depth - 1 tablespoon honey or agave syrup for sweetness - Salt and pepper to taste for seasoning This Crunchy Asian Slaw bursts with color and flavor. Each ingredient plays a role. Fresh green and red cabbage provide crispness and crunch. Carrots add sweetness. Bell peppers give a pop of color. Scallions bring a mild onion flavor. Fresh cilantro brightens each bite. The dressing is just as important. It combines sesame oil, soy sauce, and rice vinegar. This mix adds richness and tang. Ginger and garlic enhance the depth. Honey or agave syrup balances the flavors. Topping with roasted peanuts adds delightful crunch and texture. You can also add more herbs for freshness. This slaw is perfect for any meal. It pairs well with grilled meats or can stand alone as a light dish. For a full recipe, check the provided link. To start, gather all your vegetables. You will want to finely slice the green cabbage and red cabbage. Use a sharp knife for this task. Cut the cabbage into thin strips. For carrots, julienne them into long, thin pieces. You can use a grater if you prefer. For bell peppers, slice them thinly as well. Aim for uniform cuts. This helps everything mix well. Here are some tips for a uniform cut: - Use a cutting board that won’t slip. - Keep your fingers tucked in while cutting. - Take your time to avoid uneven pieces. You will need several ingredients for the dressing: - 1/4 cup sesame oil - 2 tablespoons soy sauce - 2 tablespoons rice vinegar - 1 tablespoon grated fresh ginger - 1 clove minced garlic - 1 tablespoon honey or agave syrup To make the dressing, combine all these ingredients in a bowl. Use a whisk to mix them well. Whisking helps blend the flavors. Aim for a smooth consistency. You can also use a jar with a lid. Shake it well until mixed. In a large bowl, combine your sliced vegetables. Pour the dressing over them. Gently toss everything together. Make sure all the veggies are coated. This step is key for flavor. Let the slaw sit for at least 15 minutes. This resting time allows flavors to meld. The vegetables will soften slightly, too. For a nice finish, sprinkle coarsely chopped roasted peanuts on top just before serving. This adds crunch and makes it look great. For the full recipe, check out the details above. To boost flavor, adjust seasoning with salt and pepper. Start with a pinch and taste. This helps you find the right balance. If you want to switch from honey, use maple syrup or brown sugar. These alternatives add sweetness without losing taste. For a stunning look, arrange the slaw in a large, shallow bowl. This gives it space to shine. Layer the colors for a beautiful effect. Add a sprinkle of roasted peanuts on top for crunch. Fresh cilantro also brightens the dish and adds color. Crunchy Asian Slaw goes well with grilled chicken or fish. It adds a fresh contrast to rich flavors. You can also turn it into a main dish. Just add grilled shrimp or tofu on top, and you have a complete meal. For the full recipe, check the earlier sections. {{image_4}} You can easily swap ingredients in Crunchy Asian Slaw. For common allergens, try using sunflower seeds instead of peanuts. If you want a nut-free dish, this is a great choice. For protein, add grilled chicken or cubed tofu. Both options boost the dish and make it more filling. Do you like it spicy? Add hot sauce or chili flakes to the dressing. This will give your slaw a nice kick. If you prefer a sweeter taste, toss in fruits like mandarin oranges or pineapple. They add natural sweetness and flavor. Using seasonal vegetables can keep the slaw fresh and exciting. In summer, add cucumbers or snap peas for crunch. In fall, consider using shredded brussels sprouts or apples for a festive twist. You can also make themed variations for holidays. For example, red and green bell peppers work well for Christmas celebrations. Check out the [Full Recipe](#) for more details on making this vibrant slaw! To keep your leftover slaw fresh, place it in an airtight container. This helps lock in moisture and flavor. Avoid using regular bowls with plastic wrap; they often let air in. If you have any dressing left, store it separately. This keeps the slaw crunchy and prevents sogginess. Crunchy Asian Slaw can last about 3 to 5 days in the fridge. Always check for signs of spoilage. If the slaw smells sour or has a mushy texture, it’s time to toss it. Freshness is key to enjoying this vibrant dish fully. You can freeze Crunchy Asian Slaw, but it won’t stay crunchy. If you choose to freeze it, use a freezer-safe container. When ready to eat, thaw it in the fridge overnight. Serve it cold or at room temperature for the best experience. To make this slaw gluten-free, use tamari instead of soy sauce. Tamari is a gluten-free soy sauce alternative. Check all other ingredients for gluten. Some brands may add gluten in sauces or dressings. Always read labels carefully. You can make the slaw a few hours ahead. However, I recommend waiting to add the dressing until just before serving. This keeps the veggies crisp and fresh. If you dress it too soon, the slaw can become soggy. Crunchy Asian Slaw has roots in many Asian cuisines. It often appears in Chinese and Thai dishes. Each region has its twist on this slaw, using local ingredients. The common theme is crunchy veggies and a tangy dressing that adds flavor. Yes, this recipe adapts well. For a vegan option, use agave syrup instead of honey. For paleo, skip the honey and soy sauce. You can also make it low-carb by using a sugar-free sweetener and avoiding high-carb veggies. This slaw pairs well with many dishes. Try it with grilled chicken, fish tacos, or pulled pork. It also makes a great side for Asian-style dishes like stir-fries or dumplings. You could even serve it as a fresh topping for burgers. For the full recipe, check out the Crunchy Asian Slaw section above. Crunchy Asian Slaw is a fresh, vibrant dish that combines a variety of veggies and dressings. You learned how to slice vegetables, mix dressings, and pair flavors. Don't forget the options for storage and meal pairings. You can adapt the recipe for dietary needs or seasons. This slaw is not just a side; it can be a meal. Enjoy experimenting with ingredients and flavors. Your kitchen is now your canvas for Crunchy Asian Slaw masterpieces.

Crunchy Asian Slaw Fresh and Flavorful Side Dish

Looking for a fresh and crunchy side dish to liven up your meals? My Crunchy Asian Slaw is bursting with

For this dish, you will need: - 4 boneless salmon fillets (about 6 ounces each) - 3 tablespoons unsalted butter, melted - 4 cloves garlic, finely minced - Zest of 1 lemon - 1 tablespoon freshly squeezed lemon juice - 1 teaspoon dried dill weed - Salt and freshly ground black pepper, to taste These ingredients come together to create a rich, buttery flavor that perfectly complements the salmon. Choosing the right vegetables enhances the meal. I like to use: - 1 cup cherry tomatoes, halved - 1 medium zucchini, sliced into half-moons (about ½ inch thick) - 1 bell pepper (any color), sliced into strips - 1 medium red onion, sliced into wedges These veggies roast beautifully. Cherry tomatoes add sweetness. Zucchini and bell peppers bring crunch. The red onion gives a slight bite. Garnishes can elevate your dish. I recommend adding: - Fresh parsley, chopped (for garnish) You can also consider a sprinkle of lemon juice for extra brightness. Adding a few lemon slices on top of the salmon adds a nice touch. For the full recipe, check out the details to bring this meal to life. First, turn your oven to 400°F (200°C). This heat helps cook the salmon and veggies just right. Next, grab a large sheet pan and line it with parchment paper. This makes for easy cleanup after cooking. In a small bowl, melt 3 tablespoons of unsalted butter. Then, add 4 cloves of finely minced garlic. Mix in the zest of one lemon and 1 tablespoon of fresh lemon juice. Don’t forget the dried dill weed! Add 1 teaspoon and a pinch of salt and pepper. Whisk all these ingredients until blended. You want a smooth, tasty garlic butter mix. Take 4 boneless salmon fillets and place them on one side of the sheet pan. Use a basting brush to coat each fillet with your garlic butter mixture. This adds flavor and keeps the salmon moist. Now, in a separate bowl, combine 1 cup of halved cherry tomatoes, sliced zucchini, bell pepper strips, and red onion wedges. Pour the leftover garlic butter mixture over these veggies. Toss them well to coat every piece. Spread the seasoned veggies on the other side of the sheet pan. Make sure they are in one layer for even cooking. This setup allows the salmon and veggies to roast perfectly together. For the full recipe, check the previous section. I always set my oven to 400°F (200°C) for this dish. This high heat helps achieve a nice roast on the salmon and veggies. It cooks quickly, locking in the flavors and moisture. I bake the salmon and vegetables for about 15 to 20 minutes. The exact time depends on the thickness of the salmon fillets. The veggies should be tender and lightly browned. You can check if the salmon is ready by using a fork to see if it flakes easily. To ensure the salmon is flaky, avoid overcooking it. Salmon cooks quickly, so keep an eye on it. If you cook it just until it flakes, you will have a juicy, tender result. Using a thermometer can help too. The internal temperature should reach 145°F (63°C) for perfect doneness. For the full recipe, visit the detailed instructions above. This dish is not just quick; it’s also bursting with flavor! {{image_4}} To keep your salmon tender, use a timer. Bake it for 15 to 20 minutes. Salmon is done when it flakes easily with a fork. Check it at the 15-minute mark. If it looks a bit undercooked, that’s okay. It will keep cooking once you take it out. If you prefer it well done, leave it in for a couple more minutes. You can change the taste of your dish easily. If you like it spicy, add red pepper flakes to the garlic butter. For a fresh touch, try fresh herbs like thyme or basil. You can also switch the lemon juice for lime juice. Taste the garlic butter before adding it to the salmon and veggies. This way, you can adjust the salt and pepper to your liking. This dish is great for meal prep. You can cook several servings at once. Store leftover salmon and veggies in airtight containers. They will keep well in the fridge for up to three days. Reheat them in the oven for the best results. You can also freeze the cooked salmon and veggies, but be careful. They may lose some texture when thawed. For quick meals, prep the garlic butter ahead of time and store it in the fridge. Just add it to the salmon and veggies when you’re ready to cook. For the full recipe, check out the complete guide above. If you want to change up the protein, try chicken or shrimp. Both cook well with the garlic butter sauce. Chicken breast will need a bit more time to bake, about 25-30 minutes. Shrimp cooks faster, so check it after just 10 minutes. You can also use firm fish like cod or halibut. These options will keep your dinners fresh and fun. The great thing about this recipe is its flexibility with vegetables. You can pick what’s in season. In spring, try asparagus or snap peas. In summer, add corn or eggplant. Fall brings sweet potatoes or Brussels sprouts. Winter is perfect for carrots or cauliflower. Using seasonal veggies not only tastes better but also supports local farms. You can give this dish a new twist with different herbs and spices. Instead of dill, try thyme or rosemary for an earthy touch. For a spicy kick, add red pepper flakes or paprika. A sprinkle of smoked paprika can add a nice depth of flavor. You can also experiment with fresh basil or cilantro for a fresh taste. Mix and match these flavors to find your favorite combination. For the full recipe, check out the details above! You can tell when salmon is fully cooked by checking its color and texture. The salmon should turn a light pink and opaque. Use a fork to poke the thickest part of the fillet. If it flakes easily, it is done. The internal temperature should reach 145°F (63°C). This ensures it's safe to eat. Yes, you can prepare this dish ahead of time. You can marinate the salmon in the garlic butter mixture and cut the veggies a day before. Store them in the fridge until you are ready to cook. Just remember to take them out of the fridge about 30 minutes before cooking. This helps them cook evenly. Sheet Pan Garlic Butter Salmon pairs well with many sides. Here are some ideas: - Steamed rice or quinoa - A green salad with vinaigrette - Roasted potatoes or sweet potatoes - Garlic bread for a tasty addition - Couscous or pasta for a heartier meal You can mix and match these sides to fit your taste. Enjoy! For the complete recipe, check out the Full Recipe section above. This blog post walked you through making sheet pan garlic butter salmon. You learned about key ingredients, how to prepare them, and the steps for perfect cooking. I shared pro tips to keep your salmon tender and tasty. Finally, I offered variations to keep the dish fresh and exciting. Remember, with practice, you’ll master this simple, healthy meal. Enjoy creating delicious moments in your kitchen!

Sheet Pan Garlic Butter Salmon Quick and Tasty Dinner

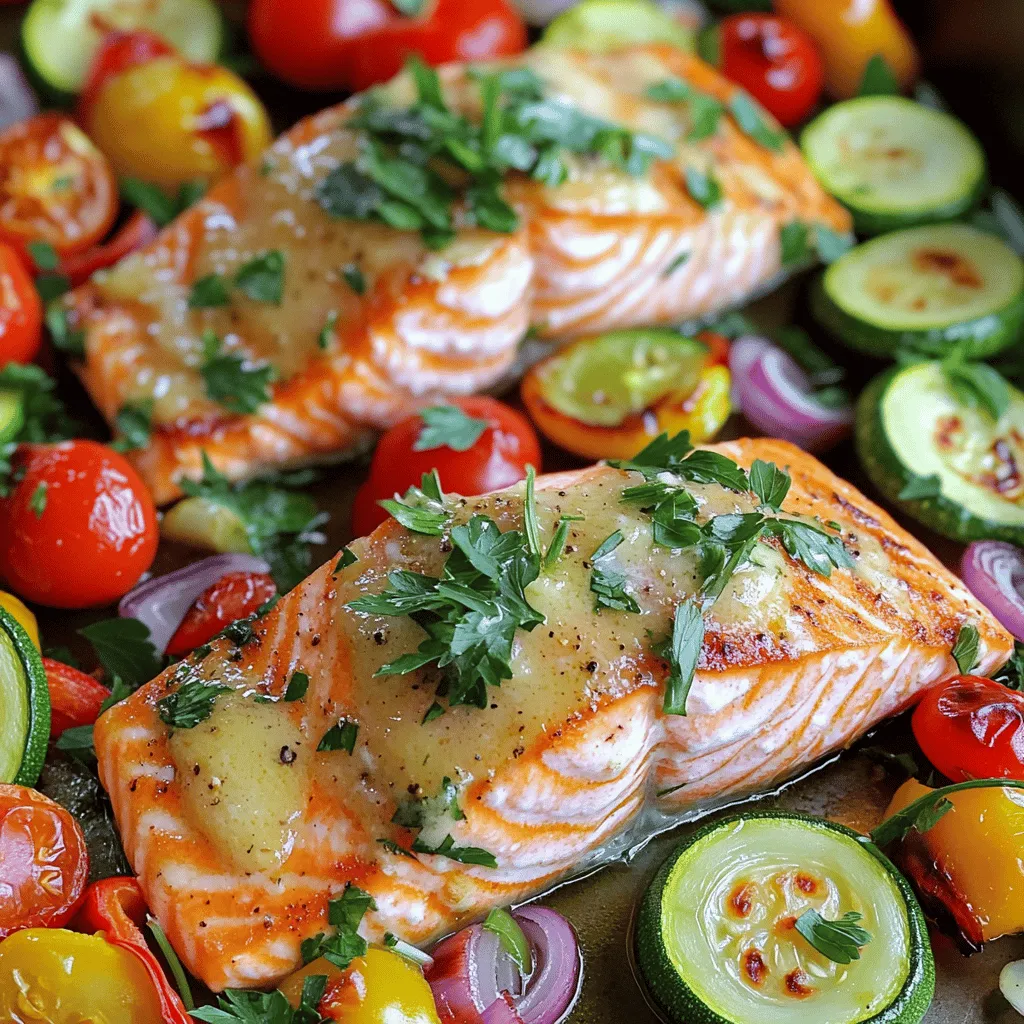
Looking for a quick and tasty dinner that packs a flavor punch? Try my Sheet Pan Garlic Butter Salmon! This

- 8 oz fettuccine pasta - 2 tablespoons olive oil - 1 pound shrimp, peeled and deveined - 1 bell pepper, diced (any color you prefer) - 1 small onion, finely chopped - 1 teaspoon Cajun seasoning - 1/2 teaspoon smoked paprika - 1 cup heavy cream - 1/2 cup freshly grated Parmesan cheese - Salt and pepper to taste - Fresh parsley, chopped, for garnish Gather these items to make your creamy Cajun pasta. The fettuccine gives a nice bite. Olive oil adds flavor and helps cook the veggies. Shrimp brings a touch of sweetness and protein. Choose a bell pepper that you love for color and crunch. The onion enhances the dish with sweetness. Cajun seasoning adds a warm kick. Smoked paprika brings a depth of flavor. Heavy cream makes the sauce rich and smooth. Parmesan cheese adds a salty, nutty touch. Don't forget salt and pepper for seasoning! Finally, fresh parsley gives a pop of color and flavor. You can find the full recipe in the article. This dish is simple and satisfying. Enjoy cooking! To start, fill a large pot with water. Add a generous amount of salt to it. Salt helps flavor the pasta as it cooks. Bring the water to a rolling boil. Once boiling, add the fettuccine. Cook it according to the package instructions. This usually takes about 8-10 minutes. You want the pasta to be al dente, which means it should be firm but not hard. After cooking, drain the pasta in a colander and set it aside. Now, take a large skillet and pour in the olive oil. Heat it over medium heat. Once the oil is hot, add the finely chopped onion and diced bell pepper. Sauté these for about 3-4 minutes. You want them softened and the onion to be translucent. This step builds the flavor base for your dish. Next, stir in the minced garlic. Let it cook for about 1 minute until it smells great. Then, add the peeled and deveined shrimp to the skillet. Sprinkle them with Cajun seasoning and smoked paprika. Cook the shrimp until they turn pink. This should take about 3-4 minutes. After that, reduce the heat to low. Carefully pour in the heavy cream. Stir the mixture well and let it simmer gently for 2-3 minutes. This makes a creamy sauce. The sauce should thicken slightly and become smooth. Now, you can combine the drained fettuccine with the creamy mixture. Toss everything together to coat the pasta well. Gradually stir in the grated Parmesan cheese until it melts. This adds richness and flavor. Season with salt and pepper to your taste. Enjoy making this dish, and check the Full Recipe for more details! To get the right creaminess in your dish, adjust the heavy cream. If you want it richer, add more cream. For a lighter sauce, use less. Start by pouring in half a cup and mix it in. You can always add more if needed. This lets you control the texture and taste. Cajun seasoning gives your pasta its kick. If you love heat, add more seasoning. For a milder taste, use less. Start with one teaspoon and taste as you go. Remember, it's easier to add spice than to take it away. You want a balance that feels just right. Cooking shrimp properly is key. Make sure your skillet is hot before adding shrimp. Cook them for 3-4 minutes until they turn pink. If you overcook shrimp, they can become tough. When they’re done, they should be firm but tender. {{image_4}} You can switch up the protein in your creamy Cajun pasta. Chicken works great. Simply cut chicken breast into bite-sized pieces and cook it until golden. You can also use sausage. Andouille sausage adds a nice, spicy kick. Slice it thin and cook it until browned. Both options keep the dish hearty and flavorful. If you need gluten-free options, use gluten-free pasta. There are many types available, like rice or corn pasta. Whole wheat pasta is another good choice. It adds more fiber and a nutty flavor. Both alternatives work well with the creamy sauce. Adding veggies boosts flavor and nutrition. Spinach is a great addition. Toss in fresh spinach at the end for a pop of color. Tomatoes also work well. Use cherry tomatoes for sweetness. Just halve them and add them to the skillet with the shrimp. These options make your meal more colorful and tasty. For the full recipe, check out the details above. To store leftovers, let the pasta cool first. Place it in an airtight container. It will stay fresh in the fridge for up to three days. Make sure to keep it sealed to prevent drying out. You can also store the sauce and pasta separately to keep the texture nice. If you want to freeze Creamy Cajun Pasta, portion it into freezer-safe containers. Leave some space at the top since the pasta will expand. It’s best to freeze it within two days of cooking. When you're ready to eat, thaw it overnight in the fridge. To reheat, place the pasta in a skillet over low heat. Add a splash of cream or broth to keep it creamy. Stir often to avoid burning. You can also use the microwave in short bursts. Just make sure to stir between heating to keep it even. Making Creamy Cajun Pasta takes about 30 minutes total. You need around 10 minutes to prep. Cooking the pasta and sauce takes about 20 minutes. This dish is quick and perfect for busy nights. Yes, you can make this dish ahead. Store it in an airtight container in the fridge. It will last up to three days. To reheat, warm it in a skillet over low heat. Add a splash of cream to keep it creamy. This pasta pairs well with several sides. I suggest a fresh green salad for crunch. Garlic bread is also a tasty choice. For drinks, a chilled white wine or iced tea complements the meal nicely. Enjoy your dinner! This blog post covers how to make Creamy Cajun Pasta. We looked at key ingredients, including pasta, shrimp, and spices. I also shared step-by-step cooking methods, tips for perfect creaminess, and ways to switch up the recipe. Remember, you can store leftovers easily and reheat them well. Whether you opt for chicken, gluten-free pasta, or extra veggies, you have many options. Enjoy crafting this flavorful dish for any meal!

Creamy Cajun Pasta Delightful and Easy Dinner Idea

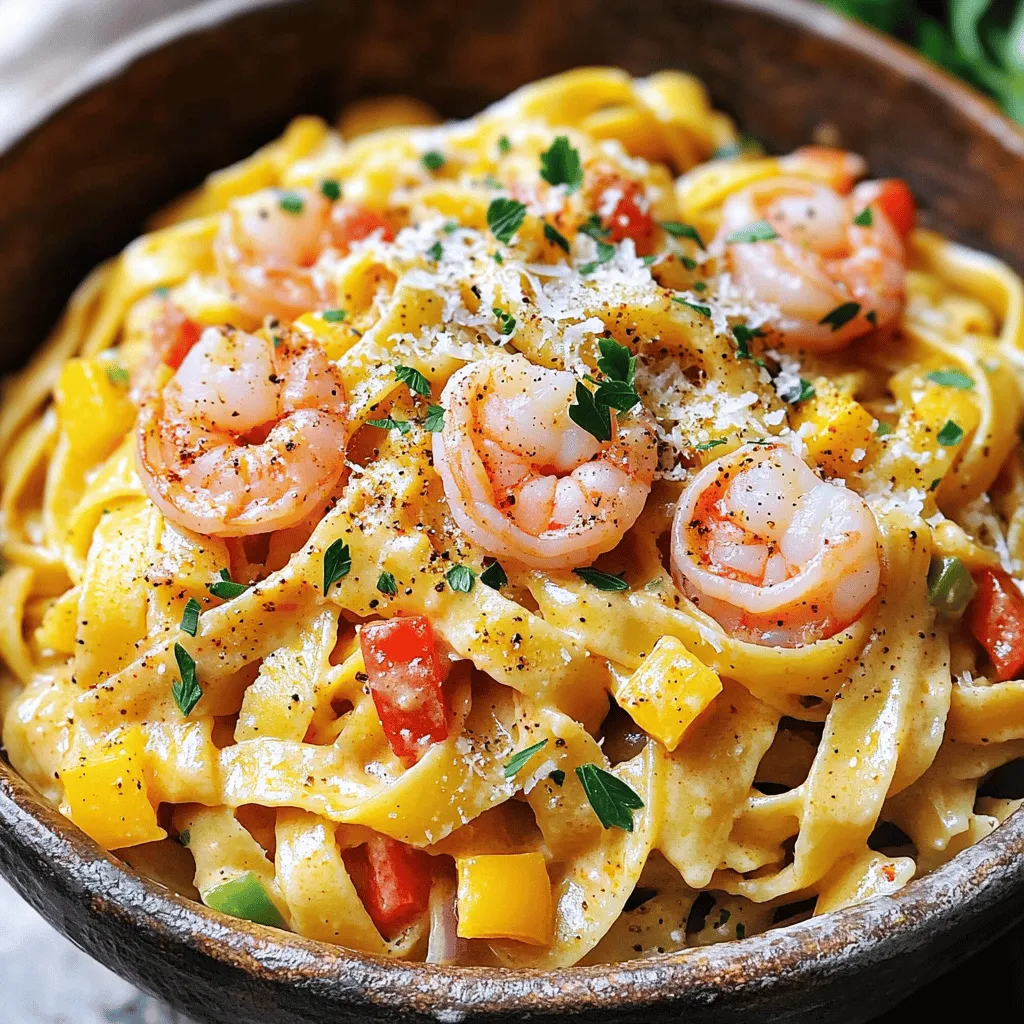
Looking for a dinner that’s both easy and packed with flavor? You’re in the right place! My Creamy Cajun Pasta

To make loaded nacho fries, you need a few key items. Here they are: - 4 large russet potatoes - 2 tablespoons extra-virgin olive oil - Seasoning: garlic powder, smoked paprika, sea salt, and pepper These potatoes are great because they get crispy on the outside and soft inside. Using olive oil helps them cook well and adds flavor. Now, let's talk about what makes these fries loaded. You will need: - 1 cup sharp cheddar cheese - 1 cup black beans - Fresh jalapeño, sour cream, pico de gallo, and cilantro The cheese melts and creates a gooey layer. Black beans add protein. Fresh jalapeños give a nice kick, while sour cream cools it down. Pico de gallo adds freshness and color. If you want to take your nacho fries to the next level, consider these extras: - Additional cheese varieties, guacamole, or avocado - Spicy toppings like diced red onions or sliced olives Adding different cheeses can create a richer taste. Guacamole or avocado gives creaminess, while spicy toppings can turn up the heat. Feel free to mix and match! For the full recipe, check out the complete guide. First, wash the russet potatoes well. Then, cut them into thick fries, about ½ inch wide. Place the fries in a large bowl. Drizzle 2 tablespoons of extra-virgin olive oil over the fries. Sprinkle 1 teaspoon of garlic powder and 1 teaspoon of smoked paprika. Add sea salt and freshly ground black pepper to taste. Toss the fries until they are well-coated in the oil and spices. Next, preheat your oven to 425°F (220°C). Line a large baking sheet with parchment paper. This helps prevent sticking. Spread the seasoned fries in a single layer on the sheet. Bake the fries in the oven for 25 to 30 minutes. Flip them halfway through, around the 15-minute mark. This helps them cook evenly and get crispy. Watch for them to turn golden brown and crispy. After baking, take the fries out of the oven. Immediately sprinkle 1 cup of shredded sharp cheddar cheese over the hot fries. Next, layer 1 cup of black beans and fresh jalapeño slices on top of the cheese. Return the baking sheet to the oven for an extra 5 minutes. This melts the cheese and makes it bubbly. Once melted, take the fries out. Drizzle ½ cup of sour cream over the top, then add ½ cup of fresh pico de gallo. Finish with fresh cilantro leaves for color. Enjoy your loaded nacho fries hot! For the full recipe, see above. To get crispy fries, single layer them on the baking sheet. This way, they cook evenly and get nice and crunchy. If your oven runs hot or cool, adjust the cooking time. For convection ovens, check for doneness a few minutes earlier. Spices can really boost the taste of your fries. Use garlic powder and smoked paprika, as they add depth. You can also try adding cumin or chili powder for extra kick. Pair your fries with sauces like salsa or chipotle mayo to enhance the flavor. Plating matters! Use a large plate or shallow bowl to arrange your fries. Drizzle sour cream and sprinkle pico de gallo on top. Add colorful toppings like jalapeños and cilantro for a pop of color. Bright colors make your dish more appealing and fun to eat. {{image_4}} You can easily make loaded nacho fries vegetarian or vegan. To do this, substitute cheese with plant-based alternatives. Many brands offer tasty vegan cheese that melts well. Look for options made from cashews or almonds for a rich flavor. Another great idea is to add roasted vegetables. Bell peppers, zucchini, or even mushrooms work well. Roasting them adds a nice depth of flavor and boosts nutrition. You can mix these in with the fries or place them on top. You can get creative with cheese combinations. Try mixing sharp cheddar with pepper jack for a kick. Or use a blend of mozzarella and gouda for a creamy texture. For meat lovers, consider adding cooked chorizo or pulled pork. These toppings elevate your nacho fries to a new level of flavor. If you like heat, go for spicy versions. Add extra jalapeños or drizzle hot sauce on top. You can use any hot sauce you enjoy. This adds flavor and spice that will excite your taste buds. Looking for something different? Try incorporating barbecue sauce or sriracha for a fun twist. The smoky flavor of barbecue sauce pairs great with the fries. Sriracha adds a bright and spicy kick. You can also give your fries a Greek or Italian flair. Crumble feta cheese on top and add kalamata olives. This gives a fresh taste that contrasts well with the warm fries. The herbs in these toppings add bright flavors too. Try these variations to make your loaded nacho fries unique and exciting. For the full recipe, check out the Loaded Nacho Fries Delight section. To keep your loaded nacho fries fresh, store them in an airtight container. This helps retain their crispiness. Let the fries cool before sealing them. You can keep them in the fridge for up to three days for best taste. Use sea salt to help maintain flavor and texture longer. When reheating, use an oven or an air fryer. These methods keep the fries crispy. Avoid using a microwave, as it can make them soggy. Bake at 350°F (175°C) for about 10-15 minutes. Check often to ensure they do not burn. You can freeze nacho fries before or after cooking. If freezing uncooked, season and place them on a baking sheet. Once frozen, transfer them to a freezer bag. If freezing cooked fries, let them cool first. Store them in a freezer-safe container. Use within three months for the best taste. Loaded nacho fries are a tasty dish made of crispy fries topped with cheese, beans, and fresh toppings. They mix the fun of nachos with the crunch of fries. This dish is popular at parties and game days because it’s easy to share and even easier to love. Yes, you can prep loaded nacho fries ahead. Cut the potatoes and store them in water to keep them fresh. You can also season them in advance. Just remember to dry them well before baking. After baking, let the fries cool. Store them in an airtight container in the fridge for up to two days. When ready to serve, reheat them in the oven to keep them crispy. Loaded nacho fries pair well with many sides. You can serve them with salsa, guacamole, or a fresh salad. Drinks like soda, iced tea, or a cold beer also go well. These options will make your meal fun and tasty. To add heat to loaded nacho fries, use spicy toppings. Fresh jalapeños are a great start. You can also use a drizzle of hot sauce or spicy cheese. Adding diced red onions or pickled jalapeños will bring more flavor and spice. For extra heat, try using a spicy salsa as a topping. The Full Recipe has all the details you need to get started. Loaded nacho fries are a fun and tasty treat you can make at home. We explored the main ingredients, step-by-step preparation, and many delicious toppings. Use tips for crispy fries and creative variations to keep your dish exciting. Remember, whether you're enjoying this as a snack or meal, the options are endless. You can customize flavors to make them your own. Start prepping your loaded nacho fries and enjoy every bite!

Loaded Nacho Fries Flavorful and Easy Recipe Guide

Do you crave a tasty snack that’s easy to make? Loaded Nacho Fries are your answer! In this guide, I’ll

To make baked feta pasta, gather these items: - 200g pasta (fusilli or penne) - 200g feta cheese - 300g cherry tomatoes, halved - 4 cloves garlic, minced - 3 tablespoons extra virgin olive oil - 1 teaspoon dried oregano - 1 teaspoon red pepper flakes (optional for extra heat) - Salt and freshly ground black pepper to taste - Fresh basil leaves, for garnish - Grated Parmesan cheese, for serving (optional) Using fresh ingredients makes a big difference. Fresh cherry tomatoes burst with flavor. They add sweetness and juiciness. Fresh basil gives a bright and aromatic touch. Dried oregano adds depth but lacks the vibrant taste of fresh herbs. If you have the choice, always pick fresh when you can. When choosing ingredients, quality matters. For pasta, I recommend Barilla or De Cecco. They cook well and have great flavor. For feta, look for brands like Athenos or Dodoni. They offer creamy texture and rich taste. For olive oil, choose a high-quality extra virgin oil, like California Olive Ranch. Quality ingredients lead to a tastier dish. First, set your oven to 200°C (400°F). This will warm up while we gather our ingredients. Next, take the cherry tomatoes and cut them in half. Mince the garlic too. We want to have everything ready for the next steps. In a large baking dish, place the halved cherry tomatoes. Add the minced garlic. Pour in three tablespoons of extra virgin olive oil. Sprinkle one teaspoon of dried oregano, red pepper flakes, salt, and black pepper. Toss everything together well. Make sure each tomato gets coated in the tasty mix. Now, make a space in the middle of your tomato mix. Place the block of feta cheese there. Drizzle a bit more olive oil on top. Lightly season the feta with salt and pepper. Put the baking dish in the oven and bake for 25 to 30 minutes. Look for roasted tomatoes and soft, brown feta. While the feta and tomatoes bake, take a pot and fill it with water. Add a pinch of salt and bring it to a boil. Cook 200g of pasta according to the package instructions until it is al dente. Once cooked, drain the pasta well and set it aside. After baking, take the dish out of the oven. Use a fork to mash the baked feta into the roasted tomatoes. Stir well to create a creamy sauce that coats both the feta and tomatoes. This step is key for rich flavor. Now, add the drained pasta into the baking dish. Gently mix everything together until the pasta is coated in the creamy sauce. Serve your Baked Feta Pasta on plates or in bowls. Garnish with fresh basil leaves and add grated Parmesan if you want. Enjoy your delightful meal! For the full recipe, check the previous section. To get the best texture in your baked feta pasta, follow these tips: - Use a good quality feta cheese. Look for creamy, full-fat feta for a rich flavor. - Don’t skip the olive oil. It helps the feta melt smoothly and adds great taste. - Bake until tomatoes blister. This gives a sweet and smoky flavor to your sauce. - Mash the feta well. Ensure it blends smoothly with the tomatoes for a creamy sauce. Many home cooks face common issues. Here’s how to avoid them: - Overbaking the feta. Keep an eye on it. Feta should be soft but not dry. - Undercooking the pasta. Always cook pasta al dente. It will soak up some sauce later. - Not seasoning enough. Taste your sauce before mixing in the pasta. Adjust salt and pepper as needed. You can easily modify the recipe to fit different diets: - Gluten-free pasta. Swap regular pasta for gluten-free options like rice or quinoa pasta. - Dairy-free feta. Use a plant-based feta or a cashew cream cheese for a vegan option. - Add veggies. Toss in spinach or zucchini for extra nutrition and color. For the complete preparation, check out the Full Recipe section. {{image_4}} You can easily make baked feta pasta a vegetarian delight. Just leave out any meat. Add more veggies like spinach, zucchini, or bell peppers. These add color and flavor. You can also use mushrooms for a nice earthy taste. Tossing in some olives can bring a briny punch. Each veggie adds its own charm to the dish. If you want to add some protein, chicken or shrimp works well. For chicken, use diced breast or thighs. Season them with salt and pepper. Add them to the baking dish with tomatoes. If you prefer shrimp, add them during the last few minutes of baking. This way, they cook perfectly. Both options make the meal more filling and satisfying. While feta is the star, you can try other cheeses. Goat cheese makes a tangy twist. Cream cheese can create a rich and creamy texture. Parmesan adds a salty kick. Experimenting with cheese can change the whole flavor. Each type brings something unique. You can even mix cheeses for a layered taste experience. For the full recipe, check out the [Full Recipe] section. To store your leftover Baked Feta Pasta, let it cool down first. Then, place it in an airtight container. Keep it in the fridge for up to three days. This helps to keep the flavors fresh and tasty. If you have a lot left, you can divide it into smaller portions. This way, you can grab a quick meal later. When you're ready to enjoy your leftovers, preheat your oven to 180°C (350°F). Place the pasta in an oven-safe dish. Cover it with foil to keep it moist. Bake it for about 15-20 minutes or until it's heated through. You can also reheat in the microwave. Just use a microwave-safe bowl and heat it for 1-2 minutes, stirring halfway through. If you want, add a splash of olive oil to keep the dish creamy. You can freeze Baked Feta Pasta, but it’s best to do this before baking. Prepare the dish and assemble it in a freezer-safe container. Cover it tightly and freeze for up to two months. When you’re ready to cook it, thaw overnight in the fridge. Then, bake it as you normally would. This way, you still get that delicious dish without losing flavor. Yes, you can use other cheeses! Goat cheese or ricotta works well. Both give a creamy taste. Just remember, they may change the dish's flavor. This dish is great on its own. However, serving it with garlic bread or a fresh salad adds variety. A simple arugula salad with lemon dressing pairs nicely too. To make it vegan, replace the feta with a vegan cheese option. You can also try tofu for a protein boost. Use plant-based pasta, and you have a great vegan meal. Feel free to add veggies like spinach, bell peppers, or zucchini. These vegetables roast well and add color and taste. You can mix in kale for a nutrient boost too. Check the tomatoes; they should be blistered and soft. The feta should be warm and lightly browned. This usually takes about 25-30 minutes. You want everything to look inviting and delicious! In this post, we explored key ingredients and detailed steps to make Baked Feta Pasta with Cherry Tomatoes. I shared tips to enhance texture and ways to substitute ingredients. For those seeking variations, options like adding protein or different cheeses were discussed. Lastly, I provided storage and reheating instructions to keep your dish fresh. Remember, cooking is fun, so don’t hesitate to try new things! Enjoy your meal and share it with others.

Baked Feta Pasta with Cherry Tomatoes Delightful Meal

If you’re ready to impress your taste buds with an easy and tasty meal, I’ve got the perfect recipe for

- Chicken and Salad Base - 2 boneless, skinless chicken breasts - 4 cups romaine lettuce, chopped - 1 cup cherry tomatoes, halved - Dressing and Toppings - ½ cup Parmesan cheese, shaved - 1 cup homemade ranch dressing (or store-bought) - 1 cup croutons (store-bought or homemade) - Seasoning - 1 tablespoon olive oil - 1 teaspoon garlic powder - Salt and black pepper to taste - Fresh herbs (like parsley or basil) for garnish This list covers everything you need for a tasty Chicken Caesar salad. Each ingredient adds flavor and texture. The chicken provides protein, while the romaine and tomatoes give freshness. The dressing ties it all together, making each bite delicious. Don't forget the croutons for that nice crunch! You can find the full recipe to help you get started on this classic dish. Marinating the Chicken Start with two boneless, skinless chicken breasts. Rub them with olive oil to add flavor. Sprinkle garlic powder, salt, and black pepper on both sides. This step helps to make the chicken tasty. Let the chicken marinate for about 15 minutes. This allows the flavors to soak in. Cooking Methods (Grilling and Baking) You can cook the chicken by grilling or baking. For grilling, set your grill to medium-high heat. Place the marinated chicken on the grill. Grill each side for about 6-7 minutes. Make sure the chicken reaches 165°F inside. For baking, preheat your oven to 400°F. Put the chicken on a lined baking sheet. Bake for 20-25 minutes until the chicken is fully cooked. After cooking, let the chicken rest for 5 minutes. This helps keep it juicy. Then, slice it into strips. Creating the Base In a large bowl, mix 4 cups of chopped romaine lettuce and 1 cup of halved cherry tomatoes. This forms a fresh salad base. Add half of the shaved Parmesan cheese for extra flavor. Dressing the Salad Drizzle 1 cup of ranch dressing over the salad. You can use homemade or store-bought dressing. Toss the salad gently to coat all the ingredients. Make sure everything is well mixed. Plating Styles You can plate the salad in two ways. For a neat look, serve it in individual bowls. This makes it fancy. For a casual meal, serve it family-style in a large bowl. Garnishing Tips Finish the salad by adding the sliced chicken on top. Sprinkle croutons over the salad for crunch. Add the rest of the shaved Parmesan cheese too. For a vibrant touch, garnish with fresh herbs like parsley or basil. This makes your salad pop! For the full recipe, check out the Crispy Ranch Chicken Caesar Salad 🥗. Resting the chicken is key. After cooking, let it sit for at least 5 minutes. This helps the juices spread evenly. Otherwise, the chicken can end up dry. You want juicy bites in your salad. For flavor, always use fresh herbs. A sprinkle of parsley or basil adds a nice touch. Marinate the chicken for 15 minutes. Use olive oil, garlic powder, salt, and pepper. These simple steps boost taste and make the chicken shine. Homemade dressing wins over store-bought. It tastes fresher and lets you control the flavors. You can make ranch dressing easily. Just mix yogurt, mayo, garlic, and herbs. This way, you skip preservatives and enjoy rich taste. Store-bought options are handy. If you're short on time, grab a bottle. Just check the label for quality. Look for dressings with real ingredients. Avoid those with too many additives. For the full recipe, check out the Crispy Ranch Chicken Caesar Salad. It's a delightful way to enjoy this classic dish. {{image_4}} Alternative Proteins If you want a twist on chicken, try using shrimp or tofu. Both cook quickly and add great flavor. You can grill shrimp for a smoky taste or sauté tofu for a savory crunch. Vegetable Additions Adding veggies boosts nutrition and flavor. Consider bell peppers, cucumbers, or avocado. These add color and texture to your salad. You can also toss in some shredded carrots for extra crunch. Gluten-Free Options To make this dish gluten-free, choose gluten-free croutons or skip them altogether. You can also add nuts like almonds or walnuts for crunch without the gluten. Vegan Adaptations For a vegan version, replace chicken with chickpeas or grilled portobello mushrooms. Use a plant-based ranch dressing instead of traditional ranch. Nutritional yeast can mimic the cheesy flavor from Parmesan. These variations help you customize your salad, making it fit your taste and dietary needs. If you want more details, check the Full Recipe for ideas! To keep your Chicken Caesar Salad fresh, store it in an airtight container. Layer the salad ingredients carefully. Place the chicken in a separate container to avoid soggy lettuce. If you have dressing left, store it separately too. This helps maintain the salad's crispness. When it comes to reheating chicken safely, do not microwave the salad. Instead, warm chicken in the oven or on the stove. Heat it until it reaches 165°F (75°C). This ensures it remains safe to eat and delicious. To enjoy your salad at its best, eat it within 2-3 days. Freshness is key! Store it in the fridge and check the ingredients regularly. Signs of spoiled ingredients can include wilting lettuce, off smells, and slimy chicken. Discard any parts that look or smell bad. Always trust your senses to ensure great taste and safety. For the full recipe, check the provided link and enjoy making this classic dish! A Caesar salad has a few key parts. First, it includes crisp romaine lettuce. Next, it uses a rich and creamy dressing. The dressing is often made with garlic, anchovies, and Parmesan cheese. Croutons add a nice crunch. These elements work together, creating a tasty salad that many love. Yes, you can prepare parts of this salad ahead of time. You can wash and chop the lettuce and tomatoes in advance. Store them in the fridge for freshness. You can also cook the chicken ahead of time. Just keep it in the fridge until you are ready to serve. However, wait to add the dressing until just before eating. This helps keep the salad crisp and fresh. While ranch is a popular choice, many other dressings work well. You can use a classic Caesar dressing made with garlic, lemon juice, and anchovies. A balsamic vinaigrette adds a nice twist too. You can even try a yogurt-based dressing for a lighter option. Each dressing brings a unique flavor to your salad. For the full recipe, check out my detailed guide on making a crispy ranch chicken Caesar salad. This blog post covered the classic Chicken Caesar Salad. You learned about the key ingredients like chicken, dressing, and toppings. I shared steps for preparing and assembling the salad, plus tips for perfecting your chicken and dressing. Try different variations to suit your taste. Store leftovers properly for freshness. Remember, a great salad starts with quality ingredients and proper technique. Enjoy making this dish your own!

Classic Chicken Caesar Salad Healthy and Simple Recipe

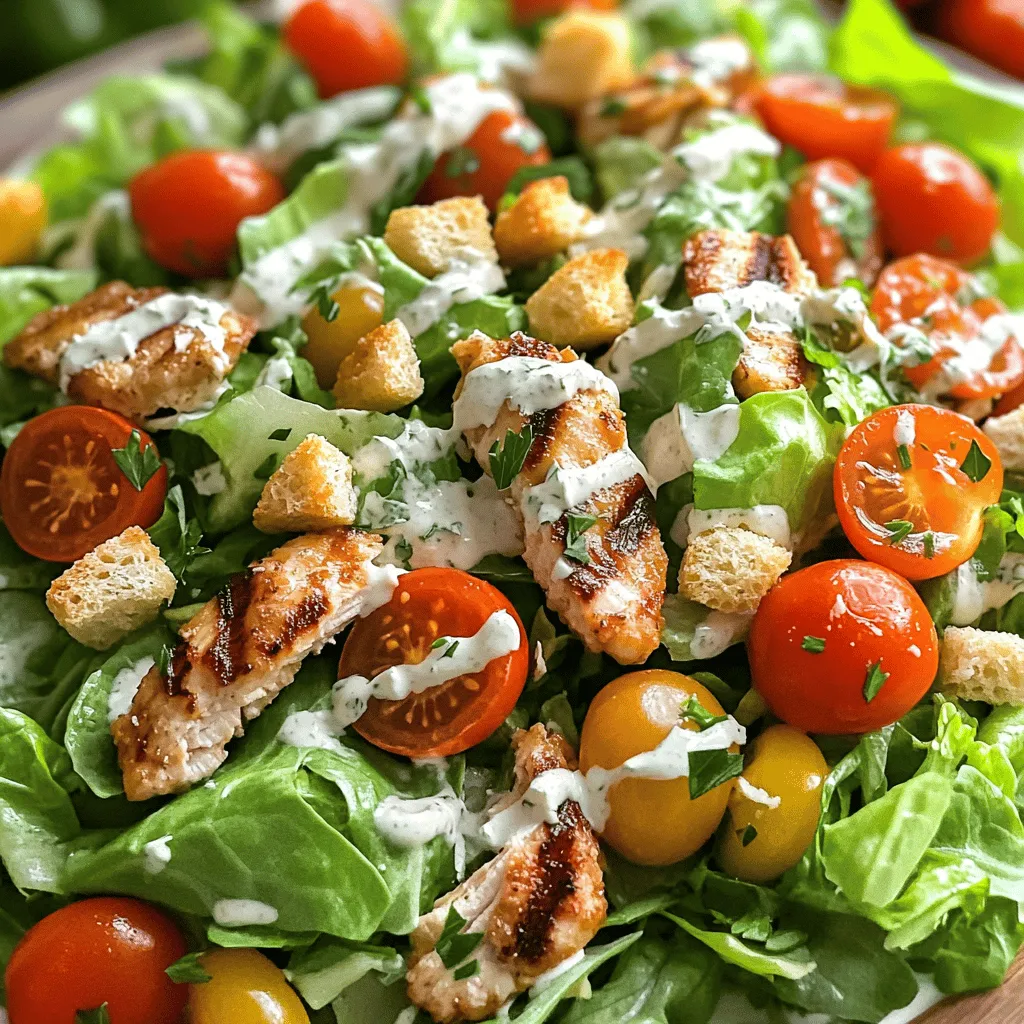
Want a tasty meal that’s both simple and healthy? This Classic Chicken Caesar Salad is your answer! With juicy chicken,

Older posts
Newer posts
← Previous Page1 … Page49 Page50 Page51 … Page86 Next →

dsad

© 2026 yumymoments • Built with GeneratePress

Our Policies

  • Copyright Policy
  • Cookie Policy
  • GDPR Policy
  • Privacy Policy
  • Disclaimer
  • Terms Of Use

More Information

  • Home
  • About
  • Contact
  • Appetizers
  • Dessert
  • Dinner
  • Drinks
©2026, yumymoments About Back To Top