Skip to content
DisclaimerTerms Of UseGDPR PolicyCookie Policy

yumymoments

  • Home
  • Drinks
  • Appetizers
  • Dinner
  • Dessert
  • About
  • Contact
  • Privacy Policy
DisclaimerTerms Of UseGDPR PolicyCookie Policy

NO-ING-IMG

- 2 cups broccoli florets - 2 cups cauliflower florets - 1 cup bell peppers (any color), diced - 1 cup carrots, sliced into thin rounds - 1 red onion, cut into wedges I love using a mix of colorful veggies. Broccoli and cauliflower add great texture. Bell peppers bring sweetness, while carrots add crunch. The red onion gives a nice bite, making this dish bright and tasty. - 4 tablespoons extra virgin olive oil - 1 tablespoon dried thyme - 1 tablespoon dried rosemary - 1 teaspoon garlic powder - 1 teaspoon smoked paprika - Sea salt and freshly cracked black pepper, to taste Olive oil helps the vegetables roast well. Thyme and rosemary add earthy notes. Garlic powder gives a savory touch, and smoked paprika adds warmth. Salt and pepper enhance all these flavors, making each bite better. - Fresh parsley, finely chopped (for garnish) - Balsamic glaze Garnishes can elevate your dish. Fresh parsley adds color and a fresh taste. A drizzle of balsamic glaze gives a sweet and tangy kick. Use these to make your dish pop visually and flavor-wise. {{ingredient_image_2}} Start by preheating your oven to 425°F (220°C). This high heat is key. It helps the vegetables roast evenly and develop great flavor. If your oven isn’t hot enough, the veggies will steam instead of roast. You want them to be crisp and golden. Wash your vegetables well under cool water. Make sure to dry them off to remove excess water. For cutting, chop the broccoli and cauliflower into bite-sized florets. Slice the carrots into thin rounds. Dice the bell peppers and cut the red onion into wedges. Uniform sizes help them cook evenly. In a large bowl, add all your prepared vegetables. Drizzle the extra virgin olive oil over them. Use your hands or a spatula to toss everything together. Make sure each piece gets a nice coat of oil. This helps the seasonings stick and adds flavor. Spread the coated vegetables in a single layer on a large sheet pan. Avoid crowding them. When they have space, they get better color and crispness. Place the pan in the oven and roast for 25-30 minutes. Stir the veggies halfway through to ensure they roast evenly. Look for a tender texture with caramelized edges. Once roasted, take the pan out of the oven. Let the vegetables cool for a few minutes. This makes them easier to handle. Transfer them to a serving dish, and sprinkle freshly chopped parsley on top. This adds a pop of color and fresh taste. Enjoy these vibrant veggies as a perfect side dish! To get the best roast, aim for 25-30 minutes at 425°F (220°C). Halfway through, stir the veggies. You want them tender and caramelized. Look for a golden-brown color on the edges. This shows they are ready to eat. You can boost the flavor with extras like fresh basil or oregano. Try adding a dash of red pepper flakes for heat. If you like sweet, a touch of cinnamon can add warmth. Feel free to mix in lemon zest for a bright twist. Serve the veggies on a bright platter. Keep each type of vegetable separate for color. Drizzle balsamic glaze over the top for a fancy touch. You can also sprinkle some fresh parsley for added flair. Your guests will love the look! Pro Tips Choose Fresh Vegetables: Opt for in-season vegetables for the best flavor and texture. Fresh produce not only tastes better but also retains more nutrients. Customize Your Seasoning: Feel free to experiment with different herbs and spices. Adding a pinch of chili flakes or lemon zest can elevate the flavor profile. Don’t Overcrowd the Pan: Ensure that the vegetables are in a single layer on the sheet pan. Overcrowding will lead to steaming rather than roasting, which affects the texture. Rest Before Serving: Allow the roasted vegetables to rest for a few minutes before serving. This helps the flavors to settle and enhances the overall taste. {{image_4}} You can change your vegetables based on the season. For spring, use fresh asparagus or snap peas. In summer, try zucchini and tomatoes. Fall brings sweet potatoes and Brussels sprouts. Winter is perfect for root veggies like parsnips and turnips. This way, you always enjoy fresh flavors and colors. You can easily make this dish vegan by using only plant-based ingredients. The olive oil is already vegan. To make it gluten-free, ensure your spices are labeled gluten-free. For a low-carb option, swap out carrots with more broccoli or cauliflower. This keeps the dish tasty and aligned with your diet. You can roast these veggies in different ways. To use a stove-top, heat a large skillet over medium heat. Add the vegetables and seasonings with a bit of oil. Stir often until they are tender and golden. For an air fryer, set it to 400°F (200°C). Cook for about 15-20 minutes, shaking halfway through. Each method gives a unique taste and texture, so try them all! To store leftovers safely, let the vegetables cool. Place them in an airtight container. You can keep them in the fridge for up to four days. Make sure the lid is secure to prevent moisture loss. For the best flavor and texture, reheat in the oven. Preheat your oven to 350°F (175°C). Spread the veggies on a baking sheet. Heat them for 10-15 minutes, stirring halfway through. This method keeps them crispy and delicious. To freeze, allow the vegetables to cool completely. Place them in a freezer-safe bag. Remove as much air as possible before sealing. They can last in the freezer for up to three months. When ready to use, thaw them in the fridge overnight. Roasting vegetables on a sheet pan takes about 25 to 30 minutes. The exact time can change based on the type and size of the vegetables. For instance, broccoli and cauliflower cook quickly, while carrots may take a bit longer. Always stir the veggies halfway through roasting. This helps them cook evenly. Look for a nice golden-brown color on the edges. That means they are ready! Yes, you can use fresh herbs! Fresh herbs provide a bright flavor. They can make your dish taste more vibrant. However, fresh herbs have a shorter shelf life and may lose flavor faster than dried herbs. If you use fresh thyme or rosemary, double the amount since they are less concentrated. This can enhance your roasted vegetables even more! Roasted vegetables pair well with many dishes. You can serve them alongside grilled chicken, fish, or steak. They also work great in salads or grain bowls. If you have leftovers, try adding them to sandwiches or wraps. They can add flavor and nutrition to your meals. Enjoy experimenting with different pairings! In this blog post, we explored how to make delicious roasted vegetables. We covered key ingredients like broccoli and carrots, along with essential seasonings like olive oil and garlic powder. I shared step-by-step instructions for prepping and roasting the veggies perfectly. Tips for enhancing flavors and serving ideas were also included. Remember, you can customize this dish with seasonal ingredients and dietary needs. Follow the storage guidelines to keep leftovers fresh. Enjoy your flavorful and healthy meals!

Sheet Pan Herb Roasted Vegetables Easy Side Dish

Are you looking for an easy side dish that impresses? Look no further than my Sheet Pan Herb Roasted Vegetables!

Gathering the right ingredients makes the best peach mango sorbet. Here is what you need for this refreshing treat: - 3 ripe peaches, peeled and diced - 2 ripe mangoes, peeled and diced - 1 cup coconut water or your favorite juice - 1/2 cup honey or agave syrup - 2 tablespoons freshly squeezed lime juice - A pinch of sea salt Using fresh fruits gives the sorbet its amazing flavor. I recommend ripe peaches and mangoes for the best taste. If you want a sweeter sorbet, adjust the honey or agave syrup to your liking. Coconut water adds a light flavor and keeps it refreshing. The lime juice brightens the taste and balances the sweetness. Don't forget the sea salt; it enhances all the flavors! For the full recipe, you can check the section above. Enjoy making your sorbet! - Step 1: Blending fruits Start by placing the diced peaches and mangoes into a blender. Blend the fruits at high speed. Aim for a smooth and creamy texture. Make sure there are no lumps left. This step is key for the perfect sorbet. - Step 2: Adding additional ingredients Next, add the coconut water or your favorite juice to the fruit blend. Then, pour in the honey or agave syrup. Add the freshly squeezed lime juice and a pinch of sea salt. Blend again until everything mixes well. Taste the mixture. Adjust the sweetness if needed. - Step 3: Freezing process Pour the blended mixture into a shallow dish. Spread it out evenly. Place the dish in the freezer. Freeze for about 2 hours, or until the edges start to firm up. This helps create a smooth texture. - Step 4: Scraping and stirring After 2 hours, check your sorbet. Use a fork to scrape the edges. This breaks up any ice crystals. Stir the mixture well for an even texture. Return the dish to the freezer for another hour. Repeat the scraping and stirring once more. Do this until the sorbet is light and fluffy. Allow it to freeze for 2-3 more hours. It should now be firm and scoopable. Enjoy your homemade Peach Mango Sorbet! For the full recipe, check out the earlier section. To make the best peach mango sorbet, you need ripe fruits. Here’s how to check if the fruits are ripe: - Peaches: Look for a vibrant color and a slight give when you press gently. The skin should feel soft but not mushy. - Mangoes: A ripe mango will have a sweet smell near the stem. It should feel slightly soft when you press it. The best types of peaches for sorbet are freestone peaches. They have a smooth texture and sweet flavor. As for mangoes, choose the Ataulfo or Haden varieties. They are sweet and creamy, making them perfect for sorbet. You might want your sorbet sweeter or less sweet. Here are some tips for adjusting the sweetness: - Honey or Agave: Start with half a cup as the recipe suggests. Taste and add more if needed. - Alternative Sweeteners: You can use maple syrup or stevia. Just remember, each sweetener has a different strength, so adjust carefully! Serving your peach mango sorbet can be fun and creative. Here are some ideas: - Garnishes: Top each serving with fresh mint leaves or a lime slice. This adds color and a zesty touch. - Pairing: Serve the sorbet with a slice of cake or alongside fresh fruit. It also goes well with a light, crisp white wine for adults. For the full recipe, check the details above! Enjoy making this refreshing treat! {{image_4}} You can change the flavor of peach mango sorbet by adding other fruits. Berries like strawberries or blueberries add a tangy taste. Bananas can give it a creamy texture. Try mixing these fruits into the blender with peaches and mangoes for a fun twist. You can also add fresh herbs for a unique flavor. A little basil or mint can make the sorbet taste fresh and bright. Just chop the herbs finely and blend them in with the fruits. This will give your sorbet a special touch. The liquid you use can change the sorbet's taste. Instead of coconut water, try orange juice or pineapple juice. Both juices add a sweet, fruity flavor that blends well with peach and mango. For a creamier sorbet, use coconut milk. This will give your dessert a rich taste and smooth texture. Just swap the coconut water for coconut milk in the recipe. Feel free to get creative! Use the [Full Recipe] as a base and explore new flavors. To keep your peach mango sorbet fresh, store it in an airtight container. This helps prevent ice crystals from forming. You can also cover the top with plastic wrap before sealing the lid. This extra layer keeps the texture smooth and creamy. For the best results, place the container in the back of the freezer. This spot stays colder than the front. Avoid opening the freezer often. Each time you do, warm air enters and can affect the sorbet's texture. Peach mango sorbet can last up to two weeks in the freezer. After that, its flavor and texture may decline. Look for signs that the sorbet has gone bad. If you see ice crystals or if it smells off, it’s best to toss it. If the color changes or it develops a grainy texture, it’s time to say goodbye. You can make peach mango sorbet without an ice cream maker by using some simple tools. Start with a blender or food processor to puree the fruits. Then, pour the mixture into a shallow dish. Place the dish in the freezer. Every hour, take it out and stir it with a fork. This breaks up ice crystals and gives you a smooth texture. Repeat this process for about 3-4 hours until it is firm and scoopable. Yes, you can use frozen fruits for your sorbet. Frozen fruits can make the sorbet colder and creamier. However, they may change the flavor slightly. Fresh fruits often have a brighter taste. If you use frozen fruits, let them sit out for a bit to soften before blending. This helps in getting a smoother mix. Peach mango sorbet pairs well with many desserts. Try serving it with a slice of cake or cookies. You can also enjoy it with fresh fruit or granola. For drinks, lemonade or iced tea complements the sorbet nicely. Both options are refreshing and enhance the fruity flavors. Yes, this recipe is vegan-friendly. It uses fruits, coconut water, and either honey or agave syrup. If you prefer to keep it vegan, use agave syrup instead of honey. All the ingredients are plant-based, making this sorbet a great choice for everyone. You can find ready-made peach mango sorbet at most grocery stores. Check the freezer section near other frozen desserts. Popular brands often carry it. If you want to shop online, look on websites like Amazon or specialty grocery stores. Many local ice cream shops also sell their own versions, so don’t forget to explore those options! This blog post gives you a fun and tasty guide to making peach mango sorbet. You learned about choosing ripe fruits, blending them, and freezing techniques. I shared tips on adjusting sweetness and serving ideas to make it special. You can even try new flavors and variations! In the end, homemade sorbet is easy, fresh, and better than store-bought. Make it your way and enjoy each delicious spoonful. Happy sorbet-making!

Peach Mango Sorbet Refreshing Summer Treat Recipe

Summer is here, and there’s nothing like a cold, fruity treat to cool down. This Peach Mango Sorbet recipe is

- Fresh cherry tomatoes - Bocconcini (small mozzarella balls) - Fresh basil leaves - Balsamic glaze - Extra virgin olive oil - Salt and freshly cracked black pepper - Skewers (4-6 inches long) Choosing the right ingredients is key for great Caprese salad skewers. - Best types of tomatoes for skewers: Use sweet, ripe cherry tomatoes. They burst with flavor and add color. Look for firm ones that feel heavy for their size. - Choosing high-quality mozzarella: Select bocconcini that are fresh and soft. They should have a milky scent. Avoid dry or rubbery mozzarella; it won't taste as good. - Importance of fresh basil: Fresh basil gives a bright flavor to your skewers. Look for vibrant, green leaves without brown spots. The aroma should be rich and fragrant. These tips will help you create a delicious, fresh appetizer. For the complete recipe, refer to the Full Recipe section. 1. Start by washing your cherry tomatoes and fresh basil in cold water. 2. Gently pat them dry with a paper towel. This step keeps them fresh. 3. If your mozzarella balls are in brine, drain them first. 4. Pat the mozzarella dry to remove excess moisture before using. 1. Grab a skewer and slide on one cherry tomato first. 2. Next, place a basil leaf on top of the tomato. This adds great flavor. 3. Add a mozzarella ball after the basil leaf. 4. Repeat the order: basil leaf, then finish with another cherry tomato. 5. Aim for 2-3 of each ingredient on each skewer for balance. 1. Drizzle the assembled skewers with extra virgin olive oil. 2. Add a generous amount of balsamic glaze for sweetness. 3. Sprinkle salt and cracked black pepper on top to enhance flavor. 4. Serve right away for the best taste, or chill for one hour. This method keeps the flavors bright and fresh. Following this full recipe, you’ll create a delightful appetizer that impresses everyone! - Ideal serving presentation: Arrange your Caprese salad skewers on a bright platter. Use vibrant colors for added appeal. A drizzle of balsamic glaze enhances the look and taste. Feel free to garnish with extra basil leaves for a fresh touch. - Pairing drinks with Caprese skewers: Light white wines, like Pinot Grigio, pair well. You can also serve sparkling water with lemon for a refreshing option. - Suggestions for pre-assembly: You can prepare the skewers a few hours in advance. Just keep them covered in the fridge. This saves time if you host a gathering. - Recommended chill time before serving: Chill the skewers for at least 30 minutes. This allows the flavors to blend nicely. - Optional ingredients for varied flavors: Try adding olives or roasted peppers for extra taste. You can also use different cheeses, like feta or goat cheese. - Suggested tools for easier assembly: Use a small bowl for the olive oil and glaze. This helps you drizzle evenly over the skewers. A pair of kitchen scissors can cut basil easily, making prep quick. For the full recipe, check out the [Full Recipe]. {{image_4}} You can switch up the cheese in your Caprese salad skewers. Try feta or goat cheese for a new twist. Both cheeses bring unique flavors that can change the taste. Feta adds a salty kick, while goat cheese offers a creamy texture. Adding vegetables or fruits can also enhance your skewers. Avocado slices add creaminess and healthy fats. Fresh melon cubes can bring a sweet contrast to the savory cheese and tomatoes. Both options add color and flavor, making your skewers even more appealing. Presentation matters when serving these skewers. You can use different types of skewers. Bamboo, metal, or even colorful plastic skewers can make your dish pop. Choose a style that matches your party theme or mood. Get creative with your serving platters, too. A rustic wooden board can give a homey feel. A bright, colorful platter can add a fun touch. Arrange the skewers in a spiral or fan shape for visual flair. For those with dietary needs, there are easy options. Caprese skewers are naturally gluten-free, making them safe for most diets. If you're looking for vegan adaptations, swap the mozzarella for marinated tofu or a nut-based cheese. Both options can mimic the texture while keeping your skewers dairy-free. You can still enjoy the vibrant flavors without compromising your diet. For the full recipe, check out the Caprese Salad Skewers Delight above. Store leftover skewers in an airtight container. This keeps them fresh and tasty. Use a container that fits your fridge well. If you don’t have one, wrap them tightly in plastic wrap. Keep the skewers in the fridge at a cool temperature. The ideal range is between 34°F and 40°F. This helps maintain the freshness of the tomatoes and cheese. Caprese salad skewers last for about three days in the fridge. After that, the tomatoes may start to lose their crispness. The cheese might also change in texture. For the best taste, eat them within two days. You can use leftover ingredients in many ways. Add cherry tomatoes to salads or pasta dishes. They can also brighten up a sandwich. Bocconcini can be tossed into a salad or melted on top of a pizza. Use basil leaves in pesto or add them to a sauce. This way, nothing goes to waste and your meals stay exciting! If you lack bocconcini, you have options. Try small mozzarella balls or feta cheese. Goat cheese is another creamy choice. These cheeses can mimic similar flavors and textures. For a vegan option, consider marinated tofu or cashew cheese. Each option can add its own twist to your skewer. Yes, you can prepare these skewers ahead of time. Assemble them up to four hours before serving. Store them in the fridge until you’re ready to serve. This keeps them fresh. Just avoid drizzling olive oil and balsamic glaze until serving. This helps keep the flavors bright. To spice things up, add crushed red pepper flakes. You can also use spicy balsamic glaze. For a kick, try a drizzle of sriracha or hot sauce. These additions can bring heat while still keeping the fresh taste of the salad. Basil is classic, but feel free to experiment. Fresh oregano, thyme, or parsley can add depth to the dish. Chives also work well for a mild onion flavor. Mixing herbs can enhance the overall taste and make your skewers unique. This blog post covered how to make Caprese skewers using fresh ingredients like cherry tomatoes and mozzarella. You learned about preparation, assembly, and serving tips. The variations section opened doors to creative ideas, while storage information ensures your leftovers stay tasty. Remember, quality ingredients matter! Feel free to experiment with flavors and presentations. Now, you can impress your friends and family with delicious Caprese skewers any time. Enjoy your culinary journey!

Caprese Salad Skewers Fresh and Flavorful Appetizer

Looking for a fresh and tasty appetizer? Caprese Salad Skewers are the perfect choice! With bright cherry tomatoes, creamy bocconcini,

- 1 cup rolled oats - 2 cups water or almond milk - 1 cup fresh or dried cranberries - Zest of 1 juicy orange - Juice from 1 orange - 2 tablespoons pure maple syrup (or honey, if preferred) - 1 teaspoon ground cinnamon - 1/4 teaspoon fine sea salt - 1/4 cup chopped nuts (such as walnuts or sliced almonds) - Optional toppings: A few slices of ripe banana, extra cranberries, or a dollop of creamy yogurt When I make cranberry orange oatmeal, I love using fresh ingredients. The rolled oats serve as a great base. They cook up fluffy and creamy. The liquid, whether water or almond milk, adds richness. I often pick dried cranberries for their chewy texture. However, fresh cranberries burst with tartness. The zest and juice from the orange brighten the dish. They bring a sweet and tangy flavor that pairs perfectly with the oats. Maple syrup or honey adds a touch of sweetness. Ground cinnamon brings warmth and depth. The fine sea salt enhances all these flavors nicely. Lastly, I like to add chopped nuts for a crunchy finish. Walnuts or sliced almonds work well in this dish. They add protein and healthy fats. You can also add optional toppings like banana slices or yogurt for extra creaminess. Each ingredient plays a role in making this meal both nourishing and flavorful. Cranberry orange oatmeal is nutritious. Each serving packs about 250 calories. It offers healthy carbs, fiber, and protein. The oats provide energy, while cranberries add antioxidants. Oranges enhance vitamin C content. - Benefits of oats: Oats are high in fiber. They help keep you full longer. Oats also support heart health by lowering cholesterol. - Benefits of cranberries: Cranberries are rich in vitamins and antioxidants. They may help prevent urinary tract infections and boost immune health. - Benefits of oranges: Oranges are a great source of vitamin C. They support skin health and help fight inflammation. You can find the full recipe in my article. Enjoy making this delightful dish! 1. Boiling the liquid: Start by pouring 2 cups of water or almond milk into a medium saucepan. Heat it over medium heat until it gently boils. The bubbling liquid means you're ready for the next step. 2. Adding the oats and salt: Once boiling, stir in 1 cup of rolled oats and 1/4 teaspoon of fine sea salt. Reduce the heat to low. Let it simmer for about 5 minutes. Stir occasionally to keep the oats from sticking to the bottom. 1. Timing for adding cranberries and orange juice: After 5 minutes, it’s time to add flavor. Stir in 1 cup of cranberries, the zest of 1 orange, and the juice from that same orange. Don’t forget the sweetness! Add 2 tablespoons of pure maple syrup and 1 teaspoon of ground cinnamon. 2. Cooking duration for thickening: Cook this mixture for another 2 to 3 minutes. Keep stirring to help the cranberries plump up and the oatmeal thicken. When it looks creamy, you know it’s ready. 1. Cooling the oatmeal: Remove the saucepan from the heat. Let it sit for about 1 minute. This short resting time lets the flavors meld and enhances the taste. 2. Adding nuts and serving suggestions: Stir in 1/4 cup of chopped nuts for a nice crunch. Now, scoop the oatmeal into bowls. Top with sliced banana, extra cranberries, or a dollop of yogurt. Enjoy your delicious, warm bowl of cranberry orange oatmeal! For a full recipe, check out the details mentioned earlier. To prevent sticking, stir the oats often. This keeps them from clumping together. Use a non-stick pot for easy cooking and cleanup. To achieve the right consistency, adjust the liquid. If you like creamier oatmeal, add more water or almond milk. For thicker oatmeal, use less liquid. You can add spices like nutmeg or vanilla. These give a warm touch to your dish. To adjust sweetness, taste the oatmeal before serving. If needed, add more maple syrup or honey. This lets you customize the sweetness to your preference. Layer toppings for a beautiful look. A few slices of banana, extra cranberries, or nuts on top create color and texture. Use nice bowls to serve the oatmeal. This makes your meal feel special and inviting. For more ideas, check the Full Recipe for details. {{image_4}} You can easily make this dish vegan and gluten-free. For a vegan choice, use almond milk instead of water. Almond milk adds a nice creamy touch and a hint of nutty flavor. Next, look for gluten-free oats. These oats provide the same texture and taste, ensuring everyone can enjoy this meal. Want to shake things up? Try adding a tropical twist! You can mix in pineapple and coconut for a sunny vibe. The pineapples add sweetness, while the coconut brings a lovely chew. For a nutty variation, add different nuts like pecans or hazelnuts. They give the oatmeal a delightful crunch and a rich flavor. Seasonal ingredients can change your oatmeal game. In fall, add pumpkin puree for a warm and cozy flavor. The pumpkin pairs well with the spices and cranberries. In summer, toss in a mix of berries like blueberries and strawberries. They add a fresh burst of color and taste, making your breakfast even more enjoyable. For the full recipe, check out the details above on how to craft this delicious Cranberry Orange Oatmeal! To keep your cranberry orange oatmeal fresh, use proper storage containers. Glass or BPA-free plastic containers work well. Make sure to let the oatmeal cool before sealing it. This prevents moisture buildup. You can store your oatmeal in the fridge for up to 4 days. This makes it easy to grab a quick breakfast. Just reheat it before serving. If you want to save some for later, freezing is a great option. To freeze oatmeal, divide it into portions. Use freezer-safe bags or containers. Squeeze out as much air as possible before sealing. When you’re ready to eat, simply defrost the oatmeal overnight in the fridge. You can also use the microwave. Heat it in short bursts, stirring often until warm. Got leftover oatmeal? Don't let it go to waste! You can turn it into breakfast bars. Just mix it with nuts and dried fruits, then bake. Another fun idea is to make smoothies. Blend the oatmeal with yogurt and your favorite fruits. This adds a tasty twist and packs in more nutrition. To make cranberry orange oatmeal vegan, use almond milk instead of regular milk. Maple syrup works well as a sweetener. Ensure your cranberries are not sweetened with gelatin. This keeps your dish plant-based. Yes, you can add other fruits. Try apples, bananas, or berries. These fruits add different flavors and textures. You can mix and match your favorites for a fun twist. Some easy toppings include: - Sliced bananas - Chopped nuts - Extra cranberries - A dollop of yogurt - A sprinkle of cinnamon These add flavor and texture to your dish. To adjust the sweetness, add more maple syrup or honey. You can also use mashed bananas for natural sweetness. Taste as you go to find your perfect level of sweetness. Yes, cranberry orange oatmeal is healthy. It offers fiber from oats and antioxidants from cranberries. The orange adds vitamin C. This dish keeps you full and energized for the day ahead. For a full recipe, check the ingredients listed above. This blog post shared a simple recipe for cranberry orange oatmeal. We reviewed ingredients, their health benefits, and step-by-step cooking instructions. I shared helpful tips for perfecting texture and enhancing flavor. You can adjust this recipe for various diets or seasons. Oatmeal is a great choice for breakfast. It fuels you with nutrients and energy. Enjoy experimenting with flavors and toppings to make it your own.

Cranberry Orange Oatmeal Nourishing and Flavorful Dish

Start your day with a warm bowl of Cranberry Orange Oatmeal that delights your taste buds and nourishes your body!

- 2 pounds baby potatoes - 3 tablespoons extra virgin olive oil - 4 cloves garlic - 1 teaspoon dried rosemary - 1 teaspoon dried thyme - ½ cup Parmesan cheese - Sea salt and black pepper - Fresh parsley for garnish To make Garlic Parmesan Roasted Potatoes, you need simple yet tasty ingredients. The baby potatoes give a nice bite, and the garlic adds a rich flavor. You can use extra virgin olive oil for drizzling, which enhances the taste. Fresh garlic is best, so don't skip it! The dried herbs, rosemary and thyme, give a nice aroma and depth. Parmesan cheese is the star here. It melts beautifully and adds a salty, cheesy finish. Use sea salt and freshly cracked black pepper to season. Finally, fresh parsley adds color and a touch of freshness to the dish. - Calories per serving: About 200 - Macronutrients breakdown: - Carbohydrates: 30g - Protein: 4g - Fat: 8g These roasted potatoes are not just delicious; they also offer a good balance of nutrients. With about 200 calories per serving, they fit well into a variety of meal plans. The carbohydrates fuel your body, while the fat from the olive oil keeps things tasty and satisfying. - Preheat the oven: Set your oven to 400°F (200°C). This makes the potatoes crisp. - Prepare the potatoes: Take 2 pounds of baby potatoes. Cut them in half. In a bowl, add the potatoes. Pour in 3 tablespoons of extra virgin olive oil. Add 4 minced garlic cloves, 1 teaspoon of dried rosemary, and 1 teaspoon of dried thyme. Sprinkle in sea salt and black pepper. Mix well until all potatoes are coated. - Toss potatoes with seasoning: Make sure every potato piece gets the tasty mixture. This helps create a nice flavor. - Arrange on baking sheet: Line a baking sheet with parchment paper. Spread the potatoes out in one layer. Leave space between them. This helps them roast evenly. - Adding cheese at the right time: Roast the potatoes for 25 minutes. Halfway, turn them to brown all sides. Once golden, sprinkle ½ cup of freshly grated Parmesan cheese on top. - Ensuring even melting: Put the baking sheet back in the oven for 5-10 minutes. Watch closely. The cheese should melt and bubble a bit. This gives it a nice crust. For the full recipe, check the detailed instructions above. To get crispy roasted potatoes, follow a few key steps. First, choose baby potatoes for their tender texture. Cut them in half to increase surface area. This helps them crisp up nicely. Make sure to coat them well with olive oil. The oil forms a barrier that keeps moisture out. Next, season with garlic, rosemary, and thyme. These herbs add depth to the flavor. Use fresh garlic if possible. It gives a stronger taste than dried. Toss the potatoes until they are fully coated. One common mistake is overcrowding the baking sheet. If the potatoes touch, they will steam instead of roast. Always leave space between them. This allows hot air to circulate and creates that desired crunch. Another mistake is under-seasoning. Don’t be shy with the salt and pepper. Proper seasoning brings out the potato's natural flavors. Taste the mix before roasting to ensure the seasoning is just right. These roasted potatoes pair well with many main dishes. They go great with grilled chicken or roast beef. You can also serve them alongside a fresh salad for a light meal. For a beautiful presentation, use a rustic bowl. A cast-iron skillet looks great too. Top with extra Parmesan and parsley for color. This makes your dish look as good as it tastes. Check out the Full Recipe for more details! {{image_4}} You can change the taste easily. Try different cheeses like cheddar or gouda. Each cheese adds its unique touch. For extra heat, add spices like cayenne or smoked paprika. Just a pinch makes a big difference. Mix and match to find your perfect combo. If you want a vegan version, swap the cheese for nutritional yeast. It gives a cheesy flavor without dairy. For gluten-free needs, this recipe is naturally safe. Just check any store-bought seasonings to ensure they are gluten-free. You can use different potatoes like Russet, Yukon Gold, or sweet potatoes. Each type has its flavor and texture. Remember, cooking time may change. Sweet potatoes may need a bit longer, while smaller potatoes cook faster. Adjust as needed for the best results. For the full recipe, check the detailed instructions above. To keep your garlic Parmesan roasted potatoes fresh, follow these tips: - Let the potatoes cool to room temperature. - Place them in an airtight container. - Use a container that fits tightly to prevent air exposure. - Store in the fridge for up to three days. You can reheat your potatoes using two main methods: the oven or the microwave. - Oven: Preheat to 350°F (175°C). Spread the potatoes on a baking sheet. Bake for about 10-15 minutes, turning them halfway through. This method keeps them crispy. - Microwave: Place the potatoes on a microwave-safe plate. Heat in short bursts of 30 seconds. Check often, so they don’t get too soft. Freezing roasted potatoes is possible, but it's best to eat them fresh. If you want to freeze: - Cool them completely and spread them in a single layer on a baking sheet. - Freeze for a few hours until solid, then transfer to a freezer bag. - Use within three months for the best flavor. To reheat, thaw in the fridge overnight. Reheat in the oven for crispy results. For more detailed instructions, check the full recipe! To make Garlic Parmesan Roasted Potatoes, you start by preheating your oven to 400°F (200°C). Next, you will need two pounds of baby potatoes, halved. Toss them in a bowl with three tablespoons of olive oil, four minced garlic cloves, one teaspoon of dried rosemary, and one teaspoon of dried thyme. Add sea salt and black pepper to taste. Spread the potatoes in a single layer on a lined baking sheet. Roast them for about 25 minutes, turning halfway. Then, sprinkle half a cup of grated Parmesan cheese on top and roast for an additional five to ten minutes until golden. You can find the full recipe for more details. Garlic Parmesan Roasted Potatoes pair well with many dishes. Consider serving them with grilled chicken, steak, or fish. They also work well as a side for roasted vegetables or a fresh salad. For a complete meal, serve these potatoes with a creamy dip or a tangy sauce. Yes, you can prepare Garlic Parmesan Roasted Potatoes ahead of time. Cook the potatoes as directed, let them cool, and store them in an airtight container. Keep them in the fridge for up to three days. When you are ready to eat, reheat them in the oven for the best texture. Garlic Parmesan Roasted Potatoes can be a healthy choice. Potatoes provide fiber and vitamins. Using olive oil adds healthy fats. However, keep an eye on the amount of cheese you use. Moderation is key to enjoying this dish as part of a balanced diet. Absolutely! You can customize the herb blend to suit your taste. Try adding fresh herbs like basil or parsley for a fresh twist. Oregano or dill can also work well. Experiment with different combinations to find your favorite flavor profile. This blog post covers how to make Garlic Parmesan Roasted Potatoes. We discussed the ingredients and their nutritional value. You learned step-by-step instructions for preparing and roasting. We also shared tips for perfecting the dish and suggested variations for your taste. In conclusion, these roasted potatoes are easy to make and delicious. They can fit any meal and satisfy your cravings. Enjoy experimenting with flavors and serving them alongside other dishes. With these ideas, you can impress anyone at your table.

Garlic Parmesan Roasted Potatoes Crunchy and Flavorful

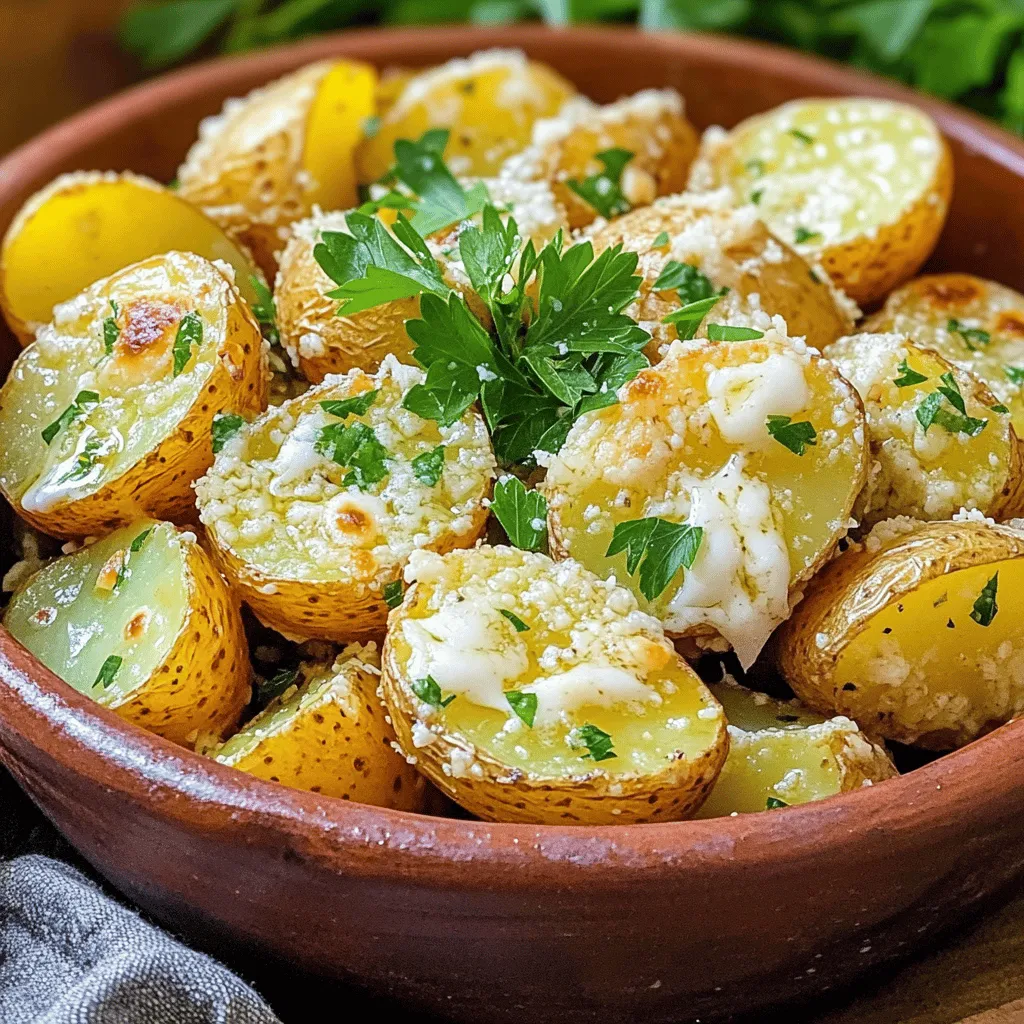
Garlic Parmesan Roasted Potatoes are the perfect side dish for any meal. They’re crunchy, flavorful, and simple to make! With

- 2 lbs chicken wings - 1 tablespoon baking powder - Spices: garlic powder, onion powder, smoked paprika - Optional: cayenne pepper - Seasoning: salt and pepper - 2 tablespoons olive oil - Garnish: fresh parsley - Baking sheet - Aluminum foil - Wire rack - Mixing bowl - Whisk Gather these ingredients to start your tasty journey. You want fresh chicken wings. Look for wings that are plump and juicy. Baking powder is key for a crispy texture. It works by drawing moisture out of the skin. The spices add flavor and warmth. Garlic powder gives a nice kick. Onion powder adds a sweet depth. Smoked paprika brings that smoky taste that everyone loves. If you like spice, add cayenne pepper. Salt and pepper boost the flavors too. Use good quality olive oil for the best results. It helps the spices stick and adds richness. Fresh parsley is great for a pop of color. It makes the dish look fresh and inviting. You will also need some kitchen tools. A baking sheet lined with aluminum foil makes cleanup easy. A wire rack is essential for airflow. This helps the wings crisp up nicely. A mixing bowl and whisk combine the spices effortlessly. Once you have everything, you are ready to make your oven-baked crispy chicken wings. Check out the Full Recipe for complete steps! - Preheat the oven to 425°F (220°C). - Line a baking sheet with aluminum foil. I always start by preheating my oven. This ensures the wings cook evenly and get crispy. I line the baking sheet with foil for easy cleanup. It's worth the little extra effort! - Combine dry ingredients in a mixing bowl. - Coat the chicken wings with spice mixture and olive oil. Now, grab a mixing bowl. In it, I combine the baking powder, garlic powder, onion powder, smoked paprika, and optional cayenne pepper. I add salt and pepper too. I whisk it all together until it’s mixed well. Next, I take the chicken wings and add them to the bowl. I drizzle olive oil over the wings and toss them. This helps the spice mix stick. I make sure every wing gets a nice coating. - Arrange wings on the wire rack. - Bake for 40-45 minutes, flipping halfway. I carefully place the coated wings on the wire rack. I make sure they are not touching. This allows the hot air to move around them. I bake the wings for 40-45 minutes. About halfway through, I flip them over. This helps both sides get crispy. I watch them closely. The goal is a golden brown color. After baking, I let them rest for five minutes. This helps keep them juicy. For a nice finish, I sprinkle fresh parsley on top. For the full recipe, check out the earlier sections. To get that perfect crunch, use baking powder. It helps the skin puff up. This simple step makes a huge difference. Always place your wings on a wire rack. This allows air to flow around them, cooking them evenly. The heat circulates and gives you that crisp texture. Want extra flavor? Try marinades! Soy sauce, honey, and garlic can add a tasty twist. You can also mix in fresh herbs like rosemary or thyme. Adjust the spice level to fit your taste. Add more cayenne for heat or keep it mild for kids. Avoid overcrowding the baking sheet. If wings are too close, they won't crisp up well. Give them space to breathe. Also, remember to flip the wings halfway through cooking. This helps them brown evenly and keeps them crispy. Following these tips will ensure your wings turn out great every time! For the full recipe, check out the detailed steps above. {{image_4}} You can change the taste of your wings easily. For an Asian-inspired flavor, use soy sauce, ginger, and garlic. This mix gives the wings a savory, rich taste. You can marinate the wings for a few hours to make the flavors deeper. If you love BBQ, try a BBQ sauce glaze. Brush it on right before serving for a sweet and tangy kick. You can even mix your favorite BBQ sauce with some honey for a caramelized finish. Want crispy wings but don't have an oven? Try an air fryer! Set it to 400°F (200°C) and cook the wings for about 25-30 minutes. Shake the basket halfway for even cooking. The air fryer gives you a crispy texture without much oil. Grilling is another fun option. Use a medium heat and cook the wings for 20-25 minutes. Turn them often to get that nice smoky flavor. It’s perfect for summer cookouts or family gatherings. Dipping sauces can make your wings even better. Classic ranch or blue cheese dressing pairs perfectly. For a twist, try a spicy sriracha mayo or a sweet chili sauce. You can also serve these wings with sides. Celery sticks add crispness, while coleslaw gives a cool, creamy touch. French fries or a fresh salad also work well for a complete meal. For the full recipe, check out the Crispy Oven-Baked Chicken Wings section. After enjoying your crispy chicken wings, let them cool down. This step is key. Place the wings in a shallow dish. Cover them tightly with plastic wrap or a lid. You can also use an airtight container for better freshness. Store them in the fridge for up to three days. To reheat your wings, the oven is best. Preheat it to 350°F (175°C). Place the wings on a baking sheet. Bake for about 10 to 15 minutes. This method keeps them crispy. You can also use an air fryer if you have one. Heat them at 360°F (182°C) for about 5 to 8 minutes. If you want to save wings for later, freezing works well. First, cool the wings completely. Arrange them in a single layer on a baking sheet. Place them in the freezer for about an hour. Once frozen, transfer the wings to a freezer bag. Remove as much air as possible. This helps prevent freezer burn. You can store them for up to three months. When ready to eat, thaw them in the fridge overnight. To reheat, follow the same oven or air fryer steps. Enjoy your tasty wings anytime! For the full recipe, check out the main article. To make wings extra crispy, use baking powder. Baking powder helps create a crunchy texture. It draws moisture away and makes the skin crispier. Spacing is key during baking. Place wings apart on the rack. This allows hot air to circulate, making all sides crispy. If wings touch, they will steam instead of crisp. Yes, you can use frozen wings. Just adjust the cooking time. Add about 10-15 minutes to the total baking time. Check the temperature to ensure they reach 165°F (74°C). For best results, do not thaw wings before cooking. This keeps them juicy and helps achieve a nice crunch. Classic choices include ranch and blue cheese. Both sauces add a creamy coolness to spicy wings. They balance the heat perfectly. For unique options, try hot sauce or honey mustard. Hot sauce adds more heat, while honey mustard gives a sweet twist. These options make your wings even more delicious! This blog post covered everything you need for delicious chicken wings. You learned about key ingredients, tools, and simple steps to make them crispy. We shared tips to avoid common mistakes and ideas for flavor variations. Think about how fun it is to try different dips and sides. Remember, crispy wings are just a recipe away. Enjoy experimenting and finding your favorite way to serve them!

Oven-Baked Crispy Chicken Wings Simple and Tasty Recipe

Are you craving crispy chicken wings but want to skip frying? You’re in the right place! My Oven-Baked Crispy Chicken

To make a tasty vegetable stir fry, gather these fresh ingredients: - 1 cup broccoli florets - 1 bell pepper (any color), thinly sliced - 1 large carrot, julienned - 1 cup snap peas, trimmed - 1 medium zucchini, sliced into half-moons - 1 cup baby corn, cut into bite-sized pieces - 3 cloves garlic, finely minced - 1 tablespoon fresh ginger, freshly grated - 3 tablespoons soy sauce (or tamari for a gluten-free option) - 1 tablespoon toasted sesame oil - 2 tablespoons vegetable oil - 1 tablespoon sesame seeds (for garnish) - Sea salt and freshly cracked pepper to taste - Fresh cilantro leaves, for garnish Both fresh and frozen vegetables work in stir fry. Fresh veggies offer great taste and color. Frozen vegetables are convenient and save time. They are picked at peak ripeness and frozen fast. This keeps nutrients intact. If you use frozen, thaw them before cooking for best results. Look for vibrant colors when picking fresh vegetables. They should feel firm and crisp. Check for any brown spots or wilting. Smell the produce; it should be fresh and pleasant. Local farmers' markets often have the best picks. Always wash your veggies before cooking. This removes dirt and pesticides. Choosing quality ingredients makes your stir fry shine. Start by washing all your vegetables. Clean them well to remove dirt. Cut the broccoli into small florets. Slice the bell pepper thinly. Julienning the carrot into strips helps it cook fast. Slice the zucchini into half-moons. Trim the snap peas and cut the baby corn into small pieces. This prep makes sure everything cooks evenly. Heat vegetable oil in a large skillet or wok. Set the heat to medium-high until the oil shimmers. Add minced garlic and grated ginger. Stir for about one minute. This step brings out their great flavors. Next, add broccoli, bell pepper, and carrot. Stir-fry these for 3-4 minutes. They should soften but stay crunchy. Then, toss in the snap peas and baby corn. Cook for another 2 minutes. Finally, add the sliced zucchini and cook for 2 more minutes. All veggies should be tender-crisp and colorful. Now, drizzle soy sauce and sesame oil over the stir-fry. Stir well to mix. Let it cook for one more minute. This allows the flavors to blend. Taste your dish and add sea salt and pepper as needed. Remove it from heat when done. To make your stir-fry pop, sprinkle sesame seeds on top. Fresh cilantro adds a nice touch too. You can also try adding a splash of lime juice for zest. This brings a fresh taste. Enjoy experimenting with flavors you love. Remember, your Vegetable Stir Fry can be a canvas for creativity! To get that perfect stir-fry texture, keep your veggies crisp. Cut them into uniform pieces. This helps them cook evenly. Use high heat to quickly cook the vegetables. It makes them tender yet still crunchy. Remember to stir constantly. This keeps the heat even and prevents burning. One common mistake is overcrowding the pan. If you add too many veggies at once, they steam instead of fry. Cook in batches if needed. Another mistake is not prepping your veggies first. Chop and wash everything before you start cooking. This saves time and helps you focus on cooking. Lastly, don’t skip the garlic and ginger. They add great flavor. To save time, use a sharp knife for quick cuts. A good knife can make all the difference. Pre-chop your veggies ahead of time. Store them in the fridge for up to two days. You can also use frozen veggies. They cook quickly and are often just as tasty. Lastly, clean as you go. This keeps your workspace tidy and makes cooking more pleasant. For the full recipe, please refer to the Full Recipe. {{image_4}} Adding protein to your stir-fry can make it heartier. Tofu is a great choice for a plant-based option. Firm tofu holds its shape well. Simply cube it and fry it until golden. Chicken is another popular addition. Use bite-sized pieces and cook them until no longer pink. You can also try shrimp or beef for extra flavor. Each protein brings its own taste and texture. Soy sauce is classic, but you can try new options. Hoisin sauce adds sweetness, while oyster sauce gives depth. For a spicy kick, add sriracha or chili paste. You can mix sauces for even more flavor. Try experimenting with spices like garlic powder or five-spice powder. These options can change the whole dish. Seasonal vegetables can change your stir-fry game. In spring, use asparagus and peas. In summer, zucchini and bell peppers shine. Autumn brings squash and mushrooms, while winter offers hearty greens like kale. Adjust based on what’s fresh in your area. This not only improves taste but also supports local farms. Always aim for a rainbow of colors to make your dish vibrant. Please refer to the Full Recipe for detailed instructions on making this vibrant and delicious dish. Once you finish your vegetable stir fry, let it cool down to room temperature. Next, place it in an airtight container. This helps keep your stir fry fresh. Store it in the fridge for up to three days. Make sure to enjoy it within this time frame for the best taste and texture. If you have extra stir fry, you can freeze it! First, let it cool completely. Then, transfer it to a freezer-safe bag or container. Label it with the date. You can freeze vegetable stir fry for up to three months. When you're ready to eat it, just remember to thaw it in the fridge overnight. To reheat your stir fry, use a pan on medium heat. Add a splash of water or oil, then add your stir fry. Stir it often until it's hot throughout. This keeps the vegetables crisp and tasty. You can also microwave it. Place it in a microwave-safe dish, cover it, and heat for about 2-3 minutes. Stir halfway to ensure even heating. Enjoy your flavorful meal! The best vegetables for stir-frying are those that cook quickly and stay crisp. I like using: - Broccoli florets - Bell peppers - Carrots - Snap peas - Zucchini - Baby corn These veggies add color and texture. You can mix and match based on your taste. Yes, you can easily make this stir fry vegan. Just use vegetable oil and soy sauce. Avoid any animal-based sauces. You can add tofu for extra protein. To change the spice level, add more or less ginger. You can also: - Include red pepper flakes - Use spicy soy sauce - Add chili paste Start with a small amount and taste as you go. This way, you can find the right heat for you. Use a variety of vegetables in different colors. For example, add: - Red bell pepper - Yellow zucchini - Purple cabbage The more colors, the more fun and vibrant your dish will look. Yes, you can prep your veggies a day before. Store them in airtight containers in the fridge. Chopping ahead saves time and makes cooking easier. Please refer to the Full Recipe for detailed instructions on making this vibrant and delicious dish. This blog post outlined the key ingredients and step-by-step instructions for making a great stir-fry. We discussed the best vegetables to use, along with tips for picking fresh produce. You learned about preparation methods, cooking tips, and ways to enhance flavor. We shared common mistakes and time-saving tricks that ensure success. Stir-fry is versatile. You can mix in proteins, spices, or seasonal veggies. Proper storage keeps leftovers fresh for next time. Use the easy reheating guidelines to enjoy your dish again! Dive into the Full Recipe for more details and enjoy creating your perfect stir-fry.

Vegetable Stir Fry Simple and Flavorful Recipe Guide

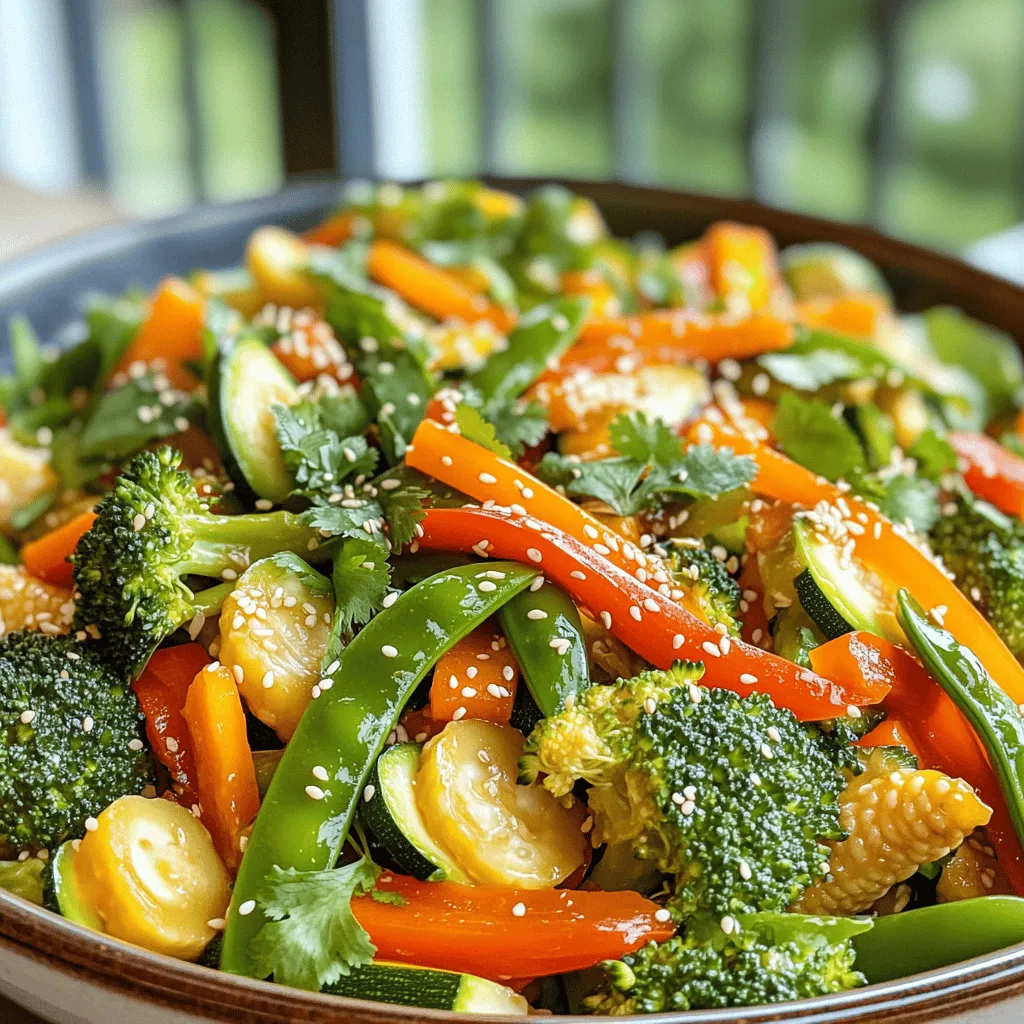
Looking for a quick and tasty meal? This Vegetable Stir Fry recipe is perfect for you! Packed with fresh colors

- 3 medium zucchinis, spiralized into noodles - 1 perfectly ripe avocado - 1 cup fresh basil leaves, packed - 2 tablespoons freshly squeezed lemon juice - 2 tablespoons pine nuts, lightly toasted - 2 tablespoons nutritional yeast - Sea salt - Black pepper - 1 cup cherry tomatoes, halved - Extra toasted pine nuts Zucchini noodles with pesto are simple yet full of flavor. To start, you need fresh and ripe ingredients. Zucchini gives a nice crunch. The avocado adds creaminess to your pesto. Fresh basil brings a bright herbal taste that pairs well with lemon juice. Lightly toasted pine nuts add a nutty twist. For extra flavor, consider nutritional yeast. It gives a cheesy taste without dairy. A pinch of sea salt and black pepper can enhance your pesto. When serving, cherry tomatoes add color and freshness. Extra toasted pine nuts on top give a lovely crunch. This dish looks great and tastes even better. You can find the complete recipe in the [Full Recipe]. Enjoy making this healthy meal! To start, you need to spiralize the zucchinis. Use a spiralizer to make long, noodle-like strands. This step is fun and easy! After spiralizing, place the noodles on paper towels. This helps soak up extra moisture. Drying the noodles prevents them from being soggy later. Now, it’s time to make the pesto! Gather your ingredients: a ripe avocado, fresh basil leaves, lemon juice, toasted pine nuts, nutritional yeast (if you want), minced garlic, and olive oil. Place all these in your food processor. Blend until the mixture is smooth and creamy. You want a nice, thick consistency that clings to the noodles. In a large bowl, gently toss the zucchini noodles with the avocado pesto. Make sure each noodle gets coated in the sauce. This is where the magic happens! Next, let the noodles sit for about 5 minutes. This marinating time helps the noodles soak in the pesto's flavors, making every bite delicious. For the full recipe, please refer to the recipe section. To stop zucchini noodles from getting soggy, follow these steps: - Spiralize and Dry: After spiralizing, lay the noodles on paper towels. This helps absorb extra moisture. - Salt for Drainage: Lightly sprinkle salt on the noodles and let them sit for 10 minutes. This draws out more water. You can enjoy zucchini noodles raw or cooked. Raw noodles keep a nice crunch. If you prefer cooked, sauté them quickly in olive oil over medium heat. Cook for just 2-3 minutes to warm them without losing texture. To ripen avocados quickly, place them in a brown paper bag with an apple or banana. This method speeds up the ripening process. For the best flavor, taste your pesto and adjust seasonings. You can add more lemon juice for zing. If you want a richer taste, mix in a pinch of sea salt or black pepper. Plating can make your dish pop. Here are some ideas: - Nest Shape: Form the zoodles into a nest on the plate. This creates an elegant look. - Pesto Drizzle: Drizzle some extra pesto around the edges for a colorful touch. Pair your zoodles with a light side salad or some grilled chicken. These options add balance to your meal and offer extra nutrients. For a complete recipe, check out the Full Recipe. {{image_4}} You can change the herbs in pesto. Try using cilantro or parsley for a new twist. Each herb brings a distinct flavor. You can also switch nuts. Instead of pine nuts, use walnuts or almonds. Each nut adds a different crunch and taste. Feel free to experiment and find what you like best! Want to make your meal heartier? Add protein! Grilled chicken or shrimp works well. If you prefer plant-based options, try tofu. Just remember, cooking time may change. If you add chicken or shrimp, cook until they are done. For tofu, sauté until it’s golden brown. This adds both flavor and nutrition. This recipe can easily be vegan. Just skip any dairy and stick with plant-based options. Check the pesto ingredients to ensure they suit your needs. For gluten-free, avoid any gluten-containing items. Zucchini noodles are naturally gluten-free, so you have a great base! Always read labels to make sure. To store leftover zucchini noodles, first, pat them dry with a paper towel. Place them in an airtight container. Keep them in the fridge for up to three days. This helps maintain their freshness. Avoid stacking too many noodles together to prevent mushiness. You want to keep them crisp. Homemade pesto can also be stored easily. Pour it into a clean jar and cover it tightly. You can also drizzle a thin layer of olive oil on top. This helps prevent the pesto from browning. If your pesto has avocado, it may brown faster. Use lemon juice to help keep it green. You can freeze both zucchini noodles and pesto. For zucchini, spread the noodles on a baking sheet. Freeze them until firm, then place them in a freezer bag. For pesto, use ice cube trays to freeze individual servings. Once frozen, transfer the cubes into a bag. When you're ready to use them, thaw in the fridge overnight or warm gently in a pan. Yes, you can cook zucchini noodles! You can sauté, steam, or even bake them. Each method changes the texture. Sautéing gives you a softer noodle, while steaming keeps them a bit crunchy. Baking makes them tender and slightly chewy. I prefer to eat them raw for the best flavor. To stop zucchini noodles from being watery, try these tips: - Sprinkle with salt: Salt draws out moisture. - Use paper towels: After spiralizing, place them on paper towels to absorb liquid. - Short cooking time: If you cook them, do not overdo it. Just a few minutes will work. Great sides for zucchini noodles with pesto include: - Grilled chicken for protein. - Roasted vegetables for added nutrients. - A crispy salad for a fresh crunch. These pairings make a well-rounded meal. Leftovers can last in the fridge for about 2-3 days. Store them in an airtight container. For best taste, eat them within this time. You can reheat them, but be careful not to cook them too long. They may get mushy. We explored zucchini noodles and avocado pesto, highlighting their key ingredients. I shared steps for making this dish, tips for perfecting flavors, and creative variations. Remember, you can enjoy this dish raw or cooked, making it versatile. Store leftovers correctly to keep them fresh. With these insights, you can create a delicious and healthy meal with ease. Enjoy experimenting with flavors and enhance your culinary skills!

Zucchini Noodles with Pesto Simple and Healthy Meal

Craving a meal that’s simple, healthy, and bursting with flavor? Look no further than zucchini noodles with pesto! This dish

You need just a few simple ingredients for this creamy dessert. They work together to create a rich and smooth pudding. Here’s what you will need: - 2 ripe avocados - 1/4 cup unsweetened cocoa powder - 1/4 cup pure maple syrup (or honey) - 1/4 cup almond milk (or any milk of choice) - 1 teaspoon vanilla extract - A pinch of sea salt Each ingredient adds its own magic. The avocados give the pudding its creamy base. Cocoa powder brings the rich chocolate flavor. Maple syrup sweetens it just right. Almond milk helps blend everything smoothly. Vanilla extract adds depth, and a pinch of salt enhances the taste. To make your pudding even more fun, you can add toppings. Here are some tasty options: - Sliced strawberries - Coconut flakes - Chopped nuts These toppings add color and crunch. Fresh strawberries give a bright touch. Coconut flakes add a hint of tropical flavor. Chopped nuts add a satisfying crunch. You can mix and match to find your favorite combo! This pudding is not only delicious but also healthy. Here’s a quick look at its benefits: - Avocados: Full of good fats and fiber. - Cocoa Powder: Rich in antioxidants. - Maple Syrup: Natural sweetener with minerals. This dessert is a treat that you can feel good about eating. It’s creamy, rich, and packed with nutrients. Enjoy it guilt-free! For the full recipe, check out the instructions above. To start, grab two ripe avocados. Slice them in half and remove the pit. Use a spoon to scoop out the soft, green flesh. This creamy flesh will give the pudding its rich texture. Place the avocado pieces into your food processor. It’s best if the avocados are soft but not mushy. This ensures a smooth blend. Next, add the remaining ingredients. You will need 1/4 cup of unsweetened cocoa powder, 1/4 cup of pure maple syrup, and 1/4 cup of almond milk. Also, include 1 teaspoon of vanilla extract and a pinch of sea salt. Blend everything together until it becomes smooth and creamy. Stop the blender to scrape down the sides. This helps mix everything well. Taste your pudding and adjust the sweetness if needed. You can add more maple syrup or cocoa powder for a richer flavor. Once blended, spoon the pudding into serving bowls. Make sure to divide it evenly for a nice look. Cover each bowl with plastic wrap. Refrigerate for at least 30 minutes. This chilling time helps the flavors blend and sets the pudding to a nice firmness. The pudding tastes best when it’s cold. Enjoy your delightful treat! You can check the [Full Recipe] for more details. To make your pudding super creamy, use ripe avocados. The softer they are, the smoother your pudding will be. Blend the avocado well until there are no lumps. If your mixture seems thick, add more almond milk a little at a time. This helps achieve that perfect creamy texture. You might want your pudding sweeter or more chocolatey. Start with the recipe’s amount of maple syrup. Then taste it. If you like it sweeter, add more syrup. If you want a richer chocolate flavor, add a bit more cocoa powder. You can change it to suit your taste. Make your dessert look great! Use small bowls for serving. Top each bowl with sliced strawberries, coconut flakes, or chopped nuts. These add color and crunch. You can even drizzle some chocolate sauce on top for a fancy touch. Serve it chilled for the best experience. For the complete recipe, including preparation steps, check out the Full Recipe. {{image_4}} If you're looking for dairy-free options, almond milk works great. You can also use oat or coconut milk. Each choice adds a unique flavor. For a creamier texture, try using coconut cream instead of regular milk. This makes the pudding rich and smooth while keeping it dairy-free. Want to spice up your pudding? Consider adding a teaspoon of instant coffee. It boosts the chocolate flavor. You can also mix in a pinch of cinnamon for warmth. If you like fruit, blend in ripe bananas or a handful of berries. These add sweetness and make it more colorful. When it comes to serving, think about the setting. For a simple snack, serve it in small cups. For parties, layer the pudding in clear glasses with fruit and nuts. This looks beautiful and impresses guests. If you're celebrating, consider adding a dollop of whipped coconut cream on top. It makes the dessert feel extra special. Check out the Full Recipe to create your own variations and enjoy this creamy treat! Store any leftover chocolate avocado pudding in an airtight container. This keeps it fresh and tasty. Place it in the fridge right after serving. It will stay good for about 3 days. When you want to enjoy it again, just give it a good stir. You might want to add a splash of almond milk if it thickens. If you want to keep the pudding longer, freezing is a great option. Spoon the pudding into freezer-safe containers or ice cube trays. Leave some space at the top since it will expand as it freezes. You can freeze it for up to 3 months. When you want to eat it, move it to the fridge overnight. Let it thaw slowly for the best taste and texture. If you finish your pudding and want more, making a fresh batch is easy. Just follow the Full Recipe. You can adjust the sweetness or flavor to fit your taste. Use ripe avocados for the best creaminess. You’ll have a new bowl of chocolate delight in no time! Chocolate avocado pudding uses simple, healthy ingredients. You need ripe avocados, unsweetened cocoa powder, pure maple syrup or honey, almond milk, vanilla extract, and sea salt. Each of these ingredients adds a unique flavor. The avocados give it a creamy texture, while cocoa adds rich chocolate taste. Maple syrup or honey sweetens it naturally. Almond milk makes it smooth and light. This pudding is not just tasty; it's also a good source of healthy fats. Chocolate avocado pudding stays fresh in the fridge for about three days. It's best to keep it covered to prevent it from absorbing other smells. If you notice any browning on the surface, just stir it in. The pudding remains creamy and delicious for days. If you want to keep it longer, you can freeze it. Just remember to thaw it in the fridge before serving. Yes, you can substitute some ingredients in this recipe. If you don't have avocados, you can use silken tofu for a similar texture. If you need a nut-free option, use oat milk instead of almond milk. You can also switch maple syrup for agave syrup or any sweetener of your choice. This flexibility lets you customize the pudding to your taste. For the full recipe, check out the earlier section. In this post, we explored how to make chocolate avocado pudding. We covered the main ingredients, optional toppings, and key nutritional info. You learned step-by-step how to prepare and blend the avocados. We also discussed tips for creamy texture and adjusting sweetness. Variations for dietary needs and storage tips were included too. Remember, this pudding is a healthy treat with endless options. Enjoy your delicious creation!

Chocolate Avocado Pudding Creamy and Rich Delight

Are you ready for a dessert that is both creamy fun and good for you? Chocolate Avocado Pudding is a

To create delicious teriyaki salmon bowls, gather the following ingredients: - 2 salmon fillets - 1/4 cup soy sauce - 2 tablespoons honey - 1 tablespoon rice vinegar - 1 teaspoon sesame oil - 1/2 tablespoon grated fresh ginger - 1 garlic clove, finely minced - 2 cups cooked brown rice - 1 cup broccoli florets - 1 medium carrot, julienned - 1/2 cup shelled edamame - 1 tablespoon sesame seeds - 2 green onions, thinly sliced (for garnish) These items are simple to find and create a balanced meal. The salmon provides healthy protein and omega-3 fats. The brown rice offers fiber and keeps you full longer. The veggies add vitamins and crunch. You can easily personalize your teriyaki salmon bowls. Here are some optional ingredients to consider: - Avocado slices for creaminess - Pickled ginger for a tangy kick - Seaweed strips for extra flavor - Bell peppers for added sweetness - Quinoa instead of brown rice for a different base Feel free to experiment! Each addition can bring new flavors and textures. Teriyaki salmon bowls are not only tasty but also nutritious. Here's a quick look at the nutritional benefits: - Salmon: High in protein and omega-3 fatty acids, great for heart health. - Brown Rice: Provides energy with complex carbs and fiber. - Broccoli: Packed with vitamins C and K, plus fiber. - Carrots: Full of beta-carotene, good for your vision. - Edamame: A good source of plant-based protein and iron. This dish supports a balanced diet while being flavorful and easy to prepare. To make the teriyaki sauce, grab a small bowl. Combine the soy sauce, honey, rice vinegar, sesame oil, grated ginger, and minced garlic. Whisk it well until it blends nicely. This sauce adds rich flavor to the salmon and veggies. Set the sauce aside for later. Next, take your salmon fillets and place them in a shallow dish. Pour half the teriyaki sauce over the salmon. Make sure each fillet gets a good coating. Cover the dish and let it sit for at least 15 minutes. This step helps the salmon soak up all that tasty flavor. While the salmon marinates, it's time to prepare the vegetables. Steam the broccoli florets and julienned carrot for about 5-7 minutes. They should be tender but still bright and crisp. You can steam them on the stove or use the microwave. Once done, set them aside. Now, heat a skillet over medium-high heat. Place the marinated salmon fillets in the pan. Discard any leftover marinade. Cook the salmon for about 4-5 minutes on each side. It should flake easily with a fork when done. Now, you are ready to put everything together. In a bowl, start with a base of cooked brown rice. Add the steamed broccoli, carrots, and edamame. Top with the cooked salmon fillets. Drizzle with the remaining teriyaki sauce, sprinkle sesame seeds, and finish with sliced green onions. This easy recipe brings together great flavors and colors. Each bite will make you smile. For the full recipe, check out the details above. To cook salmon just right, aim for 4-5 minutes on each side. Heat your skillet to medium-high before adding the salmon. This helps lock in moisture. You want the salmon to flake easily with a fork. If you prefer crispy skin, place the skin side down first. Use a timer to avoid overcooking. Brown rice is my go-to for teriyaki salmon bowls. It adds a nutty flavor that complements the fish. Other great options include jasmine or basmati rice for a softer texture. For veggies, broccoli and carrots work well. You can also add bell peppers or snap peas for extra crunch. Edamame adds protein and a pop of color. When serving, arrange the rice as a base. Layer the salmon and vegetables on top. Make it colorful! Use bright veggies like orange carrots and green broccoli. Sprinkle sesame seeds for a nice touch. Finish with sliced green onions for freshness. Serving on a bamboo mat with chopsticks adds an elegant feel. These little details make your meal look gourmet. For a full recipe, check out the section above. {{image_4}} If you want to switch things up, try different proteins. Chicken works well with teriyaki sauce. Simply use chicken breast or thighs in place of salmon. Tofu is also a great choice. It soaks up the sauce nicely. Just press and cube the tofu before cooking. Shrimp is another tasty option. Cook them until they turn pink for a quick meal. For a plant-based meal, use tempeh or seitan. These proteins hold flavor well and add great texture. Coat them in teriyaki sauce and cook them just like you would the salmon. Add more veggies to your bowl for extra nutrients. Try bell peppers, snap peas, or zucchini. They add color and crunch. Want to boost the flavor? Add a splash of lime juice for brightness. A bit of sriracha can give your bowl a spicy kick. Toasted sesame oil adds depth. For a sweet twist, try pineapple chunks in your bowl. They pair wonderfully with the teriyaki sauce. You can also add nuts like cashews or almonds for crunch. Enjoy experimenting with these options! For the full recipe, check the earlier section. To keep your leftover teriyaki salmon bowls fresh, store them in airtight containers. Make sure the salmon and rice are cooled before sealing. This helps avoid sogginess. Store them in the fridge for up to three days. Label your containers with the date. Enjoy your meal later without worry! When you’re ready to eat, reheat your teriyaki salmon bowls gently. Use the microwave or a skillet. If using the microwave, place a damp paper towel over the bowl. This keeps the salmon moist. Heat for about one to two minutes. If using a skillet, warm it on low heat. Stir occasionally to avoid burning. This method keeps the flavors intact. If you want to prep for the future, freezing is a great option. Assemble the bowls without the sauce. The rice, salmon, and vegetables freeze well. Place everything in freezer-safe bags and remove excess air. They can last up to three months. When you’re ready to eat, thaw in the fridge overnight and reheat as mentioned. Enjoy a quick meal that tastes fresh! For a full recipe, check out the detailed instructions! To make teriyaki salmon bowls from scratch, follow these steps: 1. Make the Teriyaki Sauce: Mix soy sauce, honey, rice vinegar, sesame oil, ginger, and garlic in a bowl. 2. Marinate the Salmon: Coat salmon fillets with half the teriyaki sauce. Let them sit for 15 minutes. 3. Steam the Vegetables: Steam broccoli and carrot until tender, about 5-7 minutes. 4. Cook the Salmon: Heat a skillet and cook the salmon for 4-5 minutes on each side. 5. Assemble the Bowls: Place brown rice in bowls, add vegetables, and top with salmon. 6. Finish with Sauce and Garnish: Drizzle with remaining sauce and add sesame seeds and green onions. You can find the full recipe for detailed instructions. The best type of salmon for teriyaki bowls is fresh, wild-caught salmon. It has rich flavor and great texture. King salmon is top choice, but sockeye and coho are also excellent. Avoid farmed salmon if you can. It tends to be fattier and has less flavor. Always look for bright color and firm flesh. This ensures a tasty dish. Teriyaki salmon lasts 3 to 4 days in the fridge when stored properly. Keep it in an airtight container to maintain freshness. Make sure the salmon cools before you store it. If you want to keep it longer, consider freezing the cooked salmon. It can last up to 3 months in the freezer. Just thaw it in the fridge before reheating. In this article, we explored how to create delicious teriyaki salmon bowls. We covered essential ingredients, marinade techniques, and perfect cooking methods for flavorful results. I offered tips for pairing rice and veggies, as well as presentation ideas. You can customize your bowl with different proteins or vegan options to suit your taste. Finally, we discussed storing leftovers for future meals. Enjoy making your own teriyaki salmon bowls, and have fun experimenting in the kitchen!

Teriyaki Salmon Bowls Flavorful and Easy Recipe

If you love bold flavors but want a quick meal, Teriyaki Salmon Bowls are your answer. This recipe is simple,

Older posts
Newer posts
← Previous Page1 … Page55 Page56 Page57 … Page86 Next →

dsad

© 2026 yumymoments • Built with GeneratePress

Our Policies

  • Copyright Policy
  • Cookie Policy
  • GDPR Policy
  • Privacy Policy
  • Disclaimer
  • Terms Of Use

More Information

  • Home
  • About
  • Contact
  • Appetizers
  • Dessert
  • Dinner
  • Drinks
©2026, yumymoments About Back To Top