Skip to content
DisclaimerTerms Of UseGDPR PolicyCookie Policy

yumymoments

  • Home
  • Drinks
  • Appetizers
  • Dinner
  • Dessert
  • About
  • Contact
  • Privacy Policy
DisclaimerTerms Of UseGDPR PolicyCookie Policy

NO-ING-IMG

- 1 pound Brussels sprouts, trimmed and halved - 3 tablespoons balsamic vinegar - 2 tablespoons extra virgin olive oil - 1 tablespoon honey or pure maple syrup - 2 cloves fresh garlic, finely minced These ingredients form the base of your dish. The Brussels sprouts bring a hearty texture. Balsamic vinegar adds a sweet and tangy flavor. Olive oil ensures the sprouts roast nicely. Honey or maple syrup gives a hint of sweetness. Fresh garlic adds depth to the taste. - Sea salt and freshly cracked black pepper, to taste - 1/4 cup feta cheese, crumbled - 1/4 cup walnuts or pecans, toasted and roughly chopped Feel free to enhance your dish with these extras. A sprinkle of sea salt and black pepper will elevate the flavor. Feta cheese adds a creamy and salty touch. Toasted nuts introduce a satisfying crunch. Brussels sprouts are packed with nutrients. A serving contains about 38 calories. They also have 0.3 grams of fat, 8 grams of carbohydrates, and 3 grams of protein. These little green gems are high in vitamins C and K. They support heart health and may aid digestion. For those with dietary restrictions, Brussels sprouts fit many diets. They are vegan, gluten-free, and low-carb. Always check for nut allergies if adding nuts. For the full recipe, check out the [Full Recipe]. - Preheat the oven to 425°F (220°C). - In a large bowl, whisk together: - 3 tablespoons balsamic vinegar - 2 tablespoons extra virgin olive oil - 1 tablespoon honey or maple syrup - 2 cloves fresh garlic, finely minced - Sea salt and cracked black pepper to taste This mixture combines sweet and tangy flavors. It will coat the Brussels sprouts beautifully. - Toss 1 pound of halved Brussels sprouts in the balsamic mixture. - Ensure each sprout gets an even coating. This step is key for flavor. If the sprouts are not well coated, they won't taste as good. Every bite should burst with that balsamic goodness! - Arrange the sprouts on a baking sheet. Place them cut side down in a single layer. - Roast for 20-25 minutes. Stir halfway through for even cooking. Watch as they turn golden brown and crisp. For a perfect texture, keep an eye on them. If you like extra tang, drizzle more balsamic on top after roasting. For a special touch, sprinkle with crumbled feta and toasted nuts. This adds flavor and crunch. You can find the full recipe to guide you further! To get the best flavor and texture, follow these tips: - Preheat your oven to a high temperature of 425°F (220°C). This helps the Brussels sprouts caramelize well. - Spread the sprouts in a single layer on the baking sheet. This ensures even cooking and nice browning. - Cut sides should face down. This helps create a crispy texture that makes them so tasty. Want to boost the taste? Here are some ideas: - Try adding a pinch of red pepper flakes for heat. - Consider a sprinkle of smoked paprika for a deeper flavor. - To adjust the sweetness, add more honey or maple syrup. Start small, then taste and adjust as needed. Looking for ideas on how to serve these Brussels sprouts? - They pair well with grilled chicken or fish for a balanced meal. - Toss them into salads for a warm, savory touch. - Serve with quinoa or couscous for a hearty side dish. - Top with toasted nuts or crumbled feta for added crunch and flavor. For the full recipe, check out the [Full Recipe]. {{image_4}} You can easily change ingredients for different diets. For vegan options, skip the honey and use maple syrup. You can use agave or brown sugar too. They offer nice sweetness. If you want different flavors, try apple cider vinegar instead of balsamic. It gives a fruity twist. Rice vinegar can also work well. You can roast Brussels sprouts in many ways. Air frying is a quick and easy method. It cooks them fast and gives a crispy finish. Just set your air fryer to 400°F (200°C) for about 15 minutes. Shake the basket halfway through for even cooking. Grilling is another great option. It adds a smoky flavor. Toss the sprouts in olive oil and grill them for about 10 minutes. Just watch them closely to avoid burning. You can mix in seasonal veggies for variety. In spring, add asparagus or peas. In the fall, consider adding sweet potatoes. Adjust your recipe based on what’s fresh. This keeps flavors bright and exciting all year. You can also change cooking times. In summer, shorter cooking times work best. In winter, a longer roast can help with caramelization. For the full recipe, check the complete details above. To store leftovers, place the Brussels sprouts in an airtight container. Keep them in the fridge for up to four days. When you want to reheat, use the oven for the best results. Preheat your oven to 350°F (175°C). Spread the sprouts on a baking sheet and heat for about 10-15 minutes. This method helps keep them crispy. If you want to freeze roasted Brussels sprouts, let them cool first. Spread them on a baking sheet in a single layer. Freeze until solid, about 1-2 hours. Then, transfer them to a freezer bag. To reintroduce crispness after thawing, preheat your oven to 400°F (200°C). Bake the sprouts for 15-20 minutes until they are hot and crispy again. In the fridge, these Brussels sprouts stay fresh for about four days. Watch for signs of spoilage like a sour smell or slimy texture. If they look or smell off, it's best to throw them away. Enjoy the flavor of your dish while it's fresh! For the full recipe, check [Full Recipe]. Roast Brussels sprouts for 20 to 25 minutes. This time gives them a nice crunch. Check for a golden brown color. Stir them halfway through cooking. This helps them roast evenly. Yes, you can prepare them ahead. Roast the Brussels sprouts and store them in the fridge. They stay fresh for 3 to 4 days. Reheat them in the oven for best results. This keeps them crispy. Balsamic roasted Brussels sprouts pair well with many dishes. Serve them with grilled chicken or fish. They also go nicely with quinoa or rice. For a vegetarian option, add them to a salad. They make a great side dish for any meal. To get crispy Brussels sprouts, use a hot oven. Preheat to 425°F (220°C). Make sure they are in a single layer. This allows air to circulate. Toss them in oil and balsamic vinegar to help with crisping. You can use frozen Brussels sprouts, but fresh is best. If using frozen, thaw them first. Pat them dry to remove excess moisture. This helps them roast better. Adjust the cooking time as needed. In this post, we explored a tasty way to enjoy Brussels sprouts with a simple recipe. We covered essential ingredients, step-by-step instructions, and helpful tips for perfect roasting. You learned about variations and how to store leftovers too. Brussels sprouts can be a great dish for any meal. With some tweaks, you can make this dish fit your taste. I hope you try it and enjoy every bite!

Balsamic Roasted Brussels Sprouts Flavorful and Easy

If you’re looking for a simple yet flavorful side dish, you’ve found it! Balsamic Roasted Brussels Sprouts are savory and

- 2 cups fresh basil leaves, packed - 1/2 cup pine nuts, lightly toasted for extra flavor - 2 cloves garlic, minced - 1/2 cup grated Parmesan cheese, plus extra for serving - 1/2 cup extra-virgin olive oil - 12 oz spaghetti or your preferred pasta type - 1 cup cherry tomatoes, halved (for garnish) - Zest of 1 lemon, for a bright flavor - Juice of 1 lemon, to enhance the freshness - Salt and pepper, to taste - Additional herbs (e.g., parsley) - Nuts (e.g., walnuts) - Protein options (e.g., grilled chicken, shrimp) Creating a vibrant Lemon Basil Pesto Pasta requires fresh and quality ingredients. The main stars are the basil and pine nuts. Fresh basil gives the dish a bright, herbal taste. Pine nuts add a pleasant crunch. Garlic brings a bold flavor that wakes up your taste buds. Parmesan cheese adds richness and depth. Finally, extra-virgin olive oil ties everything together with its smoothness. When it comes to the pasta, I love using spaghetti, but feel free to choose any type you enjoy. The cherry tomatoes add a pop of color and sweetness. A dash of lemon zest and juice brightens the dish. Don’t forget to season with salt and pepper to balance the flavors. If you want to get creative, consider adding optional ingredients. Fresh herbs like parsley can enhance the taste. Nuts like walnuts provide a new texture. You might also want some protein, like grilled chicken or shrimp, to make it a full meal. For a detailed guide, check the Full Recipe. To start, gather your fresh basil leaves, toasted pine nuts, minced garlic, and grated Parmesan cheese. Place these ingredients in a food processor. Pulse the mixture until it becomes finely chopped. You want it to have texture, not be completely smooth. This step builds the base of our bright and flavorful pesto. Next, add the zest and juice of one lemon. This adds a bright flavor that wakes up the dish. Toss in some salt and pepper for seasoning. Now, while the food processor runs, slowly drizzle in the olive oil. Blend until the pesto reaches a chunky yet smooth consistency. Taste it and adjust salt and pepper to your liking. Fill a large pot with water and add salt. Bring it to a vigorous boil. Add your spaghetti and cook according to the package instructions, about 8-10 minutes. Before you drain the pasta, reserve about one cup of the cooking water. This water is magical for adjusting the sauce later. In a big bowl, combine the drained pasta with the fresh pesto. Gently toss everything together until the pasta is well coated. If the mixture is too thick, use a little of the reserved pasta water to achieve your desired creaminess. This step ensures every bite is filled with flavor. Now it’s time to plate your dish. Serve the pasta in individual bowls. Garnish with halved cherry tomatoes and a few fresh basil leaves on top. For an extra treat, sprinkle with more grated Parmesan cheese. This adds a beautiful finish and extra flavor to your meal. Enjoy this Lemon Basil Pesto Pasta! For the Full Recipe, see the previous section. For the best flavor, always use fresh, quality ingredients. Fresh basil gives the pesto a bright taste. I really love using pine nuts that are lightly toasted. They add a nice, nutty flavor. You can also adjust the garlic and cheese levels to your taste. If you love garlic, add more! Want it cheesier? Go for extra Parmesan. Cook your pasta al dente for a better texture. This means it should be firm but not hard. A quick tip is to taste it a minute or two before the package time is up. Also, save some pasta water before draining. This water helps to improve the sauce's consistency. It can make your pesto cling to the pasta better. Serve your pasta immediately for the best taste. If it sits too long, it may dry out. I like to pair Lemon Basil Pesto Pasta with a fresh side salad or warm garlic bread. This makes for a complete meal that you can enjoy with family or friends. For the full recipe, check out the Lemon Basil Pesto Pasta recipe! {{image_4}} You can change the taste of your pesto by swapping herbs. Try cilantro for a fresh twist. Mint also adds a unique flavor. Different nuts can give your pesto a new vibe. Use almonds or cashews instead of pine nuts. Each nut brings its own taste and texture to the dish. Switch up your pasta choice for a fun twist. Whole wheat pasta adds fiber to your meal. If you need gluten-free options, there are many choices available. You can also use different pasta shapes like penne or fusilli. These shapes hold the pesto well and add a nice texture. Garnishing can elevate your dish to the next level. Crushed red pepper flakes add a spicy kick. If you want something hearty, try adding roasted vegetables. This not only adds flavor but also makes your meal more colorful and filling. For the full recipe, check out the [Full Recipe]. Store leftover pesto in an airtight container in the fridge. It lasts up to a week. If you want to keep it longer, freeze unused pesto in ice cube trays. Once frozen, transfer the cubes to a freezer bag. This method makes it easy to use just the right amount later. The pasta is best enjoyed fresh. However, you can store it in the fridge for 2 to 3 days. To reheat, heat it gently. Add a splash of water to keep it from sticking together. When reheating, use low heat. This method helps avoid overcooking and keeps the flavor intact. You can also reheat it with a bit of olive oil or reserved pasta water. This technique adds moisture and flavor back to your dish. For more flavor, consider adding a sprinkle of fresh Parmesan when serving. You can make this dish vegan easily. Just substitute Parmesan cheese with nutritional yeast or a vegan cheese alternative. This keeps the flavor bright and still delicious. Yes, you can use store-bought pesto if you're in a rush. However, I find that homemade pesto gives a fresher flavor and better nutrition. Plus, it’s fun to make! You can use any type of pasta you like. Spaghetti is a favorite, but feel free to choose your preferred shape. Penne, fettuccine, or even gluten-free pasta work well too! To make the pesto creamier, just add more olive oil. You can also mix in a touch of heavy cream for extra richness. This helps the sauce cling to the pasta beautifully. Lemon basil pesto pasta is a vibrant dish that combines fresh ingredients. You start by blending basil, nuts, garlic, and cheese into a tasty sauce. Cook your pasta and mix it all together for a quick meal. Use the tips to perfect your pesto and experiment with variations. Remember, fresh ingredients make all the difference. Enjoy this dish fresh or store leftovers smartly. Trust me, this meal brings bright flavors to any table. Make it your own and savor every bite!

Lemon Basil Pesto Pasta Fresh and Flavorful Dish

Looking for a fresh and flavorful dish? Lemon Basil Pesto Pasta brings bright, zesty tastes to your table. With simple

To create the perfect Chili Lime Grilled Corn, you need fresh and simple ingredients. Here’s what you will need: - 4 ears of fresh corn, husked - 2 tablespoons extra virgin olive oil - 1 teaspoon chili powder - 1/2 teaspoon smoked paprika - 1/2 teaspoon garlic powder - Salt and freshly ground black pepper to taste - 2 tablespoons freshly squeezed lime juice - 1/2 cup crumbled feta cheese (optional) - Fresh cilantro or parsley sprigs for garnish Each ingredient plays a vital role in building flavor. The fresh corn gives a sweet crunch. Extra virgin olive oil adds richness. Chili powder and smoked paprika contribute a nice kick and depth. Garlic powder enhances the overall taste without overpowering it. Salt and pepper balance the flavors perfectly. The lime juice adds zest and brightness, making the dish pop. If you want to elevate your dish, consider using feta cheese. It brings creaminess and saltiness that pairs well with the corn. Fresh cilantro or parsley sprigs add a touch of color and freshness. For the Full Recipe, make sure to follow the instructions closely. You’ll enjoy every bite of this tasty BBQ delight! Preheat your grill to medium-high heat. Aim for around 375°F to 450°F. This heat ensures the corn cooks well and gets those lovely grill marks. Start by husking the corn. Remove all the green husks and silk strands. Once done, rinse the corn under cold water. Shake off excess moisture. This step cleans the corn and gets it ready for grilling. In a small bowl, whisk together olive oil, chili powder, smoked paprika, garlic powder, salt, and black pepper. This mix creates a vibrant marinade that adds tons of flavor. Use a basting brush to coat each ear of corn with the marinade. Make sure every side is covered. Now, place the corn directly on the hot grill grates. Grill for about 10 to 12 minutes. Turn the corn every few minutes. This helps it cook evenly and adds nice char marks. When the corn is golden brown and has grill marks, take it off the grill. Drizzle fresh lime juice over it for a zesty kick. If you like, sprinkle crumbled feta cheese on top. Garnish with fresh cilantro or parsley to make it look pretty. This simple process transforms corn into a flavorful BBQ delight. For the complete recipe, check out the Full Recipe link! To get the best grilled corn, follow these tips: - Choose fresh corn: Look for firm, green husks. The kernels should feel plump. - Preheat the grill: Set it to medium-high heat, around 375°F to 450°F. - Turn the corn often: This ensures even cooking and gives nice char marks. - Watch for color: The corn should turn golden brown and have visible grill marks. Marinating corn adds depth to its flavor. Here’s how to do it well: - Use enough marinade: Coat the corn completely with the chili mix. - Let it sit: Allow the corn to marinate for at least 15 minutes. This helps the flavors soak in. - Try different spices: Feel free to add herbs or other spices to your marinade for variety. Serving your corn well makes it even more tempting. Consider these ideas: - Presentation matters: Arrange the corn on a rustic wooden board or colorful platter. - Add lime wedges: Place lime wedges on the side for a fresh touch. - Garnish creatively: Sprinkle crumbled feta cheese and cilantro for added color and taste. For the full recipe, check out the details above. Enjoy your delicious Chili Lime Grilled Corn! {{image_4}} If you love heat, try adding cayenne pepper or hot sauce to the marinade. Start with a pinch of cayenne, and adjust to your taste. This small change adds a fiery kick that pairs well with the lime. You can also brush some hot sauce on the corn after grilling for extra flavor. For a vegan twist, replace feta cheese with a dairy-free cheese alternative. You can also use avocado oil instead of olive oil. This keeps the dish rich and tasty while being plant-based. Fresh herbs like basil or mint can also brighten the dish without dairy. Feel free to swap herbs and spices for unique flavors. Try cilantro instead of parsley for a fresher taste. You can use smoked paprika for a deeper flavor or add cumin for a warm, earthy note. Each swap changes the dish's character, making it fun to experiment. For the full recipe, you can refer to the main article. Enjoy your culinary journey! To keep grilled corn fresh, let it cool first. Wrap each ear in plastic wrap or foil. Store it in the fridge. It stays good for about three days. If you want to save it longer, consider freezing. When reheating grilled corn, the microwave works well. Just place it on a microwave-safe plate. Heat for about 30 seconds. Check if it’s warm enough. For the best texture, you can also use a grill or skillet. Heat it on low for a few minutes. This keeps the corn juicy and flavorful. To freeze grilled corn, let it cool completely. Cut the kernels off the cob for easier storage. Place them in an airtight container or a freezer bag. Remove as much air as possible. Label the bag with the date. The corn can stay in the freezer for up to six months. When you're ready to use it, thaw it in the fridge overnight before reheating. Enjoy your delicious flavors from the Chili Lime Grilled Corn! For the full recipe, check above. Yes, you can! Preheat your oven to 400°F. Place the husked corn on a baking sheet. Brush it with the chili marinade. Roast the corn for about 20-25 minutes, turning it halfway. This way, you still get that delicious flavor. You can store grilled corn in the fridge for up to three days. Place it in an airtight container. This keeps it fresh and tasty for your next meal. Frozen corn works, but fresh is better. If using frozen, thaw it first. Drain any excess water before adding the marinade so it sticks well. Grilled corn goes great with: - Black bean salad - Coleslaw - Grilled meats like chicken or steak - Rice dishes These sides complement the corn’s bold flavors. To sweeten corn, soak it in water for 30 minutes. This adds moisture and enhances sweetness. You can also sprinkle a bit of sugar on top before grilling for extra sweetness. For the full recipe, check out the Chili Lime Grilled Corn instructions. This blog post covered how to grill corn with a zesty chili lime twist. We discussed ingredients, prep steps, and grilling techniques. I shared tips for perfect grilling and serving. Variations allow you to customize this dish to your taste. Remember to store leftovers properly for later enjoyment. Whether you enjoy it spicy, vegan, or with unique herbs, grilled corn is a versatile treat. Experiment, have fun, and make it your own!

Chili Lime Grilled Corn Flavorful BBQ Delight

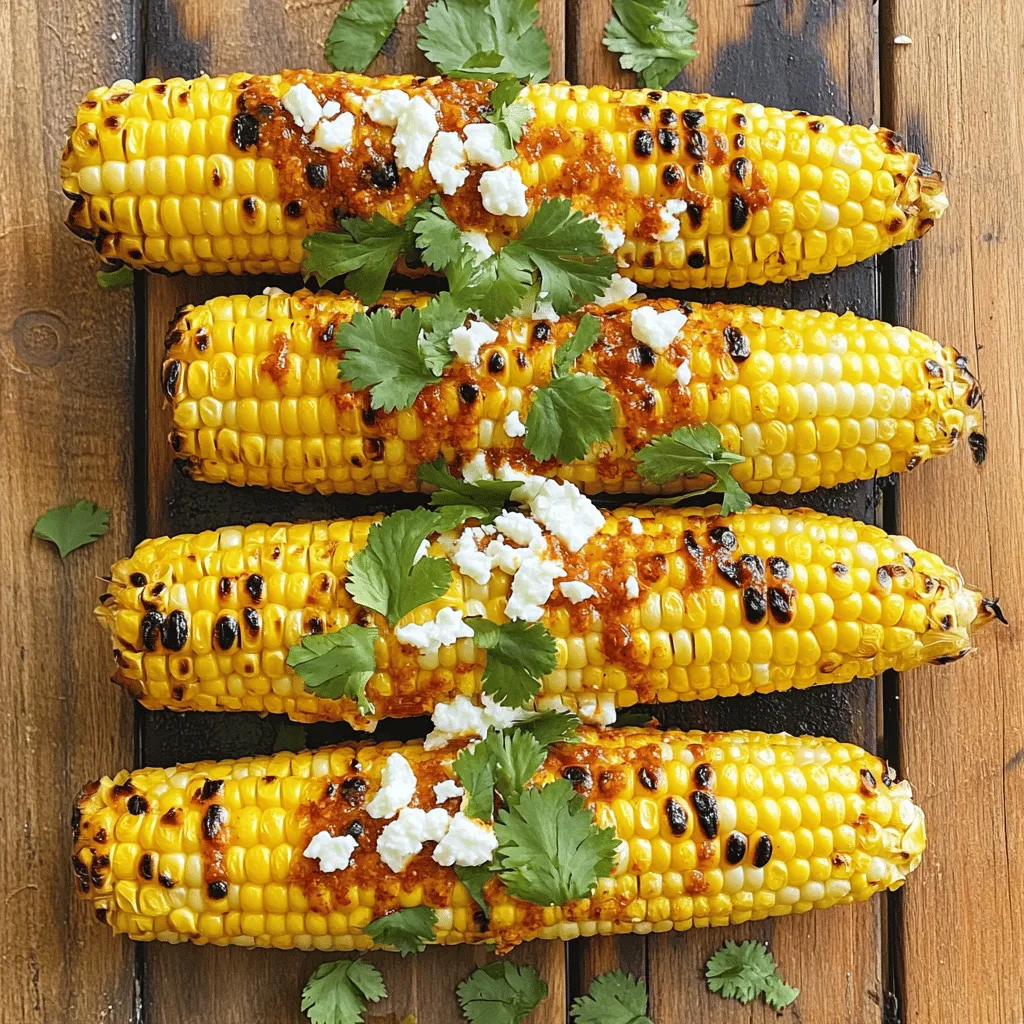
Get ready for a flavor explosion with my Chili Lime Grilled Corn! This simple dish brings together juicy corn, zesty

- Cauliflower florets: Start with one large head. Cut it into small, bite-sized pieces. - Cheese varieties: Use 2 cups of shredded sharp cheddar and 1/4 cup grated Parmesan. - Seasonings: Add garlic powder, onion powder, smoked paprika, salt, and black pepper for flavor. - Fresh herbs: Chopped parsley adds color and freshness. - Additional cheeses: Try using mozzarella or gouda for more flavor. - Dairy-free options: Replace cream cheese with a dairy-free cream cheese. - Low-carb alternatives: Substitute cauliflower with broccoli for a different taste. This recipe is easy to adapt based on what you have. If you want to learn more, check out the full recipe. 1. Preheat the Oven: First, set your oven to 375°F (190°C). This step makes sure your dish cooks evenly. 2. Steam the Cauliflower: Fill a pot with water and bring it to a boil. Place a steaming basket on top. Add the cauliflower florets and cover. Steam for about 5–7 minutes. The cauliflower should be tender but still a bit firm. Drain it and set it aside. 3. Prepare the Cheese Mixture: Grab a large mixing bowl. Combine the softened cream cheese, milk, garlic powder, onion powder, smoked paprika, salt, and pepper. Use a whisk or mixer to blend until smooth. Make sure there are no lumps for a creamy texture. 1. Incorporate Cheddar: Gently fold in 1 1/2 cups of shredded cheddar cheese into the cream cheese mixture. Mix just until combined. The cheese should be evenly spread throughout the mix. 2. Folding in Cauliflower: Carefully add the steamed cauliflower to the cheese mixture. Use a spatula to fold the florets in gently. Ensure they are coated well without mashing them. 1. Transfer to Baking Dish: Pour the cauliflower and cheese mixture into a greased 9x13 inch baking dish. Use a spatula to spread it evenly. 2. Bake Until Golden: Sprinkle the remaining 1/2 cup of shredded cheddar cheese and the grated Parmesan cheese on top. This creates a cheesy crust. Place the dish in your preheated oven. Bake for 25–30 minutes. Look for the cheese to be melted, bubbly, and golden brown. Enjoy your delicious Cheesy Cauliflower Bake! For the detailed recipe, refer to the Full Recipe. How to avoid mushy cauliflower: To keep your cauliflower firm, steam it just until tender. This usually takes about 5–7 minutes. If you overcook it, the cauliflower can turn mushy. Make sure to drain it well after steaming. You want it to hold its shape in the bake. Achieving the perfect cheesy crust: For a great cheesy crust, use a mix of cheeses. I love using sharp cheddar and Parmesan. Spread a layer of cheese on top before baking. This helps create that golden, bubbly crust we all crave. Bake until the cheese is melted and lightly browned. Pairing with proteins: This bake goes well with many proteins. Try serving it alongside grilled chicken or roasted pork. The creamy dish balances the flavors of the meat nicely. You can also add a simple salad for a fresh touch. Ideal side dishes: For sides, consider light options like steamed broccoli or a crisp green salad. These will add color and crunch to your meal. You can also serve it with garlic bread for a comforting touch. Prep ahead methods: You can make this dish ahead of time. Steam the cauliflower earlier in the day, and mix it with the cheese mixture. Keep it in the fridge until you're ready to bake. This way, you save time when it’s meal time. Reheating guidelines: To reheat, place the bake in the oven at 350°F (175°C). Cover it with foil to keep it moist. Heat for about 15–20 minutes until warmed through. This keeps the texture nice and prevents it from drying out. For the full recipe, check out the Cheesy Cauliflower Bake section! {{image_4}} You can make your Cheesy Cauliflower Bake even tastier with some fun twists. Start by adding spices like cayenne or Italian herbs. A little heat from red pepper flakes can kick it up a notch. Mix in herbs like thyme or rosemary for a fresh touch. You can also add sautéed onions or crispy bacon for extra flavor. These mix-ins make every bite exciting. If you follow a gluten-free diet, this recipe is a great fit. All the ingredients are naturally gluten-free. For a vegan option, swap out the cream cheese and cheddar for plant-based versions. Cashew cheese or nutritional yeast gives a cheesy flavor without dairy. You can use almond milk instead of regular milk for a creamy texture. Serving your Cheesy Cauliflower Bake can be a fun part of the meal. Try using a cast-iron skillet for a rustic look. You can also bake it in individual ramekins for a personal touch. Top each serving with fresh herbs for color. This makes your dish not just tasty but pretty too. For an even more festive vibe, add a sprinkle of paprika on top before serving. For more details on the recipe, check out the Full Recipe. To keep your Cheesy Cauliflower Bake fresh, follow these easy tips: - Refrigeration: Allow the bake to cool down. Then, cover it tightly with plastic wrap or aluminum foil. Store it in the fridge for up to 3 to 4 days. - Freezing: If you want to save it longer, freeze the cooled dish. Use an airtight container or freezer bag. It can last up to 2 months in the freezer. Just remember to label it with the date. When you’re ready to enjoy leftovers, reheating is key: - Oven Reheating: Preheat your oven to 350°F (175°C). Place the bake in an oven-safe dish. Cover it with foil to keep it moist. Heat it for about 20 minutes or until hot. This method helps keep the texture and flavor intact. - Microwave Reheating: If you’re in a hurry, use the microwave. Place a portion on a microwave-safe plate. Heat it for 1 to 2 minutes, checking often. Stir to ensure even heating, but this method may make the cheese less crisp. Knowing how long your dish lasts is important: - Fridge Life: In the fridge, your Cheesy Cauliflower Bake stays good for 3 to 4 days. - Signs of Spoilage: If you see mold or a sour smell, it’s time to toss it. Any change in texture can also signal that it’s no longer fresh. Enjoy your cheesy delight while it’s at its best! For the complete recipe, check out the [Full Recipe]. Can I use frozen cauliflower? Yes, you can use frozen cauliflower. Just thaw it and drain excess water. This helps avoid a watery dish. Frozen cauliflower may need a bit longer to bake, so keep an eye on it. How do I make it spicier? To spice it up, add red pepper flakes or cayenne pepper to the cheese mix. You can also add diced jalapeños or hot sauce for extra heat. Can I replace cream cheese with Greek yogurt? Yes, Greek yogurt can work as a good substitute. It adds creaminess and a tangy flavor. The texture will be lighter, but it will still taste great. What type of cheese is best for baking? Sharp cheddar cheese is best for baking. It melts well and adds a strong flavor. You can also mix in mozzarella for a gooey texture. Can I make this dish in advance? Absolutely! You can prepare it a day before and store it in the fridge. Just bake it when you are ready to serve. How to adjust cooking time for different ovens? If your oven runs hot or cold, check your dish a few minutes early. Ovens can vary widely, so use your eyes and nose to judge doneness. Look for a golden top and bubbling cheese. This blog post covered a delicious cauliflower bake recipe. We explored key ingredients like cheese and seasonings. You learned step-by-step instructions for preparation and baking. Tips ensured your dish is perfect, while variations made it fun and flexible. Remember to store leftovers properly for longer enjoyment. With all these insights, you can create a tasty dish that everyone will love. Enjoy experimenting and happy cooking!

Cheesy Cauliflower Bake Flavorful and Easy Recipe

Are you looking for a comforting dish that’s both cheesy and healthy? My Cheesy Cauliflower Bake hits the sweet spot!

- 2 pounds chicken wings, thoroughly rinsed and patted dry - 1/4 cup honey - 1/4 cup hot sauce (such as Sriracha or your preferred brand) - 2 tablespoons low sodium soy sauce - 1 tablespoon apple cider vinegar - 1 tablespoon garlic powder - 1 teaspoon onion powder - 1/2 teaspoon smoked paprika - Salt and pepper to taste - 1 tablespoon sesame seeds (for garnish) - 2 green onions, finely chopped (for garnish) If you want to change things up, you can use different hot sauces. Try a smoky chipotle sauce for a unique twist. For honey, maple syrup works great too. Use coconut aminos instead of soy sauce for a gluten-free option. If you don't have garlic powder, fresh minced garlic can work well. Just remember to adjust the amounts slightly. You will need a few essential tools for this recipe: - A large mixing bowl for the sauce - A whisk to blend the ingredients - A baking sheet lined with aluminum foil for easy cleanup - A wire rack to help the wings cook evenly - Tongs for tossing and arranging the wings These tools will make your cooking process smooth and enjoyable. Having everything ready helps you focus on making those delicious sweet and spicy chicken wings. First, preheat your oven to 425°F (220°C). This high heat helps the wings get crispy. Next, take your baking sheet and line it with aluminum foil. This makes cleanup super easy. Place a wire rack on top of the sheet. The rack lets hot air circulate around the wings for even cooking. Grab a large mixing bowl. Pour in the honey, hot sauce, soy sauce, apple cider vinegar, garlic powder, onion powder, and smoked paprika. Add a pinch of salt and pepper for flavor. Use a whisk to mix everything until it looks smooth. This sauce is key to our sweet and spicy chicken wings. Now, take your rinsed and dried chicken wings. Add them to the bowl with the sauce. Use your hands or tongs to toss the wings. Make sure each wing is fully coated in that tasty sauce. After that, arrange the wings in a single layer on the wire rack. Leave space between them. This space helps the wings stay crispy instead of getting soggy. Place the baking sheet in your hot oven. Bake the wings for 30 to 35 minutes. Flip them halfway through to ensure even browning. You will know they are done when they look golden and crispy. If you want more flavor, toss the wings in any extra sauce after baking. You’re ready to serve these delicious sweet and spicy chicken wings! To get crispy chicken wings, start with dry wings. Rinsing them helps remove extra blood and debris. After rinsing, pat them dry with paper towels. This step is key. The less moisture on the wings, the crispier they will be. Use a wire rack over a baking sheet. This allows air to circulate around the wings. Flip them halfway through cooking for even browning. Finding the right blend of sweet and spicy is important. Use equal parts honey and hot sauce for a good start. Adjust the hot sauce to suit your taste. If you like it sweeter, add more honey. For added heat, try adding cayenne pepper or more hot sauce. Taste your sauce before coating the wings. This helps you make it perfect. If your wings are not crispy, check the baking method. Avoid overcrowding the wings on the rack. This can cause steaming instead of baking. If the wings are too spicy, serve them with cooling dips. Blue cheese or ranch dressing works well. If they are too sweet, balance it with more hot sauce or vinegar. Always taste and adjust as you go. {{image_4}} You can change the sauce for your wings to match your taste. A teriyaki glaze adds a nice twist. Mix soy sauce, brown sugar, and ginger for a sweet flavor. If you like citrus, try a mix of orange juice and chili sauce. This will give a bright, tangy kick. You can also use BBQ sauce for a smoky touch. Experiment with what you love! Air frying is a great way to make crispy wings with less oil. Preheat your air fryer to 375°F (190°C). Cook the wings for about 25 minutes, shaking the basket halfway through. Grilling is another fun method. Marinate the wings in your sauce and grill them over medium heat. Turn them often for even cooking and a nice char. Both methods keep the wings juicy and tasty! Love heat? You can spice up your wings with extra ingredients. Add cayenne pepper or crushed red pepper to the sauce. You can also toss the cooked wings in a spicy chili oil. For a unique twist, try using ghost pepper sauce. Just a little will go a long way. Always taste your sauce first to get the heat just right. Enjoy experimenting with flavors! After enjoying your sweet and spicy chicken wings, store any leftovers properly. Place them in an airtight container. Make sure to cool them down before sealing. This keeps them fresh and tasty for later. Store the wings in the fridge. They will stay good for about 3 to 4 days. When you want to eat your leftover wings, you can reheat them easily. The best way is to use an oven. Preheat it to 375°F (190°C). Place the wings on a baking sheet. Heat for about 10 to 15 minutes. This method keeps them crispy. You can also use a microwave. If you do, put a damp paper towel over them to avoid drying out. Heat them for about 1 to 2 minutes. If you have many wings and want to save them for later, freezing is a great option. First, let them cool completely. Then, place them in a freezer-safe bag. Squeeze out as much air as possible. This helps prevent freezer burn. You can freeze them for up to 3 months. When you're ready to eat them, thaw in the fridge overnight. Reheat them before serving to enjoy that crispy texture again. For the full recipe, check the earlier section. You can change the spice level in a few easy ways. To make it milder, use less hot sauce. You can also mix in more honey for sweetness. If you love heat, add more hot sauce or include crushed red pepper flakes. You could even use a spicier hot sauce if you prefer. Experiment to find the right balance for your taste. Yes, you can use frozen chicken wings. Just make sure to thaw them first. You can do this overnight in the fridge or quickly in cold water. Once thawed, rinse and pat them dry before following the recipe. Cooking times may change slightly, so check for doneness. Many dipping sauces pair well with sweet and spicy chicken wings. Here are a few options: - Blue cheese dressing - Ranch dressing - Honey mustard - Sriracha mayo - Garlic aioli These sauces can add extra flavor and richness, balancing the wings' heat. You can find sweet and spicy chicken wings at many sports bars and casual dining spots. Look for places that focus on chicken wings or American-style cuisine. Some Asian restaurants may also serve wings with a sweet and spicy glaze, inspired by Asian flavors. For the complete recipe, check out the section above. You’ll find all the ingredients and steps needed to create these flavorful wings. Enjoy cooking! This blog covered making sweet and spicy chicken wings. We explored the ingredients, the steps, and handy tips. You learned about sauce options and cooking methods to fit your taste. Storing and reheating wings for later was also discussed. Now, you’re ready to impress with juicy, crispy wings. Enjoy the fun of cooking these delicious bites and share them with friends!

Sweet and Spicy Chicken Wings Tasty Crispy Recipe

Get ready to elevate your snack game with my Sweet and Spicy Chicken Wings recipe! These wings pack a flavorful

- 4 cups green cabbage, finely shredded - 1 cup carrots, grated - 1/2 cup red cabbage, finely shredded - 1/2 cup mayonnaise - 2 tablespoons apple cider vinegar - 1 tablespoon Dijon mustard - 1 tablespoon granulated sugar - Salt and freshly ground black pepper to taste - 1/4 cup green onions, thinly sliced (for garnish) Gathering the right ingredients is key to making a great coleslaw. Start with fresh green cabbage. I like to use about four cups, finely shredded. It gives a nice crunch. Then, add one cup of grated carrots. This adds sweetness and bright color. A half cup of finely shredded red cabbage balances the dish with flavor and color. Next, for the creamy dressing, you will need half a cup of mayonnaise. It binds the salad and adds richness. Two tablespoons of apple cider vinegar bring tanginess. One tablespoon of Dijon mustard adds a bit of spice. A tablespoon of granulated sugar rounds out the flavors. Don’t forget to season with salt and freshly ground black pepper. It enhances all the tastes. Finally, garnish with a quarter cup of thinly sliced green onions. They add a fresh finish and pop of color. For complete instructions, check the Full Recipe. - Combine the shredded green cabbage, grated carrots, and red cabbage in a large bowl. - Toss ingredients to ensure even blending. This step makes sure each bite is colorful and tasty. - In a smaller bowl, whisk together mayonnaise, apple cider vinegar, Dijon mustard, and sugar. - Season with a pinch of salt and pepper. The dressing should be smooth and creamy. - Pour the creamy dressing over the vegetable mixture in your large bowl. - Gently fold the dressing into the vegetables. Make sure all pieces are coated well. - Taste and adjust seasoning as needed. If it needs more sweetness, add sugar. If it needs more tang, add vinegar. - Refrigerate for at least 30 minutes to let flavors meld. This helps the cabbage soften and taste better. Enjoy making this classic dish with the full recipe! You can prepare coleslaw a day in advance. This helps the flavors mix well. Store it in an airtight container in the fridge. I recommend chilling it for at least 30 minutes. This resting time makes the coleslaw taste even better. Want to spice things up? Add fresh herbs like cilantro or dill. A dash of cayenne pepper gives it a kick. You can also try other dressings. Swap mayonnaise for yogurt for a tangy twist. Or use a vinaigrette for a lighter option. For a great look, serve coleslaw in a large bowl. This highlights its colorful layers. If you want individual servings, use mason jars. It makes for a fun and fresh presentation. Coleslaw pairs well with grilled chicken or BBQ ribs. It adds a nice crunch and balances rich flavors. {{image_4}} You can use different types of cabbage to change the flavor of your coleslaw. Napa cabbage is softer and has a mild taste. It gives a nice texture. Savoy cabbage is crinkly and has a sweet flavor. It adds a fun twist to your dish. Both options work well with the classic coleslaw recipe. Feel free to mix and match to find your favorite. Add colorful ingredients to make your coleslaw pop! Diced bell peppers bring crunch and sweetness. Try using red, yellow, or orange peppers for a vibrant look. Chopped apples add a juicy bite and a touch of sweetness. Raisins can offer a chewy texture and extra flavor. These add-ins not only brighten your dish but also enhance the taste. While the classic mayonnaise dressing is great, you can explore other options. A tangy vinaigrette can give your coleslaw a lighter feel. Use olive oil, vinegar, and a bit of mustard for a zesty kick. A yogurt-based dressing can add creaminess without as many calories. This option is perfect if you want a healthier version. Experiment with these dressings to find what you love best! To keep your classic coleslaw fresh, store it in an airtight container. This helps to lock in flavors and moisture. Make sure the coleslaw is cool before sealing it. It lasts about 3 to 5 days in the fridge. Check for any signs of spoilage before serving. If you notice any off smells or changes in color, it’s best to toss it. I do not recommend freezing coleslaw. Freezing can change the texture of the cabbage. It may turn mushy when thawed. If you want to prepare ahead, make the dressing and chop the veggies separately. Store them in the fridge until you’re ready to mix them. This keeps your coleslaw crunchy and fresh. For more details, check the Full Recipe. The best way to shred cabbage is by using a sharp knife or a box grater. You can also use a food processor with a shredding attachment. Start by cutting the cabbage into quarters. Remove the core and slice it thinly. Aim for even pieces to ensure a nice texture in your coleslaw. This method gives you a perfect blend of crunch and flavor. Yes, you can use pre-packaged coleslaw mix for convenience. These mixes often include cabbage and carrots, which saves time. However, fresh cabbage can have a better crunch and taste. If you choose the mix, check the ingredients. You might want to add more fresh veggies or extra dressing to boost flavor. To make coleslaw spicy, add ingredients like jalapeños or hot sauce. You can also mix in red pepper flakes for heat. If you enjoy a kick, try adding a pinch of cayenne pepper to the dressing. Adjust the spice level based on your taste. This adds an exciting twist to the classic flavor. Classic coleslaw pairs well with grilled meats like burgers or BBQ chicken. It also complements sandwiches and wraps. Serve it alongside fish tacos or fried chicken for a fun meal. You can even use it as a topping for tacos or nachos. These pairings enhance the meal and bring out the coleslaw's crunch. Classic coleslaw can be a healthy side dish. It contains cabbage and carrots, which offer vitamins and fiber. However, the mayonnaise adds calories and fat. You can make it healthier by using yogurt or a vinaigrette for the dressing. Balance is key, so enjoy it as part of a varied diet. This blog post covers how to make classic coleslaw, including ingredients and instructions. We discussed tips for enhancing flavors and serving ideas. You can choose from variations, like different types of cabbage or dressings, to make it your own. Knowing how to store coleslaw correctly ensures it stays fresh. Embrace your creativity with this simple dish! Enjoy every crunchy bite, and make coleslaw a regular part of your meals.

Classic Coleslaw Simple and Delicious Side Dish

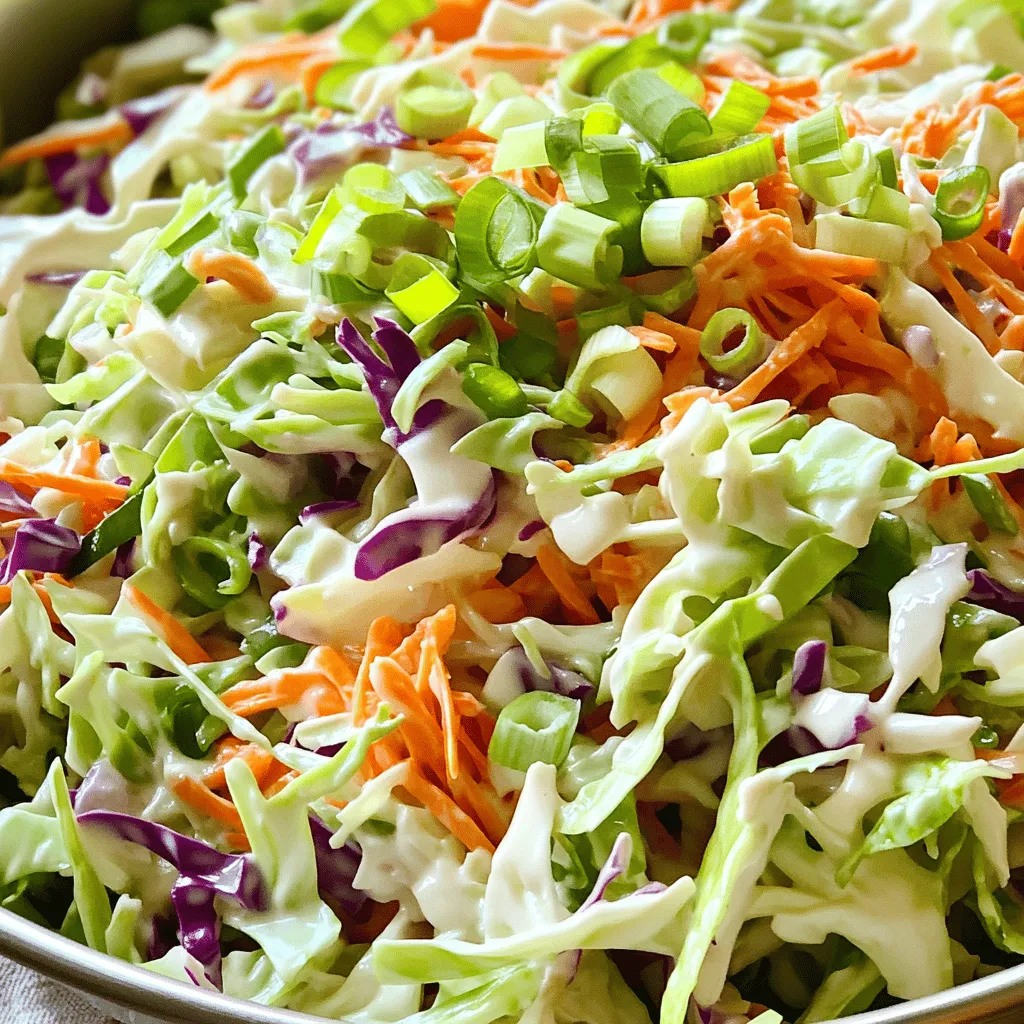
Looking for a side dish that’s both simple and delicious? Classic coleslaw brings crunch and flavor to any meal. With

To make Lemon Dill Salmon Foil Packets, you need a few key items. These ingredients work together to create a tasty meal. Here’s what you need: - 4 salmon fillets (approximately 5-6 oz each) - 2 tablespoons extra virgin olive oil - 2 tablespoons fresh dill, finely chopped (or 1 tablespoon dried dill) - 1 medium lemon, thinly sliced - 1 cup cherry tomatoes, halved - 1 cup asparagus spears, trimmed and cut into 2-inch pieces - 2 cloves garlic, minced - Sea salt and freshly cracked black pepper, to taste - Aluminum foil Having fresh ingredients makes a big difference in flavor. For the salmon, look for bright color and no fishy smell. Fresh dill adds a nice touch, but dried dill works well too. You don’t need fancy tools for this recipe, but a few basics help. Here are the tools I recommend: - Mixing bowl - Whisk or fork - Knife and cutting board - Aluminum foil sheets (12x15 inches) - Grill or oven These tools make prep and cooking simple. A good knife helps with cutting lemon and veggies. Want to switch things up? You can add a few optional ingredients for extra flavor. Here are some ideas: - Red pepper flakes for heat - Capers for a briny kick - Fresh parsley for a different herb flavor - A splash of white wine for depth These options let you customize the dish. Feel free to get creative based on what you have at home. If you want more ideas, check out the Full Recipe for inspiration! Start by gathering all your ingredients. You will need four salmon fillets, two tablespoons of olive oil, fresh dill, a medium lemon, cherry tomatoes, asparagus, garlic, sea salt, and black pepper. 1. Preheat your grill or oven. For the grill, set it to medium-high. For the oven, preheat to 400°F (200°C). 2. Cut four pieces of aluminum foil. Each should be about 12x15 inches. Lay them flat on a clean surface. 3. In a bowl, mix the olive oil, minced garlic, chopped dill, sea salt, and black pepper. Whisk until combined and fragrant. Now, it’s time to assemble your packets: 1. Place one salmon fillet in the center of each foil sheet. 2. Spoon the olive oil mixture over each fillet. Make sure they are well coated. 3. Lay thin lemon slices on top of each salmon fillet. 4. Evenly distribute the halved cherry tomatoes and asparagus pieces among the packets. 5. Sprinkle more sea salt and black pepper over everything, according to your taste. You can choose to bake or grill your salmon foil packets: - Baking: If you use the oven, place the packets on a baking sheet. Cook for 15-20 minutes. The salmon should be opaque and flaky. - Grilling: For grilling, place the foil packets directly on the grill. Cook for the same amount of time, 15-20 minutes. Both methods yield tender, flavorful salmon. Just be careful when opening the packets, as the steam will be hot. For a fresh touch, serve the salmon with extra dill and a lemon wedge. Enjoy your meal! For the full recipe, refer to the earlier section. To get the best salmon, follow these tips: - Use fresh salmon fillets for great taste. - Preheat your grill or oven to the right temperature. This helps the salmon cook evenly. - Cook the salmon for 15 to 20 minutes. It should be opaque and flake easily. - Check the salmon with a fork to see if it's done. This is key to perfect cooking. Avoid sticking and leaking with these tips: - Use high-quality aluminum foil. It holds up well and keeps moisture in. - Oil the foil lightly before adding the salmon. This helps prevent sticking. - Seal the packets tightly. Make sure there are no openings for steam to escape. - Do not overcrowd the packets. Leave space for the steam to circulate. To boost flavor, try these ideas: - Use a simple marinade of olive oil, garlic, and herbs. This adds depth. - Add lemon zest to the marinade for extra zing. It brightens the dish. - Consider adding capers or olives for a salty kick. These pair well with salmon. - Experiment with other vegetables, like bell peppers or zucchini. They add color and taste. For the full recipe of Lemon Dill Salmon Foil Packets, check out the detailed instructions. {{image_4}} You can swap out the asparagus and cherry tomatoes in this recipe. For a crunchy bite, try adding bell peppers or zucchini. Both add color and flavor. You can also use green beans or baby carrots. They cook well in the foil packets and taste great with salmon. If you want to change the flavor, use different herbs. Basil, parsley, or thyme work well with salmon. Each herb brings its own taste. You can also add a pinch of red pepper flakes for heat. This simple tweak can change the whole dish. Salmon is a great choice, but you can use other fish too. Try trout, tilapia, or cod. Each fish has a unique taste and texture. Make sure to adjust the cooking time for different fish. Thinner fish like tilapia will cook faster. Check the fish often to avoid overcooking. After enjoying your Lemon Dill Salmon Foil Packets, you may have some leftovers. To store these, let the foil packets cool down first. Once they are cool, you can keep them in the fridge. Place the packets in an airtight container or cover them with plastic wrap. They will stay fresh for up to three days. This way, you can enjoy your meal again without fuss. When it’s time to reheat your salmon, do it gently to keep its flavor. Preheat your oven to 350°F (175°C). Open the foil packets carefully to release steam. Place the salmon on a baking sheet and cover it loosely with foil. Heat for about 10-15 minutes. Check that it’s warm throughout. If you prefer the microwave, use a microwave-safe dish. Heat on medium power for 1-2 minutes, checking frequently to avoid overcooking. If you want to save your salmon for later, you can freeze it. First, let the cooked salmon cool completely. Then, wrap each packet tightly in aluminum foil or plastic wrap. Place the wrapped packets in a freezer-safe bag or container. This will keep your salmon fresh for up to three months. When you're ready to eat, thaw it in the fridge overnight before reheating. Enjoy the great taste of your Lemon Dill Salmon Foil Packets anytime! Cook Lemon Dill Salmon Foil Packets for about 15-20 minutes. The exact time depends on your grill or oven's heat. You want the salmon to be opaque and flake easily with a fork. Always check after 15 minutes to avoid overcooking. Yes, you can use different herbs! Basil, parsley, or thyme work well. Each herb gives a unique taste. Just remember, some herbs are stronger than others. Start with a smaller amount and adjust to your liking. The best side dishes include rice, quinoa, or a fresh salad. Roasted potatoes or steamed veggies also pair nicely. These sides balance the flavors of the salmon and add texture. Feel free to mix and match based on your preference. For more ideas, check the Full Recipe section. This article covered how to make Lemon Dill Salmon Foil Packets. We talked about key ingredients, tools, and optional add-ons. I detailed preparation steps and cooking methods, like baking and grilling. Tips on cooking salmon just right, preventing leaks, and boosting flavor were included. We explored variations with other vegetables and fish too. Finally, I gave storage and reheating advice. With these clear steps, you'll enjoy tasty salmon meals anytime. Try it out and have fun cooking!

Lemon Dill Salmon Foil Packets Quick and Simple Meal

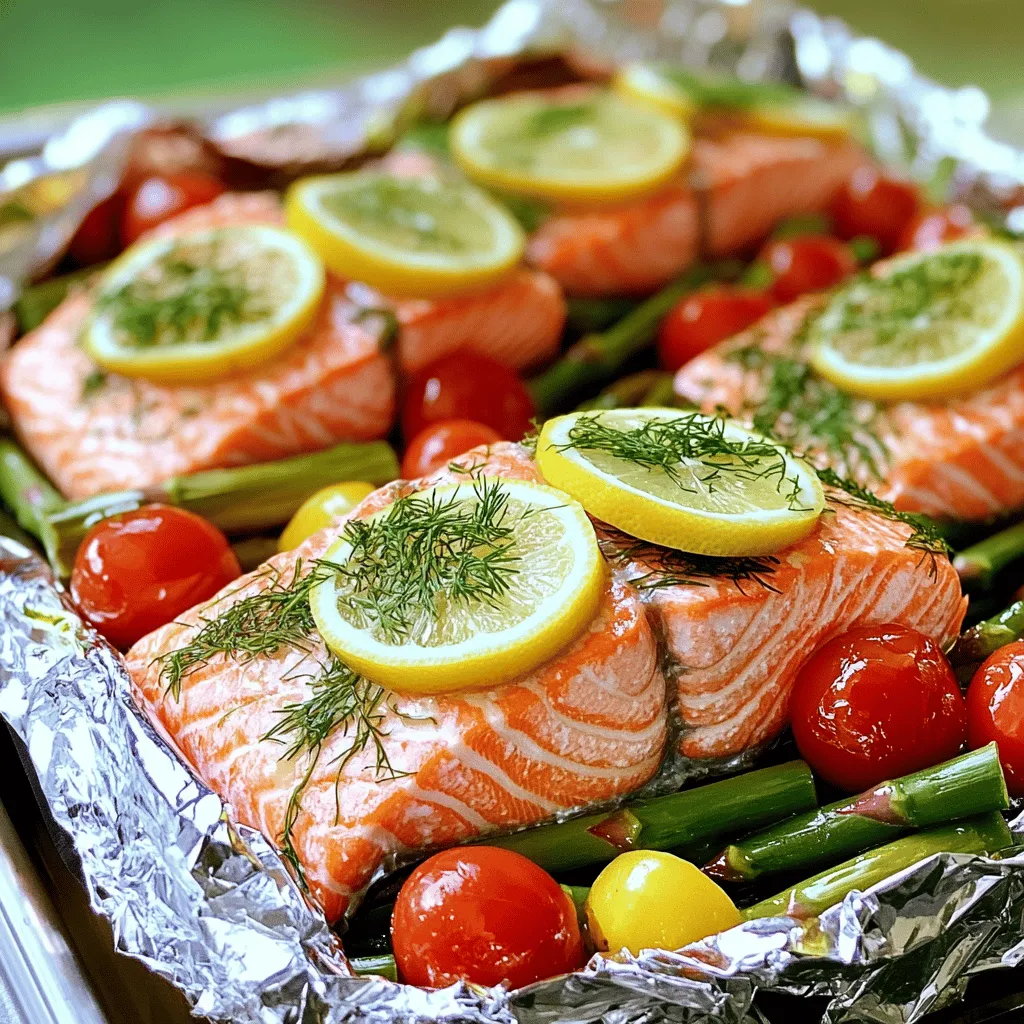
Are you ready for a quick and simple meal that bursts with flavor? Lemon Dill Salmon Foil Packets are your

- 4 boneless, skinless chicken breasts - 1 ripe mango, diced into small cubes - 1 red bell pepper, finely chopped - 1 small red onion, finely diced - 1 jalapeño, deseeded and minced finely - 2 tablespoons fresh cilantro, roughly chopped - 2 tablespoons lime juice (freshly squeezed) - 1 tablespoon extra virgin olive oil - 1 teaspoon garlic powder - 1 teaspoon ground cumin - Salt and pepper, to taste These main ingredients create a burst of flavor. The chicken gives a hearty base, while the mango and vegetables add freshness. Olive oil and seasonings enhance the taste. Using a ripe mango is key; it should feel soft but not mushy. - Additional herbs for garnish - Spices for extra flavor Feel free to add herbs like basil or mint for a twist. A dash of chili powder or smoked paprika can kick up the flavor. These options let you customize the dish to your liking. - Approximately 300 calories per serving - About 30g protein, 10g fat, and 20g carbs This meal is filling and nutritious. You get a good amount of protein from the chicken. The mango provides vitamins, while the veggies add fiber. This balance makes it a great choice for a healthy dinner. For the complete recipe, check out the Full Recipe link. - Preheat your grill or stovetop grill pan to medium heat. - In a bowl, mix olive oil, garlic powder, ground cumin, salt, and pepper. - Place the seasoned chicken breasts on the grill. Cook for 6-7 minutes on each side. The chicken must reach 165°F (75°C) inside. - While the chicken cooks, prepare the mango salsa. In a bowl, mix diced mango, red bell pepper, red onion, jalapeño, cilantro, lime juice, and a pinch of salt. Stir gently. - Let the chicken rest for 3-5 minutes after grilling. This keeps the chicken juicy. - For serving, place the grilled chicken on a colorful plate. Spoon the fresh mango salsa over each piece. Add extra cilantro and lime wedges for a beautiful finish. For the full details, check out the full recipe! To keep your chicken juicy, never overcook it. Use a meat thermometer to check the internal temperature. Aim for 165°F (75°C). Rest the chicken after grilling for 3-5 minutes. This helps the juices stay inside. For perfect grill marks, preheat your grill well. A hot grill sears the chicken quickly. Place the chicken on the grill diagonally for great marks. Flip the chicken only once to keep the marks clear. Choose a ripe mango for the best flavor. A ripe mango feels slightly soft when you press it. Look for a sweet aroma at the stem end, too. Combining flavors in salsa is key. Mix sweet mango with spicy jalapeño for balance. Add fresh lime juice for brightness. Let the salsa sit for a bit to let the flavors blend. Make salsa ahead of time for easy prep. You can store it in the fridge for up to two days. Just stir it before serving to refresh the flavors. Store leftovers properly to maintain freshness. Place chicken and salsa in separate airtight containers. They can last in the fridge for three to four days. {{image_4}} You can cook mango salsa chicken in different ways. Grilling gives it a smoky flavor. The grill marks add a nice touch to the dish. If you don't have a grill, you can bake it. Baking keeps the chicken juicy while cooking evenly. Another method is pan-searing. This method is quick and still gives you a nice crust. It’s great for busy nights when you want dinner fast. You can change the mango salsa to fit your taste. Adding fruits like pineapple gives it a sweet twist. Avocado adds creaminess and makes it richer. If you like more heat, add more jalapeño. You can also switch to a milder pepper if you prefer less spice. Adjusting the salsa makes it fun and unique each time. Pairing is important for a great meal. Serve mango salsa chicken with rice or quinoa. These grains soak up the salsa and add texture. You can also add a side salad for freshness. Grilled veggies or corn on the cob work well too. They balance the flavors and make your plate colorful. To keep your mango salsa chicken fresh, cool it quickly. Place the chicken in shallow containers. Cover them tightly with plastic wrap or a lid. This helps avoid any bad smells or flavors. Your dish will stay fresh in the fridge for up to three days. After that, the taste may fade. When it's time to eat leftovers, the best way to reheat chicken is in the oven. Set it to 350°F (175°C) and heat for about 15-20 minutes. This keeps the chicken moist. For the salsa, you can serve it cold. If you prefer warm salsa, heat it gently on the stove. Stir it often to keep it from burning. Yes, you can freeze mango salsa chicken! Wrap the chicken tightly in plastic wrap and foil. It can stay fresh in the freezer for up to three months. For the best taste, freeze the salsa separately. This way, it keeps its fresh flavor. Store the salsa in an airtight container or freezer bag. When you are ready to enjoy it, just thaw and serve! Can I use frozen chicken? Yes, you can use frozen chicken. Just make sure to thaw it first. Thawing helps cook the chicken evenly. You can place the chicken in the fridge overnight or use the defrost function on your microwave. Always ensure it reaches 165°F (75°C) for safe eating. What to serve with Mango Salsa Chicken? This dish pairs well with rice or quinoa. You can also serve it with a fresh salad. Tortilla chips and guacamole add a nice crunch too. Try adding black beans for extra protein and flavor. Can I make the salsa ahead of time? Yes, you can make the salsa ahead of time. Just store it in the fridge. This allows the flavors to blend well. I recommend making it up to a day in advance. Just give it a stir before serving. How do I know when the chicken is done? The best way to check is with a meat thermometer. Cooked chicken should reach 165°F (75°C). Also, the juices should run clear, not pink. If you don't have a thermometer, cut into the thickest part of the chicken. It should not be pink inside. Is this recipe gluten-free? Yes, this recipe is gluten-free. The ingredients used contain no gluten. Always check labels on your spices and sauces to be safe. Can this recipe be made dairy-free? Absolutely! This recipe is naturally dairy-free. There are no dairy products used in the dish. Enjoy the flavors without worrying about dairy. In this post, we explored how to make mango salsa chicken. You learned about the main and optional ingredients, along with key nutritional facts. We walked through the preparation and cooking steps, plus tips for juicy chicken and tasty salsa. I shared variations for cooking and serving suggestions to keep things fresh. Proper storage and reheating tips ensure you enjoy leftovers too. Remember, cooking can be fun and flexible. Enjoy your meals, and don’t hesitate to try new flavors!

Mango Salsa Chicken Flavorful and Easy Dinner Recipe

Looking for a quick, tasty dinner that will impress your family? This Mango Salsa Chicken recipe is just the ticket!

- 2 tablespoons extra virgin olive oil - 1 medium onion, finely chopped - 3 cloves garlic, minced - 1 medium carrot, diced - 2 cans (14 oz each) fire-roasted diced tomatoes - 4 cups vegetable broth - 1 tablespoon sugar (optional, to balance acidity) - 1 teaspoon dried basil - 1 cup heavy cream (or use coconut cream for a dairy-free option) - 1/4 cup fresh basil leaves, finely chopped - Sea salt and freshly ground black pepper to taste - Croutons and whole fresh basil leaves for garnish You can add more depth to your soup. Consider using: - A pinch of red pepper flakes for heat - A squeeze of lemon for brightness - A dash of balsamic vinegar for tang To make this soup, gather these tools: - A large, heavy-bottomed pot - A wooden spoon for stirring - An immersion blender or countertop blender - Measuring cups and spoons - A knife and cutting board for prep This tasty soup is easy to make. With these ingredients and tools, you'll create a dish that warms the soul. For detailed cooking steps, check out the Full Recipe. First, gather all your ingredients. You need: - 2 tablespoons extra virgin olive oil - 1 medium onion, finely chopped - 3 cloves garlic, minced - 1 medium carrot, diced - 2 cans (14 oz each) fire-roasted diced tomatoes - 4 cups vegetable broth - 1 tablespoon sugar (optional) - 1 teaspoon dried basil - 1 cup heavy cream - 1/4 cup fresh basil leaves, finely chopped - Sea salt and black pepper Make sure to have a large, heavy-bottomed pot ready. This pot will help cook the soup evenly. 1. Heat the olive oil in the pot over medium heat until it shimmers. 2. Add the chopped onion. Sauté for about 5 minutes until it softens and turns translucent. 3. Next, stir in the minced garlic and diced carrot. Cook them for another 3 minutes. You want the garlic to smell great and the carrot to soften. 4. Pour in the fire-roasted diced tomatoes and their juices. Add the vegetable broth next. If you like, sprinkle in the sugar. This helps balance the tomato’s acidity. Stir in the dried basil. Bring the mix to a gentle boil. 5. Once it boils, reduce the heat to low. Let the soup simmer uncovered for about 20 minutes. 6. Take the pot off the heat. Use an immersion blender to puree the soup until it’s smooth. If you don’t have one, carefully transfer it to a blender in batches. Blend until creamy. 7. Return the pot to low heat. Slowly stir in the heavy cream. Warm the soup for 5 minutes. Don’t let it boil, or the cream can lose its charm. 8. Finally, mix in the fresh basil leaves. Season the soup with sea salt and black pepper. Taste and adjust as you like. Ladle the soup into bowls. For a lovely touch, top each bowl with croutons and a few fresh basil leaves. This makes your dish look inviting and adds extra flavor. Enjoy every spoonful of this creamy delight! To get a creamy soup, you need to blend it well. Use an immersion blender for a smooth finish. If you don't have one, blend in batches in a regular blender. Adding heavy cream at the end gives it a rich taste. Heat the soup gently after adding cream. This keeps it creamy and avoids curdling. One common mistake is boiling the soup after adding cream. This can cause the cream to separate. Another mistake is not blending enough. A chunky soup will not feel creamy. Also, skip the salt until the end. This helps you control the flavor better. Lastly, don’t rush the simmering time. Letting it simmer allows all flavors to blend. Presentation makes your soup inviting. Use deep bowls to show off the color. Add croutons for crunch and texture. A few whole basil leaves add a fresh look. Drizzle a little cream in a swirl for flair. Serve with a slice of crusty bread to complete the meal. Enjoy the delight of a beautifully served dish! {{image_4}} If you want to make this soup dairy-free, you can use coconut cream instead of heavy cream. Coconut cream adds a rich flavor and keeps it creamy. You can also try almond milk or cashew cream for a lighter option. These swaps keep the soup flavorful and smooth while making it vegan-friendly. To give your soup a kick, add red pepper flakes or a dash of hot sauce. Start with a small amount, then taste and adjust. You can also blend in fresh jalapeños for a unique twist. This helps balance the tomato flavor with some heat, making each bite exciting. In summer, use fresh tomatoes instead of canned. Just roast them for extra flavor. In fall, add roasted butternut squash for a sweet touch. You can also toss in fresh spinach or kale for a nutrient boost. These seasonal changes keep the soup fresh and exciting all year round. After you make the soup, let it cool completely. Pour the soup into a clean container. Make sure it has a tight lid. Store it in the fridge for up to five days. This keeps the soup fresh. If you want to save it longer, consider freezing. To freeze the soup, use freezer-safe containers. Leave some space at the top for the soup to expand. You can also use ice cube trays for small portions. Once frozen, store the cubes in a zip-top bag. This way, you can use just what you need. The soup can last up to three months in the freezer. When it's time to eat, gently reheat the soup. You can do this on the stove or in the microwave. If using the stove, heat it on low. Stir often to keep it smooth. If you find it too thick, add a splash of vegetable broth or water. This helps bring back its creamy texture. Enjoy your warm bowl of soup! You can serve many things with creamy tomato basil soup. A classic grilled cheese sandwich pairs well. The crispy bread and cheesy goodness match the soup's creaminess. You might also try a fresh garden salad. This adds crunch and brightness to your meal. For a heartier option, consider a slice of crusty bread. Dipping it into the soup brings joy. Creamy tomato basil soup lasts about 3 to 5 days in the fridge. Make sure to store it in an airtight container. This will keep it fresh for longer. If you want to enjoy it later, label the container with the date. Yes, you can use fresh tomatoes instead of canned. Choose ripe tomatoes for the best flavor. You will need about 2 pounds of fresh tomatoes. Peel and chop them before adding to the pot. Keep in mind, fresh tomatoes may require longer cooking time. For the complete guide, check out the Full Recipe. It includes all the steps to make this delicious soup from scratch. We covered how to make a rich and tasty creamy tomato basil soup. You learned about key ingredients and helpful tools. I shared tips for the best texture and ways to avoid mistakes. We also explored fun variations and how to store leftovers. Remember, cooking is about enjoying your time. Use fresh ingredients and make it your own. Transform your kitchen into a place of flavor and warmth with this simple recipe. Your delicious soup awaits!

Creamy Tomato Basil Soup Flavorful and Simple Recipe

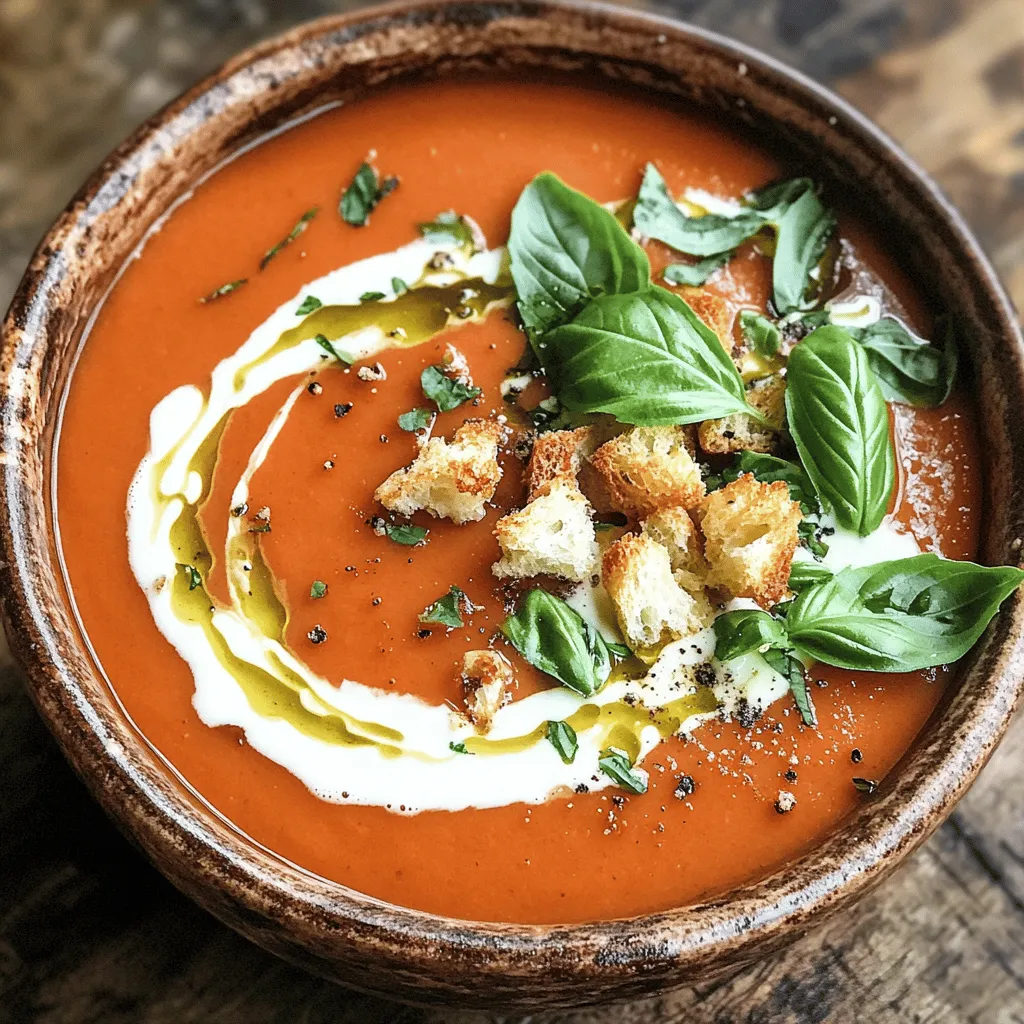
Are you ready to dive into a delicious bowl of creamy tomato basil soup? This recipe is simple, flavorful, and

- 1 pound Brussels sprouts, trimmed and cut in half - 4 cloves of garlic, finely minced - 1/4 cup freshly grated Parmesan cheese - 3 tablespoons extra virgin olive oil - 1 teaspoon garlic powder - 1/2 teaspoon sea salt - 1/4 teaspoon freshly ground black pepper - 1/4 teaspoon red pepper flakes (optional for an extra kick) - Fresh parsley, finely chopped, for garnish - Additional Parmesan for serving When I make Garlic Parmesan Roasted Brussels Sprouts, I focus on quality ingredients. Fresh Brussels sprouts give the best flavor and texture. I like to trim and cut them in half to ensure they cook evenly. Garlic is a must. I finely mince four cloves for a strong, aromatic base. The Parmesan cheese adds a creamy depth. I prefer freshly grated Parmesan. It melts better and has a richer taste. Next, I reach for extra virgin olive oil. It not only helps to roast the sprouts but also enhances their flavor. I include garlic powder for an extra kick. Sea salt and black pepper round out the seasoning. Red pepper flakes add a nice heat if you want that little extra zing. Lastly, I love to garnish my dish. Fresh parsley brightens the appearance and adds fresh flavor. A sprinkle of extra Parmesan on top makes it even more appealing. For the complete recipe and detailed steps, check out the Full Recipe. You’ll want to try this dish soon! 1. Preheat your oven to 400°F (200°C). This helps the sprouts get nice and crispy. 2. Trim the ends off the Brussels sprouts and cut them in half. This step makes them cook evenly. 1. In a large mixing bowl, combine the halved Brussels sprouts, minced garlic, olive oil, garlic powder, sea salt, black pepper, and red pepper flakes if you want a little heat. 2. Toss everything together well. Make sure each sprout gets a good coating of the mixture. 1. Line a baking sheet with parchment paper. Spread the Brussels sprouts out in a single layer. They need space for roasting. 2. Roast them in the preheated oven for 20 minutes. Halfway through, stir them gently to ensure they brown evenly. 3. After 20 minutes, take the baking sheet out. Sprinkle the grated Parmesan cheese over the Brussels sprouts. 4. Return them to the oven for another 5 to 10 minutes. You want them crispy and golden brown, with melted cheese. 5. Once they are ready, take them out and garnish with fresh parsley before serving. This adds a nice touch and color. For the Full Recipe, refer to the earlier section! To get the best roast, set your oven to 400°F (200°C). This high heat helps the Brussels sprouts become crispy and golden. Spread the sprouts out on a baking sheet. Give them space to breathe. If they are too close, they will steam instead of roast. Want to kick up the flavor? You can add spices like paprika or herbs like thyme. Both will give your Brussels sprouts a tasty twist. If you want to try a different cheese, go for feta or goat cheese. They add a new flavor profile and can change the whole dish. Brussels sprouts pair well with many sides. Try serving them with roasted chicken or quinoa salad. You can also place them on a big platter for a nice family-style meal. For a fun twist, serve them in mini bowls with toothpicks for easy snacking. For the full recipe, check out the detailed instructions above. Enjoy your cooking! {{image_4}} You can take your Garlic Parmesan Roasted Brussels Sprouts to new heights. One great way is to add crispy bacon or pancetta. The salty flavor of bacon pairs well with the sprouts. Just chop the bacon and mix it with the sprouts before roasting. You can also switch up the type of cheese you use. Parmesan is great, but you can try pecorino Romano or even feta. Each cheese adds its unique twist. Experimenting with flavors makes cooking fun and exciting. If you want a vegan version, skip the cheese. Use nutritional yeast instead. It gives a cheesy flavor without dairy. You can also add some lemon juice for brightness. For those needing gluten-free options, this recipe is safe as is. Just ensure your seasonings are free of gluten. This way, everyone can enjoy these tasty Brussels sprouts. Adding Asian flavors can make this dish special. Try drizzling some soy sauce or sesame oil before roasting. This adds a savory and nutty taste. For an Italian twist, mix in dried herbs like oregano or thyme. These herbs enhance the flavor and bring a taste of Italy to your table. Get creative with the spices you love! For the full recipe, check out the section above. To store leftovers, let the Brussels sprouts cool to room temperature. Place them in an airtight container. This keeps them fresh and tasty for up to three days. For the best results, use a glass container. Glass does not hold odors or stains like plastic can. You can reheat the sprouts in the oven or microwave. For the oven, preheat it to 350°F (175°C). Spread the sprouts on a baking sheet and heat for about 10 minutes. This method helps keep them crispy. If you use the microwave, place them in a microwave-safe dish. Heat in short bursts of 30 seconds. Check often to avoid sogginess. Freezing is a great way to save extra Brussels sprouts. First, cool them completely. Then, spread them on a baking sheet in a single layer. Freeze for about two hours until solid. After that, transfer them to a zip-top bag. Remove as much air as possible before sealing. To thaw, place them in the fridge overnight. Reheat as mentioned before. They might lose some crispiness, but they will still taste good. Roast Brussels sprouts for 20 to 25 minutes at 400°F (200°C). This high heat gives them a great texture. Halfway through, stir them for even cooking. You want them crispy and golden brown. Yes, you can use frozen Brussels sprouts. However, fresh ones taste better. If using frozen, thaw and drain them first. Then, follow the same steps as the fresh ones. Adjust your cooking time since frozen sprouts may need a bit longer. You can add many things for extra flavor. Try crispy bacon or pancetta for a savory kick. Fresh herbs like thyme or rosemary add a nice touch, too. You can also mix in lemon juice for brightness. Experiment and find what you love! For the full recipe, check out the Garlic Parmesan Roasted Brussels Sprouts. In this post, I covered how to prepare Brussels sprouts with garlic and Parmesan. You’ve learned about essential ingredients and seasoning tips. I also shared step-by-step instructions for roasting them to perfection. Don’t forget to try different flavor pairings or serving styles for variety. Finally, proper storage and reheating methods help maintain taste and texture. Enjoy experimenting with this versatile vegetable in your meals!

Garlic Parmesan Roasted Brussels Sprouts Delight

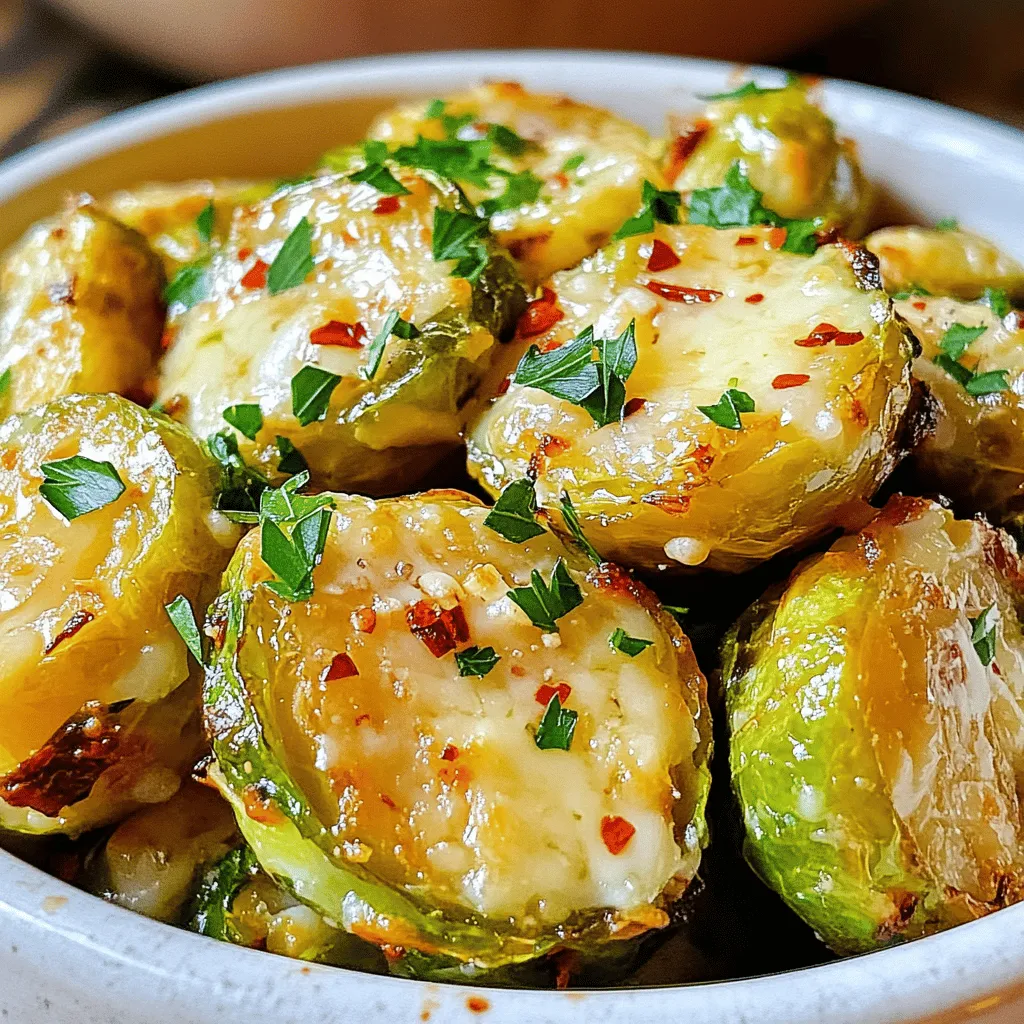
Are you ready to make a side dish that steals the show? Garlic Parmesan Roasted Brussels Sprouts Delight combines the

Older posts
Newer posts
← Previous Page1 … Page56 Page57 Page58 … Page86 Next →

dsad

© 2026 yumymoments • Built with GeneratePress

Our Policies

  • Copyright Policy
  • Cookie Policy
  • GDPR Policy
  • Privacy Policy
  • Disclaimer
  • Terms Of Use

More Information

  • Home
  • About
  • Contact
  • Appetizers
  • Dessert
  • Dinner
  • Drinks
©2026, yumymoments About Back To Top