Skip to content
DisclaimerTerms Of UseGDPR PolicyCookie Policy

yumymoments

  • Home
  • Drinks
  • Appetizers
  • Dinner
  • Dessert
  • About
  • Contact
  • Privacy Policy
DisclaimerTerms Of UseGDPR PolicyCookie Policy

NO-ING-IMG

- 4 large bell peppers (red, yellow, or green) - 1 cup quinoa - 2 cups vegetable broth - 1 can (15 oz) black beans - 1 cup corn - 1 medium onion - 2 cloves garlic - Ground cumin, smoked paprika, chili powder - 1 cup diced tomatoes and shredded cheese When making stuffed bell peppers, choose your bell peppers first. I love using red, yellow, or green peppers for their bright colors. They not only look good, but they also taste great. Next, quinoa is a star in this dish. It is a super grain packed with protein. You will need one cup, rinsed well, to remove any bitterness. For cooking the quinoa, I use vegetable broth instead of water. This adds more flavor to the dish. Now, let’s talk about the additional ingredients. I use one can of black beans for protein and fiber. Make sure to drain and rinse them well. Corn adds sweetness and a nice texture, so I usually go for one cup. A medium onion adds depth to the filling. Dice it up before cooking. For seasonings, I like to keep it simple but flavorful. You will need two cloves of garlic, minced. Ground cumin, smoked paprika, and chili powder give the dish a warm, spicy kick. Lastly, you can add one cup of diced tomatoes. If you want a creamy texture, top it with shredded cheese before baking. You can find the full recipe in the link above. This mix of ingredients creates a healthy and tasty meal that everyone will love! - Preheat the oven to 375°F (190°C). - Slice the tops off and remove seeds. First, I set my oven to 375°F. This heat will make the peppers tender and warm the filling. Next, I grab my bell peppers. I like to choose bright colors like red, yellow, or green. They look great on the plate. I slice the tops off and remove the seeds inside. This step is key. It makes space for our tasty filling. - Combine quinoa and broth in a saucepan. - Bring to a boil, then simmer and fluff. While the peppers wait, I cook the quinoa. I measure one cup of quinoa and rinse it well. Then, I add it to a saucepan with two cups of vegetable broth. I turn the heat to high and bring it to a boil. Once it bubbles, I reduce the heat to low, cover it, and let it simmer for about 15 minutes. After that, I fluff it with a fork. Fluffy quinoa is a must for our stuffed peppers. - Sauté onion and garlic. - Fold in beans, corn, tomatoes, and spices. Now, I move to the filling. In a large skillet, I heat some olive oil. I add a diced onion and sauté it until it turns soft. This takes around 3-4 minutes. Next, I toss in minced garlic and cook for one more minute. The smell is amazing! Then, I mix in black beans, corn, diced tomatoes, cumin, smoked paprika, and chili powder. I also sprinkle some salt and pepper. I stir well and let it heat for about 5 minutes. Finally, I fold in the quinoa. This creates a colorful and tasty filling for our peppers. Now, you have all the steps to make delicious stuffed bell peppers. If you want the full recipe, be sure to check out the details! How to achieve fluffy quinoa To get fluffy quinoa, rinse it well before cooking. This removes the bitter coating. Use a ratio of one cup quinoa to two cups broth. After boiling, lower the heat and cover. Let it simmer for about 15 minutes. Once done, fluff it gently with a fork. This step keeps the grains separate and light. Tips for sautéing onions and garlic Start with a hot pan and a bit of oil. Add diced onions and cook until they look clear. This takes about 3 to 4 minutes. Then, add minced garlic for flavor. Cook it for only one minute. Garlic burns fast, so keep an eye on it. Suggestions for additional spices Consider adding spices like oregano or thyme. These spices boost the taste. A pinch of cayenne pepper adds heat if you like spice. For a citrus kick, try a squeeze of lime juice right before serving. Using fresh herbs for garnishing Fresh herbs make your dish pop. Use chopped cilantro or parsley. Sprinkle them on top just before serving. They add color and freshness to your stuffed peppers. Best cheeses for melting Cheddar and pepper jack are my favorites. They melt well and add creaminess. For a richer taste, mix in some mozzarella. Just sprinkle cheese on top before baking for extra gooeyness. Dairy-free cheese alternatives For a dairy-free option, look for coconut or almond-based cheeses. These melt nicely, too. Nutritional yeast is another good choice. It adds a cheesy flavor without dairy. {{image_4}} You can make stuffed bell peppers even heartier by adding protein. If you enjoy meat, chicken or turkey work great. Simply cook and shred or dice the meat before mixing it with the quinoa filling. For a lighter option, try using vegetarian proteins like tofu or lentils. Tofu adds a nice texture and absorbs flavors well. Lentils are packed with protein and give a great taste. Feel free to get creative with your veggies! You can replace bell peppers with zucchini or mushrooms. Each option gives a unique twist. You can also adjust the recipe based on seasonal produce. In summer, ripe tomatoes or fresh corn can enhance the dish. In winter, root vegetables like sweet potatoes can add warmth and depth. Want to spice things up? Try a Mexican-inspired version! Add salsa and jalapeños for a zesty kick. You can also mix in black olives for a nice flavor boost. If you prefer a Mediterranean twist, fold in feta cheese and olives for a rich taste. Both variations create a fun and flavorful meal. For the full recipe, check the earlier sections to guide you through this delicious process! To keep your stuffed peppers fresh, store them in an airtight container. Place them in the fridge within two hours of cooking. They can last up to four days. If you want to save them for longer, freezing is a great option. Wrap each pepper tightly in plastic wrap and then place them in a freezer-safe bag. This way, they can last up to three months. Just remember to label your bags with the date. When it comes to reheating, you can use either the oven or the microwave. If you choose the oven, preheat it to 350°F (175°C). Place the peppers on a baking sheet and cover them with foil. Heat for about 20 minutes. This method keeps the filling moist and the peppers warm. For the microwave, place one pepper on a plate and cover it with a damp paper towel. Heat on high for 2-3 minutes, checking to see if it’s hot all the way through. Stuffed peppers pair well with a variety of sides. Serve them with a fresh salad for a light meal. You can also add some crusty bread for texture. For added flavor, drizzle them with a tasty sauce. A dollop of yogurt or avocado dip makes a great addition, too. You can even serve them with salsa for a spicy kick. These options enhance the meal and make it even more enjoyable. Yes, you can prepare stuffed bell peppers ahead of time. First, cook the filling and cool it down. Then, fill the peppers and cover them tightly with plastic wrap. Store them in the fridge for up to 24 hours. When ready to bake, just pop them in the oven. This saves time and makes meal prep easier. If you want to swap quinoa, there are great options. Brown rice is a popular choice. It has a nice texture and flavor. Another option is couscous, which cooks quickly. If you prefer a low-carb option, try cauliflower rice. It absorbs flavors well and is very healthy. You can tell if the peppers are done by checking their texture. They should be tender and easily pierced with a fork. The cheese on top should be melted and bubbly. A golden color on the cheese shows that they are perfectly cooked. Yes, you can use frozen bell peppers for this recipe. Thaw them first to help them cook evenly. Drain any excess water from thawed peppers. This avoids a soggy filling. You can then stuff and bake them as usual. These stuffed bell peppers are a tasty and fun dish to make. We covered the main ingredients, step-by-step instructions, and tips for perfect flavor and texture. You can personalize the recipe with different proteins and veggies. Storing leftovers is simple, letting you enjoy this meal later. Whether you prep in advance or try various flavors, this dish is sure to please. Now, enjoy your cooking adventure and share these delicious stuffed peppers with others!

Stuffed Bell Peppers with Quinoa Healthy Dish

Are you looking for a healthy, satisfying dish that’s easy to make? Stuffed bell peppers with quinoa are a tasty

- 1 medium head of cauliflower - 1 cup snap peas - 1 vibrant bell pepper - 1 carrot - 2 green onions - 2 cloves garlic - 1 tablespoon fresh ginger - 2 tablespoons soy sauce - 1 tablespoon sesame oil - 1 tablespoon vegetable oil - Salt and pepper, to taste - Sesame seeds, for garnish - Fresh cilantro, for garnish Cauliflower rice stir fry is a bright, tasty dish. You can make it with fresh ingredients. Cauliflower is the star here, offering a light base. I love using a medium head of cauliflower. It gives just the right amount for four servings. Snap peas add a nice crunch. Their sweet taste pairs well with the other veggies. I often use a vibrant bell pepper, like red or yellow, for color. A carrot, julienned, gives a sweet bite and bright color. Green onions add a mild onion flavor. Fresh ginger and garlic pack a punch. Their zesty flavors enhance the whole dish. I always use soy sauce for a salty kick. Sesame oil adds a rich, nutty taste that rounds out the flavors. You will need vegetable oil for frying. Salt and pepper are key to make everything pop. For the final touch, I love to sprinkle sesame seeds and fresh cilantro on top. They add a nice presentation and extra flavor. You can find the full recipe to guide you through cooking this easy and flavorful meal. Enjoy making it! To start, take your medium head of cauliflower. Remove the green leaves and cut it into quarters. You can use a box grater or a food processor to turn it into rice-sized pieces. A box grater gives you more control, while a food processor is faster. Either way, you want small, fluffy bits that look like rice. Set this aside for later. Heat a large wok or non-stick skillet over medium-high heat. Add the vegetable oil and let it get hot. Once it's shimmering, add the minced garlic and ginger. Sauté them for about 30 seconds until they smell amazing. Then, toss in the diced bell pepper and julienned carrot. Cook these veggies for 2-3 minutes. You want them to soften but still have a nice crunch. Next, add the snap peas. Keep stirring for another 2 minutes. They should be tender-crisp at this point. Now, it's time to mix in the cauliflower rice. Stir everything together and cook for another 3-4 minutes. Make sure the cauliflower is well combined with the veggies. You want it tender but not mushy. Once the veggies and cauliflower are cooked, drizzle the soy sauce and sesame oil over the stir-fry. Mix well to coat everything with the sauce. Season with salt and pepper to your taste. Remove the stir-fry from the heat and gently fold in the sliced green onions. This adds a pop of flavor and color. Now, plate your stir-fry while it’s hot. Sprinkle sesame seeds on top and add some fresh cilantro for a burst of flavor. Enjoy your colorful, healthy meal! For the full recipe, see the details above. - To keep vegetables crisp-tender, cook them quickly over high heat. - Cut veggies into uniform sizes to ensure even cooking. - Adjust cooking times based on the thickness of the ingredients. For example, carrots may need a minute longer than snap peas. - Add more soy sauce to boost flavor, or try coconut aminos for sweetness. - To achieve a glossy finish, drizzle sesame oil at the end of cooking. - Experiment with fresh herbs like basil or mint for added brightness. - A wok heats quickly and helps you stir-fry evenly. - Use a non-stick skillet if you don’t have a wok. - For grating cauliflower, a box grater works well, but a food processor saves time. - Keep a sharp knife handy for easy chopping of vegetables. These tips will help you create a delicious cauliflower rice stir fry. For the complete recipe, check the [Full Recipe]. {{image_4}} You can change the veggies to fit your taste. Try adding broccoli or zucchini. Both add great flavor and crunch. Bell peppers are also a colorful choice. Seasonal vegetables make this dish fresh. In spring, use asparagus. In fall, try carrots or squash. You can even add mushrooms for an earthy taste. Adding protein makes your stir fry heartier. Tofu works great for a vegetarian option. It soaks up flavors and adds texture. For meat lovers, chicken or shrimp are excellent choices. Cook them before adding to the veggies. If you’re vegan, stick with tofu or use chickpeas. Both keep the meal filling and tasty. This dish can fit many diets. For gluten-free needs, use tamari instead of soy sauce. It has the same great taste without gluten. If you follow a low-carb or keto diet, cauliflower rice is a perfect choice. It gives you the texture of rice with fewer carbs. You can enjoy this stir fry without guilt! To keep your cauliflower rice stir fry fresh, store it in airtight containers. This helps lock in moisture and flavor. Make sure the stir fry cools down before sealing the lid. You can keep it in the fridge for up to three days. If you notice any strange smells or colors, it’s best to toss it. To freeze your stir fry, let it cool completely first. Then, place it in freezer-safe bags or containers. Squeeze out as much air as possible before sealing. This helps prevent freezer burn. You can freeze it for up to three months. To reheat, simply thaw it overnight in the fridge for best results. When reheating, you can use either the stovetop or microwave. For the stovetop, heat a little oil in a pan and add the stir fry. Stir often until it's hot. This keeps the texture nice. If using a microwave, place it in a microwave-safe bowl. Heat in 30-second bursts, stirring in between. This method is quick, but be careful not to overcook it. Yes, you can make cauliflower rice ahead of time. To do this, follow these tips: - Grate the cauliflower and store it in an airtight container. - Keep it in the fridge for up to three days. - You can also freeze it for up to a month. - To thaw, simply place it in the fridge overnight. Cauliflower rice is a great substitute for traditional rice. Here’s why: - It has fewer calories and carbs than white or brown rice. - It offers more vitamins, like Vitamin C and K. - Cauliflower is high in fiber, which helps with digestion. - It can help you feel full without heavy calories. To keep your cauliflower rice firm, avoid these common mistakes: - Do not overcook it; 4-5 minutes is enough. - Use a large skillet to allow for even cooking. - Make sure to dry the cauliflower well after washing. - Avoid adding too much liquid while cooking. Absolutely! You can use many different sauces. Here are some great options: - Teriyaki sauce for a sweet touch. - Coconut aminos for a soy-free option. - Spicy chili sauce for some heat. - A splash of lime juice for freshness. For the full recipe, check out the details above. This article covered making a delicious cauliflower rice stir fry. We explored ingredients, techniques, and tips to enhance flavor. You learned how to prepare the cauliflower, cook the vegetables, and finish your dish. We also discussed variations, storage options, and answered common questions. In closing, this stir fry is a simple, tasty choice for your meals. Customize it to fit your taste and dietary needs. Enjoy creating your own healthy dish!

Cauliflower Rice Stir Fry Easy and Flavorful Meal

If you’re craving a quick meal that’s both tasty and healthy, try this Cauliflower Rice Stir Fry. It’s packed with

The heart of my Lemon Basil Pesto Pasta is fresh basil. I use 2 cups of tightly packed leaves. Fresh basil gives a bright flavor that shines. Pine nuts are my choice for nuts. I toast 1/2 cup until golden. This step adds depth and warmth. If you don't have pine nuts, try walnuts or almonds. You will need just a few more items. Start with 2 cloves of peeled garlic for that bold taste. Zest and juice from 1 large lemon add freshness. I also use 1/2 cup of extra virgin olive oil for creaminess. Finally, 1/2 cup of freshly grated Parmesan cheese brings richness. Don't forget sea salt and freshly ground black pepper to taste. For the pasta, I like 12 oz of spaghetti or any pasta you love. Garnishes can elevate your dish. I often add 1 cup of halved cherry tomatoes for color. Extra fresh basil leaves bring a lovely touch too. For an even richer taste, drizzle some extra olive oil on top. You can also sprinkle more Parmesan cheese before serving. These little extras make each bite special. For the full recipe, follow the steps I've outlined above. To make the pesto, gather your fresh basil, toasted pine nuts, garlic, lemon zest, and lemon juice. Place these in a food processor. Pulse the mixture until it is coarsely chopped. This helps to release the flavors. Next, while the processor runs, add the olive oil slowly. Keep blending until the pesto is smooth and creamy. Finally, mix in the grated Parmesan cheese. Pulse again until it blends well. Season with sea salt and black pepper to taste. Set your pesto aside for now. Fill a large pot with water and add a good pinch of salt. Bring the water to a rolling boil. Once boiling, add your pasta. Cook the pasta based on the package instructions. You want it to be al dente, which means firm to the bite. Before draining, save about 1 cup of the starchy water. After that, drain the pasta and return it to the pot. Now it’s time to bring everything together. Pour the pesto over the warm pasta. Toss the pasta gently to coat it evenly with the pesto. If the mixture seems too thick, add some of the reserved pasta water. Do this a little at a time until you reach the creamy texture you want. To finish, transfer your pasta to serving plates. Garnish with halved cherry tomatoes and fresh basil leaves for a pop of color. Enjoy your Lemon Basil Pesto Pasta! For the full recipe, check out the step-by-step guide above. To get the best pesto, focus on blending. Start with fresh basil, toasted pine nuts, and garlic. Pulse them together until they are coarsely chopped. Next, slowly add olive oil while blending. This step makes the pesto creamy. If it's too thick, add a bit of the pasta water. This water helps thin it and adds flavor. Cooking pasta al dente means it has a slight bite. Use a large pot with plenty of salted water. Bring it to a rolling boil before adding the pasta. Check the cooking time on the package. Drain it once it's ready, but save some pasta water. This water is starchy and helps your sauce stick. Seasoning is key to a great dish. After making your pesto, taste it. Add sea salt and freshly ground black pepper to enhance the flavors. You can also add more lemon juice for brightness. When combining the pesto with pasta, use the reserved pasta water. This ties everything together, making it even tastier. For the complete Lemon Basil Pesto Pasta recipe, check out the [Full Recipe]. {{image_4}} You can swap some ingredients in Lemon Basil Pesto Pasta to fit your taste. If you don’t have pine nuts, try walnuts or almonds. They add a nice crunch. For those who can't have cheese, use a vegan option like nutritional yeast. If lemon is too tart, lime juice works well too. This keeps the fresh flavor but changes it slightly. Want to make your pasta heartier? Add protein! Grilled chicken or shrimp pairs great with the pesto. Simply cook them separately, then toss them with the pasta. For a vegetarian option, try chickpeas or tofu. They soak up the flavors nicely and add a good texture. Seasonal veggies can brighten your dish. In summer, cherry tomatoes and zucchini add freshness. In fall, roasted butternut squash brings warmth. You can stir these in at the end or serve them on top. This adds color and makes your meal more nutritious. For the full recipe, check out the [Full Recipe]. To store leftover pesto, place it in an airtight container. Make sure to cover the surface with a thin layer of olive oil. This helps keep the pesto fresh and bright. It will last in the fridge for about five days. If you see any browning, just stir it in before using. When reheating the pasta, use a skillet for the best results. Add a splash of water or olive oil to prevent sticking. Heat over low heat, stirring gently until warm. You can also microwave it. Use a microwave-safe dish, cover it with a damp paper towel, and heat in short bursts. Stir every 30 seconds to ensure even heating. Freezing pesto is simple and smart! You can freeze it in ice cube trays. This way, you can use just the right amount later. Once frozen, transfer the cubes to a freezer bag. It will last for about three months in the freezer. Thaw it in the fridge overnight before using. This keeps the flavor fresh and tasty for your next meal. For the full recipe, check out the details above. If you don't have pine nuts, you can use other nuts. Walnuts, almonds, or cashews work well. They all add a nice crunch and flavor. Seeds like sunflower or pumpkin are great too. Just toast them for extra taste. Homemade pesto can last about one week in the fridge. Store it in an airtight container. To keep it fresh, cover the top with a thin layer of olive oil. This helps prevent browning. Yes, you can easily make this pasta vegan. Just skip the Parmesan cheese or use a vegan cheese substitute. Nutritional yeast is a great choice for a cheesy flavor. You can also add more nuts for creaminess. Check out the Full Recipe for more ideas! This blog post covered how to make a tasty pesto pasta dish. We discussed the key ingredients like fresh basil and nuts, plus optional garnishes. I shared step-by-step instructions, from preparing the pesto to cooking the pasta. Tips on getting the right consistency and flavor were included too. In the end, it's easy to adapt this recipe to suit your taste. Enjoy exploring different variations and storage tips. Now, it’s your turn to create your perfect pesto pasta!

Lemon Basil Pesto Pasta Simple and Flavorful Dish

If you’re craving a tasty, quick meal, Lemon Basil Pesto Pasta is the way to go! This dish bursts with

- 1 cup fresh peaches, thinly sliced - 1 cup fresh blueberries Fresh peaches add a sweet, juicy burst to the galette. I love their soft texture and bright flavor. Blueberries bring a nice tartness, which balances the sweetness of the peaches. Together, they create a wonderful mix that is both colorful and tasty. - 1 pre-made pie crust (store-bought or homemade) - 2 tablespoons granulated sugar - 1 tablespoon cornstarch A pre-made pie crust saves time and makes this recipe simple. You can use your favorite store brand or make your own if you prefer. The sugar helps sweeten the fruit, while cornstarch thickens the juices. This way, the filling stays nice and holds together when you slice it. - 1 teaspoon vanilla extract - 1 tablespoon freshly squeezed lemon juice - Pinch of sea salt for sprinkling Vanilla extract adds a warm, sweet note to the fruit. Lemon juice brightens the flavors and adds a bit of zing. A pinch of sea salt brings out the sweetness, making the fruit pop. These simple flavors work together to create a great taste. - 1 egg - 1 tablespoon milk The egg and milk mixture creates a glossy finish on the crust. This wash makes the galette look golden and inviting. It’s an easy way to give your dessert a professional touch. You can brush it on before baking for a beautiful finish. For the complete recipe, check out the [Full Recipe]. First, preheat your oven to 400°F (200°C). This step is key for a great bake. Next, take a medium bowl and mix the sliced peaches and blueberries. Add the sugar, cornstarch, vanilla extract, and lemon juice. Gently toss everything together. Let it sit for 15 minutes. This helps the flavors blend. Now it’s time to roll out the pie crust. On a floured surface, roll it to about 12 inches wide. Be gentle and even. Once it's ready, transfer the crust to a baking sheet lined with parchment paper. Make sure it's centered so it bakes evenly. Spoon the fruit mixture into the center of your crust. Leave a 2-inch border all around. This is where you will fold the crust over the fruit later. Start folding the edges over the filling. Create nice folds that overlap. This not only looks good but also keeps the filling inside. Now, let’s get it in the oven! Bake the galette for 25 to 30 minutes. Watch for the crust to turn golden brown. You’ll see the fruit bubbling, which means it’s ready. Once it’s done, take it out and let it cool for a bit. This helps the juices set. Now you're ready to slice and enjoy this Peach Blueberry Galette! Check out the Full Recipe for more details. To make your galette shine, adjust the sweetness to suit your taste. Start with the sugar amount in the recipe. If you prefer it sweeter, add a bit more sugar. If you like it tart, cut back. Marinating the fruit is another secret. After mixing the peaches and blueberries with sugar, cornstarch, vanilla, and lemon juice, let it sit for 15 minutes. This allows the flavors to blend well. You will notice a juicy, flavorful filling when you bake it. A soggy bottom can ruin your galette. To avoid this, sprinkle some cornstarch on the pie crust before adding the fruit filling. This will help absorb excess juice and keep your crust crisp. For a flaky crust, handle it gently. When rolling out the dough, don’t press too hard. Make sure to use cold ingredients, like butter, for a better texture. It creates little pockets of air that help the crust puff up as it bakes. Toppings can elevate your galette. I recommend serving it warm with a dollop of whipped cream or a scoop of vanilla ice cream. The cold cream pairs well with the warm fruit. For a lovely presentation, slice the galette into wedges. You can sprinkle fresh mint leaves on top for added color and freshness. This small touch makes your dessert look even more inviting. For the complete recipe, check out the [Full Recipe]. {{image_4}} You can change up the fruits in your galette. Adding strawberries or raspberries gives a new twist. These berries add sweetness and a bit of tartness. You can also mix in spices like cinnamon or nutmeg. Just a sprinkle can warm up the flavors. It makes your galette even more inviting and cozy. If you need a gluten-free option, you can use a gluten-free pie crust. Many brands make tasty alternatives. For vegan bakers, swap the egg wash for a plant-based milk wash. This keeps your galette golden and yummy. You can also adjust the sugar. Use honey or maple syrup instead of sugar for a healthier choice. Seasonal fruits can change your galette's vibe. In fall, try using apples and cranberries. This combo gives a nice, tart flavor that is perfect for chilly days. In summer, use other berries like blackberries or cherries. They add a burst of freshness and color to your dessert. Each season brings new flavors to explore! For more details on making this delightful dessert, check out the Full Recipe. Before you store your galette, let it cool for about 30 minutes. This cooling time helps set the filling and keeps the crust crispy. Once cool, wrap it tightly with plastic wrap or aluminum foil. You can also place it in an airtight container. This will keep your galette fresh and tasty for days. If you want to save some for later, you can freeze your galette. Start by letting it cool completely. Then, wrap it in plastic wrap, followed by aluminum foil to protect it from freezer burn. When you want to eat it, simply thaw it in the fridge overnight. To reheat, bake it in a 350°F (180°C) oven for about 15 to 20 minutes. This will help restore the crispiness. Your peach blueberry galette will stay fresh in the fridge for about 3 to 4 days. Keep an eye out for any signs of spoilage. If you see mold or if it smells off, it's best to toss it. Enjoying this dessert at its best ensures you get all the wonderful flavors. To make a galette from scratch, you need a simple crust. Start with flour, butter, and water. Mix them until they form a dough. Chill the dough for 30 minutes. This makes it easier to roll out. Use a rolling pin to flatten the dough into a round shape. You want it thin but strong enough to hold the filling. This technique creates that lovely rustic look. Yes, you can use frozen fruit. Frozen fruit is convenient and lasts longer. It is often picked at peak ripeness. However, it can release more juice when thawed. This may make the filling a bit runnier. If you use frozen fruit, let it thaw. Drain any excess juice before mixing with sugar and cornstarch. Fresh fruit offers brighter flavors and firmer texture. Both have their pros and cons. A galette is simpler than a pie. It has no pie dish and is freeform. You roll out the dough and fold the edges over fruit. This method creates a more rustic look. A pie is baked in a dish and usually has a top crust. Galettes are quicker to make and easier to handle. Both are delicious, but the galette is more relaxed. Serve a galette warm or at room temperature. Slice it into wedges for easy sharing. Top each slice with whipped cream or a scoop of ice cream. This adds creaminess and sweetness. A sprinkle of fresh mint can add color and freshness. You can also serve it with a side of custard for a special treat. Enjoy the beauty and taste of this simple dessert. For a detailed guide, check the Full Recipe. In this blog post, I shared how to make a delicious fruit galette. We explored fresh ingredients, baking essentials, and ways to enhance flavor. I provided step-by-step instructions, helpful tips, and various options for customization. Remember, baking is about joy and creativity. Don’t be afraid to experiment with different fruits or dietary needs. Enjoy your galette warm with whipped cream or ice cream. With practice, you’ll perfect your recipe and impress your family and friends. Happy baking!

Peach Blueberry Galette Flavorful and Simple Dessert

Are you ready to delight your taste buds with a Peach Blueberry Galette? This simple dessert combines juicy peaches and

- Shrimp Specifications: Type and Size - For this recipe, use large shrimp, about 1 lb (450g). Look for shrimp that are peeled and deveined for ease. Fresh shrimp is best, but frozen works too. Just make sure they are fully thawed before cooking. - Asparagus Preparation: Fresh vs. Frozen - I prefer fresh asparagus for its crispness and flavor. Use one bunch, trimmed and cut into 2-inch pieces. If you choose frozen, make sure to thaw it and drain excess water. Fresh gives a better texture and taste. - Butter Options: Unsalted vs. Salted - I recommend using unsalted butter for this dish. It lets you control the salt level. You will need 4 tablespoons, divided into two portions. Salted butter can work too, but be cautious with added salt in the final dish. Cleaning and Seasoning Shrimp Start by rinsing the shrimp under cold water. This removes any shell bits. After rinsing, pat them dry with paper towels. Season the shrimp well with salt and black pepper. Make sure they are coated evenly for great flavor. Trimming and Cutting Asparagus For the asparagus, begin by trimming the tough ends. Cut the asparagus into 2-inch pieces. This size helps them cook evenly and look nice on the plate. Sautéing Asparagus to Perfect Texture In a large skillet, melt 2 tablespoons of unsalted butter over medium heat. Once the butter is melted and bubbly, add the asparagus pieces. Sauté them for about 3-4 minutes, stirring often. You want them to be bright green and slightly tender, yet still crunchy. Remove them from the skillet and set aside. Sautéing Garlic for Maximum Flavor In the same skillet, add the remaining 2 tablespoons of butter. Let it melt completely. Then, add the minced garlic and red pepper flakes. Sauté for about 1 minute. Stir constantly until the garlic smells great but be careful not to burn it. Cooking Shrimp to Juicy Perfection Add the seasoned shrimp to the skillet. Spread them out in a single layer. Cook for about 3-4 minutes, or until they turn pink and opaque. Once cooked, gently fold in the lemon zest and lemon juice. This adds a fresh taste that brightens the dish. Combining Ingredients in the Skillet Return the sautéed asparagus to the skillet. Mix everything together gently. Cook for another minute to heat through. This allows the asparagus to soak up the garlic butter. Adjusting Seasonings for Optimal Taste Taste the dish and see if it needs more salt, black pepper, or lemon juice. Adjust these to fit your taste. This step helps to enhance the flavors and make every bite delicious. For the full recipe, check out the detailed instructions above. - Achieving the Perfect Sauté To get a great sauté, heat your skillet first. Use medium heat and add butter. When the butter bubbles, it's time to add the asparagus. Stir gently to keep it from burning. Cook for just a few minutes. The asparagus should stay bright green and crunchy. - Flavor Enhancements: Adding Citrus and Herbs Fresh lemon juice and zest bring zest to your dish. They brighten flavors, giving a fresh taste. You can also add herbs like parsley or cilantro. These herbs add color and flavor. Just sprinkle them on top before serving. - Pairing with Side Dishes Garlic butter shrimp and asparagus taste great with rice or quinoa. You can also serve it with a light salad. A side of crusty bread is perfect for soaking up the sauce. Choose simple sides that won’t overpower the dish. - Ideal Presentation Tips For a lovely display, use a large white platter. Arrange the shrimp and asparagus in a colorful way. Drizzle the leftover garlic butter sauce over the top. Add a lemon wedge on the side for a pop of color. This makes your meal look gourmet and inviting. For the complete dish, check out the [Full Recipe]. {{image_4}} You can easily swap ingredients in this dish. For protein, try chicken or tofu. Both options work well with garlic butter. Chicken gives a nice bite, while tofu adds a soft texture. For veggies, think about using broccoli, zucchini, or bell peppers. These choices add color and crunch. Broccoli gives a nice bite, while zucchini cooks quickly. Bell peppers bring sweetness to the dish. Adjust spice levels to suit your taste. If you like it hot, add more red pepper flakes. For a milder dish, cut back on the flakes. You can also try different herbs for a unique twist. Basil or thyme can add fresh notes. Use fresh herbs for the best flavor. For a zesty kick, consider adding more lemon juice or zest. It brightens the dish nicely. For the full recipe, refer to the recipe section. To keep your garlic butter shrimp and asparagus fresh, store leftovers in the fridge. Place the dish in an airtight container. It will stay good for up to 3 days. The shrimp may lose some texture over time, but the flavor remains strong. If you want to save it for longer, you can freeze it. Divide the dish into smaller portions and use freezer-safe containers. It will last up to 3 months in the freezer. To avoid freezer burn, make sure to seal the containers well. When it's time to eat leftovers, reheating properly helps keep the flavor and texture. The best way is to use a skillet over medium heat. This method warms the shrimp and asparagus evenly. Stir gently to avoid overcooking the shrimp. You can also use a microwave. Place the leftovers in a microwave-safe bowl. Cover it with a lid or microwave-safe wrap. Heat it in short bursts of 30 seconds, stirring in between. This way, you ensure everything heats evenly without drying out. For more details, check out the Full Recipe. Can I use frozen shrimp or asparagus? Yes, you can use frozen shrimp or asparagus. Just thaw them first before cooking. This helps them cook evenly and keeps the texture nice. How do I know when shrimp are fully cooked? Shrimp are fully cooked when they turn pink and opaque. They should also curl into a C shape. If they look gray or feel mushy, they need more time. What can I serve with Garlic Butter Shrimp and Asparagus? I love serving this dish with rice or pasta. You can also pair it with a fresh salad or crusty bread. These sides soak up the delicious garlic butter sauce. Can I make it ahead of time? You can prep the shrimp and asparagus ahead of time. Just store them in the fridge until you are ready to cook. However, I recommend cooking it fresh for the best taste. Is this dish suitable for meal prep? Yes, this dish is great for meal prep. You can cook it in batches and store it in airtight containers. It stays tasty in the fridge for up to three days. How to make Garlic Butter Shrimp and Asparagus gluten-free? To make this dish gluten-free, avoid using any sauces that contain gluten. Stick to fresh ingredients and focus on the garlic, shrimp, and asparagus. This way, you keep it safe and delicious! This blog post shared how to make Garlic Butter Shrimp and Asparagus. We covered ingredients, cooking steps, and tips. You learned about shrimp types, fresh versus frozen asparagus, and butter choices. The cooking process showed how to sauté perfectly and combine flavors. You discovered variations with proteins and veggies, plus storage tips for leftovers. Making this dish is easy and fun. Keep experimenting with flavors. Enjoy your cooking journey!

Garlic Butter Shrimp and Asparagus Simple Recipe

Looking for a quick and tasty meal? This Garlic Butter Shrimp and Asparagus recipe is simple and packed with flavor.

- 1 pound boneless, skinless chicken breasts - 1/2 cup buffalo sauce - 1 tablespoon olive oil - 1 head of iceberg or butter lettuce - 1 cup shredded carrots - 1/2 cup diced celery - 1/4 cup crumbled blue cheese - Fresh cilantro or parsley for garnish When I make Buffalo Chicken Lettuce Wraps, I start with the main ingredients. The chicken breasts give a lean protein base. I always choose boneless and skinless to keep things easy. The buffalo sauce adds that spicy kick, which I love. Olive oil helps to keep the chicken moist while it cooks. Next, I gather my additional ingredients for assembly. I prefer using iceberg or butter lettuce for the wraps. These leaves hold the filling well and add crunch. Shredded carrots and diced celery bring extra texture and freshness to each bite. Lastly, I consider optional ingredients for flavor. Crumbled blue cheese offers a nice creamy contrast to the heat. Fresh herbs like cilantro or parsley can brighten the dish. Each ingredient plays a role in making these wraps fresh and tasty. {{ingredient_image_2}} 1. First, preheat your grill or skillet to medium heat. This step is key. It helps cook the chicken evenly. 2. Next, take 1 pound of boneless, skinless chicken breasts. Drizzle them with 1 tablespoon of olive oil. Season both sides with 1 teaspoon of garlic powder, 1 teaspoon of onion powder, salt, and freshly ground pepper. Make sure to coat them well. 1. Place the seasoned chicken on the grill or skillet. Cook for about 5 to 7 minutes on each side. The chicken should not be pink inside when done. The juices should run clear. 2. After cooking, remove the chicken from heat. Let it rest for about 5 minutes. Resting helps keep the chicken juicy. 1. Shred the chicken using two forks. Pull apart the meat into bite-sized pieces. 2. In a large mixing bowl, combine the shredded chicken with 1/2 cup of buffalo sauce. Toss the chicken until every piece is coated. You can adjust the sauce amount for spiciness. 3. While mixing, separate your lettuce leaves. Use iceberg or butter lettuce for the wraps. Keep them intact. 4. To assemble, take a lettuce leaf and spoon some buffalo chicken into the center. 5. Add shredded carrots and diced celery for crunch. If you like, sprinkle some crumbled blue cheese on top. 6. Finish your wraps with fresh cilantro or parsley for a nice touch. Enjoy your tasty buffalo chicken lettuce wraps! To ensure your chicken is cooked through, check the center. It should not be pink, and juices must run clear. I cook the chicken on medium heat for about 5-7 minutes per side. This method gives you juicy and tender chicken. For shredding chicken effectively, let it rest first. After cooking, let the chicken sit for about 5 minutes. This helps keep the juices in. Use two forks to pull apart the chicken into bite-sized pieces easily. You can modify the buffalo sauce to fit your spice preference. If you like a milder flavor, add less sauce. For extra heat, add more sauce or a dash of hot sauce. Consider adding or omitting blue cheese based on your taste. It adds a creamy flavor, but it’s not for everyone. Try it without first, then decide if you want to add it later. Creative garnish ideas can make your wraps pop. Try using fresh cilantro or parsley for a bright touch. You can also add lime wedges on the side for a zesty kick. For parties, serve the wraps on a large platter. Arrange them nicely and add extra buffalo sauce for dipping. This makes it easy for guests to grab and enjoy! Pro Tips Adjust the Heat: If you prefer a milder flavor, try using a mild buffalo sauce or mixing it with a bit of ranch dressing to tone down the heat. Perfectly Shredded Chicken: For easier shredding, let the chicken rest for a few minutes after cooking. The meat will be tender and easier to pull apart. Fresh Lettuce Leaves: Choose crisp and vibrant lettuce leaves for wraps. Iceberg or butter lettuce works best as they hold the filling well. Customize Your Toppings: Feel free to add other toppings like diced tomatoes or sliced avocados to enhance the flavor and texture of your wraps. {{image_4}} If you want to make Buffalo chicken lettuce wraps healthier, consider these options: - Low-carb wraps: Instead of lettuce, you can use collard greens or cabbage leaves. They hold the filling well and add a nice crunch. - Buffalo sauce substitutes: Try using hot sauce mixed with Greek yogurt for a creamy, lower-calorie sauce. You can also mix in some honey for a sweet twist. Adding new flavors can elevate your Buffalo chicken wraps. Here are some ideas: - Vegetables: Mix in diced bell peppers, corn, or even black beans with the chicken. This adds color and nutrition. - Cheeses: Experiment with different cheeses like feta or pepper jack. They can bring a new flavor and texture to the dish. If you have specific dietary needs, you can easily adjust this recipe: - Gluten-free options: Ensure the buffalo sauce is gluten-free. Many brands offer gluten-free sauces, so read the labels. - Vegan alternatives: Swap the chicken for shredded jackfruit or tofu. These options soak up the buffalo sauce well and provide a great texture. To store your buffalo chicken lettuce wraps, keep the chicken and veggies separate from the lettuce. This keeps the lettuce crisp. Use airtight containers to hold each part. For the chicken mixture, a glass container works well. It seals tightly and keeps the flavors fresh. When you’re ready to enjoy leftovers, use the microwave for the chicken. Heat it in short bursts of 30 seconds. Stir between each burst to ensure even warming. For the lettuce wraps, do not microwave them. Instead, eat them cold or at room temperature to keep their crunch. You can freeze the buffalo chicken mixture for later. Place it in a freezer bag and remove as much air as possible. Label the bag with the date. It stays good for up to three months. For lettuce wraps, it’s best to freeze only the chicken. Lettuce does not freeze well and will become mushy when thawed. Yes, you can! Use turkey or pork instead of chicken. Both work well with buffalo sauce. Ground meat is also an option. Just cook it until it’s brown and fully done. Shredded beef can add a nice twist too. Make sure to season it like the chicken for good flavor. You have many tasty options! Try serving them with: - Fresh veggie sticks (carrots, cucumbers, or bell peppers) - A side salad with a light dressing - Sweet potato fries for a fun crunch - A bowl of ranch or blue cheese dressing for dipping These sides will add color and flavor to your meal. Buffalo chicken lettuce wraps stay fresh for about 2 to 3 days in the fridge. Store them in an airtight container. Keep the chicken mixture separate from the lettuce leaves. This way, the lettuce stays crisp. If you notice any change in smell or color, it’s best to toss them. Buffalo chicken lettuce wraps are a tasty, fun dish to make. You learned about the main ingredients and how to prep them. Cooking tips helped you perfect your chicken and adjust the heat. We explored variations for different diets and flavors, plus storage info for your leftovers. Try these wraps for your next meal; they are easy and full of flavor. Enjoy them with friends or family for a great time. Making these wraps lets you explore your cooking skills while creating something delicious.

Buffalo Chicken Lettuce Wraps Fresh and Tasty Option

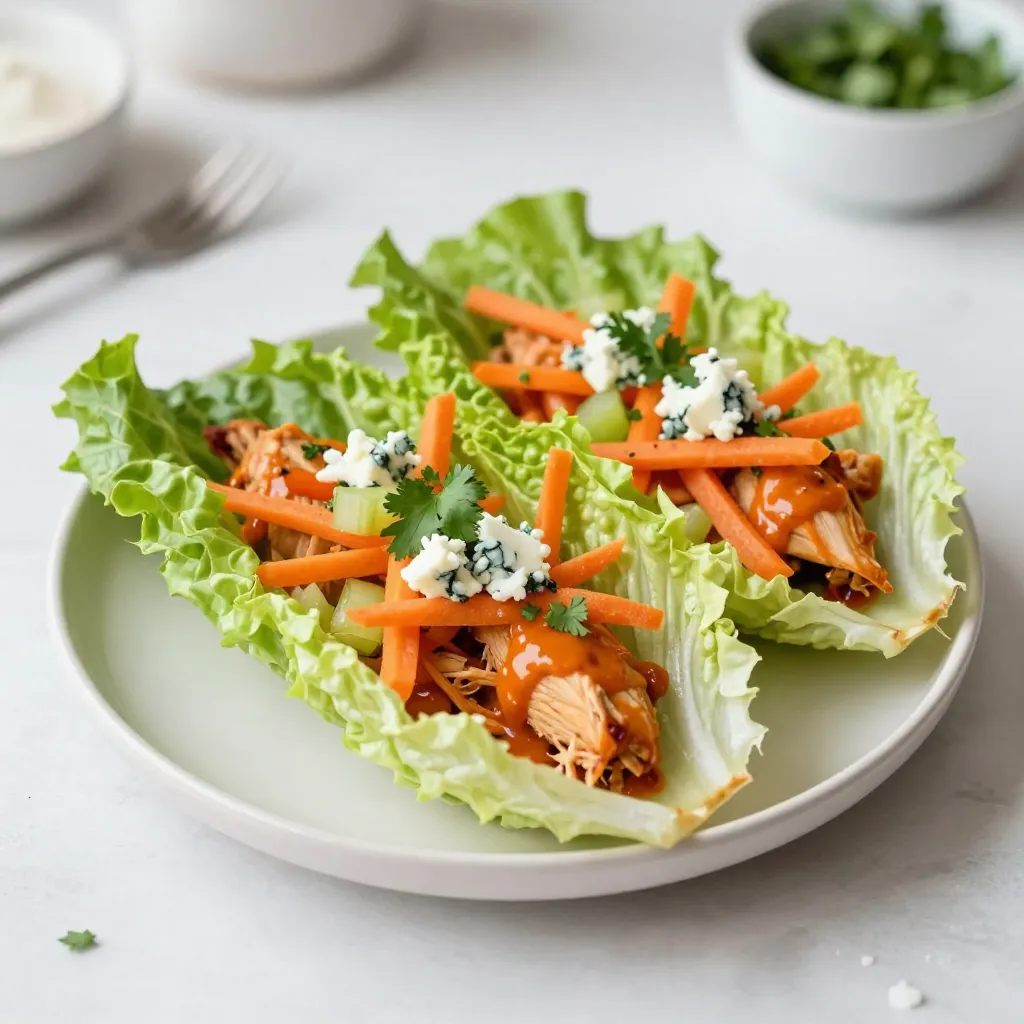
Looking for a fresh and tasty meal that packs a punch? Buffalo chicken lettuce wraps are the answer! These wraps

To make your delightful Chocolate Chip Cookie Dough Bites, gather these ingredients: - 1 cup all-purpose flour - 1/2 cup unsalted butter, softened at room temperature - 1/2 cup packed brown sugar - 1/4 cup granulated sugar - 1 teaspoon pure vanilla extract - 1/4 teaspoon fine sea salt - 1/2 cup mini chocolate chips - 1/4 cup crushed walnuts (optional) - 1/2 cup dark chocolate chips (for coating) If you need substitutes: - You can use coconut oil instead of butter. - For gluten-free bites, try almond or oat flour. - Maple syrup works well in place of brown sugar for a different flavor. These bites are tasty but consider their caloric content: - Each bite has about 100 calories. For a better understanding of the macronutrient breakdown: - Carbohydrates: 10g - Protein: 1g - Fat: 6g To make your cookie dough bites, you will need: - A mixing bowl - Electric mixer - Baking sheet - Parchment paper - Microwave-safe bowl (for melting chocolate) - Fork (for dipping) I recommend having a cookie scoop for easy portioning. This makes rolling the bites simple and fun! Heat-treating the flour To start, we need to heat-treat the flour. This method makes it safe to eat. Preheat your oven to 350°F (175°C) and spread the flour on a baking sheet. Bake it for about 5 minutes. Then, let it cool completely before using it in the dough. Creaming butter and sugars Next, we cream the butter and sugars. In a large bowl, mix the softened butter, brown sugar, and granulated sugar. Use an electric mixer set on medium speed. Beat this mixture for 2-3 minutes until it becomes light and fluffy. Incorporating flavorings Now, we add flavorings. Stir in the pure vanilla extract and sprinkle in the fine sea salt. Make sure to mix until everything blends well together. Mixing dry and wet ingredients Gradually add the cooled, heat-treated flour to the butter mixture. Use a wooden spoon or spatula to mix until you get a smooth dough. Don't overmix, or the bites may be tough. Forming the cookie dough bites With your hands, scoop out tablespoon-sized bits of dough. Roll each piece into a smooth ball. Place these dough balls on a parchment-lined baking sheet, leaving space between them. Chilling time and technique Next, we chill the dough. Put the baking sheet in the fridge for about 30 minutes. This helps firm up the bites, making them easier to coat later. Melting dark chocolate While the dough chills, it's time to melt the chocolate. Place dark chocolate chips in a microwave-safe bowl. Heat them in 30-second intervals, stirring each time until smooth. Dipping and setting the bites Once the dough bites are chilled, dip each one into the melted chocolate. Ensure they are fully coated. Use a fork to lift them out and let excess chocolate drip off. Place the coated bites back on the parchment-lined sheet. For the complete recipe, refer to the Full Recipe section. To get the perfect texture, avoid overmixing your dough. Mix just until the ingredients blend. This keeps your bites soft and chewy. When you add the flour, do it slowly. This helps you achieve the right dough consistency. The dough should feel soft but not sticky. For a great presentation, use a decorative glass jar. You can also place the bites on a pretty platter. Drizzle some melted chocolate over the top for flair. Sprinkle a bit of flaky sea salt to enhance the taste. You can pair these bites with cold milk, hot coffee, or even a scoop of ice cream. One common mistake is not cooling the dough enough. If the dough is warm, the chocolate may not coat well. You should also measure your ingredients carefully. Too much flour can make the bites dry. Stick to the Full Recipe for best results. {{image_4}} To make vegan chocolate chip cookie dough bites, swap dairy ingredients with plant-based options. Use coconut oil instead of butter. For sweetness, consider maple syrup or agave nectar. Replace regular chocolate chips with dairy-free versions. You can also consider using a vegan flour like almond or oat flour. These choices will keep the bites soft and delicious. For gluten-free chocolate chip cookie dough bites, replace all-purpose flour with gluten-free flour blends. Almond flour or coconut flour works well too. Ensure the flour is certified gluten-free to avoid cross-contamination. When making dough, check that all other ingredients are gluten-free. This includes sugars and chocolate chips. Read labels carefully to prevent any mix-ups. Want to add more flavor? Sprinkle in a bit of cinnamon for warmth. It pairs nicely with chocolate. You could also mix in different types of chocolate. Try white chocolate chips or dark chocolate chunks for variety. Experimenting with flavors makes each batch unique. Don't be afraid to get creative with your cookie dough bites! For the full recipe, check out the details above. To keep your chocolate chip cookie dough bites fresh, store them in the refrigerator. Place the bites in an airtight container. This method keeps them soft and tasty. They will last about one week in the fridge. If you want to save some for later, freezing is a great option. First, arrange the bites on a tray in a single layer. Freeze them for about an hour until they’re firm. Once frozen, transfer them to a freezer-safe bag. They can last up to three months in the freezer. To thaw, simply leave them in the fridge overnight. You can also let them sit at room temperature for about 30 minutes. Always check for signs of spoilage. Look for any changes in color or texture. If the bites smell off or taste strange, it’s best to discard them. Trust your senses; if something feels wrong, it probably is. Chocolate chip cookie dough bites last about one week in the fridge. If you freeze them, they can last up to three months. Just store them in an airtight container to keep them fresh. Yes, you can eat cookie dough bites raw. The key is using heat-treated flour. This step makes the dough safe to eat. You can enjoy the sweet flavor without worry. You can use coconut oil or vegan butter as a butter substitute. Both work well and keep the bites rich. If you want a lighter option, use applesauce for a healthier twist. Of course! You can simply skip the walnuts. The cookie dough bites will still taste great. If you want to add texture, try using sunflower seeds or pumpkin seeds instead. The best way to melt chocolate is in a microwave-safe bowl. Heat it in 30-second intervals. Stir well after each interval until the chocolate is smooth. This method helps prevent burning. In this article, we explored the essential ingredients and tools for making chocolate chip cookie dough bites. I shared step-by-step instructions, tips for perfecting texture, and variations to suit different diets. We also discussed storage methods and addressed common questions. Remember, the right ingredients and techniques make all the difference. Enjoy your cookie dough bites, whether as a treat or a fun project. Happy baking!

Chocolate Chip Cookie Dough Bites Delightful Treat

If you’ve ever craved that sweet, rich taste of cookie dough without the worry, you’re in for a treat! Chocolate

- 2 ripe avocados - 4 small eggs - Salt and freshly ground black pepper to taste - 2 tablespoons chopped fresh chives - 2 tablespoons crumbled feta cheese - 1 teaspoon paprika - 1 teaspoon olive oil Baked avocado eggs provide a healthy start. Each serving has about: - Calories: 300 - Total Fat: 20g - Protein: 12g - Carbohydrates: 10g These eggs are rich in healthy fats and protein. The avocados add fiber, which is great for digestion. Feta cheese boosts your calcium intake too. This dish is not just tasty; it’s also nutritious! You get a good mix of macronutrients to fuel your day. - Preheat oven to 425°F (220°C). - Slice avocados in half and remove the pit. Start by preheating your oven. This step ensures your baked avocado eggs cook perfectly. Next, use a sharp knife to slice the avocados lengthwise. Be careful here, as you don’t want to cut yourself. Gently pop out the pit. If the avocado is ripe, it should come out easily. Use a spoon to scoop out a little flesh from the center of each half. This creates space for the eggs to fit snugly. - Arrange avocado halves in a baking dish. - Crack eggs into the avocado halves and season. Now, place the avocado halves in a baking dish. If they wobble, crumple some aluminum foil. This will help keep them steady while baking. Next, crack an egg into each avocado half. Be careful not to spill any egg white. If your eggs are large, you can remove a bit of the white for a better fit. After that, season each egg with salt, black pepper, and paprika. These spices bring out the rich taste of the eggs and avocados. - Bake and check for doneness. - Add toppings before serving. Now it's time to bake! Put the dish in your preheated oven for 12 to 15 minutes. Keep an eye on the eggs. If you like runny yolks, bake for less time. For firmer yolks, bake a bit longer. After baking, take the dish out of the oven. Top each avocado with chives and feta cheese. These add color and flavor. Let the dish cool for a minute before digging in. Enjoy your creation! For the full recipe, visit the provided link. To get baked eggs just right, timing is key. Monitor the baking time closely. If you prefer runny yolks, aim for about 12 minutes. For firmer yolks, add a few more minutes. Adjusting the size of your avocados can help too. If you use larger eggs, choose bigger avocados to fit them snugly. Want to amp up the taste? Consider adding more seasonings. A sprinkle of garlic powder or a dash of cayenne can add a nice kick. You might also try fresh herbs like basil or parsley for added freshness. When it comes to toppings, think outside the box. You can swap feta cheese for goat cheese or even some crispy bacon bits for extra flavor. To serve your baked avocado eggs beautifully, use a rustic wooden board. It adds charm and style to your dish. Garnish with extra chives for a pop of color. Pair your dish with sliced tomatoes or a side salad for a balanced meal. A glass of fresh juice or a light smoothie can make this meal feel even more special. For a delightful experience, serve with crispy toasted bread for dipping. {{image_4}} You can make baked avocado eggs even more fun by swapping ingredients. Different cheeses can change the flavor. Try goat cheese for a tangy kick or cheddar for a classic taste. You can also play with spices. Instead of paprika, use chili powder for heat. Garlic powder adds a great depth. Experiment with dried herbs, like oregano or thyme. Each swap will give you a new dish! Want to make it vegan or dairy-free? You can easily swap the eggs. Use silken tofu instead! Just blend it until smooth and fill the avocado halves. Add a splash of turmeric for color. For a gluten-free meal, you’re already set! This dish is naturally gluten-free. Just ensure your toppings and sides also meet this need. Baked avocado eggs shine as part of a brunch spread. Pair them with fresh fruit and pastries for a colorful table. You can also serve them in a breakfast bowl. Add quinoa, spinach, or even salsa for a tasty twist. These ideas make the dish flexible for any meal. So, feel free to mix and match! Check out the Full Recipe for more details. To store baked avocado eggs, first let them cool. Place them in an airtight container. This keeps them fresh and tasty. You can store leftovers in the fridge for up to two days. If you want to keep them longer, consider freezing them. When it's time to eat your leftovers, use the oven for reheating. Preheat it to 350°F (175°C). Place the eggs in a baking dish and cover with foil. Heat them for about 10 minutes. This keeps the eggs from drying out. You can also use a microwave, but it may change the texture. Heat in short bursts, checking often to avoid overcooking. Freezing baked avocado eggs is not the best option. The texture of the eggs can change. However, if you must freeze them, follow these steps: 1. Let the eggs cool completely. 2. Wrap each avocado half tightly in plastic wrap. 3. Place them in a freezer bag or container. 4. Label with the date and freeze for up to one month. To thaw, place them in the fridge overnight. Reheat gently in the oven to avoid rubbery eggs. Enjoy your baked avocado eggs fresh for the best taste! For the full recipe, check out the ingredients and instructions above. Baked avocado eggs stay fresh in the fridge for about 2 days. Store them in an airtight container. Ensure they cool down before placing them inside. This helps keep them safe and tasty. The longer they sit, the more the texture may change. Yes, you can use larger eggs! Just be careful when cracking them. You might need to scoop out a bit more avocado flesh. This makes room for the egg white. If you do not make enough space, the egg could overflow. Baked avocado eggs pair well with many sides. Try serving them with: - Sliced tomatoes - Crispy toasted bread - Fresh salad - A side of fruit These options add color and flavor. They make the meal more balanced and fun. Yes, baked avocado eggs are healthy! They offer good fats from avocados. Eggs provide protein, making this dish filling. The dish also has vitamins and minerals. Feta cheese adds flavor and calcium. Overall, this meal is a nutritious choice for breakfast or brunch. For more details, check the Full Recipe. Baked avocado eggs are a tasty and healthy breakfast option. You learned about the key ingredients, like avocados and eggs, and the simple steps to prepare them. Nutrition facts show they're good for you. With tips for perfecting the dish and fun ways to serve, you can impress anyone. Whether you want to swap ingredients or store leftovers, these eggs fit your needs. Enjoy your meal and inspire others with this easy recipe!

Baked Avocado Eggs Simple and Tasty Recipe

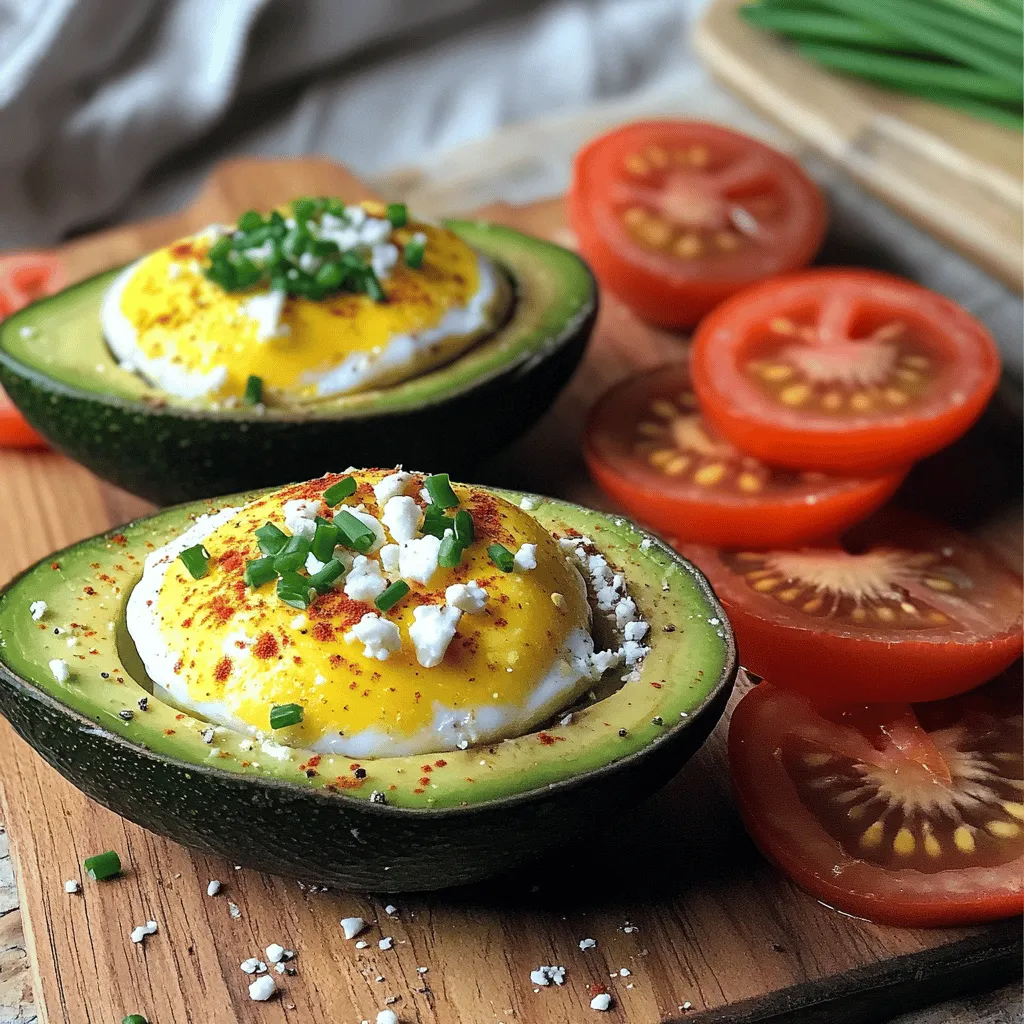
Looking for a simple yet delicious breakfast idea? Baked Avocado Eggs combine creamy avocado and rich eggs for a tasty

For your Caprese skewers, you will need: - 1 cup cherry tomatoes, vibrant and ripe - 1 cup fresh mozzarella balls (such as bocconcini or ciliegine) - A handful of fresh basil leaves, preferably large ones - 2 tablespoons balsamic glaze, for a sweet and tangy kick - 1 tablespoon extra virgin olive oil, for richness - Salt and freshly cracked black pepper, to taste - Wooden or metal skewers, 6 to 8 inches in length To ensure your Caprese skewers shine, start with the freshest ingredients. Look for tomatoes that are firm and bright. They should smell sweet and earthy. For mozzarella, choose balls that feel soft and plump. They should look glossy with no cracks. Basil leaves must be vibrant green, free of spots or wilting. Always buy your ingredients close to the time you plan to make the skewers. If you want to switch things up, consider these options: - Use grape tomatoes instead of cherry tomatoes for a slight sweetness. - Try burrata cheese for a creamier texture. - For a spicy kick, add slices of jalapeño or a sprinkle of red pepper flakes. - If you're vegan, substitute mozzarella with marinated tofu or vegan cheese. These alternatives can add a fun twist to your Caprese skewers while keeping them fresh and tasty. To start, rinse your cherry tomatoes and fresh basil leaves in cold water. Make sure to dry them gently with a clean towel. This helps keep them fresh and tasty. Next, gather your skewers. If you're using wooden ones, soak them in water for about 30 minutes to prevent burning on the grill or in the oven. Now comes the fun part! Take a skewer and thread on one cherry tomato first. Then, fold a basil leaf if it’s large, and slide it onto the skewer next. Follow this with a mozzarella ball. Repeat this pattern—cherry tomato, basil leaf, mozzarella ball—until you fill the skewer. Aim for three cherry tomatoes and three mozzarella balls. Leave a little space at the ends to hold the skewer easily. Once your skewers are ready, place them on a platter. Drizzle some extra virgin olive oil across the top. This adds a rich flavor that balances the fresh tastes. Then, drizzle balsamic glaze for that sweet, tangy kick. Finally, sprinkle salt and freshly cracked black pepper to bring out the natural flavors. For a stunning look, add an extra drizzle of balsamic glaze before serving. You can find the full recipe in the main article. Enjoy these bright, fresh bites at your next gathering! Choosing the right ingredients is key to great Caprese skewers. Start with ripe cherry tomatoes. Look for bright colors and firmness. Fresh mozzarella should be soft and creamy. I like using bocconcini or ciliegine for their size. Don’t forget about the basil! Large leaves bring a fresh taste. Always pick leaves that are green and fragrant. The quality of your ingredients will shine through in every bite. Caprese skewers are perfect for parties. They are easy to eat and look great on a table. You can make them ahead of time, so you have less stress when guests arrive. Serve them alongside crackers, olives, or dips for variety. Consider pairing the skewers with a refreshing drink. A sparkling lemonade or a light wine works well. Your guests will enjoy the flavors and appreciate the effort. A beautiful presentation can elevate your Caprese skewers. Arrange them on a large platter. Drizzle balsamic glaze over the top for a glossy finish. For a fun twist, place the skewers upright in a jar filled with fresh basil. This makes a stunning centerpiece. You can also add colorful plates or napkins to brighten the table. Presentation matters, and these ideas will make your dish stand out at any occasion. {{image_4}} You can play with flavors in Caprese skewers. Try adding slices of ripe avocado for creaminess. You can also use marinated artichoke hearts for a tangy twist. If you love spice, add jalapeño slices or roasted red peppers. These swaps add new tastes while keeping it fresh and fun. Balsamic glaze is a classic choice, but you can try others too. A pesto drizzle gives a rich herbal flavor. For a zesty touch, use lemon vinaigrette or a garlic-infused olive oil. These dressings not only enhance taste but also make your skewers look beautiful. You can easily make this dish vegan. Replace mozzarella with vegan cheese or silken tofu. For a nutty flavor, try adding cashew cheese. Use a plant-based balsamic glaze to keep it all vegan. These changes let everyone enjoy Caprese skewers, no matter their diet. For the full recipe, check out the Caprese Skewers Delight. To keep your Caprese skewers fresh, store them in an airtight container. Place a damp paper towel inside to help maintain moisture. This will keep the tomatoes and mozzarella from drying out. Consume leftovers within two days for the best taste. For the best results, buy fresh mozzarella and tomatoes. Store mozzarella in its brine or water. This keeps it moist and flavorful. For cherry tomatoes, keep them at room temperature. Cold can ruin their taste and texture. Basil should stay in a glass of water. Cover it loosely with a plastic bag to keep it fresh longer. I do not recommend freezing Caprese skewers. Freezing changes the texture of tomatoes and cheese. If you have extra ingredients, you can freeze mozzarella. Just remember to thaw it in the fridge before use. Enjoy your Caprese skewers fresh for the best experience! For the full recipe, check the Caprese Skewers Delight section. You can store Caprese skewers in the fridge for up to two days. Keep them in an airtight container. Make sure to separate layers with parchment paper to prevent sticking. The tomatoes and cheese will stay fresh, but the basil may wilt slightly. Yes, you can make Caprese skewers a few hours ahead. Just assemble them and chill in the fridge. For the best taste, add the olive oil and balsamic glaze right before serving. This keeps the flavors bright and fresh. Caprese skewers pair well with many sides. Here are some great options: - Garlic bread or bruschetta - A light salad, like arugula with lemon vinaigrette - Antipasto platter with cured meats and olives - Fresh fruit, such as strawberries or melon For a complete experience, check out the Full Recipe: Caprese Skewers Delight . You learned about making Caprese skewers, from choosing great ingredients to storing leftovers. I shared tips for freshness and fun flavor ideas. You can mix it up with unique combinations and sauces to fit dietary needs. Remember to present your skewers well for gatherings. With these steps, you can impress everyone at your next event. Enjoy making and sharing these tasty bites! They are sure to be a hit!

Caprese Skewers Simple and Fresh for Any Occasion

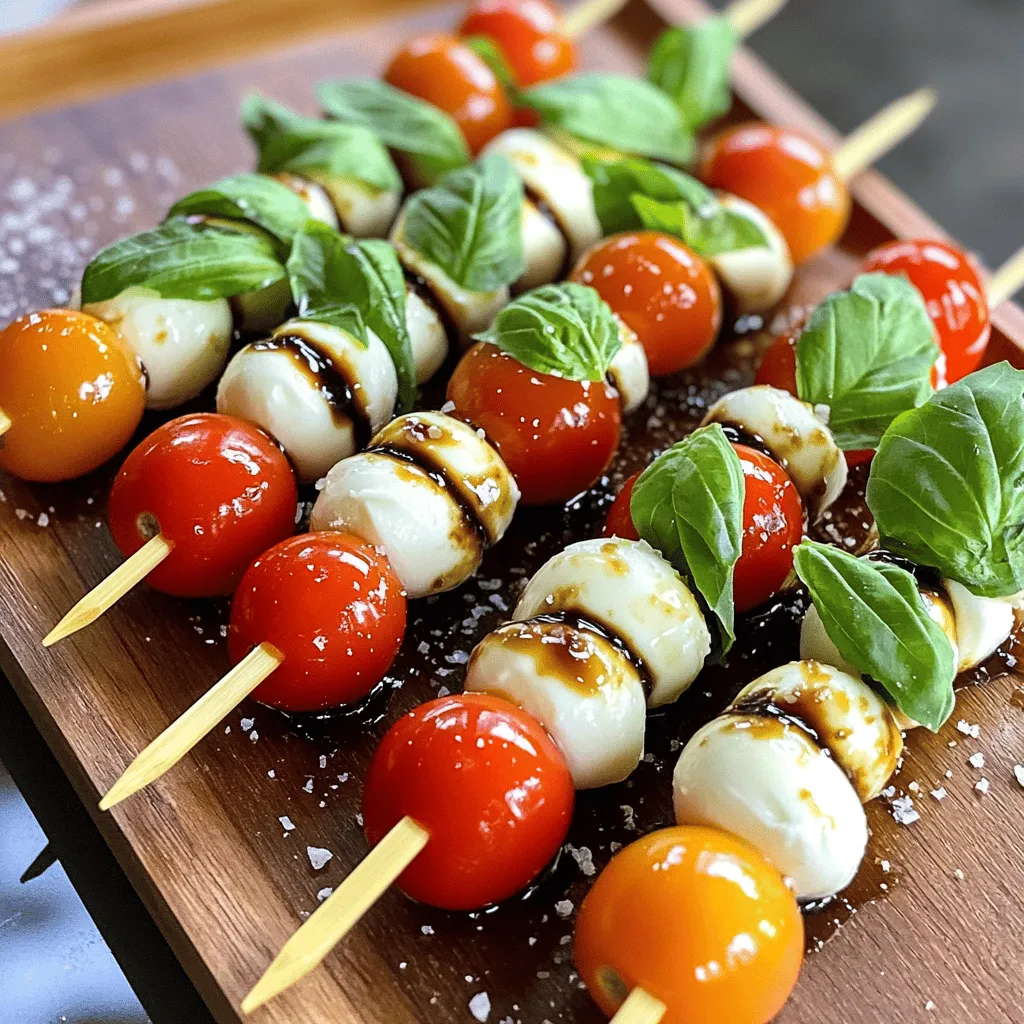
Looking for a fresh and simple appetizer? Caprese skewers are perfect for any gathering! With just three main ingredients—tomatoes, mozzarella,

- 1 cup green or brown lentils, thoroughly rinsed - 1 medium onion, finely chopped - 2 medium carrots, diced into small cubes - 2 stalks celery, diced - 3 cloves garlic, minced - 1 can (14 oz) diced tomatoes, including juices - 6 cups vegetable broth (preferably low-sodium) - 2 teaspoons ground cumin - 1 teaspoon smoked paprika - 1 bay leaf - 2 cups kale, stems removed and chopped - Salt and freshly ground black pepper to taste - 2 tablespoons olive oil - Fresh parsley, chopped, for garnish - Fresh herbs like thyme or basil - Bell peppers or other vegetables like zucchini Lentils are a powerhouse of nutrition. They offer protein, fiber, and iron. They keep you full and satisfied. Low-sodium broth helps control salt intake, making this soup heart-healthy. Using fresh herbs adds flavor and nutrients without extra calories. Each ingredient in this soup serves a purpose. Enjoy the health benefits while you savor the rich taste. For the full recipe, check out the previous section. - Prepping vegetables: Start by chopping your onion, carrots, and celery. Dice them into small pieces. This helps them cook evenly. Use a sharp knife for safety and ease. Mince the garlic as well. Set these aside for later. - Rinsing lentils: Measure one cup of lentils. Place them in a fine mesh strainer. Rinse them under cold water. This removes dirt and any small stones. Make sure to rinse until the water runs clear. This step is vital for clean soup. - Sautéing aromatics: Heat two tablespoons of olive oil in a large pot. Use medium heat. Add the chopped onion and cook for about five minutes. When the onion turns soft and clear, add the diced carrots and celery. Stir them in and cook for another five to seven minutes. This blend creates a tasty base for your soup. - Simmering the soup: Stir in the minced garlic, ground cumin, and smoked paprika. Cook this mixture for one minute. Let the spices release their flavors. Next, add the rinsed lentils, canned tomatoes with juices, vegetable broth, and a bay leaf. Raise the heat until it boils. Once it boils, lower the heat and cover the pot. Let it simmer for 30 to 35 minutes. The lentils should be soft but not mushy. - Seasoning and serving: After simmering, remove the bay leaf. Stir in two cups of chopped kale. Let it cook for about five minutes until the kale wilts. Taste the soup and add salt and black pepper as needed. Adjust the seasonings to your liking. - Presentation suggestions: Ladle the hot soup into bowls. For a nice touch, sprinkle chopped parsley on top. Serve with a slice of crusty bread on the side. Drizzling a bit of olive oil on top adds extra flavor. Enjoy your comforting vegan lentil soup! For the full recipe, refer to the section above. To ensure lentils are tender, start with fresh lentils. Old lentils may take longer to cook. Rinse them well before adding to your soup. This removes dirt and helps them cook evenly. To avoid mushy soup, keep an eye on the timer. Lentils cook quickly. Simmer them just until they are tender yet firm. Stir gently while they cook, so they don’t break apart too much. Adjusting spice levels is easy. Start with the basic spices in the recipe. Taste your soup as it cooks. If you want more heat, add a pinch of cayenne. For earthiness, try adding more cumin. Adding extra ingredients can elevate your soup. Consider adding fresh herbs like thyme or basil. You can also toss in some diced bell peppers or spinach for added nutrition and flavor. Pair your soup with crusty bread for a hearty meal. A warm baguette or sourdough works best. Spread a little olive oil or vegan butter on the bread for extra taste. Serving with salads brings freshness to your meal. A simple green salad with a tangy vinaigrette complements the rich flavors of the soup. You can also try a quinoa salad for added protein and fiber. For the full recipe, refer to the detailed instructions provided earlier. Enjoy your cooking adventure! {{image_4}} You can choose different lentils for your soup. Red lentils cook faster and break down easily. They make the soup creamy and thick. Green or brown lentils stay firmer, giving you a nice texture. I like to mix them sometimes for more flavor. You get a tasty balance with both types. Want to spice things up? Try adding coconut milk for a creamy touch. It gives a sweet flavor that pairs well with spices. You can also add curry powder for a warm, rich taste. Adding vegetables like bell peppers or sweet potatoes boosts flavor and nutrition. Get creative and mix in what you love! Texture matters in a good soup. If you want a creamy soup, blend part of it. This gives you a smooth, rich feel. If you prefer a chunky stew, skip the blending. Just enjoy the hearty pieces of lentils and veggies. Both styles are delicious, so pick what suits your mood! After you enjoy your vegan lentil soup, store the leftovers right away. Keep the soup in an airtight container. It stays fresh in the fridge for up to five days. If you want to save it for later, you can freeze it. Pour the cooled soup into freezer-safe containers. Leave some space at the top for expansion. This way, it will last for about three months in the freezer. When you want to enjoy your soup again, there are great ways to reheat it. The best method is on the stove. Pour the soup into a pot and heat it over medium heat. Stir it often to avoid burning. You can also use a microwave. Place the soup in a microwave-safe bowl. Heat it in short bursts, stirring in between. This keeps the flavor and texture just right. If the soup seems thick, add a splash of broth or water. Your vegan lentil soup can last a good while if stored right. In the fridge, it stays fresh for five days. In the freezer, it keeps for three months. Always check for signs of spoilage before eating. If you see mold or it smells off, throw it away. Always trust your senses; if it seems bad, don’t risk it. Enjoy your soup while it’s fresh! Making vegan lentil soup is quick and easy. You need about 15 minutes to prep the ingredients and 35 minutes to cook. So, the total time is about 50 minutes. This includes chopping veggies and letting the soup simmer. Yes, you can use dried lentils! If you choose dried, rinse them and add them to the pot. You should also add about 1 to 1.5 cups of dried lentils. Keep in mind that they will take longer to cook—around 30 to 40 minutes. Adjust the broth to ensure the soup has enough liquid. Absolutely! This soup is gluten-free. All the ingredients, like lentils, veggies, and spices, are safe for a gluten-free diet. You can enjoy this meal without worries about gluten. Pair this soup with crusty bread for a hearty meal. You might also enjoy a fresh salad alongside it. A side of roasted vegetables can add nice crunch and flavor. Feel free to mix and match to find your favorite combinations! This blog post covered how to make a tasty vegan lentil soup. We looked at key ingredients, like lentils, vegetables, and spices. I shared the cooking steps and gave helpful tips to make it perfect. We talked about variations to suit your taste and how to store leftovers for later. In closing, this soup is not just easy but also good for you. You'll enjoy its rich flavors and health benefits. Give it a try and enjoy your meal!

Vegan Lentil Soup Healthy and Flavorful Delight

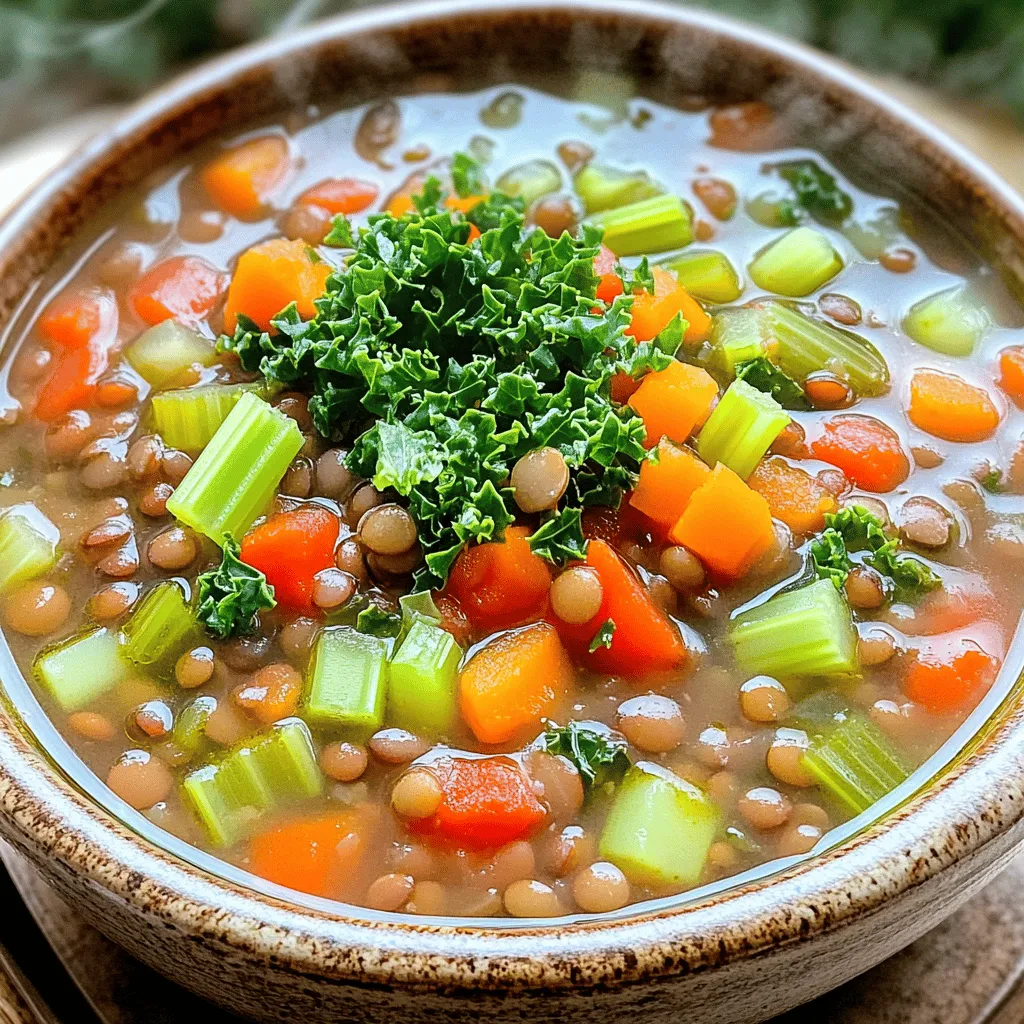
Looking for a warm, healthy meal that’s easy to make? You’re in the right place! This Vegan Lentil Soup is

Older posts
Newer posts
← Previous Page1 … Page57 Page58 Page59 … Page86 Next →

dsad

© 2026 yumymoments • Built with GeneratePress

Our Policies

  • Copyright Policy
  • Cookie Policy
  • GDPR Policy
  • Privacy Policy
  • Disclaimer
  • Terms Of Use

More Information

  • Home
  • About
  • Contact
  • Appetizers
  • Dessert
  • Dinner
  • Drinks
©2026, yumymoments About Back To Top