Skip to content
DisclaimerTerms Of UseGDPR PolicyCookie Policy

yumymoments

  • Home
  • Drinks
  • Appetizers
  • Dinner
  • Dessert
  • About
  • Contact
  • Privacy Policy
DisclaimerTerms Of UseGDPR PolicyCookie Policy

NO-ING-IMG

This recipe uses simple, tasty ingredients. Each one adds to the creamy texture and rich flavor. Here’s what you need: - 1 cup jasmine rice - 2 cups coconut milk - 1 cup almond milk - 1/2 cup granulated sugar (or maple syrup for a lighter choice) - 1/4 teaspoon salt - 1 teaspoon pure vanilla extract - 1/2 teaspoon ground cinnamon - 1/2 cup shredded coconut (sweetened or unsweetened) - Fresh mango slices and mint leaves for garnish Feel free to mix things up! Here are some ideas for changing flavors or making it suit your taste: - Swap jasmine rice for basmati or arborio rice. - Use coconut cream instead of coconut milk for a richer taste. - Change almond milk to oat milk or soy milk. - Sweeten with honey or agave syrup instead of sugar. - Add a dash of nutmeg or cardamom for a new twist. Using high-quality ingredients makes a big difference. Fresh coconut milk adds creaminess. Jasmine rice gives a lovely aroma. Always choose good-quality sugar or sweeteners. The better the ingredients, the tastier the pudding. It’s worth it to get the best for this dish. For the full recipe, check out the earlier section! Start by rinsing the jasmine rice. Use cold water and a fine mesh sieve. Rinse until the water runs clear. This step removes excess starch. Less starch means a creamier pudding. In a medium saucepan, mix the rinsed rice with coconut milk, almond milk, sugar (or maple syrup), and salt. Stir everything well. Place the pan on medium heat. Bring the mix to a gentle boil while stirring. Once it boils, lower the heat and cover the pot. Let it simmer for 20-25 minutes. Stir occasionally to keep it from sticking. The rice should soften, and the pudding will thicken. After cooking, take the pan off the heat. Add vanilla extract and ground cinnamon. Then, fold in the shredded coconut, saving some for garnish. Let the pudding cool for a few minutes. Serve it warm or chilled. For a nice touch, scoop it into bowls. Garnish with fresh mango slices, more shredded coconut, and mint leaves. This makes the dish look vibrant and inviting. You can find the full recipe in the previous section. Enjoy your creamy delight! To make your coconut milk rice pudding rich and creamy, start with jasmine rice. This rice type has the right starch content for a smooth texture. Rinse it well under cold water until the water runs clear. This step removes excess starch and prevents gumminess. Combine the rinsed rice with coconut milk and almond milk for a silky mix. Stir often while cooking to keep the rice from sticking. Cook on low heat to allow the rice to absorb the liquids slowly. This helps achieve that luxurious creaminess you want. Want to elevate your pudding? Consider adding spices and other flavors. Ground cinnamon brings warmth and depth. You can also add a pinch of nutmeg for extra warmth. Vanilla extract adds a sweet note that pairs well with coconut. If you enjoy a tropical twist, try adding fresh fruit like mango or pineapple. Shredded coconut gives texture and flavor. You can also experiment with sweeteners. Maple syrup offers a unique twist while keeping it natural. Avoid these pitfalls for the best results. First, do not skip rinsing the rice. It’s key for a nice texture. Next, don’t rush the cooking process. Low and slow is best. Keep the heat steady and stir regularly. If your pudding turns out too thick, add a bit more almond milk. Lastly, let it cool before serving. This allows the flavors to meld and enhances the taste. Following these tips will help you create a delightful dish every time. For the full recipe, check out the Coconut Bliss Rice Pudding section. {{image_4}} You can easily make this pudding vegan. Just swap the almond milk with any plant-based milk, like oat or soy milk. If you want a sweeter taste, use maple syrup instead of granulated sugar. This keeps it rich and creamy while being dairy-free. Want to jazz up your coconut milk rice pudding? Try adding tropical flavors! You can mix in pineapple, passion fruit, or even mango. These fruits add a touch of sweetness and a burst of color. For a spicy kick, consider adding a pinch of cardamom or nutmeg. This pudding pairs well with many desserts. Try serving it with a scoop of sorbet or fresh fruit on the side. For a crunchy texture, add some toasted nuts or granola. You can also serve it in small cups for a fun party treat. Don’t forget to check out the Full Recipe for more ideas! After you make your coconut milk rice pudding, let it cool. Place it in a bowl at room temperature for about 30 minutes. This stops the cooking process. Cover the bowl with plastic wrap or a lid. Make sure it is airtight to keep it fresh. Store it in the fridge if you are not eating it right away. To reheat your rice pudding, scoop the amount you want into a bowl. Add a splash of coconut milk or almond milk to keep it creamy. Heat in the microwave for about one minute. Stir it halfway through to ensure even heating. You can also reheat it on the stove over low heat. Stir constantly until warm. Your rice pudding will stay fresh in the fridge for about four days. If you want to save some for later, you can freeze it. Place it in a freezer-safe container. It can last for up to three months in the freezer. When you're ready to eat it, thaw it in the fridge overnight before reheating. Enjoy the full recipe for more tips! You can make this rice pudding dairy-free by using coconut milk and almond milk. Both work great together. They add creaminess without any dairy. You can also use other plant-based milks like oat or soy milk. Just keep in mind that the flavor may change slightly, but it will still be yummy! Yes, you can use different types of rice. Jasmine rice gives a nice fragrance, but you can try arborio or even basmati rice. Each type of rice will change the texture and taste a bit. Arborio will make it creamier because it has more starch. Just remember to adjust the cooking time based on the rice type you choose. You’ll know the rice pudding is done when the rice is soft and the mixture thickens. Stir it often while it cooks. If it starts to look creamy and smooth, you’re on the right track. You can also taste a little bit to check the texture. It should be tender, not crunchy. If it’s too thick, you can add a splash of milk to loosen it up. Enjoy your Coconut Milk Rice Pudding! Check out the Full Recipe for more tips. You learned about key ingredients, cooking steps, and ways to customize coconut milk rice pudding. I shared tips to avoid mistakes and enhance flavors. You can adapt this dish to suit your needs, whether vegan or a fan of tropical flavors. Storing and reheating care will keep your pudding fresh. With these insights, you can enjoy a delightful dessert anytime. Explore these steps to create the perfect bowl of joy!

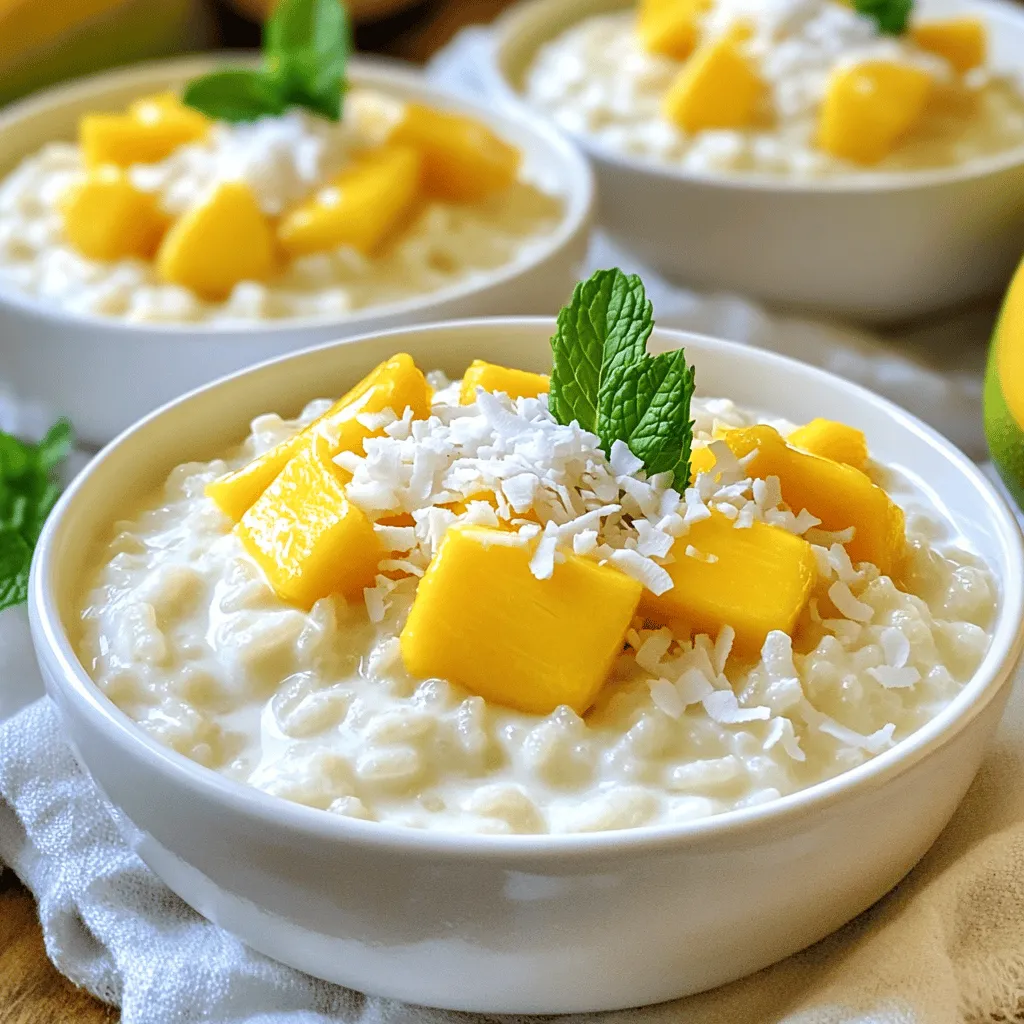
Coconut Milk Rice Pudding Rich and Creamy Delight

Are you ready to indulge in a creamy dessert that warms the soul? Coconut Milk Rice Pudding is an easy
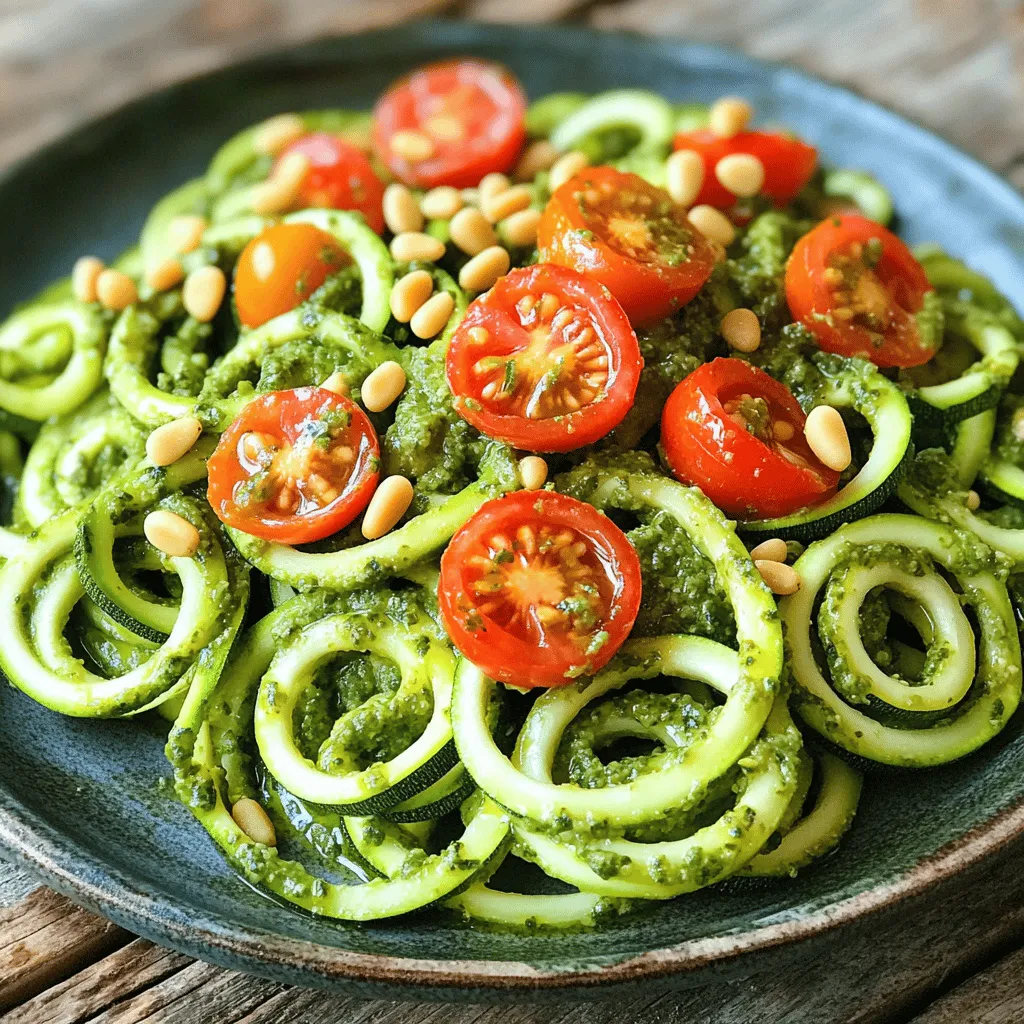
- 2 large zucchinis - 1 ripe avocado - Fresh basil leaves - Extra virgin olive oil - Freshly squeezed lemon juice - Garlic clove - Salt and black pepper - Cherry tomatoes and pine nuts for garnish You need just a few simple ingredients to make delicious zucchini noodles with pesto. Start with two large zucchinis. They are the base of this dish. You want ripe avocados for a creamy texture. Fresh basil leaves add great flavor and aroma. Extra virgin olive oil gives richness to the pesto. For the additional ingredients, add freshly squeezed lemon juice. It brightens the dish. A garlic clove gives it a zesty kick. Don't forget salt and black pepper to taste. Garnish with cherry tomatoes and toasted pine nuts for crunch and color. This combination makes the dish healthy and full of flavor. You can find the complete recipe [Full Recipe]. To start, grab your spiralizer. This tool makes long, thin noodles from zucchinis. First, wash the zucchinis. Cut off the ends, then secure one in the spiralizer. Turn the handle to create the noodles. - Tip: Use firm zucchinis for the best results. They spiralize easily and hold their shape. - Tip: If you want long noodles, press down lightly while turning. This helps shape them perfectly. Next, let’s make the avocado pesto. Take your ripe avocado, and place it in a food processor. Add fresh basil leaves, lemon juice, olive oil, and minced garlic. Blend until smooth and creamy. - Tip: If the pesto is too thick, add a splash of water. Blend again until you reach your desired texture. This will help the flavors mix well. Now, it's time to bring it all together. Pour the creamy pesto over your spiralized zucchini noodles in a large bowl. Use tongs to gently toss the noodles, coating them evenly with the vibrant pesto. For plating, divide the zesty zucchini noodles among your serving plates. Place halved cherry tomatoes on top, and sprinkle toasted pine nuts for a nice crunch. - Presentation Tip: Serve in shallow bowls. Add a small dollop of pesto on the side for extra flavor. This makes the dish look even more appealing. You can find the Full Recipe for this healthy and flavorful dish at the top! When choosing zucchinis, look for firm and shiny ones. They should feel heavy for their size. Avoid any with soft spots or blemishes. Fresh zucchinis taste better and hold their texture well. Store them in the fridge to keep them crisp. Wrap them in a paper towel to absorb moisture. This helps them last longer. For the best flavor, use ripe avocados. They should feel slightly soft when you squeeze them. This ripeness makes the pesto creamy and rich. You can also vary the ingredients. Try adding different nuts like walnuts or cashews. If you want to skip cheese, nutritional yeast works well. It adds a cheesy taste without dairy. Pair your zucchini noodles with protein for a full meal. Grilled chicken, shrimp, or chickpeas are great choices. You can also add roasted vegetables for more flavor. For a side dish, serve a light salad. A fresh green salad with lemon dressing complements the dish perfectly. For more ideas, check the Full Recipe for inspiration. {{image_4}} Zucchini noodles are great for many diets. They are naturally vegan and gluten-free. You can enjoy this dish without any animal products. The main ingredients fit well for anyone looking for healthy options. To make it gluten-free, just ensure your pesto uses gluten-free nuts. For a nut-free version, swap pine nuts with sunflower seeds. This keeps the creamy texture without nuts. If you're looking to lower fat, use less avocado in the pesto. This keeps the taste while cutting calories. You can change the flavor of your pesto easily. Try adding herbs like parsley or cilantro. This gives a fresh twist to the dish. You can also add a pinch of red pepper flakes for heat. Experimenting with nuts can change the taste too. Instead of pine nuts, use walnuts or cashews. Each nut brings a unique taste to the pesto. You can even add lemon zest for a bright flavor. Feel free to get creative with your zucchini noodles. The [Full Recipe] guides you step-by-step to make delicious meals. To keep your leftover zucchini noodles fresh, refrigerate them. Place the noodles in an airtight container. This helps them stay crisp and not soggy. Use them within two days for the best taste and texture. For the pesto, store it in a separate container. To prevent browning, drizzle a thin layer of olive oil on top before sealing. This adds flavor and keeps the bright green color. How long does the dish last in the fridge? Zucchini noodles with pesto stay good in the fridge for up to two days. After that, the noodles may become watery and lose flavor. If you want to save them for later, freezing is an option. You can freeze the zucchini noodles for up to three months. To do this, blanch them in hot water for one minute, then cool them in ice water. Drain and pack them in freezer bags. For the pesto, you can freeze it in ice cube trays. Once frozen, transfer the cubes to a freezer bag. This way, you can use just what you need later. This method keeps the flavors fresh and ready to use. You can use a few kitchen tools if you don’t have a spiralizer. A box grater works well. Just grate the zucchini into thin strips. You can also use a vegetable peeler. Simply peel the zucchini into long ribbons. Both methods give you great results! Yes, making zucchini noodles ahead of time is easy. Spiralize or slice the zucchini, then place them in an airtight container. Store them in the fridge for up to two days. To keep them fresh, you can sprinkle a little salt to draw out excess water. Zucchini noodles are low in calories and high in fiber. They help keep you full without the carbs of regular pasta. Avocado in the pesto adds healthy fats and vitamins. Together, they create a dish that is tasty and good for your body! This blog post covered how to create a delicious zucchini noodle dish with avocado pesto. You learned about the key ingredients and step-by-step instructions to make it. I shared tips for selecting the best zucchinis and perfecting your pesto. Plus, I provided storage tips to keep your dish fresh. Remember, cooking should be fun and flexible. Feel free to experiment with flavors and adaptations. Enjoy the healthy meals while impressing your friends and family!

Zucchini Noodles with Pesto Healthy and Flavorful Dish

Are you ready to enjoy a healthy and flavorful dish? Zucchini noodles with pesto offer a fresh twist on traditional

For the best banana oatmeal cookies, gather these simple ingredients: - 2 ripe bananas, thoroughly mashed - 1 cup rolled oats - 1/2 cup almond butter (or any nut butter of your choice) - 1/4 cup honey or maple syrup - 1/2 teaspoon pure vanilla extract - 1/2 teaspoon baking powder - 1/2 teaspoon ground cinnamon - 1/4 teaspoon sea salt - 1/3 cup dark chocolate chips (optional) - 1/3 cup chopped walnuts or pecans (optional) These ingredients are easy to find and fun to mix. The ripe bananas give the cookies their natural sweetness. Rolled oats add great texture and heartiness. Almond butter provides creaminess and flavor. Honey or maple syrup offers a touch of sweetness. You can switch the nut butter based on what you like. If you want more flavor, try adding dark chocolate chips or nuts. They add a nice crunch and richness. This recipe allows you to be creative and make it your own. For the full recipe, check the complete steps to create these delightful cookies. Start by preheating your oven to 350°F (175°C). This step is key for even baking. Next, take a baking sheet and line it with parchment paper. This helps the cookies not to stick. Make sure to spread it out flat, so it covers the whole sheet. In a large bowl, mash your two ripe bananas well. You want them soft and smooth. Then, add in 1/2 cup of almond butter. Stir until these two mix together well. Now, pour in 1/4 cup of honey or maple syrup. Add 1/2 teaspoon of pure vanilla extract, 1/2 teaspoon of baking powder, 1/2 teaspoon of ground cinnamon, and 1/4 teaspoon of sea salt. Mix this all together until it looks uniform. After that, slowly fold in 1 cup of rolled oats. If you want extra flavor, add in 1/3 cup of dark chocolate chips and 1/3 cup of chopped walnuts or pecans. Using a tablespoon, scoop out small amounts of the cookie dough. Place them on the lined baking sheet. Make sure to leave about 2 inches between each scoop. This gives them room to spread. Bake these in your preheated oven for 12-15 minutes. Look for a light golden brown color on the edges. They will feel soft but will firm up as they cool. After baking, let them sit on the sheet for 5 minutes. Then, move them to a wire rack to cool completely. Enjoy your delicious cookies! For the Full Recipe, check the ingredients and steps above. To get the best texture in your cookies, use ripe bananas. The riper they are, the sweeter and softer your dough will be. Make sure to mash them well to avoid lumps. You want a smooth mix. Use rolled oats instead of quick oats. They give a better chew and hold up well in baking. Also, don’t overmix the dough. Just blend until combined. This keeps your cookies soft and fluffy. Add-ins can take your cookies to the next level. Try mixing in dark chocolate chips for some sweetness. If you like nuts, chopped walnuts or pecans add a nice crunch. A sprinkle of sea salt on top boosts flavors, too. You can also try different spices, like nutmeg or ginger, to change the taste. If you want a fruity twist, add dried fruits like raisins or cranberries. Make your cookies look as good as they taste! Arrange them on a rustic wooden platter for a warm touch. A light dusting of ground cinnamon creates a lovely look and smell. You can also add fresh fruit or nuts around the cookies for color. Pair your banana oatmeal cookies with a cup of tea or coffee. This makes for a cozy treat. For more details and to try this recipe, check the Full Recipe. {{image_4}} You can easily make these cookies gluten-free. Instead of rolled oats, use certified gluten-free oats. This ensures no cross-contamination occurs. You can also try gluten-free flour blends. Just replace the oats in the recipe with 1 cup of your chosen gluten-free flour. This change keeps the texture similar while making them safe for those with gluten sensitivities. To make these cookies vegan, swap honey for maple syrup. Honey is not vegan, but maple syrup works great. Use almond butter or any other nut butter that fits your diet. Ensure the chocolate chips are dairy-free, as many contain milk. With these swaps, you create a tasty vegan treat that everyone can enjoy. Get creative with flavors! Add different spices like nutmeg or ginger for a warm touch. You can mix in dried fruits like raisins or cranberries for sweetness. If you want a nutty crunch, try using pecans or almonds. For a tropical twist, add shredded coconut or even some pineapple bits. The options are endless, and each variation can turn a simple cookie into something special. To keep your banana oatmeal cookies fresh, let them cool completely. Then, place them in an airtight container. This method keeps them soft and moist. You can also use parchment paper between layers to prevent sticking. Store the container in a cool, dry place. Avoid leaving them out for too long, as they can dry out. If you want to save some cookies for later, freezing works great. First, let the cookies cool completely. Then, place them in a single layer on a baking sheet. Freeze them for about an hour. Once frozen, transfer them to a freezer-safe bag or container. This way, you can enjoy a treat whenever you crave one! Banana oatmeal cookies last about 5 days at room temperature. If stored in the fridge, they can last up to a week. When frozen, they can stay good for about three months. Just remember to label your containers with the date. That way, you'll know how long they have been stored. Enjoy your cookies fresh or from the freezer! Yes, you can swap ingredients in this recipe. Use different nut butters like peanut or cashew. Maple syrup can replace honey for a vegan option. You can also use quick oats instead of rolled oats. If you want a nut-free version, omit the nuts or use seeds like sunflower seeds. The cookies are ready when their edges turn light golden brown. They will look soft in the middle. They will firm up as they cool. Set a timer for 12 to 15 minutes. Keep an eye on them during the last few minutes to avoid overbaking. Serve these cookies warm with a glass of milk or a cup of tea. They pair well with yogurt for breakfast. You can also stack them up on a plate for a fun dessert. For a twist, try adding a scoop of ice cream between two cookies for a tasty sandwich. In this post, we explored how to make Banana Oatmeal Cookies. We shared the key ingredients, step-by-step baking instructions, and helpful tips for perfecting your cookies. We also discussed fun variations and storage methods. These cookies are simple and tasty, and they can suit different diets. Enjoy making them for yourself or to share with friends. Happy baking!

Banana Oatmeal Cookies Simple and Tasty Recipe

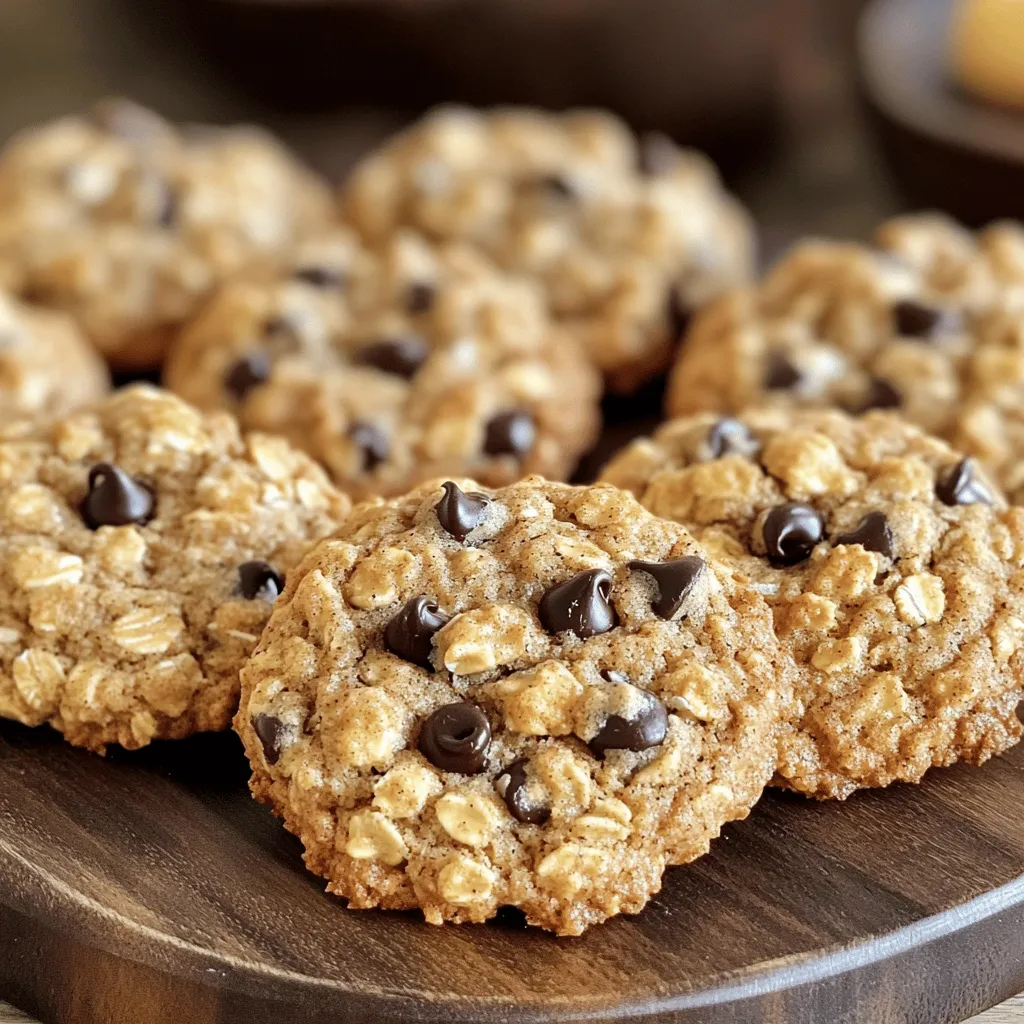
Are you craving a sweet treat that’s both easy to make and healthy? Look no further! This Banana Oatmeal Cookies

- 2 ripe avocados - 1 cup cherry tomatoes, halved - 1 cup fresh mozzarella balls (bocconcini), halved - 1/4 cup fresh basil leaves, finely chopped - 2 tablespoons balsamic glaze - 1 tablespoon extra virgin olive oil To make Caprese stuffed avocados, you need fresh and ripe ingredients. Choose avocados that yield slightly when pressed. This ensures a creamy texture. The cherry tomatoes add a sweet burst of flavor. Use small, fresh mozzarella balls for a delightful chew. Basil leaves bring a fragrant touch. Balsamic glaze and olive oil enhance the dish with rich flavors. - Sea salt - Freshly ground black pepper - Additional herbs or spices Seasoning is key to enhancing your dish. A sprinkle of sea salt brings out the flavors. Freshly ground black pepper adds a subtle kick. You might also consider adding herbs like oregano or thyme for extra depth. Adjust the seasoning to suit your taste, creating a personal touch to your Caprese stuffed avocados. For the full recipe, refer to the Caprese Stuffed Avocados Delight entry above. To start, slice each avocado in half lengthwise. Make sure to use a sharp knife. Twist the two halves apart gently. Next, carefully remove the pit using a spoon or knife. Be cautious to avoid cutting yourself. Now, scoop out a bit of the flesh from each half. This creates a cavity for the filling. You want enough room for the tasty mix but not too deep to ruin the avocado’s shape. Grab a medium mixing bowl. Combine the halved cherry tomatoes and mozzarella balls in it. Make sure to mix them well. Then, add the finely chopped basil leaves. This ingredient brings bright flavor and fresh color. Next, drizzle in the extra virgin olive oil and half of the balsamic glaze. Season with sea salt and freshly ground black pepper. Toss everything gently, coating the ingredients evenly. The mix should look colorful and appetizing. Now, it’s time to fill the avocado halves. Use a spoon to generously scoop the Caprese mixture into each hollow. Don’t worry if it overflows a little; it will look inviting. Finally, drizzle the remaining balsamic glaze over the stuffed avocados. This adds a nice shine and tangy kick. For the full recipe, you can refer to the earlier section. Enjoy your Caprese stuffed avocados right away or let them chill in the fridge for a bit. This allows the flavors to blend beautifully. Selecting ripe avocados is key. Look for avocados that yield slightly to gentle pressure. A perfect avocado should feel soft but not mushy. This ensures a creamy texture that pairs well with the filling. Avoid any avocados with dark spots or blemishes. Balancing flavors with seasoning is also important. When mixing your tomatoes and mozzarella, add salt and pepper to taste. Seasoning enhances the natural flavors of the ingredients. A drizzle of olive oil adds richness while the balsamic glaze gives a sweet-tangy kick. For a stunning presentation, serve the stuffed avocados on a bright plate. A bed of peppery arugula makes a great base. It adds color and a fresh taste. You can also garnish with whole basil leaves for extra flair. Pair your Caprese stuffed avocados with light sides. A simple green salad or crusty bread complements the dish well. You could also serve a glass of chilled white wine. It enhances the meal without overpowering the flavors. Enjoy this fresh and vibrant dish with friends or family. For the full recipe, check out Caprese Stuffed Avocados Delight. {{image_4}} You can easily change the flavors of your Caprese stuffed avocados. Try using different cheeses like feta or goat cheese instead of mozzarella. These cheeses add a unique taste. Feta gives a salty zing, while goat cheese offers a creamy texture. You can also add protein to your dish. Grilled chicken or shrimp works well here. Simply chop the protein into small pieces and mix it with the tomatoes and cheese. This change makes the dish more filling and boosts its protein content. If you want a vegan version, simply skip the mozzarella. You can substitute it with avocado or a vegan cheese. This keeps the dish creamy and delicious without dairy. For those following a low-carb diet, this recipe is already a great choice. Just be mindful of the balsamic glaze, as it contains sugar. Consider using a sugar-free version or making your own. This way, you can enjoy the flavors without the carbs. For the full recipe, check out the detailed instructions above. To keep your Caprese stuffed avocados fresh, store them in the fridge. Place leftovers in an airtight container. This helps prevent moisture loss and keeps flavors intact. If you have extra filling, store it separately. This way, you can enjoy the dish without soggy avocados. Try to consume within a day for the best taste and texture. The freshness of your ingredients matters. Ripe avocados can last up to two days in the fridge once cut. Cherry tomatoes and mozzarella can stay fresh for about three days. Basil wilts quickly, so use it within a day or two after cutting. Balsamic glaze lasts longer, around a month in the fridge. Remember, using fresh ingredients ensures the best flavor in your Caprese stuffed avocados. Enjoy the full recipe for more tips and insights! To keep avocados fresh, use lemon juice or lime juice. The acid slows browning. You can also cover the cut avocado tightly with plastic wrap. This limits air exposure and helps keep the green color. Store leftover halves in an airtight container to help maintain freshness. Remember, use the ripe avocados quickly for the best flavor. Yes, but store them carefully. Make the filling a few hours ahead. Keep it in the fridge until you’re ready to serve. Cut the avocados right before serving to keep them fresh. If you want to prep earlier, assemble them but leave out the balsamic glaze. Drizzle it on just before serving for a tasty touch. Caprese stuffed avocados pair well with many sides. Try serving them with a simple green salad. A light pasta dish also complements the flavors. For drinks, a crisp white wine or sparkling water works great. You can even add some crusty bread to soak up the glaze. Enjoy these combinations for a complete meal! Caprese stuffed avocados are a fresh and tasty dish. We covered the main ingredients like ripe avocados, cherry tomatoes, and mozzarella. I provided step-by-step instructions and helpful tips to make your dish shine. You can customize your recipe with different cheeses or proteins. Remember to store any leftovers properly. With these ideas, you can make a delicious meal that impresses. Enjoy creating this simple yet tasty dish that fits any occasion!

Caprese Stuffed Avocados Fresh and Flavorful Delight

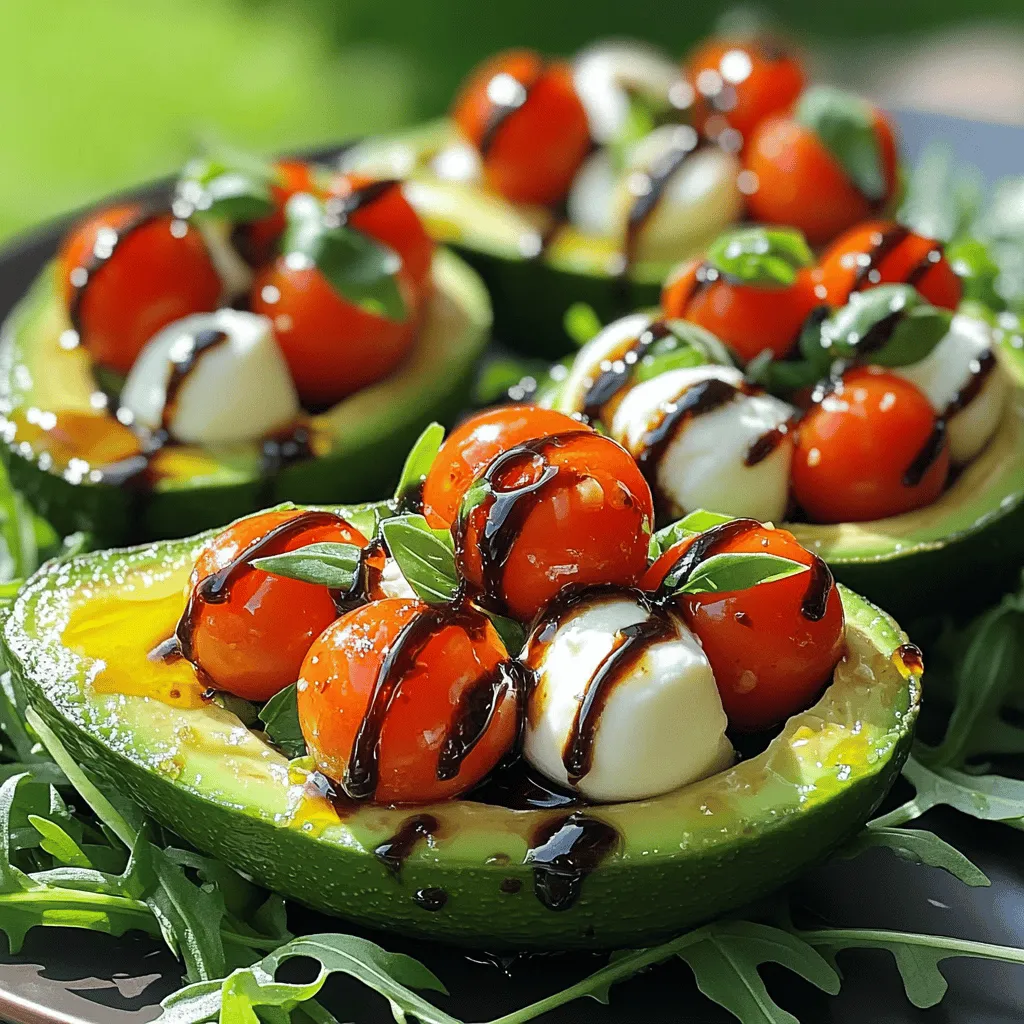
Are you ready to enjoy a fresh and vibrant twist on a classic dish? Caprese stuffed avocados combine creamy avocados

- 1 bunch of fresh asparagus, woody ends trimmed - Zest of 1 large lemon - 3 garlic cloves, finely minced - 3 tablespoons extra-virgin olive oil - Sea salt and freshly cracked black pepper, to taste - 1 teaspoon red pepper flakes (optional for a kick) - Fresh parsley, finely chopped, for a vibrant garnish - 2 tablespoons freshly squeezed lemon juice Fresh asparagus is the star of this dish. Look for bright green, firm stalks. Trim the woody ends to keep the texture tender. Zesting a lemon adds a bright note. The zest releases oils that enhance the flavor. Minced garlic brings depth, giving a warm, savory touch. Use good quality olive oil. It adds richness and helps the flavors meld. Seasoning is key, so use sea salt and fresh pepper to taste. If you want a bit of heat, red pepper flakes are a fun option. They add a little kick without overwhelming the dish. Lastly, fresh parsley is perfect for garnish. It adds color and freshness. Squeezing lemon juice right before serving brightens the dish even more. This combination of flavors makes lemon garlic roasted asparagus a must-try side dish. For the complete cooking steps, check the Full Recipe. - Preheat the oven to 425°F (220°C) - Trim the woody ends of the asparagus To start, I always preheat my oven to 425°F (220°C). This high heat helps the asparagus roast well, leading to that nice crisp. Next, I trim the woody ends. You want to cut off about an inch from the bottom. This part is tough and not tasty. Just hold the asparagus and bend it gently. It will break where it's tender. - In a mixing bowl, combine asparagus, olive oil, garlic, lemon zest, lemon juice, salt, and pepper - Toss until asparagus is thoroughly coated Now, grab a large mixing bowl. Add the fresh asparagus. Pour in three tablespoons of extra-virgin olive oil. Then, add three minced garlic cloves, the zest of one lemon, and two tablespoons of lemon juice. Sprinkle in sea salt and black pepper to taste. If you like a kick, add a teaspoon of red pepper flakes. Gently toss everything together until the asparagus is well-coated. This mixture is what makes the asparagus so flavorful. - Line a baking sheet with parchment paper - Arrange the asparagus in a single layer and roast for 12-15 minutes Next, I line a baking sheet with parchment paper. This makes for easy cleanup. Then, I spread the asparagus out in a single layer. This helps them roast evenly. I pop the baking sheet into the oven and roast for 12 to 15 minutes. You'll know they are done when they are tender and golden brown. For a full recipe, check out the Full Recipe section. Enjoy the wonderful smell filling your kitchen! To roast asparagus well, make sure to preheat your oven. Set it to 425°F (220°C). This heat helps the asparagus become tender and golden. If your asparagus is thick, adjust the cooking time. Thicker stalks need more time, about 15-18 minutes. Thin stalks will need only 10-12 minutes. Keep an eye on them as they cook. For a spicy kick, add red pepper flakes. This simple twist makes the dish exciting. You can also try different herbs like thyme or dill. Each herb brings its own unique taste and character. Garnish your asparagus with fresh parsley. This brightens the dish and adds color. For an extra touch, serve lemon wedges on the side. This allows everyone to squeeze more lemon juice for added flavor. It looks great and tastes even better! {{image_4}} You can change the flavor of your lemon garlic roasted asparagus with simple swaps. - Garlic Powder or Shallots: If you don’t have fresh garlic, use garlic powder. It gives a good taste. Shallots add a sweet, mild flavor. - Cheese Toppings: Try adding grated parmesan or feta cheese before roasting. This gives a rich, creamy flavor to the dish. Mixing different veggies can create a fun twist. - Cherry Tomatoes or Bell Peppers: Toss in some halved cherry tomatoes or sliced bell peppers with your asparagus. They cook well together and add color. - Different Green Veggies: You can also mix asparagus with green beans or broccoli. These pair nicely and add a variety of textures. You don’t have to stick to roasting. There are other easy ways to cook asparagus. - Grilling or Sautéing: Grilling gives a smoky flavor, while sautéing keeps it crisp. Both methods work well with garlic and lemon. - Air Fryer: For a quick option, use an air fryer. It cooks the asparagus fast and keeps it tender without much oil. For more details, check out the Full Recipe for Zesty Garlic Lemon Roasted Asparagus 🧄. To keep your roasted asparagus fresh, place it in the fridge. Use an airtight container to seal in flavor. If you don't have one, wrap it tightly in plastic wrap. This helps keep moisture in and prevents drying out. When you reheat asparagus, you want to keep it crispy. The best way is to use the oven. Preheat it to 350°F (175°C). Place the asparagus on a baking sheet for about 5-7 minutes. Check often to avoid overcooking. Microwaving works too, but it can make the asparagus soggy. If you use the microwave, heat it in short bursts, around 30 seconds. Freezing roasted asparagus is easy but requires care. First, let it cool completely. Then, place it in a freezer-safe bag. Make sure to remove as much air as possible to prevent freezer burn. When you're ready to use it, thaw overnight in the fridge. Thawed asparagus works well in soups or stir-fries but may not hold up well in salads. For the best results, enjoy it fresh or reheated. You can find the Full Recipe for Zesty Garlic Lemon Roasted Asparagus in the article. You can tell when the asparagus is done by looking for a few signs. First, the color will change to a bright green. Next, the tips should be slightly crispy. Finally, the stalks will feel tender when you poke them with a fork. This usually takes about 12 to 15 minutes at 425°F (220°C). Keep an eye on them to avoid overcooking. Yes, you can make Lemon Garlic Roasted Asparagus ahead of time. Roast the asparagus and let it cool. Store it in an airtight container in the fridge for up to three days. When ready to eat, simply reheat it in the oven at 350°F (175°C) for about 5-10 minutes. This will help keep the asparagus crispy and tasty. Lemon Garlic Roasted Asparagus goes well with many dishes. Here are some great options: - Grilled chicken or fish - Quinoa salad - Garlic mashed potatoes - Couscous with herbs - A fresh green salad These pairings balance flavors and textures, creating a delicious meal. You can access the Full Recipe for Zesty Garlic Lemon Roasted Asparagus 🧄 online. This recipe will guide you through each step to make this tasty side dish. Enjoy! In this blog post, I shared a recipe for Lemon Garlic Roasted Asparagus. You learned how to prepare fresh asparagus, mix in simple ingredients, and roast them to perfection. I also provided tips and variations to customize your dish. Asparagus is not only delicious but also easy to make. Enjoy your tasty creation, whether as a side dish or a meal. Remember, cooking is fun, so feel free to experiment and make this recipe your own.

Lemon Garlic Roasted Asparagus Flavorful Side Dish

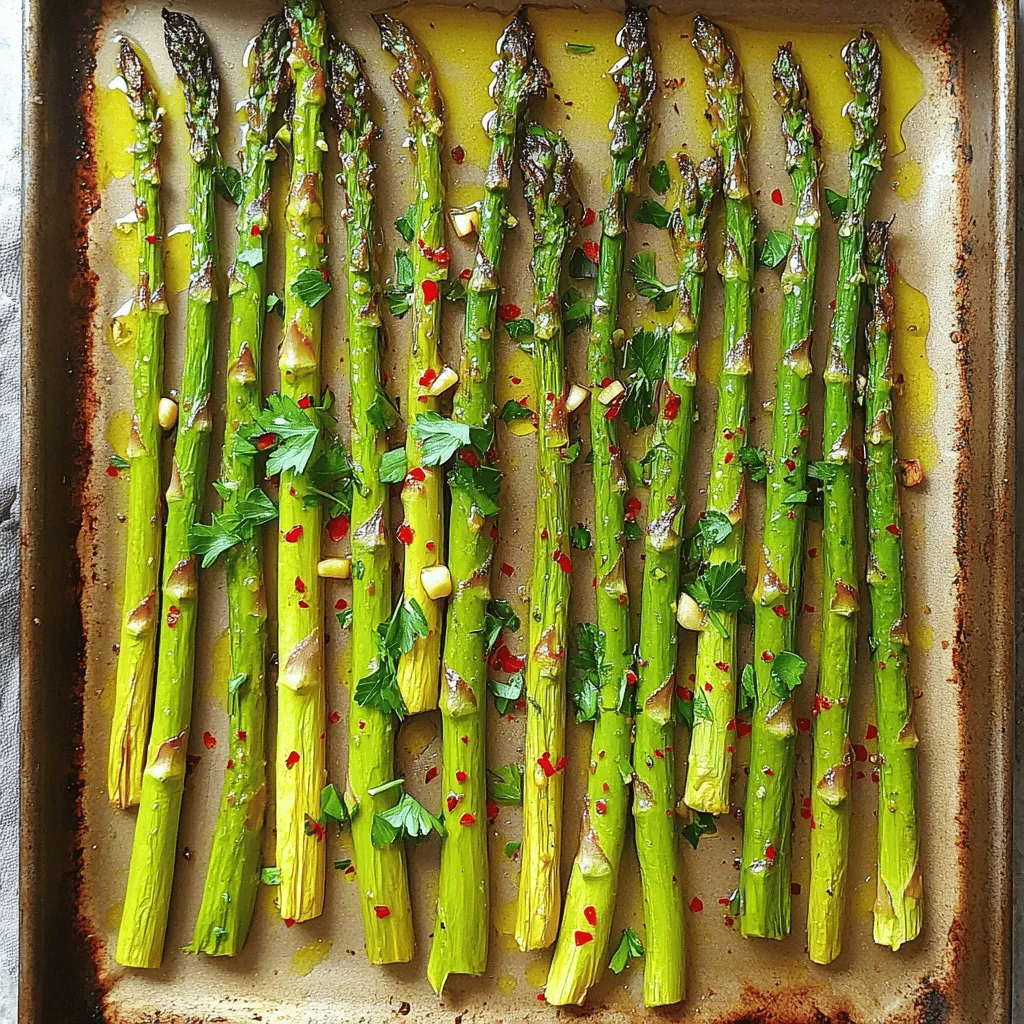
Looking for a tasty side dish that’s simple and healthy? Let me introduce you to Lemon Garlic Roasted Asparagus! This

To make pumpkin spice overnight oats, you need the following ingredients: - 1 cup rolled oats - 1 cup almond milk (or any milk of your choice) - 1/2 cup canned pumpkin puree - 1 tablespoon maple syrup - 1 teaspoon pumpkin spice blend - 1/4 teaspoon vanilla extract - 1 tablespoon chia seeds - A pinch of salt - Optional toppings: Chopped pecans, sliced banana, or coconut flakes Each ingredient plays a key role in the flavor and texture of the oats. The rolled oats form the base. Almond milk adds creaminess. Canned pumpkin gives a rich flavor and color. Maple syrup sweetens the dish. The pumpkin spice blend brings warmth with its mix of spices. Vanilla extract adds depth. Chia seeds help thicken the oats. A pinch of salt balances the sweetness. You can adjust this recipe to your taste. Add chopped pecans for crunch or sliced banana for sweetness. Coconut flakes can give a tropical twist. You can also try different sweeteners like honey or agave syrup. Feel free to experiment with spices too. Try adding a dash of cinnamon or nutmeg for extra flavor. Just remember, the key is to have fun and make it your own! For the full recipe, check out the complete details above. To start, grab a medium-sized mixing bowl. Add 1 cup of rolled oats to the bowl. Then, pour in 1 cup of almond milk. You can use any milk you like. Next, add 1/2 cup of canned pumpkin puree. This gives our oats a creamy texture and rich flavor. Add 1 tablespoon of maple syrup for sweetness. Adjust the amount if you prefer it sweeter. Now, sprinkle in 1 teaspoon of pumpkin spice blend or a mix of cinnamon, nutmeg, and ginger. It adds that cozy, fall flavor we love. Lastly, put in 1/4 teaspoon of vanilla extract, 1 tablespoon of chia seeds, and a pinch of salt. Now, it’s time to mix. Use a whisk or spoon to stir all the ingredients together. Make sure everything combines well, with no clumps of oats or pumpkin. You want a smooth mixture. Once it looks good, carefully pour it into an airtight container. If you like, you can divide it into individual jars for easy serving later. Seal the container tightly. Place it in the refrigerator. Let the oats soak and absorb all the flavors for at least 4 hours. For the best taste, leave them overnight. In the morning, take the oats out and give them a good stir. If the mixture seems too thick, add a splash of almond milk to loosen it up. Enjoy your pumpkin spice overnight oats straight from the jar or in a cozy bowl. For the full recipe, check above. To make perfect overnight oats, choose good-quality rolled oats. They absorb liquid well and give a nice texture. Use a 1:1 ratio of oats to liquid. This keeps your oats creamy without being too runny. If your oats are too thick in the morning, just stir in more milk. Letting them sit overnight helps them soak up all the flavors. You can change the flavor of your oats easily. Instead of pumpkin spice, try cocoa powder for a chocolate twist. You can also add fresh fruit like mashed bananas or berries. For a nutty touch, use almond or peanut butter. Mix in some honey or agave syrup if you want extra sweetness. Toppings add fun and crunch to your oats. Chopped pecans give a nice nutty flavor. You could also add sliced bananas for a sweet touch. Coconut flakes add a tropical vibe. For some crunch, sprinkle granola on top. Get creative with your toppings to make each serving unique. You can explore more ideas in the Full Recipe. {{image_4}} If you want to skip dairy, use almond milk or oat milk. These options are creamy and tasty. You can also try coconut milk for a rich flavor. All these choices work well with pumpkin spice. They keep your oats smooth and add a nice twist. You can mix up the pumpkin spice in your oats. If you can’t find pumpkin spice, use cinnamon, nutmeg, and ginger. This blend gives a warm taste. You can also add cardamom for a unique flavor. Experimenting with these spices can change the oats from good to great. Think about adding other flavors to your oats. Try apples or pears for a fall twist. You can also mix in maple syrup for a sweet touch. If you love chocolate, add cocoa powder for a rich treat. Seasonal fruits can brighten your dish and keep it fresh. Explore all these options to find your favorite flavor combo. To keep your pumpkin spice overnight oats fresh, use an airtight container. Glass jars work great. Make sure to seal them tightly. Store them in the fridge, where they can stay cool and tasty. If you want to make a larger batch, divide them into smaller portions for easy grab-and-go meals. Pumpkin spice overnight oats stay fresh in the fridge for up to five days. The flavors will deepen as they sit. Just remember that the oats can absorb moisture over time. If they get too thick, add a splash of almond milk to restore creaminess. Always give them a good stir before eating. You can enjoy these oats cold or warm. If you prefer them warm, transfer your oats to a microwave-safe bowl. Heat in 30-second intervals, stirring in between. This ensures even warming. If you find them too thick after heating, add a little more milk to get the right texture. Enjoy your tasty breakfast! To make pumpkin spice overnight oats, follow these simple steps: 1. Take rolled oats and mix them with almond milk in a bowl. 2. Add canned pumpkin puree, maple syrup, and pumpkin spice. 3. Stir in vanilla extract, chia seeds, and a pinch of salt. 4. Mix until everything blends well. 5. Pour the mixture into jars and seal them. 6. Refrigerate overnight for the best flavor. 7. In the morning, stir the oats and add extra milk if needed. 8. Top with chopped pecans, banana slices, or coconut flakes, and enjoy! Yes, you can use other types of oats. Quick oats will work in a pinch. They will soften faster, so your oats may be ready in less time. Steel-cut oats are less common but can be used. They need more soaking time to soften. Just remember, the texture will change slightly with different oats. If you don’t have pumpkin puree, try using mashed sweet potatoes or butternut squash. Applesauce is another option for a different flavor. These will change the taste a little but keep the recipe tasty. You can also use a store-bought pumpkin spice blend if you need to skip the pumpkin altogether. Yes, pumpkin spice overnight oats are healthy! They provide fiber from the oats and pumpkin. This helps keep you full. The chia seeds add healthy fats and protein. Almond milk keeps the dish dairy-free, and maple syrup adds natural sweetness. It’s a great breakfast choice that can fuel your day. You can find the full recipe above to get started! Pumpkin spice overnight oats are easy to make. They are creamy, flavorful, and filling. You blend oats, pumpkin, and spices. Then you let them sit overnight. This lets the flavors mix and the oats soften. You wake up to a tasty breakfast. It’s perfect for busy mornings. This recipe makes two servings. Each serving has around: - Calories: 280 - Protein: 8g - Carbohydrates: 45g - Fiber: 7g - Sugar: 8g - Fat: 6g The oats provide fiber, while pumpkin adds vitamins. Maple syrup gives a natural sweetness. Chia seeds add healthy fats and protein. This meal is balanced and good for you. Top your oats for extra flavor. I love adding chopped pecans for crunch. Sliced bananas bring a nice sweetness. Coconut flakes add a tropical twist. You can also enjoy them straight from the jar. They are perfect for a quick breakfast on-the-go. For more ideas, check out the Full Recipe. In this blog post, we explored how to make pumpkin spice overnight oats. We broke down the ingredients you need and offered tips for perfecting the dish. Customization options let you tailor your oats to your taste. Remember, storing them correctly keeps them fresh longer. With various flavors and toppings to try, these oats can fit any season. Enjoy making this easy, healthy breakfast. Your mornings just got tastier!

Pumpkin Spice Overnight Oats Simple and Tasty Recipe

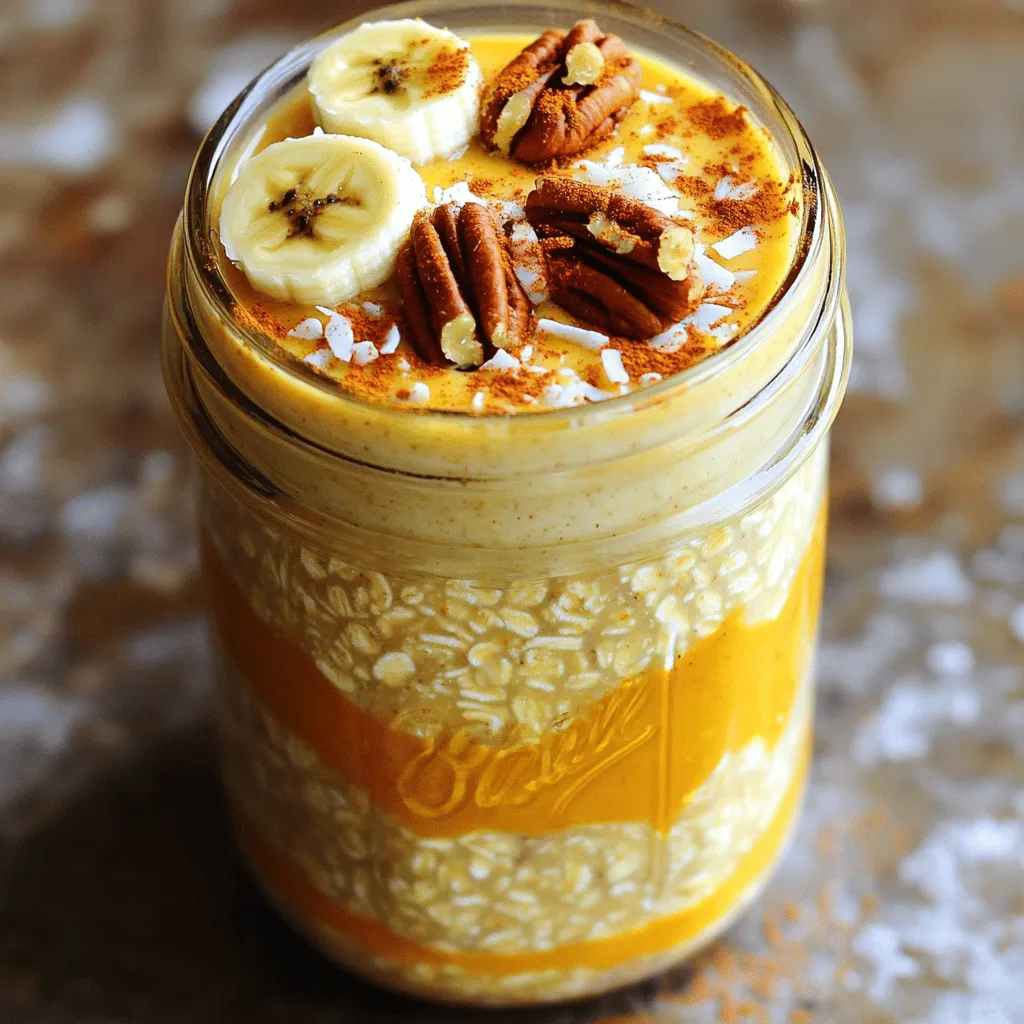
Are you ready to awaken your mornings with a delicious treat? Pumpkin Spice Overnight Oats are a simple and tasty

To make zucchini noodles with pesto, start with these main ingredients: - 3 medium zucchinis These zucchinis are the star of the dish. They give a fresh taste and a nice texture. You can spiralize them to make fun noodle shapes. Next, you will need these key ingredients for the pesto: - 1 cup fresh basil leaves - 1/4 cup toasted pine nuts - 1/2 cup finely grated Parmesan cheese - 2 cloves garlic, minced - 1/3 cup extra virgin olive oil - Salt and freshly cracked pepper to taste These items combine to create a rich and flavorful sauce. The basil adds a bright note, while the garlic gives depth. The pine nuts and cheese add creaminess and richness. To make the dish even better, consider these optional garnishes: - 1 cup cherry tomatoes, halved (for garnish) - Extra toasted pine nuts and fresh basil leaves (for garnish) These garnishes add color and a burst of flavor. The tomatoes bring a sweet touch, while the extra basil and nuts enhance the overall taste. You can find the full recipe to guide you through the steps easily. To make the pesto, you need a food processor. Start by adding fresh basil leaves, toasted pine nuts, finely grated Parmesan cheese, and minced garlic into the bowl. Pulse the mix until it is finely chopped. Next, keep the processor running and slowly drizzle in the extra virgin olive oil. Blend until the mixture is smooth and creamy. Taste your pesto and add salt and freshly cracked pepper to your liking. Set this flavorful sauce aside for later. Now, let’s turn our zucchinis into noodles! You can use a spiralizer, a vegetable peeler, or a julienne peeler. If you use a spiralizer, aim for long strands that look like pasta. Make sure to create enough noodles for your meal. Zucchini noodles are light and healthy, making a great base for our pesto. Heat a drizzle of olive oil in a large skillet over medium heat. Once hot, add your zucchini noodles and sauté them for about 2-3 minutes. You want them to soften just a bit but still stay firm. Be careful not to overcook them, as they can become mushy. When your zucchini noodles are ready, take the skillet off the heat. Toss in your freshly made pesto and mix until every strand is coated. For serving, plate your zucchini noodles right away. Top them with halved cherry tomatoes, extra toasted pine nuts, and fresh basil leaves for a lovely finish. This dish is bright and full of flavor, making it a perfect choice for any meal. For the full recipe, check out the complete details above. To spiralize zucchini, use a spiralizer, vegetable peeler, or julienne peeler. If you use a spiralizer, choose medium-sized zucchinis. They hold their shape well and create long noodles. Make sure to cut off the ends before spiralizing. This ensures even cuts and helps the zucchini fit into the machine. If you want shorter noodles, cut the strands into smaller pieces after spiralizing. Cooking zucchini noodles is quick. Sauté them for about 2-3 minutes over medium heat. This keeps them tender yet firm. If you cook them too long, they will become mushy. It’s best to keep them al dente, just like traditional pasta. After cooking, drain any excess moisture. This prevents a watery dish. To elevate your pesto, consider adding a squeeze of lemon juice. This brightens the flavors and adds freshness. You can also mix in some spinach or arugula for extra nutrients and taste. If you like a spicier kick, add a pinch of red pepper flakes. For a more earthy flavor, consider using walnuts instead of pine nuts. Each tweak adds a unique twist to your dish. Make sure to follow the Full Recipe for the best results! {{image_4}} You can easily add protein to your zucchini noodles. Chicken or shrimp works great. For chicken, grill or sauté it with some olive oil. Season with salt and pepper. Cut it into bite-sized pieces. Mix it into the zucchini noodles before serving. For shrimp, sauté it in a pan until pink and firm. Add it to the dish for a quick protein boost. Both options make the meal more filling and satisfying. If you want a vegan pesto, swap the cheese. Use nutritional yeast for a cheesy flavor. Blend it with the other pesto ingredients. You can also add some avocado for creaminess. This keeps the pesto rich and tasty without dairy. A hint of lemon juice can brighten the flavors. These swaps make it easy for everyone to enjoy this dish. To make your zucchini noodles even more colorful, add seasonal veggies. Bell peppers, spinach, or cherry tomatoes work well. Sauté them briefly with the zucchini noodles. This adds flavor and texture. You could also try roasted vegetables for more depth. Mix and match based on what’s fresh. This way, your dish stays exciting and full of life. For the complete recipe, check out the Full Recipe section. To keep leftover zucchini noodles fresh, place them in an airtight container. Add a paper towel inside to absorb extra moisture. This helps prevent sogginess. Store them in the fridge for up to two days. For longer storage, consider freezing them. However, be aware that freezing changes their texture. When ready to eat, thaw them in the fridge overnight. Store your leftover pesto sauce in a small jar or airtight container. Cover the top with a thin layer of olive oil. This oil helps keep the pesto fresh and bright. You can store it in the fridge for up to one week. For longer storage, freeze the pesto in ice cube trays. Once frozen, transfer the cubes to a freezer bag for easy use. When reheating zucchini noodles, do so gently. Use a skillet over low heat. Add a splash of olive oil to help revive their texture. Stir frequently until warmed through. Avoid high heat, as this can make the noodles mushy. If reheating pesto, warm it on low heat as well, stirring until just heated. This keeps the flavors intact while preventing separation. Using zucchini noodles has many benefits. They are low in carbs, which helps if you're watching your weight. Zucchini is high in fiber, making it good for your digestion. They also provide vitamins A and C, which are great for your skin. Additionally, zucchini noodles are quick to cook. This saves time in the kitchen, so you can enjoy your meal faster. Yes, you can use store-bought pesto. It saves time and still tastes good. However, making your own pesto gives you control over the flavors. You can adjust the garlic or cheese to your liking. If you choose store-bought, pick one with fresh ingredients. Look for options that do not have added preservatives. You can make zucchini noodles without a spiralizer using a vegetable peeler or a julienne peeler. Just slice the zucchini lengthwise into thin strips. This method takes a little longer but works well. You can also use a box grater to shred the zucchini into noodle-like shapes. The key is to keep the strands thin for the best texture. Zucchini noodles with pesto offer a tasty, healthy meal you can make at home. We explored the key ingredients for both the noodles and the pesto. I provided steps to make them and tips to enhance their taste. You can add proteins or seasonal veggies for variety, and I shared how to store leftovers safely. Remember, zucchini noodles are low in carbs and add great flavor. Enjoy creating this dish and feel good about what you eat!

Zucchini Noodles with Pesto Simple and Flavorful Dish

Zucchini noodles with pesto are a fun and healthy dish you can whip up! They taste amazing and are quick

When making coconut cream pie bars, you need to gather some simple yet key ingredients. Each one plays a vital role in creating that perfect pie flavor and texture. Here's what you will need: - 1 ½ cups graham cracker crumbs - ½ cup unsweetened shredded coconut - ½ cup unsalted butter, melted - 1 cup granulated sugar - ¼ cup cornstarch - ¼ teaspoon sea salt - 4 large egg yolks - 2 cups canned coconut milk - 1 teaspoon pure vanilla extract - 1 cup heavy whipping cream - 2 tablespoons powdered sugar - ½ cup toasted coconut flakes (for garnishing) Each ingredient adds a layer of flavor and texture. The graham cracker crumbs form a sweet, crunchy base. Shredded coconut gives a rich coconut taste. Butter brings it all together. Sugar sweetens the filling, while cornstarch thickens it perfectly. The egg yolks lend creaminess, and coconut milk boosts the coconut flavor. Whipping cream tops off the bars, making them light and airy. Finally, toasted coconut flakes add a crunchy finish. This combination creates a delicious dessert that everyone will love. For the full recipe, check out the link! To start, gather your ingredients. In a mixing bowl, combine: - 1 ½ cups graham cracker crumbs - ½ cup unsweetened shredded coconut - ½ cup unsalted butter, melted Mix until everything is well combined and crumbly. Next, press this mixture firmly into the bottom of a lined 9x9-inch baking pan. Make sure it’s evenly spread. Bake in a preheated oven at 350°F (175°C) for 10 minutes. Once golden, remove from the oven and let it cool completely. Now, let’s create the creamy filling. In a medium saucepan over medium heat, whisk together: - 1 cup granulated sugar - ¼ cup cornstarch - ¼ teaspoon sea salt Mix well until everything is blended. Gradually whisk in 2 cups of canned coconut milk. Stir constantly to avoid lumps. Cook until the mixture thickens and bubbles, which takes about 5-7 minutes. Next, it’s time to temper the egg yolks. In a separate bowl, beat 4 large egg yolks until smooth and pale. Slowly whisk in about ½ cup of the hot coconut mixture. This step is crucial to prevent the eggs from cooking. Once combined, pour this mixture back into the saucepan. Cook for another 2-3 minutes until it thickens and bubbles. Remove from heat, then stir in 1 teaspoon of pure vanilla extract. Pour the luscious coconut cream filling over the cooled crust. Use a spatula to spread it evenly across the surface. Allow the bars to cool at room temperature for about 30 minutes. After that, place them in the refrigerator to chill and set for at least 2 hours. While the bars chill, let’s whip the cream topping. In a clean mixing bowl, beat 1 cup of heavy whipping cream with 2 tablespoons of powdered sugar. Beat until soft peaks form. This creates a light and airy topping that pairs perfectly with the rich filling. Once the filling is set, spread the whipped cream evenly over the chilled coconut filling. For a nice touch, sprinkle ½ cup of toasted coconut flakes generously on top. Now, it’s time to cut into bars and enjoy. The tropical flavor in every bite makes these bars a delightful treat! - Ensuring proper tempering of the eggs: This step is key. To temper the egg yolks, beat them until smooth. Then, slowly add hot coconut mixture. This slow addition helps prevent cooking the eggs. If you rush this, you may end up with scrambled egg bits in your filling. - Achieving the right consistency for the filling: The filling should be thick and creamy. Cook it until bubbles form and it coats the back of a spoon. If it’s too thin, it won’t set properly. If it’s too thick, it will be hard to spread. - Techniques for perfect whipped cream: Use cold heavy whipping cream for the best results. Beat it until soft peaks form. If you overbeat, it can turn into butter. Add powdered sugar for sweetness and stability. - Suggestions for garnishing and serving: For a lovely touch, drizzle extra coconut milk on each bar. Add a dollop of whipped cream on top. Finish with a sprinkle of toasted coconut flakes for crunch. - Ideal serving temperature: These bars are best served chilled. Let them sit in the fridge for at least 2 hours before serving. This helps the filling set and makes them easy to cut. Enjoy the cool, creamy goodness with every bite! {{image_4}} You can easily tweak the flavor of your coconut cream pie bars. Adding chocolate or fruit can create new tastes. For a chocolate twist, mix in some cocoa powder or melted chocolate into the filling. This gives a rich, dark flavor that pairs well with coconut. If you prefer fruit, try adding fresh bananas or strawberries. Layer the fruit on top of the filling before adding the whipped cream. This gives a nice color and flavor contrast, making your bars even more appealing. You can also play with the crust. Instead of using graham cracker crumbs, try crushed vanilla wafers or even a nut-based crust. This change can give your bars a unique flair. For those with dietary needs, there are simple swaps. You can make a gluten-free crust by using almond flour or gluten-free graham cracker crumbs. This way, everyone can enjoy the bars without worry. If you want to make vegan coconut cream pie bars, replace the egg yolks with cornstarch or silken tofu. For the dairy, use coconut cream instead of heavy whipping cream. This keeps the creamy texture while making it plant-based. These adjustments make your dessert more inclusive, allowing everyone to enjoy this delicious treat. For the full recipe, check out the details provided above. Store your coconut cream pie bars in the refrigerator. Use an airtight container to keep them fresh. If you have leftovers, cover them with plastic wrap if you don't have a container. This helps prevent drying out. The bars stay good for up to five days. For the best taste, keep the whipped cream separate if possible. Add it just before serving. This keeps it fluffy and light. You can freeze these bars for a longer shelf life. Cut them into individual pieces. Wrap each piece tightly in plastic wrap. Then place them in a freezer-safe bag. They can stay frozen for up to three months. To defrost, place them in the fridge overnight. If you’re in a hurry, you can leave them out at room temperature for about an hour. Enjoy your coconut cream pie bars at their best! For the full recipe, check the earlier section. Can these bars be made ahead of time? Yes, you can make these bars a day ahead. They taste even better after chilling overnight. Prepare the crust and filling the day before. Just add the whipped cream and toasted coconut before serving. How do you know when the filling is set? The filling sets when it is thick and bubbly. It will coat the back of a spoon. After cooling, it should be firm enough to slice easily. Are there any nut-free options for crust? Absolutely! Use graham cracker crumbs or vanilla wafer crumbs. Both options are tasty and nut-free. Just make sure to check the label to confirm. What can I substitute for coconut milk? You can use almond milk or oat milk if you want non-coconut options. For a richer flavor, try whole milk or cream. Keep in mind, the coconut flavor will change. How long do the bars last in the fridge? These bars last up to five days in the fridge. Store them in an airtight container to keep them fresh and tasty. Enjoy them chilled for the best flavor! These Coconut Cream Pie Bars combine a crunchy crust with a creamy filling. You learned to mix simple ingredients and follow easy steps to create a delicious treat. Remember to pay attention to the egg tempering and whip your cream right for the best taste. With tips for variations and storage, you can enjoy these bars your way. I hope you feel inspired to try this recipe and share it with friends! Enjoy your baking adventure.

Coconut Cream Pie Bars Irresistible Dessert Delight

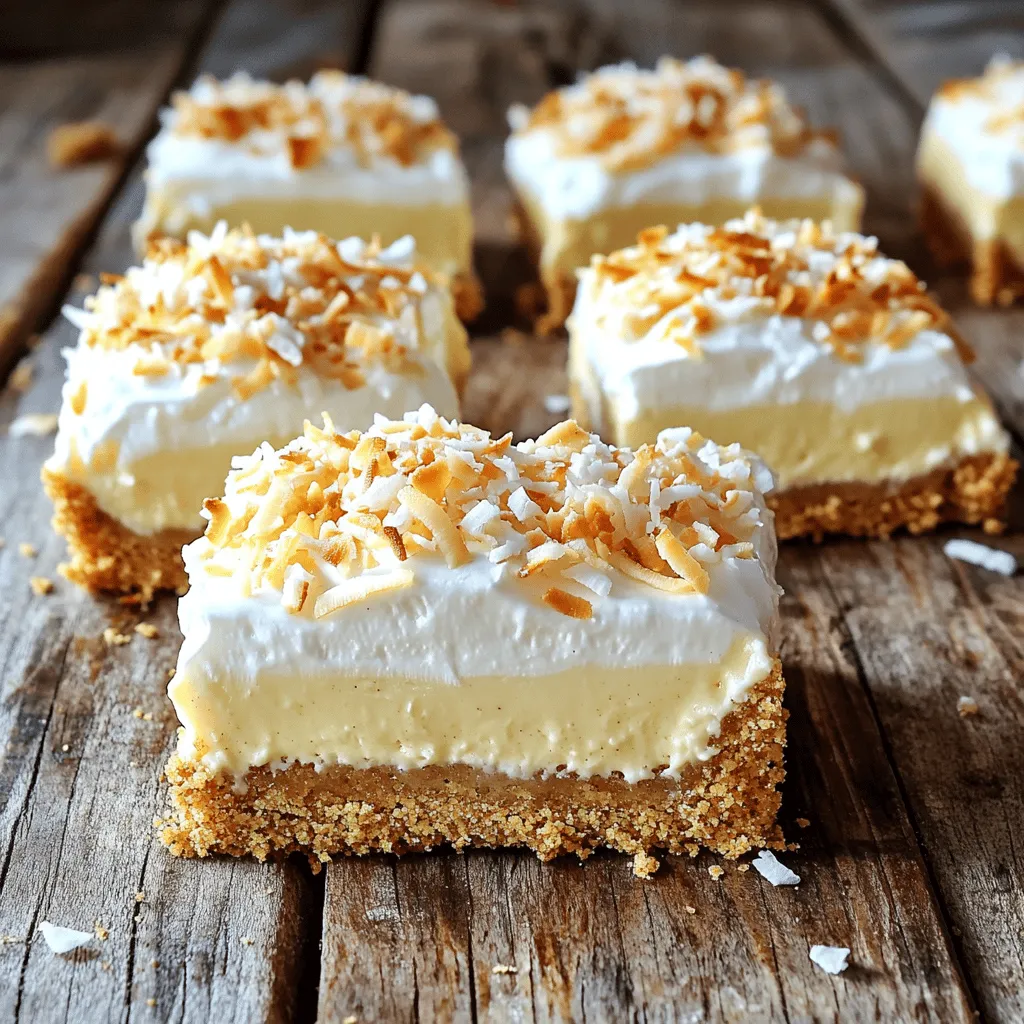
Are you ready to indulge in a luscious dessert that takes coconut cream pie to a whole new level? These

Here are the ingredients you need for this fun treat: - Apples: 3 medium (suggest using Granny Smith or Honeycrisp) - Granola: 1 cup (choose your favorite flavor) - Caramel Sauce: 1/2 cup (store-bought or homemade) - Mini Chocolate Chips: 1/4 cup (semi-sweet or dark) - Chopped Nuts: 1/4 cup (pecans, walnuts, or almonds) - Ground Cinnamon: 1/2 teaspoon - Whipped Cream: optional - Extra Caramel Sauce: for garnishing When picking apples, I recommend using Granny Smith for a tangy bite or Honeycrisp for sweetness. You can mix and match granola flavors to suit your taste. Whether you buy caramel sauce or make your own, it will add that essential gooey goodness. Don't forget the mini chocolate chips and nuts for crunch! The ground cinnamon adds warmth, while whipped cream can elevate your nachos even more. You can find the full recipe to guide you through the steps. - Step 1: Wash and slice the apples. Start by rinsing the apples under cold running water. This step ensures your apples are clean and ready to eat. Next, cut the apples into thin wedges. Make sure to remove the core. You want just the juicy flesh for this treat. - Step 2: Arrange apple slices on a serving platter. Take your beautifully sliced apples and lay them out on a large platter. A wooden board also works great. Aim for a single layer, so every slice is visible and ready to shine. - Step 3: Sprinkle cinnamon over apples. Lightly dust the apple slices with ground cinnamon. This spice adds a warm flavor that pairs well with the apples. It's a simple touch that makes a big difference. - Step 4: Add granola over the apples. Grab your favorite granola and sprinkle it evenly over the apple slices. This adds crunch and a lovely texture that contrasts with the soft apples. - Step 5: Drizzle caramel sauce. Generously drizzle caramel sauce over the apples and granola. You want the gooey sweetness to cover as much as possible. This is the star of your nachos! - Step 6: Scatter chocolate chips and nuts. Toss mini chocolate chips and chopped nuts over the top. This adds rich flavor and a delightful crunch. Choose nuts like pecans or almonds for the best results. - Step 7: Top with whipped cream (optional). If you want an extra touch, add a dollop of whipped cream right in the center. This creamy layer makes the nachos even more indulgent. - Step 8: Drizzle additional caramel sauce. Finish by drizzling more caramel sauce over the top. This not only enhances the flavor but also makes your dish look stunning. Enjoy your Caramel Apple Nachos right away! Each bite will be a wonderful mix of flavors and textures. For the full recipe, check back to ensure you don’t miss any details. - Use a wooden board for a rustic look. - Arrange apple slices in an attractive pattern. For a stunning display, I like to use a wooden board. It gives a warm, welcoming feel to your caramel apple nachos. Make sure to slice the apples thinly. This makes them easier to grab and eat. When you lay them out, try to create a fan shape or a spiral. This draws the eyes and makes the dish look more inviting. - Experiment with different nuts or granola flavors. - Substitute apples with pears for variety. You can easily switch up flavors in this recipe. Try using different nuts like walnuts or almonds. Each nut brings its own taste and crunch. If you want to change the fruit, pears work great too. Their sweetness pairs well with the caramel sauce. You can even mix and match granola flavors. This adds layers of taste and makes each bite unique. - Serve with vanilla ice cream or yogurt. - Pair with a light dessert wine. Caramel apple nachos shine even brighter when served with a side. A scoop of vanilla ice cream balances the sweetness of the nachos. Yogurt adds a nice tang, which cuts through the rich flavors. If you enjoy wine, a light dessert wine matches perfectly. It enhances the flavors without overpowering them. {{image_4}} Caramel apple nachos are great to customize. You can change them for the season, diet, or taste. Here are some fun ideas for making your nachos even better. - Fall: Add pumpkin spice for a seasonal twist. It gives a warm flavor that fits perfectly with the apples. - Summer: Incorporate berries for a fresh touch. Strawberries or blueberries add color and sweetness. - Gluten-Free: Use gluten-free granola. This keeps the crunch while making it safe for those with gluten issues. - Vegan: Opt for dairy-free caramel sauce. This way, everyone can enjoy the treat, no matter their diet. - Swap chocolate chips for dried fruits. Raisins or cranberries add a chewy texture. - Add coconut flakes or crushed Oreos. This brings a new taste and makes it more fun to eat. Feel free to mix and match these ideas from the Full Recipe. Enjoy creating your perfect caramel apple nachos! Store leftover nachos in the fridge. Place them in an airtight container. This keeps them fresh for up to two days. The cool air will slow down spoilage. If you have extra toppings, keep those separate. To keep toppings fresh, store granola, nuts, and fruits apart. Granola can get soggy if left on the apples. Nuts lose crunch when exposed to moisture. Keep chopped fruits sealed tight to avoid browning. Use small containers for easy access. When ready to serve again, refresh nachos in the oven. Preheat to 350°F (about 175°C). Place nachos on a baking sheet for about five minutes. This warms them up and keeps the apples crisp. Drizzle fresh caramel sauce on top for a treat! Yes, you can make the base of your nachos ahead of time. Slice the apples and sprinkle them with lemon juice to stop browning. Store the apples in an airtight container in the fridge. You can prepare the granola, nuts, and chocolate chips too. Just add the toppings right before serving. This keeps everything fresh and crunchy. For this recipe, tart apples like Granny Smith work well. They balance the sweet caramel. Sweet apples like Honeycrisp can also be used for a different taste. Tart apples give a nice crunch and contrast to the caramel flavor. Sweet apples make the dish even sweeter and softer. Making homemade caramel sauce is easy! You need just a few ingredients. Here’s a simple way: - Ingredients: - 1 cup granulated sugar - 6 tablespoons unsalted butter - 1/2 cup heavy cream - A pinch of salt Instructions: 1. In a medium saucepan, heat the sugar over medium heat. Stir it until it melts and turns golden brown. 2. Add the butter and stir until melted. 3. Slowly pour in the heavy cream while stirring. The mixture will bubble, so be careful! 4. Stir until smooth and add salt. Remove from heat and let it cool before using. This simple caramel sauce is perfect for drizzling on your Caramel Apple Nachos. Enjoy your delightful fall treat! For the complete recipe, check out the Full Recipe above. Caramel apple nachos are a fun and tasty treat. You saw the needed ingredients, step-by-step guide, and helpful tips. This dessert is easy to prepare and can be customized for any season or diet. Don't forget to try different toppings and pair it with ice cream or yogurt. With these ideas, you can make your nachos unique and fun. Enjoy creating your version of this sweet treat.

Caramel Apple Nachos Delightful Fall Treat Recipe

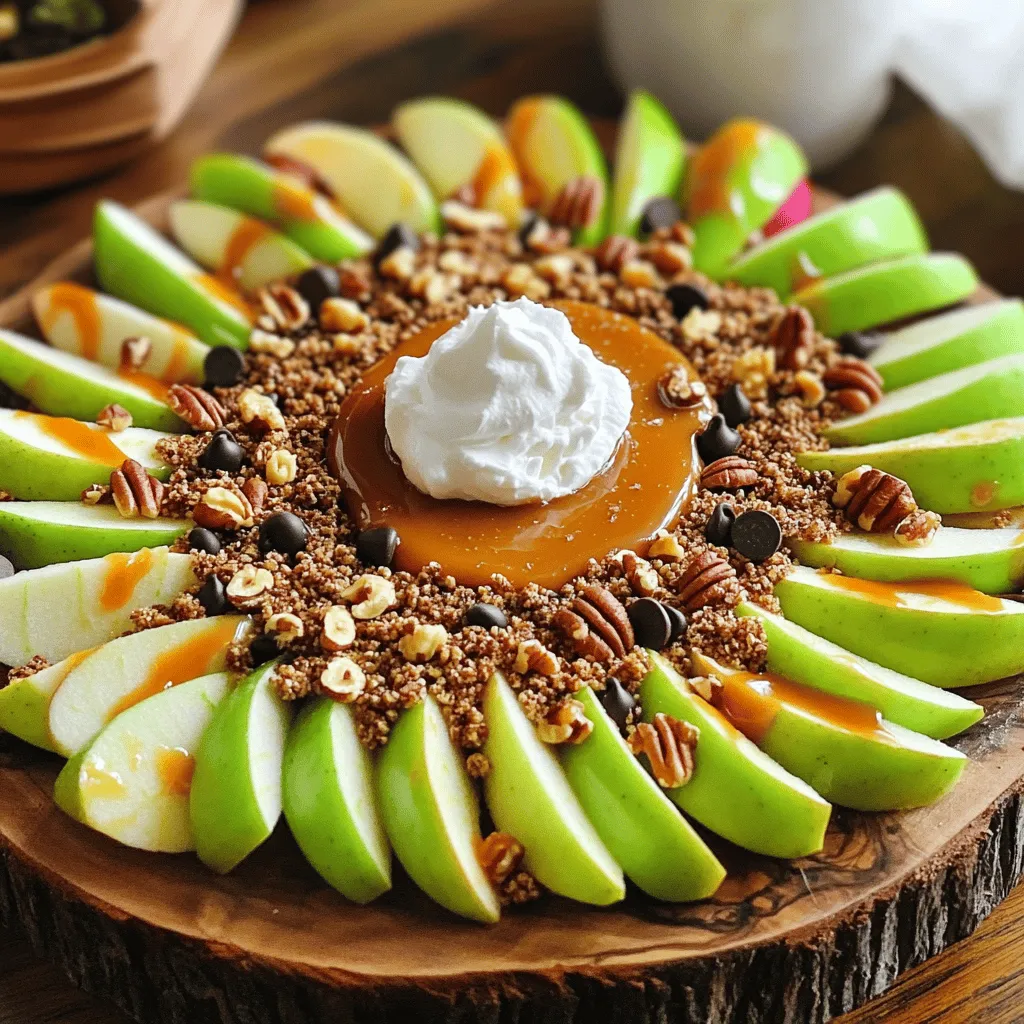
Fall is here, and what better way to celebrate than with Caramel Apple Nachos? This sweet treat combines crunchy apples,

- 3 ripe bananas, thoroughly mashed - 1/3 cup melted coconut oil - 1/2 cup packed brown sugar - 1 large egg, beaten until frothy - 1 teaspoon pure vanilla extract These main ingredients make your banana bread moist and sweet. Ripe bananas add natural sugars and flavor. Coconut oil keeps it rich and soft. Brown sugar gives depth to the taste. The egg binds everything together, while vanilla adds a lovely aroma. - 1/2 cup semi-sweet chocolate chips - 1/4 cup chopped walnuts or pecans - 1/2 teaspoon ground cinnamon Optional add-ins can enhance the flavor and texture. Chocolate chips bring extra sweetness and gooeyness. Nuts add a nice crunch. Ground cinnamon gives warmth and spice. Pick any or all of these to make your bread unique. - 9x5 inch loaf pan - Mixing bowls - Spatula You’ll need a few basic tools for this recipe. A 9x5 inch loaf pan helps shape your bread. Mixing bowls let you combine ingredients easily. A spatula is great for scraping and folding batter. With these tools, you're all set to bake! Start by preheating your oven to 350°F (175°C). This temperature helps the bread rise well and bake evenly. Next, grease a 9x5 inch loaf pan. You can use coconut oil or cooking spray. This step prevents the bread from sticking to the pan. In a large mixing bowl, mash three ripe bananas until smooth. The riper the bananas, the sweeter the bread will be. Add 1/3 cup of melted coconut oil to the bananas. Mix them well until you have a smooth mixture. Then, stir in 1/2 cup of packed brown sugar. Blend until the sugar dissolves fully. Next, add one large beaten egg and 1 teaspoon of pure vanilla extract. Mix until everything is creamy and well combined. Now, sprinkle 1 teaspoon of baking soda and a pinch of fine sea salt over the wet mixture. Stir well to ensure the baking soda spreads evenly. Gently fold in 1 cup of sifted all-purpose flour. Mix just until no dry flour is visible. Over-mixing can make your bread tough. Finally, carefully fold in 1/2 cup of semi-sweet chocolate chips. This is where the magic happens! For extra flavor, you can add 1/2 teaspoon of ground cinnamon or 1/4 cup of chopped nuts if you like. This will enhance both taste and texture in your banana bread. You can find the full recipe in this article. Enjoy the simple steps that lead to a delicious treat! To get the best texture in your banana bread, do not over-mix. Mixing too much makes the bread dense. Stir just until the dry flour disappears. This keeps the bread light and fluffy. The ripeness of your bananas matters too. Use bananas that are very ripe. They should have brown spots. Ripe bananas add natural sweetness and moisture to your bread. You can boost flavor with spices. A pinch of cinnamon adds warmth and richness. You can also try nutmeg for a deeper taste. These spices make your bread smell amazing while baking. Using good quality chocolate chips also enhances the flavor. Choose semi-sweet or dark chocolate. High-quality chocolate melts better and adds a rich taste to each slice. Check the doneness with a toothpick. Insert it into the center of the bread. If it comes out clean or with a few moist crumbs, it's ready. This quick test prevents overbaking. Let your banana bread cool in the pan for about 10 minutes. This helps it set and makes it easier to remove. After that, move it to a wire rack to cool completely. Cooling helps keep the bread moist. For the full recipe, refer to the [Full Recipe]. {{image_4}} You can easily make this banana bread nut-free. Try swapping chocolate chips for dried fruits like raisins or cranberries. This change adds sweetness and a chewy texture. You can also make it vegan-friendly. Replace the egg with a flaxseed meal or a chia seed mixture. Use plant-based yogurt or applesauce to keep moisture. Do you want to enhance the flavor? Adding peanut butter or almond butter gives a great nutty taste. It also makes the bread more filling. I like to experiment with different types of chocolate. Dark chocolate or white chocolate can change the whole vibe of your bread. Try mixing semi-sweet and milk chocolate for a fun twist. If you're looking for different flours, consider gluten-free options. Almond flour or coconut flour works well as substitutes. You can also try whole wheat flour for a healthier twist. It adds a hearty texture and a nutty flavor. Just remember, different flours may require some adjustments in liquid. Always check the Full Recipe for specific instructions. You can store leftover banana bread at room temperature. Keep it in a cool, dry place. Use an airtight container or wrap it in plastic wrap. This keeps it moist and fresh. If you live in a warm area, you might want to refrigerate it. However, the cold can change the texture. To properly freeze banana bread, wrap it tightly in plastic wrap. Use aluminum foil or a freezer bag for extra protection. Write the date on the outside to remember when you froze it. When you want to eat it, thaw the bread in the fridge overnight. You can also leave it out at room temperature for a few hours. Banana bread lasts about 3 to 5 days at room temperature. If you refrigerate it, it can last up to a week. For frozen banana bread, enjoy it within 3 months for the best taste. Watch for signs of spoilage, like a sour smell or mold. If it looks or smells off, it’s best to throw it away. For the full recipe, check out the Chocolate Chip Banana Bread Delight section above. To check if your banana bread is done, use a toothpick. Insert it into the center of the loaf. If it comes out clean or with a few moist crumbs, your bread is ready. The edges should pull away slightly from the pan. This step is key to baking success. You want that warm, soft texture inside! Yes, you can easily substitute ingredients. If you want to replace eggs, use 1/4 cup of applesauce or mashed banana. For oils, try unsweetened applesauce or yogurt. These swaps keep your banana bread moist and tasty. Just make sure to adjust the amounts based on what you use. Chocolate chip banana bread is great on its own. However, you can enhance it with a few simple sides. Try spreading butter or cream cheese on top. A drizzle of honey or maple syrup works well too. You can also serve it with a cup of coffee or tea for a cozy treat. For the best flavor, use very ripe bananas. Look for bananas with brown spots or mostly brown skin. These bananas are sweeter and more flavorful. Avoid green bananas, as they won't provide the same taste. Ripe bananas make your bread soft and moist. Yes, mini loaves are a fun option! Just adjust the baking time. Bake mini loaves for about 25 to 30 minutes. Check them with a toothpick to know when they are done. This way, everyone can enjoy their own little loaf of goodness! If you want the full recipe, check out the section above! In this blog post, we covered the key ingredients and steps for making delicious chocolate chip banana bread. We discussed using ripe bananas, coconut oil, and sugar, along with optional add-ins like nuts or spices. I shared tips for the perfect texture and flavor, along with storage options. Remember, fresh bananas and mindful mixing lead to the best results. Enjoy your baking adventure, and don’t hesitate to try new variations. With these tips, you’ll make a delightful treat that your friends and family will love.

Chocolate Chip Banana Bread Delicious and Easy Recipe

Are you ready to bake something truly delicious? My Chocolate Chip Banana Bread recipe is not only easy, but it’s

Older posts
Newer posts
← Previous Page1 … Page62 Page63 Page64 … Page86 Next →

dsad

© 2026 yumymoments • Built with GeneratePress

Our Policies

  • Copyright Policy
  • Cookie Policy
  • GDPR Policy
  • Privacy Policy
  • Disclaimer
  • Terms Of Use

More Information

  • Home
  • About
  • Contact
  • Appetizers
  • Dessert
  • Dinner
  • Drinks
©2026, yumymoments About Back To Top