Skip to content
DisclaimerTerms Of UseGDPR PolicyCookie Policy

yumymoments

  • Home
  • Drinks
  • Appetizers
  • Dinner
  • Dessert
  • About
  • Contact
  • Privacy Policy
DisclaimerTerms Of UseGDPR PolicyCookie Policy

NO-ING-IMG

- 1 pound large shrimp, peeled and deveined - 1 can (13.5 oz) coconut milk - 1 lime, zested and juiced - 2 tablespoons fish sauce - 2 tablespoons honey - 2 cloves garlic, finely minced - 1 teaspoon fresh ginger, finely grated - 1 small red chili, seeds removed and finely chopped (optional) - Fresh cilantro for garnish - Cooked jasmine rice for serving - Salt and pepper to taste For this coconut lime shrimp dish, you need fresh ingredients to get the best taste. The shrimp must be large and fresh. This makes them tender and juicy. The coconut milk adds creaminess and a rich flavor. Lime gives a zesty kick that brightens the dish. The fish sauce brings in a salty depth, while honey adds a touch of sweetness. Garlic and ginger give a warm, fragrant layer. If you like heat, consider adding red chili. It gives a nice balance to the flavors. When serving, fresh cilantro adds a pop of color and flavor. Jasmine rice is perfect to soak up the tasty sauce. Remember to season with salt and pepper according to your taste. This dish is not just simple; it is a delightful meal that impresses every time. For the full recipe, check out the details above. First, grab a medium mixing bowl. Whisk together the creamy coconut milk, fresh lime juice, and lime zest. This mix creates a rich and zesty base. Next, add fish sauce, honey, minced garlic, grated ginger, and chopped red chili. Stir well until everything blends nicely. You want a vibrant and aromatic marinade that will soak into our shrimp. Now, take your large shrimp and coat them with the marinade. Make sure each shrimp gets a good layer of that tasty mix. Let the shrimp sit for at least 15 minutes at room temperature. If you have more time, refrigerate them for up to 1 hour. This step deepens the flavor and makes each bite more delicious. Heat a skillet over medium heat. Once hot, add the marinated shrimp along with all the tasty marinade. Cook for about 3-5 minutes. You will see the shrimp turn pink and opaque. Be careful not to overcook them; they can become tough if left too long. Season with salt and pepper to your taste. Once done, sprinkle freshly chopped cilantro on top for a burst of color and flavor. For the full recipe, check out the details above. Enjoy each bite of this delightful dish! To make coconut lime shrimp, avoid overcooking. Cook shrimp just until they turn pink. This keeps them tender and juicy. Use a thermometer to check for doneness. Shrimp should hit 120°F. This method ensures perfect shrimp every time. Want more zing? Add extra lime juice. It brightens the dish and boosts flavor. You can also try a splash of coconut rum. This adds depth and a tropical twist. Experiment with flavors to find what you love most. Presentation matters. Serve coconut lime shrimp in shallow bowls. This makes it look elegant and inviting. Add lime wedges and extra cilantro on top. This not only adds color but also lets guests customize their meal. For the full recipe, check out the complete guide. {{image_4}} You can turn the coconut lime shrimp into tasty tacos. This gives a fun twist to the dish. Start by warming soft tortillas. Next, fill each tortilla with shrimp. Add a slice of avocado or a sprinkle of cabbage for crunch. Fresh cilantro adds a nice touch, too. You can also drizzle some lime juice on top. Suggested toppings for tacos: - Sliced avocado - Shredded cabbage - Fresh cilantro - Lime wedges - Crumbled feta cheese If you like heat, make the shrimp spicy. You can add more chopped chili or a dash of hot sauce. This adds a kick to the dish. Pair your spicy shrimp with sides that match, like spicy rice or jalapeño corn salad. This creates a balance of flavors. Pairing with spicy sides: - Spicy jasmine rice - Jalapeño corn salad - Hot slaw You can adapt the coconut lime shrimp for a veggie option. Use firm tofu or jackfruit instead of shrimp. Marinate them just like the shrimp for great flavor. Cook them until they’re golden and warm. Suggested ingredients for a vegetarian twist: - Firm tofu, cubed - Jackfruit, shredded - Zucchini slices - Bell peppers, sliced For the full recipe, check the earlier section. You can enjoy these variations while keeping the delicious coconut lime flavor. To store leftovers, let the coconut lime shrimp cool down. Place them in an airtight container. This keeps the shrimp fresh. You can store them in the fridge for up to 2 days. Make sure to label the container with the date. Recommended storage containers include glass or plastic with tight lids. They help keep the shrimp juicy and prevent any strong odors. Avoid using metal containers, as they can alter the flavor of the dish. Freezing the coconut lime shrimp is an option if you need to save them longer. First, cool the shrimp completely. Then, place them in a freezer-safe bag. Remove as much air as possible before sealing. This helps prevent freezer burn. You can freeze them for up to 3 months. When you are ready to use them, thaw the shrimp in the fridge overnight. This method keeps the flavor intact and ensures even thawing. For reheating, the best appliances are a skillet or microwave. If using a skillet, heat it on low. Add a splash of coconut milk to keep the shrimp moist. Stir gently until heated through. In the microwave, use a microwave-safe dish. Cover it loosely to allow steam to escape. Heat in short bursts of 30 seconds, stirring in between. This avoids overcooking. To avoid overcooking during reheating, always check the shrimp frequently. Cook until they are just heated through. Overcooked shrimp can become tough and chewy, losing their delightful texture. Yes, you can use frozen shrimp. Just remember to thaw them first. The best way is to place the shrimp in the fridge overnight. If you need them faster, put them in a bowl of cold water for about 20-30 minutes. Avoid using hot water, as it can cook the shrimp unevenly. If you don't have coconut milk, you have options. You can use heavy cream mixed with a bit of water. Another option is almond milk with a touch of coconut extract. Both will give you a creamy texture, but they will change the flavor a bit. Cooked shrimp will turn pink and opaque. You can also look for a slight curl in their shape. The internal temperature should reach 120°F. If you overcook them, they will become tough and rubbery, so keep an eye on them while cooking. Yes, you can prep this dish in advance. Marinate the shrimp and store them in the fridge for up to one hour. If you want to prepare it for later, cook the shrimp and store them in an airtight container in the fridge. Reheat gently to keep them tender. For more details, check out the Full Recipe. This blog post covered how to make a delicious coconut lime shrimp dish. We discussed key ingredients, like shrimp, coconut milk, and lime. I shared step-by-step instructions and offered tips for perfect cooking. You can easily adapt this recipe for tacos or vegetarian options. Don't forget the storage tips for your leftovers. Enjoy trying this recipe, and make it your own! Cooking can be fun and rewarding with the right guidance.

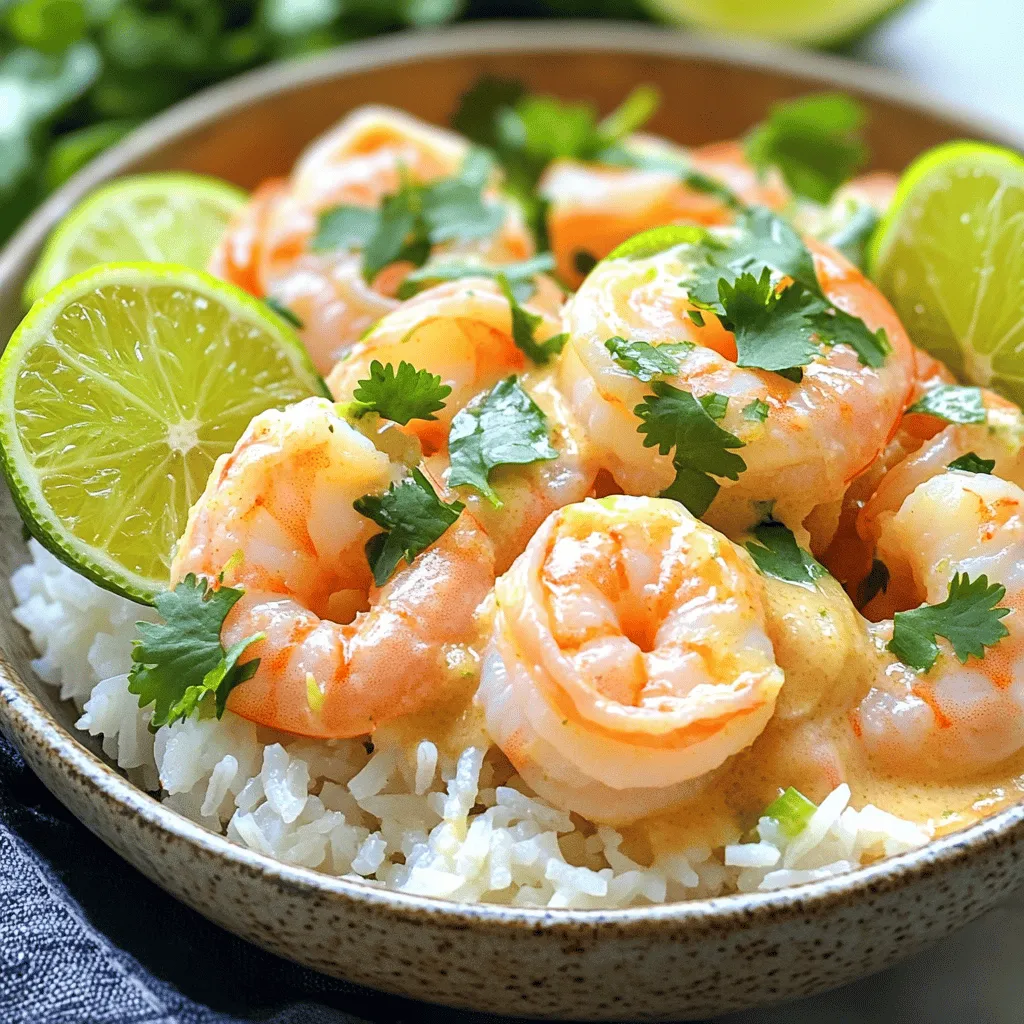
Coconut Lime Shrimp Delightful and Flavorful Meal

If you crave a meal bursting with flavor, you’ll love Coconut Lime Shrimp! This dish combines fresh shrimp with creamy

To make delicious Pumpkin Spice Overnight Oats, gather these simple ingredients: - 1 cup rolled oats - 1 cup almond milk (or any milk of your choice) - ½ cup canned pumpkin puree - 1 tablespoon chia seeds - 2 tablespoons maple syrup (or honey for sweetness) - 1 teaspoon pumpkin pie spice - ½ teaspoon vanilla extract - A pinch of salt - ¼ cup Greek yogurt (optional, for an extra creamy texture) - Crushed nuts or granola for topping (optional, for added crunch) Each ingredient plays a key role in making these oats tasty and nutritious. The rolled oats provide a hearty base, while the pumpkin puree adds a fun fall flavor. The chia seeds help thicken the mixture and boost fiber. Maple syrup or honey sweetens the oats just right. Pumpkin pie spice gives that warm, cozy taste we all love. If you want creaminess, Greek yogurt can be mixed in. Top it off with crushed nuts or granola for some crunch. This combination makes for a satisfying breakfast that you can enjoy all season long. For the full recipe, check out the instructions to create this delightful dish! To make pumpkin spice overnight oats, follow these simple steps. 1. Combine rolled oats and chia seeds: In a large mixing bowl, add 1 cup of rolled oats and 1 tablespoon of chia seeds. Stir them well. This mix will give your oats a nice texture. 2. Mix in pumpkin puree and sweeteners: Add ½ cup of canned pumpkin puree, 2 tablespoons of maple syrup (or honey), 1 teaspoon of pumpkin pie spice, ½ teaspoon of vanilla extract, and a pinch of salt to the bowl. Stir all the ingredients until they blend well. 3. Gradually add almond milk: Slowly pour in 1 cup of almond milk while stirring the mixture. This helps the oats soak up the milk fully. 4. Incorporate Greek yogurt (optional): If you want creamier oats, fold in ¼ cup of Greek yogurt now. This step adds a rich texture. 5. Divide into jars and refrigerate overnight: Spoon the mixture into two mason jars or airtight containers. Press down slightly to pack the oats. Seal the jars tightly and place them in the fridge. Let them chill overnight or for at least 4 hours. Now, you can wake up to a tasty fall breakfast! These pumpkin spice overnight oats are easy, quick, and full of flavor. Enjoy them straight from the jar or transfer to a bowl for extra toppings. For the full recipe, check out the details above. - Use fresh ingredients for optimal flavor. Fresh oats and spices enhance taste. - Stir the oats before serving to redistribute ingredients. This helps mix flavors evenly. - Adjust liquid for preferred consistency. Add more milk for thinner oats or less for thicker ones. - Serve in jars for a rustic look. Mason jars add charm and are easy to store. - Garnish with fresh fruit or extra yogurt. This adds color and richness to your dish. These tips will help you create the best pumpkin spice overnight oats. For the full recipe, check out the detailed instructions above. {{image_4}} You can make these oats even more fun! Try using coconut milk instead of almond milk. This small switch gives your oats a creamy and tropical taste. It’s like a mini vacation in a jar! You can also add dried fruits or nuts. They bring in a nice crunch and extra flavor. Think raisins, cranberries, or walnuts. Each bite will surprise your taste buds. Fall is the best time to play with flavors. Instead of pumpkin pie spice, try apple pie spice. It gives a warm and sweet taste that feels like home. You can also mix in seasonal fruits like apples or pears. They add freshness and sweetness. Slice them thin and layer them on top for a pretty look. These simple changes keep your breakfast exciting and tasty! To keep your pumpkin spice overnight oats fresh, use airtight containers. This helps lock in flavor and moisture. You can store them in the fridge for up to three days. This way, you can enjoy a tasty breakfast anytime. If you want to save some oats for later, consider freezing individual servings. This method allows for longer storage. Simply thaw them overnight in the refrigerator before serving. This keeps the texture nice and creamy when you're ready to eat. Pumpkin spice overnight oats last up to three days in the fridge. Store them in airtight containers. They stay fresh and tasty throughout this period. Just make sure to keep them sealed. Yes, you can easily make these oats vegan. Simply use plant-based milk like almond or oat milk. For the creamy texture, skip the Greek yogurt or use a vegan yogurt. Maple syrup is a great vegan sweetener too. Absolutely! If you prefer warm oats, heat them in the microwave. Start with 30 seconds, then stir. You can add a splash of milk to help them warm up nicely. Just be careful not to overheat them. Boost your oats with protein easily. Consider adding nuts like almonds or walnuts. You can also sprinkle seeds like chia or hemp on top. For an even bigger boost, mix in some protein powder. You learned how to make Pumpkin Spice Overnight Oats. The recipe uses simple ingredients and takes little time. I shared tips for creaminess and presentation to make your oats shine. You can change flavors with different spices or fruits. Store these oats easily and enjoy them fresh or frozen. Try this dish for breakfast or snacks. It's tasty, healthy, and fun to make. You will love how simple and fast it is. Enjoy your new recipe!

Pumpkin Spice Overnight Oats Tasty Fall Breakfast

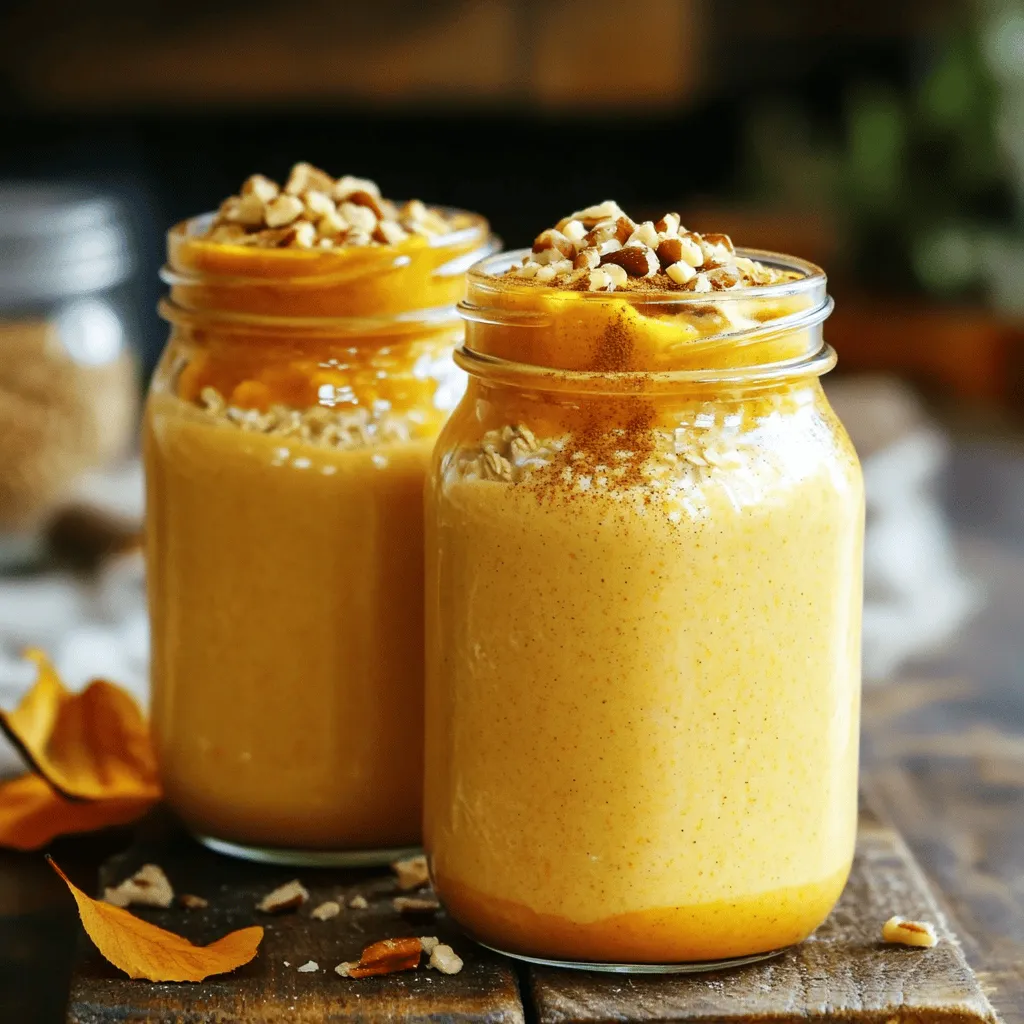
Fall is here, and that means it’s time for warm flavors like pumpkin spice! If you’re looking for a quick,

- 1 pound Brussels sprouts - 3 tablespoons balsamic vinegar - 2 tablespoons honey - 2 tablespoons extra virgin olive oil - 1 teaspoon garlic powder - Sea salt and freshly ground black pepper to taste - Fresh parsley, finely chopped - 1/4 cup freshly grated Parmesan cheese (optional) For this dish, I focus on fresh, high-quality ingredients. Choosing Brussels sprouts that are firm and bright green is key. Balsamic vinegar gives the dish a sweet and tangy depth of flavor. Honey balances the acidity, creating a rich glaze that clings to the sprouts. Extra virgin olive oil adds healthy fats and enhances the roasting process. Seasoning is just as crucial. Garlic powder gives a warm, savory note, while sea salt and black pepper bring out the natural sweetness of the sprouts. For garnish, fresh parsley adds color and a burst of freshness. If you enjoy cheese, Parmesan adds a creamy and salty finish, enriching this dish. This combination of ingredients makes Balsamic Glazed Brussels Sprouts a delightful and flavorful roasted dish. For the complete details on how to prepare it, refer to the Full Recipe. First, trim the ends of the Brussels sprouts. Remove any yellow or damaged leaves. Next, cut each sprout in half. This step helps them roast evenly. Now, preheat your oven to 400°F (200°C). A hot oven will give you that crispy texture we love. In a large bowl, toss the halved Brussels sprouts with olive oil. Add garlic powder, salt, and black pepper. Mix well to coat each sprout. This helps to enhance the flavor. Line a baking sheet with parchment paper. Spread the sprouts in a single layer to allow even roasting. Roast them for 20-25 minutes. Remember to stir halfway through for even cooking. You want them golden brown and tender. While the Brussels sprouts roast, prepare the balsamic glaze. In a small saucepan, combine balsamic vinegar and honey. Heat it over medium heat until it simmers. Stir it gently to mix. Cook for about 5-7 minutes. You want the glaze to thicken and become syrupy. This sweet and tangy sauce will coat your Brussels sprouts beautifully. For the full recipe, check the section above. For the best Brussels sprouts, roast them at 400°F (200°C). This high heat helps them get crispy. Roast them for 20-25 minutes. Stir them halfway through. This step ensures even cooking and adds to the crunch. Want to boost the flavor? Add spices like paprika or chili powder. Fresh herbs like thyme or rosemary also work well. If you like heat, sprinkle some red pepper flakes for a spicy kick. To make your dish shine, serve Brussels sprouts in a large bowl. Drizzle some extra balsamic glaze on top for a glossy finish. A sprinkle of Parmesan cheese adds a gourmet touch. Fresh parsley adds color and freshness, making your dish look even better. For the full recipe, check out the Balsamic Glazed Brussels Sprouts section above! {{image_4}} You can easily change the flavor of balsamic glazed Brussels sprouts. Adding fruit or nuts gives a nice crunch. Try adding sliced apples or pears for sweetness. Chopped walnuts or pecans can add a great texture. You can also explore different vinegars or sweeteners. Apple cider vinegar or red wine vinegar can give a new twist. Instead of honey, use maple syrup for a different flavor profile. If you want a vegan-friendly dish, skip the Parmesan cheese. The glaze itself is already plant-based. For gluten-free diets, this recipe is safe to enjoy. Just ensure your balsamic vinegar is gluten-free. You can easily make these adjustments to fit your needs. These variations keep the dish exciting and versatile. Check out the Full Recipe for more ideas! Store leftover balsamic glazed Brussels sprouts in an airtight container. This helps keep them fresh. Make sure to let them cool before sealing. You can store them in the fridge for up to three days. If you want to keep them longer, consider freezing them. Frozen Brussels sprouts can last for about two months. To reheat, I recommend using an oven. Preheat it to 350°F (175°C). Spread the sprouts on a baking sheet and heat for about 10-15 minutes. This method helps them stay crispy. You can also use a microwave if you’re short on time. Just heat them on a microwave-safe plate for about one to two minutes. To keep the flavor and texture, sprinkle a little olive oil before reheating. Enjoy your delicious leftovers! Yes, you can prep Brussels sprouts ahead of time. Trim and halve them, then store them in the fridge. Use an airtight container to keep them fresh. They will stay good for about 2 days. Just remember to toss them in olive oil and seasonings before roasting. Balsamic glazed Brussels sprouts pair well with many dishes. Here are some ideas: - Grilled chicken for a healthy protein. - Roasted salmon for a rich flavor. - Quinoa salad for a light meal. - Mashed potatoes for a comforting side. These sides balance the sweetness of the glaze nicely. Watch for a few signs to know when Brussels sprouts are done. - They should be golden brown and crispy on the outside. - A fork should easily pierce them. - The texture should be tender but not mushy. Roast them for 20-25 minutes for perfect results. For more tips, check the Full Recipe. Balsamic glazed Brussels sprouts are easy and delicious. We covered essential ingredients, seasoning, and the best roasting methods. Tips for taste and presentation will elevate your dish. You can also try fun flavor twists or make it diet-friendly. Store leftovers well and reheat to keep them tasty. With these steps, you can impress anyone at your next meal. Enjoy creating this tasty side dish!

Balsamic Glazed Brussels Sprouts Flavorful Roasted Dish

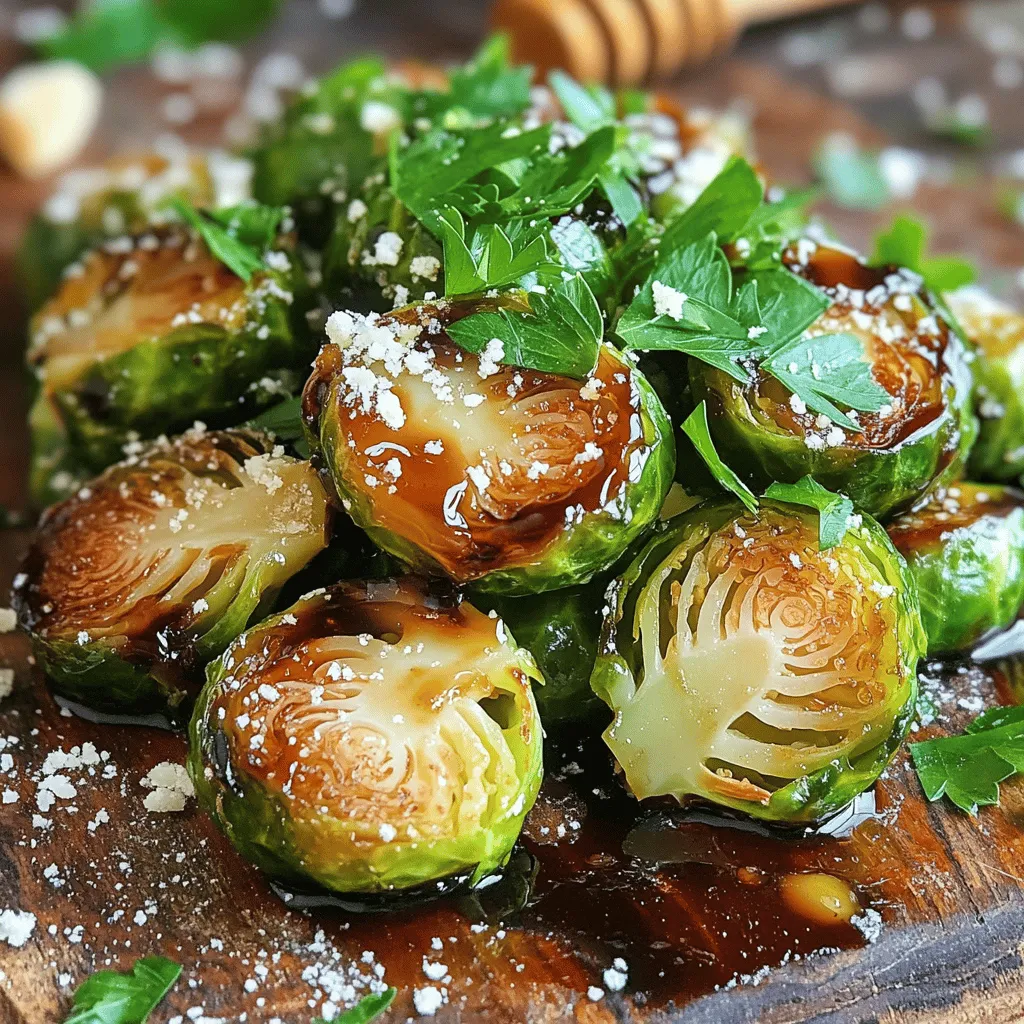
Are you ready to transform Brussels sprouts into a delicious side dish? My Balsamic Glazed Brussels Sprouts offer a sweet

- 2 lbs boneless, skinless chicken thighs, cut into bite-sized pieces - 1 large onion, finely chopped - 4 cloves garlic, minced - 1 tablespoon fresh ginger, grated - 1 can (14 oz) crushed tomatoes - 1 cup coconut milk - 2 tablespoons garam masala - 2 tablespoons curry powder - 1 teaspoon ground cumin - 1 teaspoon paprika - 1 teaspoon turmeric - 1 teaspoon chili powder (adjust according to your heat preference) - 1 tablespoon olive oil - Salt and pepper, to taste - Fresh cilantro, for garnish - Steamed basmati rice, for serving The star of this slow cooker chicken tikka masala is the chicken thighs. I always choose boneless, skinless thighs. They stay juicy and tender during cooking. The next key players are the aromatics: onions, garlic, and ginger. These add depth and warmth to the dish. For spices, I use garam masala, curry powder, cumin, paprika, turmeric, and chili powder. Each spice brings its own unique flavor. The crushed tomatoes and coconut milk are the base. They create a rich and creamy sauce that makes the dish special. Don't forget the finishing touches! Salt and pepper enhance flavor. Fresh cilantro adds a burst of color and freshness. Steamed basmati rice is a perfect side. It soaks up the yummy sauce and makes each bite delightful! This full recipe gives you all the details you need to make this dish at home. Enjoy the tasty journey! First, gather your chicken thighs. They must be boneless and skinless. Cut them into bite-sized pieces. In a large mixing bowl, add the chicken pieces. Season them with salt and pepper. Next, sprinkle in garam masala, curry powder, ground cumin, paprika, turmeric, and chili powder. Toss everything well to coat the chicken evenly with spices. This step makes each bite packed with flavor. Now, let’s cook the onion. Heat olive oil in a skillet over medium heat. Add the chopped onion and sauté until it turns translucent. This takes about 5-7 minutes. Cooking the onion well adds a sweet base to the dish. Once the onion is ready, stir in minced garlic and grated ginger. Cook these for about one minute. This mix adds a rich aroma and boosts the flavor of the dish. Next, pour the onion mixture into the slow cooker. Place the seasoned chicken pieces on top. Add crushed tomatoes and coconut milk to the pot. Stir everything together until well combined. Secure the lid on the slow cooker. Set it to cook on low for 6-8 hours or on high for 3-4 hours. I recommend the low setting for the best results. This slow cooking tenderizes the chicken and melds the flavors beautifully. When the cooking time is up, taste the dish. Adjust the seasoning if needed. If you want a thicker sauce, remove the lid. Let the tikka masala cook for another 30 minutes on high, stirring occasionally. For serving, place steamed basmati rice on one side of the plate. Ladle the chicken tikka masala beside it. Sprinkle fresh cilantro on top for color and flavor. You can also add a lime wedge for a zesty touch. For the full recipe, check out the detailed steps above. Enjoy your delicious meal! - Choosing the right cut of chicken: I recommend using boneless, skinless chicken thighs. They stay moist and tender during cooking. Chicken breasts can dry out, so thighs are a better choice. - Recommended spices for authentic flavor: Use fresh spices like garam masala, curry powder, and turmeric. These spices create a rich taste and aroma. Freshness matters, so check the dates on your spice jars. - Over or under seasoning: Always taste your dish before serving. Adjust salt and spices as needed. Too little seasoning makes it bland, while too much can overpower the dish. - Skipping the sauté step: This step builds flavor. Sautéing onions, garlic, and ginger first brings out their natural sweetness. It enhances the overall taste of the tikka masala. - Best slow cookers for making tikka masala: Look for a slow cooker with a programmable timer. This lets you set cook times easily. A ceramic insert is also great for even cooking. - Essential utensils for preparation and serving: Use a large mixing bowl for seasoning chicken. A sturdy wooden spoon helps mix everything well. For serving, a ladle works best to scoop out the delicious sauce. {{image_4}} You can make this dish vegetarian or vegan. To do this, substitute chicken with chickpeas or tofu. Both options soak up flavors and add protein. Use one can of chickpeas or 14 oz of firm tofu, cubed. You can also use vegetable broth instead of chicken broth. This adds depth to the dish while keeping it plant-based. Add a mix of your favorite vegetables. Think bell peppers, spinach, or even sweet potatoes. These will give your meal a colorful twist. If you want a milder dish for kids, reduce the chili powder. You can also swap it out for a pinch of paprika. This will keep the flavor without too much heat. For those who love spice, try adding fresh chili peppers. You can also increase the chili powder a bit. Taste as you go to find your perfect level of heat. Serve your chicken tikka masala with naan, quinoa, or cauliflower rice. Naan is great for scooping up the sauce. Quinoa adds a healthy grain option. Cauliflower rice is low-carb and very trendy. You can also create fun side dishes. Try a fresh salad with cucumber and tomatoes. A yogurt sauce can cool down the spices, too. Enjoy your meal with friends and family, and share your unique spin on this classic dish! To keep your chicken tikka masala fresh, follow these steps: - Refrigeration: Allow the dish to cool before placing it in an airtight container. Store in the fridge for up to 4 days. - Freezing: For longer storage, freeze in a freezer-safe container. It lasts up to 3 months. Make sure to label the container with the date. Reheating your chicken tikka masala is simple. Here are the best methods: - Microwave: Place a portion in a microwave-safe dish. Cover with a lid or plastic wrap. Heat in 1-minute intervals, stirring in between, until hot. - Stovetop: Heat in a pan over medium heat. Stir often to avoid sticking. Add a splash of water or coconut milk to keep it creamy. To keep the flavor and texture: - Don’t overheat, as it can dry out the chicken. - Stir in fresh cilantro before serving for extra flavor. You can find the full recipe for this delicious chicken tikka masala [here](#). Enjoy! It takes about 15 minutes to prep and 6 to 8 hours to cook on low. If you cook on high, it will take about 3 to 4 hours. This recipe serves 6 people, perfect for family dinners or meal prep. Yes, you can use frozen chicken. However, make sure to adjust the cooking time. Frozen chicken needs about 1 to 2 hours more. Always check that the chicken is fully cooked before serving. You can replace coconut milk with yogurt for creaminess. Heavy cream works well too. For a lighter option, use almond milk or cashew cream for a nice texture without the coconut flavor. If you don’t have garam masala, you can make your own. Mix equal parts of cumin, coriander, and paprika. Add a pinch of cinnamon and nutmeg for warmth. This blend captures the essence of garam masala nicely. In this post, I shared how to make slow cooker chicken tikka masala. We covered essential ingredients, like chicken thighs and aromatic spices. I explained step-by-step instructions for preparing, sautéing, and slow cooking. I also offered tips for perfecting your dish and avoiding common mistakes. In closing, chicken tikka masala can be made easily at home. With the right tips and techniques, you'll impress anyone who tries it. Enjoy this tasty meal with your favorite sides!

Flavorful Slow Cooker Chicken Tikka Masala Recipe

Looking for an easy and delicious meal? This Flavorful Slow Cooker Chicken Tikka Masala is perfect for you! I’ll share

- 8 oz rice noodles - 1 tablespoon sesame oil - 1 red bell pepper, sliced into thin strips - 1 carrot, julienned into matchstick pieces - 1 cup sugar snap peas, trimmed and halved - 3 green onions, chopped (both white and green parts) - 1/4 cup fresh cilantro, finely chopped - 1/2 cup creamy peanut butter (smooth is ideal) - 1 tablespoon soy sauce (low-sodium recommended) - 2 tablespoons fresh lime juice (about 1 lime) - 2 tablespoons honey or maple syrup (for vegans) - 1 tablespoon sriracha sauce (adjust according to your spice preference) - 1 clove garlic, minced - 1/4 cup warm water (for adjusting consistency) - Crushed peanuts - Extra cilantro for garnish - Lime wedges for serving Spicy Thai Peanut Noodles need fresh and bright ingredients. Rice noodles are the base. They soak up the rich sauce well. The sesame oil adds a nutty flavor and helps cook the veggies. For the veggies, I love using red bell pepper, carrot, and sugar snap peas. They add crunch and color. Green onions and cilantro finish the dish with freshness. The peanut sauce is key to this dish. Creamy peanut butter brings richness. Soy sauce adds saltiness, while lime juice gives a zesty kick. Honey or maple syrup balances the flavors with sweetness. Sriracha adds heat, but you can adjust it to your liking. Garlic rounds out the sauce with depth. For garnishes, crushed peanuts give a lovely crunch. Extra cilantro adds brightness, and lime wedges are perfect for squeezing fresh juice on top. You can find the full recipe to guide you through this delicious dish. - Boil salted water and cook rice noodles. - Drain and rinse with cold water. Start by boiling a large pot of salted water. This step is key for flavor. When the water boils, add 8 ounces of rice noodles. Cook them for about 4 to 6 minutes until al dente. This means they should be firm but not hard. Once they are cooked, drain the noodles and rinse them with cold water. This stops the cooking process. Set the noodles aside in a bowl for later use. - Combine ingredients in a bowl. - Adjust consistency with warm water. Next, grab a medium mixing bowl. In this bowl, combine 1/2 cup of creamy peanut butter, 1 tablespoon of soy sauce, and 2 tablespoons of fresh lime juice. Add 2 tablespoons of honey or maple syrup and 1 tablespoon of sriracha. Finally, toss in 1 minced garlic clove. Whisk these ingredients together until smooth. If the sauce is too thick, add 1/4 cup of warm water. This helps you reach your desired sauce thickness. - Heat sesame oil in skillet. - Stir-fry red bell pepper, carrot, and sugar snap peas. In a large non-stick skillet, heat 1 tablespoon of sesame oil over medium heat. When the oil is shimmering, add the sliced red bell pepper, julienned carrot, and sugar snap peas. Stir-fry these veggies for about 3 to 4 minutes. You want them to stay bright and crisp. - Mix noodles with sautéed vegetables. - Toss with peanut sauce until well coated. Now it's time to bring everything together. Add the cooled noodles to the skillet with the sautéed vegetables. Drizzle the peanut sauce over the noodles. Use tongs or two forks to gently toss everything. You want the noodles to be well-coated with the sauce and the veggies mixed throughout. - Add green onions and cilantro. - Serve with garnishes. Remove the skillet from heat. Mix in 3 chopped green onions and 1/4 cup of finely chopped cilantro. Toss again for even distribution. Now, serve your spicy Thai peanut noodles in bowls. Top with extra crushed peanuts for a nice crunch. Enjoy the vibrant flavors and textures in each bite. For the complete recipe, see the Full Recipe section. - To cook rice noodles, bring salted water to a boil. - Cook noodles for 4 to 6 minutes until al dente. - Avoid overcooking to keep them firm and chewy. - After cooking, drain the noodles and rinse with cold water. - Rinsing stops the cooking and helps keep the noodles separated. - For a spicier sauce, add more sriracha to taste. - If you want less heat, use less sriracha or skip it. - Try using honey or maple syrup for sweetness. - Each sweetener gives a slightly different flavor. - Taste as you mix, and adjust until it’s just right. - Serve the noodles in deep bowls for a fun look. - Use colorful garnishes for added visual appeal. - Fresh cilantro and extra crushed peanuts work well. - A lime wedge adds a nice pop of color and flavor. - A beautiful dish makes it more enjoyable to eat. For the full recipe, check out the section above. {{image_4}} You can easily make this dish vegetarian or vegan. Simply replace honey with maple syrup. This swap keeps the sweetness while making it plant-based. You can also add tofu or tempeh for protein. Both options soak up flavor and add a nice texture. Feel free to get creative with your veggies. You can use different vegetables like broccoli or bell peppers. Both options add color and crunch. If you want a low-carb twist, substitute rice noodles with zucchini noodles. Just spiralize the zucchini and sauté until tender. Not everyone enjoys a lot of heat. You can use milder sauce options if you prefer. Try a sweet chili sauce instead of sriracha. You can also incorporate other spices or chili sauces to control the heat level. Always taste as you go to find your perfect balance. Store any leftovers of your Spicy Thai Peanut Noodles in an airtight container. This helps keep them fresh. Try to eat them within 3 days for the best taste and quality. You can freeze the noodles, but they may change texture. To freeze, place them in a freezer-safe container. When you want to eat them, thaw the noodles in the fridge overnight before reheating. The best way to reheat your noodles is on the stove over medium heat. This method keeps them from getting dry. Add a splash of water while reheating to maintain moisture. Enjoy your delicious meal again! For the full recipe, check the earlier section. You can pair these noodles with a light side salad or crispy spring rolls. The fresh crunch of a salad complements the rich flavors well. Spring rolls add a nice touch of texture. Yes, you can use other noodles like soba or udon. Both options have great flavor and texture. Soba noodles offer a nutty taste, while udon noodles are chewy and filling. This dish can be made kid-friendly. Simply lower the spice by using less sriracha. You can also serve the sauce on the side for those who want less heat. Absolutely! You can prepare the peanut sauce ahead of time. Just store it in the fridge in an airtight container. It stays fresh and tasty for up to a week. This dish comes from the streets of Thailand. It features a combination of bold and rich flavors. Street food like this is loved for its quick preparation and delicious taste. For the complete recipe, check out the full recipe. You now have a clear path to making Spicy Thai Peanut Noodles. We covered the main ingredients and their roles. You learned how to cook the noodles and make the sauce. Sautéing fresh veggies adds flavor and crunch. Remember, adjust the spice level to your taste. Feel free to mix in different veggies or proteins. Store leftovers for easy meals later. Enjoy this vibrant dish that brings a taste of Thailand to your kitchen. Happy cooking!

Spicy Thai Peanut Noodles Flavorful and Easy Recipe

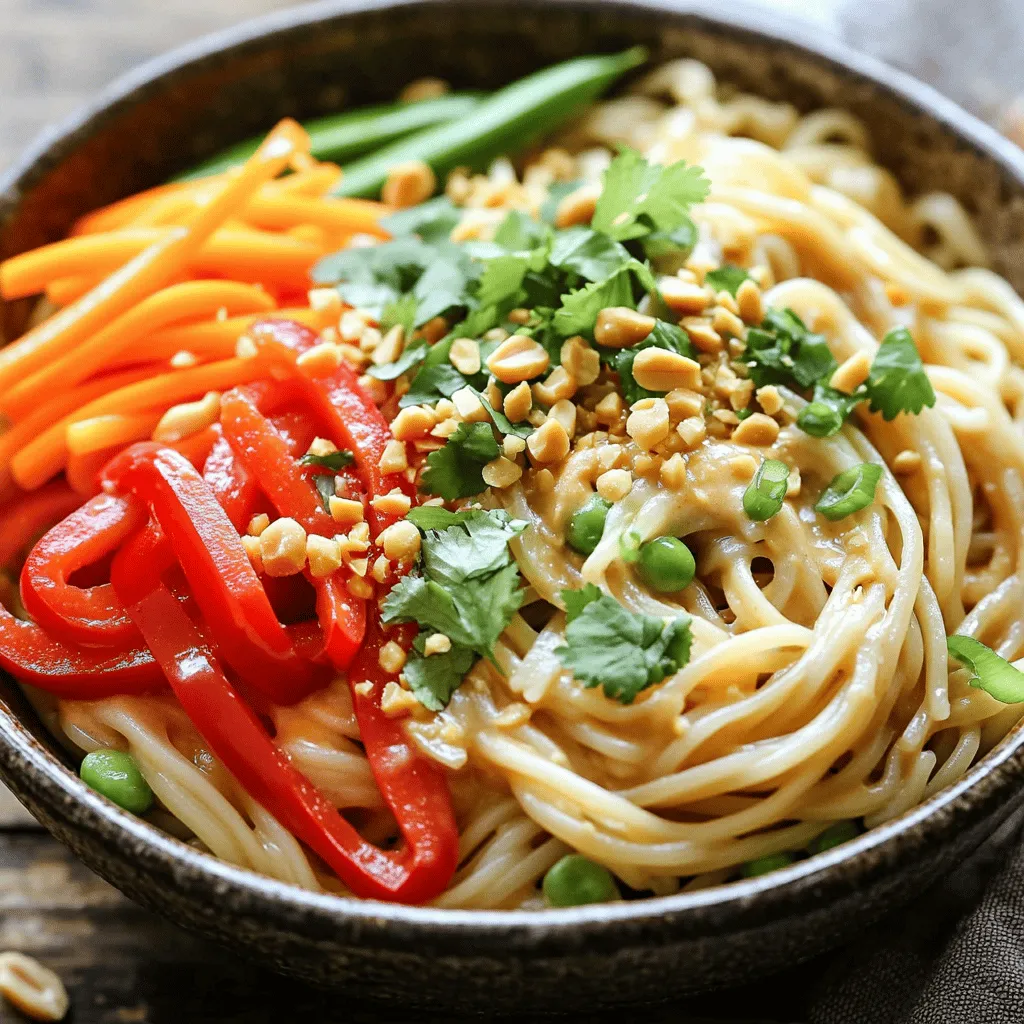
Looking for a quick and tasty meal? You’ll love this Spicy Thai Peanut Noodles recipe! With just a few simple

To make Herbed Garlic Butter Mushrooms, you will need a few simple ingredients. Here is the list: - 500g fresh mushrooms (cremini or button) - 4 tablespoons unsalted butter - 4 cloves garlic, minced - 1 tablespoon fresh thyme, chopped - 1 tablespoon fresh parsley, chopped - 1 teaspoon fresh rosemary, finely chopped - Salt and freshly ground black pepper, to taste - Zest and juice of 1 lemon These ingredients work together to create a rich and savory dish. The mushrooms soak up the buttery flavor while the garlic adds a nice kick. Fresh herbs bring brightness and depth, and the lemon juice brightens it all. Using fresh ingredients makes a big difference in taste. For the best results, choose mushrooms that look fresh and firm. Check for dirt; clean them gently with a damp cloth. You can use different types of mushrooms, but cremini or button mushrooms are great for this dish. When you're ready, gather your ingredients and check the Full Recipe for detailed instructions. This dish will impress your family and friends with its rich flavor and simple preparation! To make herbed garlic butter mushrooms, start by cleaning the mushrooms. Rinse them gently under cold water. Use a soft brush or cloth to remove any dirt. Once clean, slice each mushroom in half. This ensures they cook evenly. Next, measure your herbs and spices. You need fresh thyme, parsley, and rosemary. Chop them finely. Also, prepare four cloves of garlic by mincing them. Measure out the lemon zest and juice. These add brightness to the dish. Now, let’s cook! In a large skillet, melt the butter over medium heat. Wait until it becomes bubbly and smells great. This should take about one or two minutes. Once the butter is ready, add the minced garlic. Sauté the garlic for one to two minutes. Stir often to prevent burning. You want it to turn golden and release a lovely aroma. After that, add the halved mushrooms to the skillet. Stir gently to coat them in the garlic butter. Season the mushrooms with salt and pepper. Let them cook for about five to seven minutes. Stir occasionally until they are tender and browned. Next, add the chopped thyme, parsley, and rosemary. Cook for another two to three minutes. This lets the herbs infuse their flavors into the dish. Finally, squeeze the juice of half a lemon over the mushrooms. Sprinkle the lemon zest on top. Toss everything to mix the flavors well. For serving, place the mushrooms in a shallow bowl or on a nice platter. This shows off their rich color and fresh herbs. You can add extra herbs as a garnish if you like. These mushrooms pair well with crusty bread. Serve them as a tasty appetizer or a side dish. Enjoy the bright flavors of this easy recipe! For the full recipe, refer to the earlier section. To get the best flavor from your herbed garlic butter mushrooms, focus on how you sauté. Start by melting the butter over medium heat. When the butter bubbles, add the minced garlic. Sauté the garlic for 1-2 minutes until golden. If the garlic burns, it will taste bitter. Then, add the halved mushrooms. Stir them gently to coat with the buttery garlic. Cook until they are tender and brown. This process brings out their natural sweetness. You can enhance this recipe by changing the herbs or adding spices. If you want a different taste, try using oregano or basil instead of thyme. A pinch of red pepper flakes can add a nice kick. You could also sprinkle some smoked paprika for a deeper flavor. Experimenting with different herbs and spices will let you find your favorite blend. Using the right skillet makes a big difference. A heavy-bottomed skillet or cast iron pan works best. These pans heat evenly and help achieve that perfect golden brown. Non-stick pans can also work but may not give the same depth of flavor. Make sure your skillet is large enough to hold all the mushrooms in a single layer. This way, they will cook evenly and absorb all the garlic butter goodness. For the full recipe, check out the complete details! {{image_4}} You can change the mushrooms in this dish for more variety. Shiitake mushrooms are great. They have a deep, rich taste. Portobello mushrooms also work well. Their meaty texture adds a hearty feel. Feel free to mix different types too. Each type brings its own flavor. This gives your dish a unique twist every time. If you're vegan, you can still enjoy these mushrooms. Swap the butter with olive oil or vegan butter. It gives the same smooth richness. You might also want to use nutritional yeast. This adds a cheesy flavor without dairy. Just make sure to adjust the seasoning to fit your taste. These mushrooms are super versatile. They can be a side dish or a main. Serve them with grilled chicken or fish for a complete meal. You can also pair them with a fresh salad. A glass of white wine goes nicely too. For a cozy touch, serve with crusty bread. It soaks up all that lovely garlic butter. For a fun twist, try them on pasta or rice. The options are endless! You can find the Full Recipe to explore more ideas. To keep your herbed garlic butter mushrooms fresh, place them in an airtight container. Store in the fridge for up to three days. Make sure they cool down before sealing. This helps keep the flavors intact. When you’re ready to eat the leftovers, use a skillet to reheat them. Heat over low to medium heat. This method keeps the mushrooms tender. Stir occasionally to avoid burning. You can also add a splash of water or broth to keep them moist. Yes, you can freeze seasoned mushrooms! However, they may lose some texture. Place cooled mushrooms into a freezer-safe bag. Remove as much air as possible before sealing. They can last up to three months. When ready to use, thaw overnight in the fridge and reheat as mentioned above. For the full recipe, check the details above. Herbed garlic butter mushrooms can last about 3 to 5 days in the fridge. To store them, place the mushrooms in an airtight container. This helps keep them fresh and tasty. When you want to eat them again, just reheat them on the stove or in the microwave. They taste best when enjoyed fresh, so try to eat them quickly. Yes, you can use dried herbs, but the flavor will be different. Dried herbs are stronger, so use less than fresh herbs. A good rule is to use one-third the amount of dried herbs compared to fresh. For this recipe, try 1 teaspoon of dried thyme, parsley, and rosemary. This change can still give you nice flavors, just remember to adjust to your taste. These mushrooms pair well with many dishes. Here are some ideas: - Grilled chicken or steak - Pasta or rice dishes - A fresh green salad - Crusty bread for dipping These sides will complement the rich, buttery flavor of the mushrooms. For the detailed instructions on how to make Herbed Garlic Butter Mushrooms, check out the [Full Recipe]. In this post, we explored making delicious Herbed Garlic Butter Mushrooms. We covered the ingredients needed and shared step-by-step cooking instructions. I provided tips to enhance flavor and variations to suit your taste. For storing and reheating, I shared best practices to keep your dish fresh. Overall, this recipe is simple and full of taste. You can impress anyone with it. Enjoy creating your own tasty version!

Herbed Garlic Butter Mushrooms Flavorful Easy Recipe

Indulge in the rich and savory world of Herbed Garlic Butter Mushrooms! This simple recipe combines fresh mushrooms with aromatic

- 1 lb boneless, skinless chicken thighs, cut into 1-inch cubes - 1 cup plain yogurt, preferably Greek for thickness - 2 tablespoons lemon juice, freshly squeezed for best flavor - 3 cloves garlic, finely minced - 1 tablespoon fresh ginger, finely grated - 2 tablespoons tandoori spice mix (equal parts cumin, coriander, paprika, turmeric, and garam masala) - 1 tablespoon vegetable oil (or safflower oil) - 1 teaspoon salt (or to taste) - 1 teaspoon cayenne pepper (adjust for spice level) - 1 bell pepper (any color), cut into 1-inch pieces - 1 red onion, cut into wedges - Fresh cilantro leaves, for garnish - Lemon wedges, for serving - Alternative spices like smoked paprika or chili powder - Additional garnishes like mint leaves or yogurt sauce Tandoori chicken skewers are a joy to make. You get to mix flavors and colors. The chicken thighs shine when you marinate them. The yogurt and spices create a rich coating. Don’t skip the marination time. It makes the chicken tender and full of flavor. The vegetables add color and crunch. Bell peppers and red onions work great. They soak up the marinade, too! You can use other veggies if you like. Zucchini or mushrooms are tasty options. Feel free to adjust spices. Add more cayenne for heat or swap spices for a twist. You can also try adding herbs for freshness. Check out the Full Recipe for the exact measurements and steps. To start, mix yogurt and spices in a bowl. Use 1 cup of plain yogurt. Add 2 tablespoons of fresh lemon juice. Next, stir in 3 minced garlic cloves and 1 tablespoon of grated ginger. Then, add 2 tablespoons of tandoori spice mix, 1 tablespoon of vegetable oil, 1 teaspoon of salt, and 1 teaspoon of cayenne pepper. Whisk everything until smooth. This marinade packs a lot of flavor. Marination time matters! Let the chicken soak in this mix. It helps the spices penetrate deeply. I recommend marinating for at least 2 hours. If you have time, marinate overnight for the best taste. Now, let’s coat the chicken. Take 1 pound of boneless, skinless chicken thighs and cut them into 1-inch cubes. Add the chicken to the marinade. Mix well, ensuring every piece is coated. Cover the bowl tightly with plastic wrap. Place it in the fridge. This step is crucial for flavor. Before grilling, preheat your grill to medium-high heat. If using wooden skewers, soak them in water for 30 minutes. This keeps them from burning. Next, it’s time to assemble the skewers. Thread the marinated chicken onto the skewers. Alternate with pieces of bell pepper and onion. Aim for a colorful mix. Pack the pieces snugly, but leave some space for even cooking. Once the skewers are ready, place them on the grill. Cook for 12 to 15 minutes. Turn them often to get nice grill marks. Use a meat thermometer to check that the chicken reaches 165°F. This ensures it’s safe to eat. Enjoy these flavorful tandoori chicken skewers! For the full recipe, check out the instructions above. To make the best Tandoori chicken skewers, focus on the marinade. The main ingredients are yogurt and spices. You can boost the flavor by adding a bit of honey or brown sugar for sweetness. A dash of smoked paprika can give it a nice smoky touch too. For the best texture, let the chicken marinate for at least two hours, but overnight is best. This allows the chicken to soak up the flavors and become tender. The yogurt helps break down the meat, making it juicy and soft. Even cooking is key for great skewers. To achieve this, preheat your grill to medium-high heat. If you use wooden skewers, soak them for about 30 minutes. This prevents them from burning. When grilling, turn the skewers every few minutes. This helps them cook evenly and get those beautiful grill marks. Use a meat thermometer to check the doneness. The chicken should reach an internal temperature of 165°F (75°C). For serving, I recommend using a large platter. Arrange the skewers in a colorful display. Garnish with fresh cilantro and lemon wedges for a zesty touch. Consider serving Tandoori chicken skewers with cucumber raita. This cooling side dish balances the spices well. You can also add a fresh salad or naan bread to complete the meal. For the full recipe, check out the details above. {{image_4}} You can change the meat for your skewers. Try lamb or shrimp for a twist. Each adds a unique flavor. If you want a vegetarian option, use paneer or mushrooms. These options keep the dish rich and tasty. Want it less spicy? Use less cayenne pepper in the mix. You can also add more yogurt to mellow it out. If you like heat, add more cayenne or a pinch of chili powder. You can even swap in another spice mix, like a barbecue rub, for a fun change. Tandoori food varies by region in India. For example, in Punjab, they often serve it with naan or rice. You can pair your skewers with traditional sides like dal or a spicy chutney. This makes each meal feel special and authentic. For the full recipe, check out the details above! To make the most of your tandoori chicken skewers, store leftovers carefully. First, let the skewers cool to room temperature. Then, place them in an airtight container. This helps keep their flavor fresh. Store the container in the refrigerator for up to three days. If you want to keep them longer, consider freezing. Wrap each skewer in plastic wrap, then place them in a freezer bag. This way, they can last up to three months. When it's time to enjoy your leftovers, reheating is key. You can use an oven or a microwave. If using an oven, preheat it to 350°F (175°C). Place the skewers on a baking tray and cover them with foil. This helps keep them moist. Heat for about 10-15 minutes or until warmed through. In the microwave, use a microwave-safe plate. Heat in short bursts of 30 seconds. Check to avoid drying them out. Enjoy them as if they were fresh off the grill! Tandoori chicken is a classic Indian dish. It originated in the Punjab region. The dish gets its name from the tandoor, or clay oven, used to cook it. Tandoori chicken is marinated in yogurt and spices, which makes it flavorful and tender. The vibrant red color comes from spices like paprika or cayenne. This dish holds cultural importance in Indian cuisine. It reflects the blend of flavors and cooking techniques from the region. For the best results, you should marinate the chicken for at least 2 hours. This allows the spices to soak in. If you have time, marinating overnight is even better. This longer time helps the chicken absorb more flavors. It also makes the meat more tender. Remember to keep the chicken in the fridge while it marinates. Yes, a grill pan is a great option for indoor grilling. Just preheat it on medium-high heat. If using wooden skewers, soak them in water for 30 minutes. This prevents burning. Once the grill pan is hot, place the skewers on it. Cook them for about 12-15 minutes, turning occasionally. This way, you can still enjoy the smoky flavor of tandoori chicken without an outdoor grill. Tandoori chicken skewers pair well with many side dishes. You can serve them with rice or naan for a complete meal. A fresh salad with cucumber and tomatoes works nicely, too. For a creamy touch, add cucumber raita. This cool yogurt dip balances the spices. You might also enjoy them with grilled vegetables or a tangy chutney. These sides enhance the flavors and make the meal more exciting. For the full recipe, check the details above. In this article, we explored how to make Tandoori chicken skewers with rich flavors and vibrant colors. We covered key ingredients like chicken thighs, yogurt, and spices. The steps to marinate and grill are simple but crucial for great taste. I shared tips to enhance flavor and presentation. Tandoori chicken skewers can be versatile, allowing you to tailor the spice levels. Whether you choose meat, seafood, or a vegetarian option, you’ll create a dish everyone enjoys. Now, you’re ready to impress your guests with this tasty treat!

Tandoori Chicken Skewers Flavorful Grilling Delight

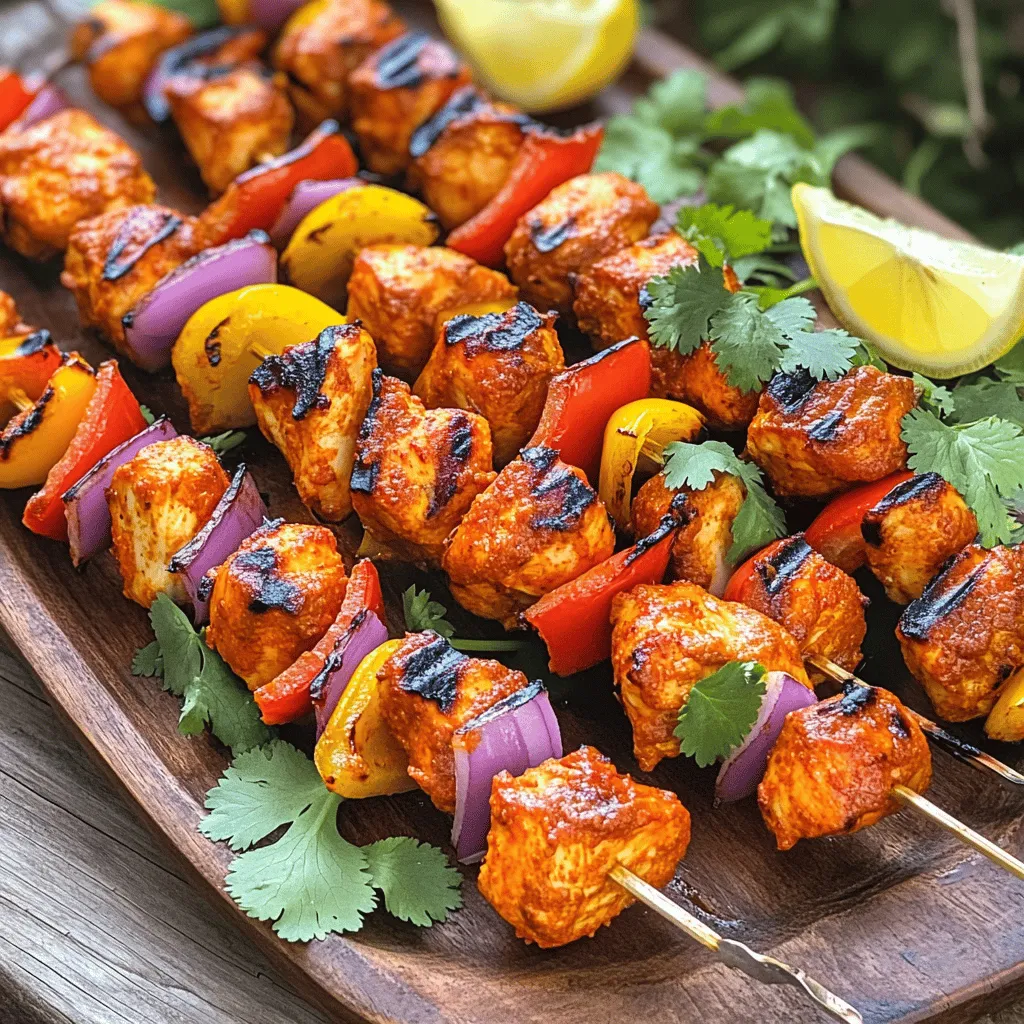
Get ready to fire up your grill for a tasty treat: Tandoori Chicken Skewers! With juicy chicken thighs, creamy yogurt,

- 3 ripe avocados, pitted and peeled - 2 cloves garlic, finely minced - 2 tablespoons freshly squeezed lemon juice - 1/4 cup fresh basil leaves, packed - 1/2 teaspoon red chili flakes (optional for added heat) - 1/4 cup extra virgin olive oil - Sea salt and freshly cracked black pepper to taste - 12 oz spaghetti or your preferred pasta - Handful of cherry tomatoes, halved (for garnish) - Grated Parmesan cheese (optional, for garnish) To make creamy avocado pasta, you need fresh, ripe avocados. They give the dish its smooth texture. Garlic adds a nice kick, while lemon juice brightens the flavor. Fresh basil brings a lovely aroma and taste. If you like heat, add red chili flakes. Extra virgin olive oil makes the sauce rich. Sea salt and black pepper help balance the flavors. For the pasta, spaghetti works best, but you can use any type you enjoy. Cherry tomatoes and Parmesan cheese are great for garnishing. With these ingredients, you're ready to create a dish that is both healthy and satisfying. For the complete method, check out the Full Recipe. To start, boil a large pot of salted water. Bring it to a rolling boil. Add 12 oz of spaghetti to the water. Cook it according to the package instructions until it is al dente. This usually takes about 8 to 10 minutes. Remember to reserve 1 cup of the pasta cooking water before you drain the spaghetti in a colander. While the pasta cooks, make the creamy avocado sauce. In a food processor, combine: - 3 ripe avocados, pitted and peeled - 2 cloves garlic, finely minced - 2 tablespoons freshly squeezed lemon juice - 1/4 cup fresh basil leaves, packed - 1/2 teaspoon red chili flakes (optional for added heat) - 1/4 cup extra virgin olive oil Blend these ingredients until the mixture is smooth and creamy. If the sauce is too thick, slowly add some reserved pasta water. Keep blending until you reach your desired sauce thickness. Taste the sauce and season it with sea salt and freshly cracked black pepper. In a large mixing bowl, add the drained spaghetti to the creamy avocado sauce. Gently toss the pasta and sauce together. Make sure every strand is coated evenly. This step is key for a delicious bite. Enjoy your velvety dish! For the full recipe, check the details above. To get that velvety texture, blend the avocados really well. I like to use a food processor for this. It makes everything smooth and creamy. If your sauce is too thick, add a little of the reserved pasta water. Mix it in slowly until you get your desired thickness. You want it to coat the pasta nicely without being runny. Adding more flavor can make your dish shine. I recommend a pinch of sea salt and black pepper. You can also try adding a bit of lemon zest for a fresh kick. Fresh herbs like parsley or cilantro can replace basil if you want a different taste. If you enjoy heat, consider adding more red chili flakes or even some crushed red pepper. For a beautiful presentation, serve the pasta in deep bowls. Place the halved cherry tomatoes on top for a pop of color. You can also sprinkle grated Parmesan cheese over the dish for richness. If you want a more colorful plate, add whole basil leaves as garnish. This makes your dish look as good as it tastes. Pair this pasta with a light salad or garlic bread to complete your meal. {{image_4}} If you want to mix things up, consider swapping the avocado. You can use peas or cashews for a creamy texture. Both ingredients add a unique twist while keeping it delicious. If you follow a vegan diet, look for pasta made from lentils or chickpeas. These options are tasty and gluten-free. Looking to spice things up? Add red chili flakes to your sauce for heat. You can also toss in proteins like chicken or shrimp for a heartier meal. Simply cook the protein in a pan and mix it with your pasta and sauce. This way, you get a filling dish that satisfies all cravings. To keep your creamy avocado pasta fresh, place it in an airtight container. This method helps lock in flavor. You can store it in the fridge for up to three days. If you want to keep it longer, consider freezing it. However, the texture may change slightly after thawing. When it’s time to enjoy leftovers, you can reheat your pasta. Use a microwave for quick heating. Place the pasta in a bowl and cover it with a damp paper towel. This step keeps moisture in as you heat it. Stir every minute until it’s warm. You can also reheat it on the stove. Add a bit of olive oil in a pan. Heat it on low and stir gently. This method helps maintain the creamy texture of the sauce. To prevent separation, add a splash of water if needed. To make this dish vegan, simply skip the Parmesan cheese. You can also use nutritional yeast for a cheesy flavor. Make sure to check your pasta for any egg content. Many brands offer vegan pasta options. Absolutely! You can use any pasta you like. Penne, fusilli, or even gluten-free options work well. Just ensure you cook them according to the package instructions for the best texture. This dish is packed with healthy fats and flavor. A serving typically has around 400 calories. You’ll get about 10 grams of protein, 20 grams of carbs, and 35 grams of fat, mostly from the avocados and olive oil. To keep the avocado bright green, use lemon juice in the sauce. Cover any leftovers tightly with plastic wrap. You can also add a layer of plastic film directly on the sauce to limit air exposure. This blog post guides you through making Creamy Avocado Pasta. We covered key ingredients and easy steps to create a tasty dish. You learned how to prepare the avocado sauce and mix it with pasta. Additionally, we shared tips for the best flavors and storage advice. Remember, you can swap ingredients to suit your taste. Enjoy your cooking, and feel free to experiment! Simple adjustments can make this dish your own. Happy eating!

Creamy Avocado Pasta Velvety and Satisfying Dish

If you’re looking for a meal that’s both creamy and satisfying, you’ve found it! Creamy Avocado Pasta is a quick,

To whip up these tasty banana oatmeal pancakes, gather these main ingredients: - 1 cup rolled oats - 1 ripe banana, mashed until smooth - 1 cup milk (any non-dairy milk works) - 1 tablespoon honey or maple syrup (optional) - 1 teaspoon baking powder - 1/2 teaspoon ground cinnamon - 1/4 teaspoon salt - 1 large egg - 1 tablespoon pure vanilla extract These ingredients form a delightful batter that is both healthy and filling. You can easily customize your pancakes with these extras: - Sliced fresh bananas - Assorted berries - A spoonful of your favorite nut butter - Chopped nuts or seeds - Chocolate chips Feel free to mix and match to create your perfect pancake! If you need alternatives, here are some easy swaps: - Use gluten-free oats for a gluten-free option. - Swap the egg for a flaxseed egg (1 tablespoon ground flaxseed + 2.5 tablespoons water). - For a dairy-free option, almond, soy, or oat milk works great. - Maple syrup can replace honey for a vegan-friendly sweetener. These substitutions keep your pancakes delicious while meeting different dietary needs. For the full recipe, check below. First, grab your rolled oats. Place them in a blender or food processor. Pulse the oats until they look like fine flour. This oat flour is key to our pancakes. It gives them a great texture. Now, take a big bowl and mix your dry ingredients. Combine the oat flour, baking powder, cinnamon, and salt. Whisk these together until they blend well. Next, in another bowl, mash your ripe banana until it’s smooth. Add the milk, egg, honey or maple syrup, and vanilla extract. Whisk this mixture until it is smooth. Slowly pour the wet mix into the dry ingredients. Stir gently until just combined. Do not overmix! Let your batter rest for 5-10 minutes. This helps it thicken and become fluffy. Heat a non-stick skillet over medium heat. Lightly grease it with oil or cooking spray. Pour 1/4 cup of batter onto the skillet for each pancake. Cook for about 2-3 minutes. Watch for bubbles on the surface. When you see them, flip the pancake. Cook for another 2 minutes until golden brown. Keep cooking the remaining batter, adding oil as needed. Serve the pancakes warm, stacked high. Enjoy them with sliced bananas, berries, or nut butter. Check out the Full Recipe for more details! To make your pancakes fluffy, use fresh baking powder. This helps them rise well. Let the batter rest for 5-10 minutes. This waiting time allows the oats to absorb moisture. It also gives the baking powder time to work. Mix the wet and dry ingredients gently. Don't overmix; a few lumps are okay. This helps keep the pancakes light and airy. One common mistake is using old baking powder. Always check the expiration date. Another mistake is not letting the batter rest. Skipping this step makes pancakes flat instead of fluffy. Make sure your skillet is hot enough. If it's too cold, pancakes will cook unevenly. Also, do not flip the pancakes too early. Wait until bubbles form on top before flipping. Serve your pancakes warm for the best taste. Stack them high and top with fresh slices of banana. You can also add mixed berries for a pop of color. Drizzle honey or maple syrup on top for sweetness. For a creamy touch, add a spoonful of nut butter. Try almond, peanut, or cashew butter for extra flavor. You can find the full recipe for these delicious pancakes above. Enjoy your meal! {{image_4}} You can easily make these pancakes vegan. Just swap the egg with a flaxseed meal. Mix 1 tablespoon of flaxseed meal with 2.5 tablespoons of water. Let it sit for five minutes to thicken. Use any non-dairy milk, like almond or soy milk, in the recipe. This way, everyone can enjoy your banana oatmeal pancakes! If you need gluten-free pancakes, you’re in luck! Rolled oats are naturally gluten-free, but check the label to be sure. You can also use gluten-free flour if you want a different texture. Just replace the rolled oats with the same amount of gluten-free flour. Your pancakes will still be tasty and fluffy. Want to jazz up your pancakes? Add fun flavors! You can mix in chocolate chips or chopped nuts. Walnuts or pecans add a nice crunch. Fresh blueberries or raspberries also work well. Experiment with spices like nutmeg or ginger for a unique twist. Create your perfect banana oatmeal pancakes with these fun additions. Check out the Full Recipe for more ideas! After making your banana oatmeal pancakes, you might have some left. To store them, let them cool down. Place them in an airtight container. This helps keep them fresh. You can keep them in the fridge for up to three days. If you want to enjoy them later, freezing is the way to go. To freeze your pancakes, first, let them cool completely. Then, stack them with parchment paper between each pancake. This prevents them from sticking together. Place the stack in a freezer-safe bag or container. Label the bag with the date. You can freeze them for up to two months. When you’re ready to eat, simply pull them out! To reheat your pancakes, you have a few good options. The microwave is quick. Place a pancake on a plate and heat for about 30 seconds. For a crispier texture, use a skillet. Heat on low and flip until warm. You can also pop them in the toaster. This will give them a nice crunch. Enjoy your pancakes warm! For the full recipe, check out the [Full Recipe]. Yes, you can make these pancakes without eggs. Use a flaxseed meal instead. Mix 1 tablespoon of flaxseed meal with 2.5 tablespoons of water. Let it sit for five minutes to thicken. This mixture acts as a great egg substitute. To make your pancakes sweeter, add more banana. You can also mix in honey or maple syrup. Start with an extra tablespoon and adjust to your taste. Remember, ripe bananas are naturally sweeter, so choose a good one. Toppings can really enhance your pancakes. Some tasty options include: - Sliced fresh bananas - Assorted berries - A spoonful of nut butter - A drizzle of honey or maple syrup - A sprinkle of nuts for crunch Try different combinations to find your favorite! Look for bubbles on the top of the pancake. When you see them, it’s time to flip. After flipping, cook for about two more minutes. The underside should be golden brown. If the pancake feels firm to the touch, it is ready to eat! In this blog post, we explored banana oatmeal pancakes, including ingredients and step-by-step cooking. You learned about essential and optional ingredients, as well as various substitutions. I shared tips for fluffiness and common mistakes to avoid. We also discussed how to store leftovers and answer key questions. In the end, these pancakes are easy to make and fun to customize. Enjoy your cooking and savor each bite!

Savory Banana Oatmeal Pancakes Easy and Healthy Recipe

If you want a tasty and healthy breakfast, try my easy banana oatmeal pancakes! They’re fluffy, simple to make, and

- Ripe avocados - Cherry tomatoes - Fresh mozzarella balls - Fresh basil leaves - Balsamic glaze - Extra virgin olive oil - Seasoning (salt and pepper) For this recipe, you want ripe avocados. They should feel soft but not mushy. Cherry tomatoes add color and sweetness. Fresh mozzarella balls, also known as bocconcini, bring a creamy texture. Fresh basil leaves give a fragrant touch. Balsamic glaze adds a nice sweet tang. Extra virgin olive oil enhances the flavor. Don’t forget salt and pepper for seasoning. - Alternative cheeses: You can use feta or goat cheese instead of mozzarella. - Different types of tomatoes: Try grape tomatoes or heirloom varieties for a twist. - Variations in herbs: Swap basil for parsley or arugula for a new flavor. Feel free to mix things up! Different cheeses and tomatoes can change the taste. Fresh herbs can also bring new life to the dish. - Calories per serving: About 300 calories. - Breakdown of macronutrients: - Protein: 7 grams - Fat: 25 grams - Carbohydrates: 15 grams This dish is rich in healthy fats from avocados. It also provides protein and carbs from the cheese and tomatoes. Each serving is light yet filling, making it a great choice for a snack or meal. 1. Cut each avocado in half lengthwise. 2. Carefully remove the pit with a spoon or knife. 3. Scoop out a small bit of avocado flesh to make room for the filling. 4. In a mixing bowl, add halved cherry tomatoes and mozzarella balls. 5. Sprinkle in fresh basil leaves for extra flavor. 6. Drizzle the olive oil over the tomato and mozzarella. 7. Season with salt and black pepper to taste. 8. Toss gently to coat all ingredients well. 9. Fill each avocado half generously with the mixture. - For a nice touch, let the filling overflow a little. - Drizzle balsamic glaze over the stuffed avocados for added flavor. - You can add extra basil leaves on top for color and taste. - Always taste and adjust the seasoning before serving. - Balance the flavors by adding more basil or a pinch of salt. - If you want a kick, consider adding crushed red pepper flakes. To make the best Caprese stuffed avocados, you need ripe avocados. Look for avocados that are slightly soft when you press them. This means they are ready to eat. Avoid any that feel mushy or have dark spots. If your avocados are not ripe yet, you can speed up the process. Place them in a brown paper bag with an apple or banana. The ethylene gas will help them ripen faster. Adding spices and herbs can elevate your dish. Try a pinch of garlic powder or red pepper flakes for some heat. Fresh herbs like oregano or thyme can also add flavor. You can pair the stuffed avocados with a simple salad or crusty bread. This will balance the creamy texture of the avocados. Caprese stuffed avocados are great for many occasions. Serve them as a light lunch or a fun appetizer at parties. They look beautiful on a plate, making them perfect for gatherings. Complement them with a fresh side salad or some crunchy veggie sticks. This adds variety and makes the meal more filling. Enjoy the fresh flavors and vibrant colors! {{image_4}} Mediterranean style You can add olives and artichokes for a Mediterranean twist. This mix gives your dish a briny taste. Simply chop some Kalamata olives and add them to your tomato and mozzarella mix. Artichoke hearts can also bring a nice texture. This flavor shift takes your Caprese stuffed avocados to a new level. Spicy twist with jalapeños If you like heat, add diced jalapeños to your mixture. This brightens the dish and adds a fiery kick. Just chop a small jalapeño and mix it with the tomatoes and cheese. You can also drizzle some hot sauce on top for extra spice. This variation is perfect for those who love a bit of adventure in their meals. Vegan alternatives To make this dish vegan, swap out the mozzarella for a plant-based cheese. You can also use marinated tofu or chickpeas for protein. These options keep the dish creamy and satisfying. Just ensure the balsamic glaze is vegan, too. This helps everyone enjoy the Caprese stuffed avocados. Low-carb adjustments If you want a low-carb option, skip the cheese. Instead, add more veggies like bell peppers or zucchini. You can also use a mix of herbs for flavor. This keeps the dish light and fresh while still being tasty. Creative serving ideas Serve the stuffed avocados on a wooden board or colorful platter. This makes the dish pop and adds a rustic feel. You can also place them on a bed of greens for a fresh look. This simple change makes the meal feel special. Using different dishes Try using small bowls or ramekins to hold the avocado halves. This can create a fun presentation for parties. You can also stack the avocados in a pyramid shape for a striking effect. This makes each bite exciting and visually appealing. For the full recipe, check out the detailed steps to create this delicious dish. To keep your Caprese stuffed avocados fresh, store them in the fridge. Use an airtight container to prevent browning. For the best taste, eat leftovers within a day. Avocados can brown quickly, so enjoy them soon after making. You can freeze unstuffed avocados for later use. Follow these steps: - Cut ripe avocados in half and remove the pit. - Wrap each half tightly in plastic wrap. - Place the wrapped halves in a freezer bag. - Label the bag with the date before freezing. When ready to use, thaw in the fridge overnight. Use frozen ingredients like mozzarella or tomatoes in a new recipe. To reheat stuffed avocados, use an oven. Preheat it to 350°F. Place the stuffed avocados on a baking sheet. Heat for about 10 minutes until warm. Avoid using the microwave, as it can make the avocado mushy. Enjoy your tasty meal fresh! Yes, you can prepare Caprese stuffed avocados ahead. However, it’s best to fill them just before serving. If you prepare them early, the avocados may brown. To slow browning, sprinkle lemon juice on the avocado flesh. This keeps the color bright and fresh. You can use leftover avocado flesh in many ways. Mash it for a dip, add it to smoothies, or spread it on toast. You can also mix it into salads for creaminess. Don't waste that delicious avocado! Absolutely! You can use feta, goat cheese, or even cheddar. Each cheese gives a unique taste. Try mixing different cheeses for more flavor. Just remember, it should melt nicely if you want a warm filling. To make this dish heartier, add proteins. Grilled chicken, shrimp, or beans work well. You can also serve these avocados with a side of whole grain bread or a salad. This adds more nutrition and keeps you satisfied. Yes, this recipe is great for meal prep! You can prepare the filling and store it in the fridge. Just fill the avocados when you’re ready to eat. This keeps the avocados fresh and tasty. For the full recipe, check above. In this blog post, I covered how to make delicious Caprese Stuffed Avocados. We looked at key ingredients like ripe avocados, cherry tomatoes, and mozzarella balls. I shared alternatives and how to store leftovers. We also explored flavor variations and serving tips. Now, you have all the tools to create this fresh dish. Enjoy experimenting and sharing your tasty creations with others!

Caprese Stuffed Avocados Tasty Easy Recipe

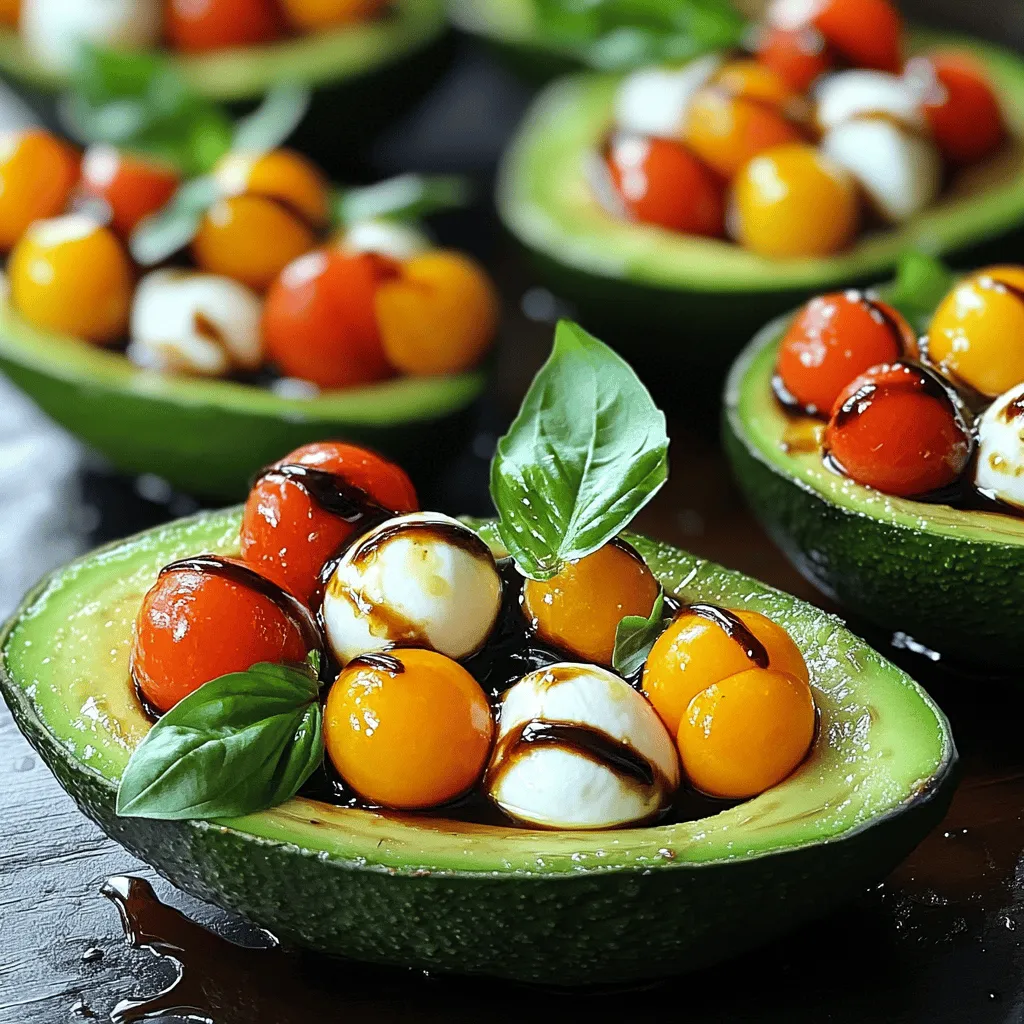
Want a quick and tasty meal? Caprese Stuffed Avocados are the answer! This easy recipe combines creamy avocados with fresh

Older posts
Newer posts
← Previous Page1 … Page66 Page67 Page68 … Page86 Next →

dsad

© 2026 yumymoments • Built with GeneratePress

Our Policies

  • Copyright Policy
  • Cookie Policy
  • GDPR Policy
  • Privacy Policy
  • Disclaimer
  • Terms Of Use

More Information

  • Home
  • About
  • Contact
  • Appetizers
  • Dessert
  • Dinner
  • Drinks
©2026, yumymoments About Back To Top