Skip to content
DisclaimerTerms Of UseGDPR PolicyCookie Policy

yumymoments

  • Home
  • Drinks
  • Appetizers
  • Dinner
  • Dessert
  • About
  • Contact
  • Privacy Policy
DisclaimerTerms Of UseGDPR PolicyCookie Policy

NO-ING-IMG

Here's what you need for orange glazed carrots. Gather these items for a tasty side dish: - 1 lb baby carrots (or whole carrots, peeled and cut into sticks) - 1/4 cup fresh orange juice - 2 tablespoons honey - 1 tablespoon unsalted butter - 1/2 teaspoon ground cinnamon - 1/4 teaspoon freshly grated nutmeg - Sea salt and freshly cracked black pepper - 1 tablespoon fresh parsley, finely chopped Each ingredient plays a role in creating a vibrant flavor. The sweetness of the honey balances the tartness of the orange juice. The spices, cinnamon and nutmeg, add warmth and depth. This recipe is simple yet full of flavor. Use fresh ingredients for the best taste. If you want, you can find the full recipe for more detailed steps. Enjoy making this delightful dish! To start, I peel whole carrots with a vegetable peeler. After peeling, I cut them into sticks about 3-4 inches long. If you choose baby carrots, just wash them well and skip the peeling. They are ready to cook as is. Next, I fill a medium saucepan with water and bring it to a boil. Once the water is bubbling, I add the carrots. I let them cook for 5-7 minutes until they are tender but still have a nice crunch. After cooking, I drain the carrots and set them aside in a bowl. In the same saucepan, I reduce the heat to medium and add unsalted butter. I let it melt until it’s frothy. Then, I pour in fresh orange juice from about two oranges. Next, I add honey, ground cinnamon, and freshly grated nutmeg. I stir the mix well and let it simmer gently. This simmering is key for making the flavors rich. Now, I return the drained carrots to the saucepan with the glaze. I gently stir to coat the carrots in the bright, sweet glaze. I cook them for an extra 5 minutes. This time helps the flavors blend together and keeps the carrots tender. To make great orange glazed carrots, start with fresh carrots. Look for ones that are bright and firm. Avoid any that are soft or have dark spots. You can find two main types: organic and conventional. Organic carrots often have better taste and fewer chemicals. However, conventional carrots are also good and more affordable. The glaze is where the magic happens. You can adjust the sweetness to fit your taste. If you want it sweeter, add a bit more honey. To make the flavor pop, try adding citrus zest. Grate the outer skin of an orange and mix it in. This gives your dish a fresh, bright note. While boiling is common, you can use other methods like steaming or roasting. Steaming keeps more nutrients and color. Roasting brings out natural sweetness and adds depth. No matter the method, keep an eye on the temperature. Carrots should be tender but not mushy. This ensures a perfect bite every time. {{image_4}} To add a kick to your orange glazed carrots, consider using crushed red pepper flakes. Just a pinch can make your dish exciting without overpowering the sweet flavor. If you want a different sweetener, try using agave syrup or maple syrup. Both can balance the spice while keeping that yummy taste. Herbs can bring a fresh twist to your carrots. Try adding fresh thyme or rosemary for a fragrant touch. You can also pair these herbs with citrus, like lemon zest, to enhance the flavor. This mix will give your dish a bright, lively taste that’s sure to impress. If you want to change up the glaze, consider using maple syrup instead of honey. Maple syrup offers a deeper, richer sweetness. Another option is to add balsamic vinegar to your glaze. This adds a tangy depth that pairs well with the sweetness of the carrots. For the full recipe, check out the details on how to make this delightful side dish! Store leftover orange glazed carrots in an airtight container. They stay fresh for up to four days in the fridge. Before serving, taste them to ensure they still have good flavor. If they seem dry, add a splash of orange juice or a bit of butter when reheating. To freeze glazed carrots, let them cool completely. Place them in a freezer-safe bag or container, removing as much air as possible. They can last in the freezer for up to three months. When ready to eat, thaw them overnight in the fridge. Reheat in a skillet over low heat, adding a little orange juice to revive the glaze. Orange glazed carrots pair well with many dishes. They complement roasted meats like chicken or pork beautifully. Try serving them alongside grain dishes, such as quinoa or rice. You can also add them to salads for a sweet crunch. These carrots add color and flavor to any meal. For more ideas, check out the Full Recipe for different serving options. You can prep orange glazed carrots a day in advance. First, cook the carrots until tender but still crisp. Drain them and let them cool. Store the carrots in an airtight container in the fridge. When you're ready to serve, heat some butter in a pan. Add the carrots and the glaze from the recipe. Warm them gently, stirring until they are hot. This will keep the flavor fresh and make serving easy. Absolutely! You can use any carrots you like. Baby carrots are sweet and easy to prepare. Regular carrots can give you a nice crunch if cut into sticks. You can also use purple or yellow carrots for a colorful dish. Different colors may add slight flavor twists, too. Purple carrots have earthy notes, while yellow carrots can taste sweeter. Experiment with these options for fun variations. If you need a substitute for honey, consider maple syrup. It adds a nice sweetness and flavor. Agave nectar is another great option. It has a lighter taste but works well in this dish. If you're looking for a sugar alternative, try brown sugar. Mix it with a bit of water to mimic honey's texture. Each choice will change the flavor slightly, so choose what you like best. This recipe for orange glazed carrots is simple and tasty. We covered the key ingredients and easy steps for cooking. You can choose fresh carrots and adjust sweetness to your liking. Don't forget the fun variations, like adding herbs or spicy elements. Store leftovers well to enjoy later. Remember, you can prep ahead to save time. Use this guide to impress at your next meal. Enjoy making these delicious carrots!

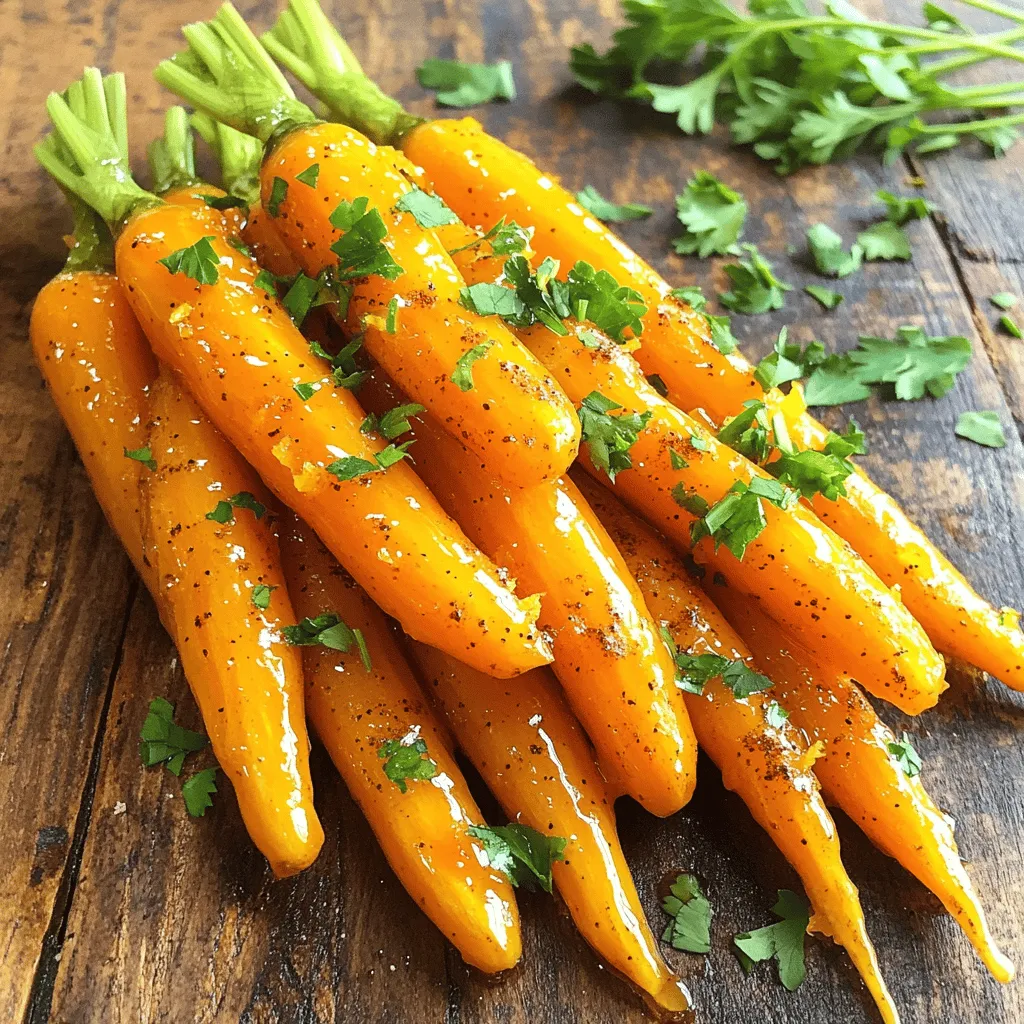
Orange Glazed Carrots Flavorful and Easy Side Dish

Looking for a side dish that’s both easy and tasty? Orange glazed carrots hit the mark! This simple recipe combines

- 1 lb beef sirloin, thinly sliced - 1 medium onion, diced - 2 cloves garlic, minced - 8 oz mushrooms, sliced - 2 tablespoons all-purpose flour - 2 cups beef broth - 1 cup sour cream - 2 tablespoons Dijon mustard - 2 tablespoons olive oil - Salt and pepper to taste - Fresh parsley, chopped for garnish - Cooked egg noodles or rice for serving In this recipe, you will need beef sirloin for the main protein. This cut is juicy and tender. Slice it thinly to ensure quick cooking. You will also need one medium onion and two cloves of garlic. These add a nice depth of flavor. Fresh mushrooms, like cremini or button, bring earthiness to the dish. You will use two tablespoons of flour to help thicken the sauce. The beef broth adds rich flavor, while sour cream gives creaminess. Dijon mustard adds a touch of tang. Olive oil is essential for cooking the beef and veggies. Finally, season your dish with salt and pepper, and garnish with fresh parsley. - Choosing the right cut of beef: Always opt for tender cuts, like sirloin or tenderloin. They cook quickly and stay juicy. - Selecting fresh mushrooms: Look for firm, dry mushrooms with no dark spots. Fresh mushrooms will have the best flavor. - Importance of low-sodium broth: This helps control the saltiness of your dish. You can always add more salt later if needed. These tips ensure your beef stroganoff is both tasty and satisfying. The right ingredients make all the difference! For the complete recipe, check out the Full Recipe. To cook the beef for optimal tenderness, choose sirloin. Slice it thinly against the grain. This helps the beef stay soft. Heat olive oil in a large skillet on medium-high heat. When the oil shimmers, add the beef. Make sure not to crowd the pan. Season with salt and pepper. Cook for about four to five minutes. You want the beef to be browned on all sides. Once done, remove the beef and set it aside on a plate. For the sauce, start by adding diced onion to the same skillet. Sauté for about three minutes until soft and clear. Next, add minced garlic and sliced mushrooms. Stir and cook for five minutes. The mushrooms should be tender and lose moisture. Now, sprinkle flour over this mixture. Stir well to coat everything and let it cook for one minute. This step avoids lumps later. Gradually pour in the beef broth. Stir constantly to mix well. This keeps the sauce smooth. Let the mixture simmer gently. After simmering, return the cooked beef to the skillet with any juices. Mix in sour cream and Dijon mustard. Stir until well combined. Let the stroganoff simmer for five more minutes. The sauce should thicken nicely and be creamy. Before serving, taste the sauce. Adjust with more salt or pepper if needed. Serve the beef stroganoff over cooked egg noodles or rice. For a beautiful finish, garnish with chopped parsley. This adds color and freshness. For plating, use shallow bowls. Drizzle some sour cream on top and sprinkle extra parsley. This makes your dish look great and inviting. For the full recipe, check out the details above. Enjoy your meal! Using the right heat is key for cooking beef stroganoff. Start on high heat to sear the beef. This gives you a nice brown color. Once the beef is done, lower the heat for the sauce. This helps the flavors blend well without burning. To get the perfect sauce, you want it creamy but not too thick. After adding the sour cream, let it simmer on low heat. Stir often to keep it smooth. If it gets too thick, add a bit more beef broth to loosen it up. You can add spices and herbs to change the taste. Try a pinch of paprika for warmth or fresh thyme for an earthy note. If you want a twist, consider using garlic powder or even a dash of Worcestershire sauce for depth. If you need alternatives, swap beef for chicken or mushrooms for a vegetarian dish. Use non-dairy sour cream for a dairy-free option. Just make sure to adjust the cooking time based on what you choose. Beef stroganoff pairs well with several sides. Egg noodles are classic, but rice works just as well. You can also serve it with mashed potatoes for a hearty meal. Steamed veggies or a simple salad add freshness. For drinks, a light red wine like Pinot Noir complements the dish. If you prefer non-alcoholic, try sparkling water with a slice of lemon. It cleanses the palate and balances the creaminess of the stroganoff. {{image_4}} You can change beef stroganoff to fit different diets. For a vegetarian dish, use mushrooms or tofu. Both options bring a meaty texture. Mushrooms, like cremini, add great umami flavor. Tofu provides a nice protein boost. You can also swap the beef for other meats. Chicken or pork work well in this recipe. Just slice them thin and cook them the same way. Both options will give you a tasty meal. Beef stroganoff has many regional styles. The Russian version is rich, often using sour cream. Western-style stroganoff is creamier and might add more spices. Different cuisines also inspire this dish. For example, some might add soy sauce for a savory kick. Others may include wine for depth. Each twist makes the dish unique and fun to try. Explore these variations to make your own beef stroganoff. Check out the Full Recipe for the classic version and enjoy experimenting! To keep leftover beef stroganoff fresh, store it in an airtight container. Place it in the fridge right after it cools. This dish lasts about 3 to 4 days in the refrigerator. If you want to keep it longer, you can freeze it. Just make sure to use a freezer-safe container. When frozen, beef stroganoff can last for about 2 to 3 months. When reheating, aim to keep the texture smooth. You can use a microwave or a stovetop. If using a microwave, heat it in short bursts. Stir in between to help heat evenly. On the stovetop, warm it over low heat. Add a splash of beef broth or a bit of sour cream. This helps restore moisture and keeps your stroganoff creamy. Enjoy your meal again without losing any flavor! To make beef stroganoff from scratch, follow these key steps for homemade authenticity: 1. Select Quality Ingredients: Start with fresh beef sirloin, onions, garlic, and mushrooms. 2. Cook the Beef: Sear thin slices of beef in hot olive oil. This adds flavor and keeps it tender. 3. Build the Base: Sauté onions, garlic, and mushrooms until soft. This enhances the taste. 4. Thicken the Sauce: Sprinkle flour over the mixture and stir well. This helps create a creamy texture. 5. Add Broth and Cream: Gradually mix in beef broth, then sour cream and Dijon mustard. This gives depth to the sauce. 6. Final Simmer: Let the sauce simmer until thickened. Adjust seasoning as needed. These steps ensure you get a rich and savory beef stroganoff that feels homemade. Yes, you can use different types of meat in beef stroganoff. Here are some options: - Chicken: Thin slices of chicken breast work well. Cook them in the same way as beef. - Pork: Pork tenderloin adds a nice flavor. Cut it thinly and follow the same steps. - Turkey: Ground turkey is a leaner option. Cook it until browned before adding other ingredients. These alternatives can give you new flavors while keeping the dish enjoyable. Yes, you can make beef stroganoff ahead of time. Here are some time-saving tips: - Cook and Store: Prepare the stroganoff as usual, then let it cool. Store it in the fridge for up to 3 days. - Reheat Gently: When ready to eat, reheat it on low heat. Add a splash of broth to keep it creamy. - Serve Fresh: Cook the noodles or rice just before serving. This keeps them from getting mushy. These steps help you enjoy beef stroganoff with less stress on busy days. If you need substitutes for sour cream, here are some options: - Greek Yogurt: This adds a similar creaminess with a tangy flavor. - Cottage Cheese: Blend cottage cheese until smooth. It’s a lower-fat choice. - Silken Tofu: For a dairy-free option, blend silken tofu. It mimics the creaminess well. These substitutes can keep your beef stroganoff tasty while fitting dietary needs. In this article, we covered how to make classic beef stroganoff. We discussed key ingredients, steps for preparing the beef, making the sauce, and serving tips. I shared useful cooking techniques and flavor enhancements, plus variations like vegetarian options. Knowing how to store leftovers and reheating properly helps enjoy this dish longer. Beef stroganoff is versatile, tasty, and perfect for various occasions. With these tips, you can create a delicious meal that impresses every time. Enjoy your cooking journey!

Classic Beef Stroganoff Flavorful and Simple Recipe

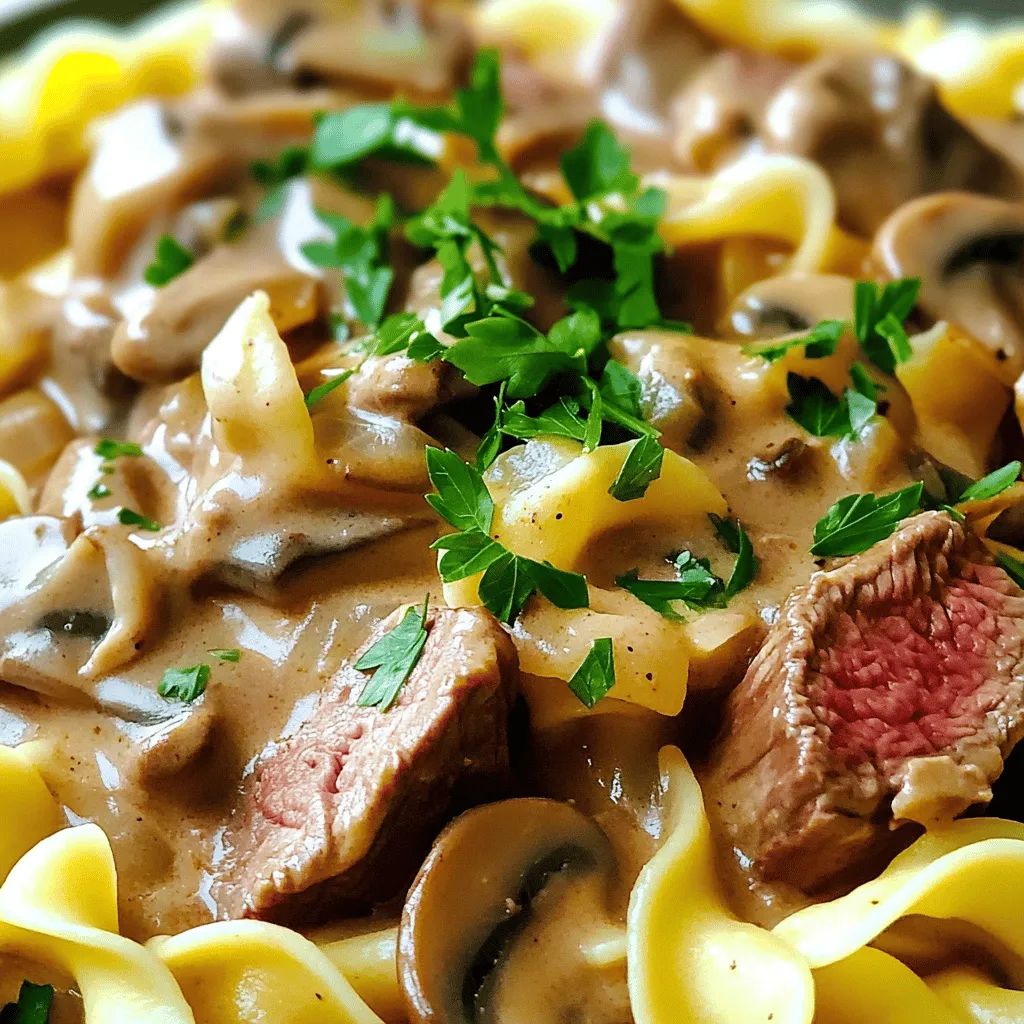
If you’re craving a warm and hearty meal, Classic Beef Stroganoff should be your go-to. This simple recipe combines tender

- 1 pint cherry tomatoes, halved - 8 ounces fresh mozzarella balls (bocconcini) - 1 bunch fresh basil leaves - 2 tablespoons balsamic glaze - 1 tablespoon extra virgin olive oil - Salt and freshly cracked black pepper to taste - 12-15 wooden skewers The ingredients for Caprese Salad Skewers are simple yet fresh. Cherry tomatoes bring a sweet burst of flavor. Fresh mozzarella adds a creamy texture that pairs well with the tomatoes. The basil leaves give a fragrant aroma and a hint of peppery taste. Balsamic glaze is a must-have. It adds a tangy sweetness that enhances the dish. Extra virgin olive oil offers a rich, fruity flavor. Salt and black pepper bring out the natural tastes of the other ingredients. For a fun twist, you can add optional ingredients. Try avocado chunks for creaminess. Prosciutto slices add a salty, savory kick. Roasted red peppers give a smoky depth to every bite. You can mix and match these items to create your perfect skewer. For the full experience, check out the full recipe. Enjoy creating these vibrant and tasty appetizers! - Rinse and slice the cherry tomatoes - Drain mozzarella if packed in liquid - Prepare fresh basil leaves Start by rinsing your cherry tomatoes under cool water. Slice each tomato in half. This helps the flavors blend better. Next, if your mozzarella balls are in liquid, drain them well. This keeps the skewers from getting soggy. Finally, grab fresh basil leaves. You want them whole and vibrant for a pop of flavor. - Step-by-step assembly of cherry tomatoes, basil, and mozzarella - Tips for achieving a beautiful presentation Now, grab a wooden skewer. Begin by placing a cherry tomato half on it, cut side facing up. This shows off its juicy inside. Next, add a basil leaf. For best results, fold it in half. Then, slide on a mozzarella ball. Repeat this until you have 3-4 sets of each ingredient on one skewer. Make sure it looks colorful! For presentation, arrange them nicely on a platter. You can even stand them upright in a glass for extra flair. - Drizzling with balsamic glaze and olive oil - Seasoning with salt and pepper Once your skewers are ready, it's time for the final touches. Drizzle them with extra virgin olive oil and balsamic glaze. This adds a lovely shine and flavor. Lastly, sprinkle a pinch of salt and freshly cracked black pepper on top. These small steps elevate the taste. Serve your skewers right away for the best experience. If you want to chill them, let them sit in the fridge for 15-20 minutes. Enjoy your fresh and tasty Caprese salad skewers! For the complete recipe, check out the Full Recipe. To keep your ingredients fresh before assembly, store them separately. Keep the tomatoes in a cool spot and the mozzarella in the fridge. Basil should stay in water or wrapped in a damp cloth. This way, everything stays bright and tasty. Avoid soggy skewers by draining the mozzarella well. If it sits in liquid, it will make your skewers wet. Also, assemble the skewers just before serving. This keeps all the flavors fresh and bright. For an attractive presentation, use a tall glass or vase to stand the skewers upright. This makes a fun display. You can also add extra basil leaves around the base for a pop of color. When it comes to drinks, pair these skewers with a crisp white wine or sparkling water. The light flavors of the skewers work well with these beverages. You can store prepared skewers in the refrigerator. Wrap them in plastic wrap to keep them fresh. They can last for 1 to 2 hours before serving. If you want to make them ahead of time, assemble and chill them. Just drizzle with balsamic glaze and olive oil right before serving. This keeps the flavors fresh and bright. For the full recipe, check out the detailed steps above. {{image_4}} You can play with flavors in Caprese salad skewers. One fun way is to add different cheeses. Try feta for a salty kick, or goat cheese for creaminess. Both will change the taste and add a new layer of flavor. You can also switch up the herbs. Instead of basil, use fresh mint for a refreshing touch, or arugula for a spicy bite. Each choice makes the dish unique and exciting. A twist in this recipe can mean adding bold flavors. For instance, pair your skewers with unique sauces like pesto or a spicy garlic dip. These sauces make the skewers pop with flavor. You can also marinate the mozzarella in olive oil with herbs. This adds depth and richness before you assemble the skewers. Make your Caprese skewers shine in any season. In summer, add fresh peaches or watermelon for sweetness. These fruits complement the salty cheese and tangy tomatoes. For holidays, use red and green ingredients to match the theme. Cherry tomatoes and basil are perfect, but you can also add roasted red peppers. They bring a warm flavor and vibrant color to the plate. Use seasonal produce for the best taste and freshness. Check out the Full Recipe to explore all these ideas! To keep your Caprese salad skewers fresh, place them in an airtight container. Use plastic wrap for extra protection. Store the skewers in the fridge. This helps maintain their taste. They stay fresh for about 2 days. After that, the basil may wilt, and the flavors fade. You don’t need to reheat Caprese skewers. They taste best cold or at room temperature. If you want to refresh them, take them out of the fridge. Let them sit for about 10 minutes. This helps bring back their flavor. You can drizzle a bit more olive oil or balsamic glaze for added taste. I don’t recommend freezing these skewers. Freezing changes the texture of tomatoes and mozzarella. If you must freeze, wrap each skewer well in plastic wrap. Use a freezer bag to prevent freezer burn. When ready to eat, thaw in the fridge overnight. Use them right away for the best taste. For the complete recipe, check the Full Recipe. To make Caprese Salad Skewers, follow these simple steps: - Rinse and slice 1 pint of cherry tomatoes in half. - Drain 8 ounces of fresh mozzarella balls if packed in liquid. - Take a wooden skewer and add a cherry tomato half, cut side up. - Place a fresh basil leaf on the skewer. - Add a mozzarella ball next, then another basil leaf. - Top with another cherry tomato half. - Repeat until the skewer is full. - Drizzle with 2 tablespoons of balsamic glaze and 1 tablespoon of olive oil. - Sprinkle with salt and pepper to taste. The Full Recipe provides more details for perfecting this dish. Yes, you can prepare Caprese Salad Skewers a day in advance. Assemble the skewers and store them in the fridge. Keep them covered with plastic wrap or in a sealed container. This helps maintain freshness and flavor. Just remember to drizzle the balsamic glaze right before serving. This way, the skewers will remain vibrant and delicious. If you need a substitute for balsamic glaze, try these options: - Use a simple mixture of olive oil and lemon juice. - Try a red wine vinaigrette for a tangy twist. - A honey mustard dressing can add a sweet touch. - You might also use a pesto for extra flavor. These alternatives can give your skewers a unique taste. Yes, Caprese Salad Skewers are naturally gluten-free. The main ingredients include tomatoes, mozzarella, basil, and olive oil. None of these contain gluten, making them safe for those with gluten sensitivities. This dish is also vegetarian-friendly, adding to its appeal. You can serve these skewers at events to accommodate different diets. They make a great appetizer for everyone to enjoy. In this blog post, we explored how to make delicious Caprese salad skewers. You learned about essential ingredients, from cherry tomatoes to mozzarella, and even some fun variations. I shared tips for assembly, presentation, and storage. Remember, these skewers are easy to prepare ahead of time and perfect for gatherings. Try adding your own twist to keep it fresh. Enjoy making these tasty treats, and let your creativity shine!

Caprese Salad Skewers Fresh and Flavorful Appetizer

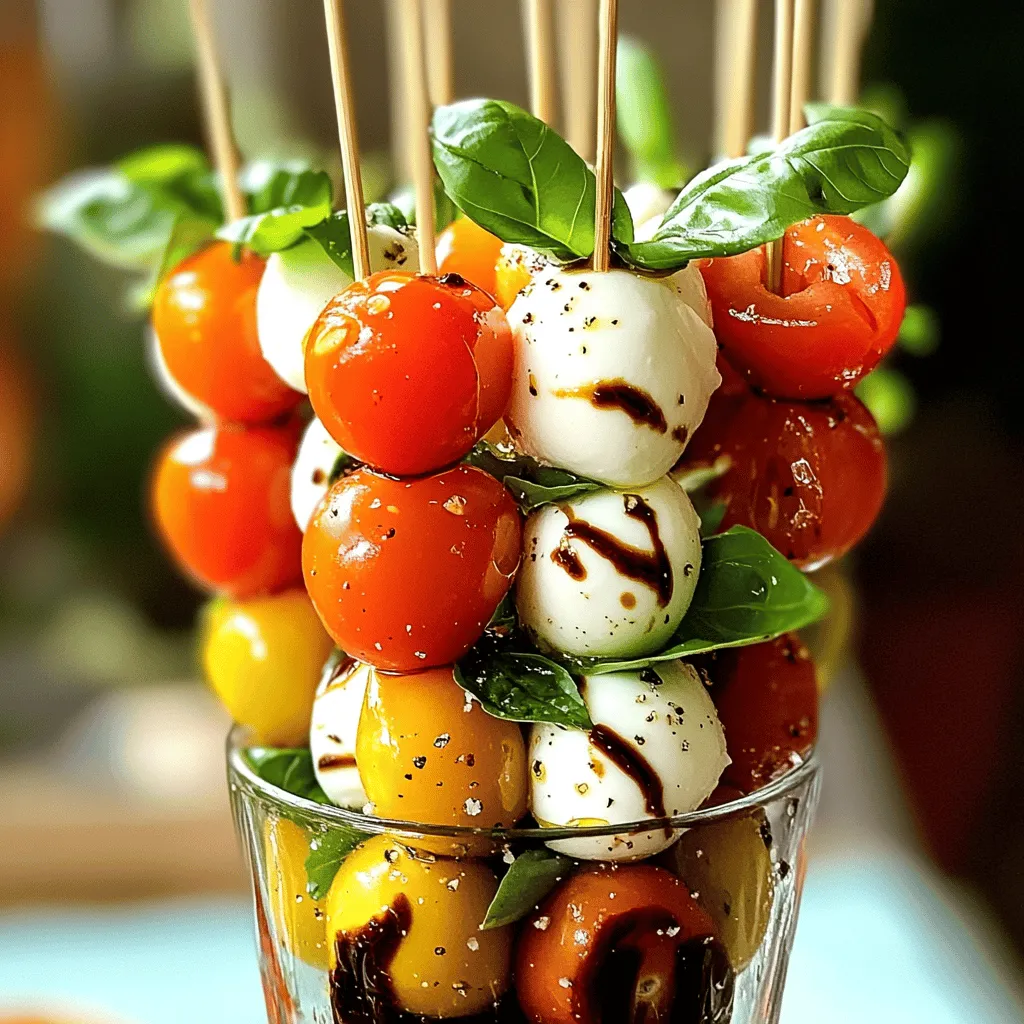
If you’re looking for a fresh and easy appetizer, Caprese Salad Skewers are the way to go. They combine juicy

To make this fresh and flavorful dish, you’ll need the following simple ingredients: - 4 medium zucchini - 1 ripe avocado - 1 cup fresh basil leaves - 2 tablespoons freshly squeezed lemon juice - 2 tablespoons tahini - 1 clove garlic, finely minced - 1/4 cup nutritional yeast - Salt and freshly ground black pepper to taste - 1 tablespoon extra-virgin olive oil - 1 cup cherry tomatoes, halved - 2 tablespoons pine nuts, toasted Each ingredient plays a key role in creating a delightful meal. Zucchini offers a crunchy base. The avocado brings creaminess, while fresh basil adds a burst of flavor. Lemon juice brightens the dish, and tahini gives it a smooth texture. Garlic adds depth, and nutritional yeast lends a cheesy taste. Salt and pepper enhance all the flavors. Lastly, cherry tomatoes and pine nuts provide a colorful and crunchy garnish. If you want to follow this recipe step-by-step, check out the Full Recipe for Zucchini Noodles with Pesto. Enjoy the mix of tastes and textures! To start, let's make those zucchini noodles. You can use a spiralizer. This tool turns zucchini into long, curly strands. If you don’t have one, don’t worry! You can slice the zucchini into thin strips using a knife or a vegetable peeler. Next, we need to drain the moisture from the noodles. Place the spiralized zucchini in a colander and sprinkle a bit of salt on top. Let them sit for about 15 minutes. This step helps reduce the water content. You want your dish to be fresh, not watery. Now, let’s move on to the avocado pesto. For this, you will need the following ingredients: - 1 ripe avocado - 1 cup fresh basil leaves - 2 tablespoons freshly squeezed lemon juice - 2 tablespoons tahini - 1 clove garlic, finely minced - 1/4 cup nutritional yeast - Salt and pepper to taste In a food processor, combine the avocado, basil, lemon juice, tahini, garlic, and nutritional yeast. Blend it all on high speed until the mixture is smooth and creamy. Taste it and adjust the salt and pepper. This will ensure the flavors are just right. Once your noodles are ready and the pesto is smooth, it’s time to combine them. Use a large mixing bowl to make this easier. Add the zucchini noodles and the avocado pesto to the bowl. Toss gently until all the noodles are coated in that lovely green sauce. To finish, drizzle some extra-virgin olive oil over the top. Toss the noodles lightly again to mix the oil in. For serving, place the zucchini noodles on a plate. You can add halved cherry tomatoes and toasted pine nuts for garnish. This adds color and crunch. Enjoy this fresh and flavorful dish right away for the best taste! For the full recipe, check out the section above. Preventing excess moisture: Excess moisture can make your zucchini noodles soggy. Start by spiralizing the zucchini and placing the noodles in a colander. Sprinkle them with salt and let them sit for about 15 minutes. The salt draws out water, making the noodles firmer and better for your dish. Best spiralizing techniques: For the best results, use a spiralizer. Hold the zucchini firmly and twist it through the blades. If you don’t have a spiralizer, a vegetable peeler or a knife works too! Just slice the zucchini into long strips. Aim for even, thin strands to mimic traditional pasta. Variations to enhance flavor: Avocado pesto can be made unique with a few tweaks. Try adding a handful of arugula for a peppery kick. You can also mix in some sun-dried tomatoes for a tangy twist. Experiment with nuts, like walnuts or cashews, for added depth. Storage tips for unused pesto: If you have leftover pesto, store it in an airtight container. Drizzle a little olive oil on top to keep it fresh. You can refrigerate it for up to a week. For longer storage, freeze the pesto in ice cube trays. This way, you can pop out a cube whenever you need a quick flavor boost! Enjoy making this fresh and flavorful dish! For the complete recipe, see the link above! {{image_4}} You can boost your zucchini noodles with some protein. Here are two great options: - Grilled chicken: Slice tender grilled chicken and mix it into the noodles. The chicken adds flavor and makes the dish more filling. - Shrimp: Cook shrimp in olive oil until they turn pink. Toss the shrimp with the zucchini noodles for a seafood twist. It pairs well with the creamy avocado pesto. If you're looking to adjust this dish for specific diets, here are some ideas: - Vegan alternatives: The recipe is already vegan with avocado and tahini. You can skip the nutritional yeast for a lighter dish or use a vegan cheese for added flavor. - Low-carb options: Zucchini noodles are a great low-carb choice. If you want to add more texture, consider sautéing some bell peppers or mushrooms with the zucchini. Enhancing the flavors can take your dish to a new level. Here are a few suggestions: - Adding chili flakes: A sprinkle of chili flakes can add a nice kick. It balances the creaminess of the pesto. - Cheese options: For a richer taste, try adding grated Parmesan or vegan cheese. It melts nicely and gives a savory finish to the dish. Feel free to explore these variations to make the dish your own. You can find the Full Recipe for Zucchini Noodles with Pesto to guide you through the process. Enjoy creating your perfect bowl! To keep your zucchini noodles fresh, you can refrigerate or freeze them. - Refrigeration methods: Place the zucchini noodles in a paper towel. This will absorb extra moisture. Put them in a sealed bag or container. They stay good for about 2-3 days in the fridge. - Freezing for later use: If you want to store them longer, freezing is a great option. Lay the noodles flat on a baking sheet. Freeze them for an hour, then transfer to a freezer bag. They can last up to 3 months in the freezer. Keeping your pesto fresh is key to enjoying its bright flavors. - Air-tight containers: Always store pesto in an air-tight container. This helps prevent oxidation, which can dull the color and taste. - Best practices for keeping it fresh: You can drizzle a thin layer of olive oil on top of the pesto before sealing. This creates a barrier from air. Pesto stored this way can last about a week in the fridge. Yes, you can use regular pasta instead of zucchini noodles. However, there are some key differences. Zucchini noodles have fewer carbs and fewer calories than traditional pasta. A cup of cooked pasta has about 200 calories, while zucchini noodles only have about 20 calories. This makes zucchini a great choice for lighter meals. You can store leftovers in the fridge for up to three days. Place them in an airtight container to keep them fresh. If you want to keep them longer, you can freeze the zucchini noodles for up to two months. Just remember to drain excess moisture before storing, as this helps avoid sogginess. You can serve many tasty side dishes with zucchini noodles. A simple garden salad pairs well. Roasted vegetables also make a nice addition. For a heartier meal, grilled chicken or shrimp complement the dish perfectly. If you enjoy wine, a crisp white wine, like Sauvignon Blanc, works great with pesto flavors. A light red, like Pinot Noir, can also be a good match. For the complete recipe, check out the [Full Recipe]. Here’s a quick reference to the ingredients you’ll need: - 4 medium zucchini - 1 ripe avocado - 1 cup fresh basil leaves - 2 tablespoons freshly squeezed lemon juice - 2 tablespoons tahini - 1 clove garlic, finely minced - 1/4 cup nutritional yeast - Salt and pepper to taste - 1 tablespoon extra-virgin olive oil - 1 cup cherry tomatoes, halved - 2 tablespoons pine nuts, toasted Use these ingredients to create a fresh and flavorful dish that everyone will enjoy! In this blog post, we explored how to make delicious zucchini noodles with avocado pesto. We detailed each step, from prepping the ingredients to blending the perfect pesto. You learned tips to avoid excess moisture and how to store leftovers properly. Experiment with protein additions and flavor enhancements to suit your taste. Embrace this healthy dish for a fresh meal. Enjoy making your zucchini noodles, and don’t forget to share your tasty creations!

Zucchini Noodles with Pesto Fresh and Flavorful Dish

Looking for a fresh and flavorful dish that delights your taste buds? Zucchini noodles with pesto are the perfect choice!

- 1 cup rolled oats - 1/2 cup natural peanut butter - 1/2 cup chocolate protein powder - 1/4 cup honey or maple syrup - 1/4 cup mini dark chocolate chips - 1/4 cup ground flaxseed (or chia seeds) - 1/2 teaspoon vanilla extract - A pinch of salt These ingredients create a snack that is tasty and healthy. Each element serves a purpose. For instance, rolled oats provide fiber. They help keep you full. Natural peanut butter adds protein and healthy fats. Chocolate protein powder boosts the protein content without added sugars. Honey or maple syrup offers sweetness and moisture. Mini dark chocolate chips make the snack fun and appealing. Ground flaxseed or chia seeds add omega-3 fatty acids. Finally, vanilla extract and salt enhance the overall flavor. A serving of these protein balls packs a solid protein punch. Each ball has about 5 grams of protein. This helps support muscle recovery and keeps hunger at bay. The caloric breakdown per serving is roughly 100 calories. This makes them a smart choice as a snack or post-workout treat. You can easily switch ingredients based on your taste or needs. If you want a different flavor, almond or cashew butter works well instead of peanut butter. For those avoiding dairy, look for plant-based protein powders. They blend well and still taste great. You can also use agave or coconut sugar instead of honey or maple syrup for a different sweetness. Start by gathering your dry ingredients. You need rolled oats, chocolate protein powder, ground flaxseed, and a pinch of salt. In a large bowl, mix these items well. This is key to ensuring even flavor in every bite. If you skip this step, the protein balls might not taste as good. So, take your time to combine them thoroughly. Now, let’s add the wet ingredients. Carefully add natural peanut butter, honey or maple syrup, and vanilla extract to the dry mix. Use a spatula or your hands to blend them. Mixing well is vital for a smooth texture. If the mix feels too dry, add a teaspoon of water. If it's too wet, sprinkle in some more oats. Adjusting moisture helps you get the right consistency. Next, it’s time to form the protein balls. Take portions of the mixture and roll them into small balls, each about 1 inch wide. Place them on a parchment-lined baking sheet. This keeps them from sticking. After shaping all the balls, cover the sheet with plastic wrap. Chill them in the fridge for at least 30 minutes. This chilling time helps the balls firm up nicely and makes them easier to eat. For the full recipe, check the details above. To get the best texture in your protein balls, focus on the oats. If your mixture is too dry, add more oats or a tiny splash of water. If it feels sticky, sprinkle in a few more oats. You want a blend that holds together but is not too wet or too dry. You can make these protein balls ahead of time. Prepare a big batch and store them in an airtight container. For longer storage, freeze them. To thaw, simply leave them in the fridge overnight. This way, you always have a healthy snack ready. These tasty snacks are perfect for many occasions. Serve them after workouts or as a fun treat during parties. Pair them with a glass of milk or a smoothie for a balanced snack. They not only taste great but also add extra protein to your diet. {{image_4}} You can change up the flavor of your chocolate peanut butter protein balls easily. Here are some fun ideas: - Adding spices: A dash of cinnamon can add warmth. If you love rich flavors, try adding cocoa powder. Just a little will boost the chocolate taste. - Incorporating fruits or nuts: Dried fruits like raisins or chopped dates can add natural sweetness. Nuts, such as almonds or walnuts, can give a nice crunch. These protein balls can fit many diets. Here’s how: - Gluten-free options: Just use certified gluten-free oats. This makes the recipe safe for those with gluten allergies. - Vegan adaptations: Swap honey for maple syrup. Use a plant-based protein powder to make it fully vegan. You might wonder what the difference is between energy bites and protein balls. - Differences: Energy bites often have more sweeteners and fewer protein sources. Protein balls focus on providing a higher protein content, thanks to the protein powder. - Nutritional considerations: Protein balls usually have more protein per serving. This makes them a great snack for muscle recovery. Energy bites can be sweeter and may have more sugar. For more inspiration, check out the Full Recipe for these tasty treats! Store your chocolate peanut butter protein balls in airtight containers. This keeps them fresh and tasty. If you plan to eat them soon, put them in the refrigerator. For longer storage, the freezer is your best friend. Just make sure to label the container with the date. In the refrigerator, these protein balls last about a week. If you freeze them, they can stay good for up to three months. Watch for signs of spoilage, like a strange smell or changes in texture. If they get hard or dry, it’s time to toss them. Taking your protein balls on the go is easy. Use a small container or a resealable bag. This helps prevent them from getting squished. If you want to share, pack them in a cute box. You can also separate them with parchment paper to keep them safe. Chocolate peanut butter protein balls can last about one week in the fridge. Store them in an airtight container to keep them fresh. If you want to keep them longer, you can freeze them. They can last for up to three months in the freezer. Just remember to thaw them in the fridge before you enjoy them. Yes, you can use different types of protein powder. Whey, casein, or plant-based protein work well. Just keep in mind that the flavor and texture might change a bit. If you use a flavored protein powder, it may add extra taste. This way, you can customize your protein balls to suit your liking. Absolutely! These protein balls pack a nutritious punch. They contain healthy fats from peanut butter and flaxseed. The rolled oats provide fiber, which is great for digestion. Each ball has a good amount of protein, helping you feel full longer. Plus, the dark chocolate chips add a touch of sweetness without too much sugar. Overall, they make for a balanced and healthy snack. For the full recipe, check out the earlier section! This blog post guides you in making chocolate peanut butter protein balls. We covered ingredients, including oats, protein powder, and nut butter, along with their nutritional value. I shared tips on preparation, storage, and variations to suit all diets. These protein balls are simple to make and perfect for a quick snack. Try these at home for a healthy treat. They can easily fit your lifestyle and offer great nutrition. Enjoy experimenting with flavors and sharing them with friends!

Chocolate Peanut Butter Protein Balls Healthy Snack Recipe

Looking for a tasty and healthy snack? You’ve come to the right place! This Chocolate Peanut Butter Protein Balls recipe

To make Banana Oatmeal Muffins, you need these basic ingredients: - 2 ripe bananas, thoroughly mashed - 1 cup rolled oats - 1/2 cup whole wheat flour - 1/4 cup packed brown sugar - 1/4 cup honey or maple syrup (your choice) - 1/2 teaspoon baking powder - 1/2 teaspoon baking soda - 1/2 teaspoon ground cinnamon - 1/4 teaspoon sea salt - 1/3 cup milk (dairy or non-dairy for a vegan option) - 1 large egg (or a flax egg for a vegan option) - 1/4 cup melted coconut oil or unsalted butter These ingredients work together to create moist and tasty muffins. The bananas add natural sweetness and moisture, while the oats give a hearty texture. You can change up the flavor and texture with these optional ingredients: - 1/2 cup chopped walnuts or pecans - 1/2 cup dark chocolate chips or raisins Adding nuts brings a nice crunch, while chocolate chips or raisins add more sweetness. Feel free to mix and match based on your taste! If you don’t have something on hand, here are some easy swaps: - Use almond flour instead of whole wheat flour for a gluten-free option. - Swap honey for agave syrup if you prefer a vegan option. - Coconut oil can be replaced with vegetable oil or melted butter. For the egg, a flax egg is simple to make. Just mix one tablespoon of ground flaxseed with two and a half tablespoons of water. Let it sit for five minutes to thicken. These substitutions help you tailor the recipe to your needs while keeping the muffins delicious. For the full recipe, check out the details above. To make the batter, start by preheating your oven to 350°F (175°C). Prepare your muffin tin by lining it with muffin liners or greasing each cup lightly. In a large bowl, mash the ripe bananas well. Then, add the honey or maple syrup, along with the melted coconut oil or butter. Mix these ingredients smoothly. In another bowl, whisk together the rolled oats, whole wheat flour, baking powder, baking soda, ground cinnamon, and sea salt. This will ensure your dry ingredients are evenly mixed. Pour the dry mix into the banana bowl and fold gently. Avoid over-mixing to keep the muffins light. Next, add the milk and egg, folding them in softly. If you like, add nuts or chocolate chips now. Now it’s time to fill your muffin cups! Use a scoop or spoon to fill each cup about two-thirds full. This gives the muffins room to rise while baking. Place the muffin tin in the oven and bake for 18 to 20 minutes. To check if they are done, insert a toothpick in the center of a muffin. If it comes out clean or with a few moist crumbs, your muffins are ready! Once baked, let the muffins cool in the tin for 5 minutes. Then, move them to a wire rack to cool completely. For serving, present the muffins warm on a nice platter. You can sprinkle powdered sugar on top for an elegant touch. A drizzle of honey adds extra sweetness. These muffins go great with coffee or tea, making them perfect for breakfast or a snack. Enjoy your delicious banana oatmeal muffins! For the full recipe, check out the earlier section. To get the best texture for your banana oatmeal muffins, avoid over-mixing. When you mix the wet and dry ingredients, do it gently. Stir just until you see no dry flour. This keeps the muffins soft and fluffy. If you want a little crunch, add nuts. They add great texture without making the muffins dense. One common mistake is using unripe bananas. Ripe bananas add natural sweetness and moisture. Look for bananas with brown spots; they are perfect for baking. Another mistake is filling the muffin cups too full. Always fill them about two-thirds full. This gives the muffins space to rise without spilling over. Spices can make a big difference in flavor. Ground cinnamon is a great choice; it pairs well with bananas. You can also add a pinch of nutmeg for warmth. If you like a bit of heat, try a dash of ginger. These spices will make your muffins taste amazing. For a fun twist, toss in some vanilla extract. It adds a sweet aroma that makes the muffins more inviting. For the full recipe, you can check the details above. {{image_4}} For a delightful crunch, add nuts to your muffins. I love using chopped walnuts or pecans. These nuts not only add flavor but also boost the nutrition. You can mix in about 1/2 cup of your favorite nuts into the batter. Just fold them in gently before baking. This small change makes a big difference in texture and taste. If you crave a sweeter muffin, chocolate chips or raisins are perfect. Both options add a nice burst of sweetness. Use about 1/2 cup of either. I often blend chocolate chips into the batter for a rich flavor. Raisins work well too, giving a chewy texture. Just remember to adjust the sweetness if you add these goodies. For a vegan twist, swap the egg with a flax egg. To make a flax egg, mix one tablespoon of ground flaxseed with three tablespoons of water. Let it sit for a few minutes to thicken. For milk, use any non-dairy option like almond or oat milk. These simple swaps keep the muffins tasty and plant-based. You still enjoy the same great flavors with these adjustments. For the full recipe, check out the details above. To keep your banana oatmeal muffins fresh, store them in an airtight container. This helps keep moisture in and prevents drying. Place a piece of parchment paper between layers if you stack them. This keeps them from sticking together. You can also wrap each muffin in plastic wrap for extra protection. Freezing muffins is a great way to save them for later. To freeze, wrap each muffin tightly in plastic wrap, then place them in a freezer bag. They can last up to three months in the freezer. When you want to enjoy one, take it out and let it thaw at room temperature. You can also reheat them in the microwave for about 20-30 seconds for a warm treat. Banana oatmeal muffins stay fresh for about 3 to 5 days at room temperature. Keep them in a cool, dry place, away from sunlight. If they start to feel dry or hard, they may be past their best. Check for any signs of mold. If you see any, it’s best to discard them. Enjoy the freshness while they last! To make banana oatmeal muffins moist, use ripe bananas. They add natural sweetness and moisture. You can also add a bit of milk to the batter. Coconut oil or butter keeps them soft, too. Avoid over-mixing the batter. This can make the muffins dense. Instead, mix until just combined. Finally, let them cool in the pan for a few minutes. This helps keep moisture in. Yes, you can substitute several ingredients in this recipe. If you don't have whole wheat flour, use all-purpose flour instead. Honey works well, but you can use maple syrup for a vegan option. For the egg, try a flax egg. Just mix 1 tablespoon of flaxseed meal with 2.5 tablespoons of water and let it sit for a few minutes. If you want nuts, skip them if you're allergic. You can replace them with more chocolate chips or raisins. Banana oatmeal muffins taste great with various sides. Serve them warm with butter or cream cheese. A drizzle of honey adds a sweet touch. They pair well with fresh fruit like berries or banana slices. For drinks, enjoy them with coffee or tea. You can also serve muffins as a snack or breakfast treat. They are perfect for any time of day! You can easily modify this recipe to fit dietary needs. For gluten-free muffins, use gluten-free oats and flour. If you're vegan, swap the egg for a flax egg and use plant-based milk. Avoid honey and choose maple syrup instead. For nut allergies, simply skip nuts and chocolate chips. Adjust sweetness according to taste. This way, everyone can enjoy these yummy muffins! For the full recipe, check out the details above. In this blog post, we explored key ingredients for banana oatmeal muffins. I shared ways to modify the recipe, including substitutions and optional items. We went through step-by-step baking instructions for perfect muffins. You learned tips to avoid common mistakes and enhance flavor. I also outlined storage best practices to keep your muffins fresh. With these insights, you'll create tasty muffins every time. Enjoy your baking adventures!

Banana Oatmeal Muffins Tasty and Easy Recipe

Are you ready to whip up a tasty treat? My Banana Oatmeal Muffins are not just easy to make; they

- 1 lb Brussels sprouts, trimmed and halved - 3 tablespoons extra virgin olive oil - 4 cloves garlic, finely minced - Zest and juice of 1 fresh lemon - 1/2 teaspoon red pepper flakes - 2 tablespoons freshly grated Parmesan cheese - Fresh parsley, chopped - Sea salt - Freshly ground black pepper The main ingredients are simple yet powerful. Brussels sprouts stand out with their nutty flavor. Olive oil adds richness and helps with roasting. Garlic gives a bold kick. Lemon zest and juice brighten every bite, making them fresh and tasty. You can add red pepper flakes for a spicy twist. Parmesan cheese makes the dish richer and creamier. Fresh parsley not only adds color but also a fresh taste. When seasoning, use sea salt and black pepper to enhance all the flavors. The right amount of salt brings out the best in your ingredients. Before you start cooking, gather all your ingredients. This will keep things smooth and quick as you prepare your Lemon Garlic Roasted Brussels Sprouts. For the full recipe, check out the details above. - Preheat the oven to 400°F (200°C). - In a large bowl, mix the halved Brussels sprouts with: - 3 tablespoons extra virgin olive oil - 4 cloves garlic, finely minced - Zest and juice of 1 fresh lemon - Sea salt and freshly ground black pepper to taste Toss the Brussels sprouts until they are well-coated. This mix gives them great flavor. - Line a baking sheet with parchment paper. - Spread the Brussels sprouts mixture evenly on the sheet. - Roast for 25 to 30 minutes. Stir them halfway through for even cooking. This step makes them crispy outside and tender inside. - If you're using Parmesan cheese, sprinkle it over the Brussels sprouts in the last 5 minutes of roasting. This adds a rich flavor. - When done, remove them from the oven. Garnish with freshly chopped parsley before serving. These simple steps will help you create a dish that shines on your table. For the full detailed instructions, check out the Full Recipe. To get your Brussels sprouts crispy, start with a hot oven. Preheat it to 400°F (200°C). This heat helps achieve a nice golden color. Next, make sure to space the sprouts on the baking sheet. If they touch, they will steam instead of roast. For best results, use a parchment-lined sheet. This keeps them from sticking and makes cleanup easy. Want to mix up the flavors? Add some herbs like thyme or rosemary. These herbs bring a fresh taste to your dish. If you prefer spices, try adding smoked paprika or cumin. When it comes to garlic, fresh is always best. Use fresh cloves for a stronger flavor. Dried garlic can work, but it won't pack the same punch. These roasted Brussels sprouts pair well with many dishes. Serve them alongside grilled chicken or fish for a complete meal. They also work great with pasta or quinoa. For a beautiful presentation, use a nice serving dish. Drizzle some extra lemon juice over the top for a fresh look. A sprinkle of Parmesan cheese adds richness and makes it pop! For the full recipe, check out [Full Recipe]. {{image_4}} For a vegan twist, simply leave out the Parmesan cheese. You can replace it with nutritional yeast for a cheesy flavor. Use plant-based oil if you want to avoid animal products. This keeps the dish light yet full of zest. If you like heat, add more red pepper flakes. You can also try a pinch of cayenne pepper for a deeper kick. Mix in some smoked paprika for a smoky flavor. This spicy version will excite your taste buds and add some fun to the dish. To make this dish healthier, reduce the oil. You can use a spray bottle with olive oil for even less. This method helps to cut down on fat while keeping the sprouts crispy. You can also roast them without oil for a truly light option. To keep leftover Brussels sprouts fresh, store them in an airtight container. This helps lock in moisture and flavor. Place them in the fridge within two hours of cooking. They should stay good for up to three days. When you want to eat them again, check for any signs of spoilage. If they look slimy or have an off smell, toss them out. When reheating Brussels sprouts, aim to keep them crispy. The best way is to use an oven or an air fryer. Preheat your oven to 350°F (175°C). Spread the Brussels sprouts on a baking sheet and heat for about 10-15 minutes. If using an air fryer, set it to 350°F (175°C) and cook for about 5-7 minutes. Avoid using the microwave, as it can make them soggy. If you want to freeze Brussels sprouts, start with fresh ones. First, wash and trim them. Blanch them in boiling water for three minutes. Then, quickly place them in ice water to stop the cooking. Drain and spread them on a baking sheet. Freeze them for about two hours. Once frozen, transfer them to a freezer-safe bag. They can last up to six months in the freezer. When ready to use, thaw them overnight in the fridge before cooking. Yes, you can prepare the Brussels sprouts ahead. Toss them with oil, garlic, and lemon. Store in the fridge for a day. When ready, roast them fresh. This keeps the flavor bright. You can use green beans or broccoli instead. They roast well and have a great texture. Cauliflower also works nicely. Simply follow the same steps as the recipe. Brussels sprouts are done when they are golden brown and crispy outside. Use a fork to check if they are tender inside. They should not be mushy. Yes, you can use frozen Brussels sprouts. Thaw them first and pat dry to remove excess moisture. This helps them crisp up nicely while roasting. These sprouts pair well with roasted chicken or salmon. They also go nicely with grain bowls or pasta dishes. Serve with a fresh salad for a complete meal. For the full recipe, check out the detailed instructions. In this blog post, we explored a tasty way to prepare Brussels sprouts. We went over the main ingredients like olive oil and garlic, plus optional items that can enhance the dish. You learned step-by-step instructions for roasting and tips to boost flavor. We also discussed variations to suit your taste and storage methods for leftovers. Brussels sprouts are delicious and easy to make. Trying these tips will help you enjoy them even more. Embrace this recipe and share your results!

Lemon Garlic Roasted Brussels Sprouts Simple Delight

Are you ready to turn Brussels sprouts into a simple delight? My Lemon Garlic Roasted Brussels Sprouts recipe combines fresh

To make delicious cinnamon sugar churros, you need a few key items. Here’s what you’ll need: - 1 cup water - 1/2 cup unsalted butter, cubed - 1 tablespoon granulated sugar - 1/4 teaspoon salt - 1 cup all-purpose flour - 2 large eggs, at room temperature - 1 teaspoon vanilla extract - 1/2 cup granulated sugar, for coating - 1 tablespoon ground cinnamon, for coating - Oil for frying (vegetable or canola oil works well) These ingredients create a rich dough that fries up crisp and fluffy. You can switch things up with some fun variations. Here are a few ideas: - Chocolate sauce for dipping - Caramel sauce for dipping - Nutmeg for a twist in the coating - Orange zest for a fresh flavor in the dough Feel free to mix and match these optional items to make your churros unique! Having the right tools makes the process smooth. Here’s what you will need: - Medium saucepan - Wooden spoon - Mixing bowl - Piping bag with a large star-shaped nozzle - Deep skillet or pot for frying - Slotted spoon for removing churros - Paper towels for draining With these tools, you’ll have everything to make perfect churros at home. For the full recipe, check out the instructions above! Making churro dough is quite simple. Start by taking a medium saucepan. Add 1 cup of water, 1/2 cup of cubed unsalted butter, 1 tablespoon of granulated sugar, and 1/4 teaspoon of salt. Heat this mixture over medium heat. Stir it occasionally until the butter melts and everything boils. Once it boils, take the pan off the heat. Quickly add 1 cup of all-purpose flour. Stir it fast with a wooden spoon. You want a smooth dough to form. Put the pan back on low heat for around 1 minute. Keep stirring until the dough pulls away from the pan's sides and forms a ball. Next, place the dough in a mixing bowl. Let it cool for about 5 minutes. Now, add 2 large eggs one at a time. Mix well after each egg until the dough becomes smooth and glossy. Finally, mix in 1 teaspoon of vanilla extract for that extra flavor. Now comes the fun part: frying! In a deep skillet or pot, heat oil over medium-high heat. You want the oil to reach around 350°F (175°C). To test if it's hot enough, drop in a small piece of dough. If it sizzles, you're ready. Fill a piping bag with the churro dough. Use a large star-shaped nozzle for nice ridges. Carefully pipe strips of dough about 4-6 inches long into the hot oil. Use kitchen scissors or a knife to cut the dough off. Fry the churros in batches. Don’t overcrowd the pan. Cook them for about 2-3 minutes on each side. You want them golden brown and crispy. When done, use a slotted spoon to take them out and let them drain on paper towels. While the churros are still warm, it's time to coat them. In a shallow bowl, mix 1/2 cup of granulated sugar with 1 tablespoon of ground cinnamon. Roll the warm churros in this cinnamon sugar. Make sure they are fully coated for that sweet touch. Serve your churros warm. They look great on a decorative platter. For a special treat, offer a small bowl of chocolate sauce or caramel for dipping. Enjoy every bite of your delicious cinnamon sugar churros! For the full recipe, check out the details above. To get the best churro texture, focus on the dough. You want it to be soft yet firm. When you mix in the eggs, do it one by one. This ensures the dough stays smooth. If your dough feels too sticky, let it cool a bit more. This will help make it easier to pipe. A few mistakes can ruin your churros. First, don't skip the cooling step after cooking the dough. This is key for the right texture. Second, watch the oil temperature. If it's too low, the churros will soak up oil and become greasy. If it's too hot, they will burn quickly. Aim for 350°F (175°C) exactly. Lastly, avoid crowding the pan while frying. This can lead to uneven cooking. For the best experience, serve your churros warm. Presentation matters! Place them on a pretty plate and sprinkle extra cinnamon sugar on top. You can pair them with chocolate sauce or caramel for dipping. This adds a rich flavor that contrasts nicely with the churros' sweetness. Enjoy them fresh for the best taste! If you want to try a full recipe, check out the complete Cinnamon Sugar Churros recipe above. {{image_4}} You can add a fun twist with chocolate dipping sauce. After you fry the churros, melt some chocolate. Dark or milk chocolate works well. Dip each churro into the warm chocolate. Let the excess chocolate drip off. This sweet addition adds richness and flavor. The combination of cinnamon and chocolate is hard to beat! Want to surprise your taste buds? Try filled churros! You can use cream, jam, or even dulce de leche. After frying, use a piping bag with a small nozzle. Insert the nozzle into the end of each churro. Squeeze in your filling until you feel it puff up. This adds a delicious surprise with every bite. If you prefer a vegan option, it’s simple! Replace the eggs with flax eggs. Mix one tablespoon of flaxseed meal with two and a half tablespoons of water. Let it sit for a few minutes to thicken. Use this mixture just like the eggs in the recipe. You can still enjoy crispy, sweet churros without animal products. Check out the Full Recipe to make these tasty variations at home! To keep your churros fresh, store them in an airtight container. Place parchment paper between layers to prevent sticking. Store at room temperature for up to two days. If you want to keep them longer, refrigeration is an option, but they may lose some crispiness. When you're ready to enjoy your churros again, reheating them correctly is key. Preheat your oven to 350°F (175°C). Place the churros on a baking sheet lined with parchment paper. Bake for about 10 minutes. This method keeps them crispy on the outside and warm on the inside. Avoid using the microwave, as it makes them soggy. Freezing is a great way to save churros for later. Allow them to cool completely. Then, place them in a single layer on a baking sheet. Freeze for about an hour. Once frozen, transfer them to a freezer-safe bag. They can last up to three months. When you're ready to eat, just reheat as mentioned above. Enjoy your churros anytime! For the full recipe, check the main section. Cinnamon sugar churros are sweet, crispy fried dough sticks. They have a light texture and a warm, sweet flavor. These treats come from Spain and are popular worldwide. You can enjoy them plain or with toppings like chocolate or caramel. To make churros crispy, follow these tips: - Heat the oil well: Ensure your oil is hot enough (about 350°F or 175°C). This helps the churros fry quickly and become crisp. - Do not overcrowd: Fry churros in small batches. Overcrowding lowers the oil temperature, making them soggy. - Drain properly: After frying, let churros drain on paper towels. This removes excess oil and keeps them crispy. - Coat while warm: Roll churros in cinnamon sugar while they are still warm. This adds flavor and keeps the exterior crunchy. You can buy cinnamon sugar churros at many places like: - Cafes and bakeries: Look for shops that specialize in pastries. - Food trucks: Many food trucks sell churros at fairs or festivals. - Frozen sections: Some grocery stores offer frozen churros. You can bake or fry them at home. - Online retailers: You can also find churro kits or mixes online for easy preparation at home. For a delicious homemade version, check out the Full Recipe! You now know how to make delicious cinnamon sugar churros. We explored the key ingredients and tools needed for this treat. I walked you through preparing the dough, frying, and coating with cinnamon sugar. We also discussed tips for getting the perfect texture and shared variations to try. Remember, you can store leftovers and even freeze them for later. Enjoy making these churros, and don't be afraid to get creative with your flavors! They are worth every effort and will surely impress everyone.

Cinnamon Sugar Churros Easy and Delicious Recipe

If you crave a sweet and crunchy treat, you need to try cinnamon sugar churros! In this easy and delicious

To make a tasty Mediterranean chickpea salad, gather these ingredients: - 1 can (15 oz) chickpeas, thoroughly rinsed and drained - 1 cup cherry tomatoes, halved for sweetness - 1 medium cucumber, diced for crunch - ½ small red onion, finely chopped for a mild bite - 1 bell pepper (any vibrant color), diced for color and flavor - ½ cup kalamata olives, pitted and sliced for a briny touch - ¼ cup feta cheese, crumbled to add creaminess - ¼ cup fresh parsley, finely chopped for freshness - 3 tablespoons extra virgin olive oil for a rich dressing - 2 tablespoons freshly squeezed lemon juice for brightness - 1 teaspoon dried oregano for herbal notes - Salt and black pepper, to taste I often use canned chickpeas for their convenience. They save time and are easy to find. Just remember to rinse them well. Fresh chickpeas, if you can find them, offer a firmer texture. You can cook them from dried, but it takes longer. Choose based on your time and taste. Feel free to personalize your salad! Here are some fun ideas: - Add diced avocado for creaminess. - Toss in some arugula for a peppery kick. - Include diced artichokes for a tangy flavor. - Try roasted red peppers for a smoky taste. These add-ins can make your salad even more exciting. Mix and match to find your favorite twist! For the full recipe, check out the detailed instructions. Start by rinsing and draining the chickpeas. Use a can of chickpeas for ease. Next, cut the cherry tomatoes in half. Dice the cucumber into small pieces. Finely chop the red onion. Dice the bell pepper into bite-sized chunks. Lastly, slice the kalamata olives. This mix of fresh veggies will create a colorful salad. In a large mixing bowl, combine the chickpeas, cherry tomatoes, cucumber, red onion, bell pepper, and olives. This step brings together a variety of flavors and textures. Next, sprinkle in the crumbled feta cheese and chopped parsley. This adds a creamy touch and fresh taste to the mix. In a separate small bowl, whisk together three tablespoons of extra virgin olive oil and two tablespoons of freshly squeezed lemon juice. Add one teaspoon of dried oregano, salt, and black pepper. Whisk until the dressing is smooth. This dressing will bring all the salad flavors together. Drizzle the dressing over the chickpea mixture. Use a large spoon or spatula to gently toss everything together. Make sure every ingredient is coated with the dressing. This ensures each bite is full of flavor. Taste the salad and adjust the flavors to your liking. You may want more salt, black pepper, or lemon juice. Feel free to tweak it until it’s perfect for you. Let the salad sit for at least 15 minutes. This resting time helps the flavors meld. Enjoy your Mediterranean Chickpea Salad! For the full recipe, check the details above. Let your Mediterranean chickpea salad rest. I suggest 15 minutes at room temperature. This simple step allows the flavors to mix well. You will notice a big difference in taste. Seasoning can transform your salad. Use salt and black pepper to bring out the flavors. A squeeze of fresh lemon juice adds brightness. You can also try herbs like dill or basil for a twist. Experiment with different spices to find your favorite mix. Make your salad look as good as it tastes. Serve it in a large, colorful bowl to show off the vibrant ingredients. Sprinkle extra feta cheese on top for a creamy touch. Fresh parsley leaves add a pop of green. For a complete meal, pair the salad with warm pita bread or crunchy pita chips. This adds more texture and flavor to your dining experience. For the full recipe, check out the Mediterranean Chickpea Salad details. {{image_4}} You can easily make this salad vegan. Just skip the feta cheese. Use avocado instead for creaminess. If you need a gluten-free option, this salad is already gluten-free! All the ingredients are safe to enjoy. You can swap out ingredients based on what you have. For example, use sunflower seeds instead of feta for a nutty taste. Seasonal veggies add freshness to your salad. In spring, try adding asparagus or snap peas for crunch. In summer, use ripe heirloom tomatoes for sweetness. In fall, roasted butternut squash brings warmth. In winter, kale can add a hearty texture. Using seasonal ingredients makes the salad taste even better. Want to boost protein? Add cooked chicken or tuna for a hearty meal. These options keep the salad filling and flavorful. You can also add more beans, like black beans or kidney beans, for a plant-based boost. Mixing in protein keeps your meal balanced and satisfying. Enjoy the full recipe to explore these delicious options! To keep your Mediterranean chickpea salad fresh, store it in an airtight container. Make sure to remove as much air as possible. This helps prevent spoilage and keeps the flavors intact. If you notice any moisture in the container, use a paper towel to absorb it. Always label the container with the date you made the salad. Your salad will last about 3 to 5 days in the fridge. After three days, check for any changes in smell or appearance. If it looks or smells off, it's best to toss it out. Enjoy the salad within this time frame for the best taste and texture. Freezing the Mediterranean chickpea salad is not recommended. The fresh vegetables can lose their crispness and flavor when thawed. However, you can freeze individual ingredients, like chickpeas or feta cheese. This way, you can easily make a fresh salad later. If you want to enjoy the salad again, it's best to make a new batch instead of freezing it. You can serve this salad with warm pita bread. Pita chips also make a great side. If you want a heartier meal, pair it with grilled chicken or fish. This adds protein and makes your meal more filling. Yes, you can make this salad ahead of time. It tastes even better when the flavors meld. Just keep it in the fridge for up to two days. If you want, add the dressing just before serving to keep it fresh. Absolutely! Mediterranean Chickpea Salad is naturally gluten-free. The main ingredients like chickpeas and veggies do not contain gluten. It is a safe option for anyone avoiding gluten in their diet. To add spice, try adding diced jalapeños or chili flakes. You can also use a spicy olive oil for the dressing. These small changes will give your salad a nice kick without overpowering it. This salad is rich in protein and fiber from the chickpeas. It also has healthy fats from the olive oil and olives. Each serving contains about 200 calories, 8 grams of protein, and 10 grams of healthy fats. For a full recipe, check out the Mediterranean Chickpea Salad section. This Mediterranean Chickpea Salad is healthy, tasty, and easy to make. We covered the key ingredients, like fresh or canned chickpeas, and discussed fun add-ins. I shared step-by-step instructions for making the salad and tips for serving it well. Explore variations to fit your tastes and learn best practices for storage. Whether it's a side dish or main meal, you can enjoy this salad any time. Dive in and create your own delicious version today!

Mediterranean Chickpea Salad Fresh and Flavorful Dish

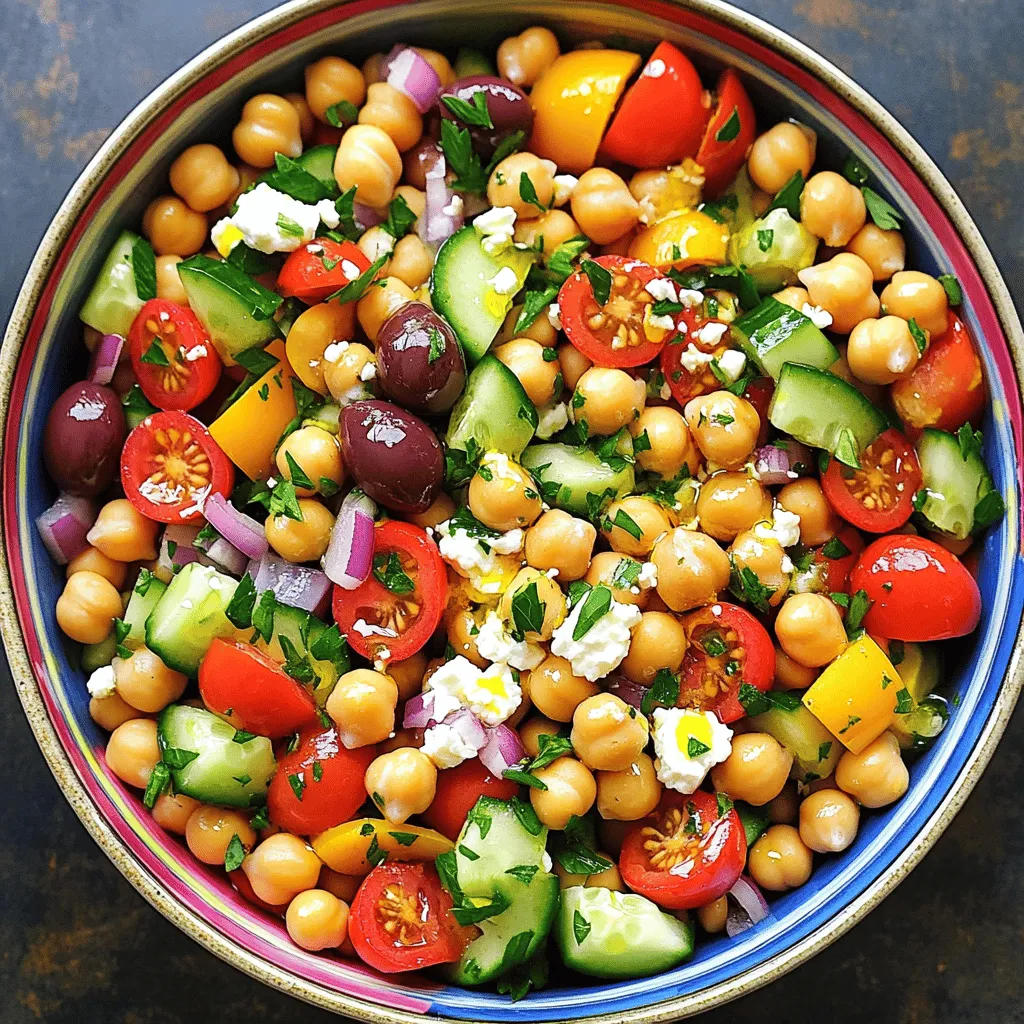
If you’re in search of a fresh, tasty dish, look no further than Mediterranean Chickpea Salad. This vibrant salad offers

To make a delicious roasted vegetable quinoa salad, you will need the following ingredients: - 1 cup quinoa, thoroughly rinsed - 2 cups vegetable broth or water - 1 red bell pepper, diced into bite-sized pieces - 1 yellow zucchini, cut into small cubes - 1 cup cherry tomatoes, halved - 1 red onion, chopped into small pieces - 2 tablespoons extra virgin olive oil - 1 teaspoon garlic powder - 1/2 teaspoon smoked paprika - Salt and freshly cracked pepper to taste - 1/4 cup fresh parsley, finely chopped - 1/4 cup feta cheese, crumbled (optional) These ingredients blend well and provide a burst of fresh flavors. The quinoa serves as a great base. It is high in protein and gluten-free. The roasted vegetables add color and nutrients. You can adjust the vegetables based on what you have. Once you gather these items, you can move on to making your delightful salad. Check out the Full Recipe for detailed steps! Set your oven to 425°F (220°C). This high heat helps to roast the vegetables perfectly. In a medium pot, combine 1 cup of rinsed quinoa with 2 cups of vegetable broth or water. Bring this to a boil over medium-high heat. Once it boils, reduce the heat to low. Cover the pot and let it simmer for about 15 minutes. The quinoa will be fluffy when ready. Remove it from heat and set it aside. On a large baking sheet, spread out the diced red bell pepper, cubed zucchini, halved cherry tomatoes, and chopped red onion. Drizzle 2 tablespoons of extra virgin olive oil over the veggies. Sprinkle with 1 teaspoon of garlic powder, 1/2 teaspoon of smoked paprika, salt, and pepper. Toss everything well so the veggies are fully coated. Spread them out in a single layer for even roasting. Place the baking sheet in the preheated oven. Roast the vegetables for 20-25 minutes. They should be tender and slightly caramelized. Stir the vegetables halfway through to ensure they brown evenly. In a large bowl, mix the cooked quinoa with your roasted vegetables. Gently fold them together. Be careful not to mash the quinoa. You want everything to stay fluffy. Add 1/4 cup of finely chopped fresh parsley to the salad. If you like, sprinkle 1/4 cup of crumbled feta cheese on top. This adds a creamy, tangy flavor that makes the dish pop. You can enjoy this salad warm or at room temperature. It’s perfect as a main dish or a side. To get fluffy quinoa, rinse it well first. This removes the bitter coating. Use two parts liquid for every cup of quinoa. Bring it to a boil, then lower the heat. Cover and let it simmer. In about 15 minutes, it will soak up all the liquid. Fluff it with a fork to make it light and airy. Roasting veggies brings out their natural sweetness. Cut them into even sizes for even cooking. Spread them out on the baking sheet, so they don't crowd each other. This helps them caramelize nicely. Toss them in olive oil, salt, and spices. Stir halfway through roasting for a perfect golden color. Aim for about 20 to 25 minutes at 425°F (220°C) to achieve that delicious flavor. A simple lemon vinaigrette pairs well with this salad. Mix fresh lemon juice, olive oil, salt, and pepper. You can also try a balsamic glaze for a sweet touch. If you want something creamy, use a yogurt dressing. Each option adds a unique twist to your salad. {{image_4}} You can mix in many other vegetables to make your salad unique. Think of adding: - Carrots, sliced thinly - Broccoli florets, chopped small - Bell peppers in different colors - Sweet potatoes, diced - Spinach, added fresh after roasting Each vegetable brings its own flavor and color. Try roasting them with the same spices to keep the taste balanced. To make your salad more filling, you can add proteins. Options include: - Chickpeas, canned or cooked - Grilled chicken, cut into small pieces - Tofu, diced and sautéed - Black beans, rinsed and drained - Hard-boiled eggs, chopped These add-ons boost nutrients and make your meal heartier. You can mix them in before serving. This salad can fit many diets. Here are some easy swaps: - For gluten-free, use quinoa or other gluten-free grains. - To keep it vegan, skip feta cheese and add avocado for creaminess. - If you want low-carb, replace quinoa with cauliflower rice. These changes make it easy to enjoy this salad, no matter your diet. You can customize it to match your needs. To store your Roasted Vegetable Quinoa Salad, place it in an airtight container. This helps keep it fresh. It’s best to cool the salad to room temperature before sealing. Store it in the fridge for up to three days. If you notice any moisture, use a paper towel to absorb it. This keeps the salad crisp. You can freeze this salad, but the texture may change. To freeze, first, let it cool completely. Transfer the salad to a freezer-safe bag or container. Remove as much air as possible before sealing. It will last up to three months in the freezer. When you’re ready to eat, thaw it overnight in the fridge. For best results, reheat gently in a skillet or microwave. Enjoy your salad within three days for the best taste and texture. After that, the veggies may lose their crunch. If frozen, it’s best to eat it within a month for maximum flavor. Always check for any signs of spoilage before eating. Freshness makes a big difference in flavor. Yes, you can use other grains. Brown rice is a great choice. It has a nutty flavor and chewy texture. You can also try farro or barley. Both have a hearty feel. Cook each grain according to package instructions. This way, they will be just right for your salad. The salad stays fresh for about three to five days. Be sure to store it in an airtight container. This helps keep it from drying out. If you add feta cheese, it may last a bit less. Always check for any off smells or changes in texture before eating. This salad pairs well with grilled chicken or fish. You can also serve it with a slice of crusty bread. For a lighter meal, try it with a bowl of soup. It’s very versatile and can be a main dish or a side. To make Roasted Vegetable Quinoa Salad, start by preheating your oven. Prepare the quinoa and then roast the vegetables. Combine them and add fresh parsley. Optionally, sprinkle feta cheese on top. This simple process gives you a tasty and colorful salad. For detailed instructions, refer to the full recipe. You learned how to make a Roasted Vegetable Quinoa Salad from scratch. We covered the key ingredients, step-by-step instructions, and valuable tips. Adding other vegetables or proteins can make it your own. Remember to store leftovers properly to keep them fresh. This salad is healthy, tasty, and easy to enjoy at any meal. I hope you feel inspired to try it! It's a great dish for everyone.

Roasted Vegetable Quinoa Salad Fresh and Colorful Meal

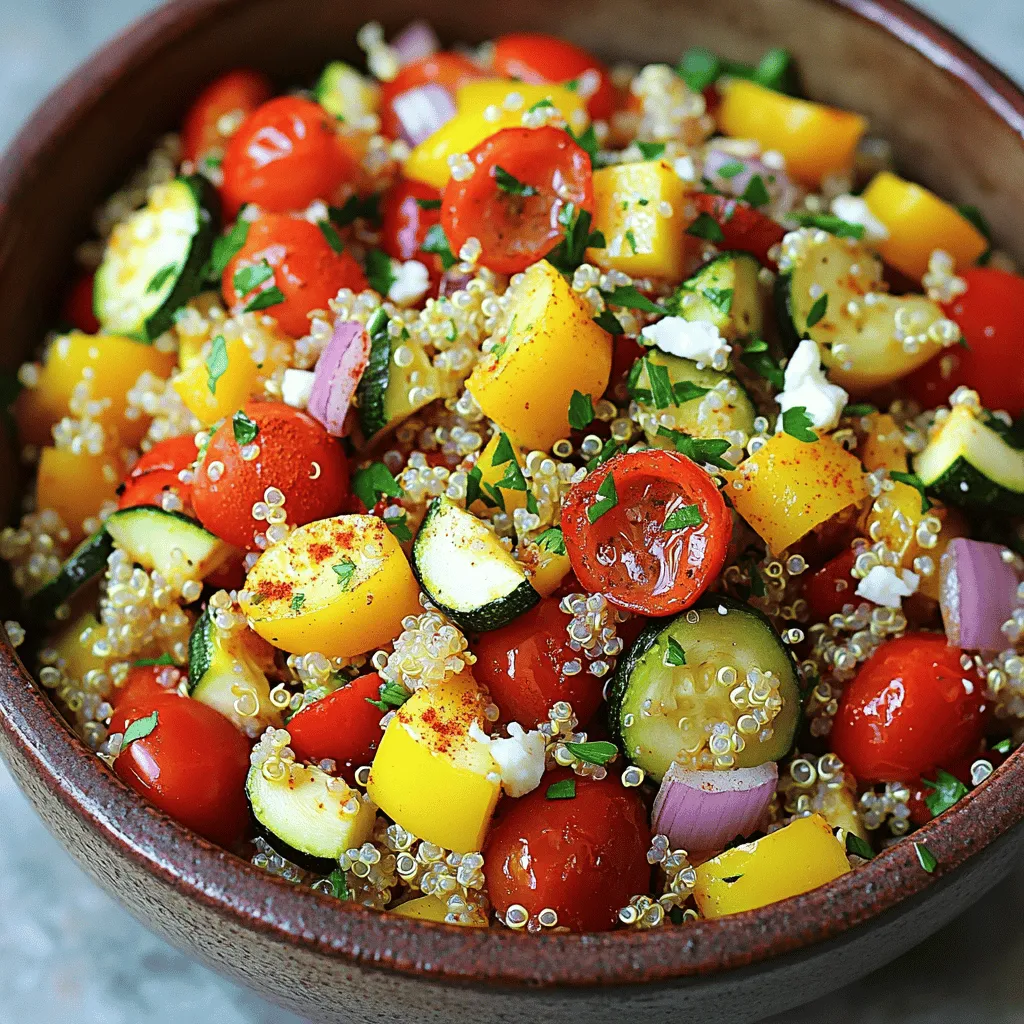
Are you ready to revamp your meals? Try my Roasted Vegetable Quinoa Salad! It’s fresh, colorful, and packed with flavor.

Older posts
Newer posts
← Previous Page1 … Page68 Page69 Page70 … Page86 Next →

dsad

© 2026 yumymoments • Built with GeneratePress

Our Policies

  • Copyright Policy
  • Cookie Policy
  • GDPR Policy
  • Privacy Policy
  • Disclaimer
  • Terms Of Use

More Information

  • Home
  • About
  • Contact
  • Appetizers
  • Dessert
  • Dinner
  • Drinks
©2026, yumymoments About Back To Top