Skip to content
DisclaimerTerms Of UseGDPR PolicyCookie Policy

yumymoments

  • Home
  • Drinks
  • Appetizers
  • Dinner
  • Dessert
  • About
  • Contact
  • Privacy Policy
DisclaimerTerms Of UseGDPR PolicyCookie Policy

NO-ING-IMG

To make creamy garlic mashed potatoes, you need simple, fresh ingredients. Here’s what you will need: - 2 pounds Yukon Gold potatoes, peeled and cubed - 4 cloves of fresh garlic, minced - 1 cup rich heavy cream - 4 tablespoons unsalted butter - 1/2 cup smooth sour cream - Salt and freshly cracked pepper, to taste - Fresh chives or parsley, finely chopped, for garnish These ingredients form the base of the dish, giving it a rich and savory flavor. Yukon Gold potatoes are perfect for mashing. Their smooth texture makes them ideal for creamy dishes. Fresh garlic adds a wonderful aroma and taste. If you want to take your creamy garlic mashed potatoes up a notch, consider these optional add-ins: - Cheese (like grated Parmesan or cheddar) - Cream cheese for extra creaminess - Roasted garlic for a sweeter flavor - Herbs like thyme or rosemary for a fresh twist These add-ins can enhance the depth of flavor and make your dish even more special. Don't worry if you have dietary needs; there are easy swaps you can make: - Use olive oil instead of butter for a vegan option. - Substitute coconut cream for heavy cream for a dairy-free version. - Swap sour cream with Greek yogurt for a lighter choice. These substitutions ensure everyone can enjoy creamy garlic mashed potatoes, no matter their diet. For the full recipe, check out the details above. Start with 2 pounds of Yukon Gold potatoes. Peel them and cut them into cubes. Make sure the pieces are about the same size for even cooking. Place the cubed potatoes in a large pot. Add cold water until the potatoes are fully submerged. Don’t forget to add a generous pinch of salt for flavor. Set the pot over medium-high heat. Bring the water to a rolling boil. Once it boils, reduce the heat to a gentle simmer. Cook the potatoes for about 15-20 minutes. You want them fork-tender but not falling apart. This texture is key to creamy mashed potatoes. While the potatoes cook, melt 4 tablespoons of unsalted butter in a small saucepan over medium heat. Add 4 cloves of minced garlic to the butter. Sauté for about 2 minutes. Stir often until the garlic smells great but does not turn brown. This step adds lovely depth to your mashed potatoes. When the potatoes are ready, drain them well in a colander. Return them to the pot. Use a potato masher or ricer to mash the potatoes. Mash until you reach your desired smoothness. Don’t overdo it, or they may turn gummy. Now, pour in 1 cup of heavy cream and 1/2 cup of smooth sour cream. Add in the sautéed garlic butter, too. Stir everything together until the mixture is creamy and smooth. This is where your mashed potatoes get their rich and velvety texture. Taste your creamy garlic mashed potatoes. Season with salt and freshly cracked pepper to your liking. Mix well to ensure the seasoning is even. For a great finish, scoop them into a serving bowl. Top with finely chopped fresh chives or parsley for a pop of color. For the full recipe, check out the [Full Recipe]. To get the creamiest mashed potatoes, start with Yukon Gold potatoes. They have a buttery texture that blends well. Always cook your potatoes in salted water for better flavor. Drain them well, so your mash doesn’t turn out watery. Use a potato masher or ricer to achieve that perfect smoothness. Incorporate heavy cream and butter while hot to help everything blend nicely. Finally, add sour cream for extra creaminess and tang. For the best results, use a few key tools. A potato masher gives you control over texture. If you want a super smooth mash, a potato ricer is your best friend. A large pot helps cook the potatoes evenly. A sturdy colander is essential for draining. Lastly, a wooden spoon or spatula will help mix in all those creamy ingredients perfectly. One common mistake is overcooking the potatoes. This can make them watery and gluey. Be careful not to skimp on the salt in the water; it enhances flavor. Avoid mashing cold potatoes, as they won’t blend well with the cream and butter. Don’t forget to taste as you go! Seasoning at the end may leave your potatoes bland. Follow these tips to make your creamy garlic mashed potatoes shine. For the complete recipe, check the Full Recipe. {{image_4}} You can add herbs to your creamy garlic mashed potatoes for a fresh twist. Chopped rosemary, thyme, or basil works well. Just mix in about one tablespoon of these herbs when mashing. This will give your dish a lovely aroma and taste. You can also infuse the butter with herbs before adding it to the potatoes. Simply heat the butter with a few sprigs of your chosen herb. Strain the butter before mixing it in for a subtle flavor boost. Cheese brings an extra layer of flavor to mashed potatoes. You can stir in grated Parmesan or sharp Cheddar for a rich taste. About one cup of cheese will do the trick. Add it after mashing the potatoes but before adding the cream. The heat of the potatoes will melt the cheese, making them deliciously gooey. For an extra kick, try adding a bit of blue cheese or goat cheese. If you want a plant-based option, you can replace dairy with vegan ingredients. Use almond milk or oat milk instead of heavy cream. For a creamy texture, try adding vegan sour cream or coconut cream. Use vegan butter or olive oil to sauté the garlic. This way, you can enjoy rich garlic mashed potatoes without dairy. These vegan alternatives still give you that velvety texture and rich taste. For the full recipe, check out the delicious details in the previous section. Store leftover creamy garlic mashed potatoes in an airtight container. Make sure the container is tightly sealed to keep out air. This helps the potatoes stay fresh. Place them in the fridge. They will last for about three to five days. If you want to keep them longer, consider freezing. When reheating your mashed potatoes, add a splash of heavy cream or milk. This helps bring back the creamy texture. Microwave them in short bursts, stirring in between. You can also reheat them on the stove. Use low heat and stir gently to avoid burning. To freeze mashed potatoes, let them cool completely first. Scoop the potatoes into freezer-safe bags or containers. Remove as much air as possible. Label the bags with the date. They can last for up to a month in the freezer. When you're ready to eat, thaw them in the fridge overnight. Reheat, adding cream to restore the creamy texture. For the full recipe, refer to the earlier sections. To make your mashed potatoes fluffier, use Yukon Gold potatoes. They are creamy and smooth. After boiling, drain them well. Then, mash them while they are hot. Adding warm milk or cream also helps. Whipping them with a hand mixer creates extra fluffiness. Yes, you can prepare creamy garlic mashed potatoes in advance. Make the dish up to a day ahead. Store it in the fridge in a sealed container. When ready to serve, reheat it gently on the stove. Add a splash of cream to restore creaminess. Creamy garlic mashed potatoes pair well with many dishes. Serve them with roasted chicken or beef. They also complement grilled vegetables and fish. For a cozy meal, enjoy them with a rich beef stew. To fix runny mashed potatoes, add more starch. You can mix in a little instant potato flakes. Another option is to cook them on low heat to evaporate excess moisture. Stir them gently until they reach the right texture. Creamy garlic mashed potatoes are a simple dish that can shine in any meal. We discussed key ingredients that give them flavor, like garlic and potatoes. I shared step-by-step instructions to ensure the best texture and creaminess. You learned helpful tips, variations, and storage info to keep your potatoes fresh. With this knowledge, you can create mashed potatoes that impress your family and friends. Enjoy experimenting with flavors and techniques to make it your own!

Creamy Garlic Mashed Potatoes Rich and Savory Delight

If you’re searching for the ultimate side dish, look no further! Creamy Garlic Mashed Potatoes are a rich and savory

- 2 cups fresh broccoli florets - 1 medium onion, finely chopped - 2 cloves of garlic, minced - 3 cups vegetable broth - 2 cups shredded sharp cheddar cheese - 1 cup heavy cream - 2 tablespoons olive oil - 1 teaspoon salt - 1/2 teaspoon freshly ground black pepper - 1/2 teaspoon smoked paprika - 1/4 teaspoon nutmeg (optional) - Croutons, for garnish This cheddar broccoli soup is not only tasty but also packed with nutrients. Each serving provides a good amount of vitamins A and C from the broccoli. The cheese offers protein and calcium, while the cream adds richness. Keep in mind, this soup is high in calories due to the cheese and cream, so enjoy it in moderation. You can make easy swaps to fit your needs. If you want a lighter soup, use milk instead of heavy cream. For a dairy-free option, try almond or oat milk with nutritional yeast for flavor. If you like spice, add a pinch of cayenne pepper. For a crunchier texture, toss in some toasted nuts or seeds on top. Always taste and adjust seasoning to your liking. For the full recipe, check out the Cheddar Bliss Broccoli Soup. Start by gathering your ingredients. You will need: - 2 cups fresh broccoli florets - 1 medium onion, finely chopped - 2 cloves of garlic, minced - 3 cups vegetable broth - 2 cups shredded sharp cheddar cheese - 1 cup heavy cream - 2 tablespoons olive oil - 1 teaspoon salt - 1/2 teaspoon freshly ground black pepper - 1/2 teaspoon smoked paprika - 1/4 teaspoon nutmeg (optional) - Croutons, for garnish First, heat the olive oil in a large pot over medium heat. When the oil is hot, add the chopped onion. Sauté the onion for about 5 minutes until it turns soft and clear. Then, add the minced garlic to the pot. Cook for another minute while stirring. Be careful not to let the garlic brown, as it can become bitter. Next, pour in the vegetable broth and bring it to a gentle simmer. Once it simmers, add the broccoli florets, salt, black pepper, smoked paprika, and nutmeg if you like. Stir everything well to mix. Let the soup cook for 10-15 minutes. This will make the broccoli tender and bright green. Once the broccoli is ready, use an immersion blender to blend the soup until it is smooth. If you don’t have an immersion blender, pour the soup in batches into a regular blender. Blend until smooth and then return it to the pot. After blending, set the pot on low heat. Stir in the heavy cream slowly. Then, sprinkle in the shredded cheddar cheese. Keep stirring until the cheese melts and blends into the soup. Taste it and add more salt or pepper if needed. Now it’s time to serve your delicious soup! Pour it into bowls and top each bowl with croutons for a nice crunch. For added flair, drizzle a little extra heavy cream on top. A sprinkle of smoked paprika can add some color and extra flavor. Enjoy your warm, creamy cheddar broccoli soup! For the full recipe, refer to the earlier section in this article. To get the best texture in your cheddar broccoli soup, focus on cooking time. Cook the broccoli just until tender. If overcooked, it can turn mushy. Blend the soup until smooth but not too long. You don’t want to lose all the richness. If you like some chunks, blend only half. This gives you a creamy base with tasty bits of broccoli. Seasoning can make or break your soup. Start with salt and black pepper. They enhance the cheese's flavor. Smoked paprika adds a nice warmth. Nutmeg is optional, but it can deepen the flavor. Always taste as you go. Adjust the seasoning to suit your palate. Fresh herbs, like chives or parsley, can add bright flavors too. Many people make a few common mistakes. First, be careful not to boil the soup too hard. This can affect the cheese’s texture. Second, don’t skip the sautéing. It builds a great base of flavor. Lastly, avoid adding cheese too quickly. If you add it all at once, it may clump. Stir it in gradually for a smooth finish. Following these tips will help you create the perfect cheddar broccoli soup. For the full recipe, check out Cheddar Bliss Broccoli Soup. {{image_4}} You can easily make this soup vegan. Start by using plant-based cheese. Look for brands that melt well. Replace the heavy cream with coconut milk or cashew cream. These options give a rich texture. You can also switch vegetable broth for a homemade mix using water and spices. This keeps all the flavor without dairy. To make this soup gluten-free, check all your ingredients. Ensure the broth and cheese are gluten-free. Most brands offer gluten-free versions. If you want to thicken the soup, use cornstarch or arrowroot powder. Mix it with water before adding it to the pot. This way, it won’t clump. Feel free to get creative with your soup. You can add cooked potatoes for extra creaminess. Or toss in some carrots for sweetness. For a spicy kick, add red pepper flakes or diced jalapeños. You can even mix in protein like cooked chicken or beans. Each choice makes the soup even more satisfying. Check the [Full Recipe] for the base ingredients before you start experimenting! You can keep leftover cheddar broccoli soup in your fridge. Make sure to let it cool first. Store it in an airtight container. It will stay fresh for about 3 to 4 days. When you're ready to eat, just take it out and check for any signs of spoilage. If you want to save some soup for later, freezing is a great option. Cool the soup completely before freezing. Pour it into freezer-safe containers. Leave some space at the top for expansion. The soup can last for up to 3 months in the freezer. When you’re ready to enjoy, thaw it in the fridge overnight. To reheat your cheddar broccoli soup, first, pour it into a pot. Heat it on low to medium heat. Stir it often to avoid burning. If the soup seems thick, you can add a splash of vegetable broth or cream for a smoother texture. Once it's hot throughout, serve it in bowls and enjoy! You can use milk or plant-based milk. Coconut milk also works well. For a thicker option, use Greek yogurt or sour cream. These options can give your soup a creamy texture. Adjust the flavors as needed to keep it tasty. Yes, you can make this soup ahead of time. Just store it in an airtight container in your fridge. It will stay fresh for about three days. When ready to eat, just reheat it on the stove. Stir well to mix the flavors again. To thicken your soup, try adding more cheese. You can also mix in a cornstarch slurry. Just mix equal parts cornstarch and cold water. Stir it into the soup while it simmers. Another option is to add mashed potatoes for a creamy texture. This article covered all you need for Cheddar Broccoli Soup. We looked at the key ingredients, nutritional facts, and even some substitutions. Cooking steps were laid out simply, making it easy to follow. I shared tips to enhance texture and avoid common mistakes. You can try variations like vegan or gluten-free options. Finally, we discussed how to store and reheat your soup. With this knowledge, you're ready to cook a delicious soup that everyone will enjoy. Enjoy your cooking!

Cheddar Broccoli Soup Hearty and Flavorful Recipe

If you crave comfort food, this Cheddar Broccoli Soup is perfect for you! Creamy, cheesy, and packed with nutrients, it

To make classic hummus, you need the following ingredients: - 1 can (15 oz) chickpeas, drained and rinsed - 1/4 cup tahini (sesame seed paste) - 1/4 cup freshly squeezed lemon juice - 2 tablespoons extra virgin olive oil - 1 garlic clove, finely minced - 1/2 teaspoon ground cumin - Sea salt, to taste - Cold water, as needed for the desired consistency - Sweet paprika and fresh parsley, chopped, for garnish Using high-quality ingredients makes a big difference. Choose chickpeas that are firm and fresh. Opt for a good tahini, as it adds creaminess. Use fresh lemon juice, not bottled, for the best flavor. Extra virgin olive oil should be smooth and fragrant. Fresh garlic gives the best taste. Always adjust sea salt for your preference. For texture, cold water is key. Add it slowly to reach your perfect smoothness. The garnish of sweet paprika and parsley adds color and a touch of flavor. This classic hummus recipe is simple but delicious. For the full recipe, refer to the instructions above. 1. Start by adding the drained and rinsed chickpeas into your food processor. 2. Add the tahini to the chickpeas. Pulse for about 30 seconds. The mix should start to blend well. 3. Next, pour in the freshly squeezed lemon juice, minced garlic, extra virgin olive oil, and ground cumin. 4. Process these ingredients together for about one minute. Aim for a smooth and creamy texture. 5. Stop the processor. Use a spatula to scrape down the sides. This helps mix all the flavors. 6. Taste the mixture and add sea salt as you like. 1. To get the right creamy consistency, add cold water. Do this one tablespoon at a time. 2. Blend the mix until it becomes velvety smooth. You want it to be easy to scoop. 3. When you are happy with the texture, scoop the hummus into a nice serving bowl. 4. For a great look, drizzle a bit of extra olive oil on top. Sprinkle sweet paprika and freshly chopped parsley as a garnish. 5. Serve your hummus with fresh veggies, pita bread, or crackers. This makes it perfect for sharing! Enjoy this classic hummus recipe and let the flavors shine! For the full recipe, see the details above. To get the best texture, adjust the water. Start with a little, then add more as needed. This way, you can control how thick or creamy your hummus gets. Use a high-speed food processor. It blends the ingredients evenly and creates a smooth mix. Pulse first to break down the chickpeas, then blend longer. This helps achieve the right consistency. Scrape down the sides often. This ensures every bit gets mixed well. Want to elevate your hummus? Try adding roasted garlic instead of raw. It gives a sweeter, richer taste. You can also include roasted red peppers or sun-dried tomatoes for a twist. Spices can really enhance your hummus, too. Add smoked paprika for a nice depth. A pinch of cayenne can add heat. Experiment with herbs like fresh basil or dill for a fresh touch. For a full recipe, check out the classic hummus delight section. {{image_4}} You can change up the base of your hummus. If you want, use other beans like black beans or lentils instead of chickpeas. These swaps give your dish a new twist. For vegan options, stick to the classic tahini and olive oil. If you want to add creaminess, you can use yogurt, but that makes it non-vegan. Always check what works best for your diet. Hummus is fun because you can add flavors. One popular choice is roasted red pepper hummus. Just blend in roasted red peppers with the chickpeas. This gives a sweet and smoky taste. Another great option is garlic and herb hummus. Add more garlic and fresh herbs like parsley or basil. This makes your hummus bright and fresh. These variations let you create a hummus for every mood. You can try them alongside the full recipe for classic hummus. Enjoy experimenting! To keep your hummus fresh, use an airtight container. Glass jars work well, but plastic containers are fine too. Make sure the lid seals tightly. This keeps air out and helps preserve flavor. Store your hummus in the fridge right after you make it. It stays fresh longer this way. If you leave it out, it can spoil quickly due to bacteria. Aim to refrigerate your hummus within two hours of making it. Hummus lasts about four to seven days in the fridge. The exact time depends on how fresh your ingredients are. Always check for signs that it has gone bad. Look for changes in color or texture. If the hummus smells sour or has mold, it’s time to toss it. Trust your senses; if it seems off, don’t eat it. Enjoy your classic hummus recipe and keep it fresh with these tips! Can I freeze hummus? Yes, you can freeze hummus. Just place it in an airtight container. Make sure to leave some space at the top, as it can expand. When you want to eat it, thaw it in the fridge overnight. Stir it well before serving. What to serve with hummus? You can serve hummus with many tasty things. Fresh veggies like carrots, cucumbers, and bell peppers work great. Pita chips or warm pita bread are also a hit. You can even use crackers or toast for a nice crunch. How to make hummus without a food processor? You can use a blender or even a fork. If you use a blender, blend in small batches. If you use a fork, mash the chickpeas well first, then mix in the other ingredients. It will take more time, but you can still get great hummus. What's the difference between store-bought and homemade hummus? Homemade hummus often tastes fresher and has a creamier texture. You can control the flavors and make it your own. Store-bought hummus may have preservatives and less flavor. Plus, making it at home can be fun and rewarding. For the best taste, try my full recipe! Making your own hummus is simple and fun. We explored the right ingredients, measurements, and storage tips. I shared ways to achieve the perfect texture and flavor. Don’t forget about creative variations, like roasted red pepper or garlic hummus. With these tips, you can make delicious hummus at home. Enjoy experimenting with flavors and share your creations! Your kitchen will become an exciting place for tasty snacks.

Classic Hummus Recipe Creamy and Flavorful Dish

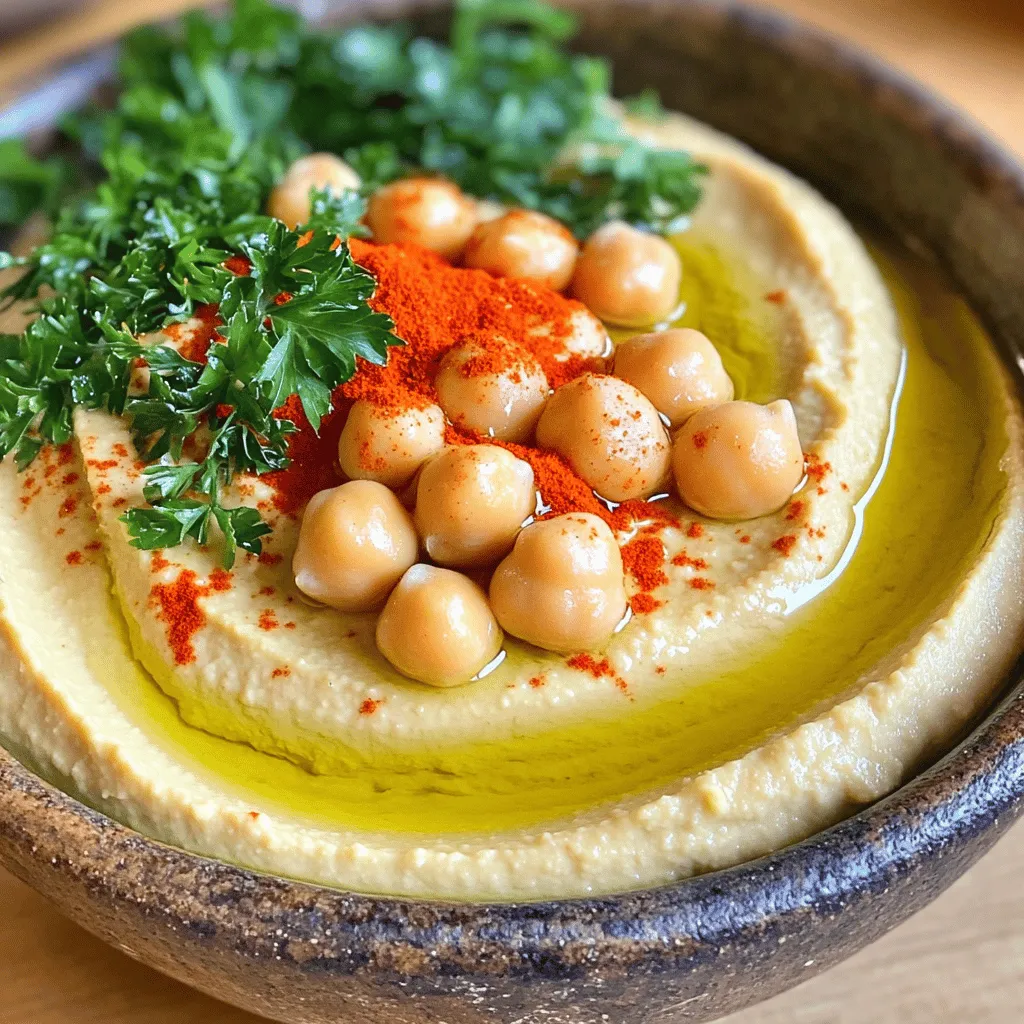
Are you ready to elevate your snack game? This Classic Hummus Recipe is creamy, flavorful, and perfect for any gathering.

- 4 bone-in, skin-on chicken thighs - 1/4 cup honey - 1/4 cup low sodium soy sauce To make this dish, start with chicken thighs. I prefer bone-in and skin-on for extra flavor. The honey adds sweetness, while the soy sauce gives it that savory punch. - 4 cloves garlic, minced - 1 tablespoon fresh ginger, grated - 1 tablespoon apple cider vinegar - 1 teaspoon sesame oil - Salt and black pepper, to taste Garlic is a must for this recipe. It creates a strong base flavor. Fresh ginger brightens the dish with its zest. Apple cider vinegar adds a touch of acidity to balance the sweetness. Sesame oil brings a nutty aroma, while salt and black pepper enhance all the flavors. - 2 tablespoons chopped green onions, for garnish - Cooked jasmine rice, for serving Chop green onions for garnish. They add color and a mild onion flavor. Serve the chicken over cooked jasmine rice. The rice absorbs the sauce well, making each bite a delight. You can find the full recipe [here](#). First, grab a medium mixing bowl. In this bowl, mix together the following ingredients: - 1/4 cup honey - 1/4 cup low sodium soy sauce - 4 cloves garlic, minced - 1 tablespoon fresh ginger, grated - 1 tablespoon apple cider vinegar - 1 teaspoon sesame oil - A pinch of salt - A few cracks of black pepper Whisk these well until they blend into a smooth marinade. For the best flavor, taste it. Adjust salt or honey to your liking. This mix is sweet, salty, and full of flavor. Now, take 4 bone-in, skin-on chicken thighs. Place them in a large resealable plastic bag or a shallow dish. Pour half of your marinade over the chicken. Make sure each thigh gets coated. Seal the bag tightly or cover the dish. Refrigerate for at least 30 minutes. If you have time, let them sit for up to 2 hours. This allows flavors to soak in deeply. Before cooking, preheat your oven to 400°F (200°C). While the oven heats, let’s sear the chicken. In an oven-safe skillet, heat a small amount of cooking oil over medium-high heat. Remove the chicken from the marinade, letting any extra drip off. Place the chicken in the skillet, skin-side down. Sear for about 5-7 minutes until the skin gets golden brown and crispy. Flip the thighs and sear the other side briefly. Next, pour the reserved marinade over the chicken. This adds a tasty glaze. Transfer the skillet to your preheated oven. Bake for 25-30 minutes. The chicken should reach an internal temperature of 165°F (75°C). For an extra touch, switch to broil for 3-5 minutes. This will caramelize the sauce beautifully. Once done, let the chicken rest for a few minutes. Enjoy it over fluffy jasmine rice, drizzled with the savory sauce from the skillet. Top with chopped green onions for a vibrant finish. For the complete cooking steps, check the Full Recipe. To make the marinade shine, you can swap honey for maple syrup or agave. These options bring sweet notes, too. You can also boost flavor with herbs like thyme or rosemary. Try adding a pinch of red pepper flakes for heat. Fresh herbs like cilantro or basil can add brightness. For crispy skin, start by patting the chicken dry with paper towels. This helps the skin get nice and crisp when cooked. Sear the chicken skin-side down for a golden finish. Use medium-high heat for best results. Always check the internal temperature. It should reach 165°F (75°C) for safe eating. Serve your chicken with fluffy jasmine rice. It soaks up the savory sauce well. You could also try brown rice for a nutty flavor or basmati rice for a fragrant twist. For jasmine rice, rinse it under cold water until the water runs clear. This helps to remove excess starch and makes it light and fluffy. Explore the [Full Recipe] for more details on making this dish come to life! {{image_4}} You can switch chicken thighs for chicken breasts. Breasts cook faster and stay juicy when marinated. You can also use pork or tofu. Marinating pork adds a sweet and savory flavor. Tofu absorbs sauces well, making it a great plant-based option. Want to heat things up? Add chili flakes to the marinade. This gives your dish a spicy kick. You can also mix in fruits like pineapple for a sweet-savory blend. The balance of flavors makes every bite exciting. Try adding vegetables like broccoli or bell peppers. Toss them in with the chicken during cooking. This way, you create a full meal in one pan. It saves time and cleans up easily. Cook the chicken and veggies together for a tasty combination. Store your honey garlic chicken thighs in an airtight container. This keeps them fresh and tasty. They can last in the fridge for up to four days. If you have marinated chicken, use it within two days. Marinating longer can change the texture of the meat. To freeze cooked chicken thighs, let them cool first. Wrap each piece tightly in plastic wrap. Place them in a freezer bag for extra protection. This way, they can stay fresh for up to three months. When you're ready to eat, thaw the chicken in the fridge overnight. For quick thawing, place it in cold water, changing the water every 30 minutes. Reheat your chicken thighs in the oven for the best results. Preheat your oven to 350°F (175°C). Place the chicken in a baking dish. Cover it with foil to keep it juicy. Bake for about 15-20 minutes or until heated through. If you want a crispy skin, uncover it during the last few minutes. This helps avoid dryness. Enjoy your meal again just like the first time! To check if chicken thighs are done, use a meat thermometer. The internal temperature should reach 165°F (75°C). Insert the thermometer into the thickest part of the thigh, avoiding the bone. If you don’t have a thermometer, cut into the chicken. The juices should run clear, not pink. Always check to ensure your chicken is safe to eat. Yes, you can make this recipe ahead of time. Prepare the marinade and marinate the chicken the night before. This saves time on busy days. You can also cook the chicken in advance and store it in the fridge. Reheat it gently before serving. Just remember, the flavors will deepen if marinated longer. If you need a substitute for honey, try maple syrup or agave nectar. Both provide sweetness, but they may change the flavor slightly. You can also use brown sugar dissolved in water. Each alternative will give a different taste. Adjust the amount to suit your preference. To adjust the recipe for fewer servings, simply divide the ingredients. For example, if you want to make two servings, use two chicken thighs and halve the marinade ingredients. This keeps the flavor balanced. Just remember, cooking times may vary slightly. Keep an eye on the chicken to avoid overcooking. This article explored making honey garlic chicken thighs, from gathering fresh ingredients to cooking. We covered key components like bone-in chicken, honey, and soy sauce, plus aromatics like garlic and ginger. I shared techniques to marinate well and achieve crispy skin, along with serving tips. Remember, you can modify ingredients for variety. Enjoy experimenting with new flavors! With this guidance, you can create delicious meals at home. Happy cooking!

Honey Garlic Chicken Thighs Flavorful and Easy Recipe

If you’re looking for a dish that packs a punch of sweet and savory flavors, my Honey Garlic Chicken Thighs

- 1 cup shredded carrots - 1 cup finely sliced cabbage - 1 bell pepper (any color), thinly sliced - 1 cup fresh bean sprouts - 2 green onions, chopped - 2 cloves garlic, minced - 1 teaspoon freshly grated ginger - 2 tablespoons soy sauce - 1 tablespoon sesame oil - ¼ teaspoon freshly ground black pepper - 1 package of spring roll wrappers - Cooking spray - Air fryer - Large mixing bowl - Clean, dry surface for wrapping - Measuring cups and spoons - Sharp knife and cutting board - Fresh cilantro - Soy sauce or sweet chili dipping sauce - Sesame seeds To start, gather all your fresh veggies. You will need shredded carrots, sliced cabbage, bell pepper, bean sprouts, and green onions. Add minced garlic and grated ginger to boost flavor. In a large bowl, mix these ingredients well. This veggie filling brings crunch and nutrients to your spring rolls. Next, we need to wrap those tasty fillings. Grab a spring roll wrapper and lay it flat. Make sure one corner points toward you. Spoon about two tablespoons of the veggie mix onto the wrapper, just above the bottom corner. Now, fold the bottom corner over the filling. Then, fold in the two side corners. Roll it up tightly from the bottom to the top. Moisten the top corner with a bit of water to seal it. Repeat this with the rest of your wrappers. Now it's time for the air fryer! Preheat it to 375°F (190°C). While it warms up, lightly spray your spring rolls with cooking spray. This helps them get that crunchy texture. Place the rolls in the air fryer basket in a single layer. Ensure they do not touch. This helps them cook evenly. Air fry for about 10-12 minutes. Flip them halfway for even browning. They should turn golden brown and crispy. Once done, let them cool for a few minutes before serving. Enjoy your delicious, healthy snack! For a full recipe, check the details above. To make your air fryer veggie spring rolls super crispy, follow these steps: - Preheat the air fryer: Always preheat your air fryer for even cooking. - Use cooking spray: A light coat of cooking spray helps create that golden crunch. - Avoid overcrowding: Place the spring rolls in a single layer. This allows hot air to circulate around them. - Flip halfway: Turn the rolls halfway through cooking for even browning on both sides. Many people face issues when making spring rolls. Here are some common mistakes: - Overfilling the wrappers: Too much filling can cause the wrappers to tear. - Using wet wrappers: Make sure the wrappers are dry before filling them. Wet wrappers can lead to soggy rolls. - Not sealing properly: Seal the wrappers well to prevent the filling from leaking during cooking. If you want to skip cooking spray, try these options: - Brush with oil: Use a pastry brush to lightly coat each spring roll with oil. - Use an oil mister: An oil mister allows for even distribution without a heavy coat. - Skip oil entirely: You can also air fry without oil, but the texture may be less crispy. By keeping these tips in mind, you can make the best air fryer veggie spring rolls. {{image_4}} You can boost your veggie spring rolls by adding protein. Tofu, shrimp, or chicken work great. For tofu, use firm tofu. Cut it into small cubes and sauté until golden. If you choose shrimp, peel and devein them first. Cook them until pink and tender. For chicken, use cooked chicken breast, shredded or diced. Mix the protein into your veggie filling. This change makes your spring rolls more filling and adds flavor. Want a kick? Add some heat to your spring rolls. You can mix in a teaspoon of sriracha or chili paste into your filling. You can also sprinkle in some crushed red pepper flakes. If you like fresh herbs, add chopped cilantro or basil for a fresh flavor. These spices and herbs will make your spring rolls exciting and tasty. Feel free to switch up the veggies! You can use ingredients like zucchini, mushrooms, or spinach. Just make sure to chop them finely. Avoid using too much water-rich veggies like tomatoes, as they can make the filling soggy. Try adding a cup of cooked quinoa for extra texture and nutrition. Using different vegetables keeps your spring rolls fresh and fun every time you make them. Check out the Full Recipe for more ideas! After enjoying your crispy air fryer veggie spring rolls, you might have some left. To store them, place the spring rolls in an airtight container. Make sure they cool down first. Keep the container in the fridge. They will stay fresh for about 2 to 3 days. When you want to eat your leftover spring rolls, reheating is key. Use your air fryer for the best results. Preheat it to 375°F (190°C). Place the spring rolls in the basket. Air fry them for 5 to 7 minutes until they are hot and crispy again. You can also use an oven. Set it to 350°F (175°C) and heat for about 10 minutes. If you want to save spring rolls for later, freezing works great. Lay them flat on a baking sheet. Make sure they do not touch each other. Freeze them for about 1 to 2 hours. Once frozen, transfer them to a freezer bag. Remove as much air as possible before sealing. They can last up to 3 months in the freezer. When you're ready to eat them, cook from frozen in your air fryer for about 12 to 15 minutes. You should air fry spring rolls for 10 to 12 minutes. This time gives them a nice golden color and crunch. Make sure to flip them halfway through cooking. This ensures even browning on all sides. Yes, you can prepare the filling a day in advance. Store it in the fridge until you are ready to wrap the spring rolls. This can save time on the day you want to cook. The spring rolls can be gluten-free if you use gluten-free wrappers. Check the label on your spring roll wrappers for gluten content. The filling is naturally gluten-free, so you just need to focus on the wrappers. Enjoy these tasty snacks without worry! Making air fryer spring rolls is fun and simple. We covered the right ingredients, how to prep the filling, and the best cooking methods. Remember the tips to get them crispy and avoid common mistakes. Feel free to experiment with fillings and spices for new flavors. Store your leftovers properly to enjoy later. Whether you make them for a snack or a meal, these spring rolls will impress. Try them out and enjoy the tasty results!

Air Fryer Veggie Spring Rolls Crunchy and Healthy Snack

Ready to make a crunchy and healthy snack? Air fryer veggie spring rolls are perfect! These rolls are easy to

Here is what you will need to make Vegan Mushroom Stroganoff: - 12 oz (340 g) wide egg-free pasta (like fettuccine or tagliatelle) - 2 tablespoons extra virgin olive oil - 1 medium onion, finely diced - 3 cloves garlic, minced - 16 oz (450 g) mixed mushrooms, sliced (cremini, shiitake, and button mushrooms work best) - 1 teaspoon dried thyme - 1 teaspoon smoked paprika - Salt and freshly ground black pepper to taste - 2 tablespoons soy sauce or tamari - 1 cup vegetable broth - 1 cup full-fat coconut milk (or unsweetened almond milk for a lighter taste) - 2 tablespoons nutritional yeast (optional, adds a cheesy flavor) - Fresh parsley, chopped, for garnishing You can swap some ingredients based on what you have: - Use gluten-free pasta if needed. - Swap olive oil with avocado oil for a different taste. - Any onion type works; yellow or red will do. - You can change the mushrooms to your favorites, like portobello or oyster. - If you want less fat, use almond milk instead of coconut milk. - Skip the nutritional yeast if you do not have it; the dish will still be tasty. This list makes it easy to gather what you need for a flavorful meal. Enjoy creating this creamy delight! Feel free to check the Full Recipe for more details. To start, cook the pasta in a large pot of boiling salted water. The goal is to achieve an al dente texture. This means the pasta should be firm to the bite. Overcooking can lead to a mushy dish, which we want to avoid. Reserve about ½ cup of the pasta water before you drain it. This starchy water helps to create a creamy sauce later. Next, you’ll sauté the onions and garlic. Heat olive oil in a large skillet over medium heat. Add the diced onion with a pinch of salt. Cook for about 4-5 minutes. The onions should turn translucent and fragrant. This is your cue to add the minced garlic. Stir it in and cook for another 30 seconds. Be careful not to burn the garlic; we want it aromatic, not bitter. Now, let’s talk mushrooms. I recommend using a mix like cremini, shiitake, and button mushrooms. They add depth to your dish. Increase the heat to medium-high and add the sliced mushrooms to the skillet. Sauté for about 6-8 minutes. Stir occasionally until the mushrooms are brown and have released their juices. This step builds a savory base for your stroganoff. Next, we turn our focus to the sauce. Stir in dried thyme and smoked paprika for depth. Then, pour in the soy sauce and season with salt and pepper. Add the vegetable broth and allow it to simmer gently for about 5 minutes. This reduces the liquid and enhances the flavors. After simmering, lower the heat and mix in the coconut milk. If you want a cheesy taste, add nutritional yeast. If the sauce is too thick, add some reserved pasta water until you reach the desired creamy consistency. Once your sauce is ready, it’s time to combine everything. Gently add the cooked pasta into the skillet. Toss well to coat the noodles evenly with the sauce. Allow it to heat through for 2-3 minutes. This step ensures that every bite is rich and flavorful. When ready to serve, dish out the stroganoff into a wide bowl. Garnish with freshly chopped parsley for a pop of color. A drizzle of olive oil adds richness. This dish pairs well with a crisp side salad for a complete meal. For the full recipe, check the link above. Enjoy your Vegan Mushroom Stroganoff! - Add fresh herbs like parsley or thyme to brighten your dish. - Experiment with seasonings like garlic powder or onion powder to boost flavor. - Use unsweetened almond milk for a lighter, creamy base. - Nutritional yeast adds a cheesy flavor and depth to your stroganoff. - Avoid overcooking pasta; it should be perfectly al dente. - Adjust seasonings to your taste; don’t skip this step! These tips can transform your vegan mushroom stroganoff into a flavorful creamy delight. For the full recipe, check out the detailed steps above. {{image_4}} You may want to boost the protein in your vegan mushroom stroganoff. I suggest adding plant-based proteins like tofu or tempeh. Both options soak up flavor well and add a nice texture. Simply cube the tofu or tempeh and sauté them with the mushrooms. This way, you create a heartier dish that fills you up. If you need a gluten-free meal, don't worry! You can easily swap the pasta. Look for gluten-free options like brown rice or chickpea pasta. These types cook differently, so be sure to check the package for cooking times. Adjusting the time can help keep your pasta from getting mushy. Want to make your stroganoff even more exciting? Try using different spices! Add a pinch of nutmeg or a dash of cayenne for warmth. You can also enhance nutrition by throwing in extra veggies. Spinach or bell peppers work well and brighten the dish. Don’t be afraid to experiment! To store leftover stroganoff, let it cool first. Place it in an airtight container. This keeps it fresh for up to five days. If you want to enjoy it later, be sure to label the container with the date. Good containers for storage include glass or BPA-free plastic. They seal well and help keep flavors intact. To freeze the dish without losing quality, let the stroganoff cool completely. Transfer it to a freezer-safe container or a heavy-duty freezer bag. Remove as much air as possible before sealing. This helps prevent freezer burn. You can freeze it for up to three months. When you're ready to enjoy your stroganoff, thaw it in the fridge overnight. Heat it slowly in a saucepan over low heat. Add a splash of vegetable broth or water as needed to loosen the sauce. Stir it well to get back that creamy delight. Enjoy your vegan mushroom stroganoff! For the full recipe, check out the details above. Yes, you can. Regular cream gives a rich texture. However, it is not vegan. Coconut milk adds a nice creaminess and a hint of sweetness. If you want a lighter option, unsweetened almond milk works well too. Each choice alters the flavor, so pick based on your taste. To make this dish gluten-free, use gluten-free pasta. Many brands offer great options like brown rice or chickpea pasta. Be sure to check the soy sauce too. Use tamari instead, as it is gluten-free. These swaps keep the dish tasty without gluten. Stroganoff pairs well with fresh salads, roasted vegetables, or crusty bread. A crisp green salad adds freshness. Roasted broccoli or carrots brings extra flavor and nutrients. You can also serve it with a light soup for a full meal. Leftover stroganoff lasts about 3 to 5 days in the fridge. Store it in an airtight container. Always check for signs of spoilage before eating. If it smells off or changes texture, it's best to toss it. Yes, you can make this dish ahead. Prepare the sauce and pasta separately. Store each in the fridge until ready to eat. When you want to serve, just reheat gently on the stove. Add a splash of water or broth to keep it creamy. Check the full recipe for detailed steps. This recipe shows you how to create a delicious vegan mushroom stroganoff. You learned about key ingredients, cooking steps, and useful tips. I shared ways to enhance flavor and avoid common mistakes. You can also explore variations and storage options to make this dish fit your needs. Enjoy experimenting with flavors and textures. This stroganoff can please anyone, whether they eat vegan or not. Cook with confidence, and make every meal tasty!

Vegan Mushroom Stroganoff Flavorful Creamy Delight

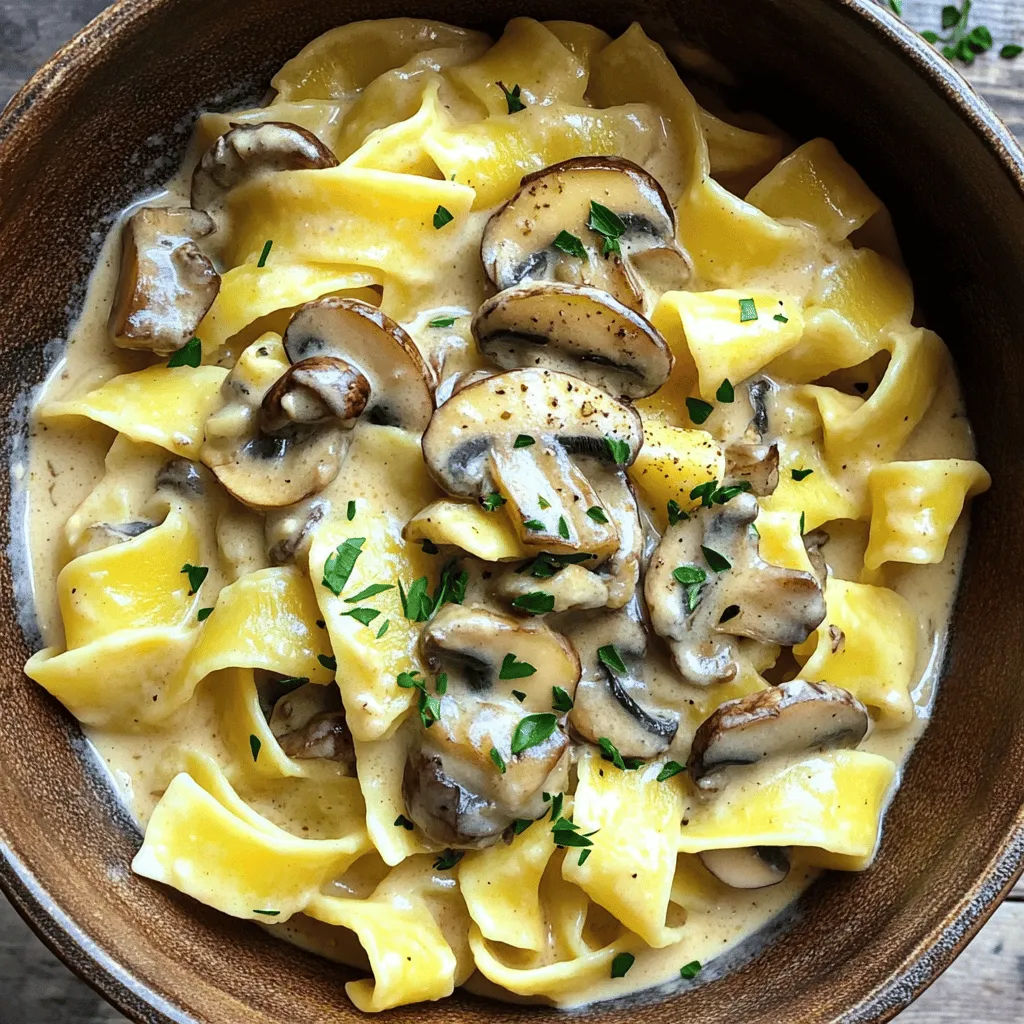
Are you ready to elevate your mealtime with a rich, satisfying dish? My Vegan Mushroom Stroganoff brings creamy delight without

To make tasty chicken fajitas, you will need: - 1 pound boneless, skinless chicken breasts, cut into thin strips - 1 large bell pepper (choose red, yellow, or green for color variety), sliced into strips - 1 medium onion, sliced into slivers - 2 tablespoons olive oil These main ingredients create a delicious base for your fajitas. The chicken gives protein, while the bell pepper and onion add crunch and flavor. For extra flavor, gather these spices: - 2 teaspoons chili powder - 1 teaspoon ground cumin - 1 teaspoon garlic powder - ½ teaspoon smoked paprika - Salt and black pepper, to taste These spices will make your chicken pop with flavor. They work together to give a warm, smoky taste that everyone will love. You can choose your tortillas based on your taste: - 8 small flour tortillas - 8 small corn tortillas Flour tortillas are soft and chewy, while corn tortillas are gluten-free and have a nice texture. Both options work great for holding all the tasty filling. For the full recipe, check out the section above. Enjoy cooking these easy chicken fajitas! Start by cutting the chicken into thin strips. In a medium bowl, mix the chicken with olive oil, chili powder, ground cumin, garlic powder, smoked paprika, salt, and black pepper. Mix well until all pieces are coated. Let the chicken marinate for at least 15 minutes. For a richer flavor, leave it in the fridge for up to 2 hours. This step adds depth to your dish. Next, heat a large skillet over medium-high heat. Once hot, add the marinated chicken. Cook it for about 5-7 minutes. Stir occasionally to ensure even cooking. Look for a golden brown color on each piece. This sear adds flavor and texture. Once done, remove the chicken and set it aside. Without cleaning the skillet, add the sliced bell pepper and onion. Sauté these for about 5 minutes. Stir them often until they get tender and a little charred. This charring brings out their sweetness and adds a nice depth to the dish. Once they’re ready, combine the cooked chicken back into the skillet. Toss everything together for about 2-3 minutes. This lets the flavors blend perfectly. Now your fajita mix is ready! Enjoy the full recipe for more details on serving. To get a nice sear on your chicken, start with high heat. Preheat your skillet for a few minutes before adding the chicken. Make sure the chicken pieces are dry. Pat them with a paper towel before seasoning. This helps them brown better. Avoid crowding the pan. Cook in batches if needed. This way, each piece cooks evenly, giving you that perfect golden crust. Using fresh ingredients can really boost the taste of your fajitas. Always choose vibrant bell peppers and sweet onions. Their natural sweetness adds depth. Fresh lime juice brightens up the dish. Consider adding fresh herbs like cilantro after cooking. It brings a burst of flavor. You can also include some chopped tomatoes or avocado for extra freshness. Cooking in batches saves time and ensures even cooking. If you have a lot of chicken or veggies, split them into smaller portions. Cook each batch separately. This prevents steaming and helps everything brown nicely. After cooking, combine everything in the skillet for a quick toss. This keeps your fajitas tasty and well-mixed. For the full recipe, check out the complete instructions above. {{image_4}} You can easily make fajitas without meat. Replace chicken with assorted veggies. Use bell peppers, zucchini, and mushrooms for great flavor. You can also add black beans for protein. Season these veggies with the same spices as the chicken. This keeps the taste bold and yummy. If you like heat, add more spice. Use jalapeños or serrano peppers with your chicken. You can also increase the chili powder in the marinade. This will give your fajitas a nice kick. For extra flavor, consider adding a splash of hot sauce when serving. It will make your meal pop! Tortillas can change your fajita game. Use corn tortillas for a gluten-free option. They add a nice crunch. Flour tortillas are soft and chewy, great for holding fillings. You can even try whole grain or spinach tortillas. Each type brings its own flavor and texture. Experiment to find your favorite! For the full recipe, be sure to check out the Full Recipe section! To store leftover fajitas, let them cool first. Place the mixture in an airtight container. You can keep chicken and veggies separate or mixed together. Store them in the fridge for up to three days. If you have extra tortillas, wrap them in foil or parchment paper. This keeps them fresh for your next meal. When reheating, I recommend using a skillet. Heat the skillet over medium heat. Add the leftover chicken and veggies. Stir them often until they are warm. This method keeps the flavors fresh. You can also use a microwave, but it might make the tortillas chewy. To avoid this, wrap tortillas in a damp paper towel. Heat them for short intervals. You can freeze chicken fajitas for a quick meal later. First, let the cooked fajitas cool. Then, place them in a freezer-safe bag. Remove as much air as possible to avoid freezer burn. Label the bag with the date. You can freeze them for up to three months. To use, thaw them in the fridge overnight. Reheat in a skillet or microwave, as mentioned above. Enjoy a tasty meal anytime! The best toppings for chicken fajitas include fresh cilantro, diced tomatoes, and creamy avocado. You can also add shredded cheese and sour cream for extra richness. Don't forget to squeeze fresh lime juice for a zesty kick! You can mix and match these toppings to make each fajita unique and tasty. Yes, you can make chicken fajitas in advance. Cook the chicken and veggies, then store them in an airtight container. They will stay fresh in the fridge for about three days. When you are ready to eat, just reheat everything in a skillet. This saves time on busy weeknights and makes dinner easy. To check if the chicken is fully cooked, use a meat thermometer. The internal temperature should reach 165°F. If you don't have a thermometer, cut into a piece of chicken. The meat should be white and no longer pink inside. Cooking chicken properly keeps it safe and juicy. For the complete recipe, don't forget to check out the Full Recipe! You learned all about making easy chicken fajitas, from ingredients to cooking tips. With the right marinade and perfect cooking techniques, you can make a great meal. Remember to store leftovers well and try different variations to keep things fun. Fajitas are tasty, and you can customize them any way you like. Enjoy exploring all the flavors and making your fajitas shine!

Easy Chicken Fajitas Flavorful and Fast Family Meal

Are you looking for a quick, tasty meal your whole family will love? You’re in the right place! In this

- 2 cups rolled oats - 1 cup pecans, coarsely chopped - 1/2 cup almond butter (or any nut butter of your choice) The base of these bars is rolled oats. They give a great chewy texture. Pecan nuts add a nice crunch and flavor. Almond butter, or your favorite nut butter, binds everything together. - 1/2 cup pure maple syrup - 1/2 cup honey (or agave syrup for a vegan option) - 1/2 teaspoon vanilla extract Maple syrup sweetens the bars, making them tasty. Honey adds more sweetness and helps with texture. Vanilla extract gives a warm, inviting flavor to each bite. - 1/4 cup unsweetened shredded coconut - 1/4 teaspoon fine sea salt - Optional: 1/2 cup dried cranberries or semi-sweet chocolate chips Shredded coconut adds a tropical touch and extra chewiness. Sea salt balances the sweetness and enhances the flavor. You can add dried cranberries or chocolate chips for a fun twist. For the full recipe, check the details above! - Preheat oven to 350°F (175°C). - Line an 8x8 inch baking dish with parchment paper. To start, you need to get the oven hot. Set it to 350°F. While it heats up, grab your 8x8 inch baking dish and line it with parchment paper. This helps with easy removal later. - Combine rolled oats, chopped pecans, shredded coconut, and sea salt. In a big bowl, mix together the rolled oats, chopped pecans, shredded coconut, and sea salt. Stir it well so every bite has a bit of each ingredient. - Whisk together almond butter, maple syrup, honey, and vanilla extract. - Pour wet mixture over dry ingredients and mix thoroughly. In another bowl, whisk the almond butter, maple syrup, honey, and vanilla extract. Make sure it’s smooth. Next, pour this wet mix over the dry ingredients. Stir it all together until everything is well combined. - Spoon mixture into the prepared baking dish, press down firmly. - Bake for 20 to 25 minutes until golden brown. - Cool, slice, and store properly after baking. Now, take the mixture and spoon it into your baking dish. Press down firmly with your hands or a spatula. This helps the bars stay together when baked. Place it in the oven and bake for 20 to 25 minutes. You want it to be golden brown. Once done, let it cool for about 10 minutes. Then, lift it out using the parchment paper. Wait until it cools completely before slicing into bars. Store them in an airtight container for up to one week. Enjoy the crunch and sweetness of these Maple Pecan Granola Bars! For the full recipe, check out the ingredients and steps above. To get the perfect texture, press down firmly when you spread the mixture in the pan. This keeps the bars compact. If you skip this step, the bars may crumble. After baking, let them cool completely before slicing. This helps you get clean edges and nice shapes. You can easily change the flavors based on what you like. Try using different nuts or seeds, such as almonds or sunflower seeds. For extra fun, think about adding mix-ins like chocolate chips or dried fruits like cranberries. This way, you can create a unique snack each time. When it comes to serving, wrapping each bar in parchment paper looks great. Secure it with twine for a rustic touch. Display the bars on a wooden board for a lovely snack spread. This simple step makes your homemade treats look even more inviting. {{image_4}} If you want a nut-free option, try sunflower seed butter. This swap keeps the bars creamy and tasty. Sunflower seed butter is rich in protein and healthy fats, just like nut butter. It adds a unique flavor, too. You can easily find it at most grocery stores. Just replace almond butter with an equal amount of sunflower seed butter in the recipe. For a vegan or gluten-free version, use agave syrup instead of honey. Agave syrup works well because it is sweet and thick. Make sure to use certified gluten-free oats. These oats are safe for people who avoid gluten. They taste great and keep the texture perfect. Adding spices can change the flavor of your granola bars. Try some cinnamon for warmth, or nutmeg for a hint of spice. Just add a pinch to the dry ingredients. These spices will make your bars taste even better. You can also mix in vanilla powder for an extra layer of flavor. To keep your maple pecan granola bars fresh, use airtight containers. This helps lock in moisture and flavor. I recommend storing them at room temperature. They can stay good for up to one week. If you want to keep them longer, consider these best practices: - Make sure the bars are completely cool before storing. - Layer parchment paper between bars to avoid sticking. - Label containers with dates to track freshness. Freezing granola bars is a great way to extend their shelf life. Wrap each bar tightly in plastic wrap or foil. Then place them in a freezer-safe bag. They can last up to three months in the freezer. When you're ready to enjoy them, thaw the bars in the fridge overnight. For a quick snack, you can also take them out and let them sit at room temperature for about 30 minutes. Enjoy the crunch and flavor of your homemade granola bars any time! Homemade granola bars last about one week when stored in an airtight container. Keep them in a cool, dry place. You can also put them in the fridge to extend their freshness. If you want to enjoy them longer, consider freezing them. Just wrap each bar tightly in plastic wrap or foil before placing them in a freezer bag. Yes, you can make these granola bars in advance. I often prepare a batch on the weekend. This allows me to grab a snack on busy days. Just make sure to store them properly to keep them fresh. They taste best within the first week after baking. You can replace oats with other grains like quinoa or puffed rice. For gluten-free diets, use certified gluten-free oats or brown rice flakes. Each grain will change the texture a bit, so experiment to find what you like best. This flexibility makes the recipe perfect for different dietary needs. In this post, we explored how to make delicious maple pecan granola bars. We covered the main ingredients, sweeteners, and fun mix-ins. You learned clear steps for baking, along with tips for the best texture. We shared ways to customize flavors and store your bars. Remember, these bars are not only tasty, but they offer healthy snacks too. Try different nuts or spices to make them your own. Enjoy your homemade granola bars fresh or stored for later!

Maple Pecan Granola Bars Crunchy and Nutritious Snack

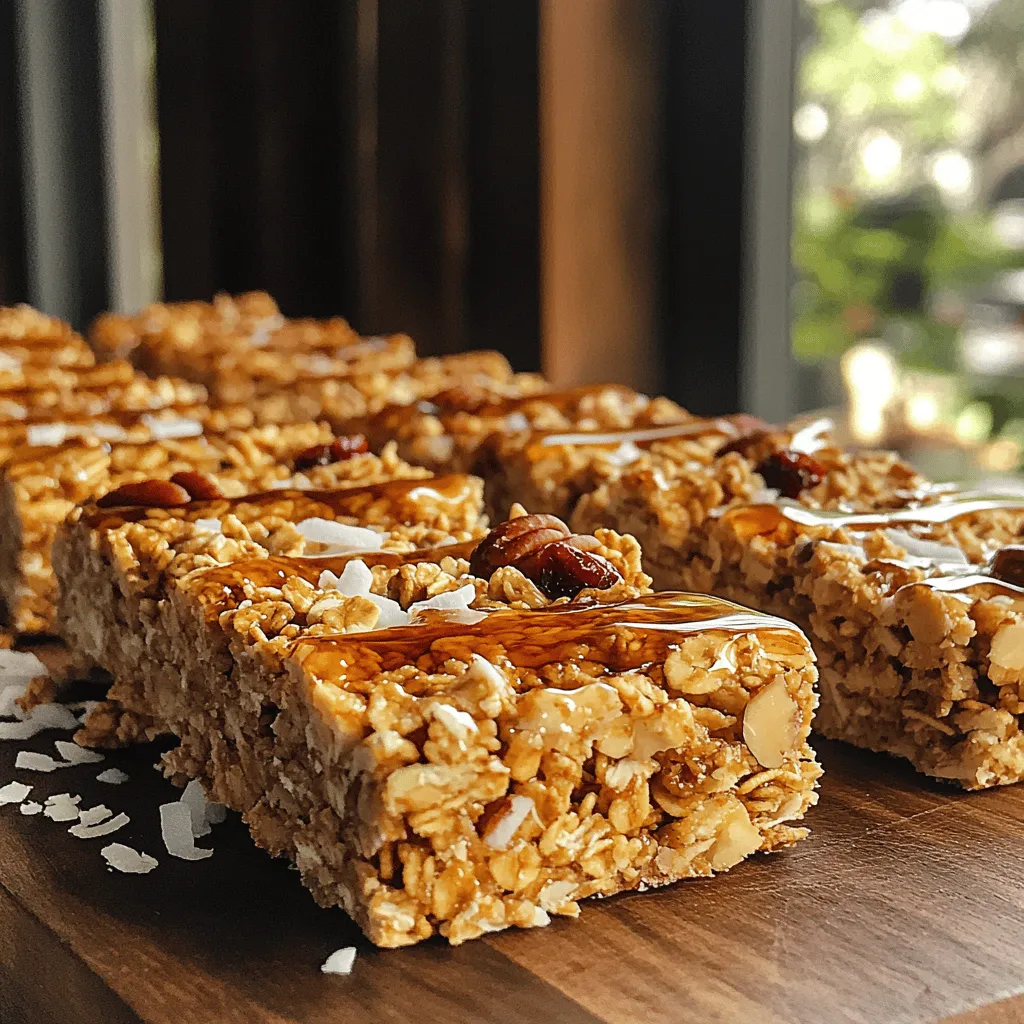
Are you craving a snack that is both crunchy and nutritious? Look no further! My Maple Pecan Granola Bars give

- 1 cup frozen strawberries - 1 ripe banana, peeled and chopped - 1/2 cup Greek yogurt, plain or vanilla - 1/2 cup almond milk (or milk of your preference) - 1 tablespoon honey or maple syrup (optional) - 1/4 teaspoon pure vanilla extract To make a delicious strawberry banana smoothie bowl, you need simple, fresh ingredients. The frozen strawberries give the bowl a thick, creamy base. A ripe banana adds natural sweetness and a smooth texture. Greek yogurt boosts protein and makes it rich. Almond milk, or any milk you like, helps blend everything. If you want it sweeter, add honey or maple syrup. A touch of vanilla extract enhances the flavor. - Fresh strawberries and banana slices - Crunchy granola - Chia seeds and shredded coconut - Fresh mint leaves Toppings are where you can be creative. Fresh fruit like strawberries and banana slices add color and taste. Crunchy granola gives it a nice texture. Chia seeds and shredded coconut add nutrition and fun. Fresh mint leaves make it look fancy and add a burst of freshness. You can mix and match these toppings to make your bowl unique and tasty. For the full recipe, check out the Strawberry Banana Bliss Smoothie Bowl . - Add frozen strawberries and banana to the blender. - Include Greek yogurt, almond milk, honey, and vanilla extract. First, gather all your ingredients. It helps to have everything ready. Take 1 cup of frozen strawberries and 1 ripe banana. Peel and chop the banana before adding it to the blender. Next, add 1/2 cup of Greek yogurt. You can use plain or vanilla yogurt based on your taste. Pour in 1/2 cup of almond milk, or any milk you like. If you want extra sweetness, add 1 tablespoon of honey or maple syrup. Finally, add 1/4 teaspoon of pure vanilla extract for flavor. - Blend on medium-high speed until smooth. - Scrape down sides as necessary. Now it’s time to blend! Start the blender on medium-high speed. Blend until the mixture is smooth and creamy. This usually takes about 30 seconds to a minute. If you see any chunks, stop the blender. Use a spatula to scrape down the sides. Blend again until everything is well mixed. - Pour into a bowl for a thick texture. - Arrange toppings artfully on the smoothie base. Once blended, pour your smoothie into a bowl. A thick texture is best for holding your toppings. Now comes the fun part—adding toppings! Slice fresh strawberries and bananas. Sprinkle crunchy granola for some texture. Add chia seeds for extra nutrition, and don’t forget shredded coconut! For a pop of color, place a couple of mint leaves on top. Enjoy your beautiful smoothie bowl right away! For the full recipe, refer to the earlier section. To blend for creaminess, start with frozen strawberries. They give your bowl a thick and frosty feel. Add the banana next. It adds natural sweetness and creaminess. Use Greek yogurt for a rich texture. Almond milk helps smooth everything out. Blend on medium-high speed until the mixture is smooth. Pause to scrape down the sides if needed. If it is too thick, add a splash more almond milk. If it is too thin, add more yogurt or frozen fruit. For natural sweeteners, honey or maple syrup works well. Both add flavor, but you can skip them. The banana and strawberries are sweet enough for many. To balance flavors, use toppings wisely. Fresh fruit adds sweetness and texture. Crunchy granola can give a nice contrast. Chia seeds add nutrition without adding sweetness. To make your bowl look fancy, arrange your toppings nicely. Start with a base of sliced strawberries and bananas. Then sprinkle granola on top for a crunchy look. A few chia seeds can be scattered for a fun touch. Add shredded coconut for a tropical feel. Finally, place fresh mint leaves on top. The green color pops and makes it look fresh. Remember, a colorful bowl is not just pretty; it makes the dish more inviting. {{image_4}} You can change up the flavors in your smoothie bowl. Adding spinach or kale gives a green boost. This adds vitamins without changing the taste much. You can also mix in nut butter or protein powder. These additions make the bowl creamier and more filling. Plus, they add healthy fats and protein. If you want a dairy-free option, substitute yogurt and milk with plant-based choices. Almond, coconut, or oat milk work well. You can use dairy-free yogurt made from nuts or coconut. For vegan diets, make sure to skip honey and use maple syrup instead. This keeps it sweet and tasty. You can use different fruits based on the season. In summer, swap strawberries for fresh berries like blueberries or raspberries. For a tropical twist, use mango or pineapple. In fall and winter, try apples or pears. They add warmth and flavor to your smoothie bowl. To store your leftover smoothie bowl, first, cover it tightly. You can use plastic wrap or a lid. This keeps the air out and helps maintain the flavor. Place it in the fridge. Use it within 24 hours for the best taste and texture. For extra freshness, consider storing the toppings separately. Keep granola and fruits in small containers. This way, they stay crunchy and vibrant. You cannot really reheat a smoothie bowl. Instead, you can freeze it if you want to save it longer. Just pour the smoothie into an airtight container. Leave some space at the top for expansion. It can last up to a month in the freezer. To enjoy it again, let it thaw in the fridge overnight. If it seems thick, reblend it with a splash of almond milk. This helps make it creamy again. Enjoy your delicious strawberry banana smoothie bowl! A smoothie bowl is a thick smoothie served in a bowl. You eat it with a spoon. Unlike drinks, smoothie bowls have a creamy texture. They are filled with fruits, yogurt, and milk. You can top them with nuts, seeds, or granola. This makes them both tasty and fun to eat. Yes, you can prep this smoothie bowl in advance. Make the smoothie base and store it in the fridge. It will stay fresh for up to two days. If you want to freeze it, pour it into a container. Just leave space for it to expand. When ready, let it thaw in the fridge overnight. Blend it again if needed. This smoothie bowl is packed with nutrients. It has about 300 calories per serving. Strawberries are high in vitamin C and antioxidants. Bananas provide potassium and fiber. Greek yogurt adds protein and probiotics. Almond milk is low in calories and dairy-free. All these ingredients make it a healthy choice. You can change this smoothie bowl to fit your taste. Try adding spinach for a green boost. Use different fruits like mango or blueberries. For a nutty flavor, mix in peanut or almond butter. If you need a dairy-free option, swap Greek yogurt for a plant-based yogurt. This way, you make it work for your diet. In this post, we explored how to create a delicious strawberry banana smoothie bowl. We covered key ingredients like frozen strawberries, banana, and Greek yogurt. You learned step-by-step instructions for blending and serving. Tips on texture, sweetness, and presentation will help you craft the perfect bowl. With flavor variations and storage tips, you can personalize each experience. Smoothie bowls are easy, fun, and packed with nutrition. Try customizing yours today and enjoy a tasty, healthy treat.

Strawberry Banana Smoothie Bowl Delicious and Nutritious

Looking for a refreshing and healthy way to start your day? A Strawberry Banana Smoothie Bowl is just the fix!

For this Honey Garlic Chicken Thighs recipe, you will need the following ingredients: - 4 bone-in, skin-on chicken thighs: The bone adds flavor. The skin gets crispy. - 1/4 cup honey: This brings sweetness and sticky goodness. - 1/4 cup soy sauce: Use low-sodium for a balanced taste. - 3 cloves garlic, minced: Fresh garlic adds depth and aroma. - 1 tablespoon fresh ginger, finely grated: This gives a warm, spicy note. - 1 tablespoon apple cider vinegar: It adds a nice tang to the sauce. - 1 teaspoon sesame oil: This adds an earthy, nutty flavor. - 1/2 teaspoon red pepper flakes (optional): Use these for a spicy kick. - Salt and freshly ground black pepper: Season to taste for flavor. - Chopped green onions: For garnish, they add color and freshness. - Toasted sesame seeds: Sprinkle for a crunchy finish. Gathering these ingredients will set you up for a tasty meal. You can adjust them based on your taste. For instance, add more garlic if you love its flavor. Enjoy making this dish! For the complete cooking process, check the Full Recipe. To make the sauce, you need to mix the ingredients in a bowl. Start with 1/4 cup of honey and 1/4 cup of soy sauce. Add 3 minced garlic cloves and 1 tablespoon of grated ginger. Next, pour in 1 tablespoon of apple cider vinegar and 1 teaspoon of sesame oil. If you like heat, add 1/2 teaspoon of red pepper flakes. Whisk everything together until it is smooth. This step is key for great flavor. For the right consistency, make sure the honey is not too thick. If it’s too thick, you can warm it slightly to make it easier to mix. A smooth sauce coats the chicken better. Now, let’s get the chicken ready. Use 4 bone-in, skin-on chicken thighs for the best results. Generously season both sides with salt and freshly ground black pepper. This will enhance the flavor of the chicken. Next, heat some oil in a large skillet over medium-high heat. When the oil is hot, place the chicken thighs in the skillet, skin-side down. Sear them for about 5-7 minutes. You want the skin to be crispy and golden brown. This step adds great texture and flavor. After searing, flip the chicken over to the flesh side. Pour the honey garlic sauce over the chicken, making sure each piece is coated. Lower the heat to medium-low and cover the skillet. Let the chicken simmer in the sauce for 20-25 minutes. Always check the internal temperature. The chicken is safe to eat when it reaches 165°F (75°C). After cooking, take the chicken out and let it rest for a few minutes. While it rests, increase the heat to high and let the sauce simmer for 2-3 minutes until it thickens. Finally, return the chicken to the skillet to coat it in the thickened sauce before serving. For the full recipe, you can refer to the complete instructions earlier. Enjoy your flavorful honey garlic chicken thighs! To get the best taste from your honey garlic chicken thighs, marinate the chicken. Use the sauce from the recipe. Let it sit for at least 30 minutes, or up to overnight in the fridge. This will allow the flavors to soak in deeply. For tenderness, sear your chicken thighs skin-side down. This step creates a crispy skin that locks in moisture. Cook them on medium-high heat for that perfect sear. When you flip them, lower the heat to let them simmer gently in the sauce. For serving, arrange the chicken on a large platter. Drizzle the remaining sauce over the top. This makes it look inviting and delicious! Garnish with chopped green onions and toasted sesame seeds. These add a nice pop of color and texture. When plating, place chicken thighs neatly. This gives it a clean and appealing look. You can also add a side of rice or steamed veggies for a complete meal. Avoid common mistakes like cooking on too high heat. This can burn the chicken skin and dry out the meat. Always check for doneness. The chicken should reach an internal temperature of 165°F (75°C). If the flavor is not strong enough, you can adjust it. Add more honey for sweetness or soy sauce for saltiness. Remember, taste as you go! This way, you can tailor the dish to your liking. {{image_4}} You can easily change ingredients in this recipe. For sweeteners, try maple syrup or agave nectar. These options can add a different flavor while keeping it sweet. You can also swap soy sauce with coconut aminos for a soy-free option. If you want to use chicken breasts instead of thighs, it works well too. Just remember, breasts cook faster, so check them at 20 minutes. You want to avoid dry chicken! Want to jazz up the flavor? Add spices like paprika or cumin for a new taste. These spices give the dish a smoky or earthy flavor. You can also add herbs such as cilantro or basil. Fresh herbs change the entire profile of the dish. For a Thai twist, add a bit of lime juice and zest. This will brighten the dish and give it a refreshing taste. You can also add some chili paste for a spicy kick. If you're looking for a lower-calorie version, use less honey or substitute it with a sugar-free sweetener. This can help reduce calories without losing flavor. For gluten-free options, use tamari instead of soy sauce. Tamari is easy to find and tastes great. It keeps the dish gluten-free while still being delicious. For health-conscious cooks, serve with steamed veggies or a salad. This adds fiber and nutrients without much added fat. After enjoying your honey garlic chicken thighs, let them cool down. This helps keep them fresh. Place the chicken in an airtight container. I recommend using glass or BPA-free plastic containers. These options help avoid any unwanted flavors. When reheating, you want to keep that tasty flavor. The best way is to use a skillet. Warm the chicken over medium heat. This method keeps the skin crispy. If you use a microwave, be careful. Microwaves can make the chicken rubbery. If you choose the microwave, heat in short bursts. Check it often to avoid overcooking. Storing and reheating properly ensures you enjoy your delicious chicken again! For the full recipe, check out the detailed guide above. To make sure your chicken is safe to eat, check its internal temperature. Use a meat thermometer. The chicken should reach 165°F (75°C). This temperature ensures the meat is fully cooked. Always check the thickest part of the thigh without touching the bone. Yes, you can use chicken breasts. However, they cook faster than thighs. Chicken breasts may dry out if overcooked. Thighs have more fat, giving them a richer flavor. Adjust cooking time if you switch to breasts. They usually take about 15-20 minutes to cook through. Great side dishes include rice, steamed veggies, or a fresh salad. You can also try mashed potatoes or quinoa. For a fun twist, serve with fried rice for a complete meal. These sides balance the sweet and savory flavors of the chicken. To spice up your sauce, add more red pepper flakes. Start with a little and taste as you go. You can also mix in hot sauce for extra heat. Another option is to add fresh chopped chili peppers. Adjust the spice to your liking for the perfect kick. In this post, we covered how to make delicious Honey Garlic Chicken Thighs. We discussed key ingredients like chicken thighs, honey, and soy sauce, and shared step-by-step instructions. We explored tips for great flavor and variations to suit your taste. Proper storage and reheating methods were also included. I hope this guide helps you create a meal that everyone enjoys. Don't be afraid to experiment and make it your own!

Honey Garlic Chicken Thighs Simple and Tasty Recipe

Are you ready to impress your taste buds with a simple, savory dish? Honey Garlic Chicken Thighs blend sweet and

Older posts
Newer posts
← Previous Page1 … Page71 Page72 Page73 … Page86 Next →

dsad

© 2026 yumymoments • Built with GeneratePress

Our Policies

  • Copyright Policy
  • Cookie Policy
  • GDPR Policy
  • Privacy Policy
  • Disclaimer
  • Terms Of Use

More Information

  • Home
  • About
  • Contact
  • Appetizers
  • Dessert
  • Dinner
  • Drinks
©2026, yumymoments About Back To Top