Skip to content
DisclaimerTerms Of UseGDPR PolicyCookie Policy

yumymoments

  • Home
  • Drinks
  • Appetizers
  • Dinner
  • Dessert
  • About
  • Contact
  • Privacy Policy
DisclaimerTerms Of UseGDPR PolicyCookie Policy

NO-ING-IMG

To make a delightful Chocolate Avocado Mousse, you need just a few simple ingredients. This recipe creates a rich and creamy dessert that feels indulgent but is healthy too. The full recipe includes: - 2 ripe avocados, peeled and pitted - 1/2 cup unsweetened cocoa powder - 1/2 cup maple syrup or honey - 1/4 cup almond milk or coconut milk - 1 teaspoon pure vanilla extract - A pinch of sea salt - Optional toppings: Shaved dark chocolate, fresh berries, or whipped coconut cream Let’s look at some key ingredients and their health benefits: - Avocados: They are full of healthy fats and fiber. These fats help your heart and keep you full. - Cocoa Powder: This adds rich chocolate flavor. It also has antioxidants that are good for your body. - Maple Syrup or Honey: Both are natural sweeteners. They provide energy and taste great. - Almond Milk or Coconut Milk: These non-dairy milks are lower in calories and great for those who avoid dairy. - Vanilla Extract: This adds a lovely aroma and taste. It can also help with digestion. - Sea Salt: A pinch enhances all the flavors in the mousse. Toppings add fun and flavor to your mousse. Here are some tasty options: - Shaved Dark Chocolate: This adds extra richness and a gourmet touch. - Fresh Berries: Strawberries, raspberries, or blueberries bring brightness and a pop of color. - Whipped Coconut Cream: This adds creamy sweetness and a tropical twist. Feel free to mix and match these toppings to create your perfect dessert! To start, gather your ingredients. You need two ripe avocados, cocoa powder, maple syrup or honey, almond milk (or coconut milk), vanilla extract, and a pinch of sea salt. This collection makes a rich and creamy mousse. 1. First, peel and pit the ripe avocados. 2. Next, place the avocados into a food processor. 3. Add the cocoa powder, maple syrup (or honey), almond milk (or coconut milk), vanilla, and sea salt. Now, it’s time to mix everything. - Secure the lid on the food processor. - Blend on high speed until the mixture is smooth and creamy. - Stop to scrape down the sides with a spatula. This helps mix everything well. Taste the mousse after blending. If you want it sweeter, add more maple syrup or honey. Blend again briefly to mix the sweetener. After blending, it’s almost time to enjoy. - Spoon the mousse into individual bowls or ramekins. - Cover the bowls with plastic wrap and refrigerate for at least 30 minutes. This step lets the flavors blend and the mousse set. When you're ready to serve, garnish each bowl. You can use shaved dark chocolate, fresh berries, or whipped coconut cream. Serve in clear glass cups to show off the mousse's rich texture and color. Enjoy your delicious treat! To make your mousse smooth, use ripe avocados. They should feel soft but not mushy. Blend the ingredients until you have a creamy mix. A food processor works best for this job. If it seems thick, add a splash of almond or coconut milk. This helps create a light and airy texture. Always taste your mousse. Adjust sweetness by adding more maple syrup or honey if needed. One common mistake is not using ripe avocados. Unripe fruit can make the mousse grainy. Another issue is over-blending. Blend just enough until smooth. If you skip the chilling step, your mousse won’t set properly. It also helps to taste as you go. This way, you can fix any issues right away. You can prepare this mousse a day in advance. Just keep it covered in the fridge. The flavors will deepen while it chills. Serve it cold for the best experience. If you’re short on time, you can even freeze it. Just let it thaw in the fridge before serving. Enjoy your delicious treat! {{image_4}} You can make this mousse vegan and dairy-free easily. The recipe already uses avocado, which gives it a creamy texture. You can replace honey with maple syrup for sweetness. Use almond or coconut milk as your liquid. This keeps the mousse rich without any dairy. Enjoy guilt-free indulgence! Want to switch things up? Add fun flavors like mint or coffee. For mint, just add a few drops of peppermint extract. Blend it in with the other ingredients. This gives a fresh twist that pairs well with chocolate. If you prefer coffee, add a teaspoon of instant coffee or espresso powder. This adds a deep, rich flavor. Both options will make your mousse even more delightful. The great news? This mousse is naturally gluten-free! You don’t need to worry about any flour or gluten in the recipe. Just stick to the ingredients like avocados and cocoa powder. You can serve it with gluten-free toppings, like fresh berries or shaved chocolate. This way, anyone can enjoy this tasty treat! To keep your chocolate avocado mousse fresh, store it in the fridge. Use an airtight container. This helps maintain its rich and creamy texture. Cover the mousse tightly with plastic wrap if you do not have a container. Make sure it touches the surface of the mousse to reduce air exposure. The mousse will stay good for about 3 to 5 days in the fridge. Check for any change in color or smell. If it looks brown or gives off a sour odor, it’s best to throw it away. Always trust your senses. If it seems off, don’t eat it. You can freeze chocolate avocado mousse for longer storage. Use freezer-safe containers or ice cube trays for easy portions. Make sure to leave some space in the container as the mousse will expand when frozen. It can last up to 2 months in the freezer. When ready to eat, thaw it in the fridge overnight. Blend it again if needed to regain its smooth texture. For the best results, enjoy it fresh. But if you need to store it, these tips work well. You can find the full recipe for chocolate avocado mousse above. Yes, you can use honey or agave syrup. Both work well in this recipe. They add sweetness without changing the taste much. If you want a sugar-free option, try stevia or monk fruit sweetener. Adjust the amount based on your taste. Remember, each sweetener has a different level of sweetness, so taste as you go. To make your mousse lighter, try folding in whipped cream or whipped coconut cream at the end. This adds air and creates a fluffier texture. You can also use aquafaba, the liquid from canned chickpeas, as a vegan option. Whip it until fluffy and gently mix it in. This method keeps it light but still rich in flavor. Yes, this recipe is great for kids! It uses healthy ingredients like avocado and cocoa. The taste is rich and sweet, making it appealing to younger palates. You can even let kids help blend the mousse and choose toppings. Just be mindful of any allergies to nuts if you use almond milk. Enjoy this fun and healthy treat with the whole family! In this article, we explored how to make chocolate avocado mousse. We covered key ingredients and their health benefits, plus optional toppings that can enhance flavor. I shared step-by-step instructions and valuable tips to create the perfect mousse. You learned about variations, storage methods, and answered common questions. Remember, this recipe is simple and fun. You can customize it to fit your taste. Enjoy every bite, and share it with friends and family. You will impress everyone with your mousse-making skills!

Chocolate Avocado Mousse Rich and Creamy Delight

Indulging in a rich and creamy dessert doesn’t mean sacrificing health. That’s why I want to share my Chocolate Avocado

To make creamy garlic Parmesan pasta, you'll need a few key items. This dish is simple yet full of flavor. You’ll love how easy it is to put together. Here’s what you need for the best creamy garlic Parmesan pasta: - 8 ounces fettuccine or spaghetti - 4 tablespoons unsalted butter - 4 cloves of garlic, finely minced - 1 cup heavy cream - 1 cup freshly grated Parmesan cheese - Salt and freshly ground black pepper, to taste - 1 teaspoon Italian seasoning blend These ingredients work together to create a rich and creamy sauce. The garlic adds a nice kick, while the Parmesan gives it a deep flavor. You can add a few extra items to make your dish even better: - 1 cup baby spinach leaves (for added nutrition) - Fresh parsley, finely chopped (for garnish) Adding spinach boosts the health factor. The parsley adds a fresh touch. You can mix and match these options based on what you like. Enjoy making this dish with your own twist! First, grab a large pot and fill it with water. Add a generous amount of salt. Bring the water to a rapid boil. Once it's boiling, add 8 ounces of fettuccine or spaghetti. Cook it according to the package instructions, usually about 8 to 10 minutes. You want the pasta to be al dente, or firm to the bite. Before you drain the pasta, save 1 cup of the pasta water. This water will help adjust the sauce later. After saving the water, drain the pasta and set it aside. In the same pot, keep the heat at medium. Add 4 tablespoons of unsalted butter and let it melt completely. Once the butter is melted, add 4 finely minced garlic cloves. Sauté the garlic for about 1 minute. Watch closely to avoid browning the garlic. If it browns, it will taste bitter. Next, pour in 1 cup of heavy cream. Stir gently, then bring it to a light simmer. Gradually whisk in 1 cup of freshly grated Parmesan cheese. Keep whisking until the cheese melts and the sauce is creamy. Now, lower the heat a little. Season your sauce with salt, freshly cracked black pepper, and 1 teaspoon of Italian seasoning blend. If you want to add nutrition, toss in 1 cup of baby spinach leaves. Stir until the spinach wilts, which takes about 1 to 2 minutes. After that, return the drained pasta to the pot with the sauce. Toss it well to coat each piece of pasta in the creamy garlic sauce. If the sauce feels too thick, add some of the reserved pasta water. Stir until you reach your desired creaminess. Finally, serve your creamy garlic Parmesan pasta on plates and sprinkle freshly chopped parsley on top for a fresh look. This dish is a true delight and perfect for any dinner! For the full recipe, check the section above. To keep garlic from burning, watch the heat. Use medium heat when you sauté. Garlic burns quickly and can turn bitter. Sauté for about one minute until it smells good. If it starts to brown, lower the heat. You want it soft and fragrant, not dark. The sauce may be too thick at times. If it is, use the reserved pasta water. Add a little at a time while stirring. This will help make the sauce creamy. If it's too thin, let it simmer longer. This will thicken it up nicely. Fettuccine and spaghetti work best for this dish. They hold the sauce well. Other pastas like penne or linguine could work too. Choose what you like best. Each pasta brings a unique touch to the meal. {{image_4}} You can add protein to make this dish heartier. Chicken works well with creamy garlic sauce. Simply cook chicken breast in the pan before adding garlic. Slice it and mix with pasta. Shrimp is another great choice. Sauté shrimp until pink, then toss with the pasta. Both options enhance flavor and make the meal more filling. For a vegetarian twist, try adding mushrooms or zucchini. Sauté these veggies with garlic for more depth. If you want a vegan version, swap heavy cream for coconut cream or cashew cream. Use nutritional yeast instead of Parmesan for a cheesy flavor without dairy. Your dish will still be creamy and delicious! You can elevate the flavor by adding herbs. Fresh basil or thyme adds a lovely touch. Spices like red pepper flakes bring heat to the dish. Vegetables like sun-dried tomatoes or bell peppers add color and taste. Experiment with these options to make your creamy garlic Parmesan pasta unique and exciting. For the complete dish, check out the Full Recipe. To store leftover creamy garlic Parmesan pasta, place it in an airtight container. Make sure it cools to room temperature before sealing. This way, it stays fresh for up to three days. Keep it in the fridge. If you notice any changes in color or smell, throw it away. When you're ready to enjoy the pasta again, reheat it slowly. Use a skillet over low heat. Add a splash of water or cream to help revive the sauce. Stir gently until it warms up. You can also use a microwave. Heat in short bursts, stirring in between. This keeps the sauce creamy and smooth. If you want to save some for later, freezing is a great option. Place the cooled pasta in a freezer-safe container. It can last up to three months in the freezer. When ready to eat, thaw it overnight in the fridge. Reheat it as mentioned above. The flavor remains delicious, just like the full recipe! Yes, you can use other cheeses. Some good options are mozzarella, pecorino, or fontina. Each cheese brings a unique flavor. Mixing cheeses can add depth to your dish. Just remember to grate them finely for easy melting. Experiment with your favorites to find new tastes. To make this dish gluten-free, swap regular pasta for gluten-free pasta. Many brands now offer great options that cook well. Check the package instructions for cooking times. Be sure to use gluten-free breadcrumbs if you want a crunchy topping. Always read labels to avoid hidden gluten in sauces or seasonings. This creamy dish pairs well with many sides. Here are a few ideas: - Garlic bread: A classic choice that complements the flavors. - Steamed vegetables: Broccoli or green beans add color and nutrition. - Salad: A fresh side salad brings a nice crunch. - Grilled chicken or shrimp: For added protein and heartiness. These sides make your meal more balanced and enjoyable! You have learned how to make creamy garlic parmesan pasta. We explored key ingredients, step-by-step cooking, and ways to enhance flavor. I shared tips to avoid burning garlic and ways to store leftovers. Remember, you can easily adapt this dish with different proteins or veggies. With practice, you will master this recipe and impress your family and friends. Enjoy this creamy delight whenever you wish!

Creamy Garlic Parmesan Pasta Irresistible Dinner Dish

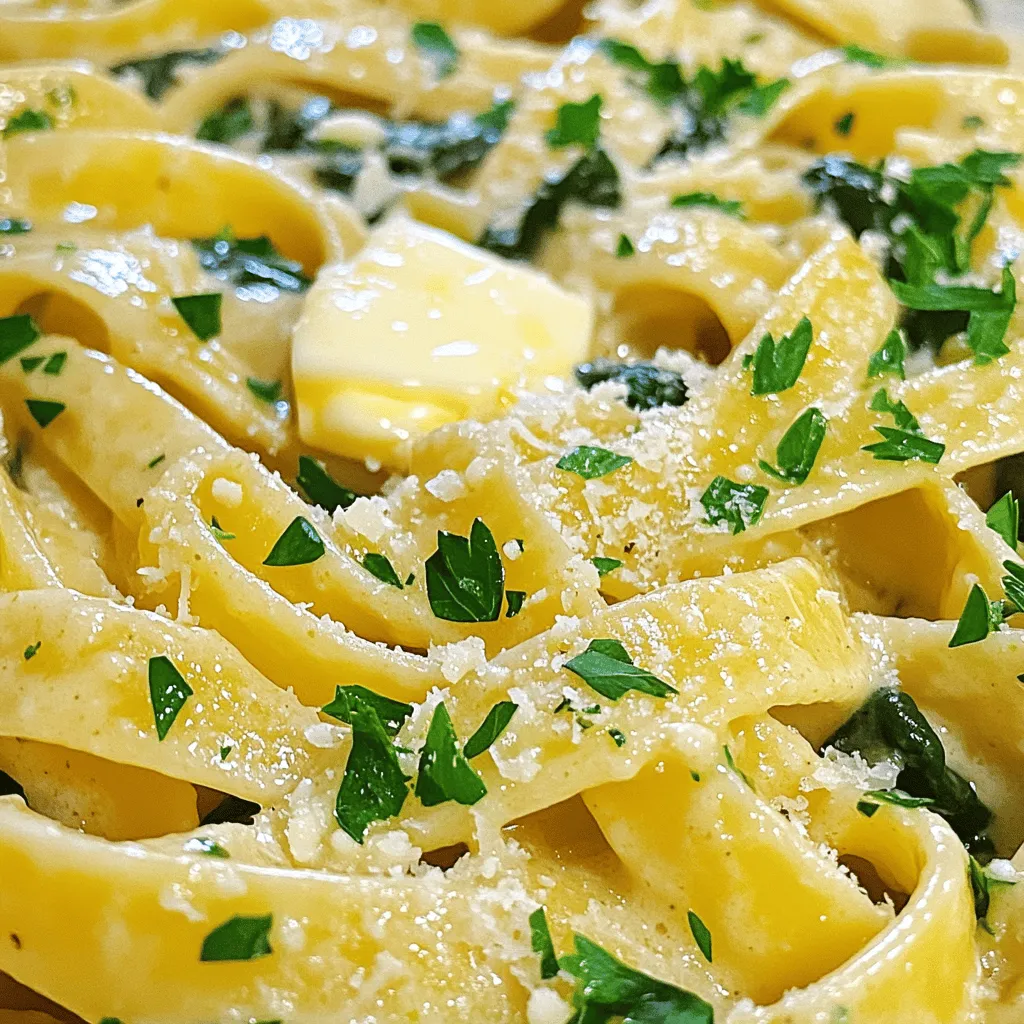
Welcome to a dinner that delights! Creamy Garlic Parmesan Pasta is not just a dish; it’s a flavor-packed experience you’ll

To make stuffed bell peppers with quinoa, gather these tasty ingredients: - 4 large bell peppers (any color) - 1 cup quinoa - 2 cups vegetable broth or water - 1 can black beans (15 oz) - 1 cup corn (fresh, frozen, or canned) - 1 cup diced tomatoes - 1 teaspoon ground cumin - 1 teaspoon smoked paprika - Salt and black pepper to taste - 1 cup shredded cheese - Fresh cilantro or parsley for garnish These ingredients come together to create a colorful and flavorful dish. The quinoa provides a nutty base, while the black beans add protein. Corn and tomatoes bring sweetness and freshness. Cumin and smoked paprika give a warm, earthy flavor that makes each bite exciting. Finally, cheese adds a creamy touch that ties everything together. If you want to dive deeper into the cooking process, check out the Full Recipe. It offers all the steps you need to create this delightful dish. 1. First, rinse the quinoa thoroughly in a fine mesh strainer. This step removes the bitter coating called saponin. 2. In a medium saucepan, combine the rinsed quinoa with vegetable broth. Bring the mixture to a boil over medium-high heat. 3. Once it boils, reduce the heat to low. Cover and let it simmer for about 15 minutes. The quinoa should be fluffy, and all the liquid will be absorbed. 1. While the quinoa cooks, prepare the bell peppers. Slice the tops off and remove the seeds carefully. 2. Place the cleaned bell peppers upright in a baking dish. Ensure they stand steady. 1. In a large mixing bowl, mix the cooked quinoa with black beans, corn, diced tomatoes, cumin, and a pinch of salt and black pepper. 2. Stir everything until it is well combined. This mixture is packed with flavors! 3. Using a spoon, fill each bell pepper with the quinoa mixture. Pack it gently but don’t overflow the tops. 1. Sprinkle a generous amount of shredded cheese on top of each filled pepper. This adds a lovely, cheesy touch. 2. Add a small splash of water to the bottom of the baking dish. Cover it tightly with aluminum foil to help steam them. 3. Bake in your preheated oven for 25 minutes. After that, remove the foil and bake for an extra 10-15 minutes. The peppers should be tender, and the cheese should be bubbly and golden brown. Once you follow these steps, you will have a delightful dish ready to enjoy. For the complete details, refer to the Full Recipe. To avoid mushy peppers, choose firm bell peppers. When you cook them, don’t overbake. Bake just until they are tender but still hold their shape. This keeps a nice crunch. You can also pre-roast them for 10 minutes before stuffing. This helps their texture. For the best flavor, use a mix of cheeses. I recommend cheddar for its sharpness. Mozzarella adds a creamy touch. Try pepper jack for a spicy kick. Mixing these gives a delicious taste and meltiness that everyone loves. Stuffed peppers pair well with many sides. A simple green salad freshens the meal. Serve with rice or quinoa for extra carbs. You can also add a side of roasted veggies for more color and flavor. For presentation, serve the peppers on a bright platter. Drizzle a bit of olive oil around the edges. You can also add extra diced tomatoes for a pop of color. This makes your dish look inviting and ready to eat. For the full recipe, check the previous section. {{image_4}} You can easily change this recipe to fit your needs. To add meat, try ground turkey or beef. Simply cook the meat in a pan before adding it to your filling mix. This gives a rich flavor and protein boost. If you want a vegan option, leave out the cheese and use a plant-based substitute. You can also add extra veggies like mushrooms or spinach for more texture and nutrients. Switching up the spices can change the whole dish. Try using chili powder for heat or oregano for an Italian twist. Fresh herbs like basil or parsley can brighten the dish. You can also swap quinoa for other grains like brown rice or farro. These options provide unique flavors and textures, making the stuffed peppers fun to explore. For a Mediterranean flair, add olives or feta cheese. These simple changes let you customize your stuffed peppers with quinoa to fit any meal or taste preference. You can find the full recipe in the main article for a complete guide. To keep your stuffed bell peppers fresh, use airtight containers. Glass containers work well for storage. You can also use heavy-duty plastic containers. Make sure the peppers cool down before sealing them. This prevents moisture build-up. Store them in the fridge for up to four days. If you want to keep them longer, freeze them. Put them in freezer-safe bags or containers. They can last up to three months in the freezer. You can reheat your stuffed peppers in the microwave or the oven. For the microwave, place one pepper on a plate. Heat it for two to three minutes. Check to see if it’s warm all the way through. If it’s not, add more time in short bursts. For the oven, preheat it to 350°F (175°C). Place the peppers in a baking dish and cover them with foil. Heat for about 15-20 minutes. To keep the texture nice, add a splash of water to the dish. This helps steam the peppers. Always check the filling to ensure it's hot. No one wants cold quinoa! Yes, you can make stuffed peppers ahead of time. Prepare the filling and stuff the peppers. Cover them and store in the fridge for up to a day. This saves time on busy nights. When ready to eat, bake them straight from the fridge. If they are cold, add a few extra minutes to the cooking time. This way, you enjoy a warm meal without much fuss. To avoid overcooked peppers, keep an eye on the cooking time. Bake them at 375°F for about 25 minutes covered. After that, uncover and bake for 10-15 more minutes. This ensures they become tender but not mushy. Check for doneness with a fork. The peppers should be soft but still hold their shape. If you want to swap quinoa, there are great options. You can use brown rice, farro, or even lentils. Each option gives a different taste and texture. Brown rice works well and is easy to find. Farro adds a nutty flavor, while lentils boost protein. Feel free to mix grains for a fun twist on the recipe. This blog post showed you how to make delicious stuffed peppers. We covered the key ingredients needed, like quinoa, beans, and spices. You learned step-by-step instructions for cooking and baking. I also shared tips for perfect texture and ways to add variety. Storing leftovers and reheating them properly will keep your dish fresh. Cooking is fun, so don’t be afraid to experiment. Follow these guidelines, and your stuffed peppers will shine at any meal. Enjoy your cooking journey!

Stuffed Bell Peppers with Quinoa Flavorful Recipe

Are you ready to elevate your dinner game? My flavorful stuffed bell peppers with quinoa will become a family favorite!

- 1 ½ cups all-purpose flour - ½ cup granulated sugar - ½ cup brown sugar, packed - 2 teaspoons baking powder - 1 teaspoon baking soda - ½ teaspoon salt - 1 large egg - ⅓ cup unsalted butter, melted and slightly cooled - ¾ cup buttermilk (or plain yogurt) - Zest of 1 large lemon - 2 tablespoons fresh lemon juice - 1 cup fresh blueberries Using precise measurements is key for great muffins. I recommend using a kitchen scale for the flour. If you want to reduce sugar, you can cut the granulated sugar by a quarter cup. For a dairy-free option, almond milk works well instead of buttermilk. Yogurt can add a nice tang, too. If you need gluten-free muffins, use a 1-to-1 gluten-free flour blend. Fresh blueberries are best for this recipe. Look for berries that are plump and firm. Avoid any with wrinkles or mold. If fresh blueberries are hard to find, frozen ones are a great backup. Just remember to rinse them gently and pat them dry. Using quality blueberries ensures your muffins burst with flavor and color. Start by preheating your oven to 375°F (190°C). This step is key. A hot oven helps the muffins rise beautifully. Prepare a muffin tin by lining it with paper liners. You can also grease each cup lightly. This will stop the muffins from sticking. In a large bowl, whisk together the dry ingredients. Use 1 ½ cups of all-purpose flour, ½ cup of granulated sugar, and ½ cup of packed brown sugar. Add 2 teaspoons of baking powder, 1 teaspoon of baking soda, and ½ teaspoon of salt. Whisk until no clumps remain. This mix creates a fluffy texture. In a separate bowl, crack 1 large egg and beat it lightly. Then, add ⅓ cup of melted unsalted butter that has cooled down a bit. Next, pour in ¾ cup of buttermilk or plain yogurt. Add the zest of 1 lemon and 2 tablespoons of fresh lemon juice. Stir until the mix is smooth. Now, gently fold the wet mix into the dry ingredients. Use a spatula or a wooden spoon. Be careful not to overmix. A few lumps are okay. Overmixing can make your muffins tough instead of soft. Once combined, fold in 1 cup of fresh blueberries. Make sure they are evenly spread without breaking them. Use a spoon or scoop to fill each muffin cup about ¾ full. This gives them room to rise. Bake in the preheated oven for 18-22 minutes. Check with a toothpick. It should come out clean when they are done. After baking, remove the tin from the oven. Let the muffins cool for about 5 minutes in the tin. Then, transfer them to a wire rack. This helps them cool completely. Enjoy your delicious lemon blueberry muffins! For the full recipe, check out the link above. Overmixing can make your muffins tough. Mix just until the dry and wet ingredients blend. A few lumps are okay. This helps keep the muffins light and fluffy, which is what we want for a tasty treat. Adding lemon zest boosts the flavor of your muffins. Zest gives a fresh and bright taste. Use a microplane or zester to get fine pieces of the peel. Make sure not to get any of the bitter white pith. This step truly makes a difference! For a soft muffin, use room-temperature ingredients. Cold butter or eggs can affect the rise. I recommend using a mix of both granulated and brown sugar. This combo gives you sweetness and moisture. Lastly, be sure to fill muffin cups about ¾ full. This allows room for rising without spilling. If you want to dive deeper into the recipe, check out the Full Recipe for all the details! {{image_4}} You can make your muffins even better by adding nuts or seeds. Chopped walnuts or pecans add a nice crunch. Sunflower seeds or pumpkin seeds work well too. Add about ½ cup to the batter before baking. This gives your muffins extra flavor and texture. Feel free to mix up the fruit in your muffins. Instead of blueberries, you can use raspberries, strawberries, or even peaches. Just make sure to keep the fruit fresh. If using frozen fruit, toss them in a bit of flour to prevent clumping. This will help spread the fruit evenly in the batter. If you're avoiding gluten, you can still enjoy these muffins. Substitute all-purpose flour with a gluten-free blend. Make sure your blend has xanthan gum, as this helps with texture. You can also use almond flour for a nutty taste. Just remember, baking times may vary with gluten-free flours, so keep an eye on them as they bake. These variations can make your Lemon Blueberry Muffins unique and fun! For the full recipe, check out the earlier section. You can keep your lemon blueberry muffins fresh for a few days. Place them in an airtight container at room temperature. If you want to keep them even fresher, store them in the fridge. They will last about a week in the fridge, but the taste is best within three days. To freeze your muffins, let them cool completely. Wrap each muffin tightly in plastic wrap. Then, place them in a freezer-safe bag or container. They can last up to three months in the freezer. When you're ready to enjoy them, just take out what you need. To reheat your muffins, you have a few options. The microwave is quick; just heat them for 10 to 15 seconds. For a crispy top, use the oven. Preheat it to 350°F (175°C) and heat the muffins for about 5 to 10 minutes. This way, they stay soft inside and warm all through. Follow the Full Recipe for these zesty muffins, and enjoy every bite! Lemon blueberry muffins stay fresh for about 2 to 3 days. Store them in an airtight container at room temperature. For longer storage, keep them in the fridge for up to a week. You can also freeze muffins for up to three months. Just wrap them well in plastic wrap. Yes, you can use frozen blueberries. They work perfectly in this recipe. Just fold them into the batter without thawing. Frozen blueberries might make the batter a little more wet. But they will still taste great and add lovely bursts of flavor. If you don't have buttermilk, plain yogurt is a great choice. You can also mix one tablespoon of lemon juice or vinegar with a cup of milk. Let it sit for about 5 minutes, and you have a good buttermilk substitute. Both options will keep your muffins moist. You can check if the muffins are done by inserting a toothpick into the center. If it comes out clean or with just a few crumbs, they are ready. The tops should look golden brown and spring back when lightly pressed. These signs show that your muffins are perfectly baked. This article covered everything you need for perfect lemon blueberry muffins. You learned about ingredients, measurements, and quality tips for blueberries. The step-by-step instructions help you bake with ease, while tips share tricks to improve texture and flavor. Different variations let you be creative, and storage info ensures your muffins stay fresh. Keep these insights in mind to bake delightful muffins that everyone will love. Happy baking!

Lemon Blueberry Muffins Fresh and Flavorful Recipe

Welcome to the world of lemon blueberry muffins! In this recipe, I’ll guide you to create soft, tasty treats bursting

To make a delicious homemade tomato basil soup, you need these simple ingredients: - 2 tablespoons extra-virgin olive oil - 1 medium yellow onion, finely chopped - 3 cloves garlic, minced - 1 teaspoon sea salt - 1/2 teaspoon freshly cracked black pepper - 1 teaspoon dried oregano - 1 (28-ounce) can of quality crushed tomatoes - 2 cups vegetable broth (unsalted) - 1/4 cup fresh basil leaves, roughly chopped - 1 tablespoon balsamic vinegar - 1 teaspoon granulated sugar (optional) - 1/2 cup heavy cream or coconut cream Each ingredient plays a key role in creating the rich flavor of the soup. The olive oil gives a nice base, while the onion and garlic add depth. The crushed tomatoes bring that classic taste, and the fresh basil provides a burst of brightness. Balsamic vinegar adds a hint of sweetness, balancing the acidity of tomatoes. You can adjust the sugar to your taste. If you want a creamier texture, choose heavy cream or coconut cream. Remember, this recipe is all about simple, fresh ingredients that work well together. For a full recipe, check the complete instructions on how to bring these ingredients to life in your kitchen! How to sauté onion and garlic To start, heat 2 tablespoons of extra-virgin olive oil in a large pot over medium heat. When the oil shimmers, add 1 medium yellow onion, finely chopped. Sauté for about 5 minutes. You want the onion to be soft and translucent. Then, add 3 cloves of minced garlic, 1 teaspoon of sea salt, 1/2 teaspoon of black pepper, and 1 teaspoon of dried oregano. Stir these for 1-2 minutes. This brings out the garlic's great smell without burning it. How to combine soup ingredients Next, pour in 1 (28-ounce) can of quality crushed tomatoes and 2 cups of vegetable broth. Stir well to mix everything together. Turn up the heat until it starts to simmer gently. This means little bubbles form. Once it simmers, reduce the heat to low and let the soup cook uncovered for 15-20 minutes. This step helps the flavors blend nicely. Simmering the soup for flavor After simmering, add 1/4 cup of roughly chopped fresh basil, 1 tablespoon of balsamic vinegar, and 1 teaspoon of granulated sugar if you need to balance the tomato's acidity. Let it simmer for another 5 minutes. This brings an extra depth to the flavor. Using an immersion blender vs. traditional blender You can use an immersion blender to puree the soup right in the pot. This is easy and less messy. If you don’t have one, carefully pour the soup into a traditional blender in batches. Blend until it’s smooth or leave some texture if you like it that way. How to achieve the desired consistency After blending, return the soup to the pot. Stir in 1/2 cup of heavy cream or coconut cream if you prefer a vegan option. Heat the soup on low for 3-4 minutes to warm it through. Avoid boiling it, as this can change the cream's texture. Adding heavy cream and adjusting seasoning Once heated, taste the soup. Adjust the seasoning as needed. You can add more salt or pepper to suit your taste. If the soup feels too thick, add a bit more broth to thin it out. Best practices for keeping the soup warm To keep your tomato basil soup warm, set it on low heat. Cover the pot to trap the warmth and flavors. You can serve it in warm bowls. Drizzle some extra olive oil on top and garnish with fresh basil for a nice touch. Enjoy with a slice of crusty bread for a full meal experience. For the complete recipe, check out the [Full Recipe]. To enhance flavor with herbs, use fresh basil. Add it near the end of cooking. Fresh herbs brighten the soup. You can also mix in a bit of dried oregano early. It will add depth to the base. For subtle seasoning adjustments, always taste your soup. You might want more salt or pepper. A small touch of balsamic vinegar adds sweetness and balance. You can also add sugar to cut acidity if needed. For the best garnishes, serve in warm bowls. Drizzle a little olive oil on top. Add fresh basil leaves for color. A sprinkle of black pepper can look nice too. Pair your soup with crusty bread or a fresh salad. A simple green salad can refresh your palate. This makes a complete meal that feels cozy and satisfying. Avoid overcooked garlic. It can become bitter and ruin your soup. Sauté it just until fragrant. When using canned tomatoes, choose high-quality brands. If using fresh tomatoes, peel and seed them first. Both can work, but the taste varies. Fresh tomatoes need more cooking time. {{image_4}} To make this soup vegan, use coconut cream instead of heavy cream. Coconut cream adds a rich texture and a hint of sweetness. This option is perfect for those who avoid dairy. You can also add different vegetables for added texture. Try carrots, bell peppers, or zucchini. These veggies not only boost nutrition but also add color and flavor. For those who enjoy bold flavors, you can add spices or hot peppers. A pinch of red pepper flakes brings heat, while smoked paprika adds depth. You can also incorporate different herbs like thyme or rosemary. These herbs pair well with tomato and basil, giving your soup a unique twist. You can transform this soup into a sauce for pasta. Simply thicken it by simmering longer. This makes a quick and easy dinner. Creative garnishes can elevate your soup. Add croutons, a drizzle of olive oil, or fresh basil on top. These touches make your dish look and taste gourmet. For the full recipe, check out the delicious details! After making your soup, let it cool. Use clean, airtight containers for storage. Glass jars or plastic containers work well. For long-term storage, freeze the soup. Use freezer-safe containers to avoid leaks. Refrigeration keeps it fresh for about 3 to 5 days. Freezing can extend its life to 3 months or more. To reheat your soup, use the stove or microwave. When using the stove, heat it slowly over low heat. Stir often to keep it smooth. If you use a microwave, heat in short bursts. Avoid overcooking. If you added cream to your soup, be careful. Heat it gently to avoid curdling. Stir in the cream after reheating for the best texture. How long does homemade tomato basil soup last? In the fridge, it lasts about 3 to 5 days. If frozen, it can last 3 months or longer. Always check for signs of spoilage. If you see mold or notice an off smell, dispose of the soup. Trust your senses; they are your best guide. Yes, you can use fresh tomatoes! Here’s how to prepare them: 1. Start with about 2 pounds of ripe tomatoes. 2. Boil a pot of water and add tomatoes for about 30 seconds. 3. Remove them and place them in ice water to cool. 4. Peel the skin off and chop the tomatoes. 5. Add the chopped tomatoes to your soup in place of the canned ones. Using fresh tomatoes gives your soup a bright flavor that shines through. To add heat, try these tips: - Add a pinch of red pepper flakes when you sauté the garlic and onion. - Or, toss in a diced jalapeño with the onions for a fresh kick. - You can also drizzle some hot sauce into the soup just before serving. These methods add warmth without losing the soup's rich flavor. Tomato basil soup is packed with nutrients: - Tomatoes are high in vitamins C and K, which boost your health. - Basil adds antioxidants and has anti-inflammatory properties. - The olive oil provides healthy fats that support heart health. This soup is not just tasty; it’s good for you too! Yes! Here’s how to adjust the recipe for a slow cooker: 1. Sauté the onion and garlic as usual, then add them to the slow cooker. 2. Combine all the other ingredients, except for the cream and basil. 3. Cook on low for 6-8 hours or high for 3-4 hours. 4. Stir in the basil and cream at the end, then blend as desired. This method allows flavors to develop slowly, making every bite delicious. Yes, this recipe is gluten-free! - Just be sure to check the labels on your vegetable broth and crushed tomatoes. - Some brands may add gluten, so look for certified gluten-free options. With the right ingredients, everyone can enjoy this flavorful soup! This blog post walks you through making a tasty tomato basil soup. We covered ingredients, step-by-step instructions, tips, variations, and storage info. Each step helps you create a warm and flavorful dish. Remember, using fresh herbs and adjusting seasonings can boost the soup’s taste. Whether you enjoy it as is or add your twist, this soup can warm your soul. Cooking should be fun. Dive in, experiment, and share your delicious results!

Homemade Tomato Basil Soup Flavorful and Simple Recipe

Are you craving a bowl of rich, comforting soup? My Homemade Tomato Basil Soup is both flavorful and simple to

- Fresh Vegetables for Skewers - 1 medium zucchini, sliced into thick rounds - 1 large bell pepper (choose either red or yellow), cut into squares - 1 large red onion, cut into wedges - 1 cup cherry tomatoes, whole - 1 cup mushrooms, whole or halved if large - Seasoning and Marinade Components - 2 tablespoons extra virgin olive oil - 2 teaspoons garlic powder - 1 teaspoon smoked paprika for a hint of spice - 1 teaspoon dried oregano for herbal notes - Salt and freshly ground black pepper to taste - Optional Garnishes - Fresh parsley, finely chopped (for garnish) I love using fresh vegetables for skewers. They add color and taste. Zucchini is soft and sweet. Bell peppers bring a crisp crunch. Red onions give a nice bite. Cherry tomatoes burst with flavor, while mushrooms add earthiness. The right seasonings make these skewers shine. Olive oil helps the spices stick. Garlic powder adds a savory touch. Smoked paprika brings a warm flavor. Oregano adds a hint of herbs. Don't forget salt and pepper! They enhance all the tastes. Garnishes are fun to use too. Fresh parsley adds a pop of green. It makes your dish look bright and fresh. You can find the Full Recipe for these delicious skewers to guide you through making them. Enjoy the vibrant mix of flavors! 1. Steps to Preheat the Grill: Start by turning your grill to medium-high heat. This means about 400°F or 200°C. Preheating helps cook the veggies evenly. 2. How to Prepare and Cut Vegetables: Grab fresh veggies like zucchini, bell peppers, onions, tomatoes, and mushrooms. Cut the zucchini into thick rounds, the bell pepper into squares, and the onion into wedges. Keep the cherry tomatoes whole and halve the mushrooms if they are large. 3. Importance of Soaking Skewers: If you use wooden skewers, soak them in water for 30 minutes. This step helps prevent them from burning on the grill. 1. Techniques for Even Coating: Place your cut veggies in a large bowl. Drizzle them with olive oil. Sprinkle garlic powder, smoked paprika, oregano, salt, and pepper on top. Toss gently to coat every piece. 2. Tips on Adjusting Flavor Profiles: Feel free to change the spices based on your taste. Want more heat? Add cayenne pepper. Prefer a sweeter taste? Use a sprinkle of brown sugar instead. 1. Detailed Process for Skewering: Take your soaked skewers and thread the seasoned veggies. Alternate between different types for a colorful look. Leave a little space between pieces for even cooking. 2. Timing and Temperature for Grilling: Place the skewers on the hot grill. Grill them for about 10-12 minutes. Turn them often to get nice grill marks and ensure they cook evenly. 3. Signs of Doneness for Perfectly Grilled Vegetables: Your veggies are done when they are tender and have those beautiful grill marks. They should not be mushy; they still need some bite. For the full recipe, refer to the [Full Recipe]. How to Avoid Common Grilling Mistakes To grill vegetable skewers well, follow these tips: - Soak Wooden Skewers: Soak them for 30 minutes to avoid burning. - Cut Uniform Pieces: Make sure all veggies are the same size for even cooking. - Preheat Your Grill: A hot grill helps avoid sticking and gives great grill marks. - Don’t Overcrowd the Skewers: Leave space between veggies so they cook evenly. Tips for Achieving Beautiful Grill Marks Getting those perfect grill marks is easy: - Oil the Grill Grates: Use a paper towel dipped in oil to grease the grates. - Place Skewers at an Angle: This helps create those nice diagonal marks. - Don’t Move Them Too Soon: Let the skewers sit for a few minutes before turning. Suggested Marinades and Seasonings Marinades can boost flavor in your skewers. Here are some ideas: - Balsamic Vinegar and Olive Oil: A classic combo that adds depth. - Lemon Juice and Herbs: Fresh herbs like thyme or rosemary brighten up the taste. - Spicy Marinade: Mix olive oil, red pepper flakes, and garlic for heat. Combining Different Vegetables Mixing veggies adds color and flavor: - Colorful Choices: Use red and yellow bell peppers for a bright look. - Pair with Firm Veggies: Zucchini and mushrooms hold up well on the grill. - Cherry Tomatoes for Sweetness: They burst with flavor and add sweetness. These tips will help you make the most of your grilled vegetable skewers. For a detailed guide, check out the full recipe. {{image_4}} You can mix and match a variety of vegetables for your skewers. The best vegetables for grilling include: - Zucchini - Bell peppers (red, yellow, or green) - Red onion - Cherry tomatoes - Mushrooms - Eggplant - Asparagus Feel free to use seasonal options, too. In summer, add fresh corn or squash. In fall, consider using Brussels sprouts or sweet potatoes. You can also swap out veggies based on what you like or what you have on hand. Adding cheese or protein can take your skewers up a notch. Feta, mozzarella, or even halloumi work well. For protein, try chicken, shrimp, or tofu. For vegan and gluten-free options, stick with the vegetables and add chickpeas or lentils. These options keep the dish light and healthy while still being filling. Explore the [Full Recipe] to see how you can create these delicious combinations at home! To keep your grilled vegetable skewers fresh, follow these steps: - Refrigeration Techniques: Allow the skewers to cool to room temperature. This helps avoid condensation in the container. Place them in the fridge within two hours of grilling. - Recommended Storage Containers: Use an airtight container to store the skewers. A glass or plastic container with a tight lid works best. You can also wrap them in aluminum foil for extra protection. To enjoy your leftover skewers, here are some great methods: - Best Methods for Reheating Without Losing Flavor: Reheat the skewers in a skillet over medium heat for about 5 minutes. This keeps them tender and flavorful. You can also use an oven at 350°F (175°C) for 10 minutes. Cover them with foil to keep moisture in. Avoid the microwave, as it can make them soggy. Feel free to explore my Full Recipe for more details and tips! How do you prevent vegetables from sticking to the grill? To stop vegetables from sticking, oil the grill grates. You can also brush the veggies with olive oil. This helps them cook well without sticking. Can I use metal skewers instead of wooden ones? Yes, you can use metal skewers. They are sturdy and reusable. Just remember, metal skewers get very hot. Use tongs or gloves to handle them. How long can grilled vegetable skewers be stored? Grilled vegetable skewers last about three to four days in the fridge. Store them in an airtight container. This keeps them fresh for your next meal. Caloric Value and Nutritional Benefits Grilled vegetable skewers are low in calories and packed with nutrients. One serving has around 100 calories. They are high in vitamins A and C, which help your immune system. Plus, they offer fiber for good digestion. Dietary Considerations for Various Ingredients Most vegetables in skewers fit many diets. They are vegan, gluten-free, and low-carb. If you add cheese or proteins, check for dietary needs. This way, everyone can enjoy the dish! Grilling vegetable skewers is a delicious way to enjoy fresh produce. We covered the key ingredients, ideal grilling methods, and tips to enhance flavors. Remember to choose your veggies wisely, marinate well, and avoid common mistakes. These easy steps lead to great results. You can even explore unique variations for seasonal flavors. Finally, proper storage keeps leftovers fresh. With this guide, you can confidently create tasty grilled vegetable skewers that everyone will love. Enjoy your grilling adventure!

Grilled Vegetable Skewers Flavorful and Healthy Choice

Looking for a tasty and healthy dish? Grilled vegetable skewers are the perfect choice! They are colorful, flavorful, and simple

To make a delightful Strawberry Shortcake Trifle, you need fresh and tasty ingredients. Here’s what you will need: - 2 cups fresh strawberries, hulled and sliced - 2 tablespoons granulated sugar (for the strawberries) - 1 cup heavy whipping cream - 1/2 cup powdered sugar - 1 teaspoon pure vanilla extract - 1 package (about 10 oz) store-bought angel food cake or pound cake, cut into 1-inch cubes - 1 cup plain Greek yogurt The trifle also requires a few dry ingredients. These help in creating the sweet layers that make this dessert special: - Granulated sugar enhances the flavor of the strawberries. - Powdered sugar sweetens the whipped cream and makes it light and fluffy. Garnishes add a lovely touch to the trifle. Here are some ideas to enhance your dessert: - Fresh mint leaves for a pop of color and flavor. - Extra sliced strawberries for a beautiful finish. Feel free to check the Full Recipe for more details on how to bring this dessert to life! Start by washing the strawberries. Hull and slice them into small pieces. Place the sliced strawberries in a medium bowl. Add 2 tablespoons of granulated sugar. Toss gently to coat the strawberries. Let them sit for 15 to 20 minutes. This helps the strawberries release their juices and create a sweet syrup. The longer they sit, the better the flavor! In a large mixing bowl, pour in 1 cup of heavy whipping cream. Use an electric mixer on medium speed to whip the cream. Watch for soft peaks to form. Once soft peaks appear, add 1/2 cup of powdered sugar and 1 teaspoon of pure vanilla extract. Continue whipping until stiff peaks form. Be careful not to over-whip. Over-whipped cream can become grainy and lose its smooth texture. Grab a large trifle dish or individual serving glasses. Start with a layer of cake cubes, about 1 inch in size, at the bottom. Spread them evenly. Next, add a layer of the sweetened strawberries. Make sure some juices soak into the cake. This step adds flavor and moisture. Then, spoon a layer of the yogurt-cream mixture over the strawberries. Repeat these layers—cake, strawberries, and yogurt-cream. Keep going until you fill the dish or glasses. Finish with a layer of yogurt-cream on top. For a nice touch, garnish with sliced strawberries and a mint leaf. Cover with plastic wrap and chill for at least one hour before serving. This rest time blends the flavors for a delicious treat. You can find the full recipe for Berry Bliss Shortcake Trifle in the earlier section! To make great whipped cream, start with cold tools. Chill your bowl and beaters in the fridge for 10 minutes. Use heavy whipping cream for the best texture. Whip until soft peaks form, then add powdered sugar and vanilla. Be careful not to over-whip. You want smooth, fluffy cream, not grainy bits. Layering is key to a stunning trifle. Start with cake cubes at the bottom. This gives a solid base. Next, spoon on the strawberries, letting their juices soak into the cake. Follow with a layer of the yogurt-cream mixture. Repeat the layers until your dish is full. Finish with a thick layer of yogurt-cream on top. Letting your trifle chill is crucial. Cover it with plastic wrap and chill for at least 1 hour. This time allows flavors to blend and the texture to improve. For the best taste, chill it overnight. The longer it sits, the better it tastes. {{image_4}} You can change the base of your trifle. Use a sponge cake, pound cake, or ladyfingers. Each cake type adds a different texture. If you want a richer flavor, try using a chocolate cake. For a lighter option, a lemon cake works great. Each choice will give your trifle a new twist. Strawberries are classic, but you can mix it up. Use blueberries, raspberries, or peaches. A mix of berries adds color and taste. Try bananas for a different texture. You can even make a tropical trifle with mango and pineapple. The key is to use fresh fruit for the best flavor. For adults, adding liqueurs can enhance flavor. A splash of amaretto or Grand Marnier pairs well with fruit. Just be careful with the amount. A little goes a long way. Mix it with the strawberries or drizzle it over the cake. This step can make your trifle extra special. For the complete Strawberry Shortcake Trifle recipe, check out the [Full Recipe]. Store any leftover strawberry shortcake trifle in the fridge. Use an airtight container to keep it fresh. If you made it in glasses, cover them with plastic wrap. This helps prevent the layers from drying out. I recommend refrigerating the trifle rather than freezing it. Freezing can change the texture of the cream and strawberries. The trifle is best enjoyed fresh, so eat any leftovers within a few days. - Fresh strawberries: 3-5 days in the fridge. - Whipped cream: 2-3 days when stored properly. - Angel food cake or pound cake: 4-7 days in the pantry, or up to 3 months in the freezer. - Greek yogurt: Check the label for expiration, but it usually lasts 1-2 weeks. By keeping track of these shelf lives, you can enjoy your dessert at its best. For the full recipe, check out the Berry Bliss Shortcake Trifle section. Yes, you can prepare this dessert ahead. Make the layers and assemble them in advance. I suggest assembling it a few hours before serving. This way, the flavors blend well. Just cover it and chill in the fridge. It stays fresh and tasty. If you don’t have heavy cream, use coconut cream or half-and-half. Both options provide creaminess. Coconut cream adds a hint of flavor, while half-and-half gives a lighter taste. To make this trifle gluten-free, choose gluten-free cake. You can also use gluten-free cookies as a base. Just check all labels to ensure ingredients are gluten-free. This way, everyone can enjoy it. Yes, you can use frozen strawberries. Just thaw them first and drain excess juice. This keeps the dessert from getting too watery. Fresh strawberries offer better flavor, but frozen can work in a pinch. You can store the trifle in the fridge for up to three days. After that, the texture may change. The cake might get soggy, and the cream may separate. It tastes best fresh! Absolutely! Mix in blueberries or raspberries for a fruity twist. You can layer different fruits for color and flavor. Just make sure to adjust the sweetness if needed. You can top the trifle with crushed cookies or chocolate shavings. Whipped cream is a great choice too. Add fresh fruit on top for a beautiful finish. It makes the dessert even more inviting! Serve the trifle in clear glasses or a large bowl. This way, guests can see the pretty layers. Use a large spoon to scoop out perfect portions. It’s fun and easy for everyone! This blog post covered how to create a delicious Strawberry Shortcake Trifle. You learned about fresh and dry ingredients, plus optional garnishes for added flair. I shared simple steps for preparing strawberries, whipping cream, and assembling the dessert. Helpful tips helped you master whipped cream and perfect layers. Variations allowed for creativity with cakes and fruits, while storage info ensured your leftovers stay tasty. The FAQs answered common questions you might have. Enjoy making your trifle and impress your friends and family!

Strawberry Shortcake Trifle Delightful Layered Dessert

Dive into sweet layers of heaven with this Strawberry Shortcake Trifle! This delightful dessert combines fresh strawberries, fluffy whipped cream,

To make a great avocado toast, you need a few key items: - 2 ripe avocados - 4 slices of whole-grain or sourdough bread - 1 small lemon, freshly juiced - 1 teaspoon extra virgin olive oil - Salt and freshly cracked pepper to taste These ingredients form the base of your dish. The ripe avocados bring creaminess, while the bread gives a nice crunch. Once you have the essentials, think about toppings that excite your taste buds. Here are some ideas: - ½ teaspoon red pepper flakes - 1 medium tomato, thinly sliced - ¼ cup feta cheese, crumbled - 1 radish, thinly sliced - Fresh herbs (cilantro or parsley) for garnish These toppings add flavor and texture. You can mix and match them too! Avocado toast is not just tasty; it’s also nutritious. Here’s a quick breakdown: - Avocados are rich in healthy fats. - Whole-grain bread offers fiber and nutrients. - Feta cheese adds protein and calcium. This dish is a great choice for breakfast or a snack. Enjoy all the fresh flavors and health benefits! For the full recipe, check out the Avocado Toast Delight 🥑 section. Toasting bread is simple, but it makes all the difference. I like to use whole-grain or sourdough bread. First, place your bread slices in a toaster. Set it to medium heat for the best result. If you don’t have a toaster, a skillet can work too. Just heat it over medium heat and toast each side for 2-3 minutes. You want your bread to be crispy and golden-brown. This texture holds the toppings well. Next, let's prepare the avocado. Start with two ripe avocados. Cut them in half and remove the pit. Scoop the green flesh into a bowl. Add the juice of one small lemon. This keeps the avocado fresh. Then, drizzle in a teaspoon of olive oil. Sprinkle in salt and pepper to taste. Use a fork to mash everything together. I like to leave some chunks for texture. This creamy mix is the heart of your avocado toast. Now comes the fun part: assembling your toast! Spread the creamy avocado mix generously on each slice of toasted bread. For a fresh twist, add sliced tomatoes on top. Crumble feta cheese over the tomatoes, then finish with a sprinkle of red pepper flakes for some heat. For another variation, top the avocado with thinly sliced radishes. Add fresh herbs like cilantro or parsley for extra flavor. Remember to adjust salt and pepper to your liking. For a full recipe, check out the Avocado Toast Delight 🥑. Enjoy making these tasty variations! When choosing avocados, look for ones that feel slightly soft but not mushy. The skin should be dark green to almost black, depending on the type. Gently press the avocado in your palm. If it yields to light pressure, it is ripe. If it feels hard, wait a few days. If it feels too soft, it may be overripe. Always check the stem end; if it comes off easily and is green underneath, your avocado is fresh. To make your avocado toast stand out, use simple seasonings. Lemon juice adds brightness and keeps the avocado green. Salt and pepper enhance the natural flavors. For a kick, sprinkle red pepper flakes on top. You can also try garlic powder or smoked paprika for a deeper taste. Fresh herbs like cilantro or parsley add a burst of freshness. Experiment with these to find your favorite mix. Serve your avocado toast on a beautiful platter. Arrange the toasts side by side to show off their colors. Use a rustic wooden board for a cozy feel. Add lemon wedges for a bright touch. Place extra toppings in small bowls for guests to add their own. This invites creativity and makes it fun. Remember, we eat with our eyes first, so make it as pretty as it is tasty! For more inspiration, check out the Full Recipe for Avocado Toast Delight. {{image_4}} This version brightens your morning. Start with the creamy avocado layer. Add thin tomato slices right on top. The juicy tomatoes mix well with the soft avocado. Next, sprinkle crumbled feta cheese for a salty touch. Finally, finish with red pepper flakes for some heat. This toast looks colorful and tastes amazing! For a fresh twist, try radishes. After spreading the avocado, layer thin radish slices. Their crunch adds a fun texture. Then, sprinkle fresh herbs like cilantro or parsley. They give a burst of flavor and color. This combo feels light and refreshing. Perfect for a warm day or a light snack. You can go beyond these two. Smoked salmon adds a rich taste. Place it on the creamy avocado for a savory delight. Poached eggs also work great. The warm yolk creates a rich sauce that blends into the avocado. Each bite feels luxurious and filling. Don't be afraid to mix and match your favorite toppings. The options are endless! For more ideas, check the Full Recipe for avocado toast delights that you can create. To keep your avocado mixture fresh, place it in an airtight container. Press plastic wrap directly onto the surface of the avocado. This helps reduce oxidation and keeps it green. Store it in the fridge and use it within one day for the best taste. If you have leftover toast, store it in an airtight container. Avoid stacking the slices to keep them crispy. If you want to save the toppings, store them separately. Toast is best eaten fresh, but it can last up to two days. To reheat your leftover toast, use a toaster or an oven. Set your oven to 350°F (175°C) and heat for about 5-10 minutes. This method keeps the bread crunchy. If using a microwave, heat for only 10-15 seconds to avoid sogginess. Enjoy your avocado toast fresh and warm! Check out the Full Recipe to create your own delicious variations! Yes, you can use frozen avocado. Just thaw it before mashing. The texture may be slightly different. Frozen avocado works well in spreads. It still tastes great on toast. If you prefer fresh, opt for ripe avocados from the store. They should feel soft when gently squeezed. There are many gluten-free bread options. Look for bread made from almond flour or coconut flour. Rice bread is also a good choice. You can find these at most grocery stores. Some brands offer tasty gluten-free sourdough. Check labels to ensure they fit your needs. Making this recipe vegan is easy! Simply omit the feta cheese. You can replace it with nutritional yeast for a cheesy flavor. Add more veggies like cucumbers or bell peppers. Use whole-grain or gluten-free bread that is vegan-friendly. Avocado toast is naturally rich in healthy fats and fiber. You can enjoy it without any animal products. For the full recipe, check out the Avocado Toast Delight. Avocado toast is simple and fun to make. We explored essential ingredients and tasty toppings. You learned how to toast bread and create the perfect avocado mix. We also looked at great storage tips and answered common questions. Remember, many variations exist to keep things interesting. Experiment with your own flavors. Enjoy crafting your avocado toast and share it with friends for a delightful meal!

Avocado Toast Variations Fresh and Flavorful Ideas

Avocado toast is a simple meal that can be exciting and full of flavor. You can transform this dish from

To make chocolate lava cake, gather these items: - 1/2 cup (115g) unsalted butter - 1 cup (170g) high-quality dark chocolate, finely chopped - 2 large eggs - 2 large egg yolks - 1/4 cup (50g) granulated sugar - 2 tablespoons all-purpose flour - Pinch of sea salt - Powdered sugar for dusting - Ice cream or whipped cream, for serving (optional) When choosing chocolate, pick a dark chocolate with at least 60% cocoa. Higher cocoa content gives a richer flavor. Look for brands that are smooth and have a nice sheen. Avoid chocolate labeled as "baking chocolate" unless it is high quality. You can add flavors to the batter. Consider a teaspoon of vanilla extract or a bit of espresso powder. These add warmth and depth to the chocolate. For toppings, think about serving your lava cake with: - Vanilla ice cream - Whipped cream - Fresh berries - A drizzle of caramel or chocolate sauce These options enhance the dessert's taste and make it even more special. Enjoy experimenting with flavors and textures! Preheat your oven to 425°F (220°C). Grease four ramekins with unsalted butter. Make sure to coat the insides well. Lightly dust the ramekins with flour. This helps the cake slide out easily after baking. Next, melt the chocolate and butter. In a microwave-safe bowl, combine the finely chopped dark chocolate and unsalted butter. Heat in the microwave in 30-second bursts. Stir well between each interval. This should take about 1-2 minutes. You want a smooth, melted mixture. Now let's mix the ingredients. In a separate bowl, whisk the whole eggs, egg yolks, and granulated sugar together. Keep whisking until the mixture is pale and thick, about 2 minutes. Slowly pour the melted chocolate and butter into the egg mixture. Stir continuously until the two mixtures blend well. Then, sift in the all-purpose flour and a pinch of sea salt. Gently fold the mixture with a spatula until just combined. Be careful not to over-mix; this can change the cake's texture. Divide the batter among the prepared ramekins, filling each about three-quarters full. Place them on a baking sheet for easy handling. Bake in the oven for 12-14 minutes. The edges should be firm, but the center must remain soft and slightly jiggly. This contrast gives you that perfect lava texture. After baking, carefully remove the ramekins from the oven. Let them sit for one minute. Run a small knife around the edges to help release the cakes. Invert each ramekin onto a plate, lifting them off gently. You should see the beautiful lava cakes on your plate. Dust the tops with powdered sugar for a nice finish. Enjoy with ice cream or whipped cream if you like. To get that gooey center, timing is key. Bake your cakes at 425°F (220°C) for 12 to 14 minutes. Keep an eye on them. The edges should set while the middle stays soft. A common mistake is overbaking. If you bake too long, the center won't be lava-like. If unsure, check at 12 minutes. If the center jiggles gently, it's ready. Presentation makes your dessert shine. After inverting the cakes, dust them with powdered sugar for a lovely touch. This adds a sweet contrast to the rich chocolate. For serving, pair your lava cake with a scoop of vanilla ice cream. The cold creaminess balances the warm, molten chocolate. You can also add fresh berries for a pop of color and flavor. Enjoy your delicious creation with these simple yet effective tips! {{image_4}} You can change the flavor of your chocolate lava cake easily. Use different types of chocolate for fun tastes. Try milk chocolate for a sweeter cake. Use white chocolate for a creamy twist. For more excitement, add flavored chocolate, like mint or orange. Creative additions make this dessert even better. A bit of espresso brings out the chocolate's rich taste. If you like citrus, add orange zest for a bright note. You can even mix in a splash of vanilla or a pinch of cinnamon for warmth. If you want a gluten-free version, use gluten-free flour instead of regular flour. This swap keeps the cake light and fluffy while making it safe for those with gluten allergies. You can also find gluten-free baking mixes that work well. For a healthier cake, substitute sugar with honey or maple syrup. This change adds natural sweetness. You can replace butter with coconut oil or applesauce. Both keep the cake moist and tasty. These options help you enjoy this dessert while being mindful of health. For the full recipe, check out the complete guide. To store leftover chocolate lava cake, use airtight containers. Place the cooled cakes in the containers. This helps prevent them from drying out. If you have ramekins, you can cover them tightly with plastic wrap. Keep the cakes in the fridge for up to three days. Remember, the fresher they are, the better the taste. For best results, avoid stacking the cakes. This keeps the tops nice and smooth. If you want to get fancy, place a piece of parchment paper between layers. This adds a little cushion and keeps the cakes intact. When you’re ready to enjoy your cake again, you can reheat it easily. The best way is to use the oven. Preheat it to 350°F (175°C). Place the cake on a baking sheet. Heat for about 10 minutes. This warms it up without making it dry. If you want to keep that gooey center, you can also use the microwave. Heat the cake for 20-30 seconds. Check it after 20 seconds to see if it’s warm enough. Be careful not to overheat it. This can ruin the lava effect you love so much. To restore the 'lava' effect, consider adding a scoop of ice cream on top. The warm cake and cold ice cream create a delightful combination. Enjoy your decadent dessert! What do I do if my cakes don’t have a gooey center? If your cakes lack a gooey center, they likely baked too long. The key is to check them at 12 minutes. The edges should be set, while the center remains soft. If you notice the center is firm, try reducing the baking time next time. Each oven can vary, so keep an eye on them! Can I make the batter in advance? Yes, you can make the batter ahead of time. Prepare it and fill your ramekins, then cover them with plastic wrap. Store the filled ramekins in the fridge for up to 24 hours. When you're ready to bake, just take them out and pop them in the oven straight from the fridge. You may need to add an extra minute or two to the baking time. Best restaurants for Chocolate Lava Cake near me? For the best chocolate lava cake, check local bistros or high-end restaurants. They often have this dessert on their menu. Look for places with good reviews and a focus on desserts. You can also ask friends for their favorites. How to serve Chocolate Lava Cake for a dinner party? At a dinner party, serve chocolate lava cake warm. Plate it carefully, and dust it with powdered sugar for a nice touch. A scoop of vanilla ice cream or a dollop of whipped cream pairs perfectly. You can also add fresh berries for color and flavor. This will impress your guests! Making the perfect chocolate lava cake involves careful ingredient selection, detailed steps, and handy tips. You now know how to choose the best chocolate and add your favorite flavors. Mixing and baking correctly brings out the cake’s gooey center. Remember to store leftovers well and reheat them properly. Enjoy the rich taste and impress your friends at your next gathering with this easy treat!

Chocolate Lava Cake Irresistible Dessert Recipe

Are you ready to indulge in a dessert that brings pure joy? Chocolate Lava Cake is the ultimate treat, bursting

To make nutty granola bars, you need a few simple ingredients. Here’s what you will need: - 2 cups rolled oats - 1 cup mixed nuts (like almonds, walnuts, or cashews) - 1/2 cup almond butter (or creamy peanut butter) - 1/4 cup honey (or maple syrup for a vegan option) - 1/4 cup unsweetened coconut flakes - 1/4 cup dried cranberries (or any dried fruit you like) - 1/2 teaspoon vanilla extract - 1/4 teaspoon fine sea salt - Optional: 1/2 teaspoon ground cinnamon These ingredients work together to create a tasty and healthy snack. You can swap ingredients based on what you have or your taste. Here are some options: - Use peanut butter if you prefer it over almond butter. - Try different nuts like pecans or hazelnuts for new flavors. - Use agave syrup instead of honey for a vegan choice. - Add seeds, like pumpkin or sunflower seeds, for extra crunch. - Replace dried cranberries with raisins, apricots, or chocolate chips. Feel free to mix and match to create your perfect granola bar. Each ingredient in your nutty granola bars offers health benefits: - Rolled oats are high in fiber, which helps digestion. - Mixed nuts provide healthy fats and protein, giving you energy. - Almond butter is rich in vitamins and aids in heart health. - Honey has antioxidants and can boost your immune system. - Coconut flakes add fiber and healthy fats, improving your skin. - Dried cranberries are full of vitamins and can help prevent infections. - Vanilla extract adds flavor and may have calming effects. - Sea salt balances flavors and is essential for hydration. - Ground cinnamon may help regulate blood sugar levels. These ingredients not only make your bars tasty but also nourish your body. For the full recipe, check out the details above. To make nutty granola bars, start by gathering all your ingredients. Use these: - 2 cups rolled oats - 1 cup mixed nuts (like almonds, walnuts, or cashews) - 1/2 cup almond butter (or peanut butter) - 1/4 cup honey (or maple syrup) - 1/4 cup coconut flakes - 1/4 cup dried cranberries - 1/2 teaspoon vanilla extract - 1/4 teaspoon sea salt - Optional: 1/2 teaspoon ground cinnamon 1. Preheat your oven to 350°F (175°C). Line an 8x8 inch baking dish with parchment paper. Leave some paper hanging over the sides for easy lifting later. 2. In a big bowl, mix rolled oats, chopped nuts, coconut flakes, dried fruit, sea salt, and cinnamon if you want. Stir well to blend all the ingredients. 3. In a small pot on low heat, warm the almond butter and honey until smooth. Stir often, then remove from heat. Add the vanilla extract and mix. 4. Pour this warm mix over your dry ingredients. Use a spatula to stir until everything is well coated. 5. Transfer the mixture to your baking dish. Press it down firmly to make it compact. This step helps the bars hold together. 6. Bake for 15-20 minutes until the edges turn golden brown. Watch closely to avoid burning. 7. After baking, let it cool completely in the pan. Use the parchment overhang to lift the bars out onto a cutting board. Cut them into squares or rectangles. - Use fresh ingredients for the best flavor. - Press the mixture firmly into the pan. This helps the bars stick together. - Keep an eye on the oven while baking. The bars can burn quickly. - If you want a chewier bar, add more almond butter or honey. - For a crunchier texture, bake a bit longer. Once cool, lift the granola slab from the pan. Place it on a cutting board. Use a sharp knife to cut into bars. You can make them any size you like. For a fun touch, wrap each bar in parchment paper and tie with twine. This makes them easy to grab on the go. Enjoy these delicious bars as a snack or breakfast! Making nutty granola bars is fun, but we can make mistakes. Here are some to watch out for: - Not Pressing Firmly: If you don't press the mixture down well, the bars may crumble. Use your hands or a spatula to pack it tight. - Overbaking: Keep an eye on the bars. Overbaking can make them hard and dry. Aim for a golden brown color on the edges. - Using Too Much Liquid: If your nut butter or sweetener is too runny, the bars won't hold together. Stick to the amounts in the Full Recipe. You can make your nutty granola bars your own. Here are some ideas: - Different Nuts: Try pecans, hazelnuts, or pistachios. Each nut adds its unique flavor. - Add Seeds: Chia seeds or flaxseeds can boost nutrition and add a nice crunch. - Change Sweeteners: Use agave syrup or date syrup for a different taste. - Mix in Chocolate: Add dark chocolate chips for a sweet twist. Just fold them in after mixing the wet and dry ingredients. You can easily adapt this recipe. Here’s how: - Gluten-Free: Use certified gluten-free oats. This ensures no gluten contamination. - Vegan: Replace honey with maple syrup or agave syrup. Both work well and keep the bars sweet. - Check Labels: Ensure all ingredients, like nut butter and coconut flakes, are gluten-free and vegan-friendly. These tips will help you create delicious, healthy nutty granola bars tailored to your taste and needs. {{image_4}} You can change the taste of your nutty granola bars easily. Try adding cocoa powder for a chocolatey treat. Mix in some cinnamon for a warm, spicy flavor. Or, add a pinch of sea salt to enhance the sweetness. You can also use flavored nut butters like chocolate almond butter. These small changes can make a big difference in taste. Experimenting with flavors keeps things fun and fresh! Choosing different nuts and fruits can change your bars a lot. Use hazelnuts or pecans for a different crunch. Swap dried cranberries for apricots or figs. You can even try pumpkin seeds or sunflower seeds for added texture. Each nut and fruit brings its own flavor and nutrition. Mix and match to find your favorite combination! To boost nutrition in your nutty granola bars, add chia seeds or flaxseeds. These seeds are great sources of omega-3 fats. You can also incorporate protein powder for an extra energy kick. Adding dried fruits like raisins or goji berries enhances the flavor and nutrients. Remember, a little change can make your bars even healthier. Check the full recipe for more ideas on how to create your perfect nutty granola bars! To keep your nutty granola bars fresh, store them in an airtight container. This helps keep them from drying out. You can also wrap each bar in parchment paper. This makes it easy to grab a snack on the go. If you live in a warm area, consider storing them in the fridge. The cool air helps keep them firm. When stored properly, nutty granola bars can last up to two weeks. If you keep them in the fridge, they might last a bit longer. Keep an eye out for any signs of spoilage, like a change in smell or texture. If they become too hard, you can warm them up slightly to make them easier to chew. Freezing is a great way to extend the life of your granola bars. Wrap each bar tightly in plastic wrap and then place them in a freezer bag. They can last for up to three months in the freezer. When you want to eat one, just take it out and let it thaw at room temperature or warm it in the microwave for a few seconds. Enjoy your delicious snack anytime! To make your nutty granola bars chewy, use less baking time. Bake them for about 15 minutes, not longer. A shorter bake time keeps them soft. Additionally, add more nut butter and honey. These ingredients help bind the mix and add moisture. Mixing in seeds like chia or flax can also help with chewiness. Yes, you can use other nut butters. Peanut butter works great if you like its flavor. Cashew butter or sunflower seed butter are also tasty options. Each type of nut butter will change the flavor slightly. Just ensure your butter is smooth for best results. You can find ready-made nutty granola bars at grocery stores or health food shops. Look in the snack aisle or the health food section. Brands often offer a range of flavors and ingredients. Always check the labels to find options that fit your needs. You can also buy them online from various retailers. - Common questions from users: - How do I store my nutty granola bars? - Can I add chocolate chips? - Are these bars good for breakfast? - How do I make them vegan? You’ve learned about making nutty granola bars from scratch. We covered key ingredients, their health benefits, and step-by-step instructions. I shared tips to avoid mistakes and ways to customize your bars. You also discovered storage tips to keep them fresh. Enjoy making your own granola bars. They are fun to create and tasty to eat. Plus, you can mix and match flavors to suit your taste. Try them out and see how easy it is to make a snack that’s good for you!

Nutty Granola Bars Easy and Healthy Recipe Guide

Looking for a quick, tasty snack that’s easy to make? You’ve found it! In this guide, I’ll show you how

Older posts
Newer posts
← Previous Page1 … Page80 Page81 Page82 … Page86 Next →

dsad

© 2026 yumymoments • Built with GeneratePress

Our Policies

  • Copyright Policy
  • Cookie Policy
  • GDPR Policy
  • Privacy Policy
  • Disclaimer
  • Terms Of Use

More Information

  • Home
  • About
  • Contact
  • Appetizers
  • Dessert
  • Dinner
  • Drinks
©2026, yumymoments About Back To Top