Skip to content
DisclaimerTerms Of UseGDPR PolicyCookie Policy

yumymoments

  • Home
  • Drinks
  • Appetizers
  • Dinner
  • Dessert
  • About
  • Contact
  • Privacy Policy
DisclaimerTerms Of UseGDPR PolicyCookie Policy

NO-ING-IMG

- 1 cup rolled oats - 1/2 cup creamy peanut butter - 1/3 cup honey or maple syrup - 1/4 cup unsweetened cocoa powder - 1/4 cup mini chocolate chips - 1/4 cup ground flaxseed - 1 teaspoon pure vanilla extract - A pinch of sea salt For these chocolate peanut butter energy bites, each ingredient plays a key role. The rolled oats give a chewy base. Creamy peanut butter adds rich flavor and healthy fats. Honey or maple syrup brings sweetness and binds the mix. Unsweetened cocoa powder gives that deep chocolate taste. Mini chocolate chips add fun bursts of sweetness. Ground flaxseed boosts the bites with fiber and omega-3s. Vanilla extract enhances the overall flavor, and sea salt balances the sweetness. These energy bites are not just tasty; they're also nutritious. Each bite delivers a good mix of calories, carbs, fats, and protein. - Calories: About 100 per bite - Carbs: 12g - Fats: 5g - Protein: 3g The ingredients provide many health benefits. Oats are great for heart health. Peanut butter offers protein and good fats. Flaxseed supports digestion and heart health. These bites can fuel your day. If you're out of creamy peanut butter, you can use almond or cashew butter. Each brings its own flavor but keeps the same texture. For sweeteners, you can choose honey or maple syrup. Honey is thicker and sweeter. Maple syrup has a unique taste and a lighter texture. You can use either based on what you like best or what you have at home. 1. Mixing the dry and wet ingredients Start by taking a large mixing bowl. Combine the rolled oats, creamy peanut butter, and honey or maple syrup. Add the unsweetened cocoa powder and ground flaxseed. Use a spatula or spoon to mix well. You want a smooth mixture with all the ingredients blended together. 2. Forming the energy bites Now, take clean hands and scoop out portions of the mixture. Roll them into small balls. Aim for about 1 inch in diameter. Make sure they are compact and hold their shape well. Place the rolled energy bites on a baking sheet lined with parchment paper. Keep some space between them. 1. How to properly roll the bites Use the palms of your hands to roll the bites. This will help keep them smooth and round. If the mixture sticks to your hands, dampen them slightly with water. It makes rolling easier and keeps your bites nice. 2. Chilling time and its importance Once all the bites are shaped, place the baking sheet in the refrigerator. Chill them for at least 30 minutes. This helps the bites firm up and hold their shape. Chilling also enhances the flavors, making each bite even tastier. 1. Signs of a perfect mixture The mixture should be sticky but not too wet. It should hold together when you roll it into a ball. If it falls apart, you may need to add more peanut butter or honey. 2. What to avoid during preparation Make sure not to overmix the ingredients. This can make the energy bites too dense. Also, avoid using too much cocoa powder. It can make the mixture too dry. Balance is key for a great taste and texture. For the complete recipe, refer to the [Full Recipe]. - Use an airtight container for refrigeration. This keeps the bites fresh. - They last up to one week in the fridge. Make sure to check for freshness. - Serve energy bites on a fun platter. You can also fill a clear jar with them. - Pair them with a smoothie or a cup of coffee. They taste great with both! - Add nuts or seeds for extra crunch. Chopped almonds or sunflower seeds work well. - Try spices like cinnamon or a dash of sea salt. These boost the flavor and make them pop. For the full recipe, check out the Choco-Peanut Bliss Energy Bites. {{image_4}} You can change the taste of your energy bites by adding nuts or seeds. Try mixing in chopped almonds, walnuts, or sunflower seeds. Each option adds a great crunch and boosts nutrition. You can also try different types of chocolate. Use dark chocolate chips for a rich flavor. Milk chocolate adds sweetness, while white chocolate gives a creamy touch. Mix and match to find your favorite blend! If you need vegan or gluten-free options, you can easily adapt this recipe. Use maple syrup instead of honey for vegan bites. Make sure to pick gluten-free oats to keep it safe for those with gluten issues. For a low-sugar or keto-friendly snack, swap honey with a sugar alternative like stevia or erythritol. This way, you can enjoy a treat that fits your diet! Incorporating seasonal flavors gives your energy bites a fun twist. For fall, add pumpkin spice or dried cranberries. In winter, consider mixing in peppermint extract or crushed candy canes for a holiday vibe. You can even shape them into festive forms for special occasions. Seasonal energy bites keep your snacks fresh and interesting all year long. How to store Chocolate Peanut Butter Energy Bites? Store these bites in an airtight container. Keep them in the fridge. This helps maintain freshness. They will last up to one week when stored properly. Can I freeze these energy bites? Yes, you can freeze them! Place the bites in a single layer. Use a freezer-safe bag or container. They will keep well for about three months. Just thaw them in the fridge before you eat. What can I use instead of honey? If you want an alternative to honey, use maple syrup. You can also try agave nectar or brown rice syrup. These will give a similar sweetness and texture. How to make them less sweet? To reduce sweetness, cut back on honey or syrup. You can also add more oats or cocoa powder. This will balance the flavors without losing the energy boost. Are energy bites a good pre-workout snack? Absolutely! These bites provide a great mix of protein and carbs. They give you energy without feeling heavy. Enjoy them about 30 minutes before your workout for the best results. Do these bites help with weight management? Yes, they can help! These bites are made with whole ingredients. They provide fiber and healthy fats that keep you full. Just watch your portion sizes to stay on track. To make Chocolate Peanut Butter Energy Bites, start by mixing all your dry and wet ingredients in a large bowl. This includes rolled oats, peanut butter, honey, cocoa powder, and ground flaxseed. Stir until everything blends well. Then, fold in the mini chocolate chips and salt. Next, use your hands to form small balls about one inch in size. Place them on a lined baking sheet and chill for at least 30 minutes. - Prep Time: 15 minutes - Total Time: 45 minutes - Servings: About 16 bites For success with this recipe, use creamy peanut butter for a smooth texture. Make sure to chill the bites well so they hold their shape. Store them in an airtight container in the fridge for up to one week. You can also serve them in a clear jar or on a platter to show off their chocolatey goodness. For extra flair, drizzle melted dark chocolate on top. This easy and quick recipe gives you a tasty boost, perfect for snacks or post-workout energy! We explored a simple and tasty recipe for Chocolate Peanut Butter Energy Bites. You learned about the key ingredients, their benefits, and substitutes like honey and peanut butter. I shared easy steps for mixing, rolling, and storing your bites. You can also experiment with flavors and adjust the recipe to fit your diet. Remember, these energy bites are a quick and healthy snack option. Enjoy making them and find joy in your easy snack that boosts energy!

Chocolate Peanut Butter Energy Bites Power Boost Snack

Looking for a quick, tasty snack that fuels your day? These Chocolate Peanut Butter Energy Bites are your go-to power

- 2 pounds baby potatoes, halved - 4 tablespoons extra virgin olive oil - 1 teaspoon garlic powder - 4 cloves garlic, finely minced - 1 cup freshly grated Parmesan cheese - 1 teaspoon dried oregano - Salt and freshly cracked black pepper, to taste - Fresh parsley for garnish - Additional seasonings (e.g., paprika, thyme) - Cheese alternatives (e.g., nutritional yeast for vegan option) For Garlic Parmesan Roasted Potatoes, you need simple, fresh items. Baby potatoes are the star. Their small size makes them tender and easy to eat. Extra virgin olive oil adds rich flavor and helps them roast nicely. Garlic powder and minced garlic pack a punch with their bold taste. Parmesan cheese brings a savory, cheesy goodness that melts beautifully. Dried oregano adds a hint of herbal freshness. Adjust salt and black pepper to suit your taste. For a nice finish, fresh parsley adds color and a fresh flavor. You can play with optional ingredients too. Paprika gives a smoky kick. Thyme adds a warm, earthy note. If you want a vegan version, swap the Parmesan for nutritional yeast. It still gives a cheesy flavor without dairy. This recipe is fun and flexible. You can adjust it to fit your taste and diet. Check out the Full Recipe for all the details! First, preheat your oven to 425°F (220°C). This high heat helps the potatoes get crispy. Next, line a large baking sheet with parchment paper. This will keep the potatoes from sticking and makes cleanup easy. In a big mixing bowl, combine the halved baby potatoes, olive oil, garlic powder, minced garlic, dried oregano, salt, and pepper. Toss everything well. You want the potatoes to be coated in the tasty mix. Now, carefully spread the seasoned potatoes on the baking sheet. Make sure they lay in a single layer. This helps them roast evenly and turn crispy. Roast the potatoes for about 25 minutes. At the halfway mark, stir them well. This promotes even cooking and browning. After the first 25 minutes, take the baking sheet out of the oven. Sprinkle the grated Parmesan cheese evenly over the potatoes. This will give them a rich, cheesy flavor. Return the baking sheet to the oven. Roast for another 10-15 minutes, or until the cheese melts and turns golden brown. Once done, remove the baking sheet from the oven. Let the potatoes cool for a few minutes. Before serving, sprinkle some fresh parsley on top for a pop of color. Enjoy your Garlic Parmesan Roasted Potatoes! For the full recipe, check out the detailed instructions. To get those perfect, crispy Garlic Parmesan Roasted Potatoes, you must ensure they lie flat in a single layer. This allows hot air to circulate, crisping up all sides. If you overcrowd the pan, your potatoes will steam instead of roast, resulting in a soggy texture. The ideal roasting temperature is 425°F (220°C). This heat is high enough for browning without burning the cheese. Always preheat your oven fully for best results. Experiment with ingredient variations to make these potatoes your own. You can add herbs like fresh rosemary or thyme for extra aroma. A dash of paprika can add a nice kick. If you want a spicy version, sprinkle some chili flakes over the potatoes before roasting. For dips, I recommend pairing these potatoes with sour cream or a tangy yogurt dip. They also go well with ketchup or a zesty aioli. When serving, presentation matters. Use a large, colorful serving bowl to show off the potatoes. For a special touch, dust extra Parmesan on top and add a handful of fresh parsley. These Garlic Parmesan Roasted Potatoes pair beautifully with grilled chicken or a fresh green salad. They can elevate any meal, from casual weeknight dinners to festive gatherings. For the full recipe, click here! {{image_4}} You can take Garlic Parmesan Roasted Potatoes to new heights with different flavors. Adding herbs like rosemary or thyme gives a fresh taste. These herbs pair well with garlic and cheese. Just add a teaspoon of dried herbs into your mix for a great twist. If you love heat, try a spicy version. Sprinkle some chili flakes on the potatoes before roasting. This addition brings a kick that many enjoy. Adjust the amount based on your spice level. Making Garlic Parmesan Roasted Potatoes fit different diets is easy. For gluten-free options, this recipe is already safe. Just check all your ingredients to ensure they are gluten-free. For vegan alternatives, swap the Parmesan cheese with nutritional yeast. This gives a cheesy flavor without dairy. You can also use cashew cheese for a creamier texture. Both options work well and keep the dish tasty. Sometimes you might not have certain ingredients on hand. For Parmesan cheese, you can use Pecorino Romano. It has a similar taste and enhances the dish. You can also switch up the potatoes. While baby potatoes are great, you can use Yukon Gold or red potatoes. Just cut them into similar sizes for even cooking. These swaps keep the recipe fresh and exciting. For the full recipe, check out the detailed instructions and tips! To keep Garlic Parmesan Roasted Potatoes fresh, store them in an airtight container. Place them in the fridge right after they cool. This will help keep them from getting soggy. You can safely store them for up to three days. Reheating is key to keeping that crispy texture. The best way is to use the oven. Preheat it to 375°F (190°C) and spread the potatoes on a baking sheet. Heat them for about 10 to 15 minutes. This method helps avoid sogginess. You can also use an air fryer if you have one. Set it to 350°F (175°C) and cook for 5 to 7 minutes. Freezing Garlic Parmesan Roasted Potatoes is simple. Let them cool completely, then spread them on a baking sheet. Freeze them for about an hour, then transfer the potatoes to a freezer-safe bag. This prevents them from sticking together. They will last up to three months. To thaw, place the potatoes in the fridge overnight. Reheat them in the oven as mentioned above for the best results. Enjoy your delicious leftovers! For the full recipe, check out the detailed instructions. To make your Garlic Parmesan Roasted Potatoes crispy, follow these tips: - Use baby potatoes for better texture. - Cut them in half for even cooking. - Toss them well in olive oil and spices. - Spread them out on the baking sheet in a single layer. - Roast at high heat for a golden finish. - Stir halfway through cooking to promote even crispiness. Using these steps will help you get that perfect, crunchy exterior while keeping the inside soft. Yes, you can use regular potatoes. Here are some tips: - Choose small or medium-sized potatoes for even cooking. - If using larger potatoes, cut them into smaller pieces. - Adjust the cooking time; larger pieces may need more time to roast. Regular potatoes can work well, but baby potatoes offer a unique bite. These potatoes pair well with many dishes. Here are some ideas: - Serve with grilled chicken or steak for a hearty meal. - Pair with roasted vegetables for a colorful platter. - They also go well with a fresh salad for a lighter option. - For a fun twist, serve with a yogurt dip or sour cream. Feel free to mix and match based on your taste! Garlic Parmesan Roasted Potatoes can be stored for about 3 to 5 days in the fridge. Here are the best storage tips: - Keep them in an airtight container to maintain freshness. - Reheat them in the oven for the best texture. Storing them properly helps keep the flavor alive for your next meal. In this blog post, we explored how to make delicious Garlic Parmesan Roasted Potatoes. We covered the right ingredients, step-by-step instructions, and helpful tips for perfecting your dish. You can adjust flavors and try new ingredients to make this recipe your own. Remember to store leftovers properly and reheat carefully for the best taste. With these easy methods, you can enjoy a tasty side dish that works for any meal. Start roasting your potatoes today and savor this amazing flavor!

Garlic Parmesan Roasted Potatoes Crispy and Flavorful

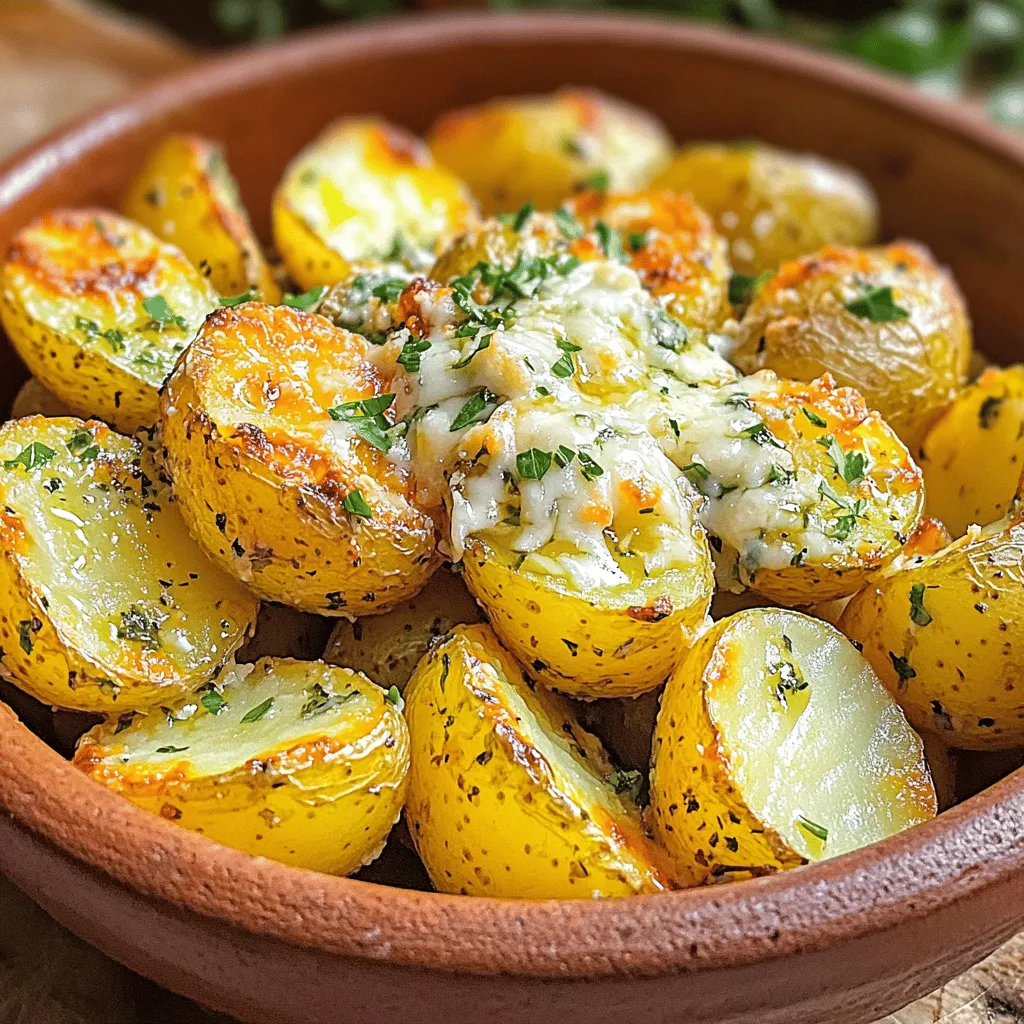
Get ready to take your side dish game to the next level with Garlic Parmesan Roasted Potatoes! These crispy, flavorful

- 2 cups rolled oats - 1 cup fresh blueberries (or frozen, thawed and drained) - 2 ripe bananas, mashed into a smooth puree - 1/4 cup honey or maple syrup - 1 cup almond milk (or your preferred milk) - 1 teaspoon pure vanilla extract - 1 teaspoon baking powder - 1 teaspoon ground cinnamon - 1/4 teaspoon salt When you gather the ingredients for your blueberry oatmeal bake, focus on quality. Rolled oats form the base, giving you a hearty texture. I love using fresh blueberries, but frozen ones work well too. They add natural sweetness and a burst of flavor. Bananas act as a sweetener in this recipe. They also help bind the ingredients together. Choose ripe bananas for the best taste. The honey or maple syrup adds extra sweetness. Use almond milk or your favorite milk to keep it creamy. The dry ingredients are simple yet vital. Baking powder helps the bake rise. Cinnamon gives a warm, cozy flavor. A pinch of salt enhances all the tastes. This mix of ingredients creates a nourishing breakfast. You can find the full recipe to guide you step by step. Enjoy the process of making this tasty dish! 1. Preheat your oven to 350°F (175°C). This ensures even cooking. 2. Grease a 9x9 inch baking dish. Use oil or cooking spray to stop sticking. 3. In a large bowl, add rolled oats, baking powder, ground cinnamon, and salt. 4. Mix these dry ingredients well with a whisk or spoon. 1. In another bowl, mash the ripe bananas into a smooth puree. 2. Add honey or maple syrup, almond milk, and vanilla extract to the bananas. 3. Mix until everything is smooth and well combined. 4. Slowly pour the wet mix into the dry ingredients. Stir gently until blended. 5. Carefully fold in the blueberries so they don’t get mashed. 1. Pour the mixture into the prepared baking dish. Smooth it out evenly. 2. If you want, add optional toppings like more blueberries or chopped nuts. 3. Bake for 30-35 minutes. Check when it’s golden brown. 4. Insert a toothpick in the center. It should come out clean. 5. Let the dish cool for about 5-10 minutes before cutting. Following these steps will lead you to a delicious blueberry oatmeal bake! For the complete recipe, check the [Full Recipe]. To get a great texture, mix your dry and wet ingredients just right. Make sure the oats, baking powder, cinnamon, and salt are mixed well. This ensures even baking. When you fold in the blueberries, do it gently. This keeps them whole and juicy. If you mix too hard, you risk mashing them. A soft touch keeps the bake looking great! Serve this dish warm for the best taste. A drizzle of honey or a splash of almond milk makes it even better. You can also add toppings like chopped nuts or coconut flakes for extra crunch. Fresh blueberries on top add a pop of color and flavor. Let your creativity shine with your favorite toppings! A big mistake is not preheating the oven. Always set it to 350°F (175°C) before starting. This helps the bake cook evenly. Another mistake is overmixing. Mixing too much can lead to a dense texture. Aim for a gentle stir to keep it light and fluffy. Pay attention to these details for a perfect blueberry oatmeal bake! {{image_4}} You can easily change the fruit in your blueberry oatmeal bake. If you love raspberries or strawberries, swap them for blueberries. They will add a nice twist. You can also add dried fruits like cranberries or raisins. This gives your bake a chewy texture and extra sweetness. You can use different types of milk in this recipe. Dairy milk, oat milk, or soy milk all work well. If you want to make it vegan, try using maple syrup or agave syrup instead of honey. This keeps the bake sweet and delicious without any animal products. Spices can make your oatmeal bake even better. Try adding nutmeg or ginger for a warm flavor. You can also add almond or coconut extracts to give it a tropical touch. These small changes can really enhance the taste and make your breakfast special. For the full recipe, check out the Blueberry Oatmeal Bake 🫐. To keep your blueberry oatmeal bake fresh, store any leftovers in the refrigerator. Place the cooled pieces in an airtight container. Make sure to cover them well to avoid drying out. This way, you can enjoy your bake for a few days. If you want to save it for longer, freezing is a great option. Cut the bake into squares and wrap each piece tightly in plastic wrap. Then, place the wrapped pieces in a freezer-safe bag. This helps keep the flavors fresh. You can freeze it for up to three months. When you’re ready to enjoy your blueberry oatmeal bake again, you can reheat it easily. The best way to keep the texture is to use the oven. Preheat your oven to 350°F (175°C). Place your slice on a baking tray and cover it with foil. Heat it for about 10-15 minutes. If you're short on time, the microwave works too. Place your slice on a microwave-safe plate. Heat it for 30 seconds to one minute, checking often. Just be careful not to overheat, as this can make it dry. Your blueberry oatmeal bake stays good for about 4-5 days in the fridge. After that, the quality may start to fade. Look out for any changes in smell or texture. If it smells off or has mold, it’s time to toss it. Keeping these storage tips in mind helps ensure you enjoy this delicious dish! For the full recipe, check out the earlier sections. Yes, you can make this dish in advance. To do this, follow these steps: - Prepare the mixture: Mix all your ingredients as usual. - Store it: Place the mixture in a covered dish in the fridge for up to 24 hours. - Bake when ready: When you're ready to eat, bake it straight from the fridge. You may need to add a few extra minutes to the baking time. This method helps you enjoy a hot breakfast with less morning fuss. If you dislike bananas or have an allergy, try these options: - Unsweetened applesauce: Use 1/2 cup as a smooth replacement. - Pumpkin puree: You can use the same amount for a different flavor. - Silken tofu: Blend it until smooth and use 1/2 cup in place of bananas. These swaps keep the bake moist and flavorful. Absolutely! This blueberry oatmeal bake is great for meal prep. Here are some ideas: - Make a big batch: Prepare the recipe on the weekend, then cut it into squares. - Pack in containers: Store individual servings in airtight containers. - Easy reheating: Just pop them in the microwave for a quick breakfast. This way, you enjoy a healthy meal all week. You can use quick oats, but there are some differences: - Texture: Quick oats cook faster and become mushy. This can make your bake softer. - Baking time: If you use quick oats, reduce your baking time by a few minutes. Rolled oats give a chewier texture, which many prefer in this dish. This blog post covered how to make a tasty blueberry oatmeal bake. You learned about the key ingredients, from oats to sweeteners. We detailed the simple steps for preparation, mixing, and baking. The tips helped ensure the best texture and flavor. Variations let you customize your bake. Proper storage and reheating methods extend freshness. In the end, this easy recipe can fit any meal plan and delight everyone. Enjoy experimenting and making this dish your own.

Blueberry Oatmeal Bake Nourishing Breakfast Delight

Start your mornings right with a warm, comforting slice of Blueberry Oatmeal Bake! It’s packed with wholesome ingredients like oats,

To make a tasty veggie loaded quiche, you will need: - 1 pre-made pie crust (9-inch) - 4 large eggs - 1 cup heavy cream - 1 cup fresh spinach, chopped - 1 cup broccoli florets, blanched and chopped - 1/2 bell pepper, diced (any color you prefer) - 1/2 cup cherry tomatoes, halved - 1/2 cup shredded cheddar cheese - 1/4 cup feta cheese, crumbled - 1/2 teaspoon garlic powder - 1/2 teaspoon onion powder - Salt and freshly ground black pepper to taste - Fresh herbs for garnish (such as parsley or chives) When picking vegetables, freshness matters. Look for bright colors, firm textures, and no brown spots. Choose spinach that is vibrant green and crisp. For broccoli, select florets that are tight and not yellowing. Bell peppers should feel heavy for their size and have smooth skin. Cherry tomatoes should be plump and firm. Fresh veggies make your quiche taste best and add nutrition. Cheese adds a rich flavor to your quiche. I recommend using shredded cheddar for a classic taste. Feta cheese gives a nice tang and creaminess. You can also explore mozzarella for a milder flavor. If you like stronger cheese, try goat cheese or Gruyère. Mix different cheeses for a more complex taste. To start, preheat your oven to 375°F (190°C). Grab your pre-made pie crust and place it in a 9-inch pie dish. Use a fork to poke holes in the bottom. This helps steam escape while baking. It also stops the crust from bubbling. Next, bake the crust for about 10 minutes until it turns lightly golden. Once done, take it out, and let it cool a bit. In a big bowl, whisk together 4 large eggs and 1 cup of heavy cream. Make sure it is smooth and blended well. Then, add 1 cup of chopped spinach, 1 cup of blanched broccoli florets, and 1/2 diced bell pepper. Toss in 1/2 cup of halved cherry tomatoes, 1/2 teaspoon of garlic powder, and 1/2 teaspoon of onion powder. Season with salt and black pepper to your taste. Stir all the veggies into the egg mixture gently. Finally, fold in 1/2 cup of shredded cheddar cheese and 1/4 cup of crumbled feta cheese. This adds rich flavor to your quiche. Now, pour the filling into your pre-baked crust. Spread it out evenly for a nice look. Place the quiche back into the oven and bake for 35-40 minutes. It should be set in the center and golden on top. To test it, insert a knife in the middle. If it comes out clean, your quiche is ready! Let it cool for about 10 minutes before slicing. This makes cutting easier and helps it hold its shape. To see the full recipe, you can check out the additional instructions. To get a creamy texture in your quiche, use heavy cream. It adds richness and smoothness. Blend the eggs and cream well before adding veggies. Whisk until the mixture is frothy. This helps to mix in air, making it light and fluffy. Season your filling well. I add garlic powder and onion powder for flavor. Don’t forget salt and black pepper. They enhance the taste of the veggies and cheese. Taste the mixture before pouring it into the crust. Adjust the seasoning if needed for the best flavor. A soggy crust can ruin your quiche. Pre-bake your crust for about 10 minutes before adding the filling. This step helps firm it up. Also, poke holes in the bottom of the crust with a fork. This allows steam to escape, keeping the crust crisp. {{image_4}} You can mix and match many veggies in your quiche. Try using kale, zucchini, or asparagus. These veggies add fun colors and flavors. You can also add mushrooms for a rich taste. If you like spice, jalapeños can give your quiche a nice kick. Just remember to chop them small so they blend in well. If you want a filling meal, add protein to your quiche. Cooked bacon or sausage can make it savory and rich. For a lighter option, try diced chicken or turkey. You can even use beans for a vegetarian protein boost. Just be sure to drain any excess liquid to keep the quiche from getting soggy. If you want to switch things up, try making a crustless quiche. It saves time and cuts carbs. Another option is to use a sweet potato or cauliflower crust for added nutrition. You can find pre-made gluten-free crusts too. These options let you enjoy the flavors without the guilt. For more details on making this dish, check out the Full Recipe. After enjoying your veggie loaded quiche, let it cool down. Cover it tightly with plastic wrap or aluminum foil. Place it in the fridge. It will stay fresh for up to three days. You can also use an airtight container for better storage. This keeps the flavors intact. To reheat your quiche, preheat your oven to 350°F (175°C). Place the quiche on a baking sheet. Heat it for about 15-20 minutes. This method helps keep the crust crispy. You can also use the microwave if you're in a hurry. Heat it for 1-2 minutes, checking often. Remember, the crust may become soft in the microwave. You can freeze veggie loaded quiche for later. First, let it cool completely. Wrap it tightly in plastic wrap. Then, place it in a freezer bag. Label the bag with the date. It can last for up to three months in the freezer. To reheat, thaw it overnight in the fridge. Then, follow the reheating instructions above. This way, you can enjoy your delicious quiche anytime! Yes, you can use a frozen pie crust. It saves time and effort. Just make sure to thaw it first. Follow the package instructions for best results. Your veggie loaded quiche lasts about 3 to 4 days in the fridge. Store it in an airtight container. This keeps it fresh and tasty. Absolutely! You can prepare the quiche a day ahead. Just bake it, let it cool, and cover it. Store it in the fridge until you’re ready to eat. Reheat it gently before serving. - Full Recipe Instructions available upon request. You now have the tools to make a great quiche. We covered fresh ingredients, crust prep, and baking tips. Remember to choose vibrant veggies and flavorful cheese for the best taste. Keep it creamy and avoid a soggy bottom by following the steps carefully. Don't forget the fun variations to make each quiche unique. Store any leftovers properly and enjoy them later. With these insights, you can cook a quiche that impresses every time. Get ready to share this delicious dish with family and friends!

Veggie Loaded Quiche Flavorful and Healthy Dish

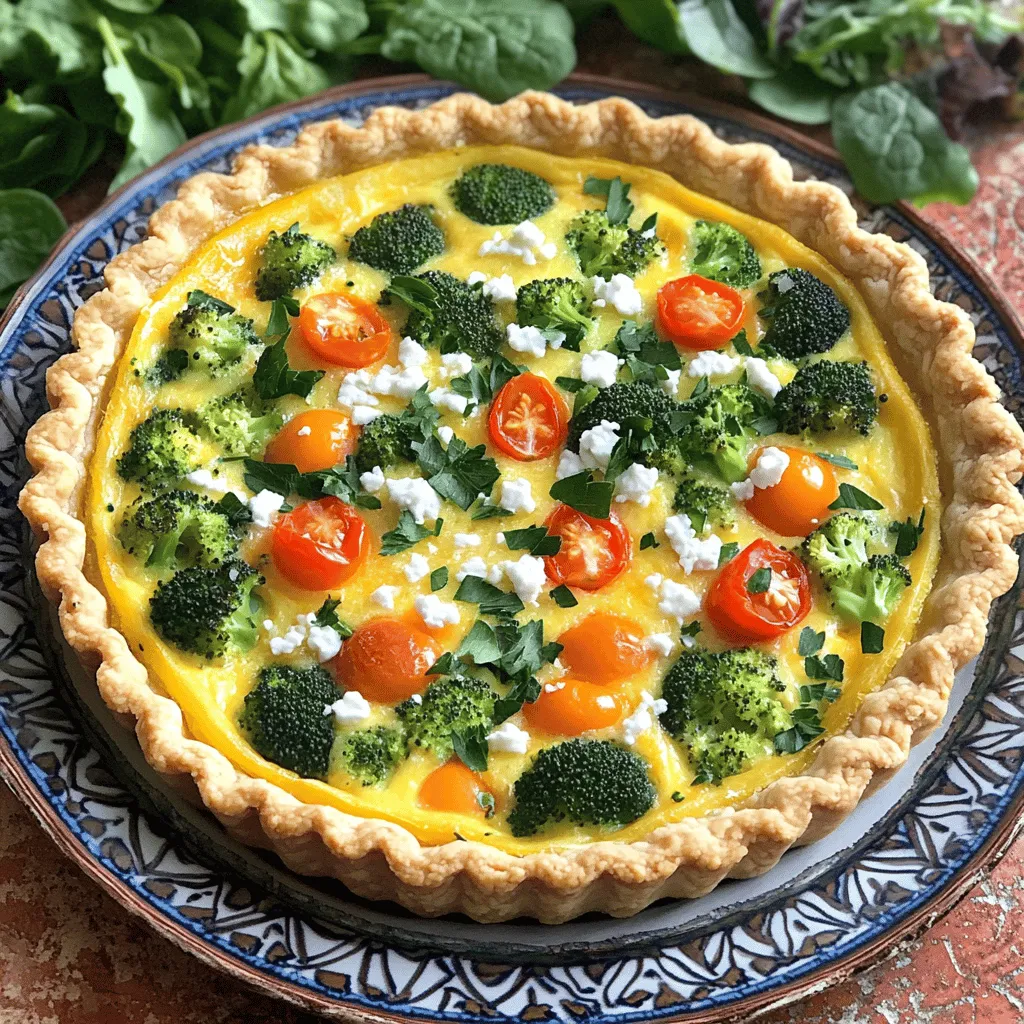
Are you ready to create a dish that’s both flavorful and healthy? My Veggie Loaded Quiche is the answer. Packed

- 1 pound medium-sized carrots - 3 tablespoons honey - 2 tablespoons extra-virgin olive oil - 3 cloves garlic, finely minced - 1 teaspoon fresh thyme leaves (or ½ teaspoon dried thyme) - ½ teaspoon sea salt - ¼ teaspoon freshly ground black pepper - 1 tablespoon sesame seeds for garnish - Fresh parsley, finely chopped for garnish The main ingredients for these honey garlic roasted carrots are simple, fresh, and easy to find. The carrots are the star. I love using medium-sized carrots because they have a great balance of sweetness and texture. Honey adds a lovely sweetness. It blends well with the rich taste of garlic. Olive oil keeps the carrots moist while they roast. Garlic is key in this dish. It gives a burst of flavor. I always mince it finely to spread the taste evenly. For seasoning, I add fresh thyme. It lifts the dish with a hint of earthiness. Sea salt enhances all the flavors. Black pepper adds a bit of spice. Finally, I finish the dish with sesame seeds and parsley. They add a nice crunch and color. The full recipe includes all these ingredients and more to guide you through making this delicious side dish. - Preheat oven to 425°F (220°C). - In a large bowl, whisk together honey, olive oil, garlic, thyme, salt, and pepper. First, you want to make sure your oven is hot. Preheating is key for good roasting. While the oven heats, mix the honey, olive oil, garlic, thyme, salt, and pepper in a bowl. This mix will coat the carrots and add great flavor. - Peel and slice carrots into sticks. - Toss the carrot sticks with the honey garlic mixture. Next, grab your carrots. Peel them and cut them into sticks about the size of your finger. You want them to cook evenly. Add these sticks to the bowl with your honey garlic mix. Toss them well so every piece gets coated. This is where the magic happens! - Line a baking sheet with parchment paper. - Roast the carrots for 25-30 minutes, stirring halfway. Now, prepare a baking sheet by lining it with parchment paper. This makes cleanup easy and helps the carrots roast nicely. Spread the carrots out in a single layer. Make sure they aren’t crowded! Place the sheet in your hot oven. Roast the carrots for 25 to 30 minutes. Stir them halfway through to ensure even cooking. They should turn golden and a bit crispy when done. For the full recipe, check the earlier section. Enjoy your delicious Honey Garlic Roasted Carrots! To get the best roast on your carrots, follow these tips: - Ensure even roasting: Carrots need space to cook well. They should not touch each other. This way, every piece gets heat and caramelizes nicely. - Keeping carrots in a single layer: Use a large baking sheet. If the carrots are flat and not stacked, they roast better. This helps them turn golden and tender. Want to add extra taste? Here are some ideas: - Experimenting with spices: Try adding spices like cumin or paprika. They can change the flavor and make it more exciting. Just a pinch can bring a new twist. - Adding a splash of lemon juice for zest: Right before serving, squeeze some lemon juice over the carrots. This brightens the flavors and adds a fresh taste. Watch out for these common errors: - Overcrowding the baking sheet: This is a big mistake. It can lead to steaming instead of roasting. Always give your carrots space to cook. - Not preheating the oven: Make sure your oven is hot before cooking. If it’s not preheated, your carrots will not roast properly. For more tips and a full recipe, check out the [Full Recipe] above! {{image_4}} You can switch honey for maple syrup. This gives a rich, deep flavor. Agave nectar is another option. It adds a sweet touch without being too strong. Brown sugar works well, too. It brings a nice caramel flavor to the carrots. For a tasty twist, try topping your carrots with crushed nuts. They add crunch and a nutty flavor. Feta cheese is also a great choice. It adds creaminess and a salty kick. You can also explore different herbs. Rosemary gives a robust taste, while dill offers a fresh burst of flavor. Honey garlic roasted carrots pair well with meats, like chicken or pork. They also work great as a side dish at family dinners. You can add them to salads for a pop of color and sweetness. They fit well in grain bowls, adding flavor and nutrition. Check out the Full Recipe for more ideas! After you make honey garlic roasted carrots, let them cool. Store them in an airtight container in the fridge. This keeps them fresh and tasty. They are best consumed within 3-5 days. You can enjoy their sweet and savory flavor during this time. If you want to keep roasted carrots longer, freezing is a great option. First, let them cool completely. Then, place them in a freezer-safe container or bag. Label the container with the date. You can freeze them for up to three months. When you are ready to eat them, thaw them in the fridge overnight. To reheat roasted carrots, the oven works best. Preheat your oven to 350°F (175°C). Spread the carrots on a baking sheet and heat for about 10-15 minutes. This keeps them crispy and tasty. You can also use a microwave for quick reheating. However, this may make them softer. To enjoy the best texture, the oven is the way to go. Yes, baby carrots work well in this recipe. They are sweet and tender. The texture is different, though. Regular carrots have a crunchier bite. Baby carrots are softer and cook faster. If you use them, check for doneness early. Toss them in the honey garlic mix just like regular carrots. These roasted carrots pair nicely with many dishes. Try serving them with roasted chicken or pork. They also go great with fish for a lighter meal. For a veggie option, serve with a grain bowl or quinoa salad. They add color and flavor to any plate. To make this dish vegan, substitute honey with maple syrup. It offers a similar sweetness and flavor. You can also try agave nectar as another option. Both keep the dish tasty and sweet. Just mix them in with the garlic and oil as usual. Yes, you can prepare these carrots ahead of time. Roast them and let them cool. Store the carrots in an airtight container in the fridge. When ready to serve, reheat them in the oven. This keeps them crispy and warm. For easy prep, you can also cut the carrots a day early. Just mix and roast when you need them. For the full recipe, check out the details above! To sum up, honey garlic roasted carrots are simple and delicious. You learned how to prepare them with key ingredients like carrots, honey, and garlic. We tackled cooking steps, tips for perfect results, and even explored variations. You can experiment with different flavors and storage methods for long-lasting enjoyment. Try serving these tasty carrots with your favorite dishes. Enjoy making this easy side that everyone will love!

Honey Garlic Roasted Carrots Simple and Tasty Side

Looking for a delicious side dish that’s quick and easy? You’ll love these Honey Garlic Roasted Carrots! With just a

- 4 boneless, skinless chicken breasts - 1/2 cup balsamic vinegar - 1/4 cup honey - 2 tablespoons Dijon mustard - 3 cloves garlic, minced - 1 tablespoon olive oil - 1 teaspoon dried oregano - 1 teaspoon salt - 1/2 teaspoon black pepper - Fresh basil leaves, for garnish - Mixing bowl - Grill or grill pan - Resealable plastic bag or shallow dish - Calories per serving: 250 - Macronutrient breakdown: - Protein: 30g - Fat: 10g - Carbohydrates: 15g When I cook balsamic glazed chicken, I love how simple the ingredients are. Each item plays a huge role in the flavor. Balsamic vinegar gives a tangy kick, while honey adds sweetness. Dijon mustard balances these flavors with a slight bite. Garlic gives it a warm, savory taste. For equipment, a mixing bowl works well to combine all the marinade ingredients. A grill or grill pan is key for cooking the chicken until it has beautiful grill marks. Using a resealable bag makes marinating easy, ensuring every piece of chicken gets coated. In terms of nutrition, this dish is packed with protein, which is great for muscle health. It has a good amount of healthy fats from olive oil, and the carbohydrates from honey provide a quick energy boost. You can find the full recipe for this dish, so you can recreate it at home and impress your family or friends. First, grab a medium bowl. Combine the following ingredients for the marinade: - 1/2 cup balsamic vinegar - 1/4 cup honey - 2 tablespoons Dijon mustard - 3 cloves garlic, minced - 1 tablespoon olive oil - 1 teaspoon dried oregano - 1 teaspoon salt - 1/2 teaspoon black pepper Whisk these ingredients well. This mixture serves as both a marinade and a glaze. Next, take the chicken breasts and place them in a large resealable bag or shallow dish. Pour half of the marinade over the chicken. Make sure each piece is coated. Seal the bag or cover the dish. Place it in the fridge for at least 30 minutes or up to 2 hours. This time lets the flavors sink in deeply. While the chicken marinates, it’s time to prepare your grill. Preheat your grill or grill pan to medium-high heat. This step is crucial for a good sear. Let the chicken sit out for about 10 minutes before grilling. This helps the chicken reach room temperature, which ensures even cooking. Now it's time to grill! First, remove the chicken from the marinade. Let any excess marinade drip off. Place the chicken on the grill. Cook for about 6-7 minutes per side. You want to check the internal temperature. It should reach 165°F (75°C) to be safe to eat. In the last few minutes, brush the remaining marinade on the chicken. This creates a sticky glaze that adds great flavor. Once the chicken is done, take it off the grill. Let it rest for 5 minutes. This resting time helps keep the chicken juicy. After resting, slice the chicken and drizzle any leftover glaze over the top. Garnish with fresh basil leaves for a lovely touch. For the full recipe, refer to the earlier section. To get that sticky glaze, cook the marinade down. Heat it in a pan until it thickens. This step adds great flavor. When using leftover marinade, make sure to cook it first. This keeps everything safe to eat. Let your chicken rest after cooking. This helps the juices spread out. A good resting time is about five minutes. Always check the cooking temperature. Chicken should reach 165°F (75°C) to be safe and juicy. To serve, place the chicken on a nice wooden board. Slice it to show the juicy inside. Scatter fresh basil leaves around the dish. This adds color and flavor. Pair it with grilled veggies or a quinoa salad for a tasty meal. {{image_4}} You can change up the flavor of your glaze easily. Look for flavored balsamic vinegars. Options like fig, raspberry, or garlic can add unique tastes. These vinegars often have a sweeter profile. They make the dish fun and different. If you want a sweeter glaze, try using maple syrup or agave nectar. These alternatives can bring a new twist to your Balsamic Glazed Chicken. Balsamic glaze is not just for chicken! You can use salmon, tofu, or pork instead. Each protein cooks differently, so adjust the times accordingly. Salmon usually cooks in about 4-5 minutes per side. Tofu takes about 6-8 minutes, depending on thickness. Pork can vary too, but aim for 6-8 minutes per side, ensuring it reaches 145°F (63°C). Each protein will soak up the flavors of the glaze well. When serving Balsamic Glazed Chicken, think about balance. Pair it with sides like roasted vegetables or a fresh salad. Quinoa or wild rice also works great. These sides complement the dish's sweet and tangy notes. For drinks, consider a light white wine or a fruity red. A Pinot Grigio or a Beaujolais will elevate your meal. Enjoy your culinary adventure! To keep your balsamic glazed chicken fresh, store leftovers in the fridge. Place the chicken in an airtight container to stop moisture loss. This helps keep it juicy. You can store it for up to four days. If you want to freeze the glazed chicken, wrap each piece tightly in plastic wrap. Then, place them in a freezer-safe bag. This method prevents freezer burn. You can enjoy this chicken for up to three months in the freezer. When reheating, you want to keep the chicken moist. The best way is to use the oven. Preheat your oven to 350°F (175°C). Place the chicken on a baking sheet and cover it with foil. Heat for about 15 to 20 minutes. You can also use the microwave, but this might dry the chicken. If you use the microwave, add a splash of water to keep it moist. Heat for about 1 to 2 minutes, checking often. Balsamic glazed chicken can last in the fridge for four days. If you freeze it, it stays good for about three months. After that, the taste and texture can change. Always check for any signs of spoilage before eating. Yes, you can use different vinegars. Apple cider vinegar and red wine vinegar work well. Each type adds a unique taste. Apple cider vinegar gives a fruity tone. Red wine vinegar adds a sharper bite. You can experiment to find what you like best. Remember, the key is to balance the flavors in your dish. If you use a stronger vinegar, adjust the sweetness. This way, the dish stays tasty and balanced. To check if the chicken is done, use a meat thermometer. Insert it into the thickest part of the breast. The temperature should reach 165°F (75°C). If you don’t have a thermometer, cut the chicken to check. The juices should run clear, not pink. Also, the meat should be firm yet tender. With practice, you will learn to tell just by looking. Absolutely! This dish is perfect for meal prep. You can marinate the chicken in advance. Just place it in the fridge for up to 2 hours. If you need to, you can cook it ahead of time too. Store the cooked chicken in an airtight container. It stays fresh in the fridge for 3 to 4 days. Reheat the chicken in the oven or on the stove. This keeps it moist and flavorful. This blog post covered a simple yet tasty balsamic glazed chicken recipe. You learned about key ingredients, equipment, and nutritional info needed for success. We discussed marinating, grilling tips, and how to achieve a perfect glaze. With variations like using different proteins and unique sides, there are many ways to enjoy this dish. Remember to store leftovers properly and reheat carefully to maintain their great taste. Experiment with the tips and enjoy your flavorful creations!

Balsamic Glazed Chicken Simple and Flavorful Recipe

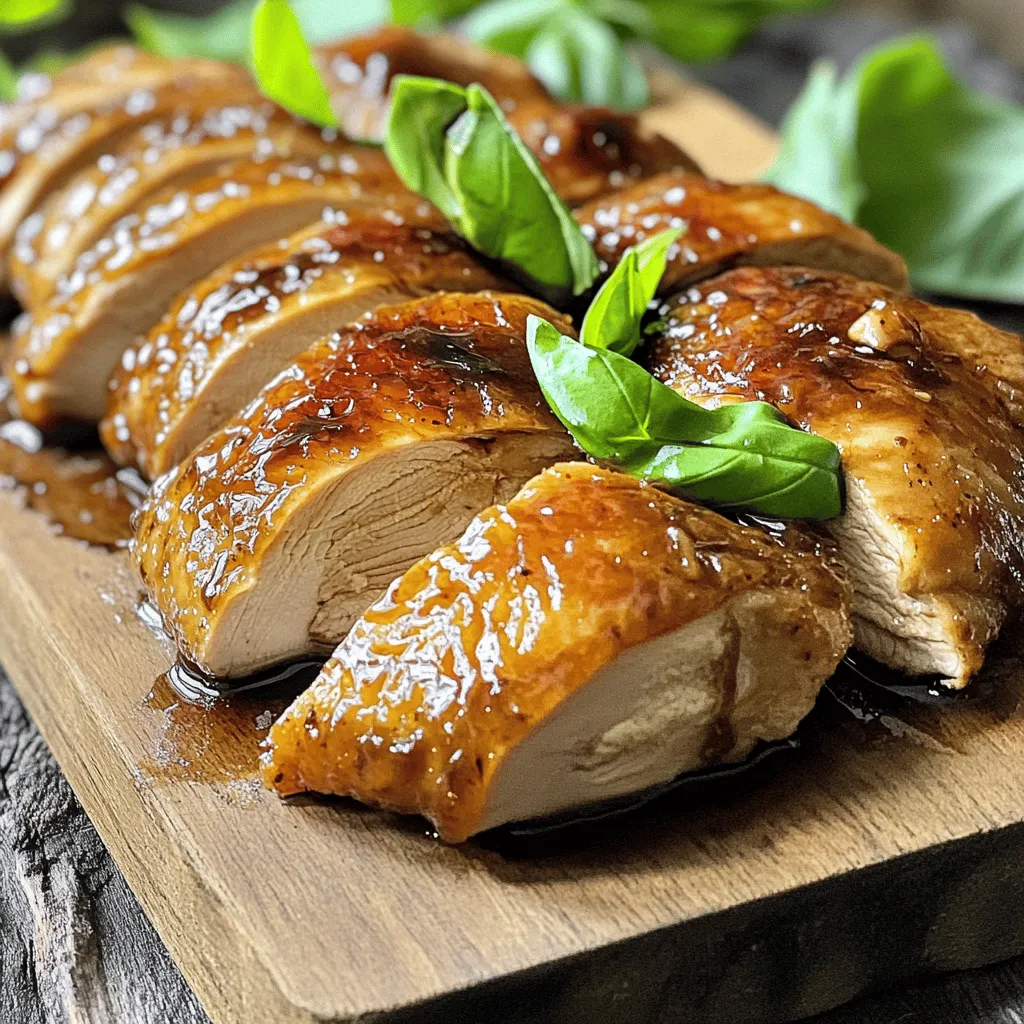
Looking for a delicious, easy dinner idea? Let me introduce you to my Balsamic Glazed Chicken! This dish packs a

- Two ripe avocados - One cup cherry tomatoes - One cup fresh mozzarella balls - Quarter cup fresh basil leaves - Two tablespoons balsamic glaze - One tablespoon extra virgin olive oil - Salt and pepper to taste - Optional: Crushed red pepper flakes I love using fresh ingredients for this dish. The ripe avocados are creamy and rich. They create a perfect base for the filling. The cherry tomatoes add a burst of sweetness. Fresh mozzarella brings a soft, chewy texture. Basil leaves offer a lovely herbal note that brightens every bite. For the dressing, I drizzle in balsamic glaze. It adds a sweet-tangy flavor that pairs well with the other ingredients. Extra virgin olive oil brings richness and depth. Finally, a sprinkle of salt and pepper enhances all the flavors. If you like heat, the crushed red pepper flakes are a fun option. This dish is simple but packed with flavor. The bright colors make it look beautiful on any table. You can find the Full Recipe to create this delightful meal. Enjoy the fresh tastes of summer with every bite! - Start by cutting each avocado in half lengthwise. - Carefully remove the pit, using a spoon to scoop it out. - Use a spoon to create a small well in each half. This well will hold your filling. - Take the scooped avocado flesh and chop it coarsely. Set it aside in a mixing bowl for later. - In the mixing bowl, add the halved cherry tomatoes and mozzarella balls. - Toss in the chopped basil and the reserved avocado. - Drizzle two tablespoons of extra virgin olive oil and two tablespoons of balsamic glaze over the mix. - Season with salt and pepper to taste. - If you like a bit of heat, add a pinch of crushed red pepper flakes. - Mix all the ingredients until they blend well and the tomatoes are coated. - Grab each avocado half and fill it generously with the Caprese mixture. - Mound the filling high to make it look inviting and colorful. - For presentation, you can drizzle extra balsamic glaze over the top. - Sprinkle more chopped basil for a fresh touch and a pop of color. This recipe is quick and simple, taking only about 10 minutes to prepare. Enjoy the fresh flavors of Caprese stuffed avocados as a delightful meal or snack! For the full recipe, check out the details above. To pick ripe avocados, look for ones that feel slightly soft when you press them gently. They should not feel mushy or hard. A dark green color usually means the avocado is ready. Avoid avocados with brown spots, as they can indicate overripeness. If you want to avoid brown avocados, buy them just before you need them. You can also store them in the fridge to slow down the ripening process. If you cut an avocado and it turns brown, sprinkle lemon juice on it. This helps keep it fresh and green. To boost the taste of your Caprese stuffed avocados, consider adding fresh herbs. Chives, parsley, or oregano pair well with the other ingredients. You can also mix in some diced red onion for a nice crunch and zing. For dressings, a drizzle of lemon vinaigrette can add brightness. A sprinkle of feta cheese adds a salty bite and creamy texture. You can even swap the balsamic glaze for a spicy sriracha for a kick. Caprese stuffed avocados shine as a light lunch or a colorful appetizer. Serve them with crusty bread or a light salad for a full meal. They also work well at parties, picnics, or barbecues. For special occasions, place the stuffed avocados on a beautiful platter. Garnish with whole basil leaves for a pop of color. This makes the dish look inviting and appetizing. You can easily impress your guests with this fresh, simple dish. {{image_4}} To make your Caprese stuffed avocados even heartier, add protein. Grilled chicken or shrimp works great. Cook the chicken or shrimp simply with salt, pepper, and olive oil. Chop it into small pieces and mix it into your Caprese filling. This adds a nice texture and flavor. For a vegetarian or vegan twist, consider using chickpeas, black beans, or tofu. These options boost protein while keeping the dish light and fresh. You can season them with herbs or spices to enhance their flavor. To take your stuffed avocados up a notch, think about flavor enhancements. Adding extra cheese, like feta or goat cheese, can give a tangy twist. You might also try nuts, like pine nuts or walnuts, for a nice crunch. Don’t shy away from exploring spices, either. A sprinkle of Italian seasoning or a dash of chili powder can add depth. If you like heat, consider adding jalapeños or a splash of hot sauce to your filling. Why not give your Caprese stuffed avocados an international flair? You can create a Mediterranean-style version. Swap in olives, artichokes, or sun-dried tomatoes for a new taste. For a fusion idea, think about using Asian flavors. Add sesame oil and diced cucumbers for a refreshing take. You can even drizzle a bit of soy sauce for a unique twist. Feel free to experiment and create your own version of this fresh and simple recipe. For the full recipe, check out the details above! To keep your Caprese stuffed avocados fresh, store them in an airtight container. This helps prevent browning. You can place a piece of plastic wrap directly on the filling. This extra step keeps air from reaching the exposed avocado. I recommend serving these stuffed avocados cold. Reheating can make the avocado mushy. If you prefer warmth, heat the filling in a skillet, but avoid the avocado. This way, you keep the best texture and flavor intact. The filling can last up to two days in the fridge. Watch for signs of spoilage like a sour smell or slimy texture. If the avocado turns brown, it’s best to toss it. Enjoy your delicious Caprese stuffed avocados while they are fresh! If you want to switch up the cheese, try using burrata. It has a creamy texture and rich taste. Feta cheese is another great option, giving a salty kick. Goat cheese also works well, adding tanginess. Each cheese brings its own flavor, making your dish unique. Yes, you can prep the filling ahead of time. Just store it in a sealed container in the fridge. However, I recommend waiting to stuff the avocados until you serve them. This keeps the avocados from browning. If you must stuff them early, add a little lemon juice to slow the browning. Absolutely! Avocados are low in carbs and high in healthy fats. Mozzarella is also low in carbs, making this dish great for keto diets. The tomatoes do add some carbs, but they are packed with nutrients. Enjoy this dish without guilt if you follow a keto plan. Yes, you can use different tomatoes based on your taste. Grape tomatoes bring a sweet burst. Heirloom tomatoes add rich flavors and colors. Roma tomatoes work well too, as they are meaty and less watery. Each type of tomato changes the taste, so feel free to experiment! Caprese stuffed avocados combine fresh ingredients for a tasty dish. From selecting ripe avocados to creating a flavorful filling, these steps are easy to follow. You can even customize the recipe with protein or spices to suit your taste. Remember to store leftovers properly for the best flavor. With this simple guide, you can impress friends and family at any gathering. Enjoy the deliciousness of your creation, and feel free to experiment with your favorite flavors!

Caprese Stuffed Avocados Fresh and Simple Recipe

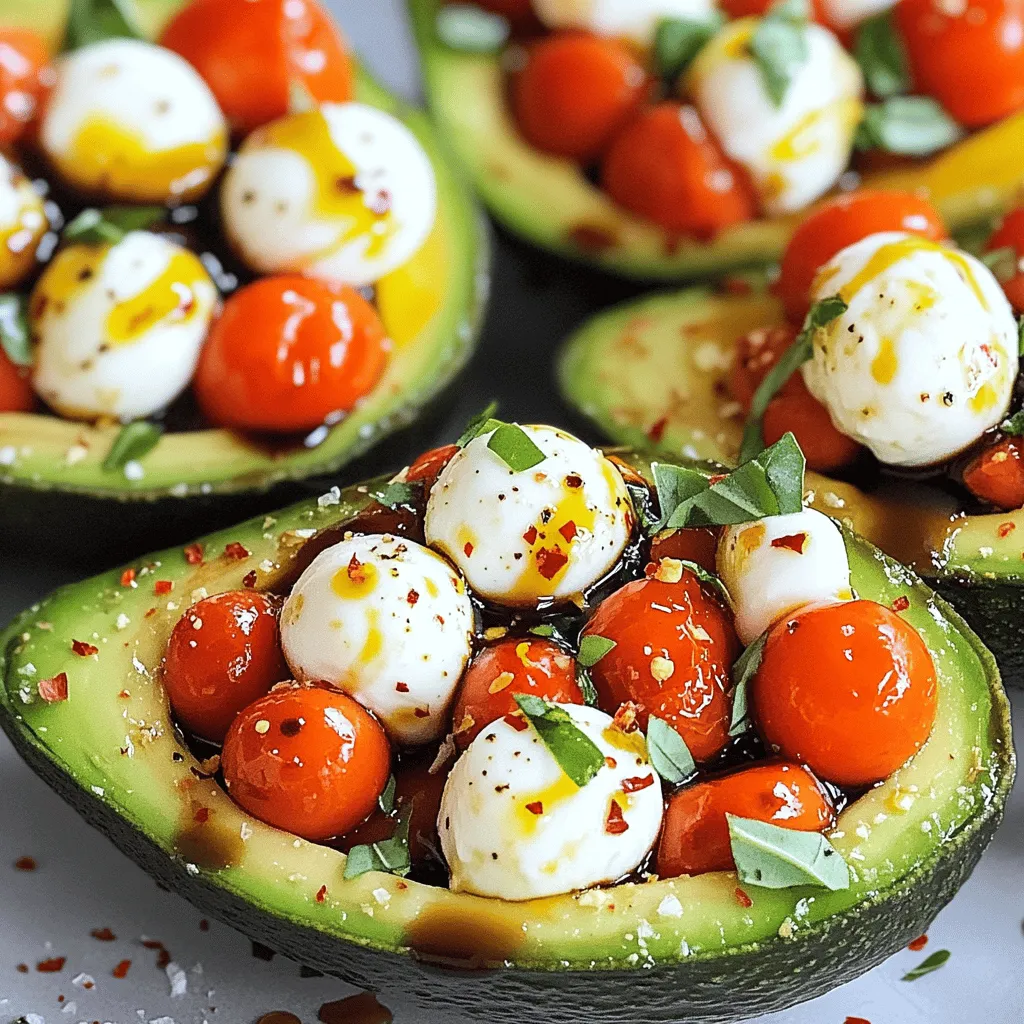
Looking for a fresh and simple dish that impresses? Try Caprese stuffed avocados! This recipe combines creamy avocado with juicy

- 1 cup frozen strawberries - 1 ripe banana, sliced - 1/2 cup Greek yogurt (or a dairy-free alternative) - 1/2 cup almond milk (or any milk of your choice) - 1 tablespoon honey or maple syrup - 1 tablespoon chia seeds - 1/4 teaspoon vanilla extract - Additional banana slices - Fresh strawberries - Granola - Coconut flakes To create a tasty Strawberry Banana Smoothie Bowl, gather your ingredients. You need frozen strawberries for that cold, refreshing taste. A ripe banana adds sweetness and creaminess. Greek yogurt gives it a rich texture. Almond milk adds a smooth base. If you want more sweetness, honey or maple syrup works well. Chia seeds can boost nutrition and add crunch. A hint of vanilla enhances the flavor. Now, let's talk about toppings! Sliced bananas and fresh strawberries make it look inviting. Granola adds a nice crunch. Coconut flakes give a tropical touch. You can mix and match these toppings to suit your taste. For the full recipe, check out the Strawberry Banana Bliss Smoothie Bowl. Enjoy making this bright and fun dish! To start, gather your ingredients. You will need: - 1 cup frozen strawberries - 1 ripe banana, sliced - 1/2 cup Greek yogurt (or a dairy-free option) - 1/2 cup almond milk - 1 tablespoon honey or maple syrup (optional) - 1 tablespoon chia seeds - 1/4 teaspoon vanilla extract Now, combine all these ingredients in your blender. Blend on high speed until smooth. If you need to, stop the blender to scrape down the sides. This step ensures all ingredients mix well. A creamy smoothie bowl is the goal. If your mix is too thick, add a splash of almond milk. Blend again until you reach the texture you like. Aim for a thick yet pourable consistency. It should feel light and fluffy, not watery or overly thick. Once your smoothie is ready, pour it into a bowl. This step is fun! Now it’s time to decorate. Arrange your toppings like extra banana slices, fresh strawberries, and crunchy granola. A sprinkle of coconut flakes adds a nice touch. Use your creativity to make it look beautiful. Enjoy every colorful layer! To make the best strawberry banana smoothie bowl, start with ripe fruit. Ripe strawberries are sweeter and more flavorful. A ripe banana adds creaminess and natural sweetness. Look for bananas with a few brown spots. They are perfect for smoothies. For yogurt, Greek yogurt is a great choice. It gives your smoothie bowl a thick and creamy texture. If you prefer a dairy-free option, try coconut yogurt. It adds a nice hint of flavor and creaminess too. The bowl you choose can make a big difference. Use a colorful bowl to make your dish pop. A wide bowl allows for a bigger canvas for your toppings. When arranging toppings, have fun! Place banana slices in a fan shape. Scatter fresh strawberries around the edges. Add granola in the center for crunch. This way, you create a beautiful and inviting smoothie bowl. Make sure to blend your ingredients well. A smooth mixture gives the best texture. If you stop blending too soon, you may get lumps. Scrape down the sides of the blender to mix evenly. Also, avoid overloading your bowl with toppings. Too many toppings can make it hard to enjoy the base. Stick to a few key toppings for the best balance. Now that you know these tips, you’re ready to make the perfect strawberry banana smoothie bowl. For the full recipe, check out the delicious details above! {{image_4}} You can easily change the flavor of your smoothie bowl. Adding other fruits makes it fun. Try mango for a tropical twist. Spinach adds a green boost without changing the taste much. You can also use flavored yogurts like vanilla or berry. This adds extra taste and creaminess to your bowl. If you want a low-calorie version, skip the honey or maple syrup. You can use unsweetened yogurt and milk. For a protein boost, add a scoop of protein powder. You can also mix in nut butter for healthy fats and more protein. This keeps you full longer! Using seasonal fruits can make your smoothie bowl even better. In summer, add fresh peaches or cherries. In fall, you might swap in pumpkin for a warm, cozy flavor. Adjusting for different tastes keeps things exciting. Feel free to experiment with what you love! You can make the smoothie base in advance. Blend the strawberries, banana, yogurt, almond milk, and other ingredients. Store the smoothie in an airtight container. It stays fresh in the fridge for up to two days. This helps you save time on busy mornings. For best results, stir the mixture before serving. This ensures all flavors blend well again. If you have leftover smoothies, you can freeze them. Pour the smoothie into ice cube trays or freezer-safe bags. This way, you can enjoy them later. When you want to drink it, thaw in the fridge overnight. You can also use the microwave on low heat. This keeps it smooth and tasty. Fresh fruits like strawberries and bananas last about three to five days in the fridge. Make sure to check for any signs of spoilage. Greek yogurt can last one to three weeks after opening. Keep it sealed tightly for the best freshness. Always watch the dates on your ingredients. This helps you use them at their best quality. To make this smoothie bowl vegan, swap out dairy ingredients. Use coconut yogurt instead of Greek yogurt. For milk, choose almond, oat, or soy milk. These options keep the bowl creamy and delicious while fitting a vegan diet. You can get creative with toppings! Try using: - Sliced kiwi for a tangy bite - Blueberries for a pop of color - Nuts like almonds or walnuts for crunch - Pumpkin seeds for added nutrition - Dark chocolate shavings for a sweet twist Mix and match these toppings for fun flavors and textures! Yes, you can use fresh strawberries. However, the texture will change. Frozen strawberries make the smoothie cold and thick. Fresh strawberries give a lighter texture. You might want to add ice to keep it chilled. The taste will be bright and fresh, perfect for summer! You’ve learned how to create a delicious strawberry banana smoothie bowl. Start with frozen strawberries and ripe banana for flavor. Add Greek yogurt or your favorite milk for creaminess. Don't forget to explore optional ingredients like honey and chia seeds for an extra boost. Finally, serve it artfully with toppings that make it look great. Experiment with variations to keep it fresh and exciting. Enjoy your healthy treat, and savor each blend!

Strawberry Banana Smoothie Bowl Easy and Delicious Recipe

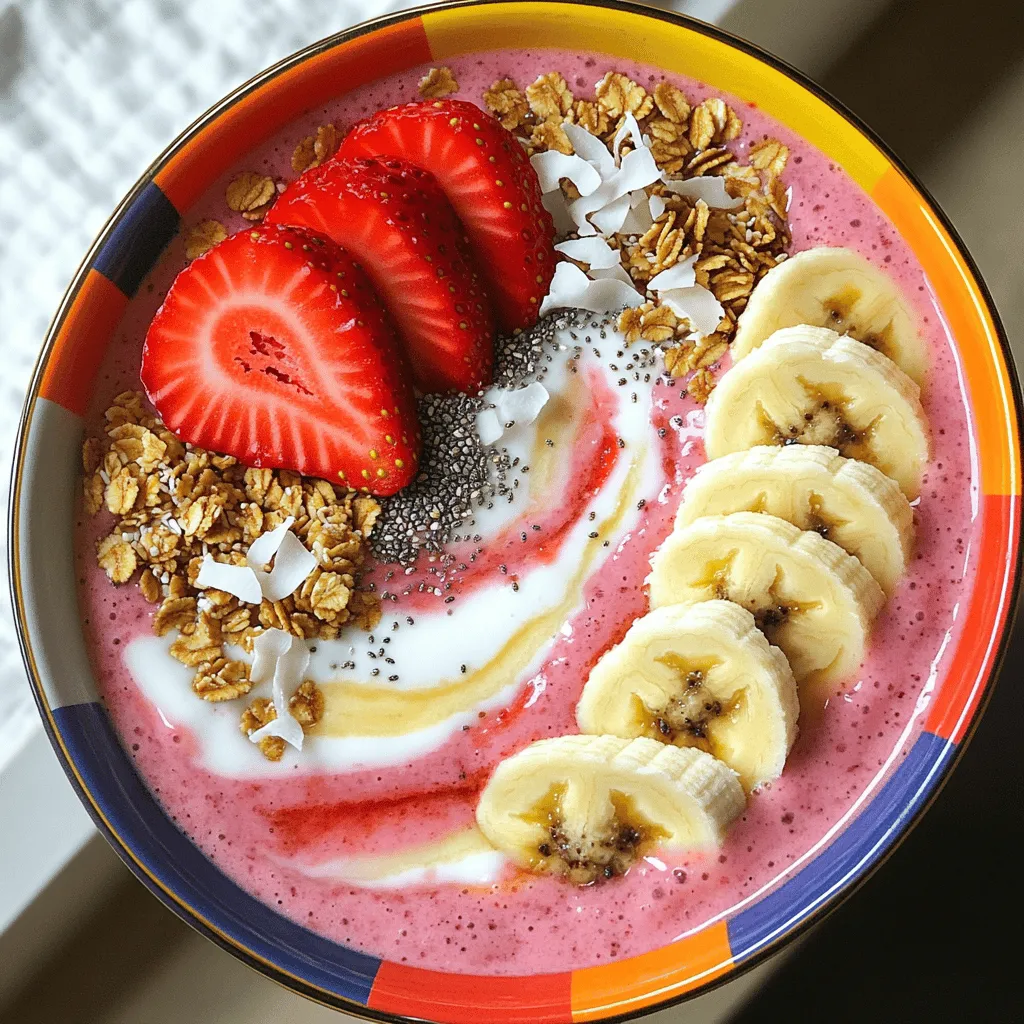
Are you ready to whip up a tasty Strawberry Banana Smoothie Bowl? This easy recipe is perfect for breakfast or

To make spicy chickpea tacos, gather these main ingredients: - 1 can (15 oz) chickpeas, thoroughly drained and rinsed - 1 tablespoon extra virgin olive oil - 8 small corn tortillas For tasty toppings, you will need: - 1 ripe avocado, diced into small pieces - 1 cup red cabbage, finely shredded - 1/4 cup fresh cilantro, roughly chopped - 1 lime, cut into wedges for serving To boost the flavor, gather these seasonings and spices: - 2 teaspoons ground cumin - 1 teaspoon smoked paprika - 1 teaspoon chili powder - 1/2 teaspoon garlic powder - 1/2 teaspoon onion powder - Salt and freshly ground pepper to taste - Sriracha or your favorite hot sauce, to taste Using these ingredients, you can create a vibrant dish that packs a punch. The chickpeas provide protein and fiber, while the spices add a delightful kick. The toppings offer freshness and texture, making each bite a joy. For the complete recipe, check the Full Recipe section. Start by heating 1 tablespoon of extra virgin olive oil in a medium skillet. Use medium heat until the oil shimmers. Next, add a can of chickpeas that you have drained and rinsed. Let them cook for 2-3 minutes without stirring. This helps them get a nice sear. After that, stir the chickpeas occasionally to cook them evenly. Once they smell great, sprinkle in the spices: 2 teaspoons of ground cumin, 1 teaspoon of smoked paprika, 1 teaspoon of chili powder, 1/2 teaspoon of garlic powder, and 1/2 teaspoon of onion powder. Don’t forget salt and pepper! Mix well so each chickpea is coated with spices. Cook for another 5-7 minutes, stirring often. You want them warm and slightly crispy. While your chickpeas are cooking, grab 8 small corn tortillas. Heat a dry skillet over medium heat. Place the tortillas in the skillet for about 1 minute on each side. This makes them soft and easy to fold. Keep an eye on them to avoid burning. You want them warm, not crispy! Now it’s time to put it all together. Take one warm tortilla and add a generous scoop of your spicy chickpeas. Next, top it with diced avocado, shredded red cabbage, and fresh cilantro. Feel free to add Sriracha or your favorite hot sauce for extra heat. Finally, serve your tacos with lime wedges on the side. A squeeze of lime adds a fresh twist to every bite. For the full recipe, check the earlier section! You can boost the flavor of your spicy chickpea tacos with a few extra spices. Try adding a pinch of cayenne pepper for heat. You can also mix in some ground coriander for a citrusy touch. If you like a smoky taste, smoked paprika is your friend. Experiment with spices you love. Each one adds a unique twist to your dish! When it comes to taco assembly, balance is key. Start with a soft tortilla. Add a generous scoop of spiced chickpeas first. Make sure to spread them out for even filling. Next, layer on your toppings. The avocado adds creaminess, while the cabbage gives a nice crunch. Finally, sprinkle fresh cilantro for that burst of flavor. The order matters for the best bite! Presentation can elevate your meal. Arrange the tacos on a colorful platter. Garnish with extra cilantro and lime wedges. This adds color and freshness. You can also serve them with small bowls of hot sauce on the side. This way, guests can add their desired spice level. For a fun touch, use a vibrant tablecloth to make the dish pop! {{image_4}} You can easily make these tacos vegetarian or vegan. The main ingredients are already plant-based. Use extra veggies for more texture. Try adding grilled zucchini, bell peppers, or corn. These add flavor and color. You can also swap the olive oil for avocado oil. This gives a different taste while keeping it vegan. If you want more protein, consider adding quinoa or lentils. Cook them separately and mix them in. You can also add black beans for a hearty taco. For a twist, try crumbled tofu, seasoned like the chickpeas. It gives a nice texture and absorbs flavors well. Toppings can change your taco game. Instead of avocado, try guacamole or a zesty salsa. Fresh radishes add a nice crunch. You can use pickled onions for a tangy bite. Crumbled feta or cotija cheese adds creaminess. For heat, try jalapeños, fresh or pickled. Each topping brings its own flair, so mix and match! For the full recipe, check out the Full Recipe section. Store leftover tacos in an airtight container. Keep them in the fridge for up to three days. Separate the chickpeas and tortillas to keep them fresh. This prevents sogginess and preserves texture. Wrap tortillas in foil or plastic wrap to maintain softness. To reheat chickpeas, warm them in a skillet over medium heat. Stir them frequently for about five minutes. You want them hot, but not overcooked. For tortillas, heat them in a dry skillet for 30 seconds on each side. This will make them soft and pliable again. You can freeze the chickpeas for easy meal prep. Place them in a freezer-safe bag and remove excess air. They can last for up to three months. When ready to use, thaw in the fridge overnight and reheat as described. Tortillas, however, do not freeze well. It’s best to make fresh tortillas for each meal. For the full recipe, check out the Zesty Spicy Chickpea Tacos. To make these tacos gluten-free, use corn tortillas. They are naturally gluten-free and work great with the spicy chickpeas. Always check the label to be sure. If you avoid cross-contamination, your meal stays safe. You can also add fresh veggies and avocado for extra flavor. I love pairing these tacos with simple side dishes. Here are some options: - Mexican Street Corn Salad: Sweet corn with lime and cheese. - Black Bean Salad: Adds protein and fiber. - Guacamole: Creamy and rich, it complements the tacos well. - Cilantro Lime Rice: A flavorful base that balances the spice. These sides will enhance your meal and create a full dining experience. Yes, you can use fresh chickpeas! Soak dried chickpeas overnight and cook them until tender. This process takes longer but can enhance the flavor. Just adjust your cooking time to ensure they are soft. Fresh chickpeas add a nice texture to your tacos. For the best taste, season them well with the spices in the recipe. Spicy chickpea tacos are a tasty and fun dish. We explored the main ingredients, spices, and toppings that enhance flavor. I shared clear steps to prepare and serve these tacos perfectly. Tips and tricks helped you improve flavor and presentation. We also discussed variations and smart storage methods. You now have all you need to make delicious tacos. Enjoy trying your own spin on this simple recipe!

Spicy Chickpea Tacos Flavorful and Simple Recipe

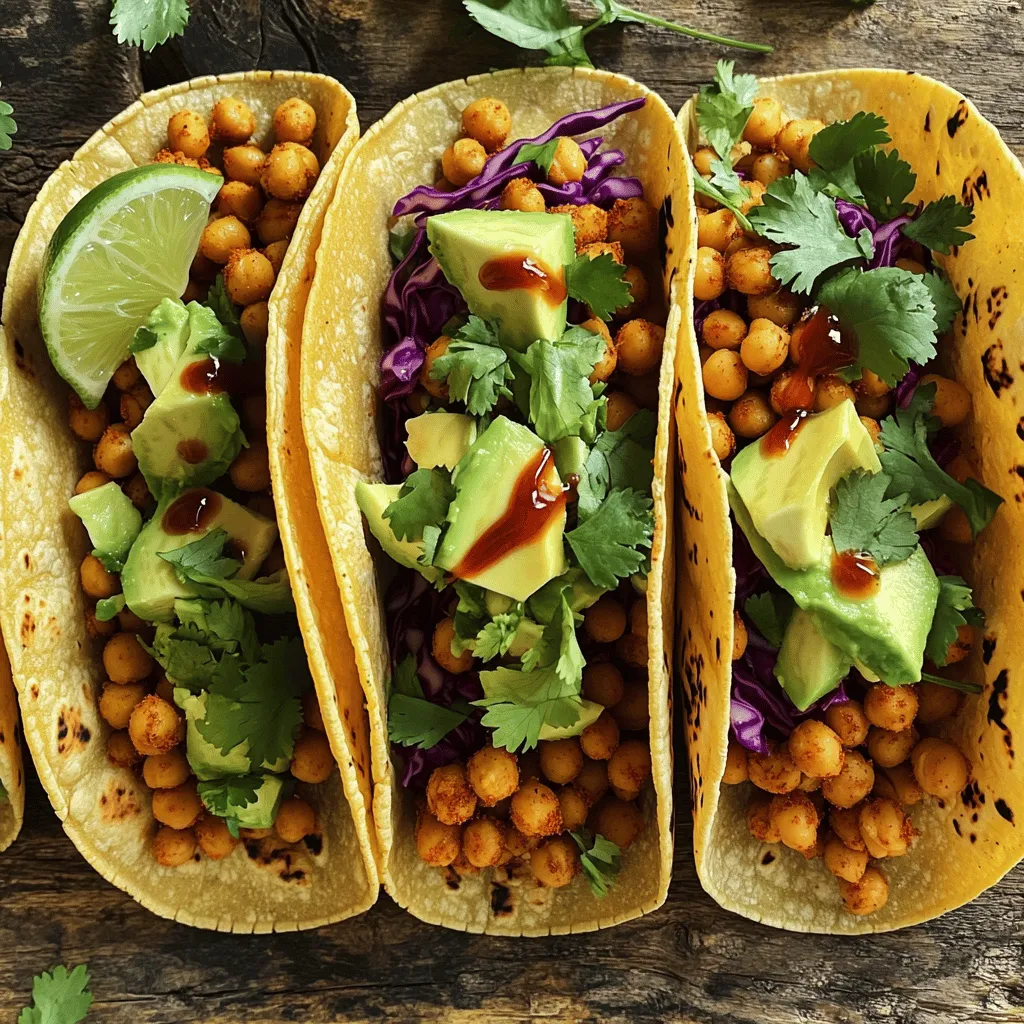
Are you ready to spice up your taco night? My Spicy Chickpea Tacos are not only packed with flavor, but

- 1 cup of creamy Greek yogurt - 1/4 cup of fresh cilantro leaves - 2 tablespoons of freshly squeezed lime juice - 1 tablespoon of honey (or agave syrup) - 1 clove of garlic - 1/2 teaspoon of ground cumin - 1/4 teaspoon of salt - 1-2 tablespoons of water Gathering the right ingredients makes all the difference in this creamy cilantro lime dressing. You will need creamy Greek yogurt, which gives it that rich texture. Fresh cilantro leaves add a bright flavor. Lime juice brings a zesty kick. Honey or agave syrup adds sweetness. Garlic adds depth. Ground cumin gives warmth, and salt balances everything out. Finally, water helps you control the thickness. - Greek yogurt alternatives: You can use regular yogurt or sour cream if you prefer. - Vegan ingredient options: Try coconut yogurt or cashew cream for a vegan twist. - Flavor enhancers: Consider adding a splash of vinegar for acidity or a pinch of paprika for heat. These substitutions ensure you can enjoy this dressing no matter your dietary needs. Each option still keeps the dressing creamy and tasty. Don't hesitate to mix and match. Feel free to get creative based on what you have at home. You can find more ideas in the Full Recipe. To make your creamy cilantro lime dressing, start by gathering your ingredients. You’ll need Greek yogurt, fresh cilantro, lime juice, honey, garlic, cumin, and salt. 1. Blending Method: Place all the ingredients in a high-speed blender. This helps mix everything well and creates a smooth texture. 2. Scraping Down the Sides: As you blend, stop to scrape down the sides of the blender. This ensures all the herbs and spices mix evenly. 3. Achieving the Desired Consistency: If the dressing is too thick, add water. Blend well after each tablespoon until you reach the thickness you like. After blending, it’s time to taste your dressing. - Tasting for Saltiness: Check if it needs more salt. A little extra can make a big difference. - Adjusting Lime Juice for Tanginess: If you want more zing, add a splash of lime juice. This brightens the flavor. - Adding Herbs for Extra Flavor: Feel free to mix in more herbs like parsley or dill. This can enhance the freshness even more. This creamy cilantro lime dressing is perfect for salads or as a dip. Make sure to check out the Full Recipe for all the steps! To keep your creamy cilantro lime dressing fresh, store it in an airtight container. A glass jar works great. Make sure the lid is tight to prevent any air from getting in. This dressing stays best in the fridge. The shelf life of this dressing is about one week. You will notice the flavors improve as it sits. The lime and cilantro meld well together. Just give it a good shake before using it again. You can use this dressing in many ways. Drizzle it over a fresh salad for a burst of flavor. It pairs well with greens like spinach or romaine. You can also use it as a dip for crunchy veggies like carrots and bell peppers. This dressing is fantastic with grilled meats too. Try it with chicken or shrimp. The bright flavors of lime and cilantro will enhance the dish. It's also perfect with fish tacos or grilled vegetables. For more delicious ideas, check out the Full Recipe for extra tips! {{image_4}} You can easily change this dressing to fit your taste. Adding jalapeños gives it a nice kick. Start with a small amount, then add more if you want extra heat. The spice level can really change the flavor profile. You can also swap out cilantro for other herbs. Try using fresh parsley or dill instead. Each herb brings its own unique flavor. This way, you keep the dressing fresh and exciting. If you want a nut-based version, use cashew cream. Simply blend soaked cashews with water until smooth. This will make the dressing rich and creamy while keeping it dairy-free. Another great option is avocado. It adds a lovely creaminess without any dairy. Just blend a ripe avocado into the dressing for a smooth texture. This addition is perfect for a healthy twist. For the full recipe, check out the details above. Enjoy experimenting with these variations! To keep your creamy cilantro lime dressing fresh, store it in an airtight container. I prefer using a glass jar. This way, it stays safe and tasty. The best temperature is around 36°F (2°C). This cool spot helps the flavors blend and stay bright. Your dressing will last up to one week in the refrigerator. After this time, it may lose some flavor or texture. Always check for any off smells or changes in color before using it. You can freeze this dressing if you want to save it for later. Pour it into an ice cube tray for easy use. This method allows you to thaw just what you need. Cover the tray with plastic wrap to avoid freezer burn. To thaw, place the dressing in the fridge overnight. For quick defrosting, you can set it in warm water for about 15 minutes. Just remember to stir well after thawing. This helps restore its creamy texture. Creamy cilantro lime dressing can last up to one week in the fridge. Store it in an airtight container. Always check for any signs of spoilage, like an off smell or changes in texture. Yes, you can prepare this dressing in advance. Making it a day ahead allows the flavors to blend well. Just remember to store it in the fridge until you need it. If you don’t have Greek yogurt, try using regular yogurt or sour cream. You can also use cashew cream for a dairy-free version. Each option will give a different taste and creaminess. Yes, this recipe can be made vegan! Simply replace Greek yogurt with a plant-based yogurt and use agave syrup instead of honey. This keeps the dressing creamy and delicious. Cilantro lime dressing works great on salads, tacos, or grilled chicken. You can also use it as a dip for fresh veggies or drizzle it over roasted vegetables. Its bright flavor enhances many dishes. For the full recipe, check out the Zesty Creamy Cilantro Lime Dressing. This blog post shared a simple recipe for creamy cilantro lime dressing. You learned about the main ingredients and their best substitutes. I explained preparation steps and tips for flavor adjustments. You also received smart storage tips and exciting variations. In the end, this dressing enhances many dishes. Try it on salads, dips, or grilled meats. Enjoy the fresh taste by personalizing it with your favorite herbs and spices. Experiment and share your tasty results!

Creamy Cilantro Lime Dressing Fresh and Flavorful Mix

Creamy cilantro lime dressing is your new secret weapon for flavor! With fresh ingredients like Greek yogurt and zesty lime

Older posts
Newer posts
← Previous Page1 … Page83 Page84 Page85 Page86 Next →

dsad

© 2026 yumymoments • Built with GeneratePress

Our Policies

  • Copyright Policy
  • Cookie Policy
  • GDPR Policy
  • Privacy Policy
  • Disclaimer
  • Terms Of Use

More Information

  • Home
  • About
  • Contact
  • Appetizers
  • Dessert
  • Dinner
  • Drinks
©2026, yumymoments About Back To Top