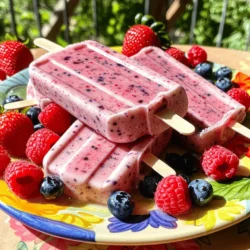
Berry Smoothie Popsicles
Beat the heat this summer with delicious Berry Smoothie Popsicles! Bursting with strawberries, blueberries, and raspberries, this refreshing treat is not only tasty but also healthy. Enjoy our easy step-by-step recipe and tips for customization, from adding greens to creating fun flavor combos. Perfect for keeping cool and impressing friends and family—click through now to explore the full berry smoothie popsicle recipe!