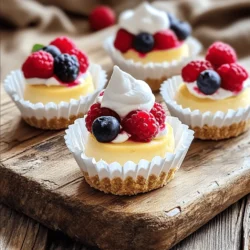
Mini Cheesecake Bites
Indulge in these delightful Mini Cheesecake Bites that are perfect for any occasion! With a creamy filling and a buttery graham cracker crust, these bite-sized treats are easy to make and utterly delicious. Whether you top them with fresh berries or a dollop of whipped cream, they're sure to impress. Ready to satisfy your sweet tooth? Click through to explore this easy recipe and treat yourself to a mini dessert adventure!